Download as PDF, PPTX

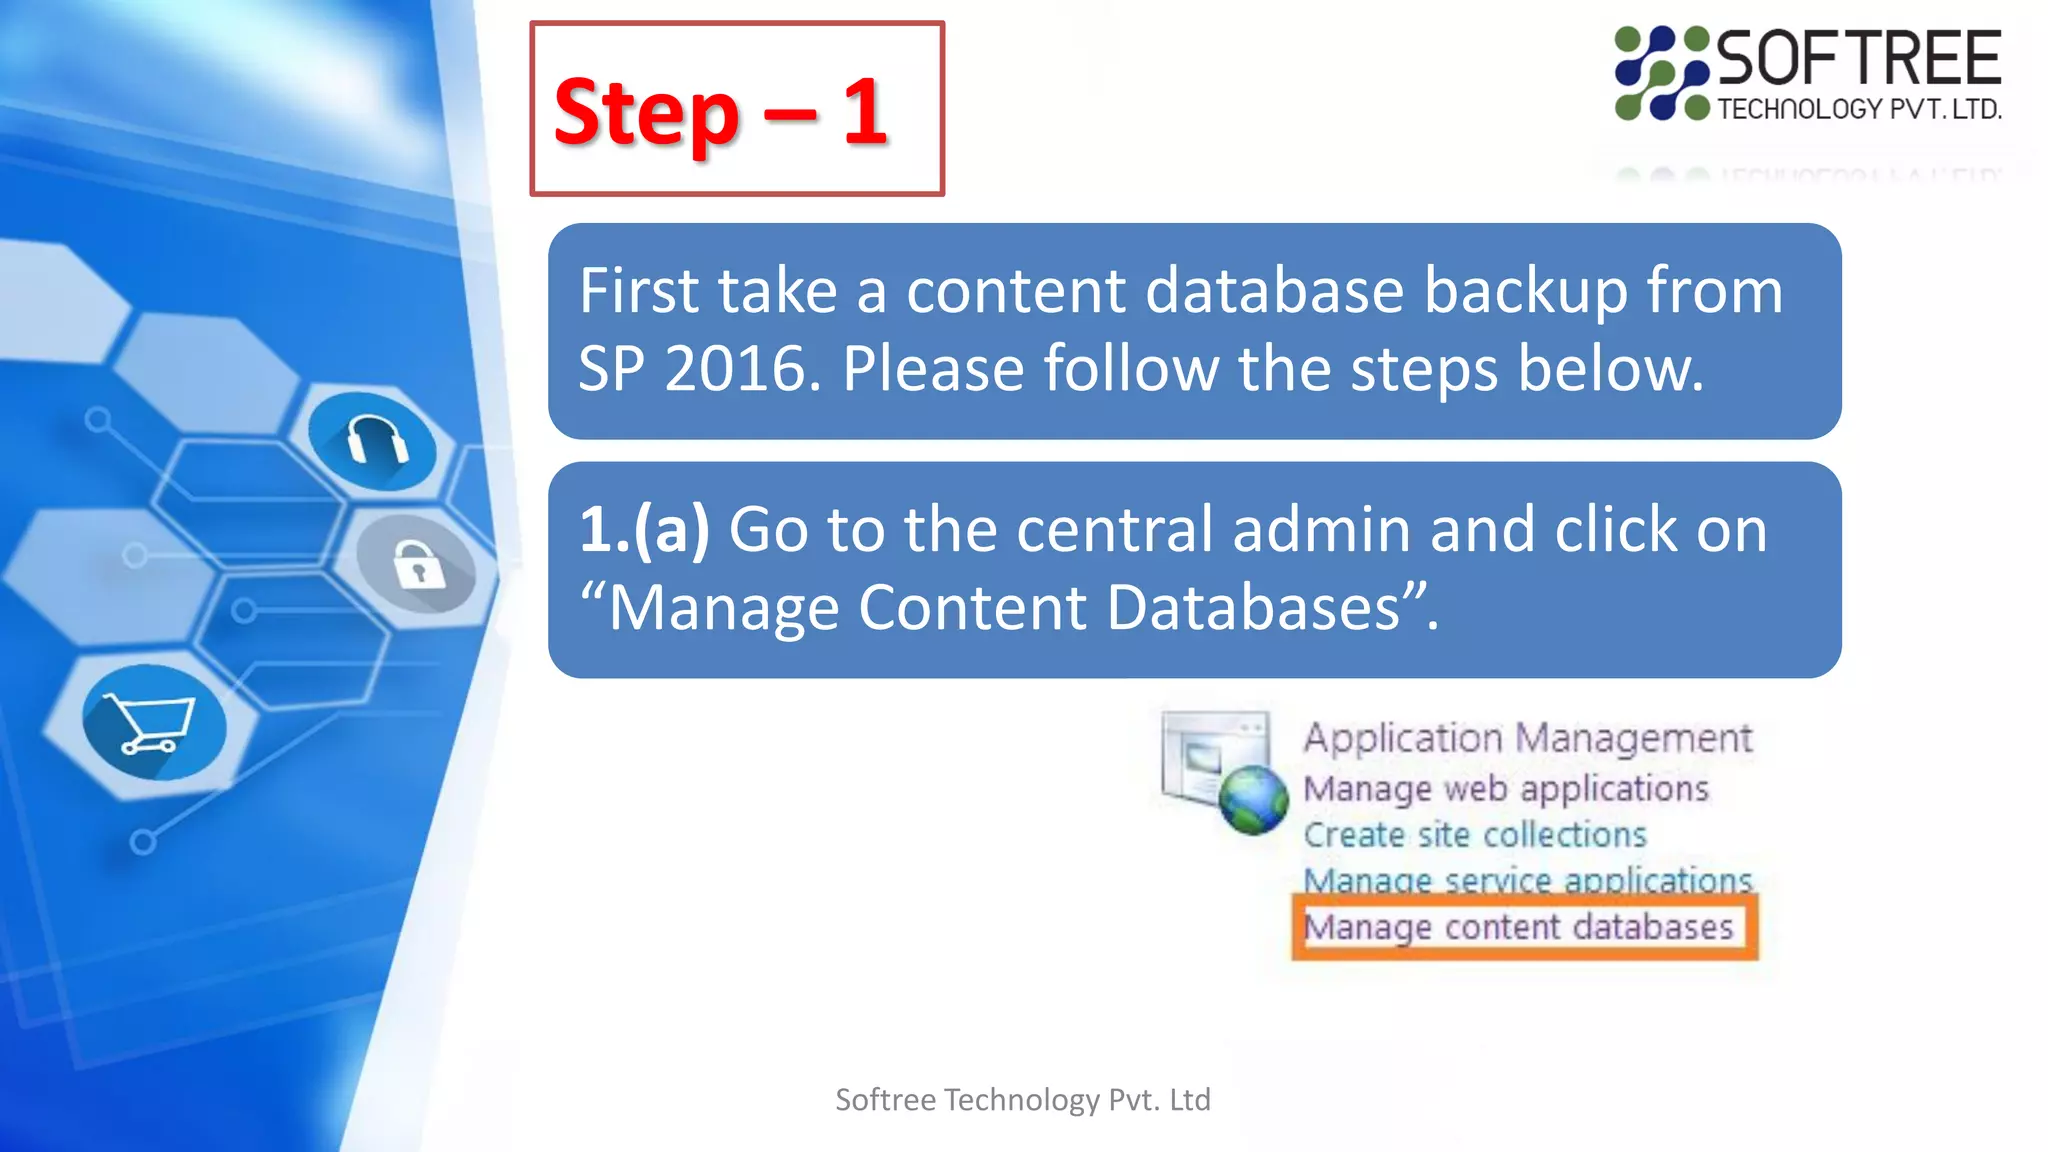
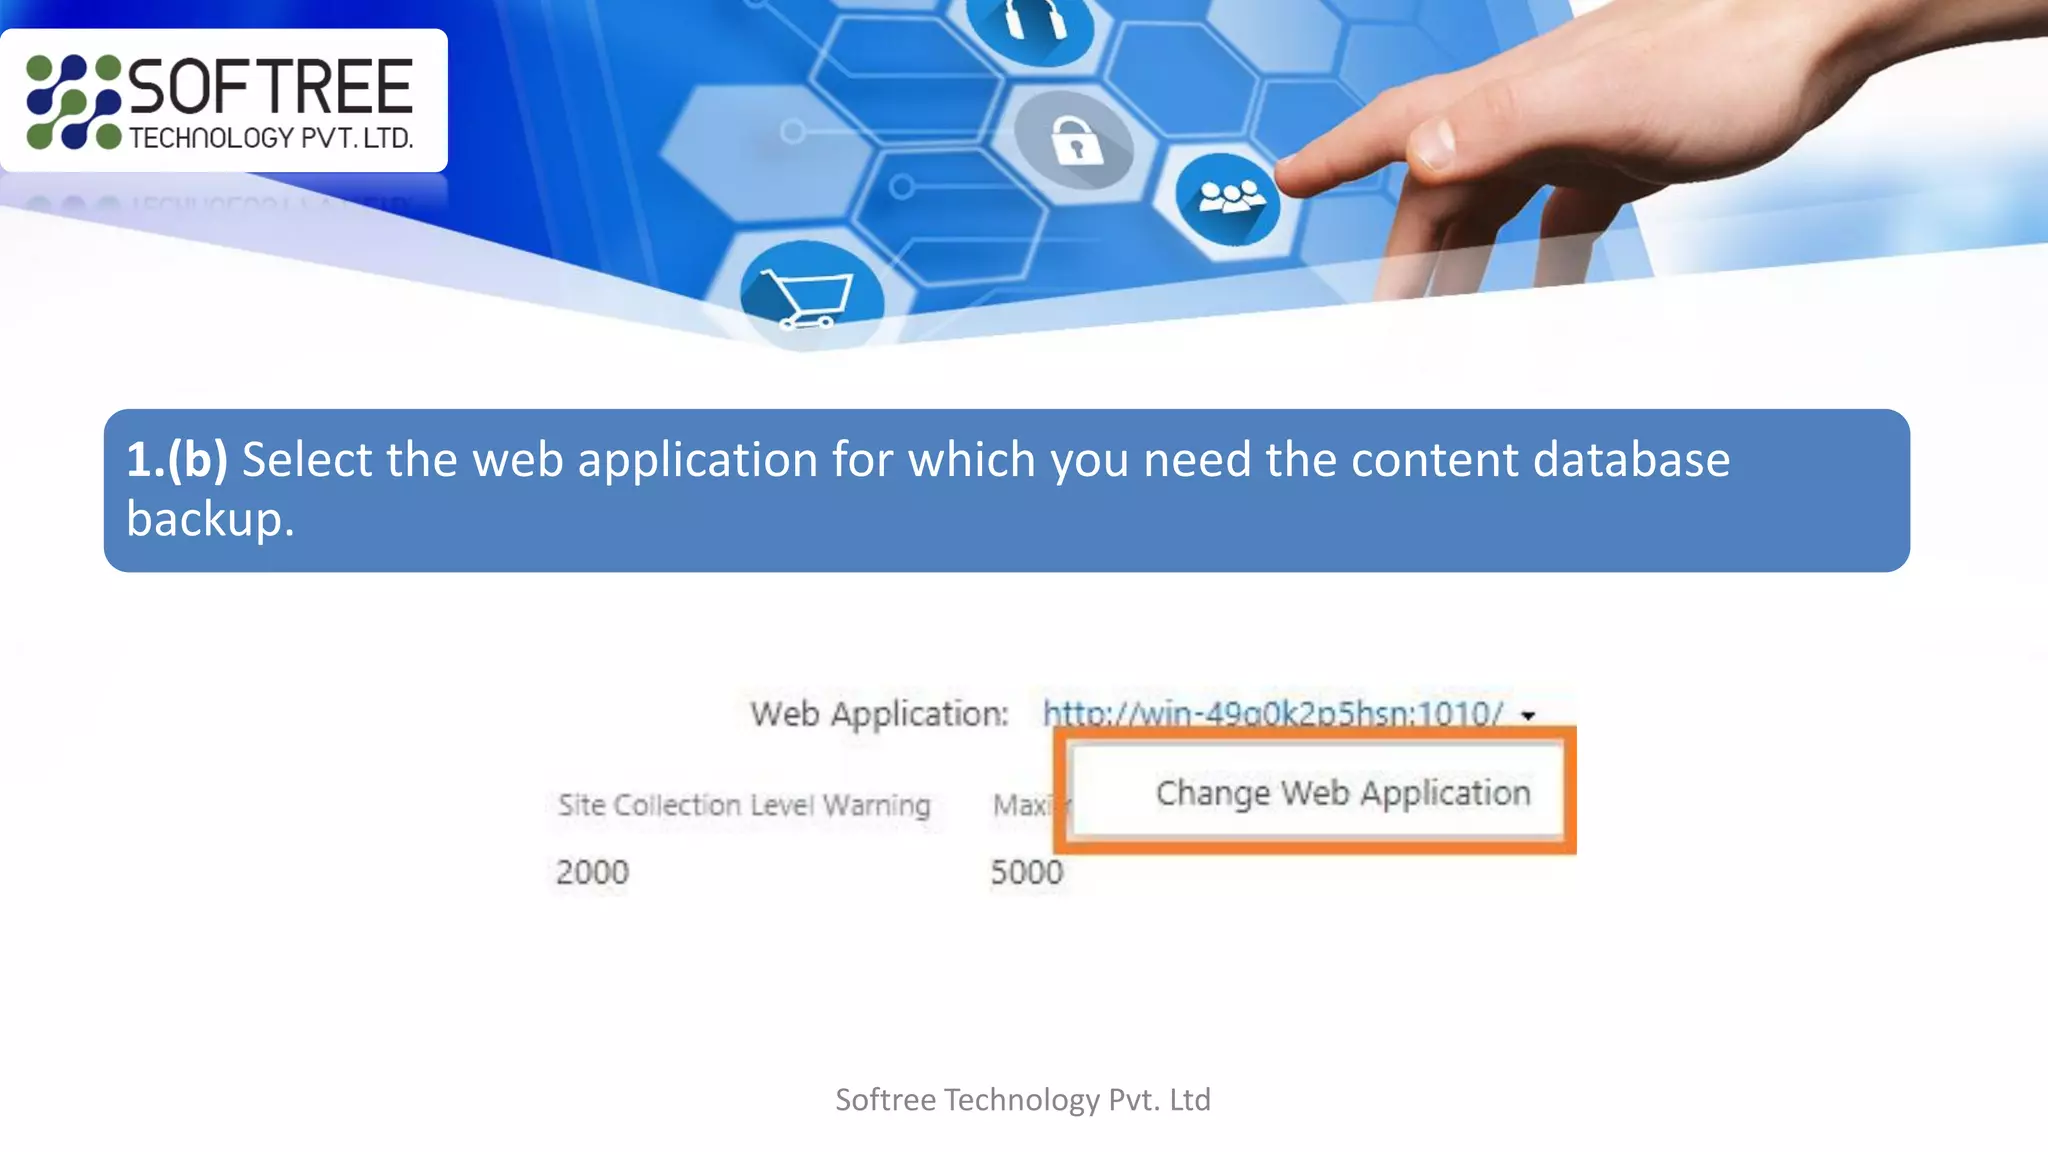
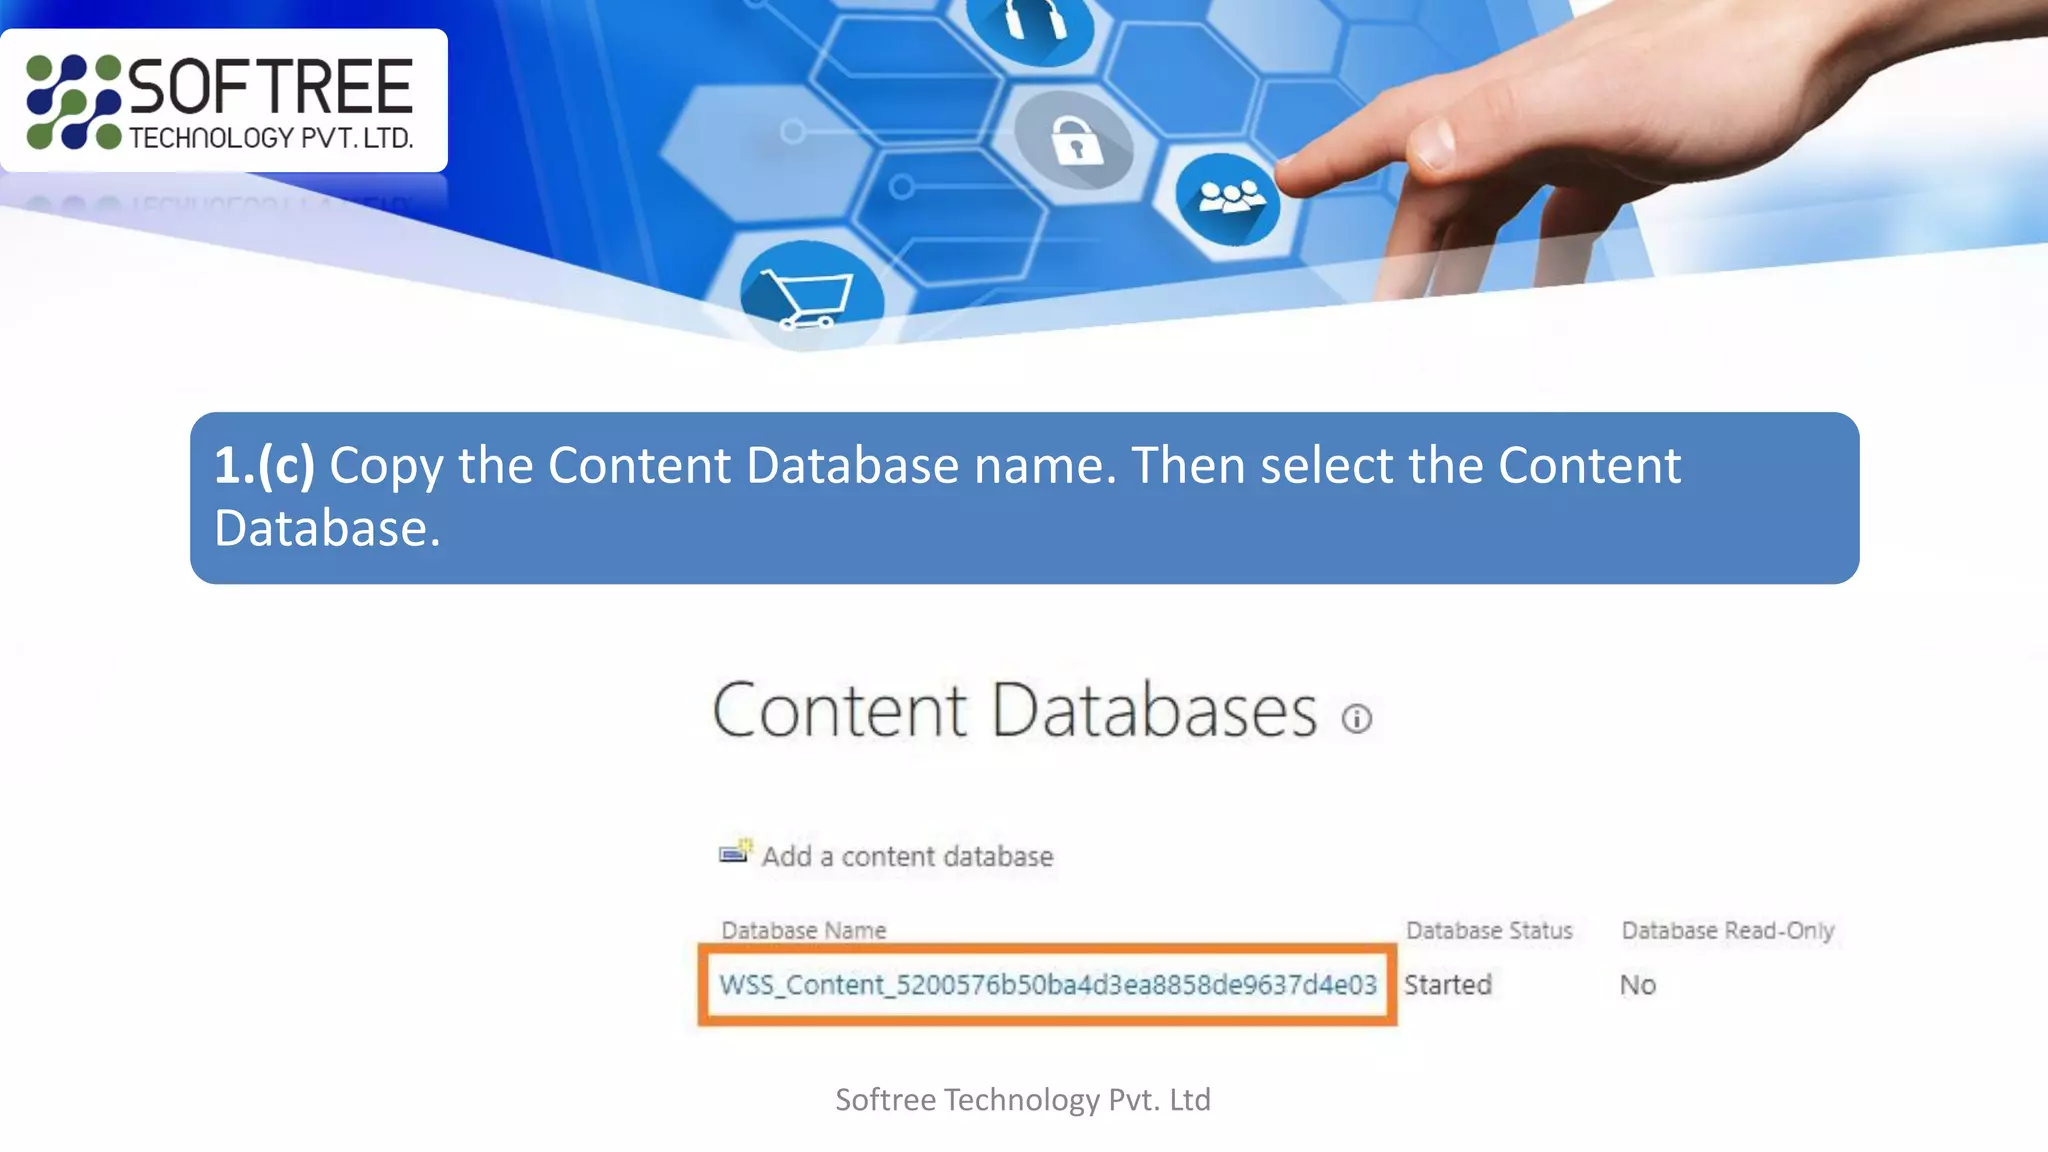
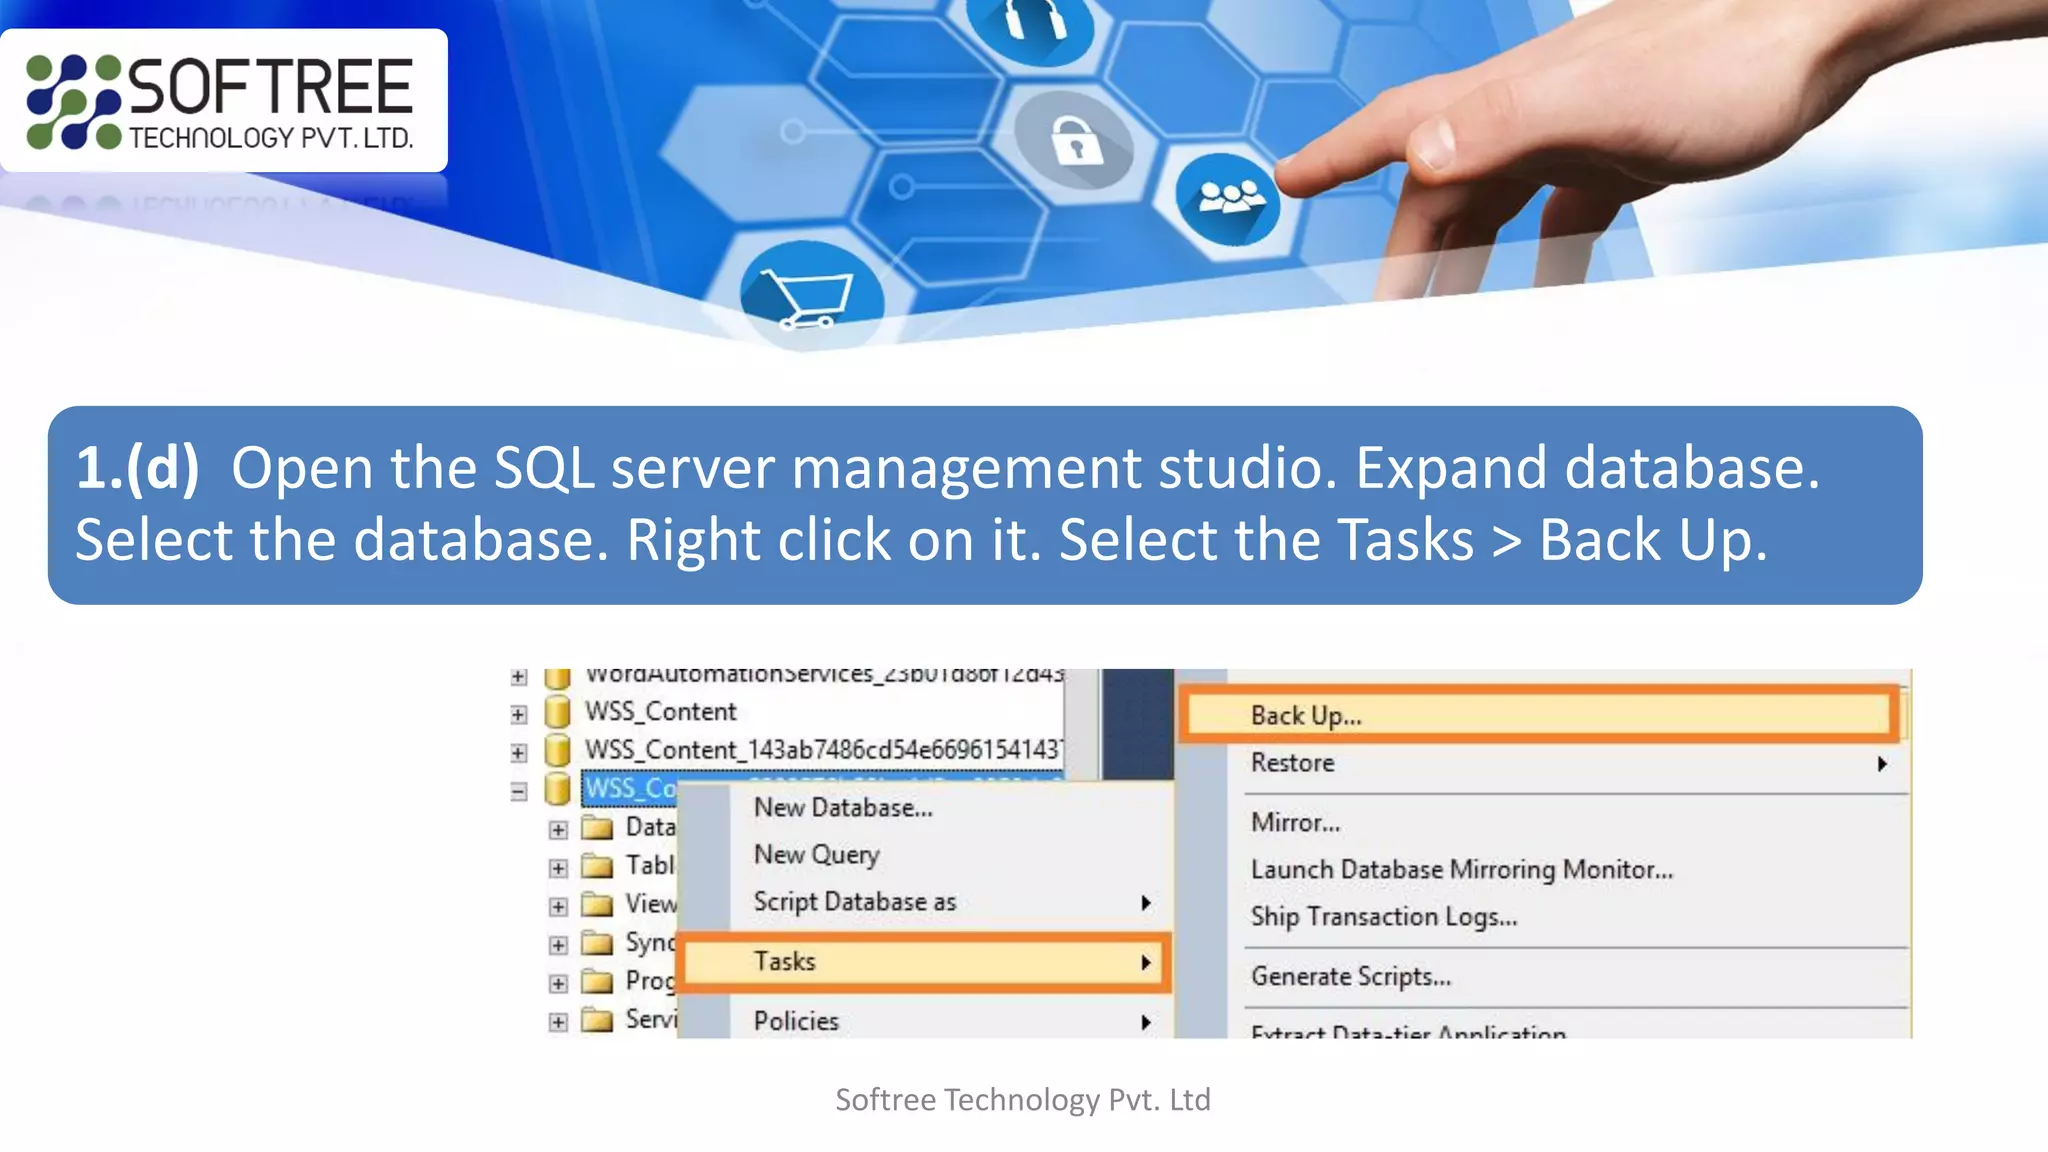
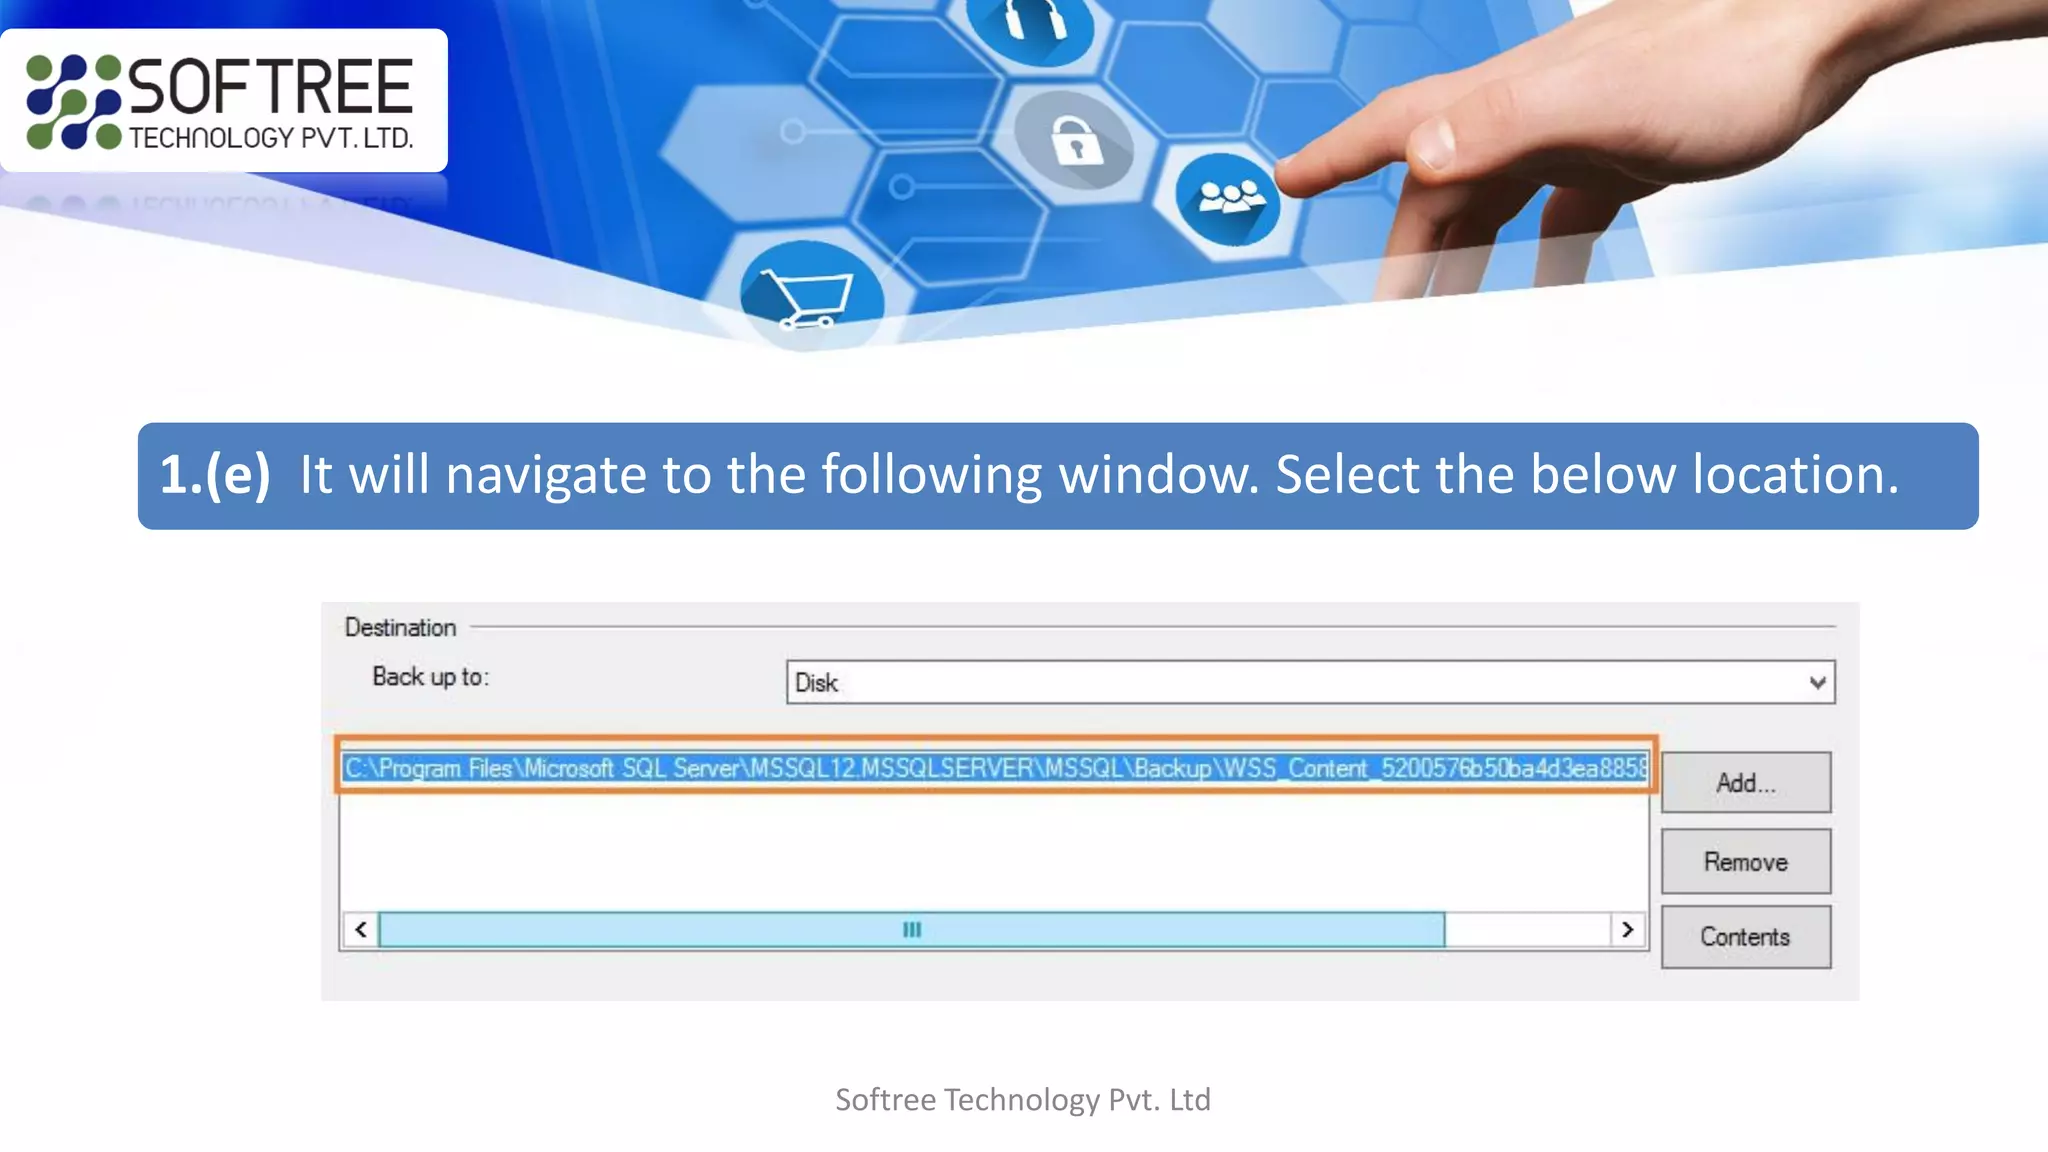
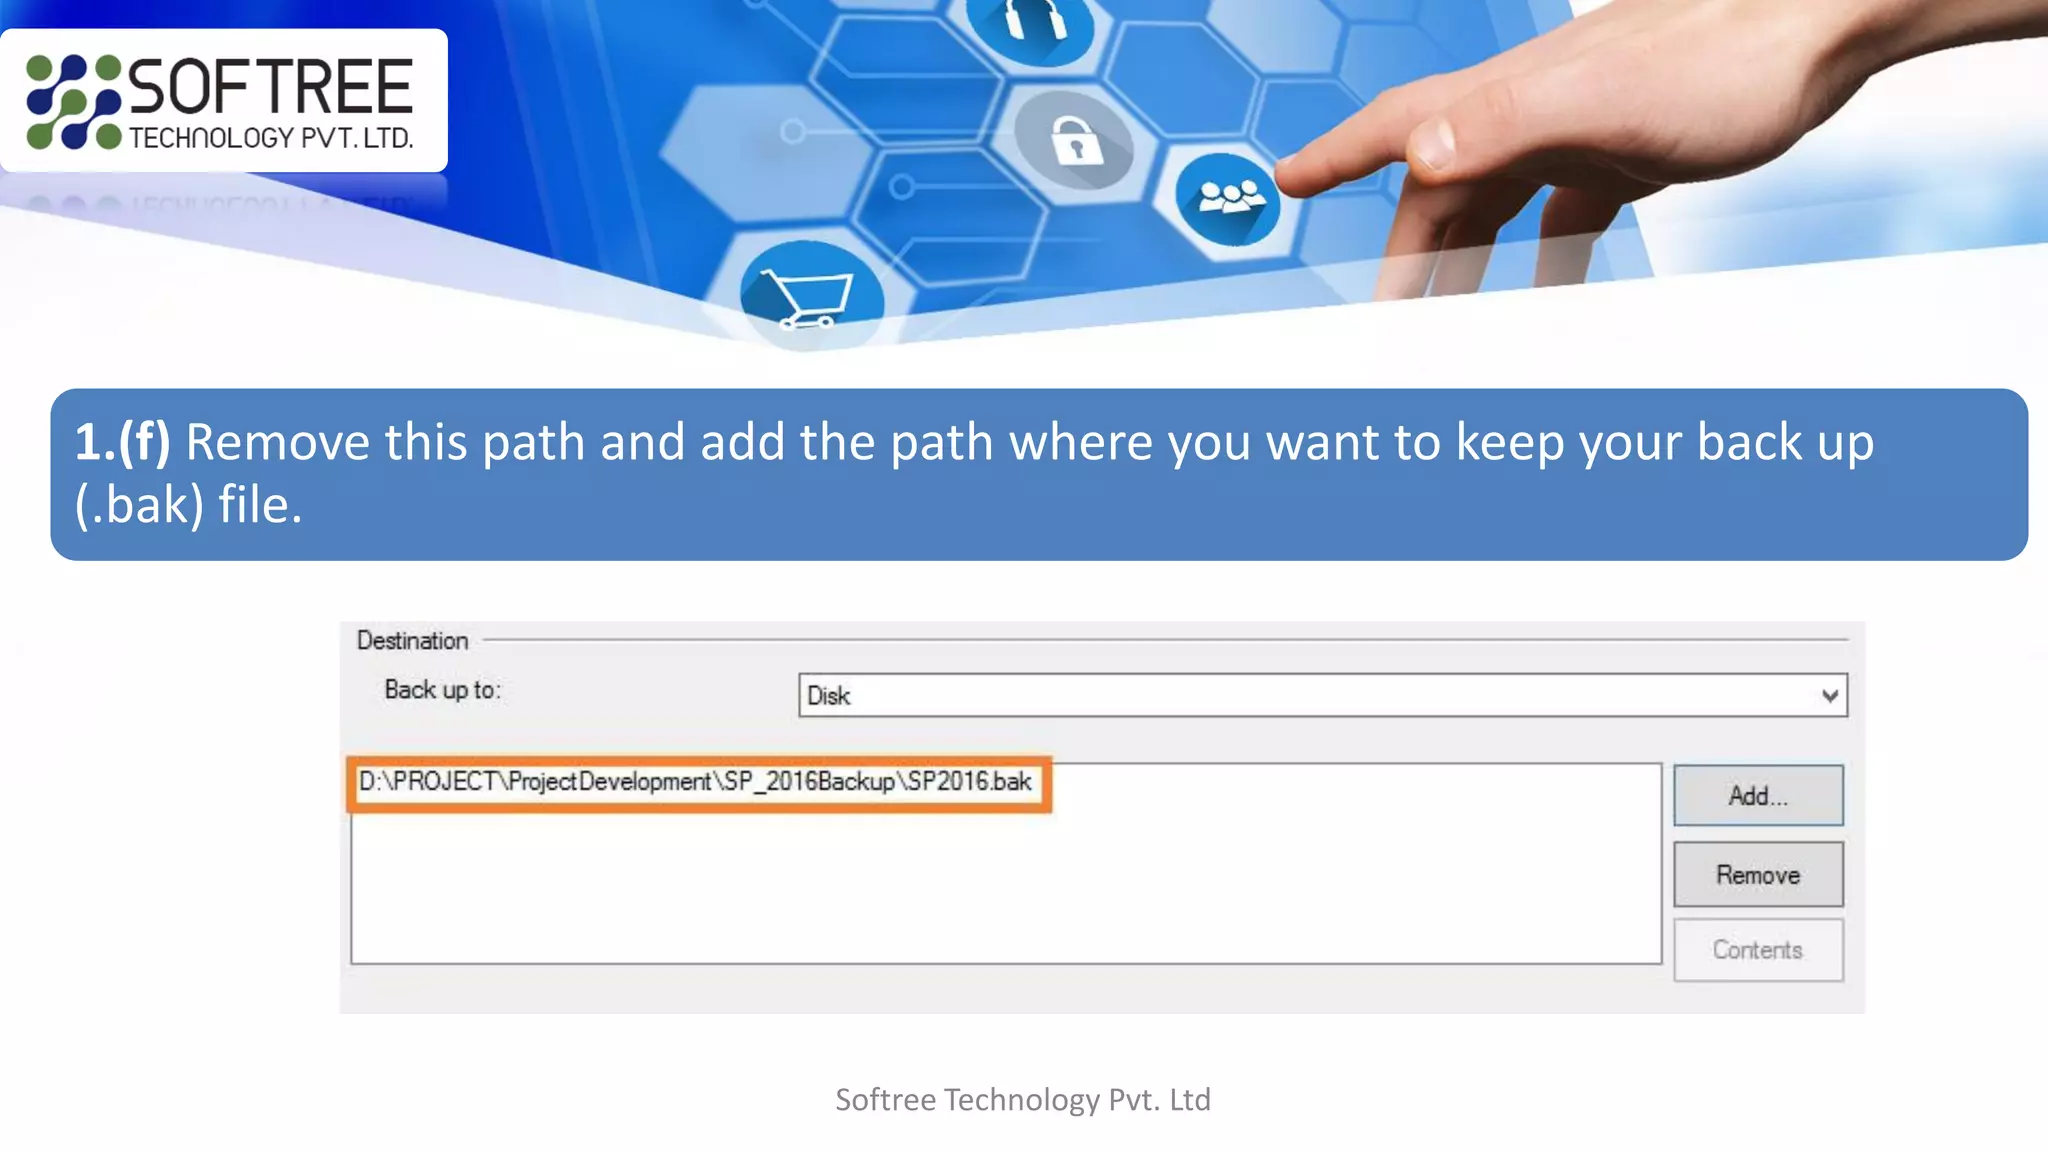
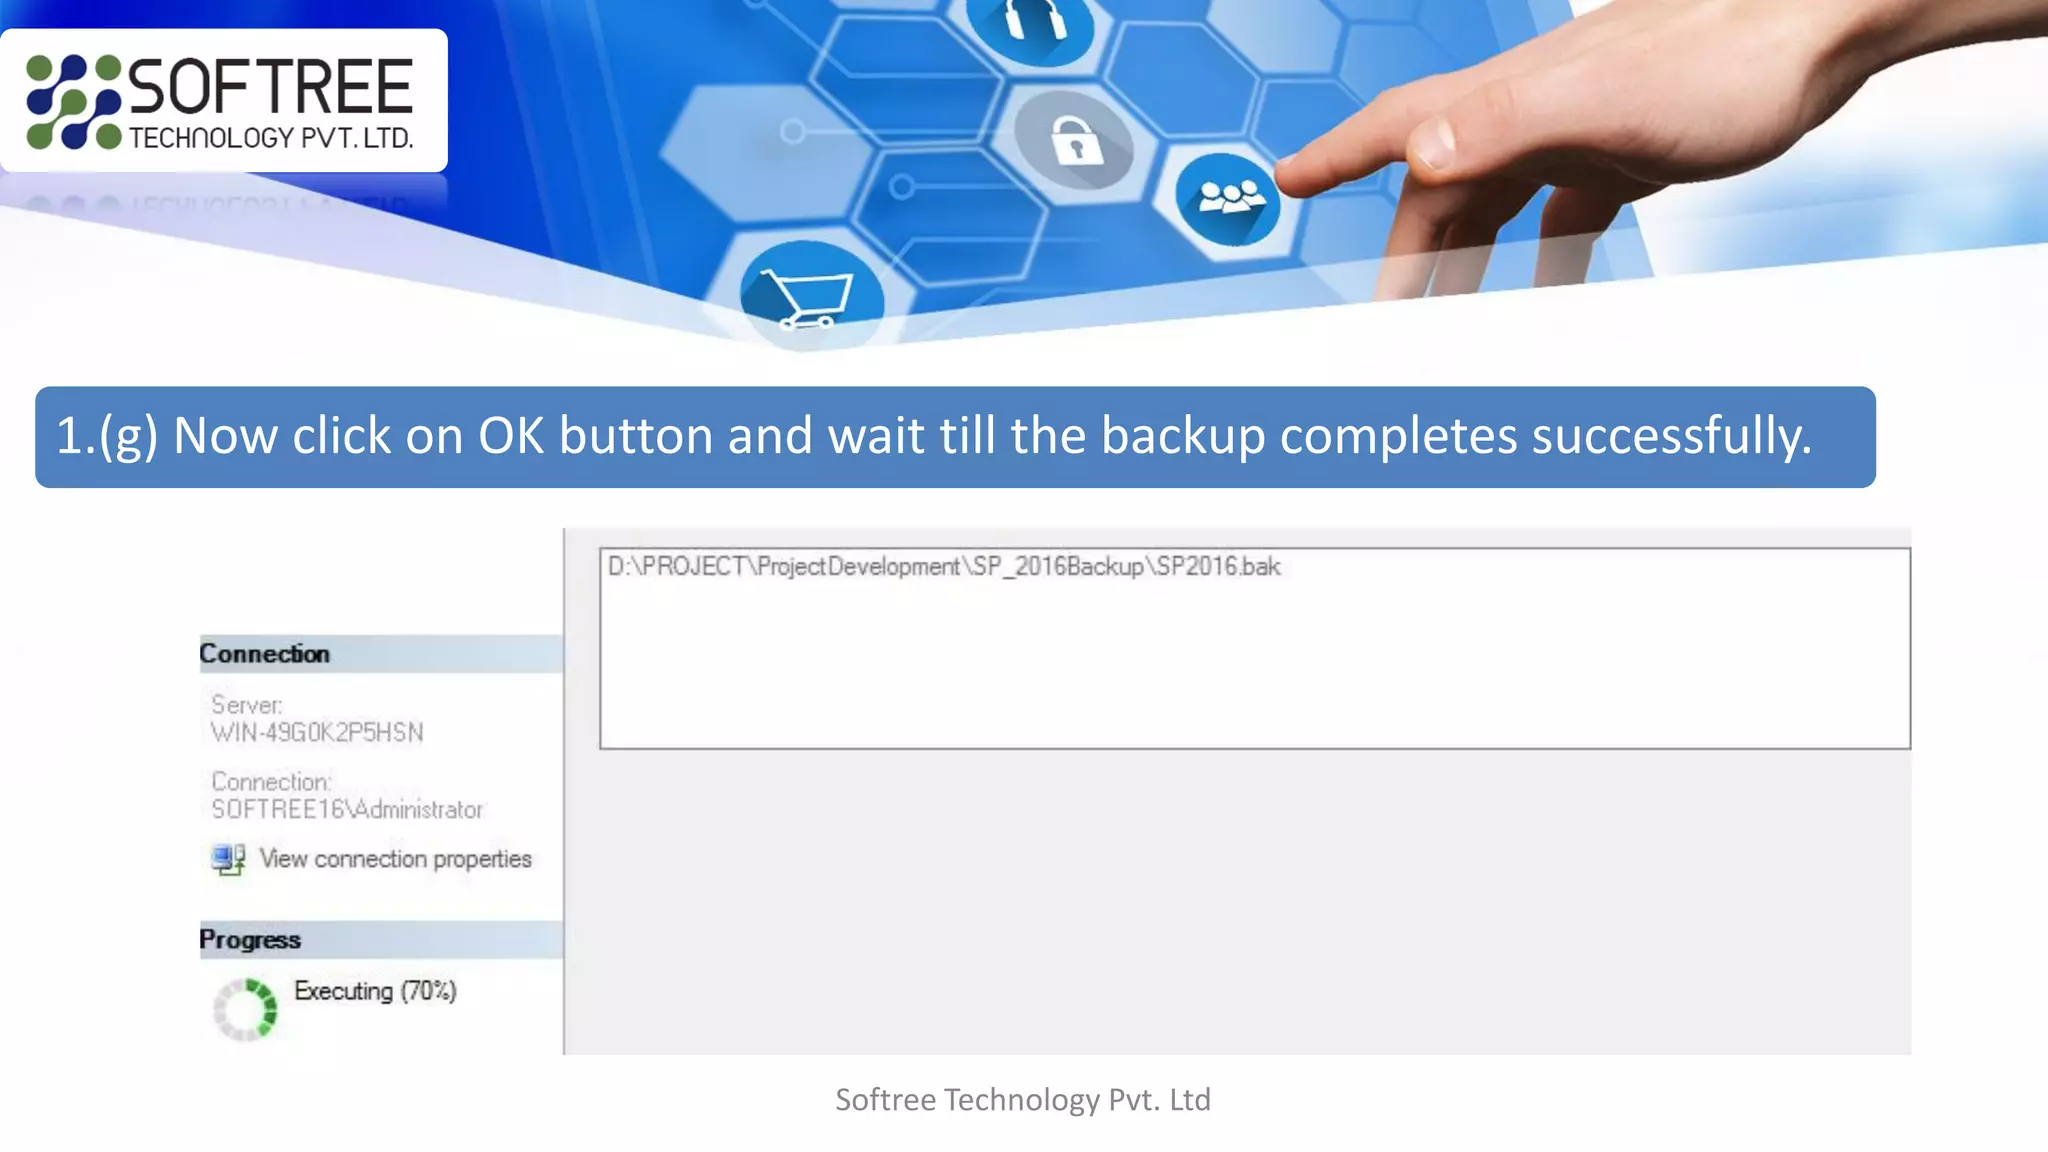
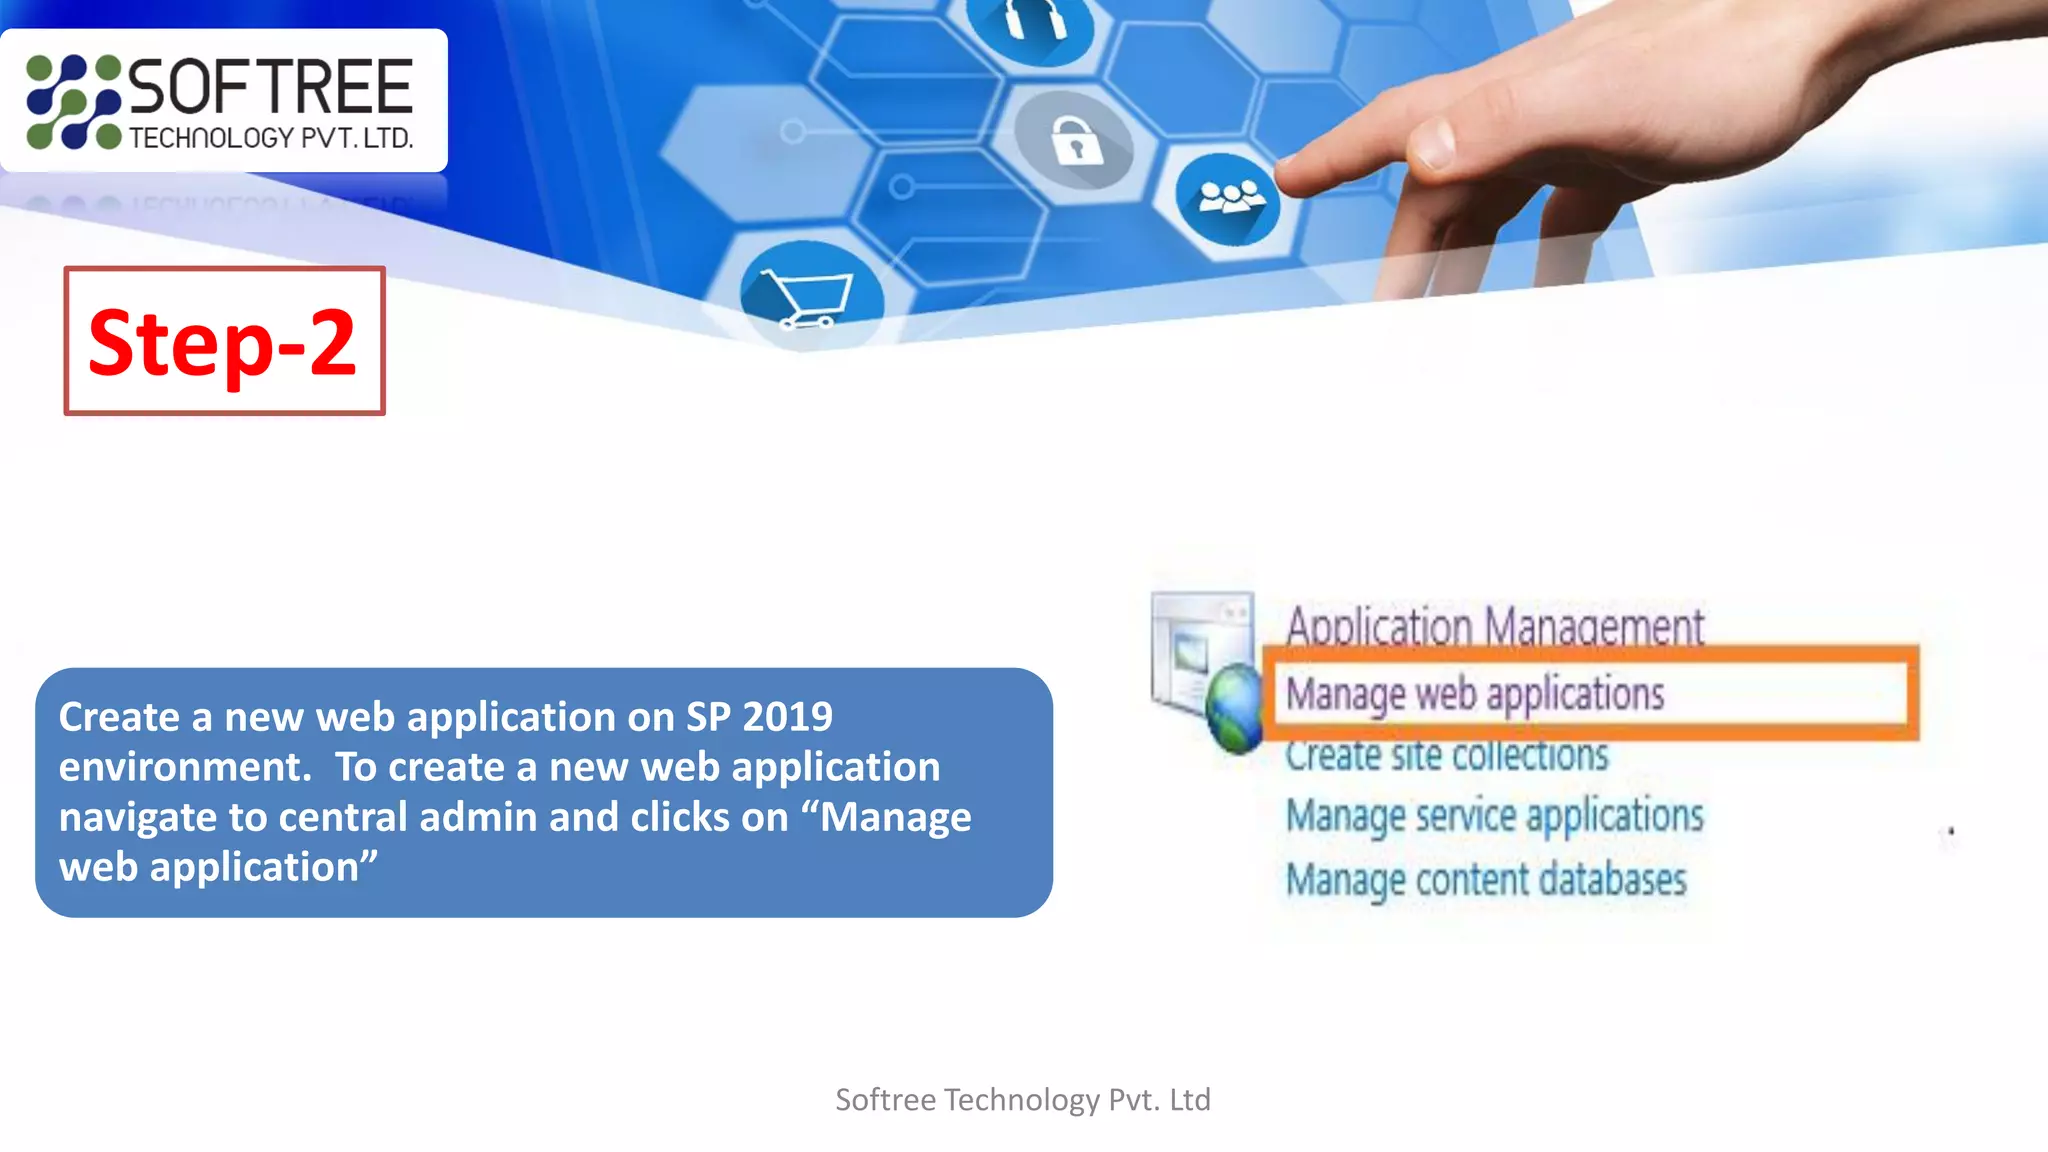
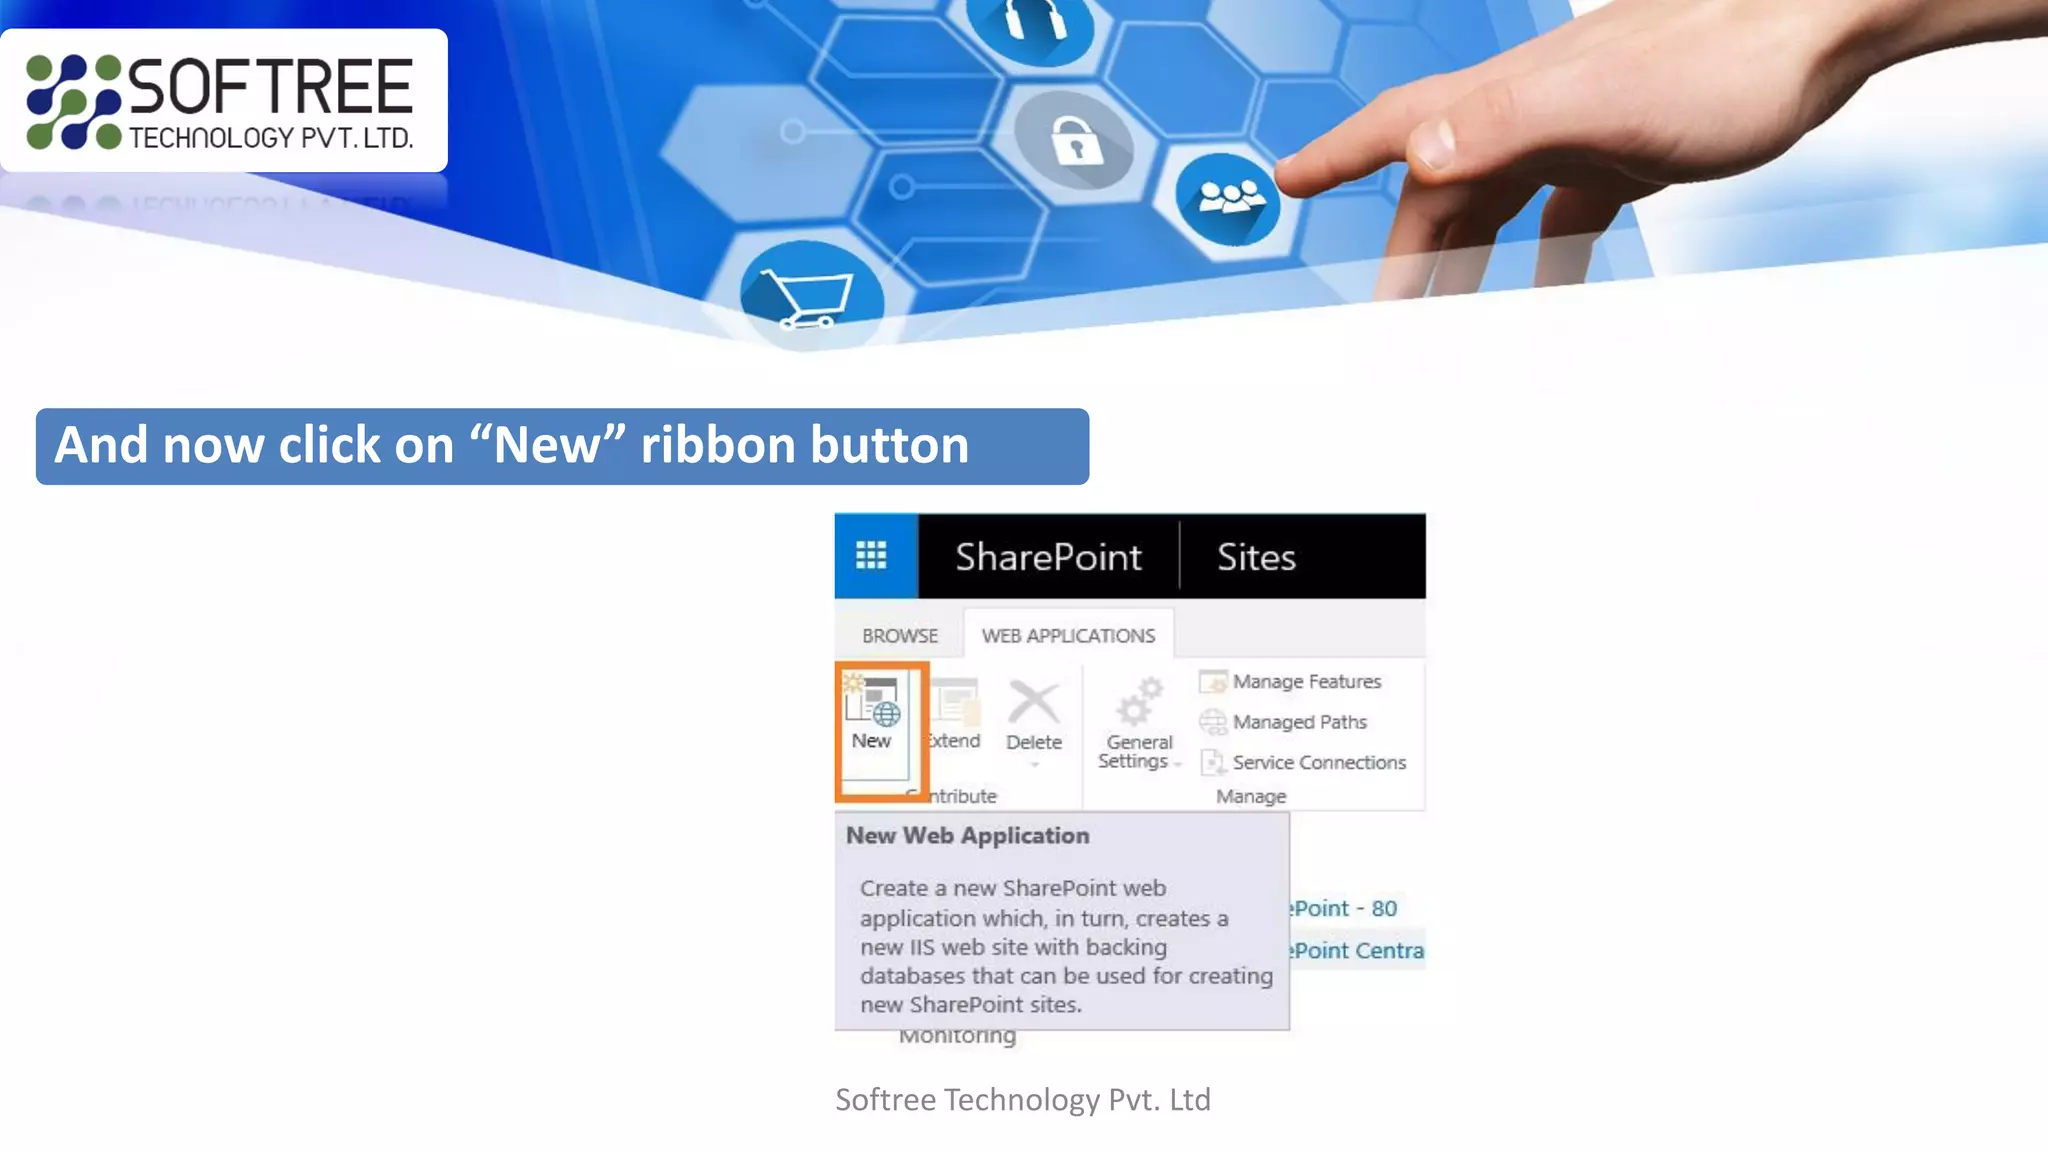
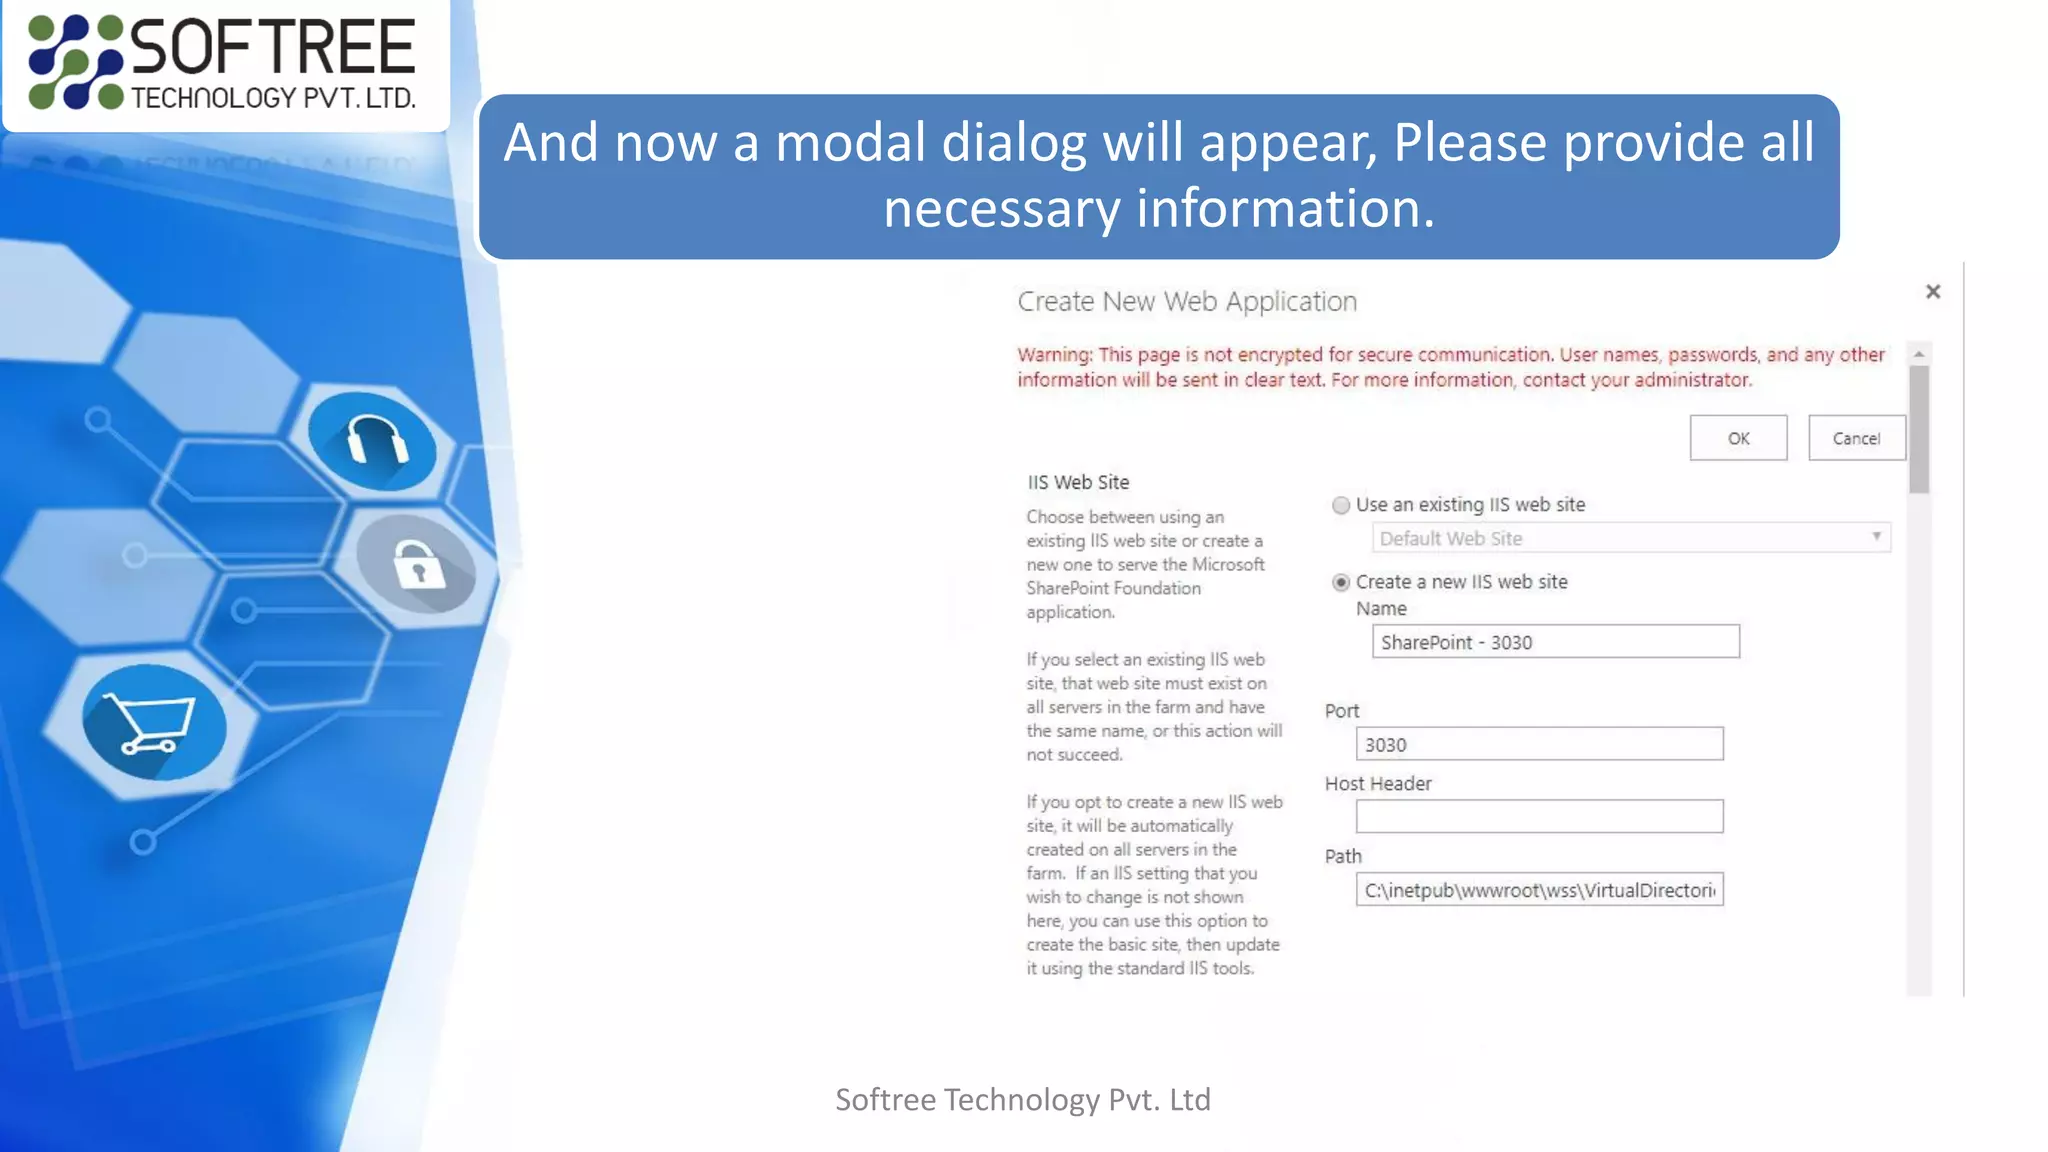
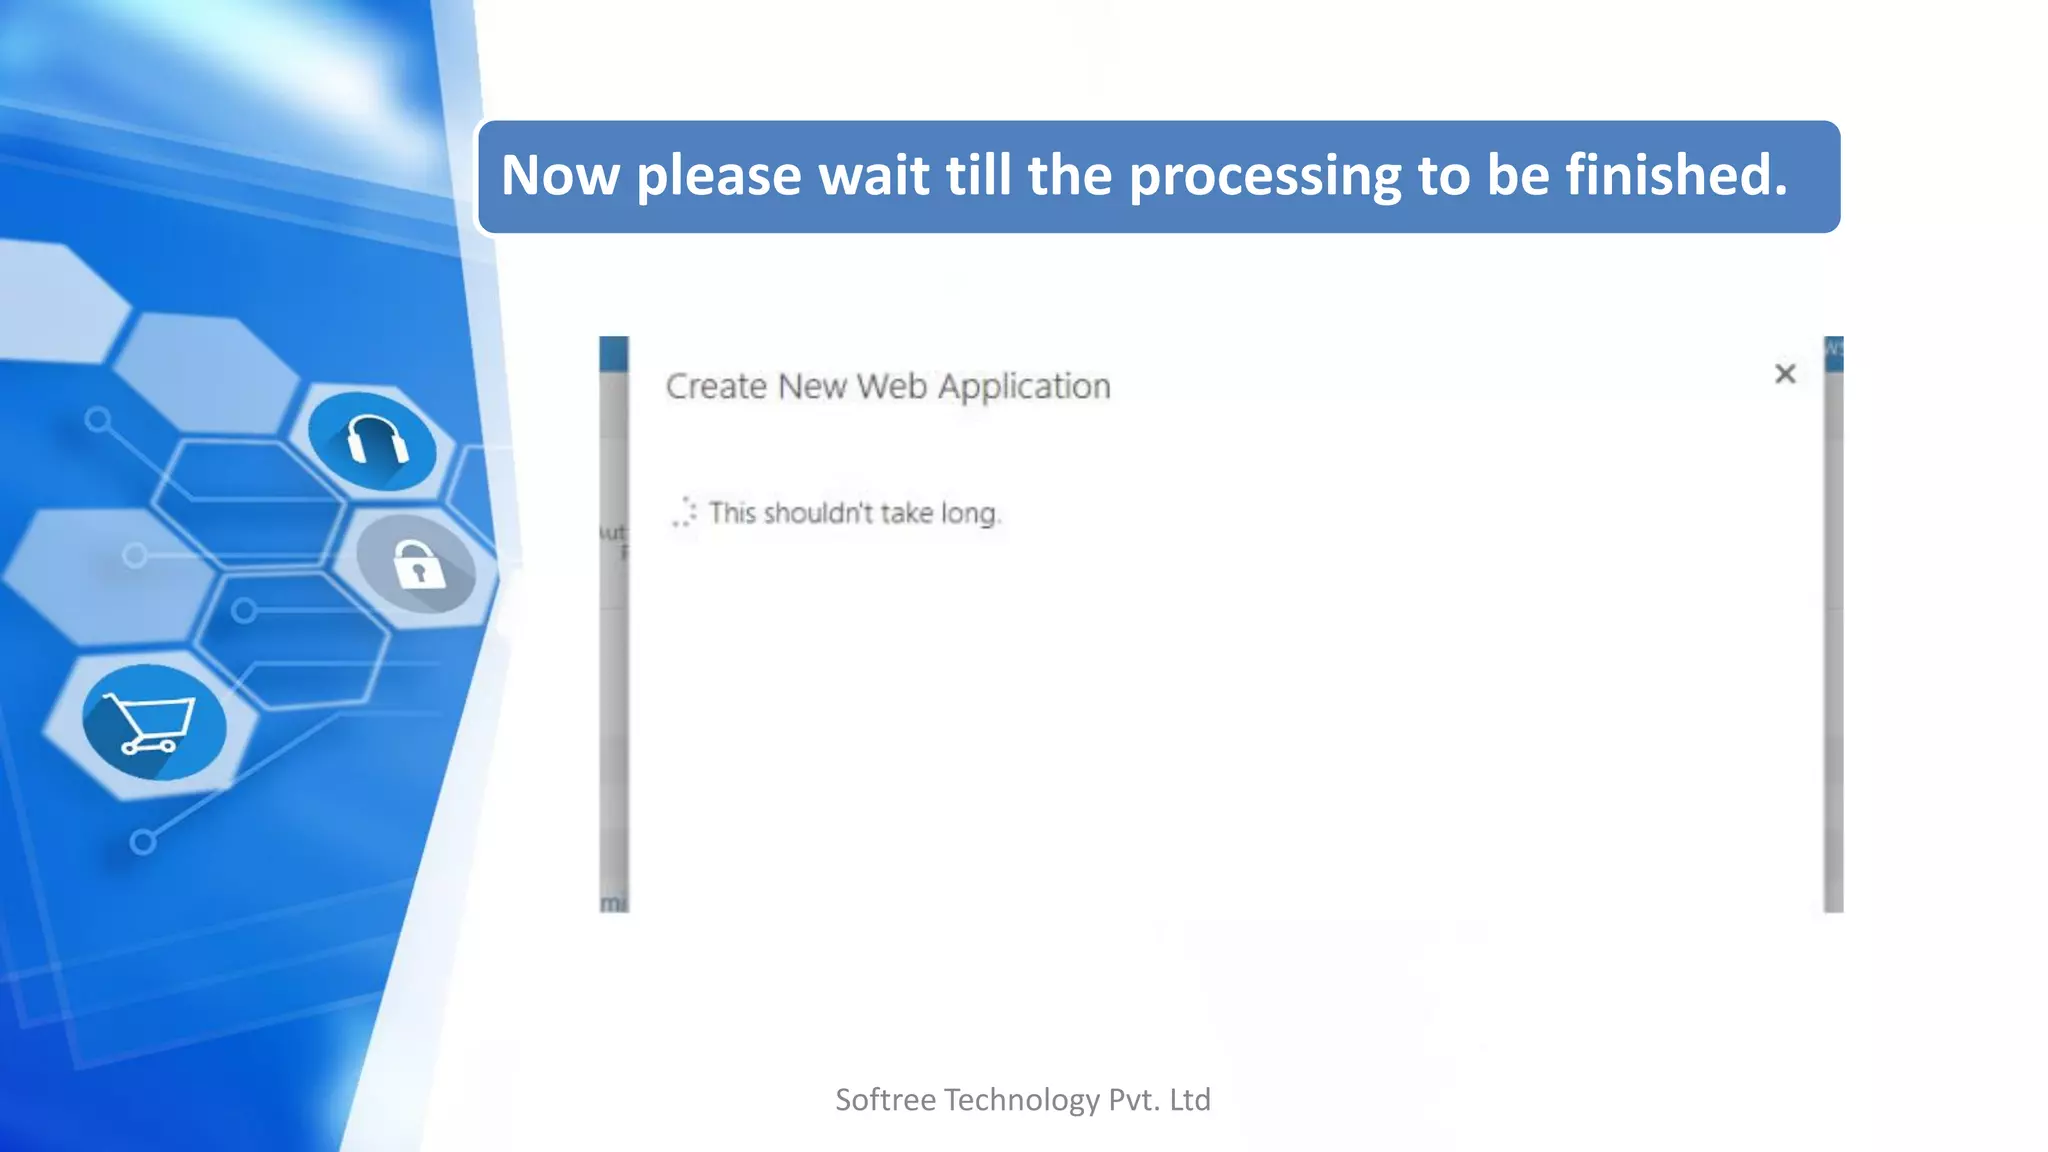
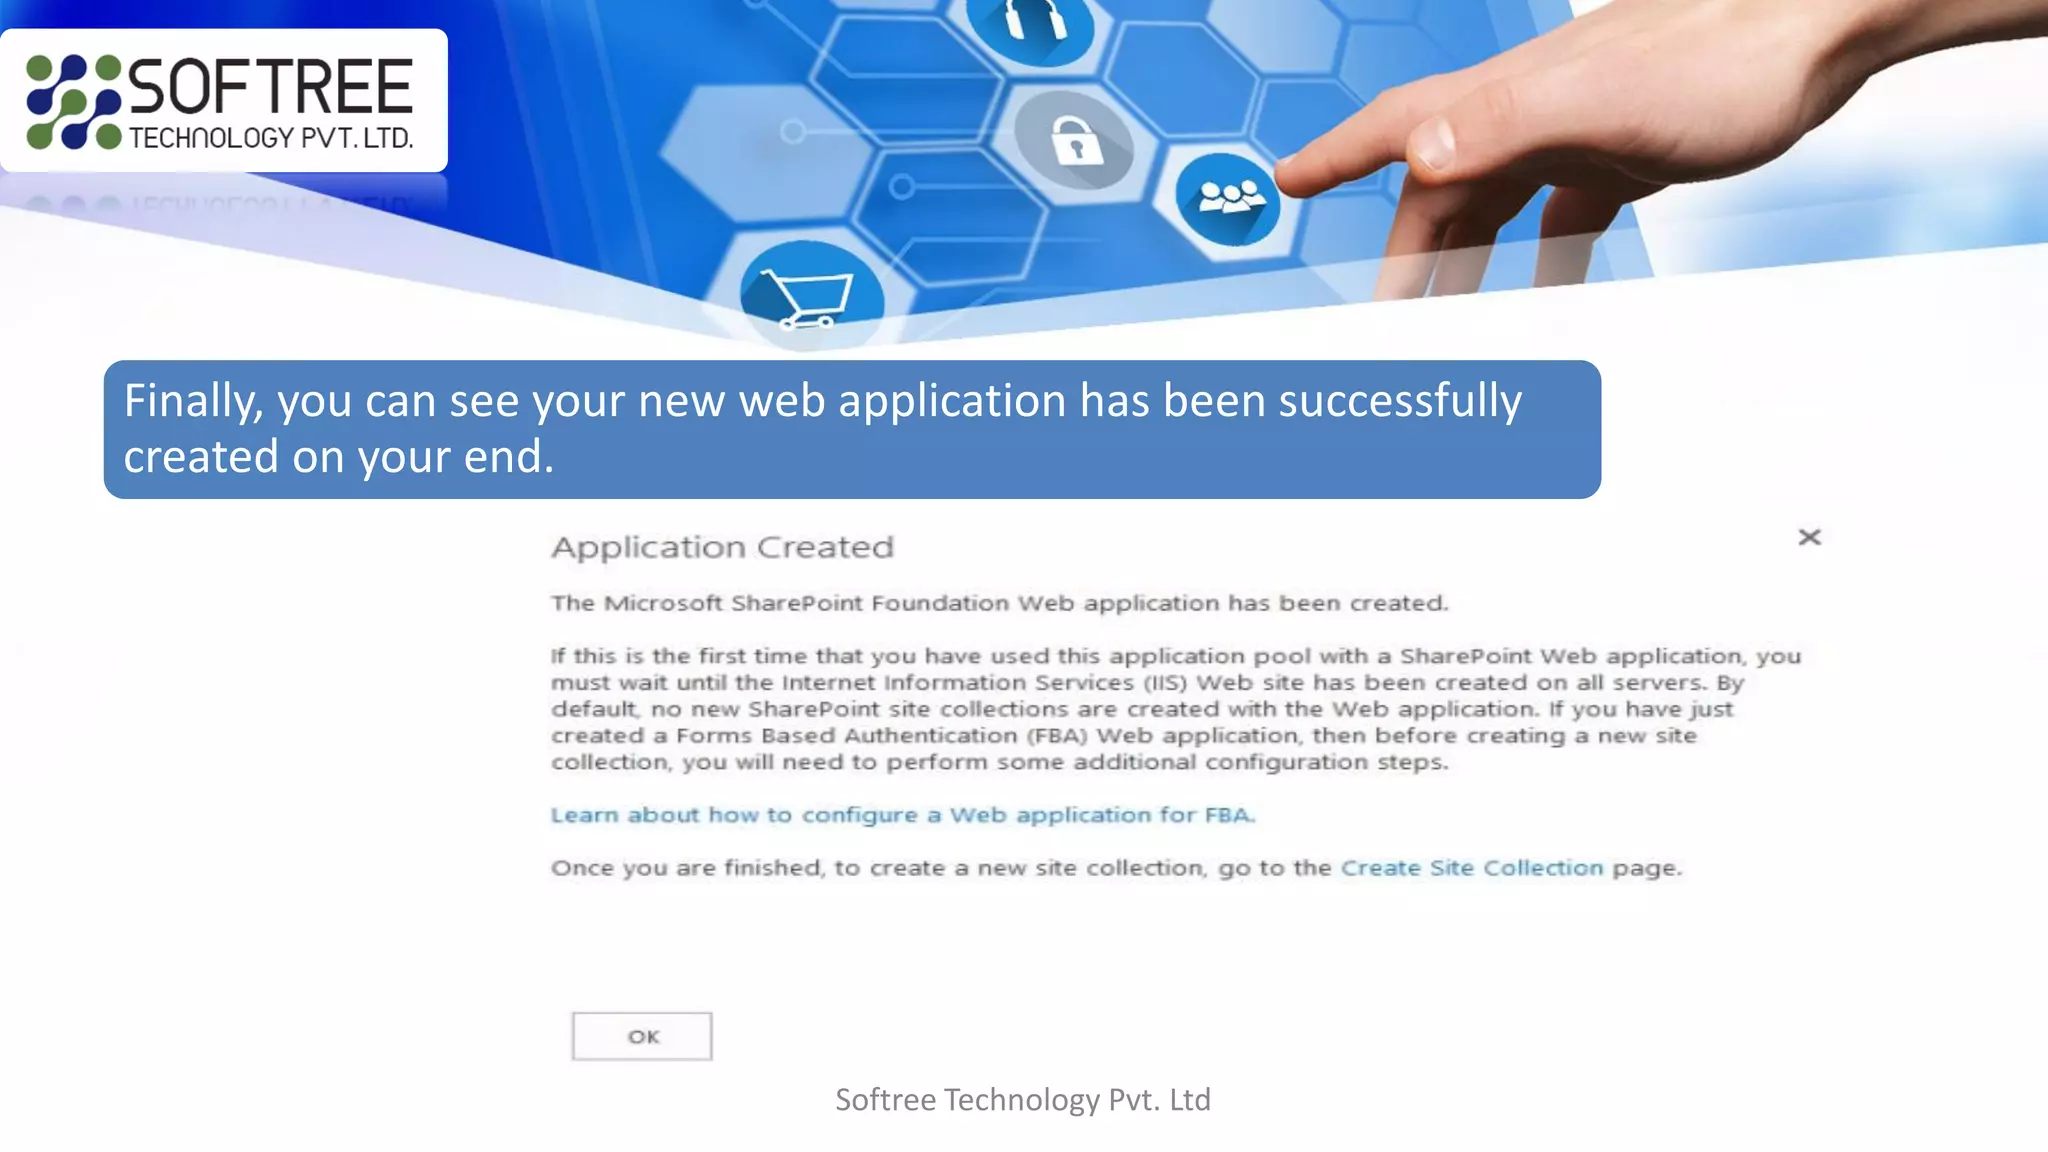
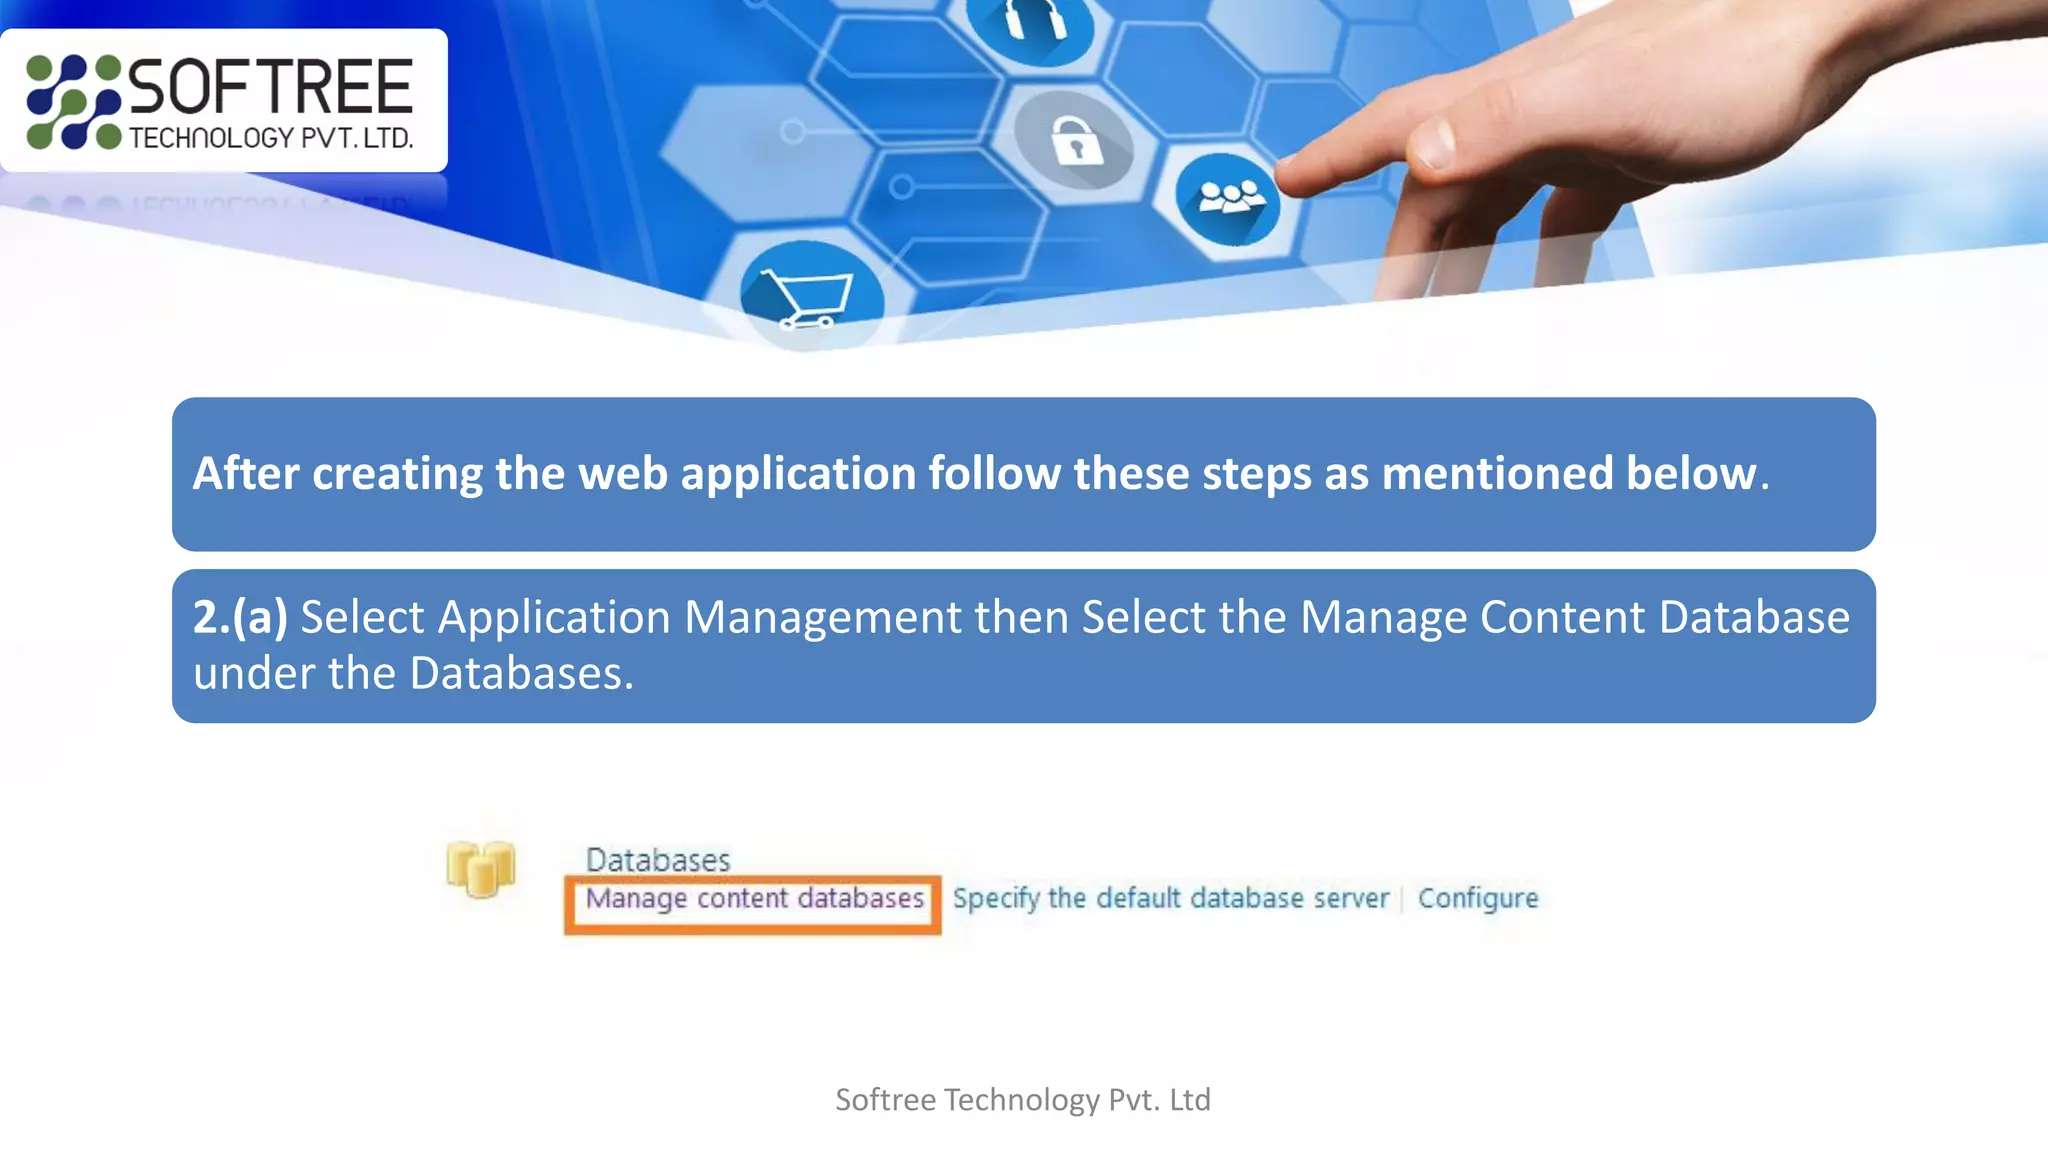
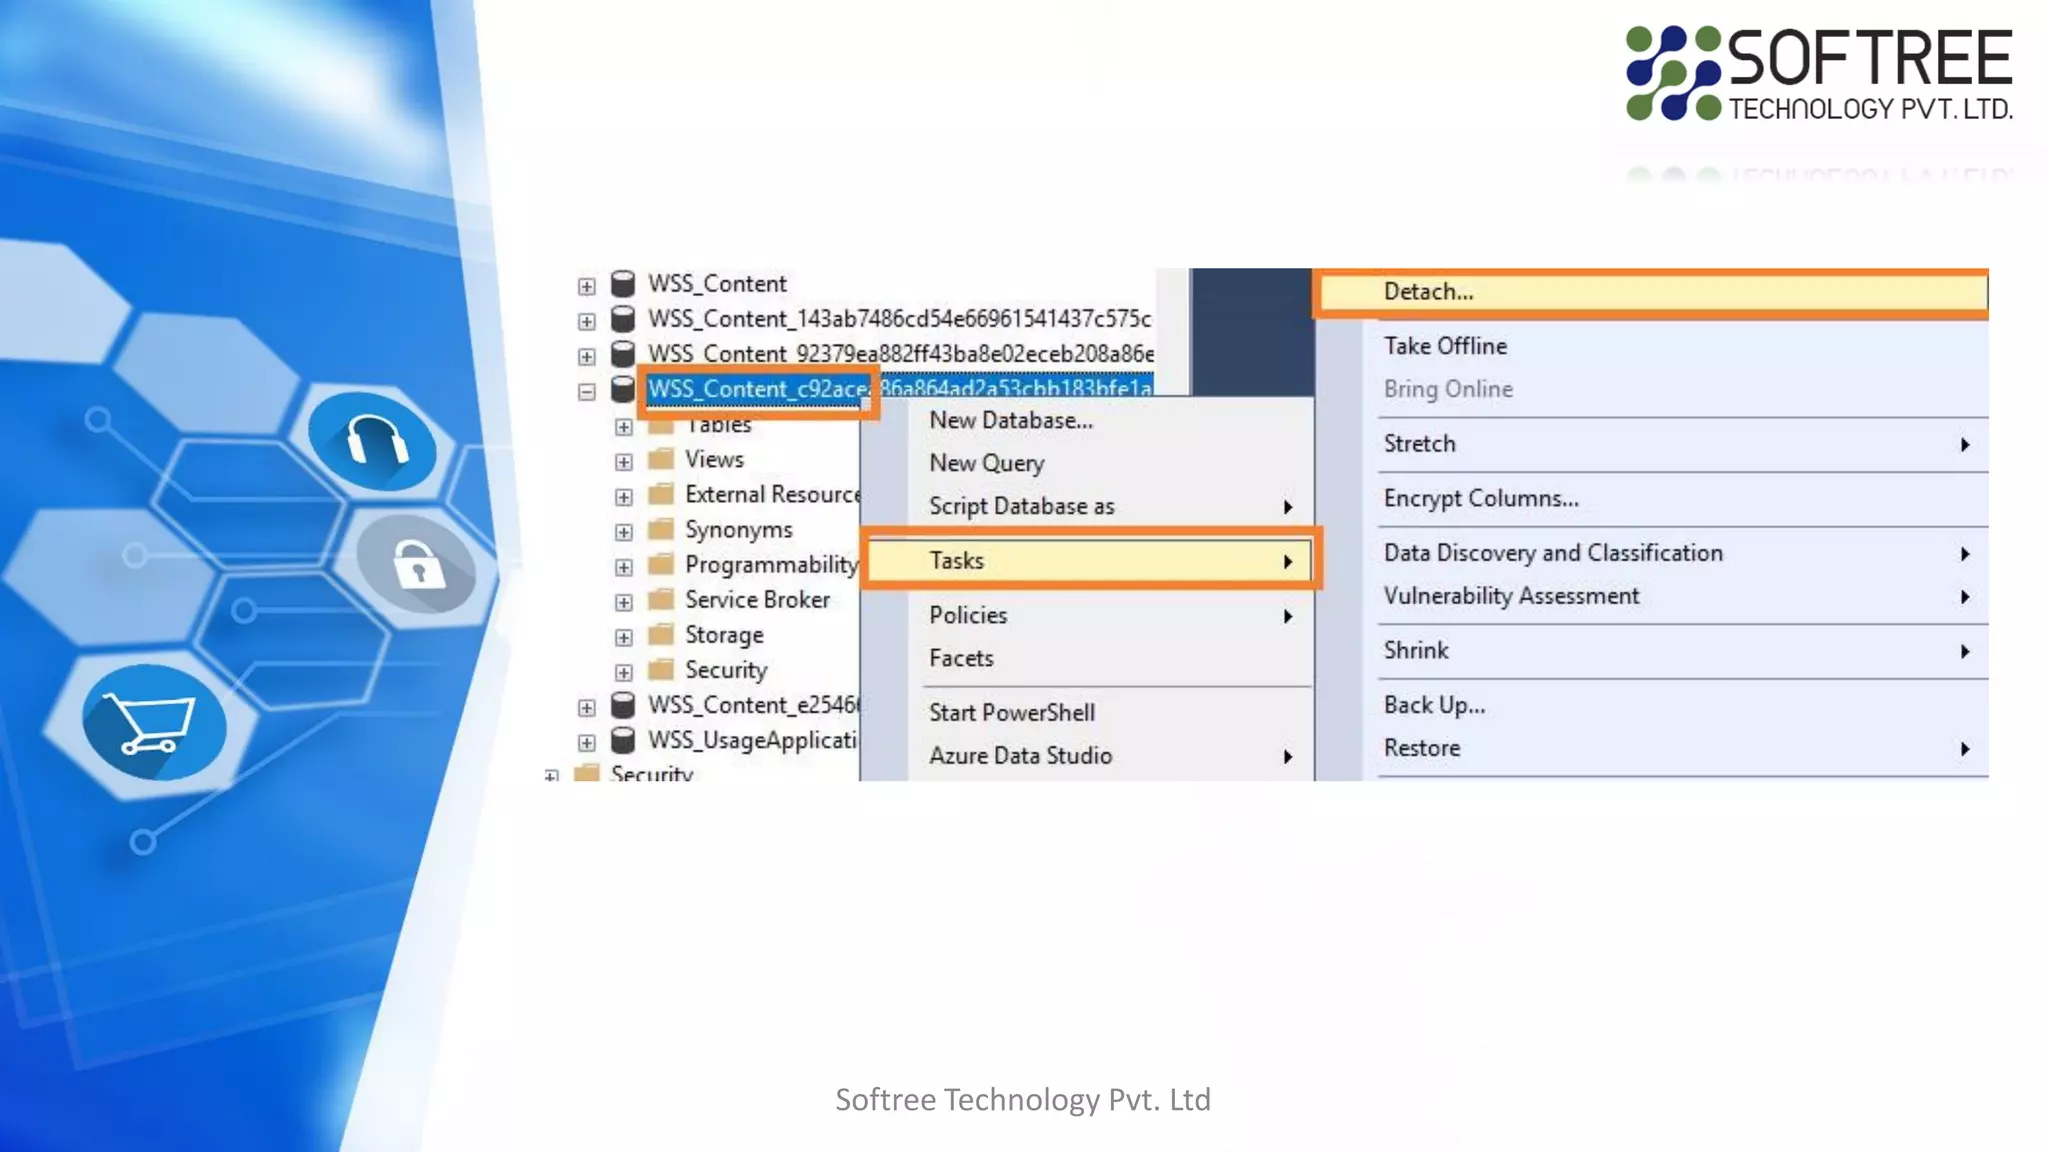
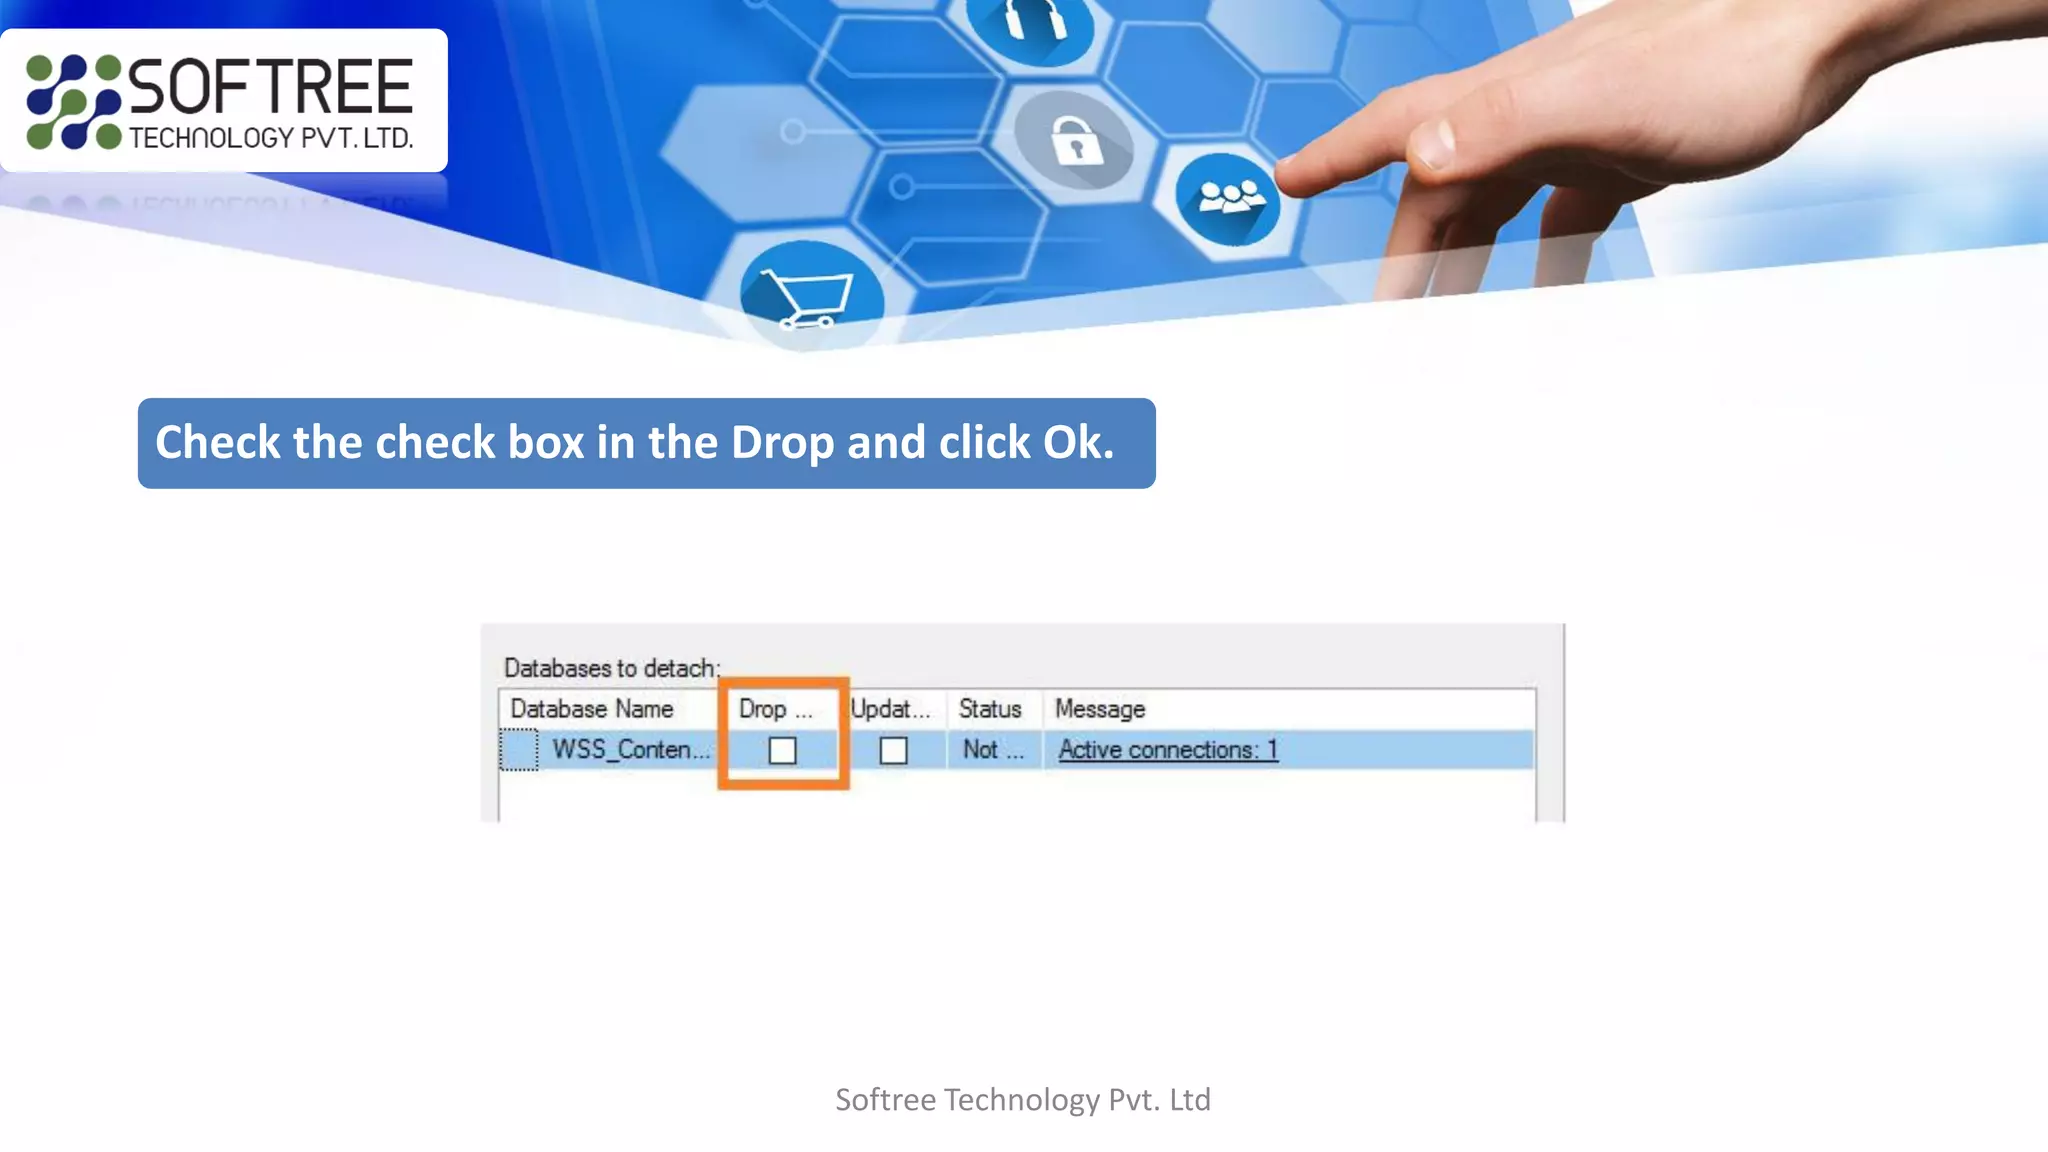
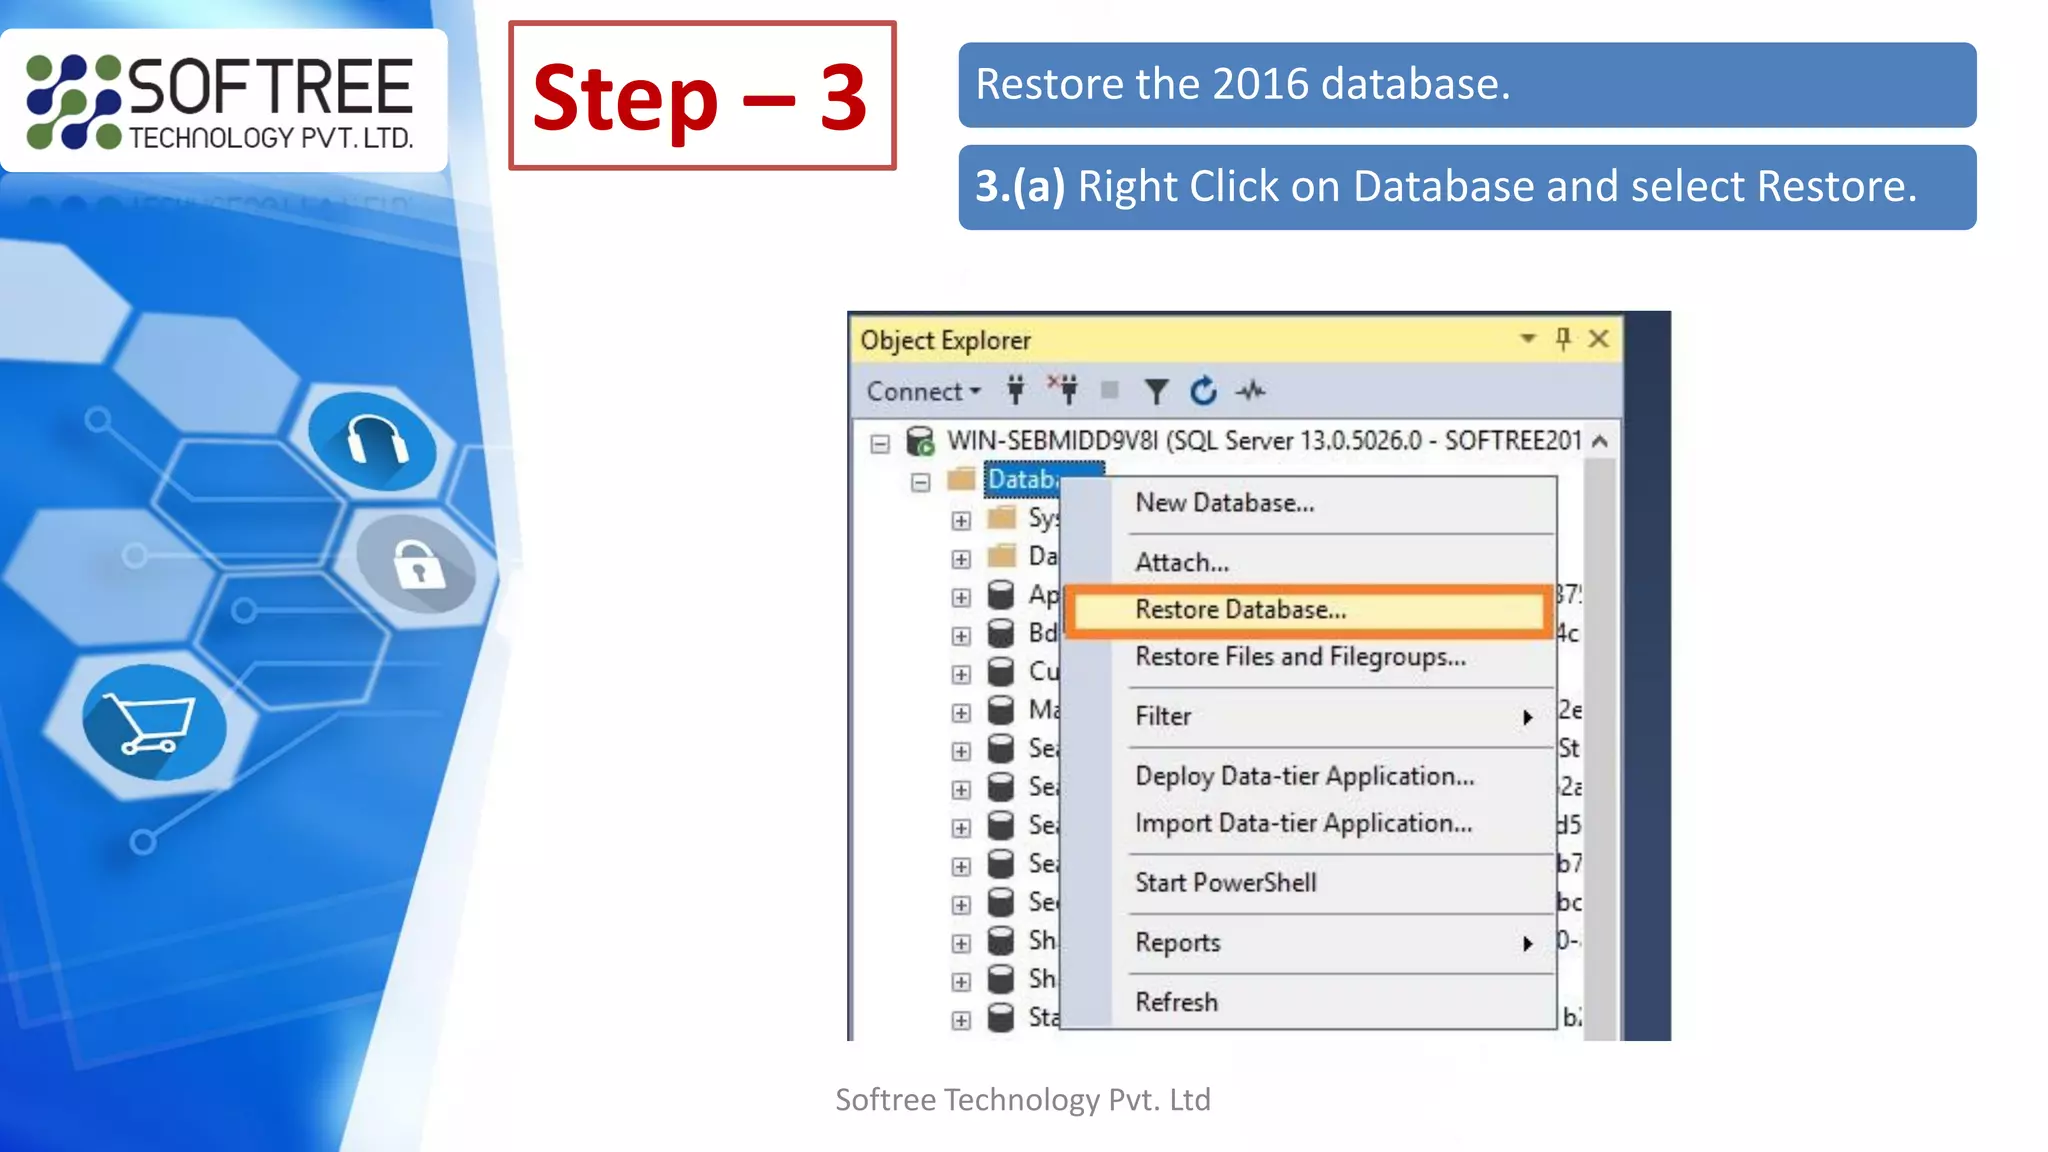
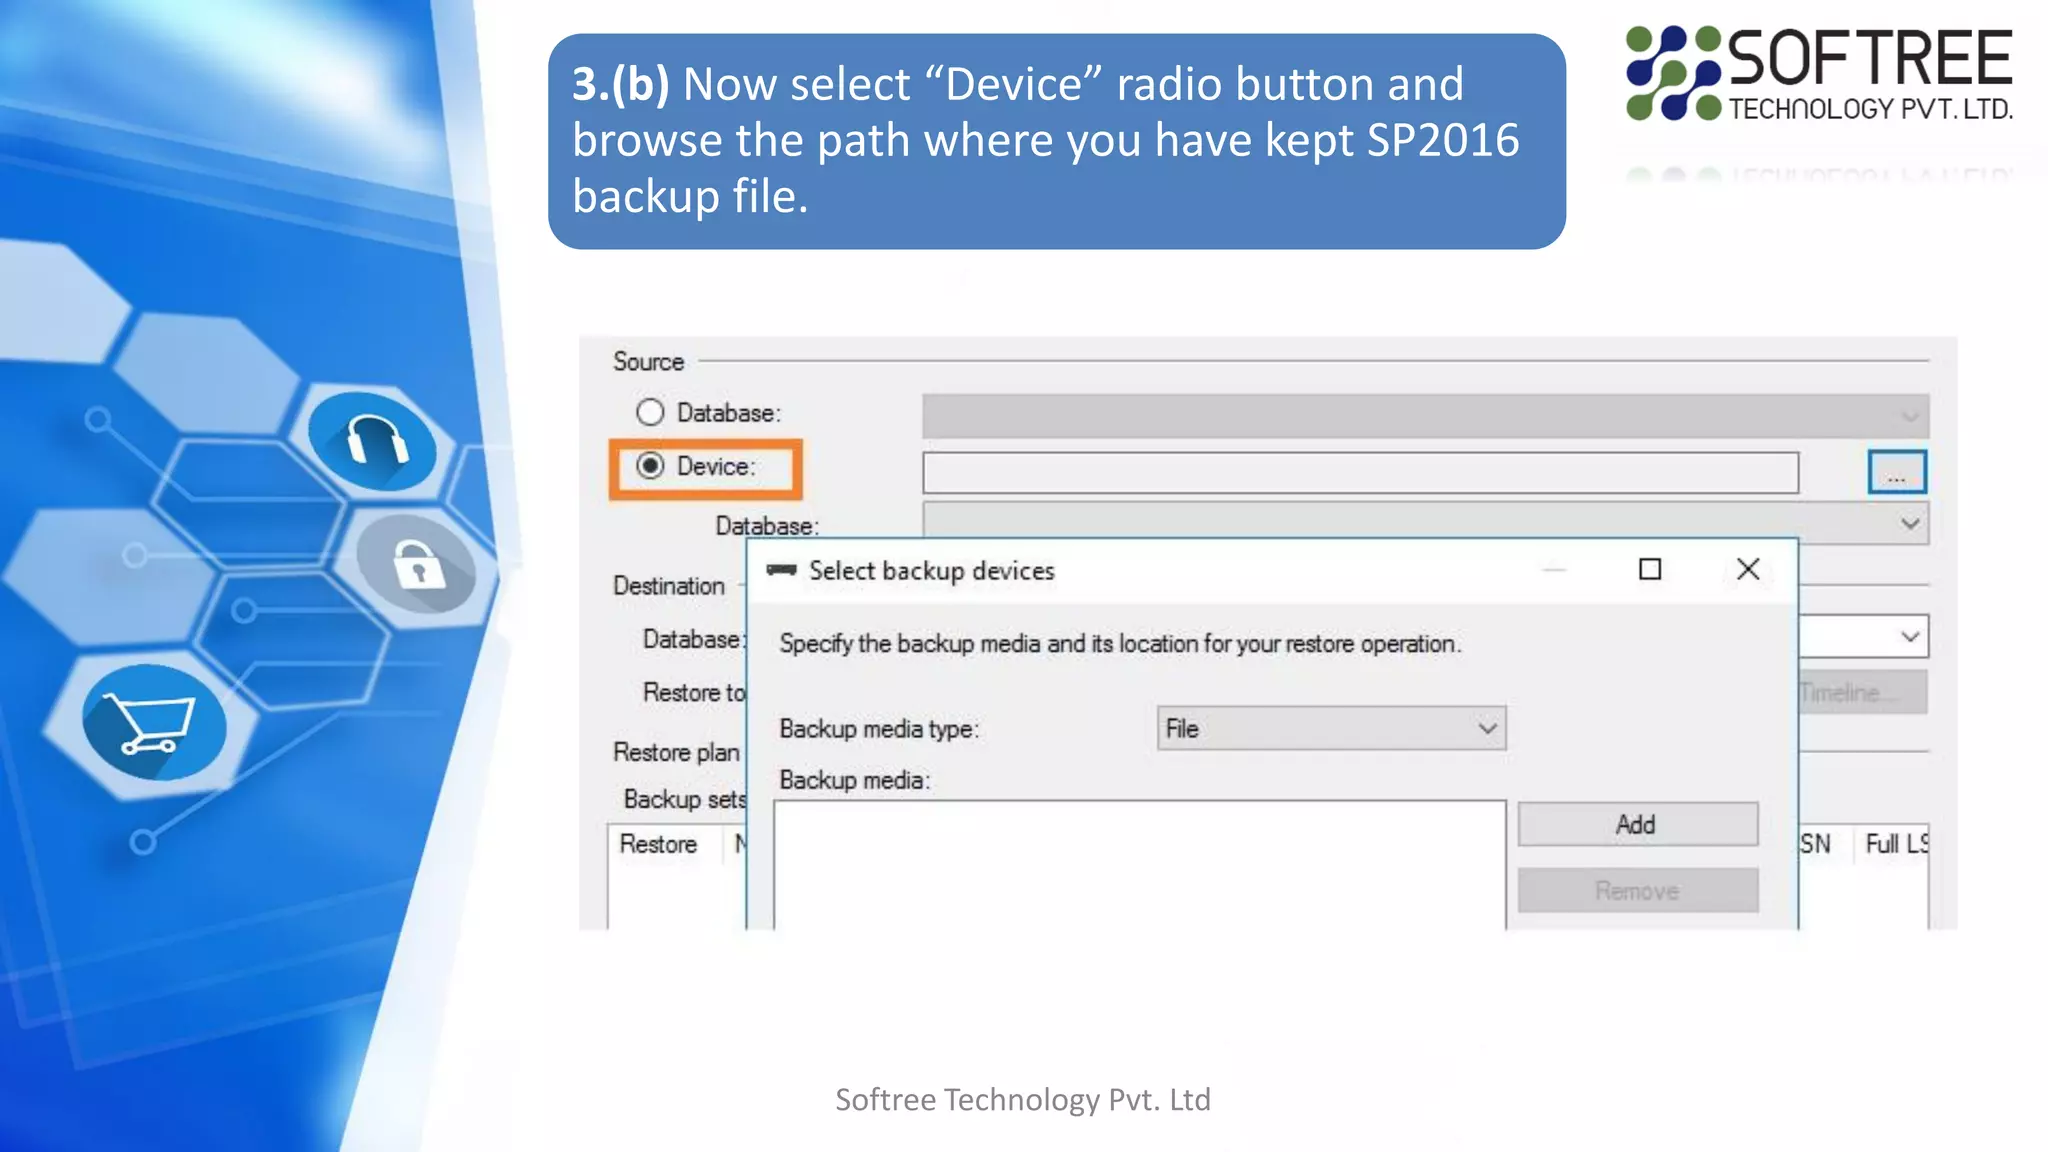
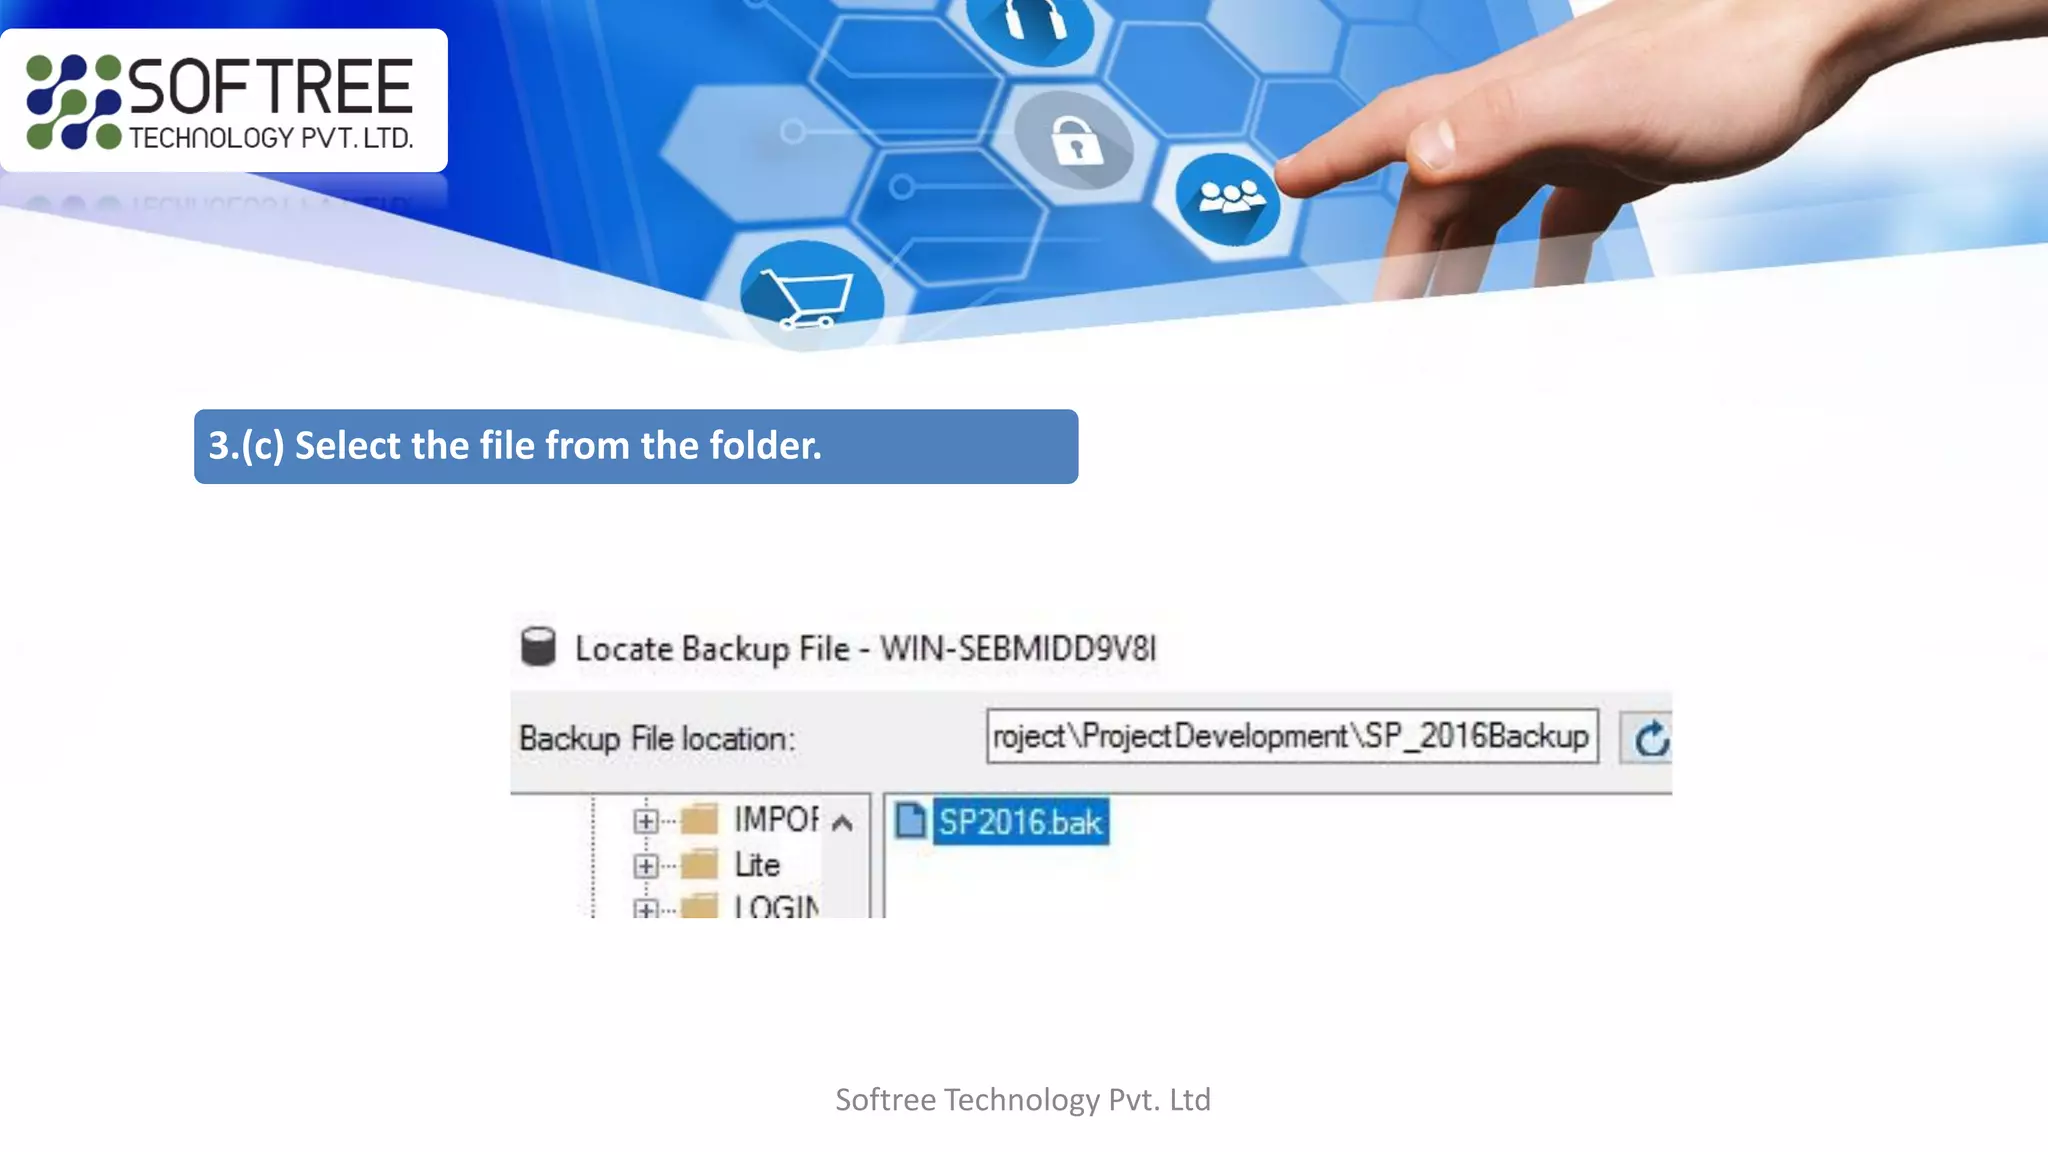
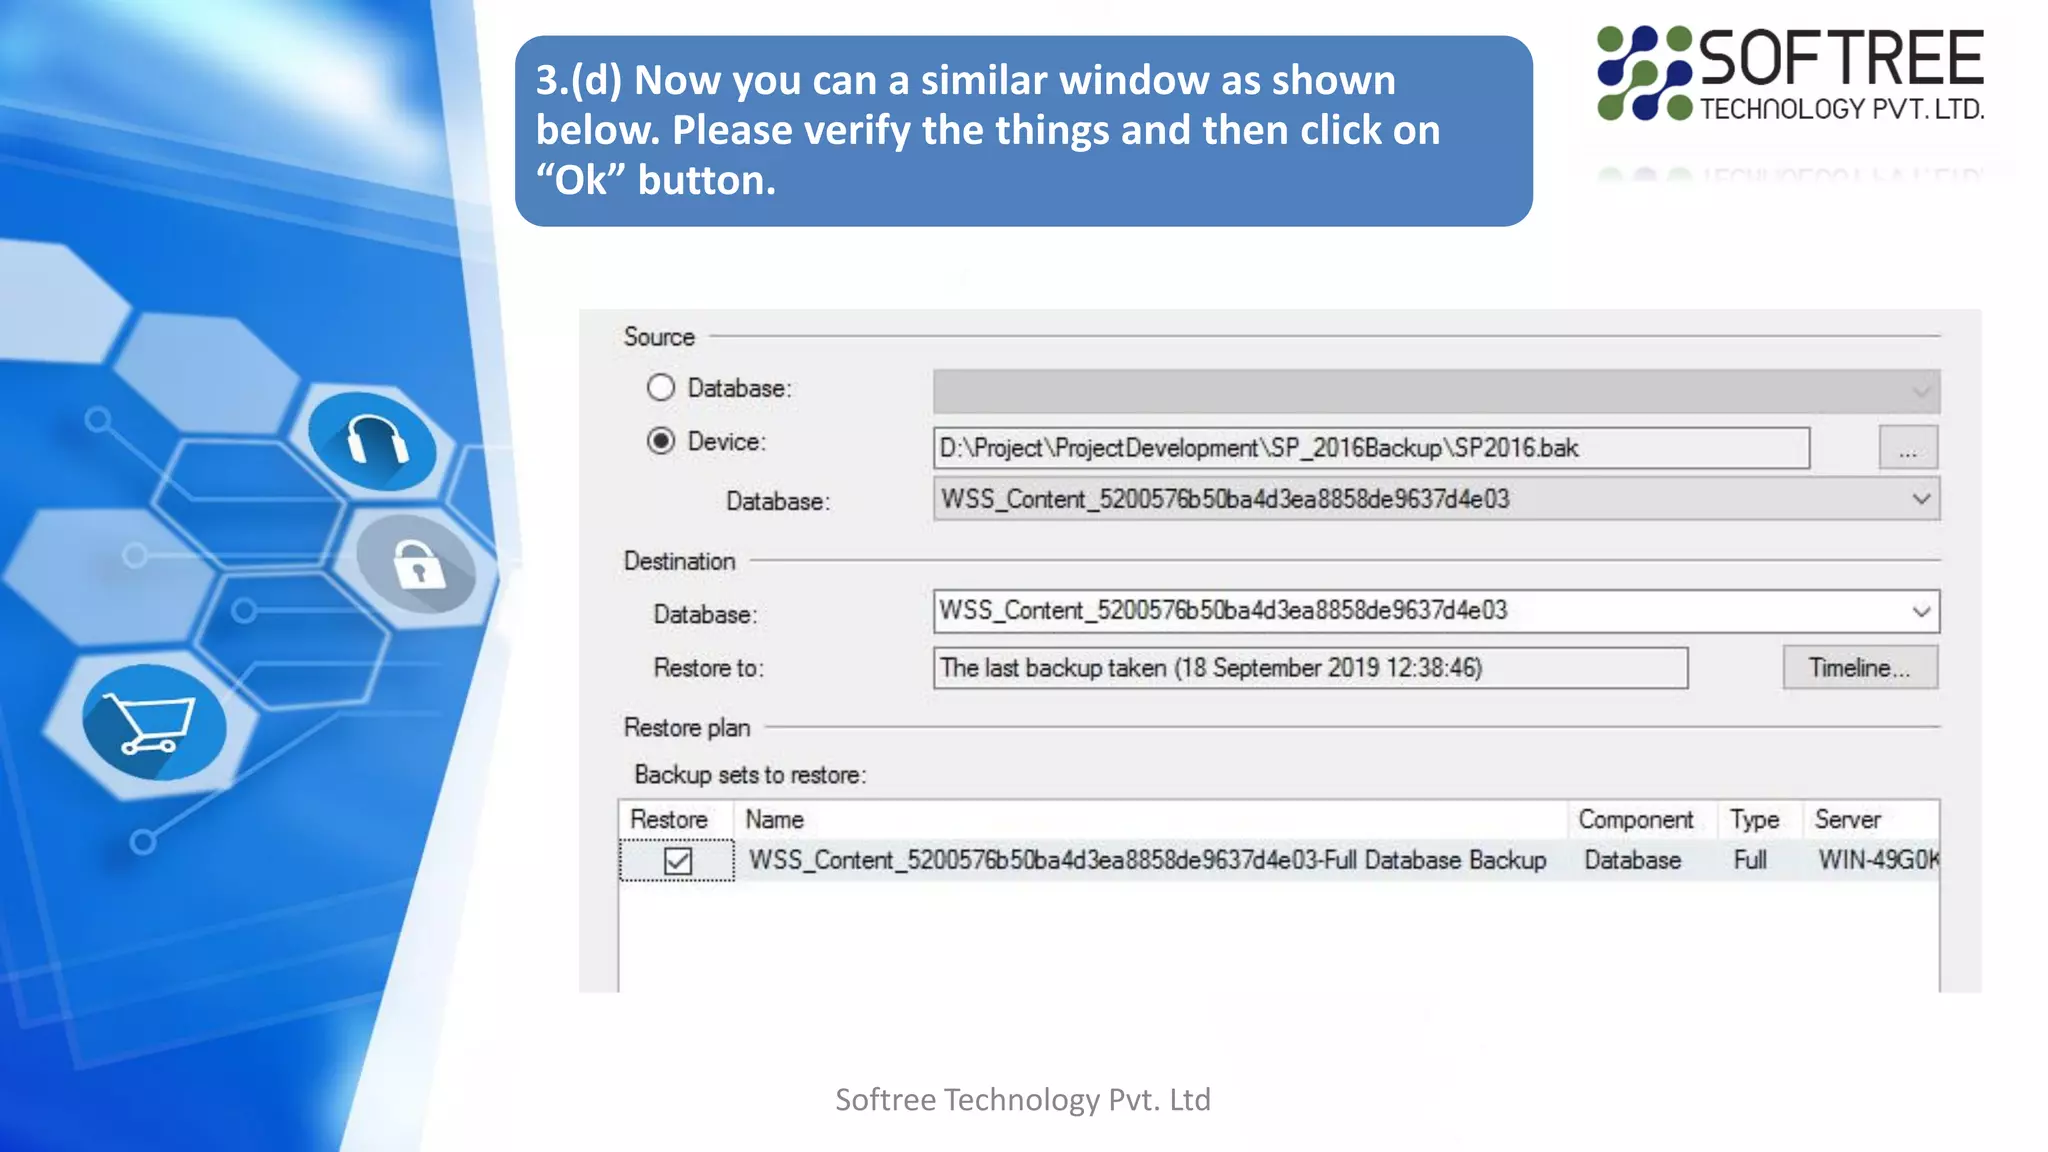
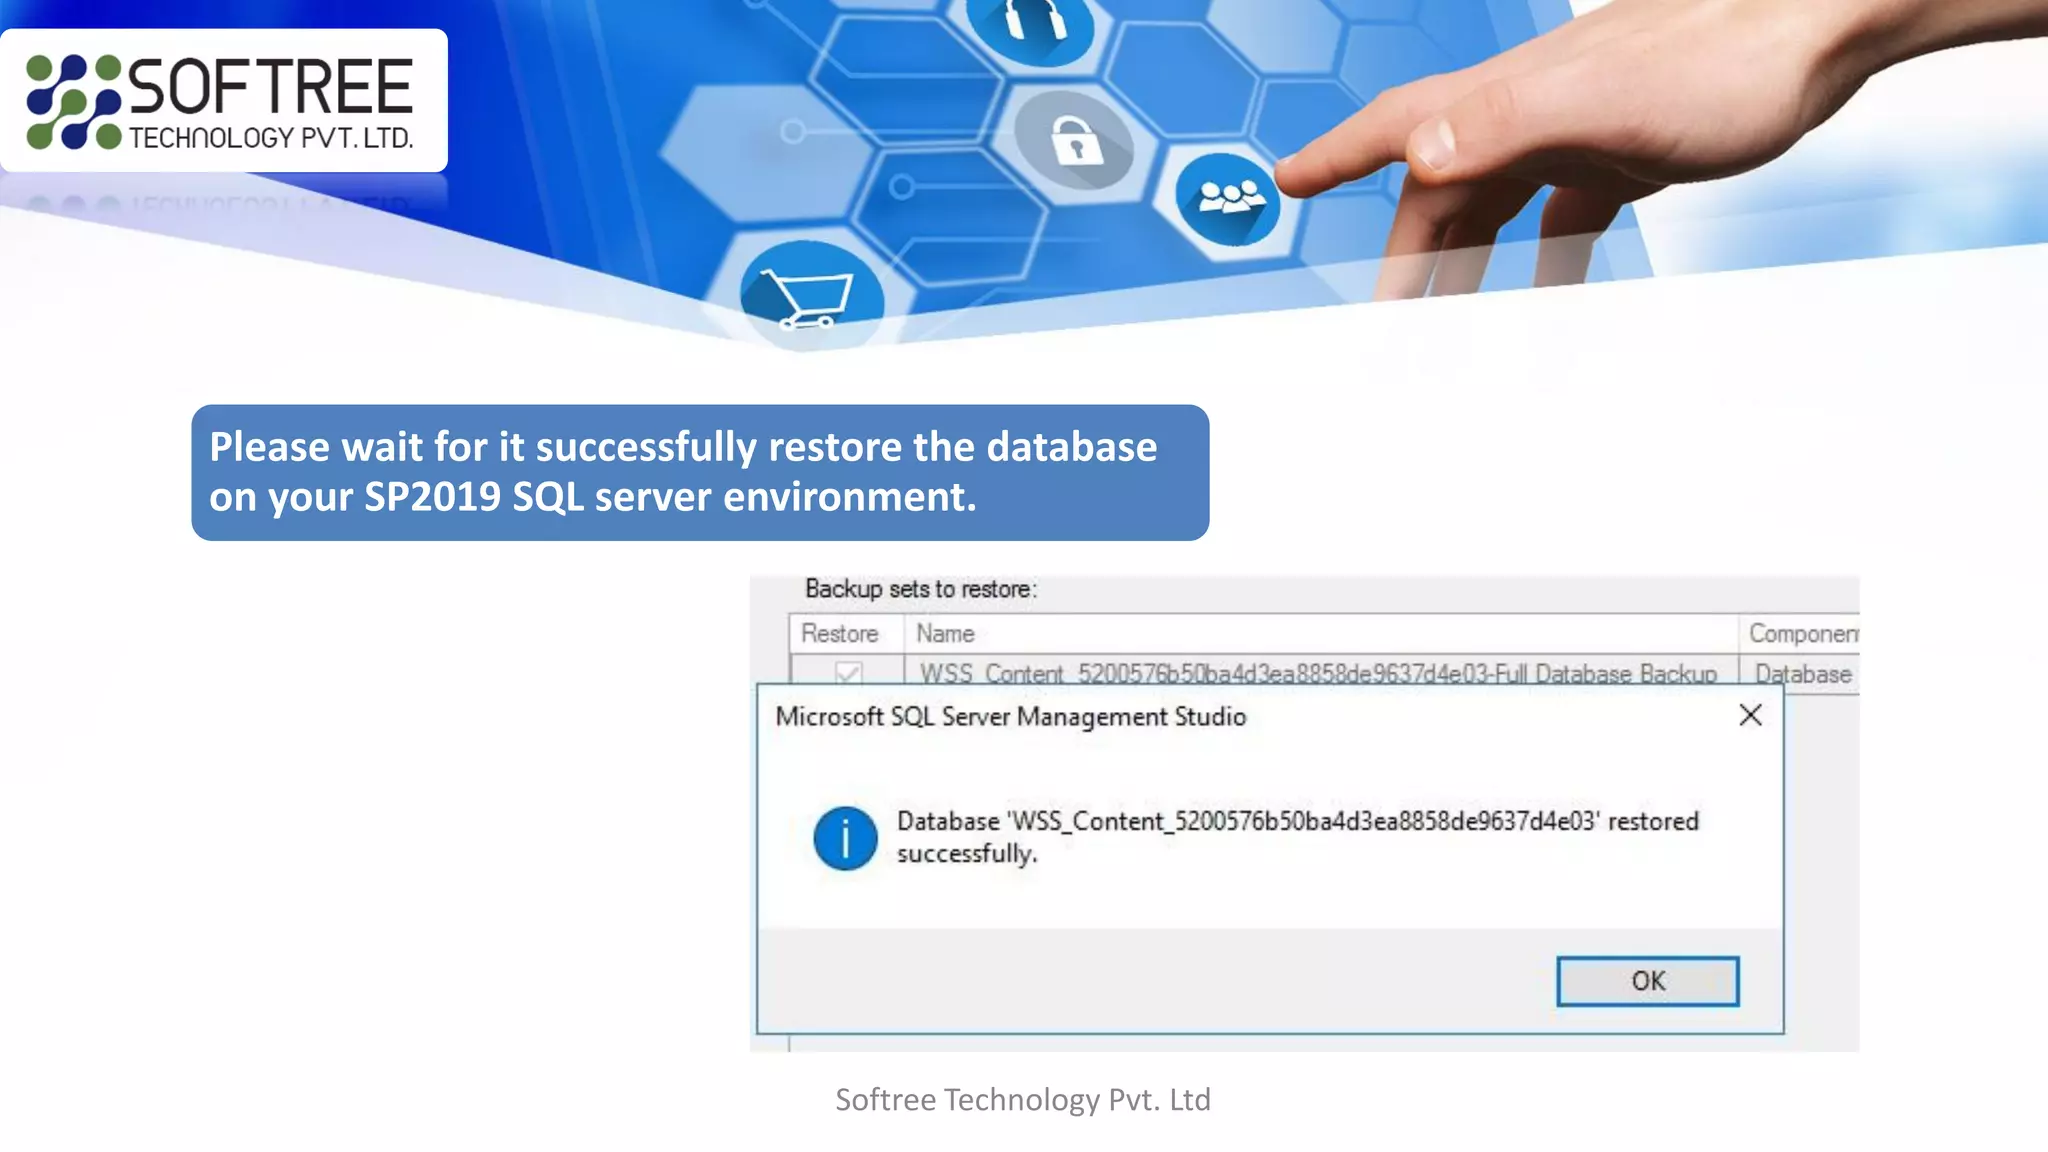
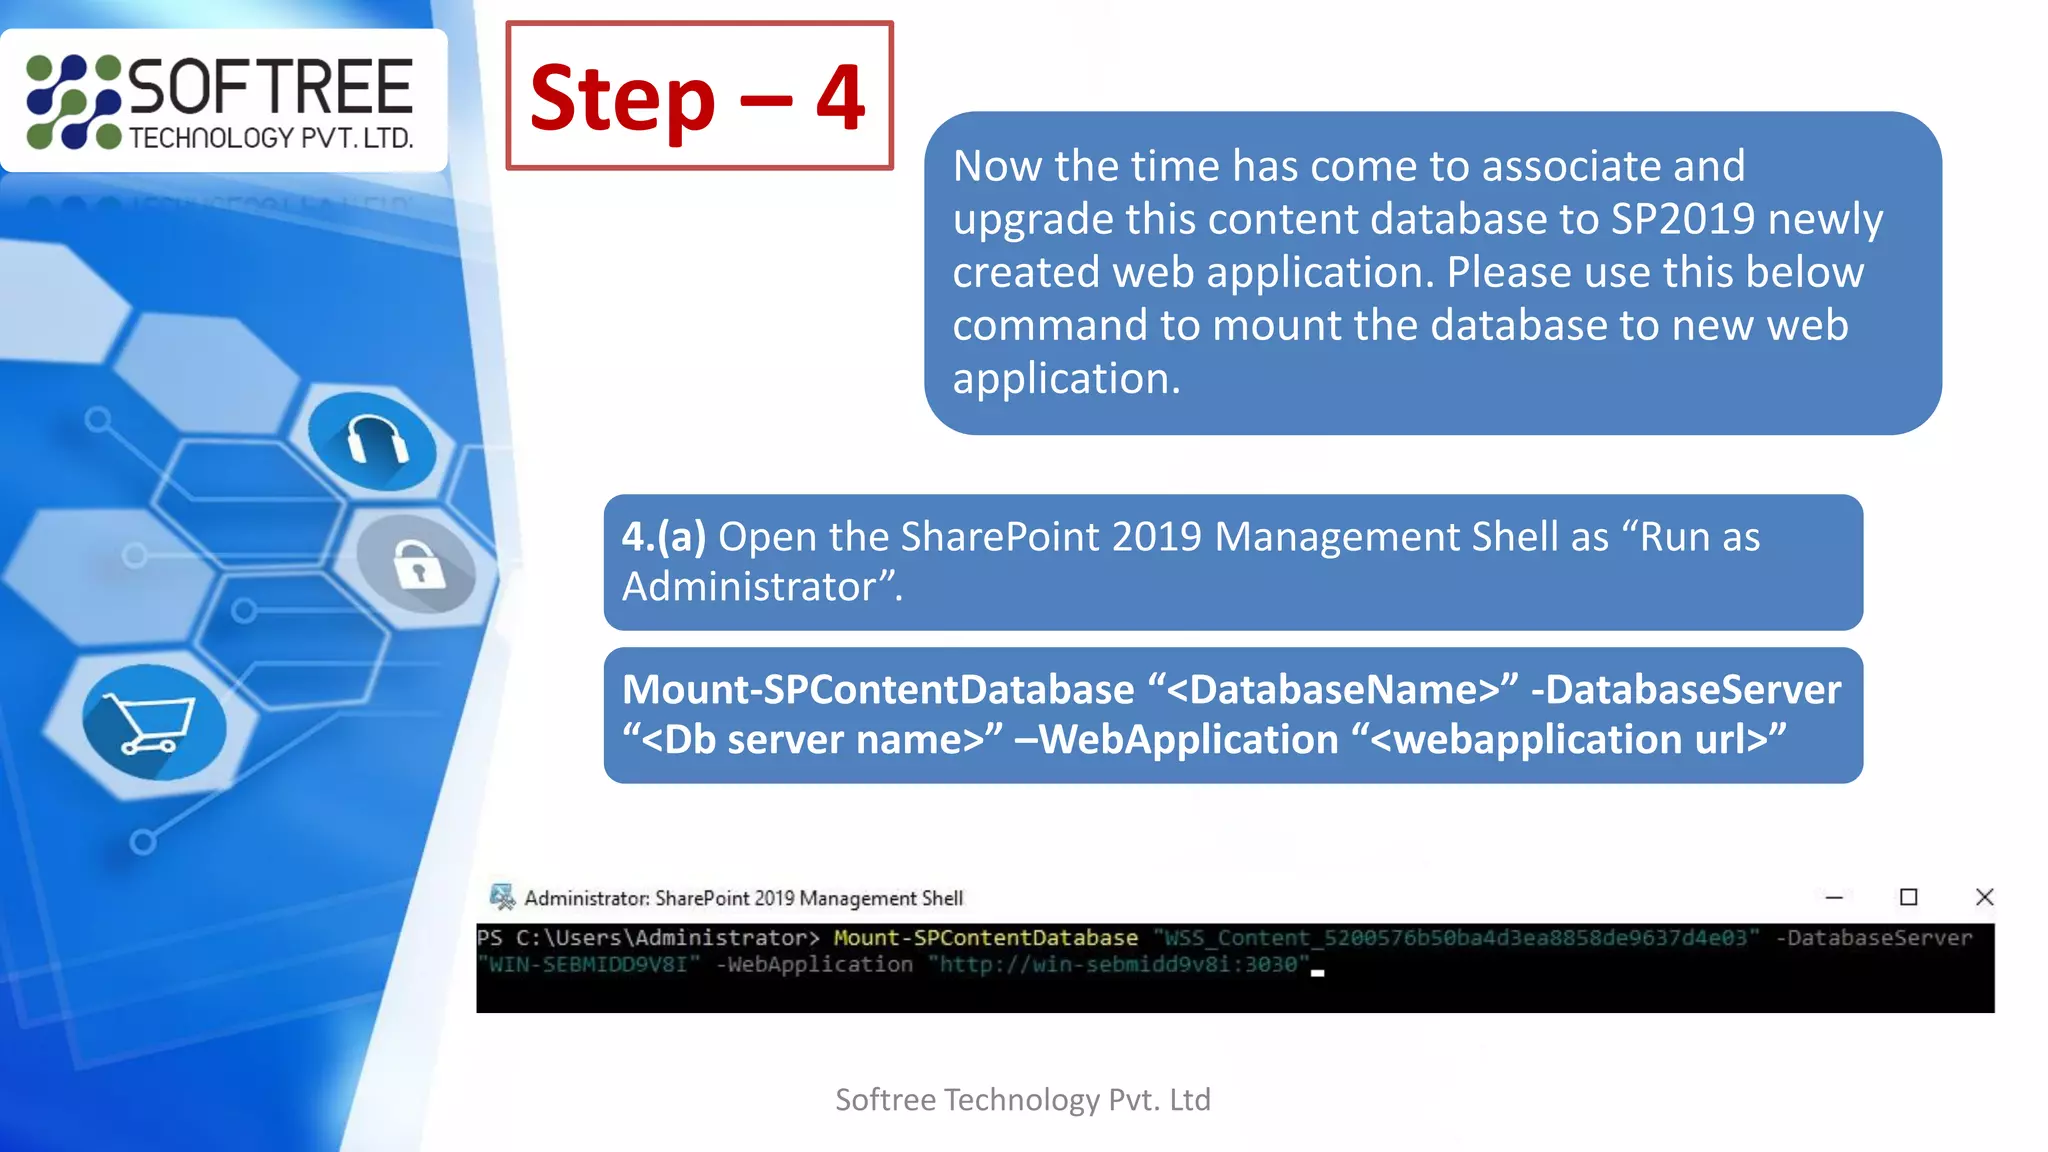
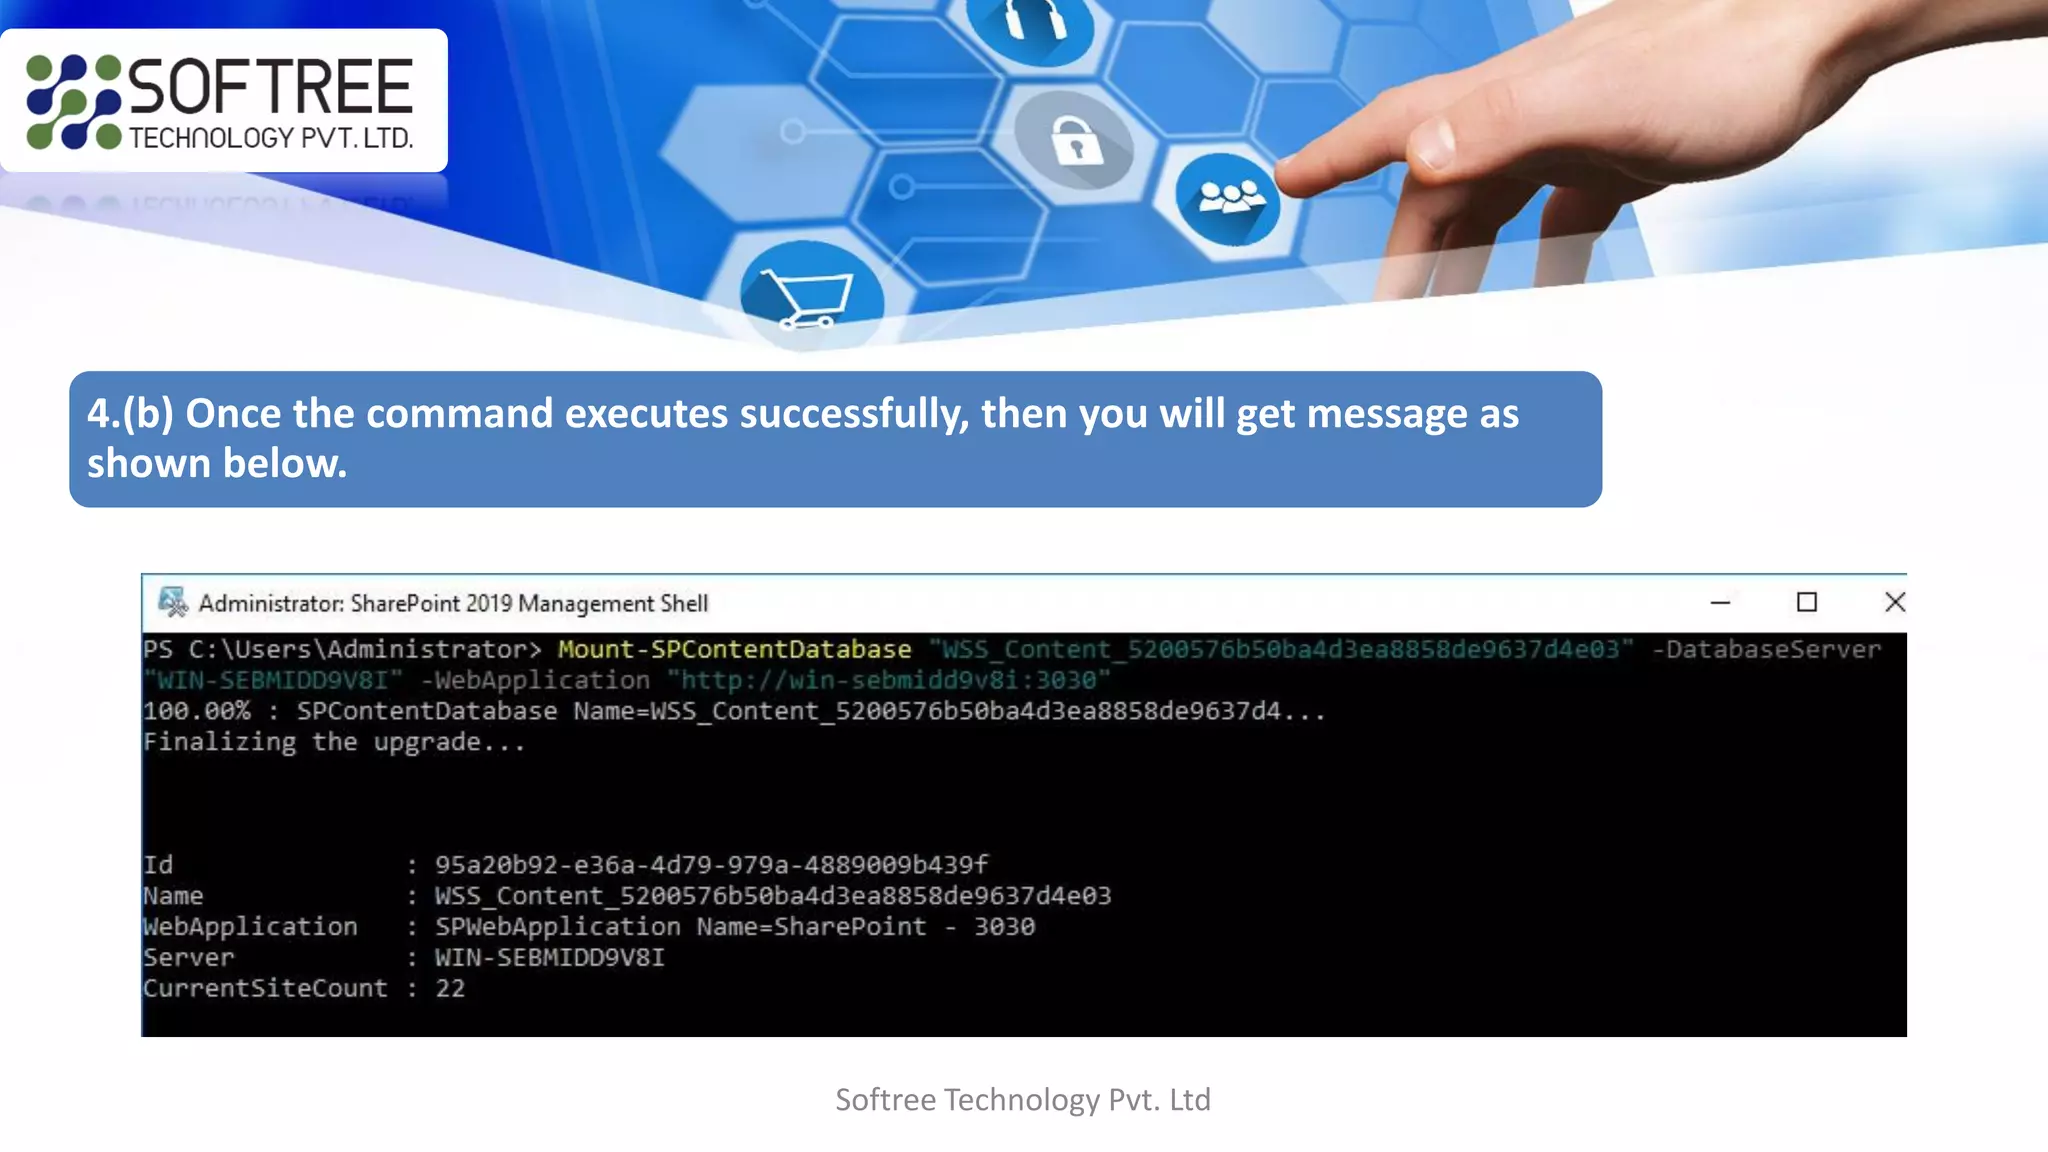
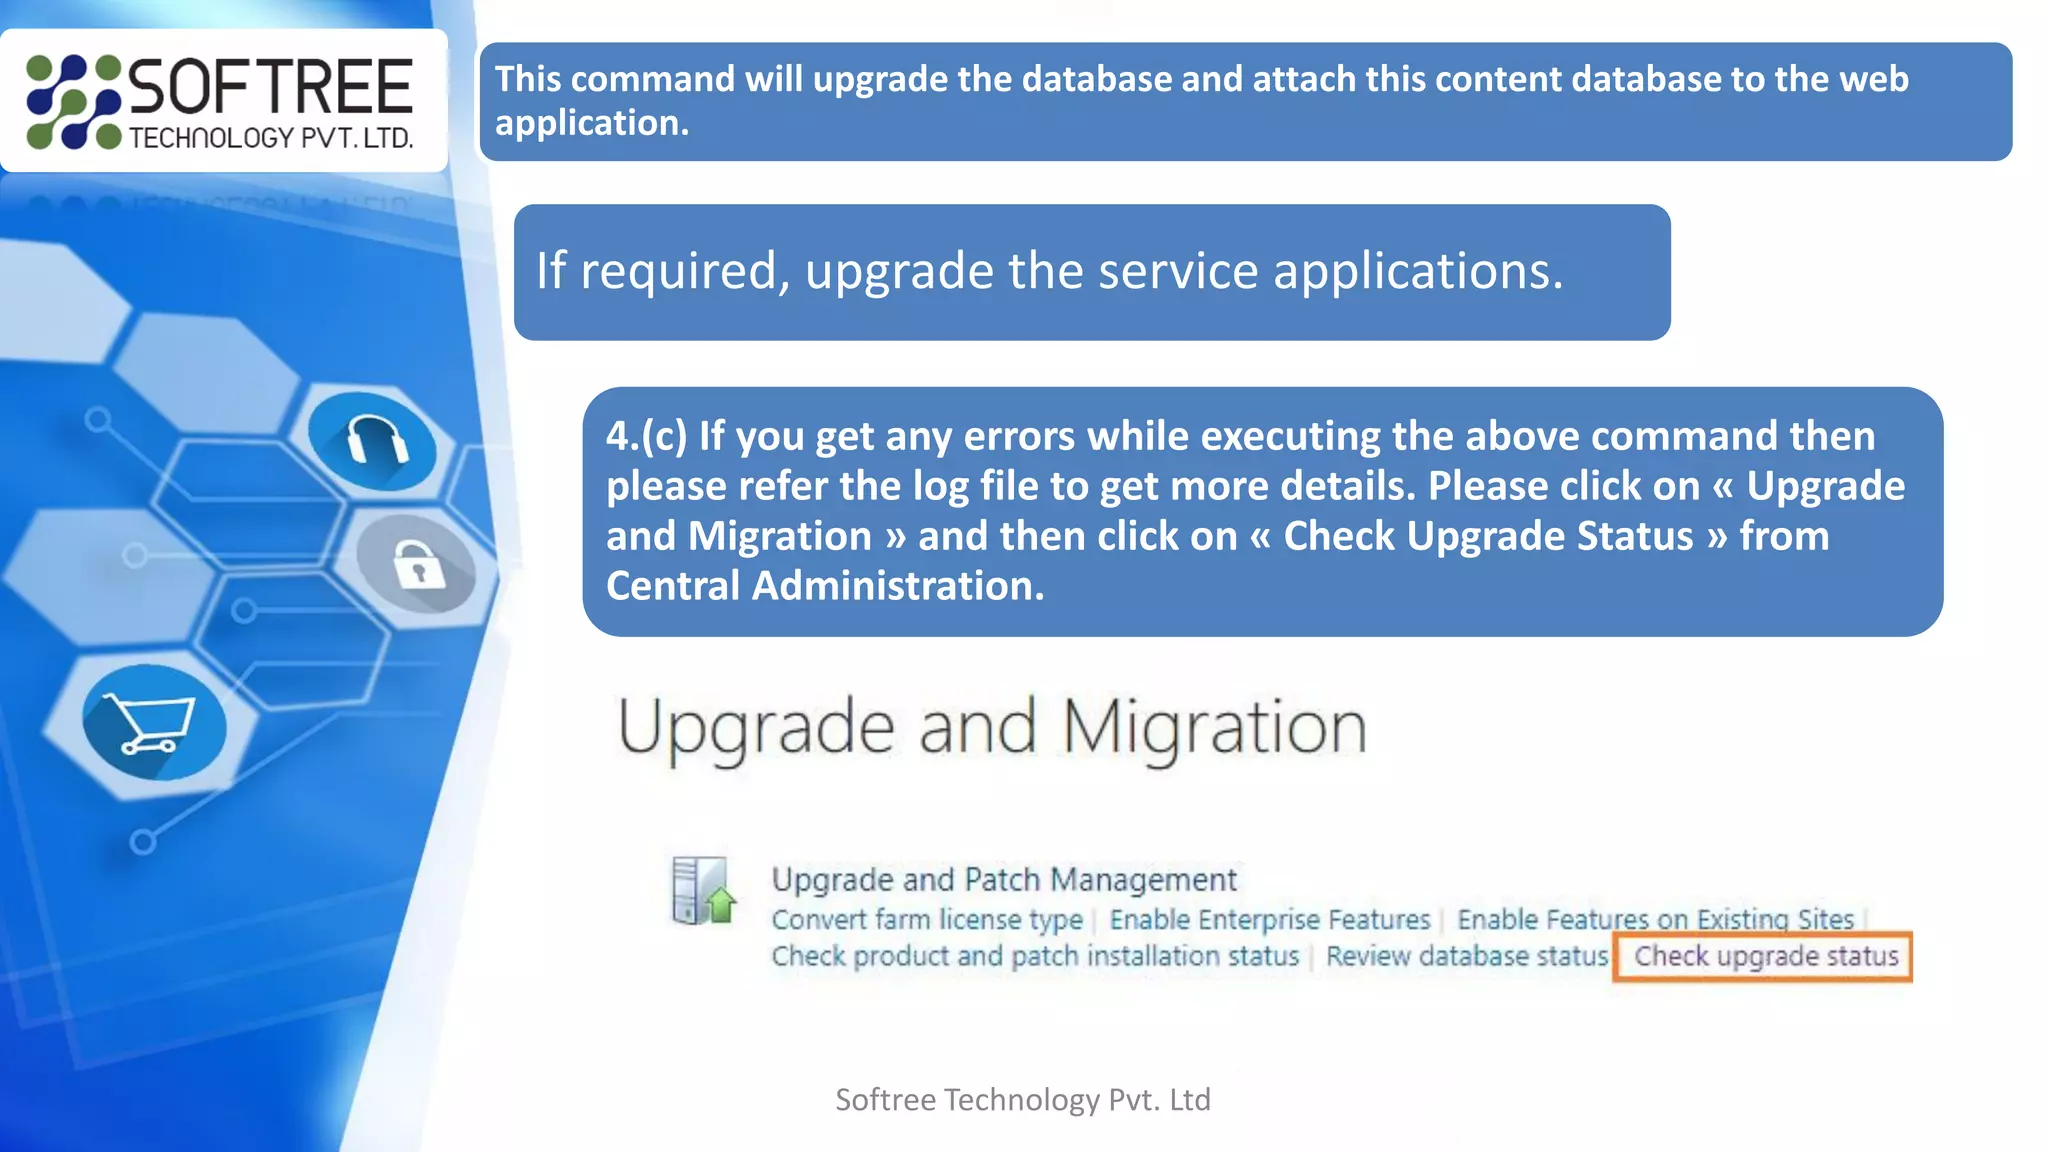


The document outlines the procedure for migrating a SharePoint 2016 environment to SharePoint 2019 using content database migration. It includes detailed steps for backing up the content database, creating a new web application in SharePoint 2019, restoring the database, and associating it with the new web application. Additionally, it provides commands for mounting the database and advises checking for errors during the migration process.


![Support, Monitoring, Continuous Improvement & Scaling Agentic Automation [3/3]](https://cdn.slidesharecdn.com/ss_thumbnails/agenticcommunityseries-day3-cfd-251120170304-ddef8112-thumbnail.jpg?width=640&height=640&fit=bounds)


