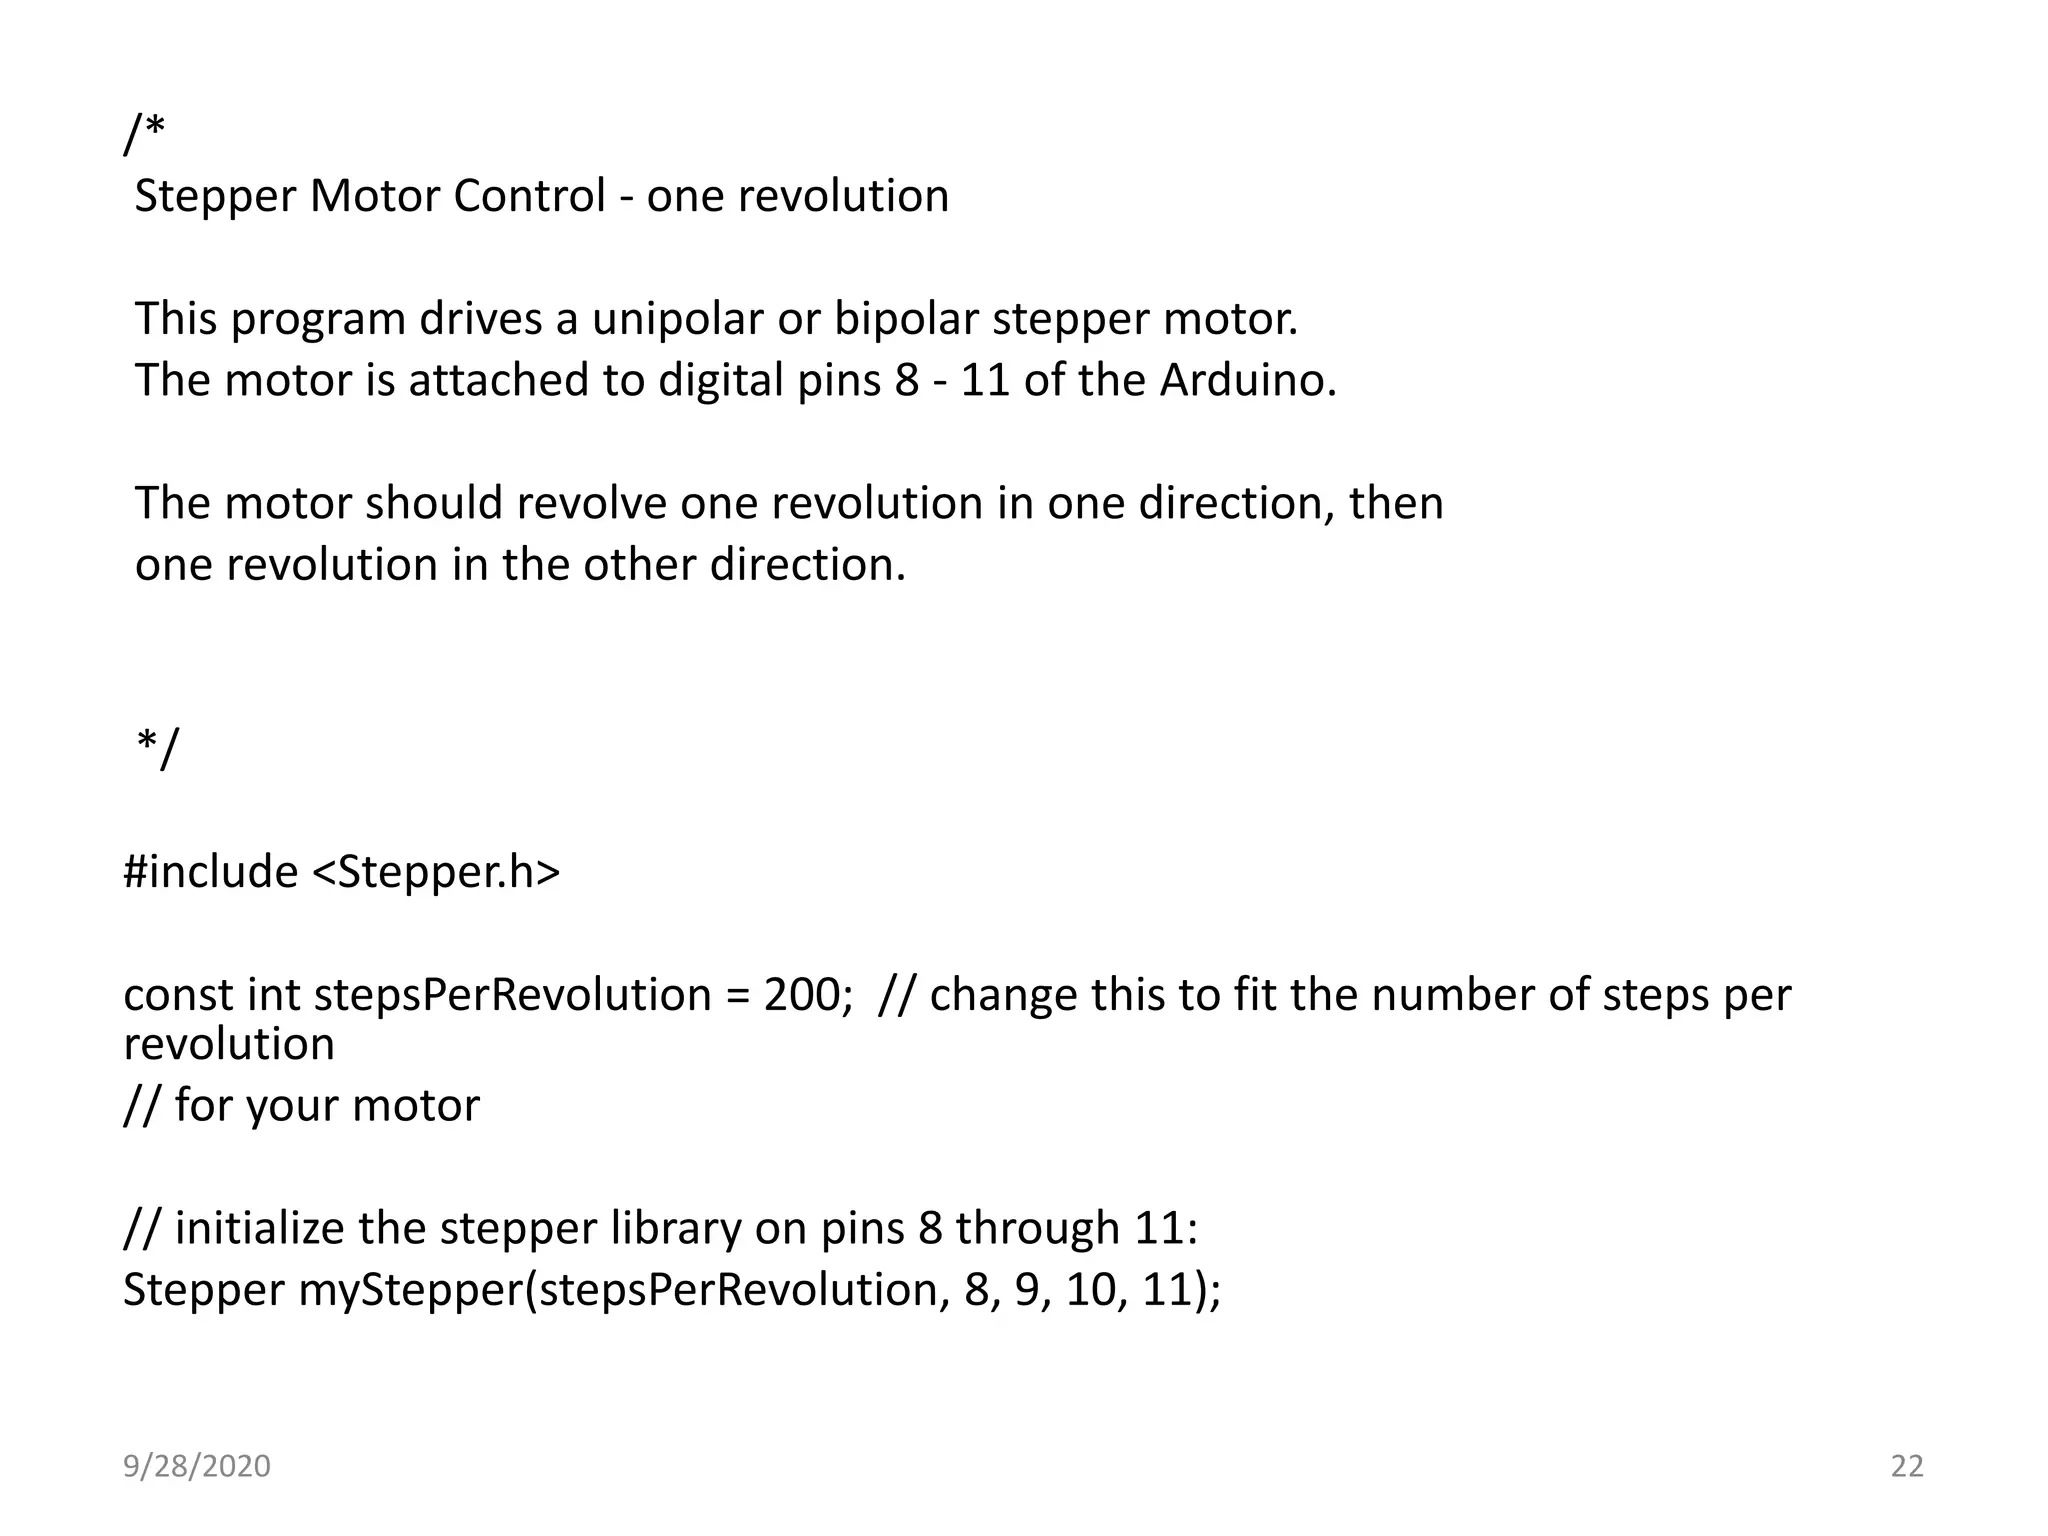
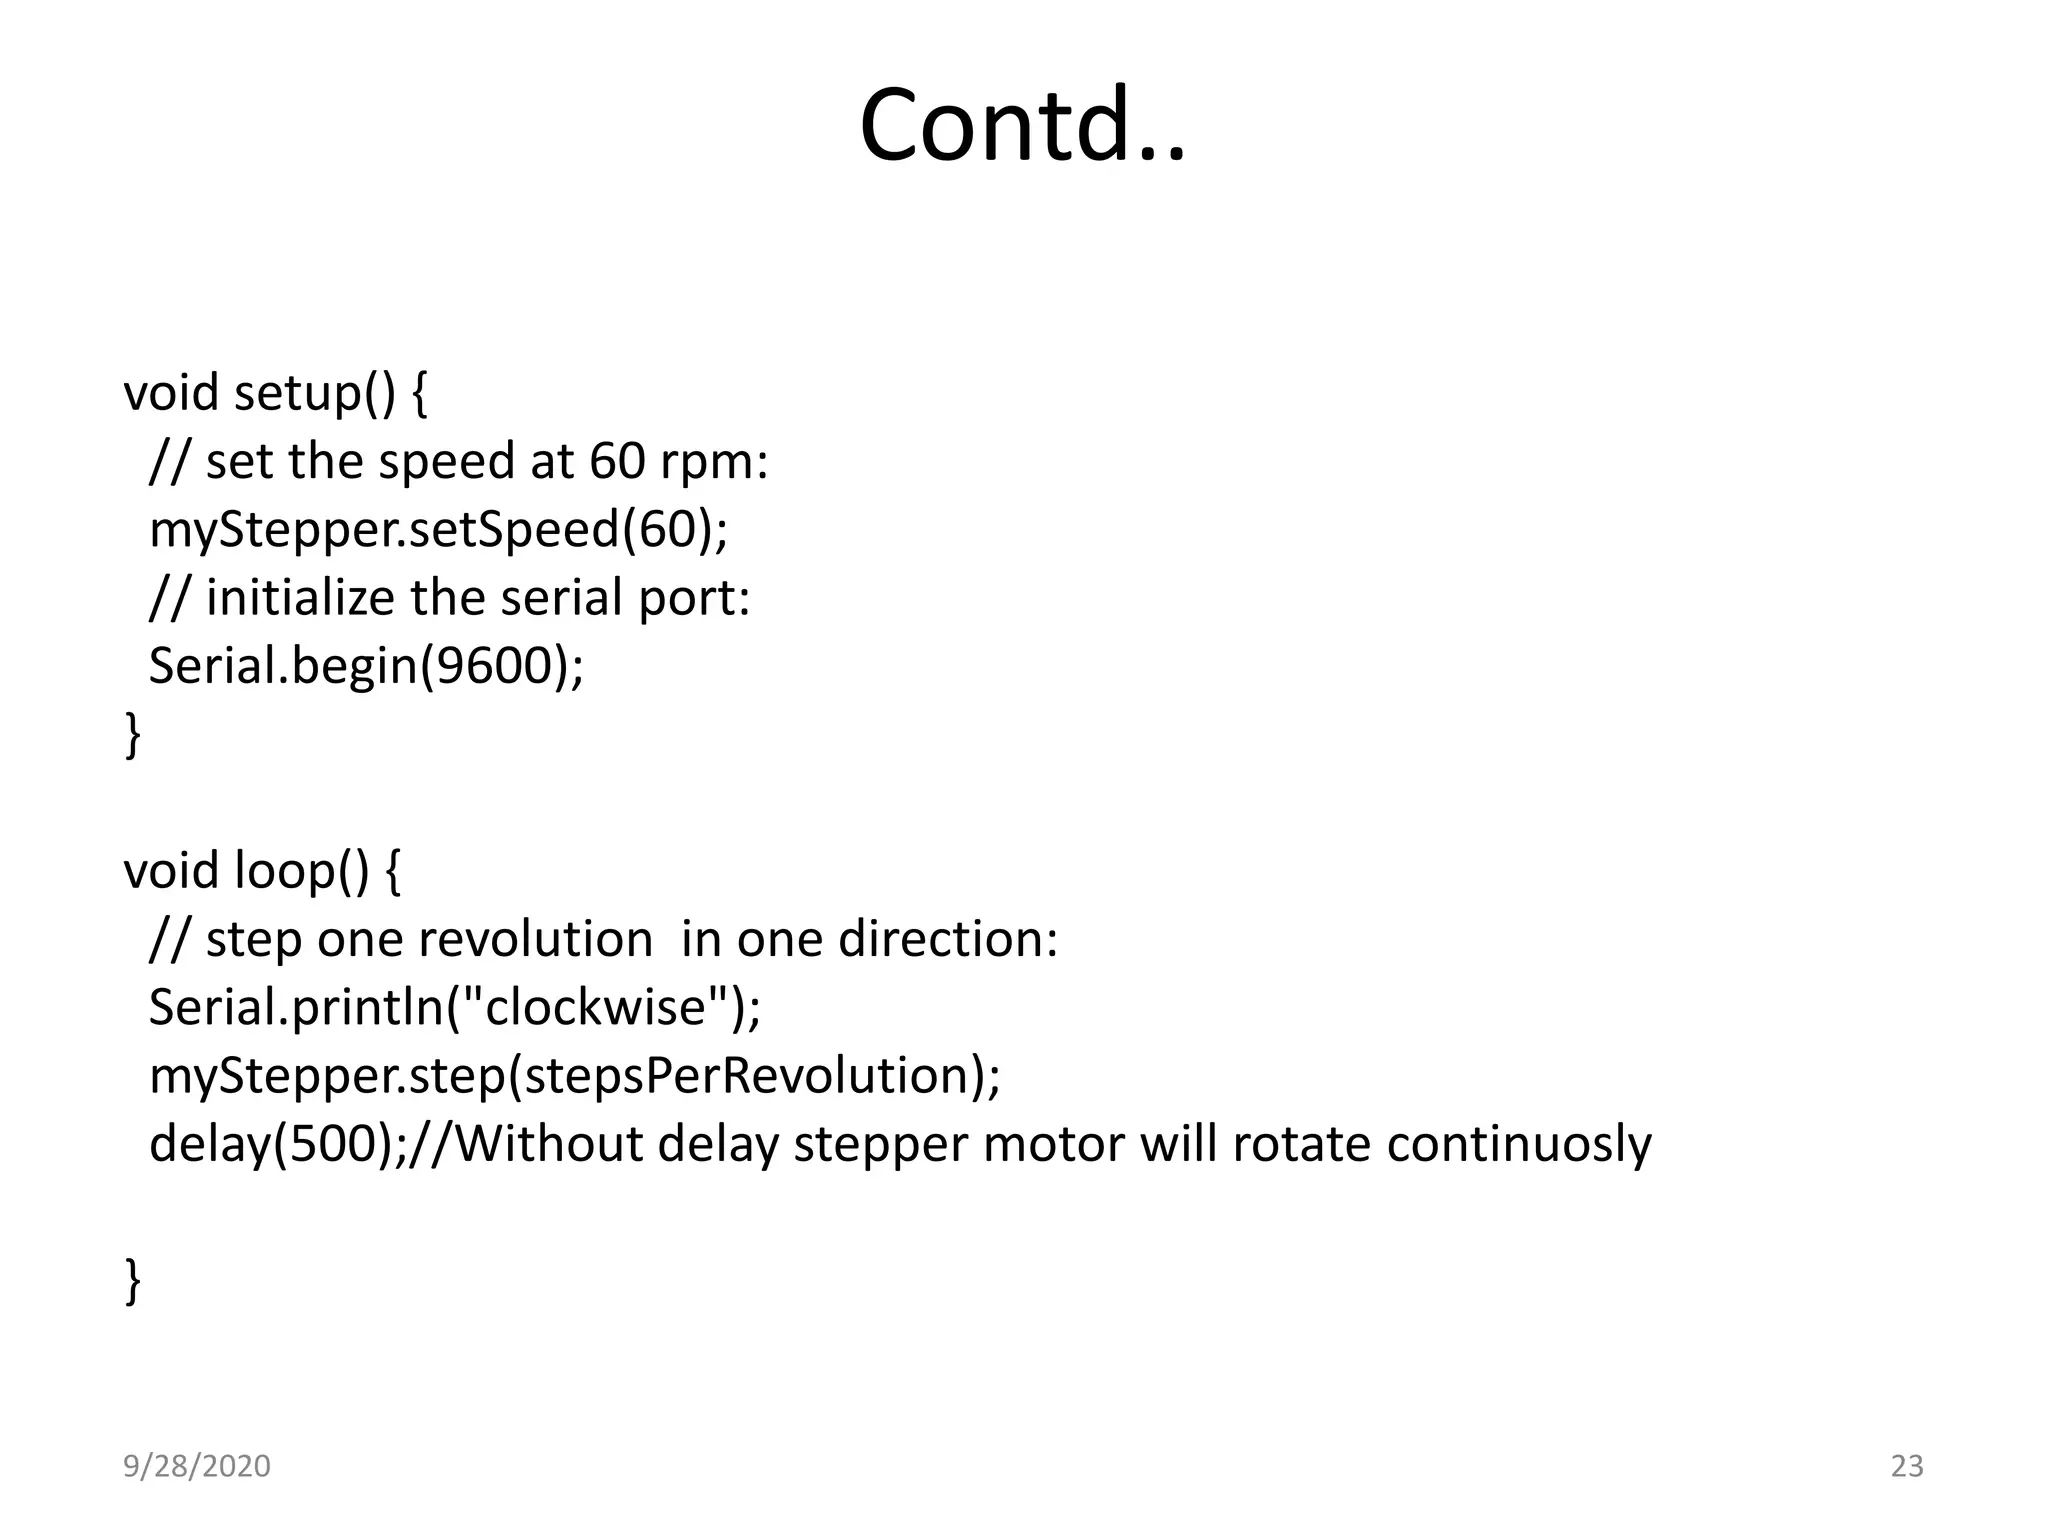
Download as PDF, PPTX

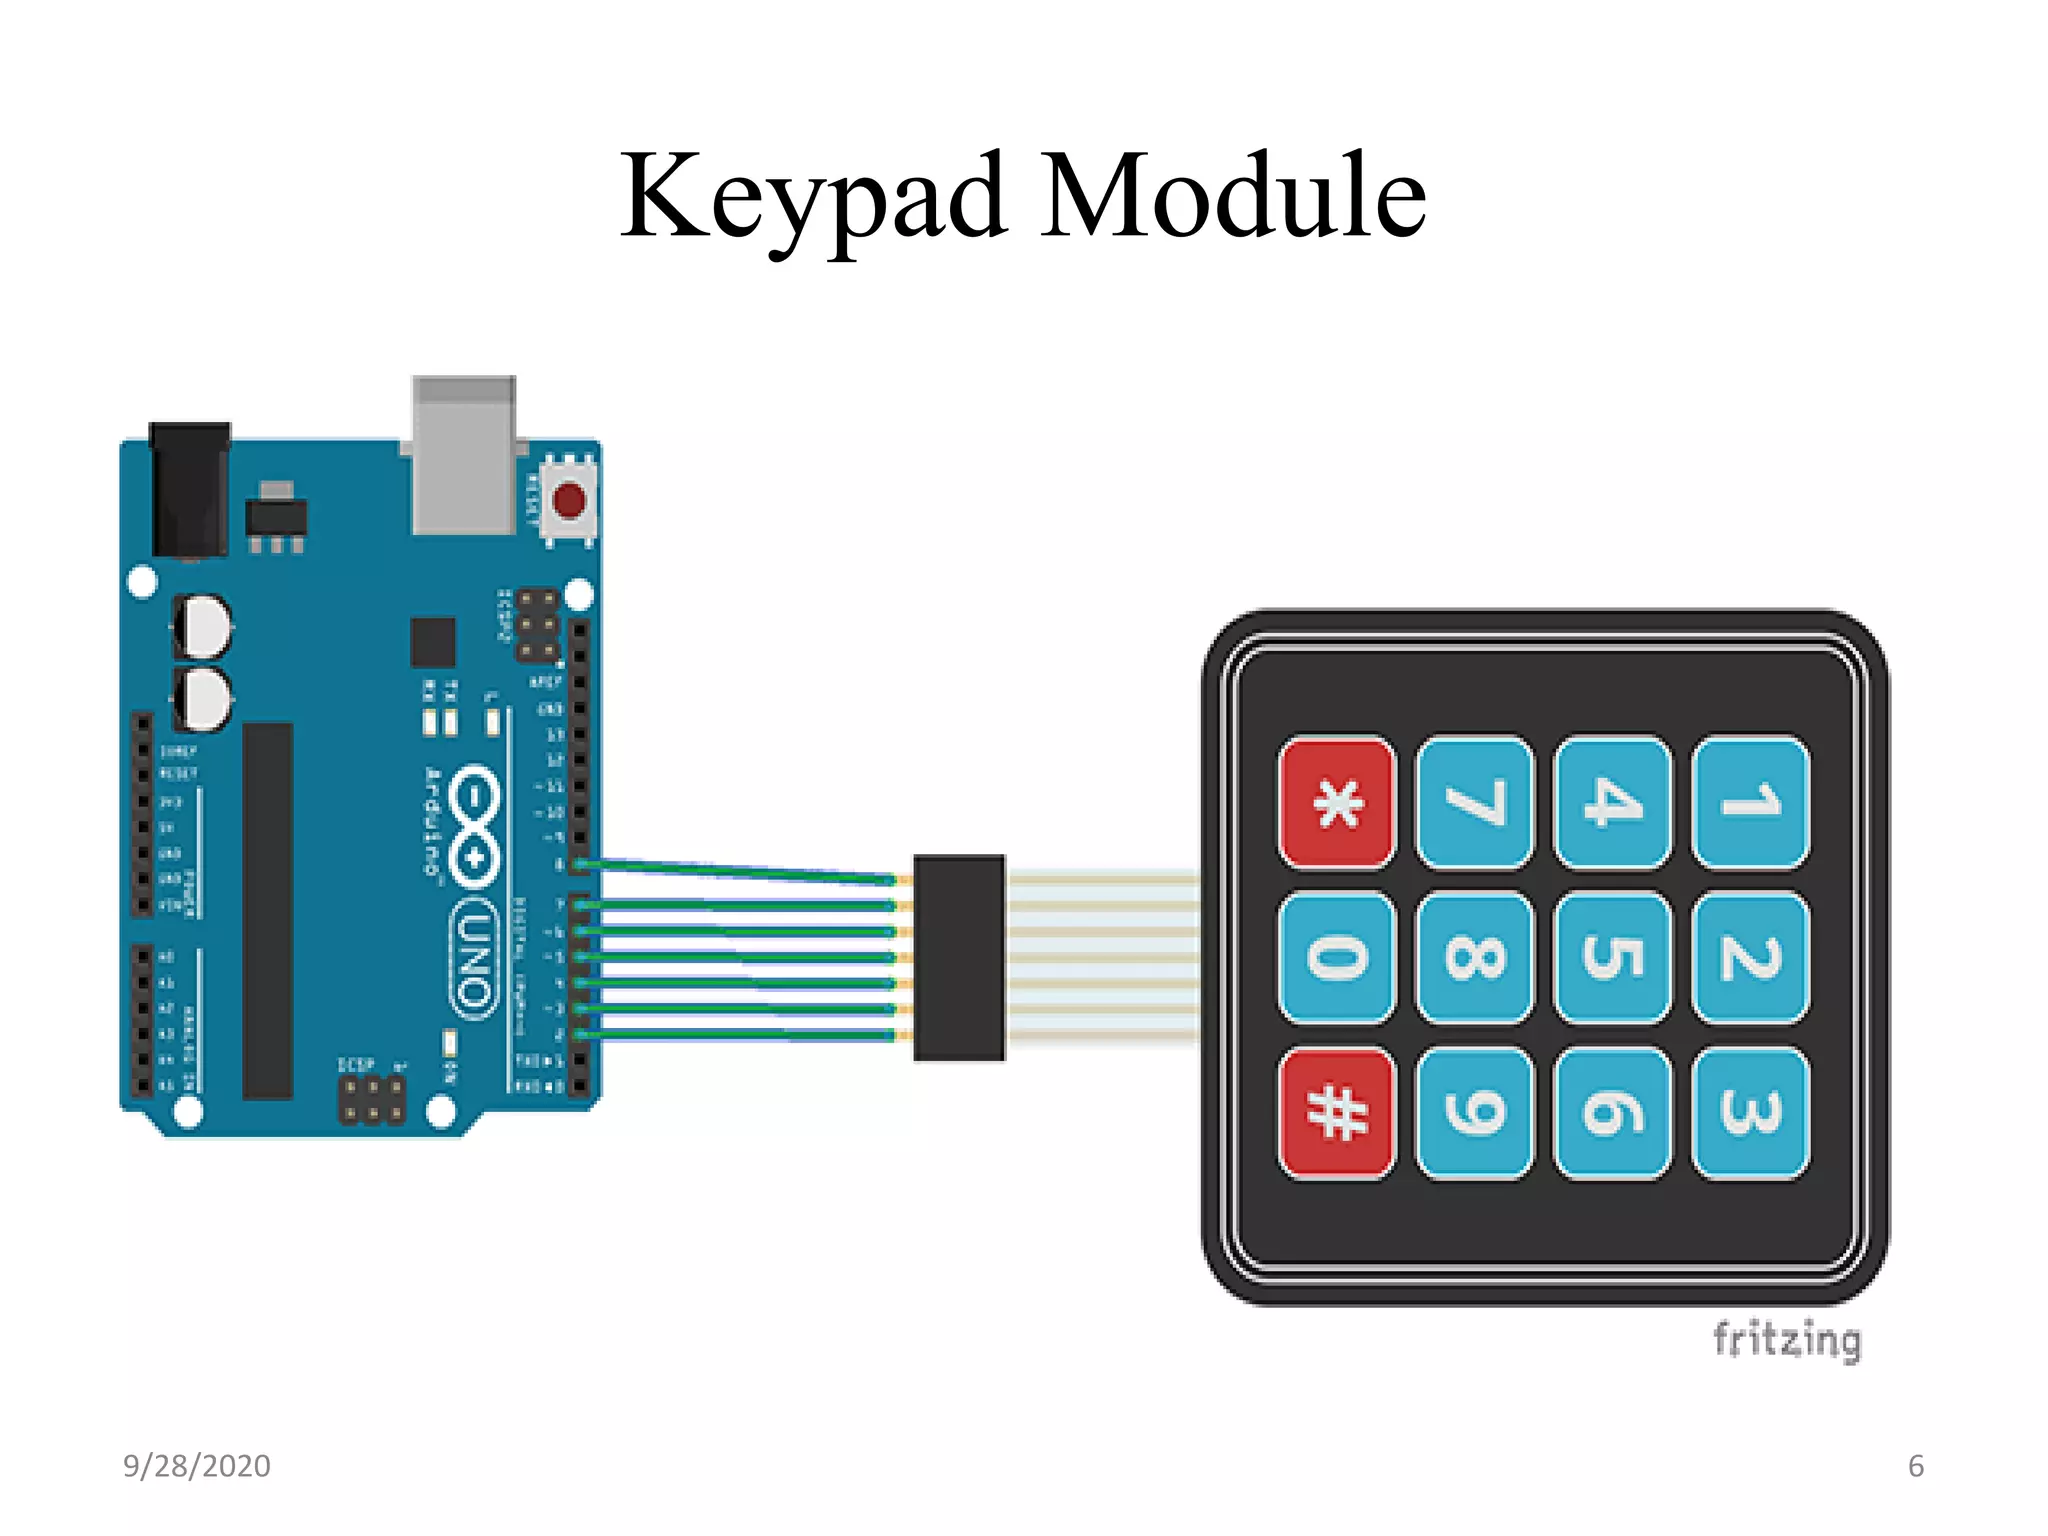

![#include <Keypad.h>
const byte ROWS = 4;
const byte COLS = 4;
char hexaKeys[ROWS][COLS] = {
{'1', '2', '3', 'A'},
{'4', '5', '6', 'B'},
{'7', '8', '9', 'C'},
{'*', '0', '#', 'D'}
};
byte rowPins[ROWS] = {9, 8, 7, 6};
byte colPins[COLS] = {5, 4, 3, 2};
89/28/2020](https://image.slidesharecdn.com/arduinoprogrammingpart2-201003071925/75/Arduino-programming-part-2-8-2048.jpg)


![#include <Keypad.h>
const byte ROWS = 4;
const byte COLS = 4;
char hexaKeys[ROWS][COLS] = {
{'1', '2', '3', 'A'},
{'4', '5', '6', 'B'},
{'7', '8', '9', 'C'},
{'*', '0', '#', 'D'}
};
byte rowPins[ROWS] = {9, 8, 7, 6};
byte colPins[COLS] = {5, 4, 3, 2};
89/28/2020](https://crownmelresort.com/image.slidesharecdn.com/arduinoprogrammingpart2-201003071925/75/Arduino-programming-part-2-8-2048.jpg)


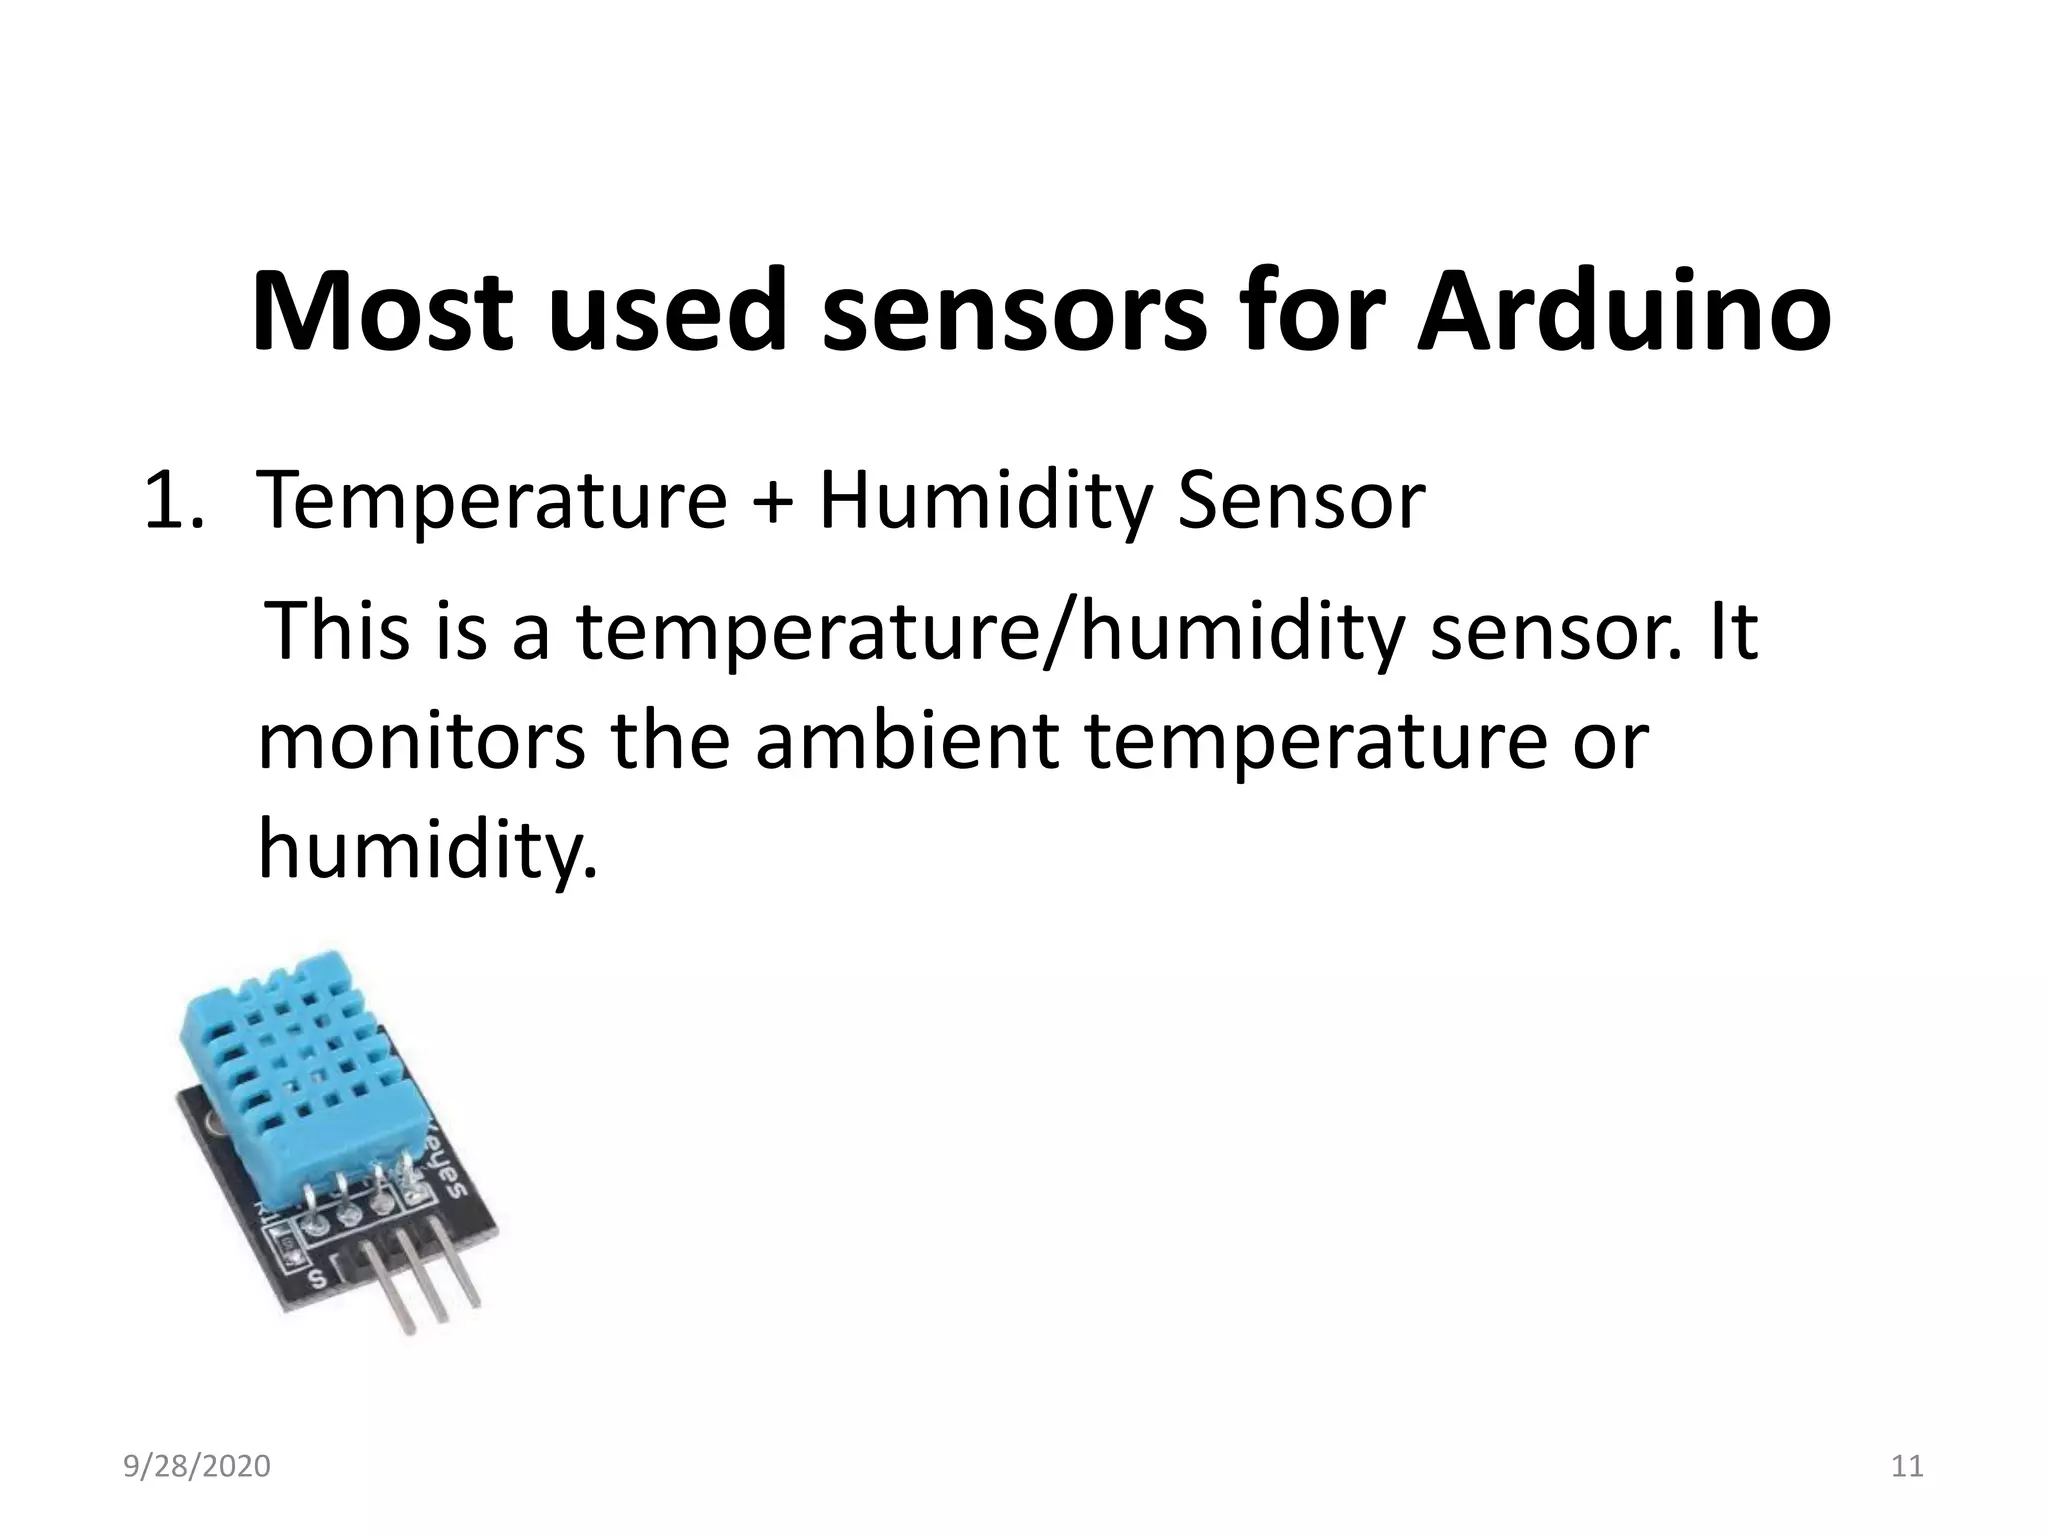
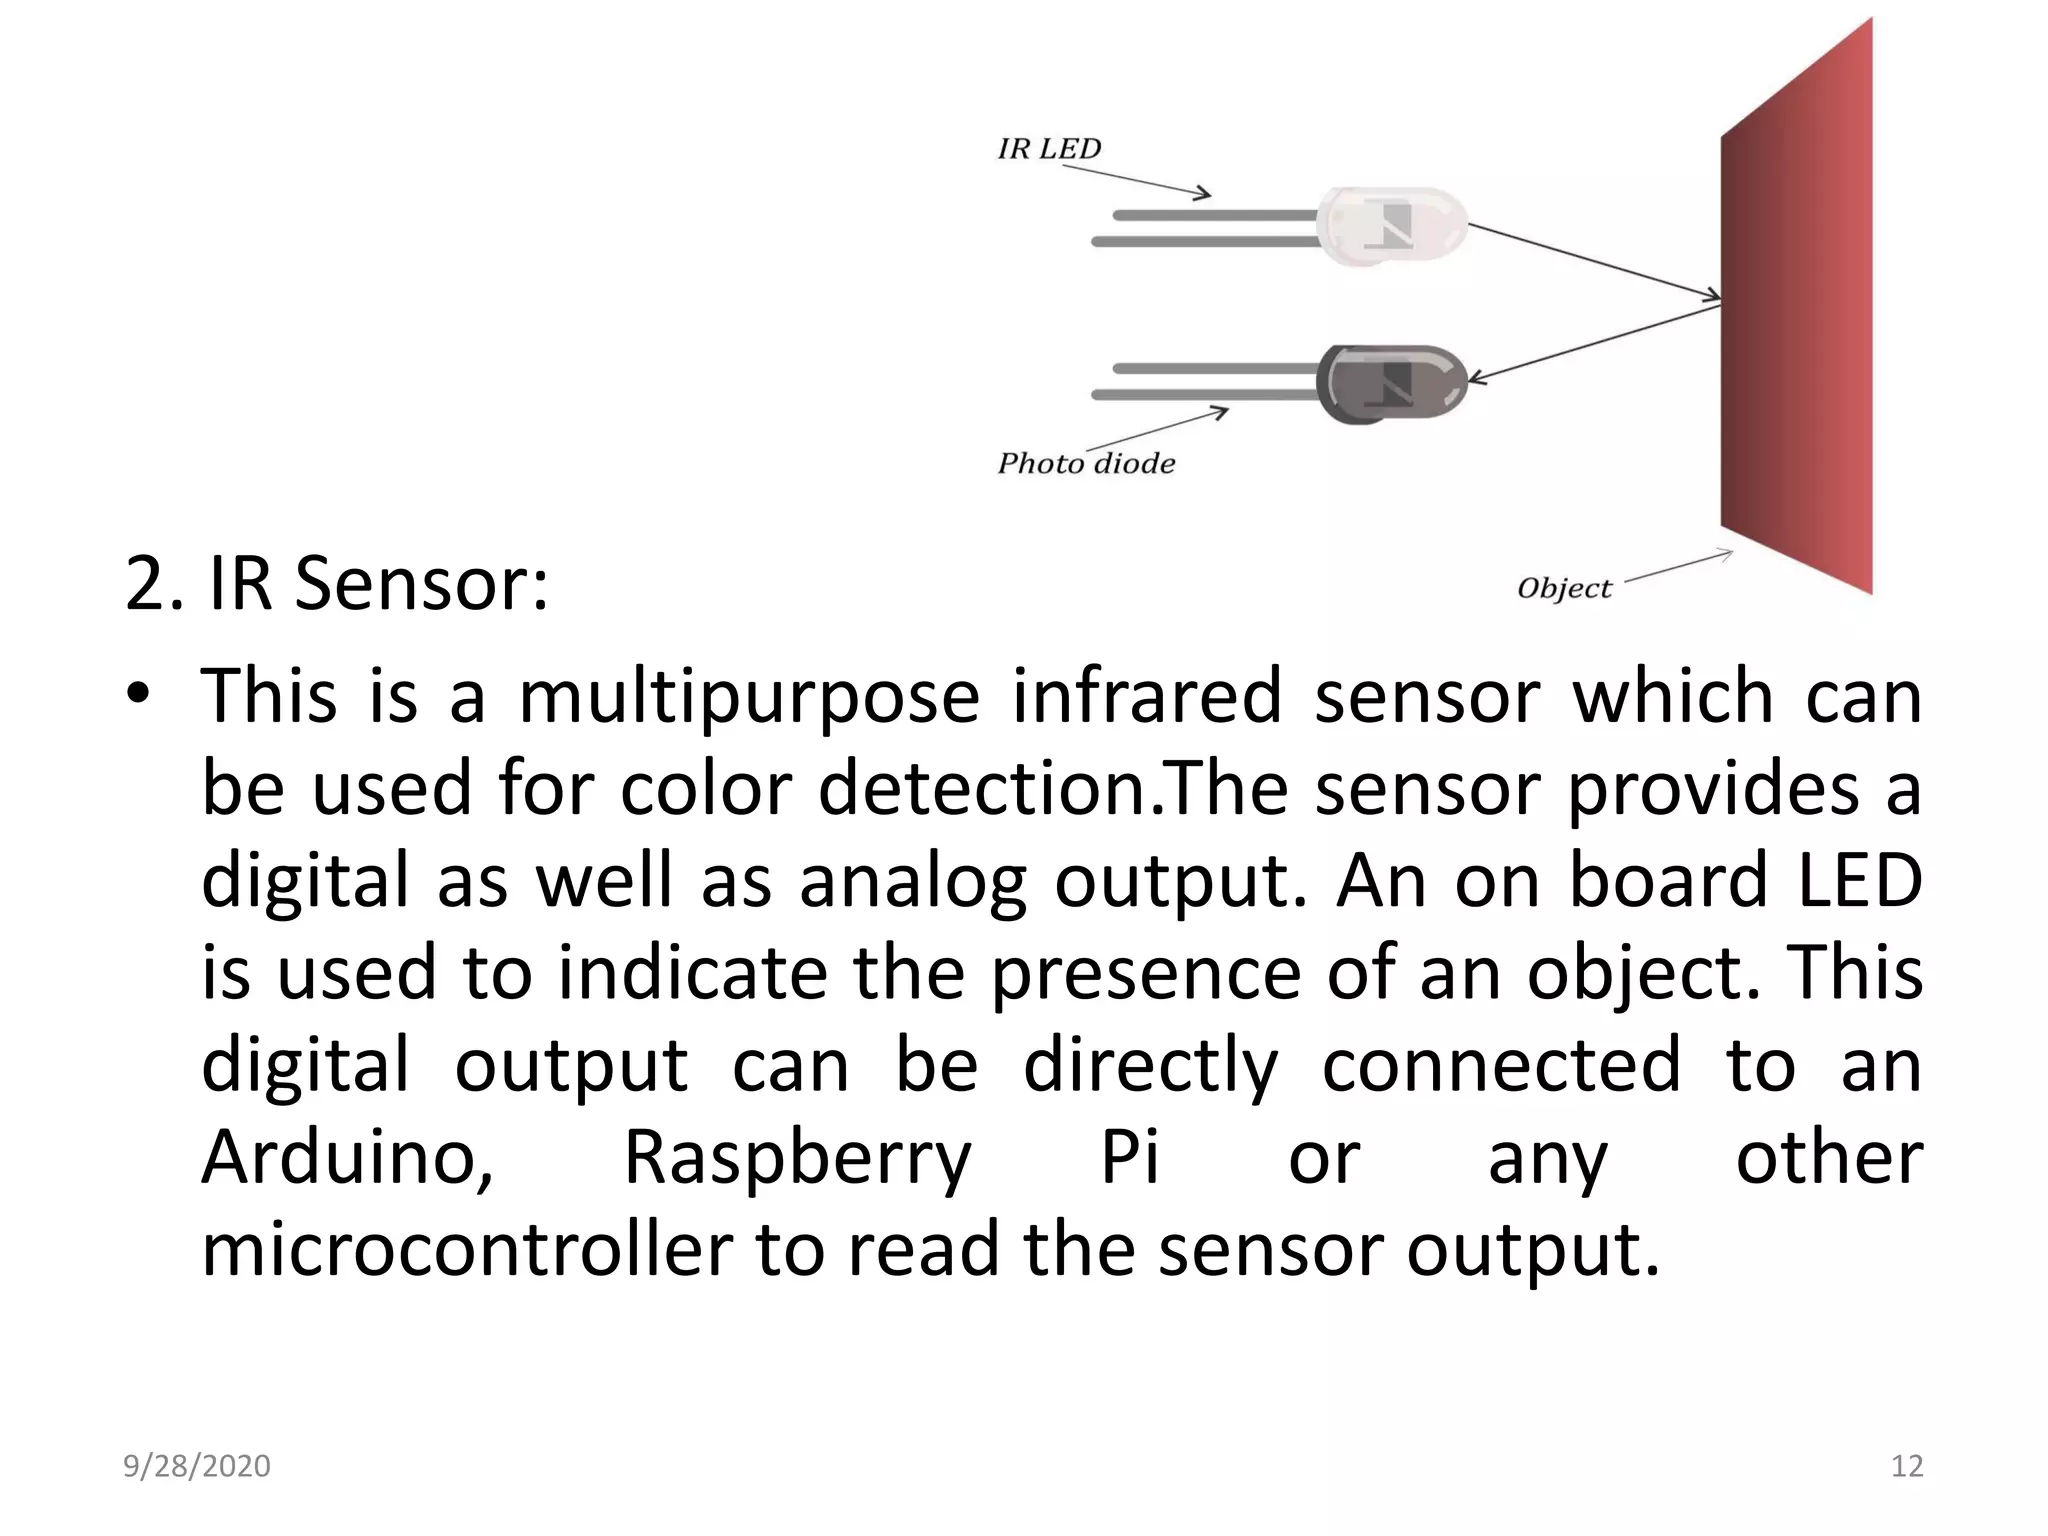
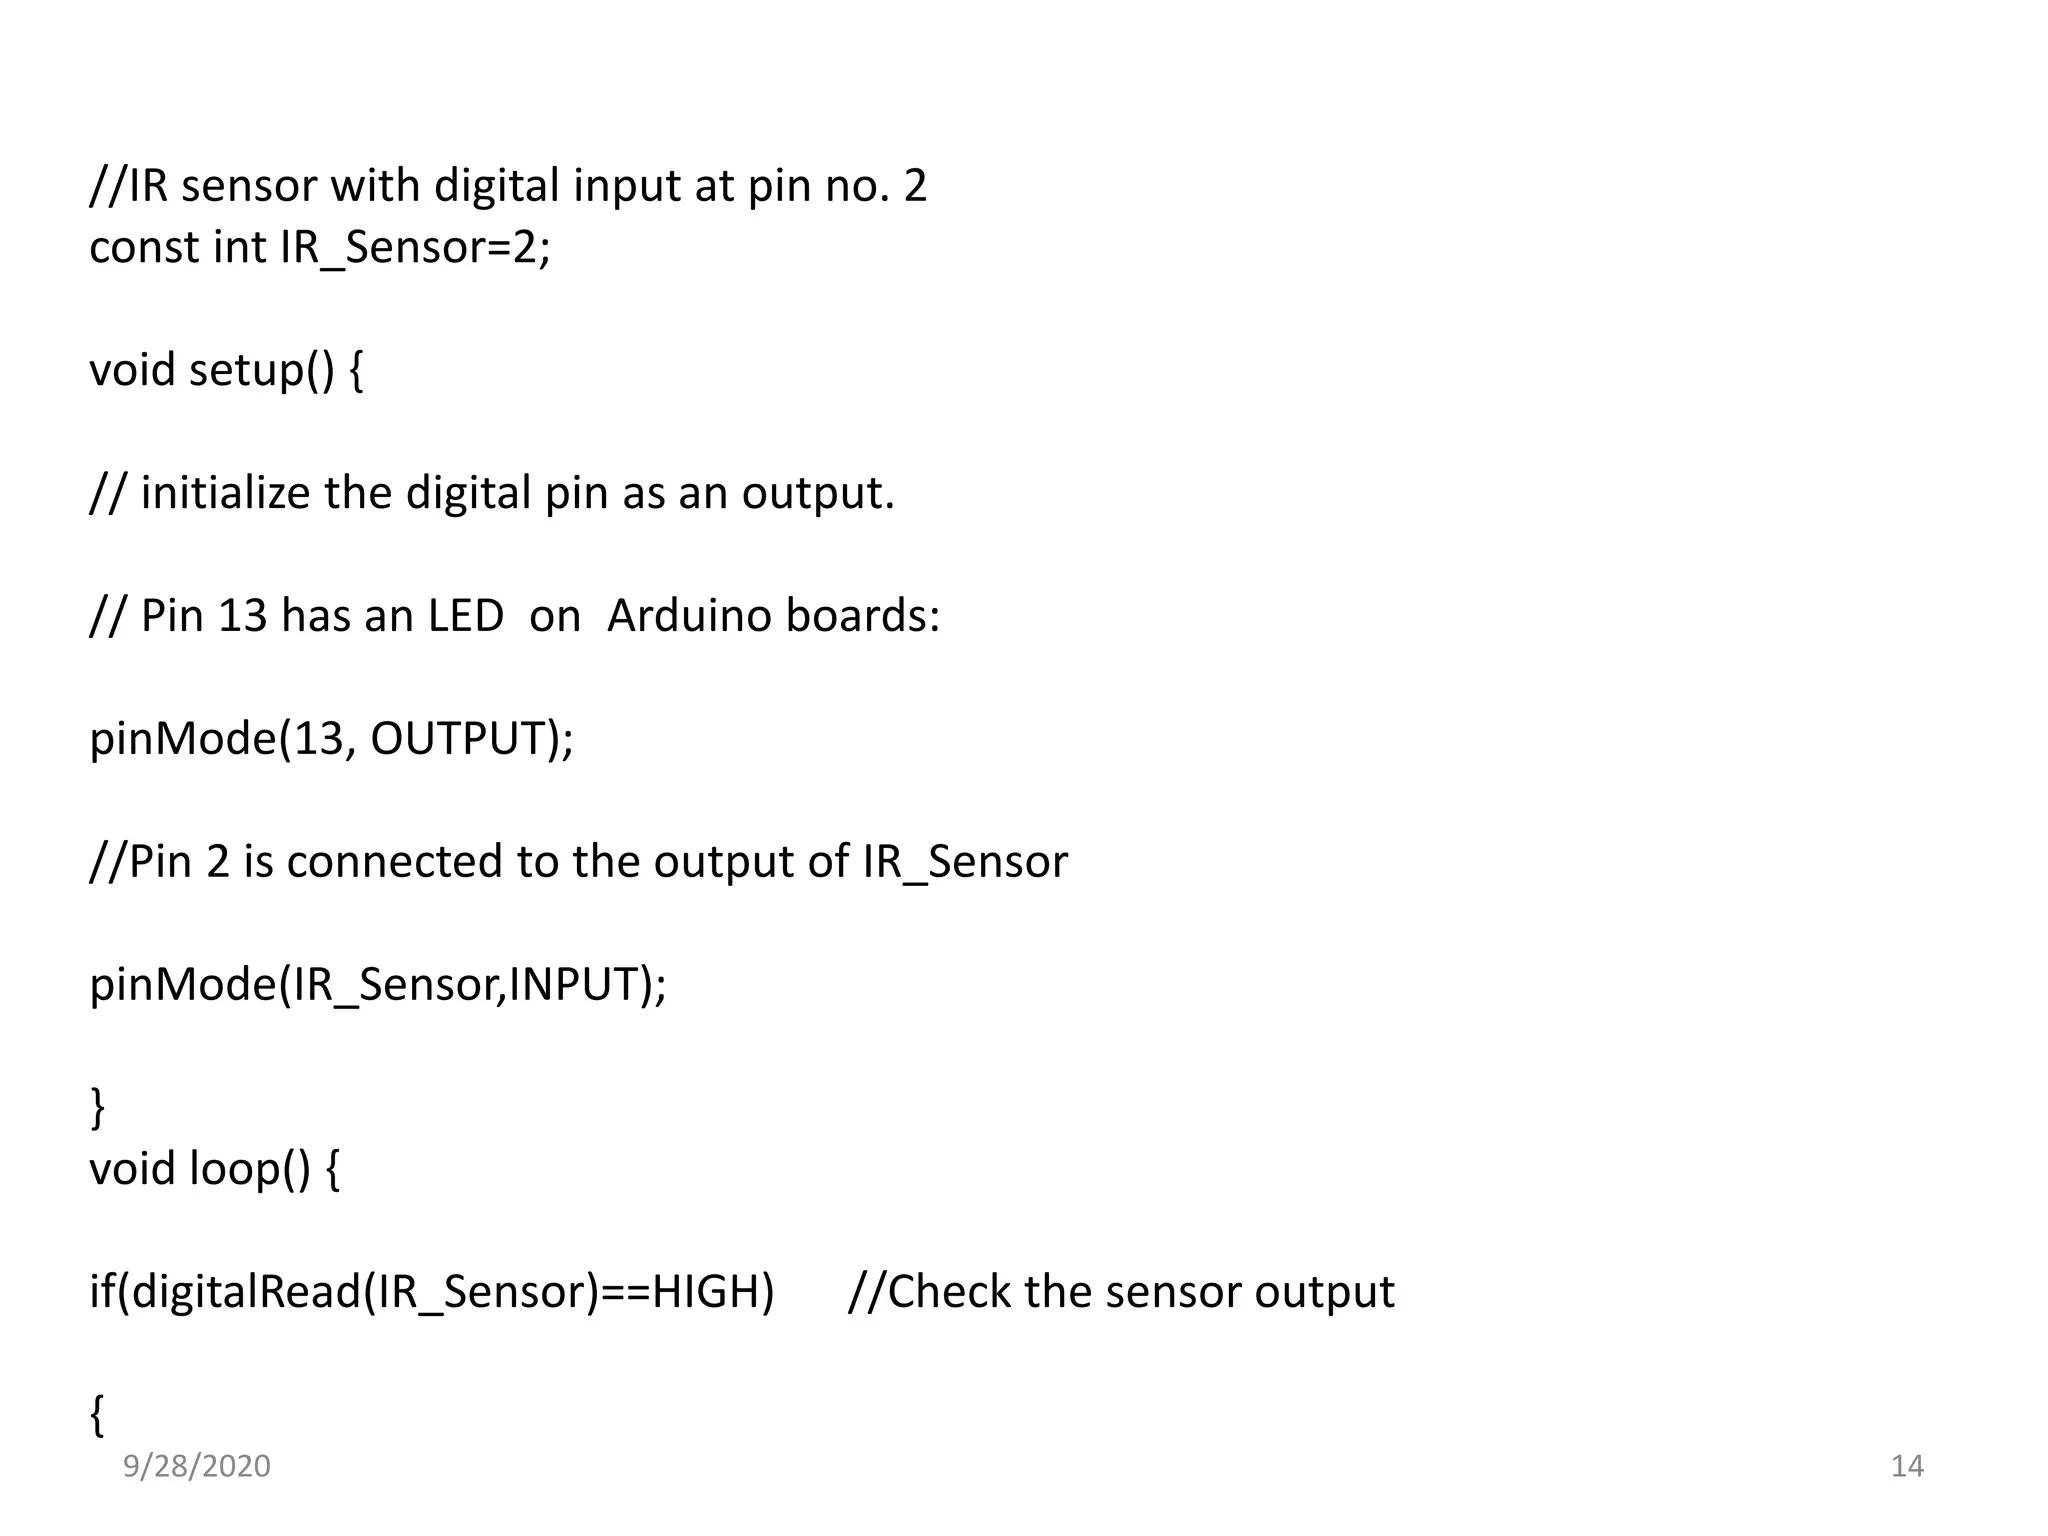
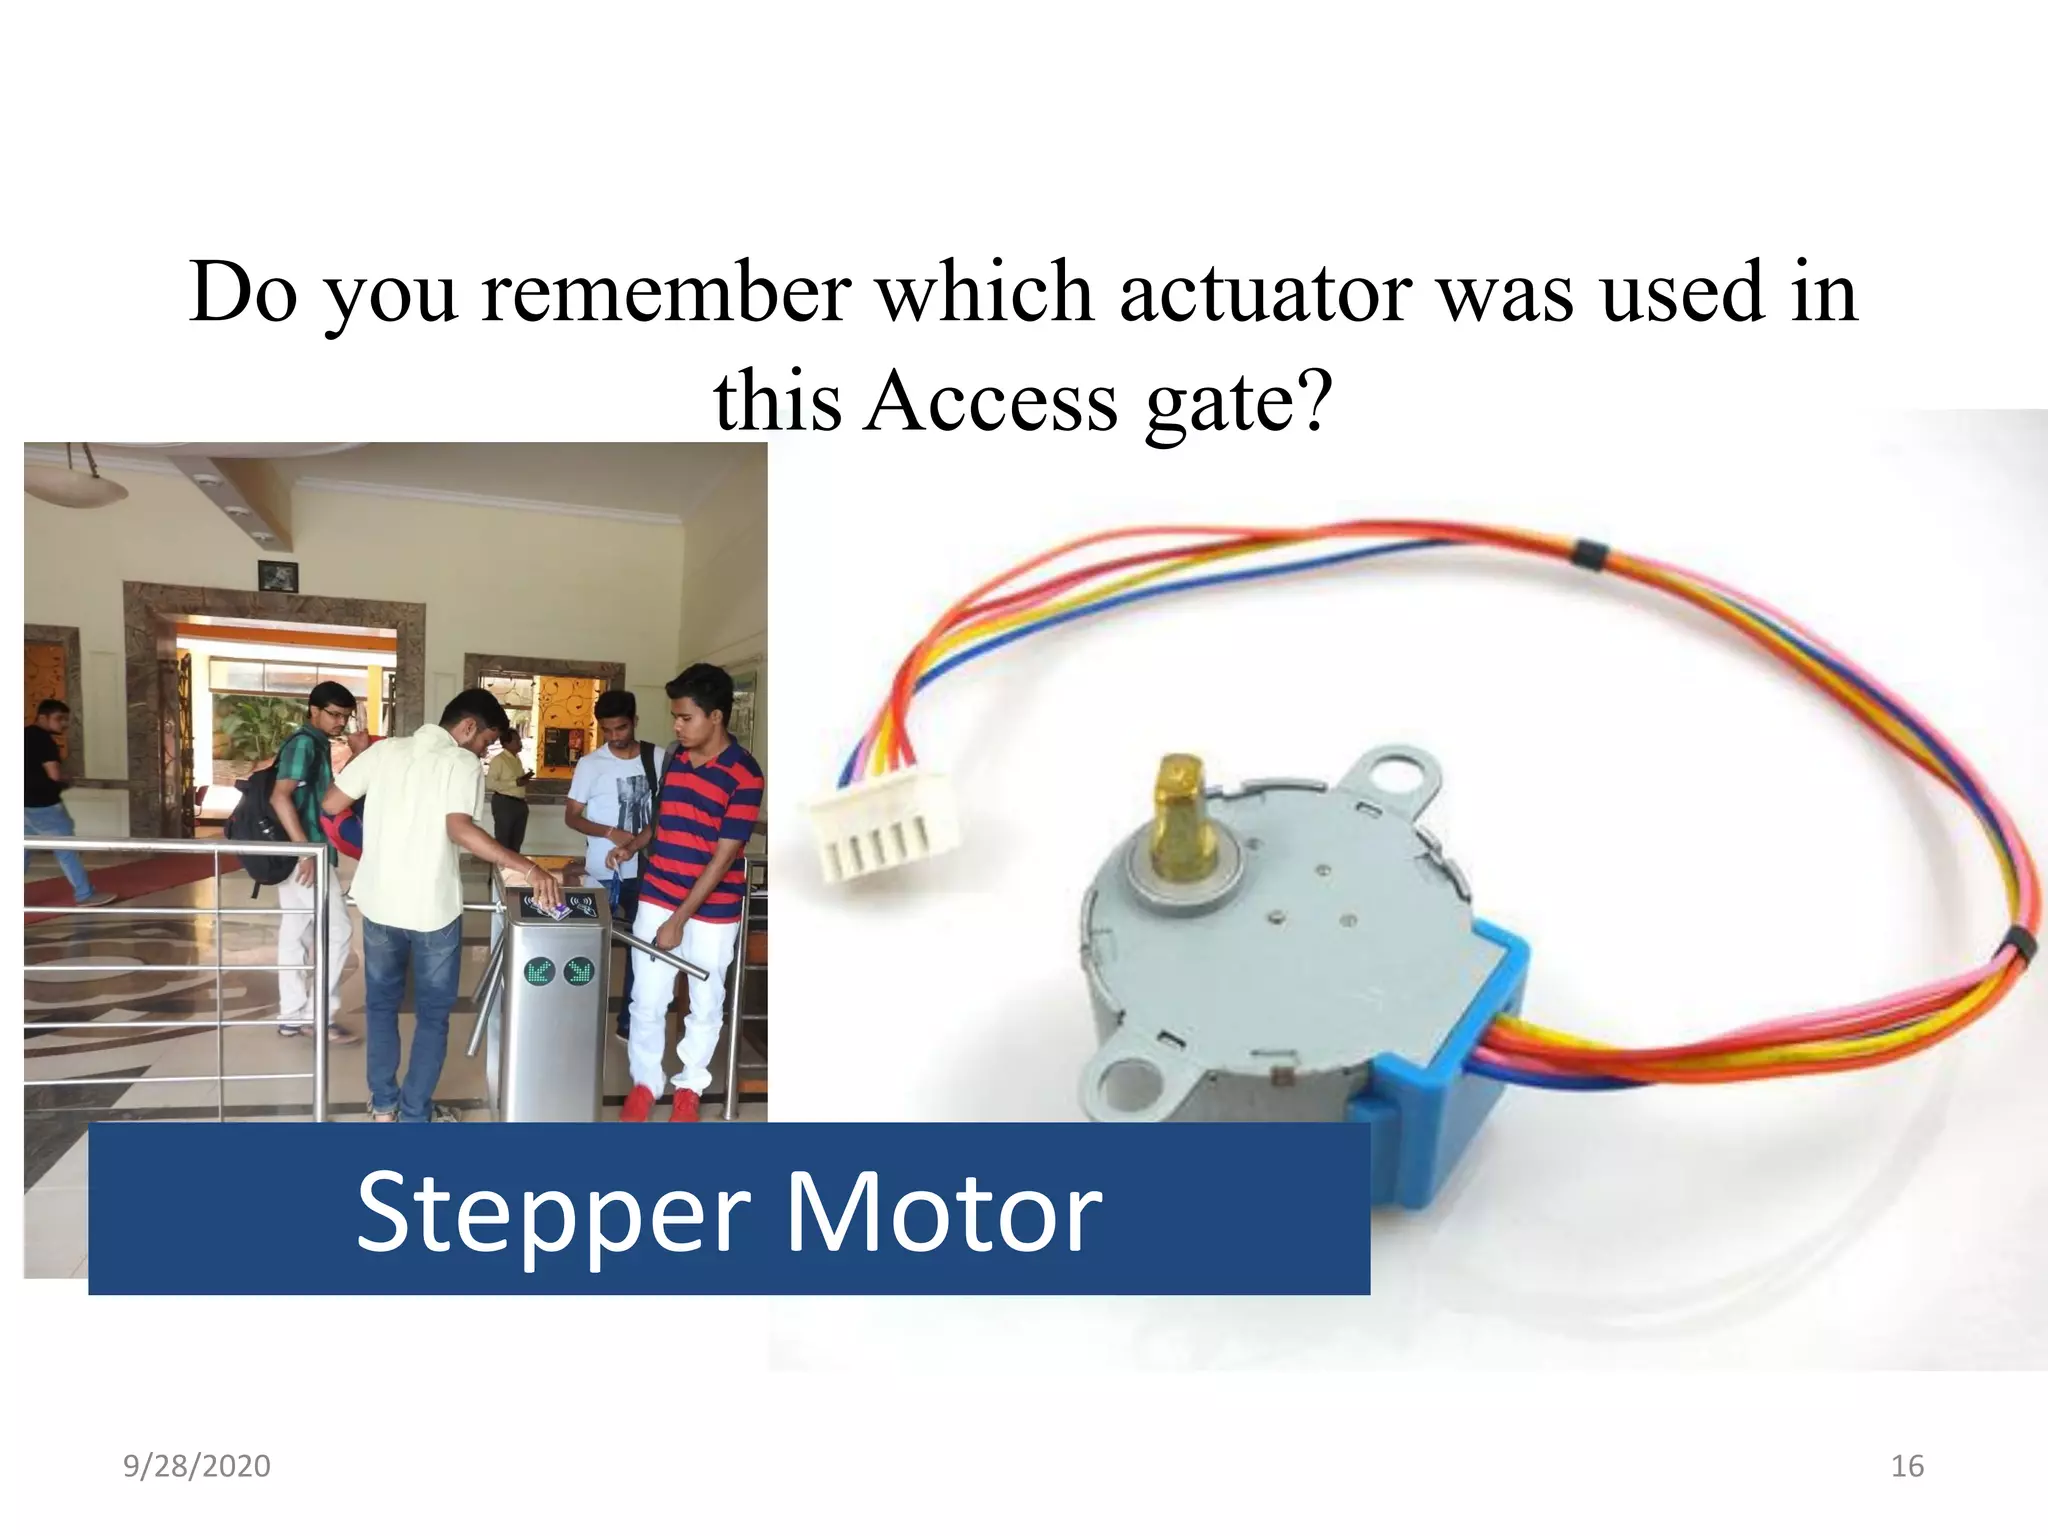
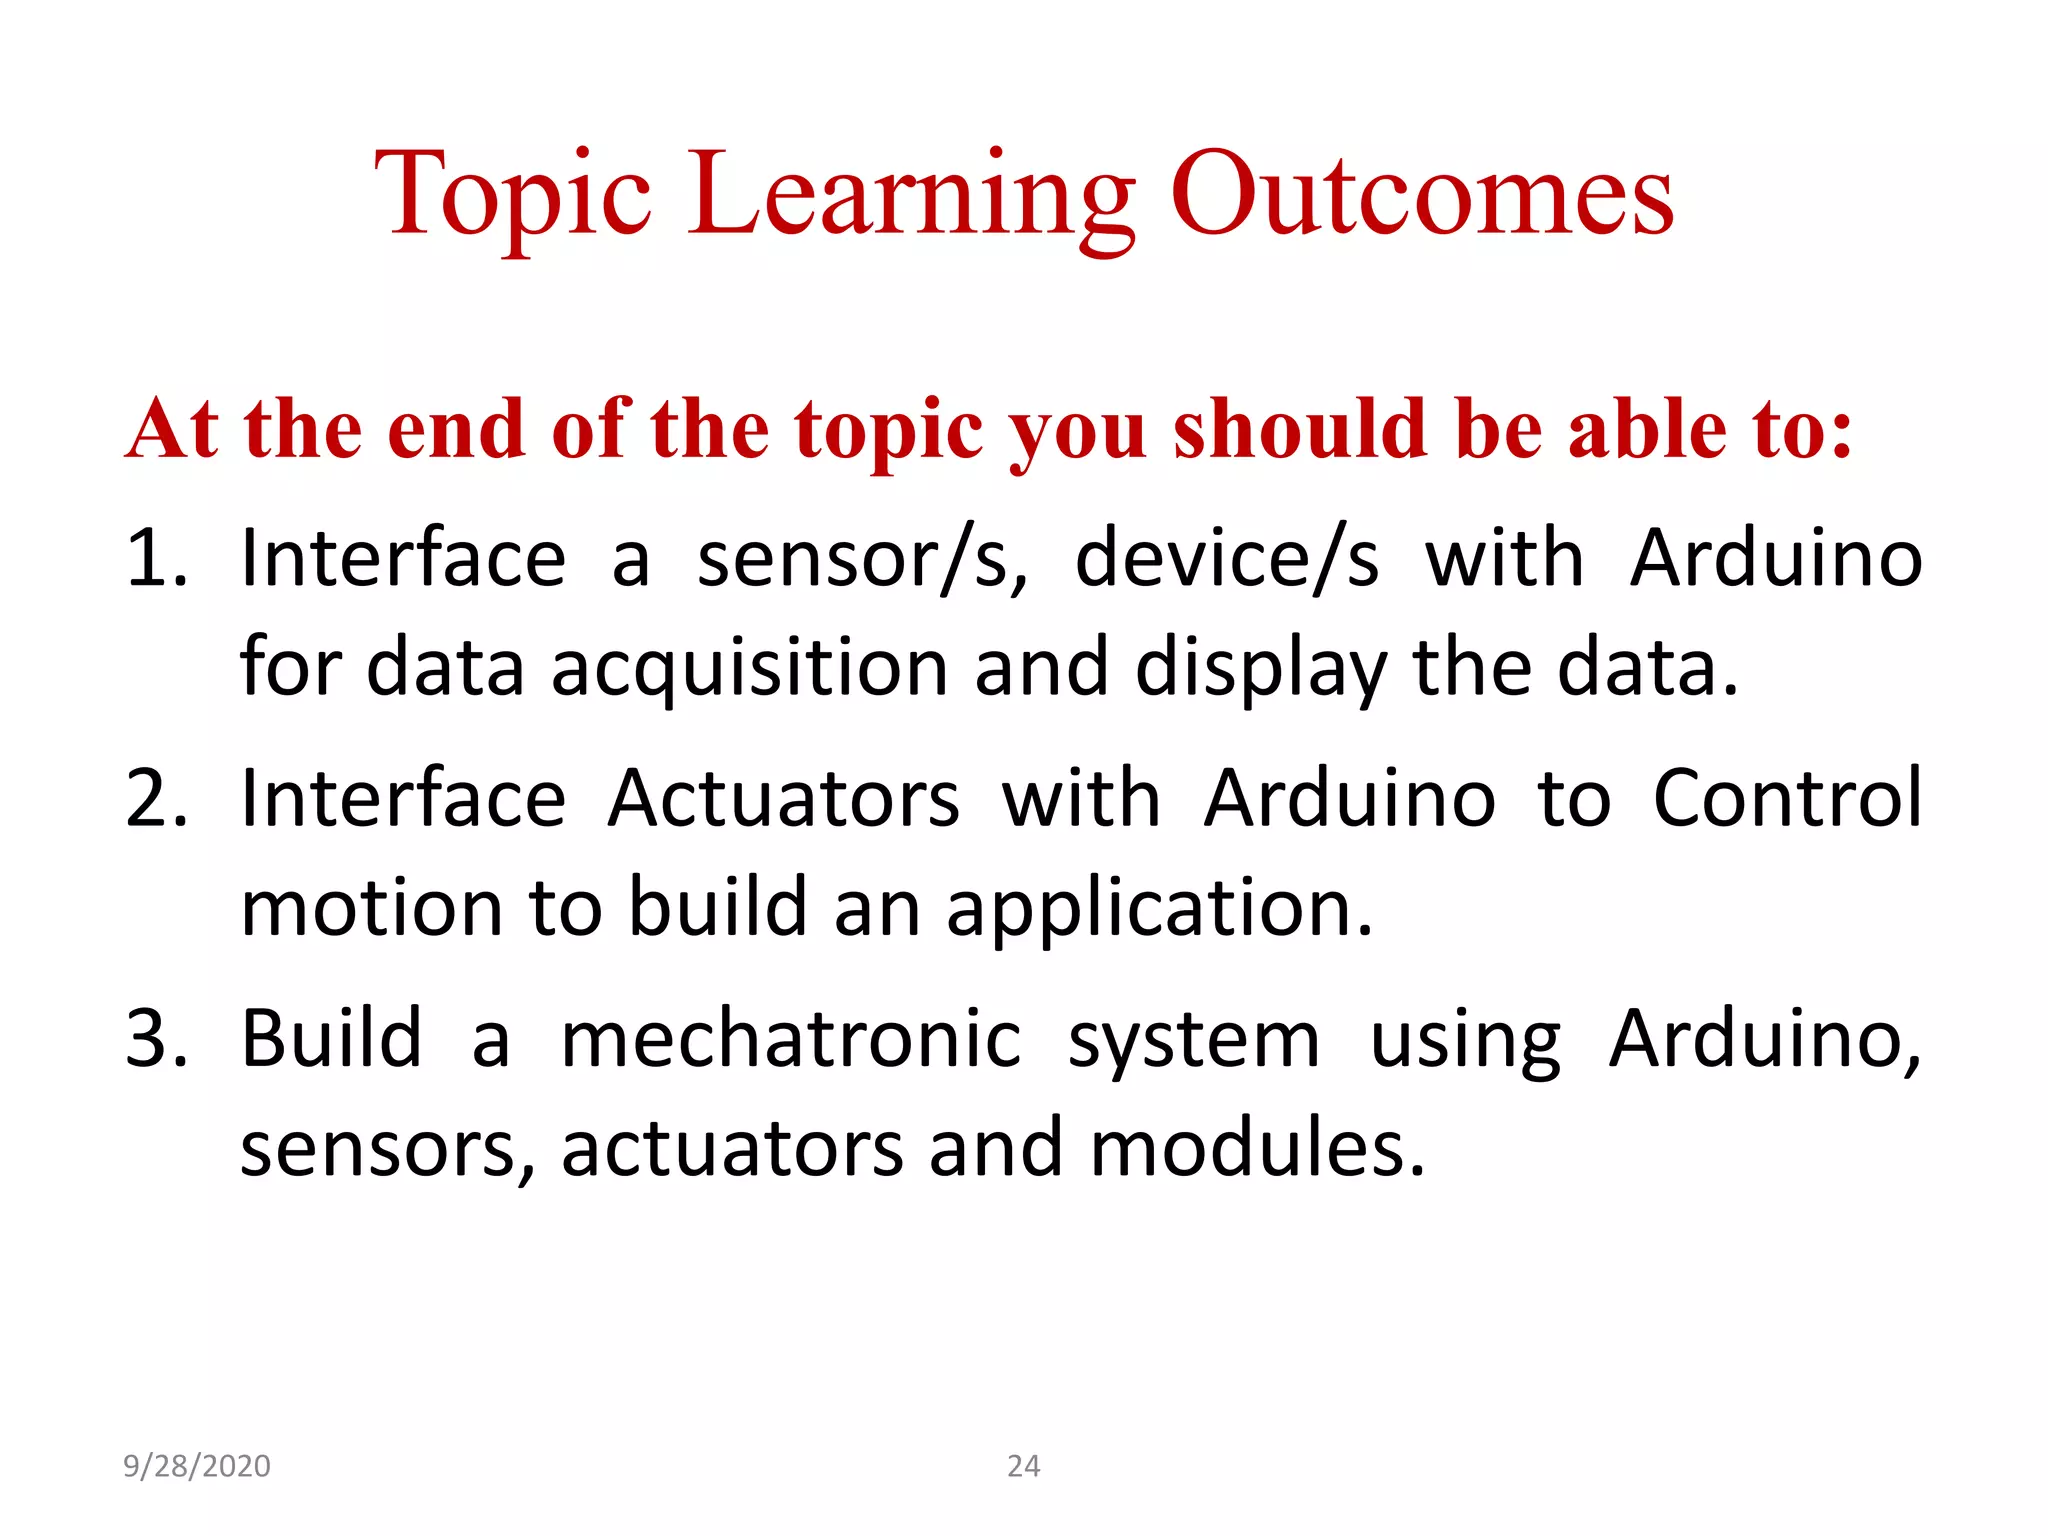
The document outlines a workshop on Arduino programming, focusing on concepts like PWM (Pulse Width Modulation), sensor interfacing, and actuator control using a stepper motor. It includes example code for using a keypad and infrared sensor, as well as project activities for controlling motor speed and direction. The learning outcomes emphasize the ability to interface sensors and actuators with Arduino for data acquisition and motion control.


![ANPARA THERMAL POWER STATION[1] sangam.pdf](https://cdn.slidesharecdn.com/ss_thumbnails/anparathermalpowerstation1sangam-251121115219-9261cde4-thumbnail.jpg?width=640&height=640&fit=bounds)


