Download to read offline


![let transport =
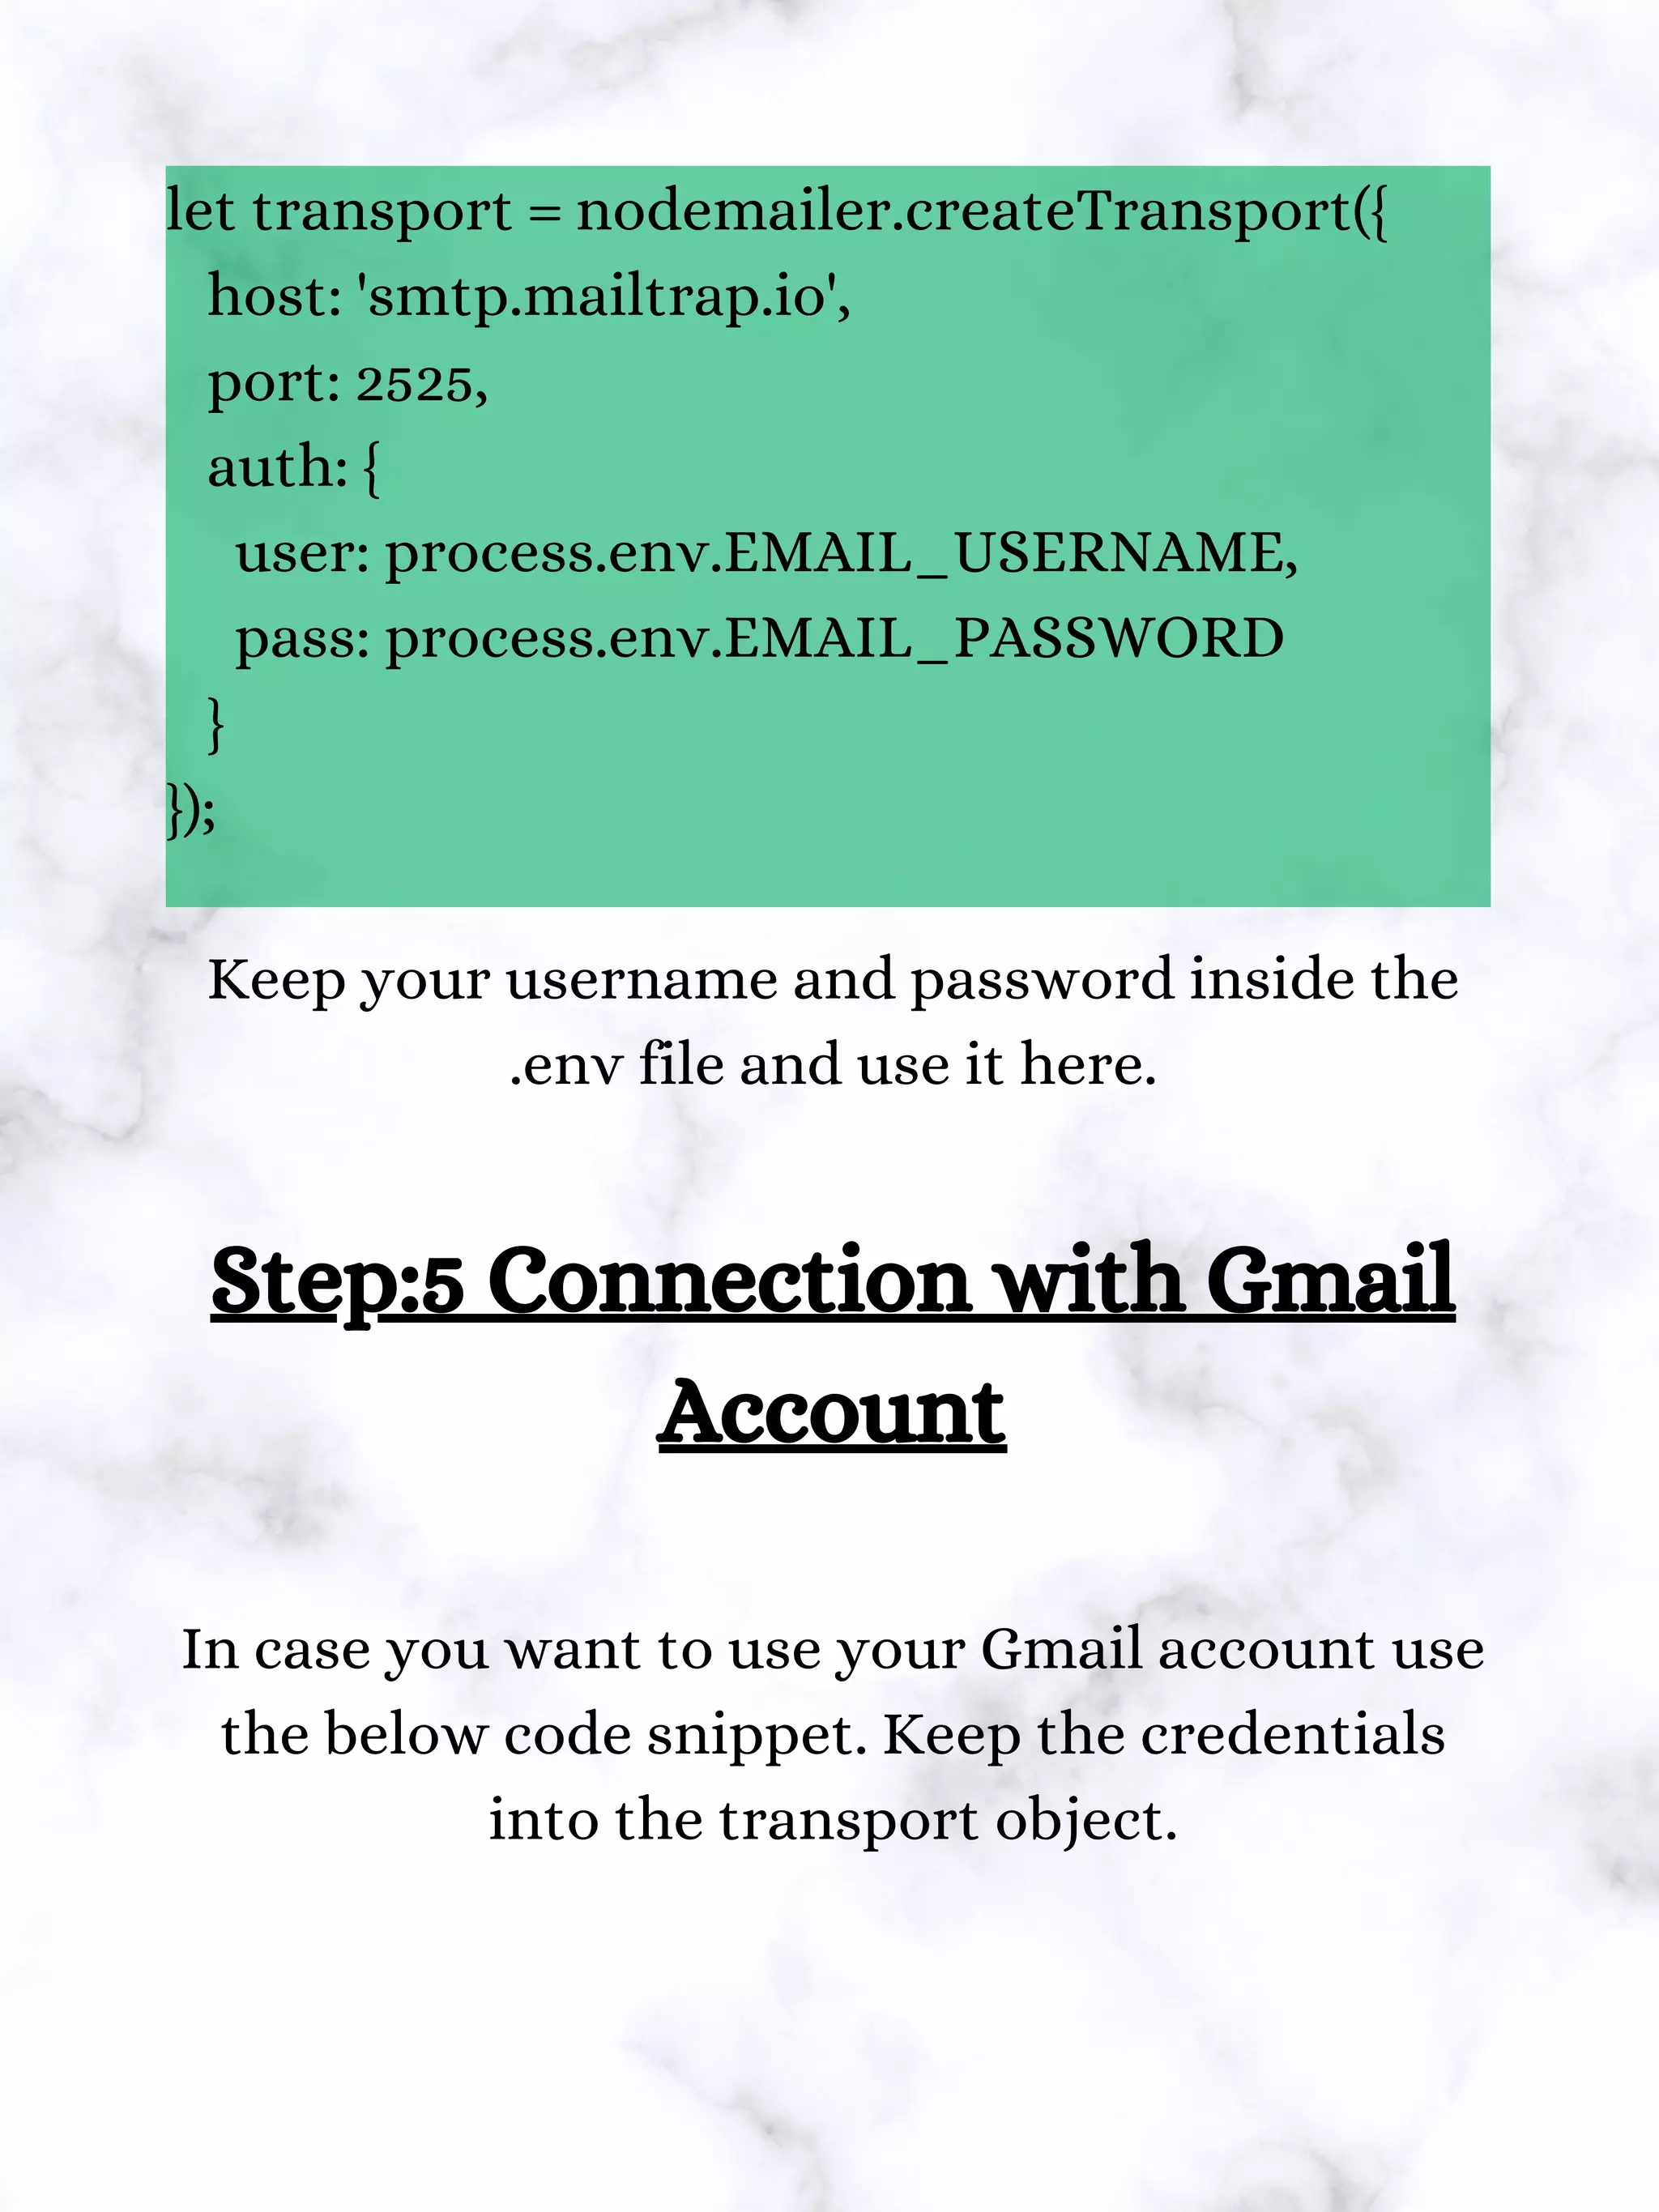
nodemailer.createTransport(options[, defaults])
options – It is an object that is used to connect
with any host.
defaults – It is an object combining into each
message object. With its help, you can define
shared options, e.g., setting the default address
for email.
Nonetheless, for sending a message via our
transport, configuring the connection must.
Moving forward in our NodeMailer example.](https://image.slidesharecdn.com/nodemailerexamplehowtosendemailusingnodemailerwithgmailmailtrap-210714035639/75/Node-mailer-example-how-to-send-email-using-nodemailer-with-gmail-amp-mailtrap-11-2048.jpg)
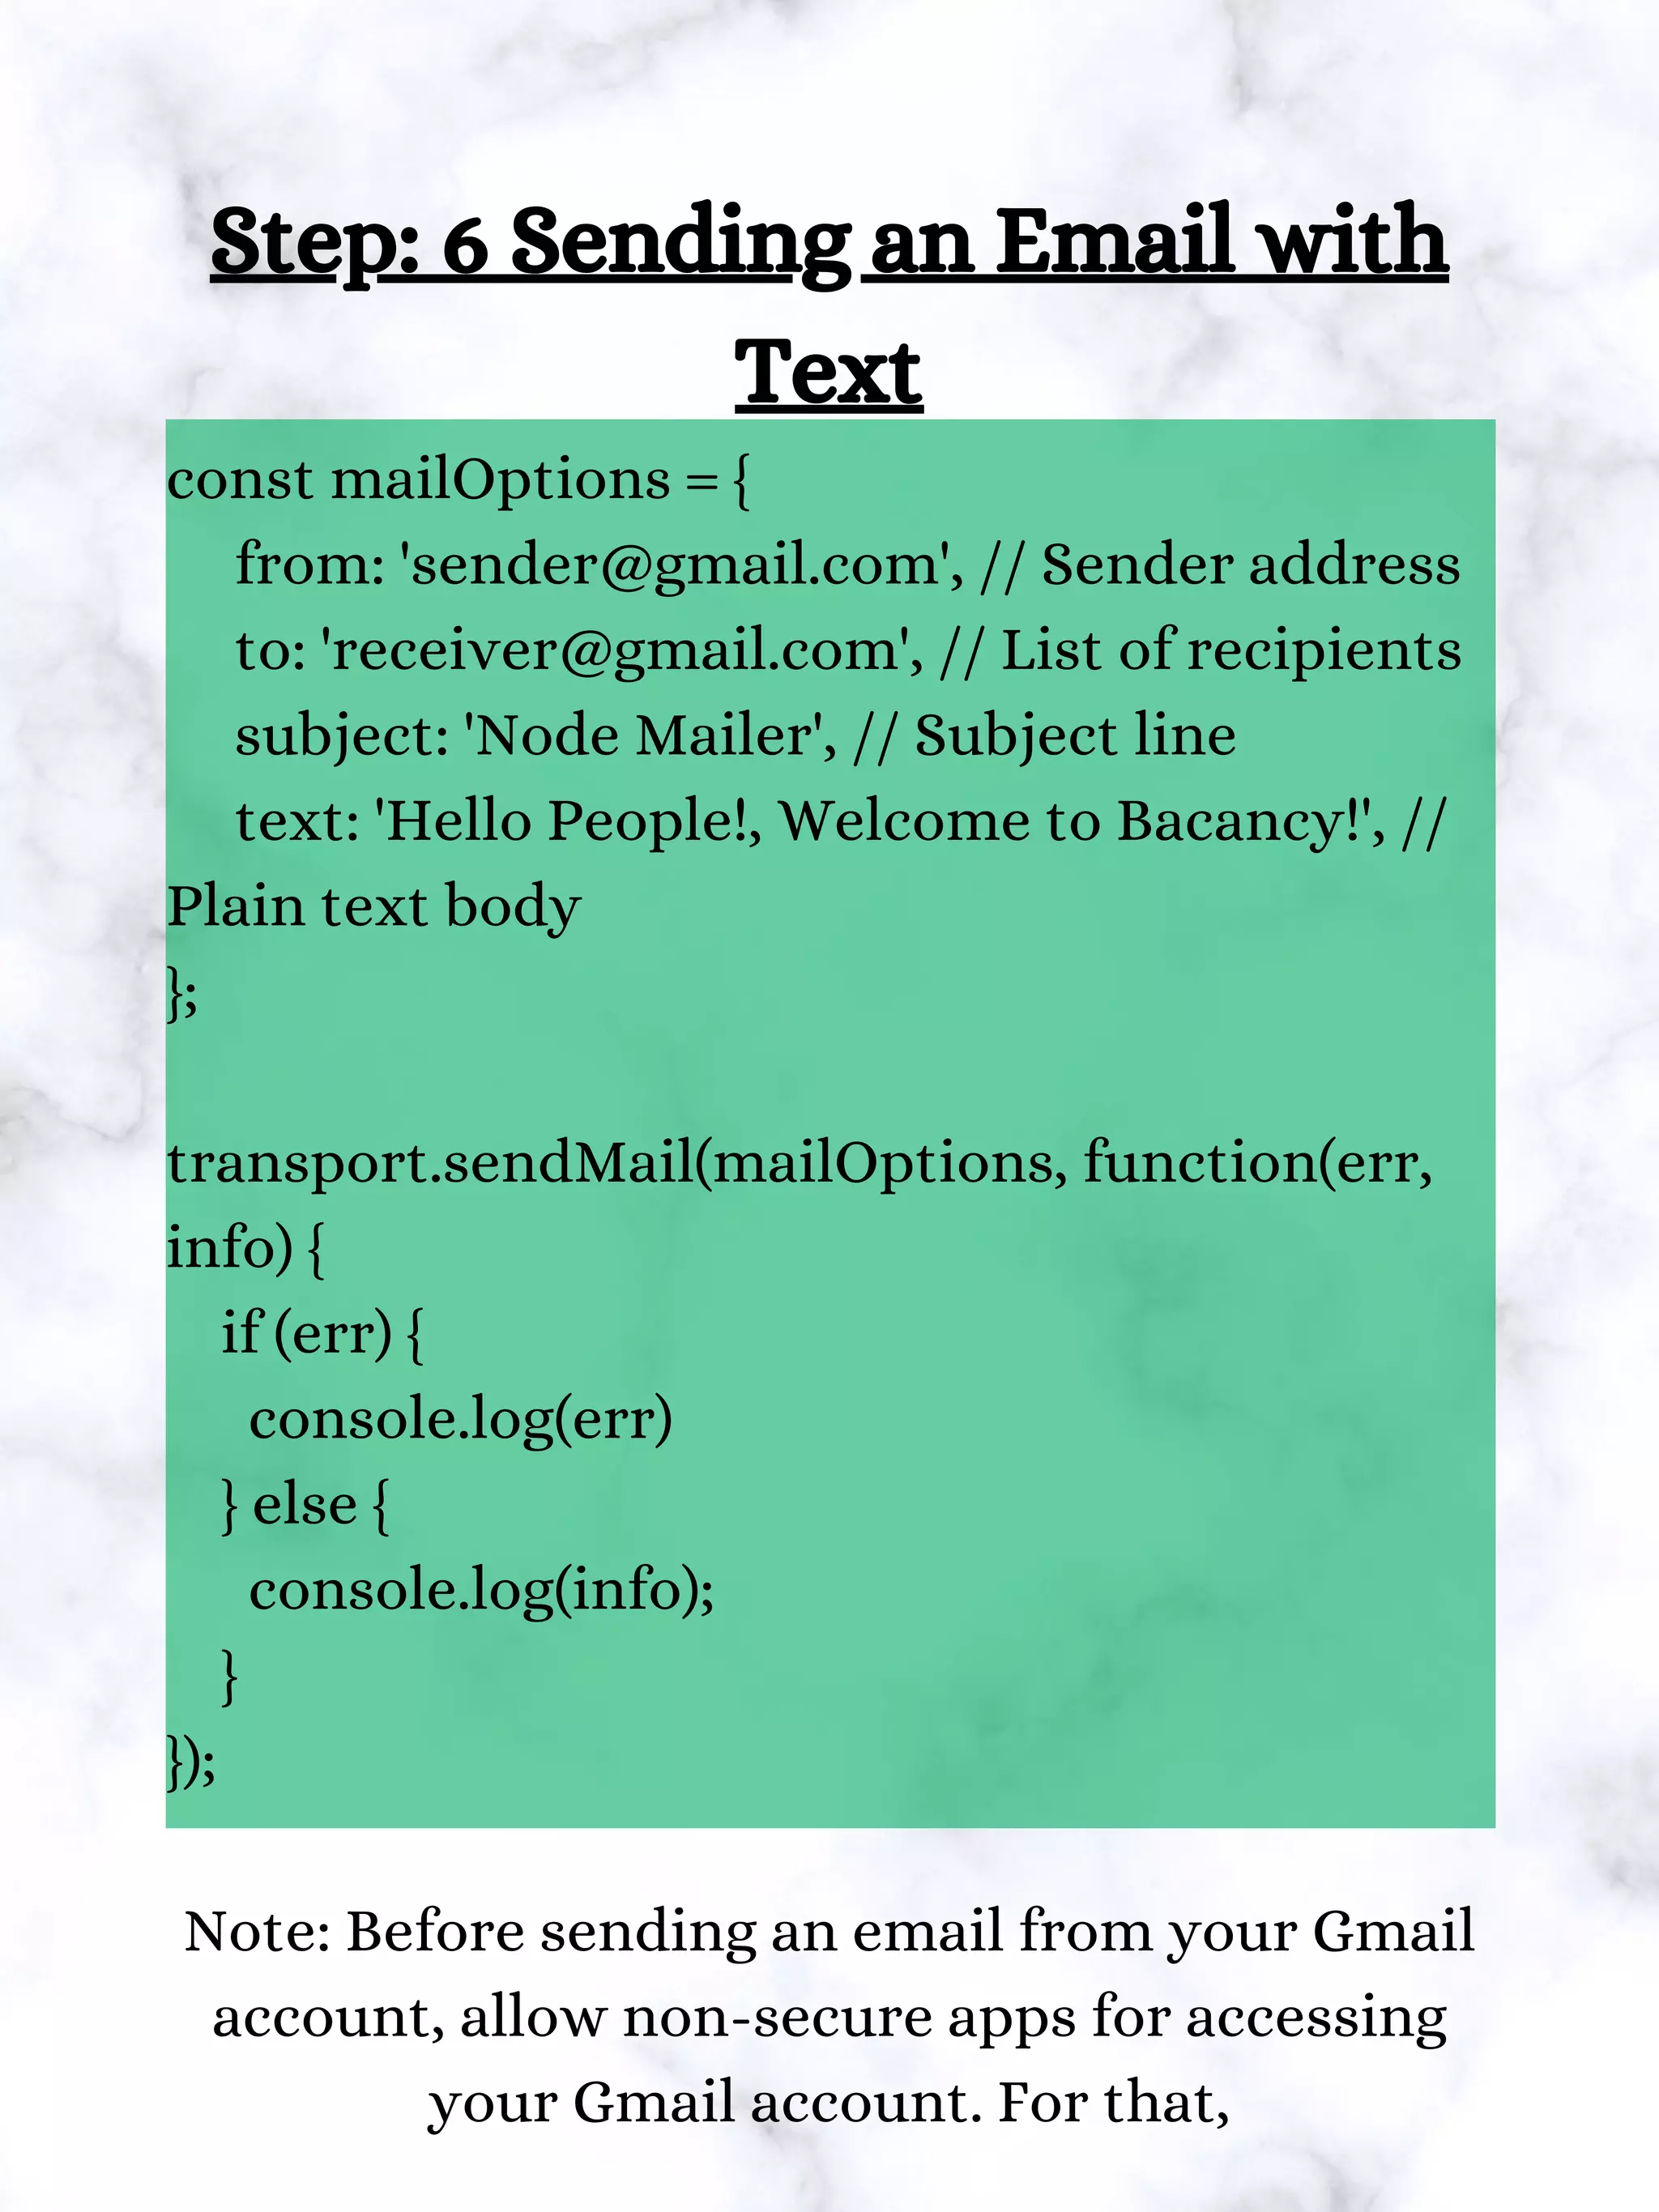

![const mailOptions = {
from: 'sender@gmail.com', // Sender
address
to: 'receiver@gmail.com', // List of
recipients
subject: 'Node Mailer', // Subject line
html: '<h1 style="color:#ff6600;">Hello
People!,
Welcome to Bacancy!</h1>',
attachments: [
{ filename: 'profile.png', path:
'./images/profile.png' }
]
};
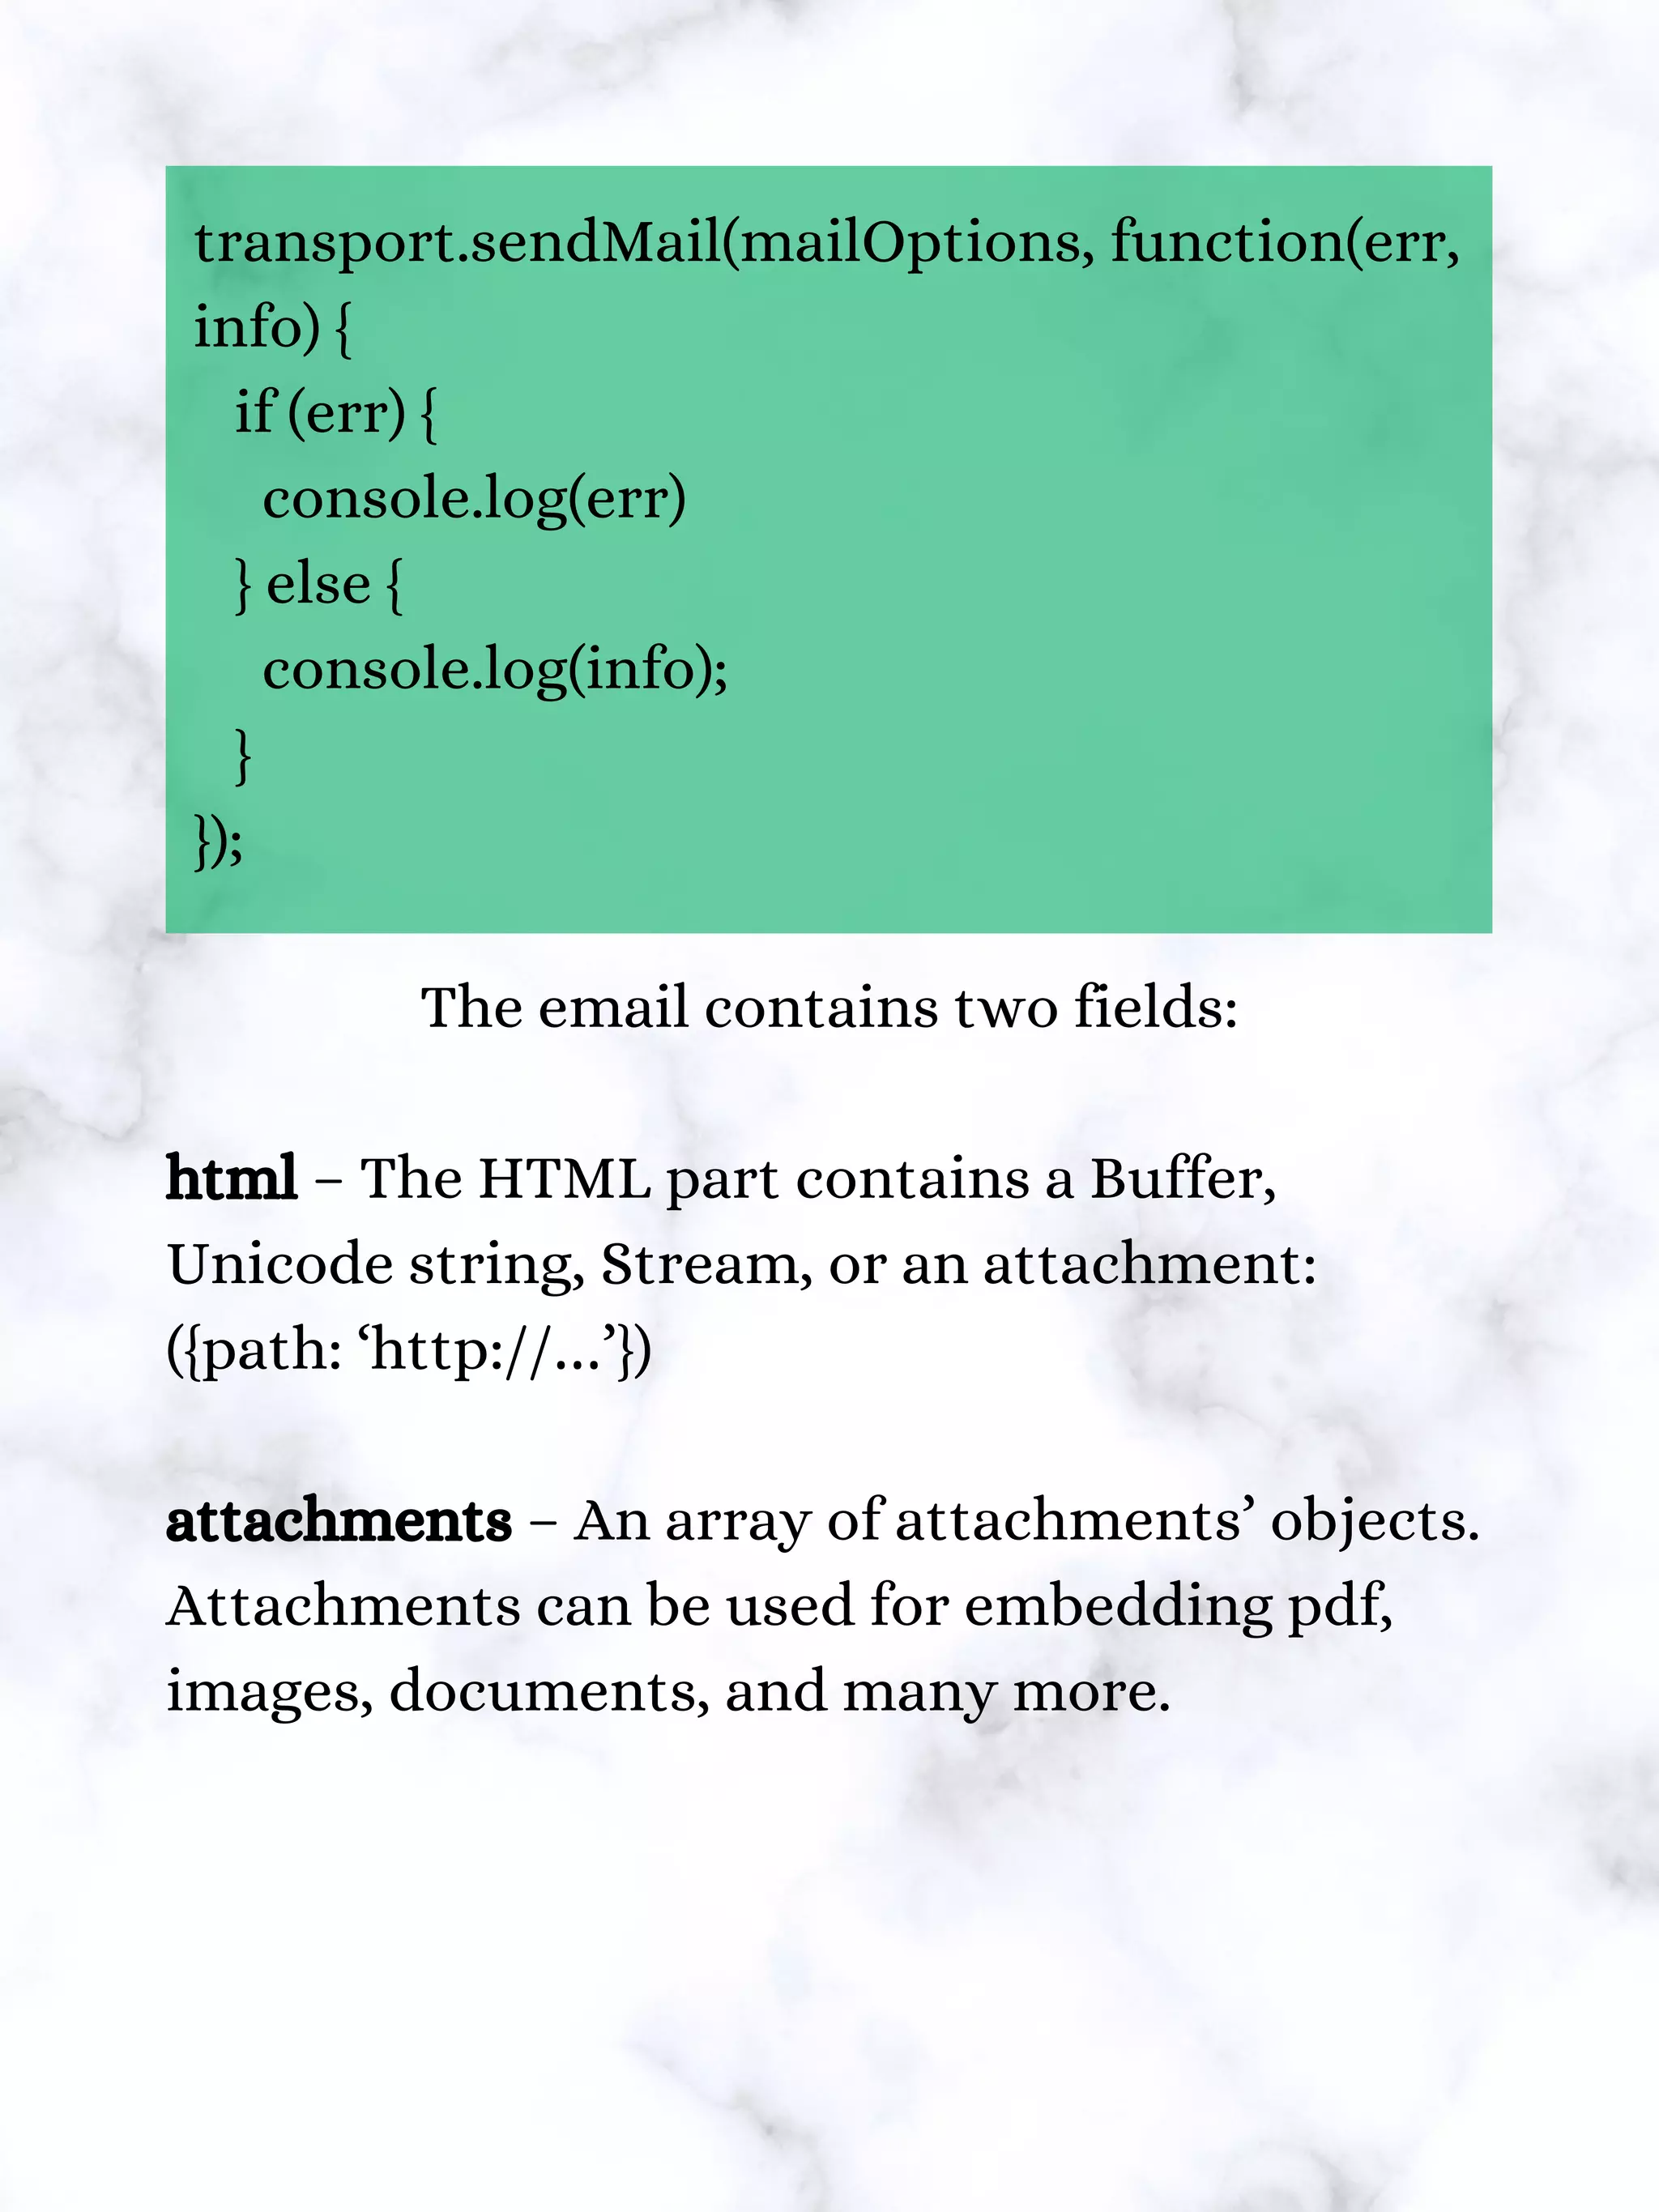
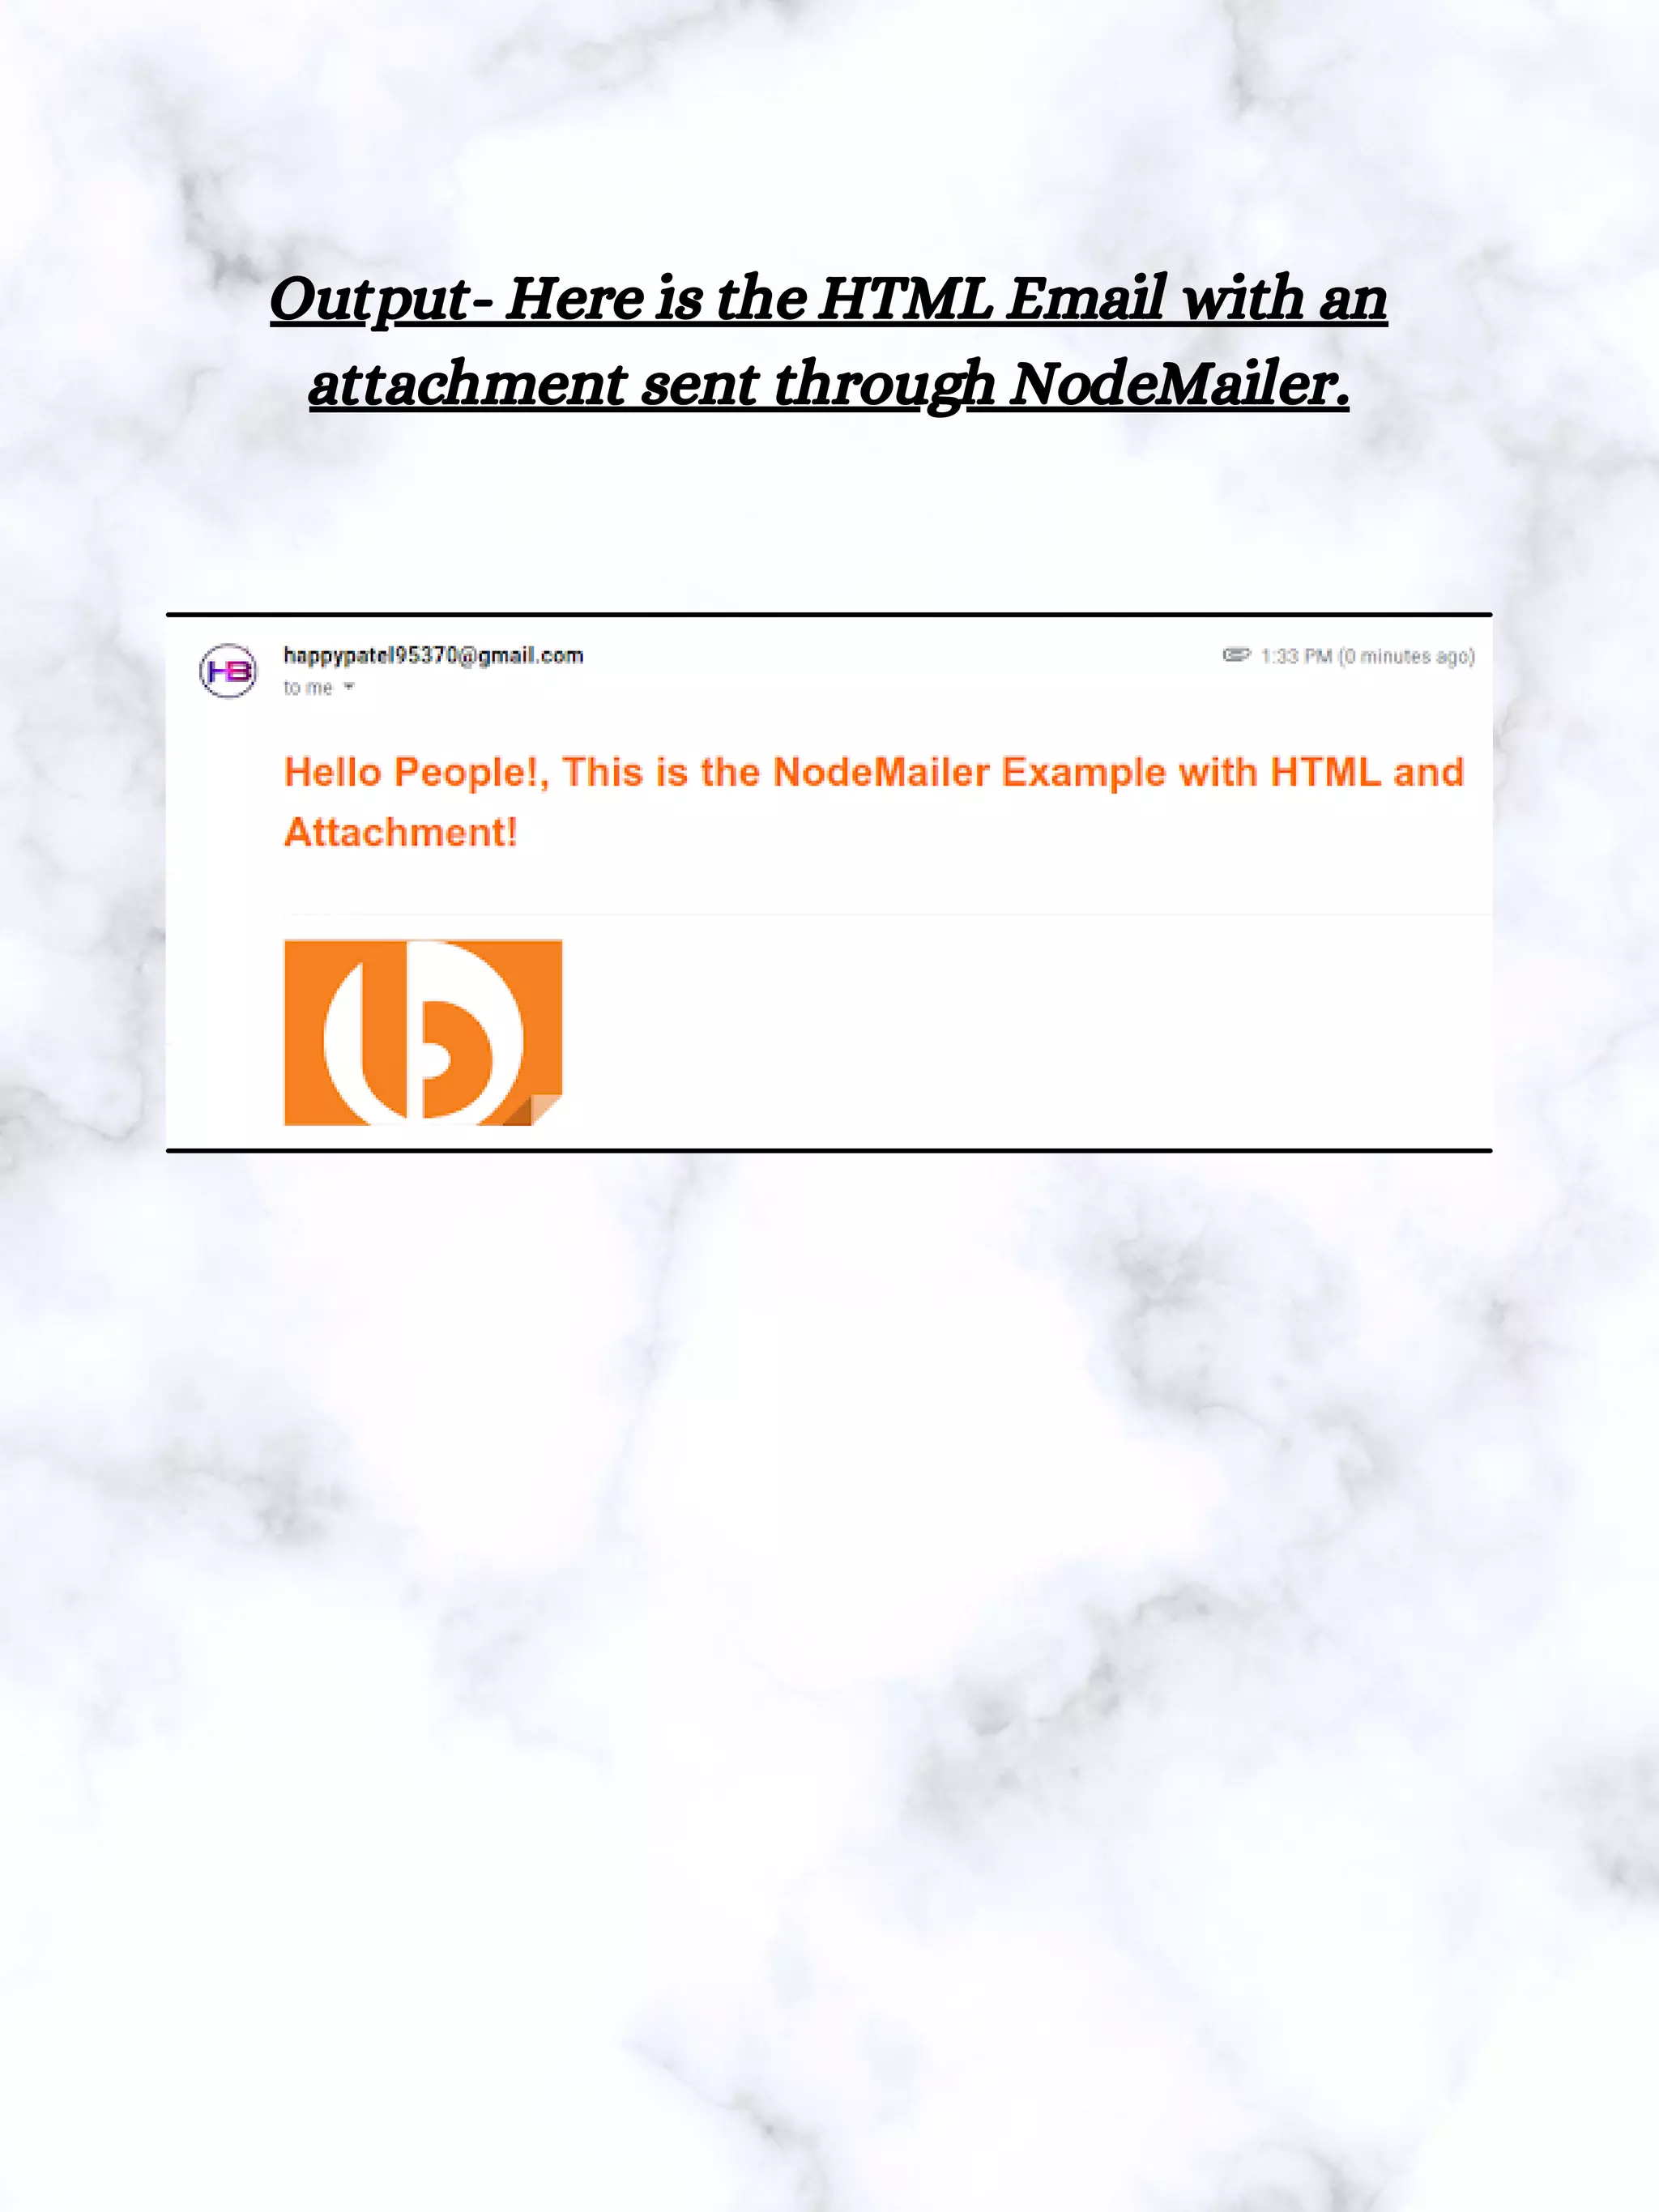
Step:7 Sending an Email with
HTML and Attachment
Use the below code snippet for sending an email
with HTML and attachments.](https://image.slidesharecdn.com/nodemailerexamplehowtosendemailusingnodemailerwithgmailmailtrap-210714035639/75/Node-mailer-example-how-to-send-email-using-nodemailer-with-gmail-amp-mailtrap-18-2048.jpg)


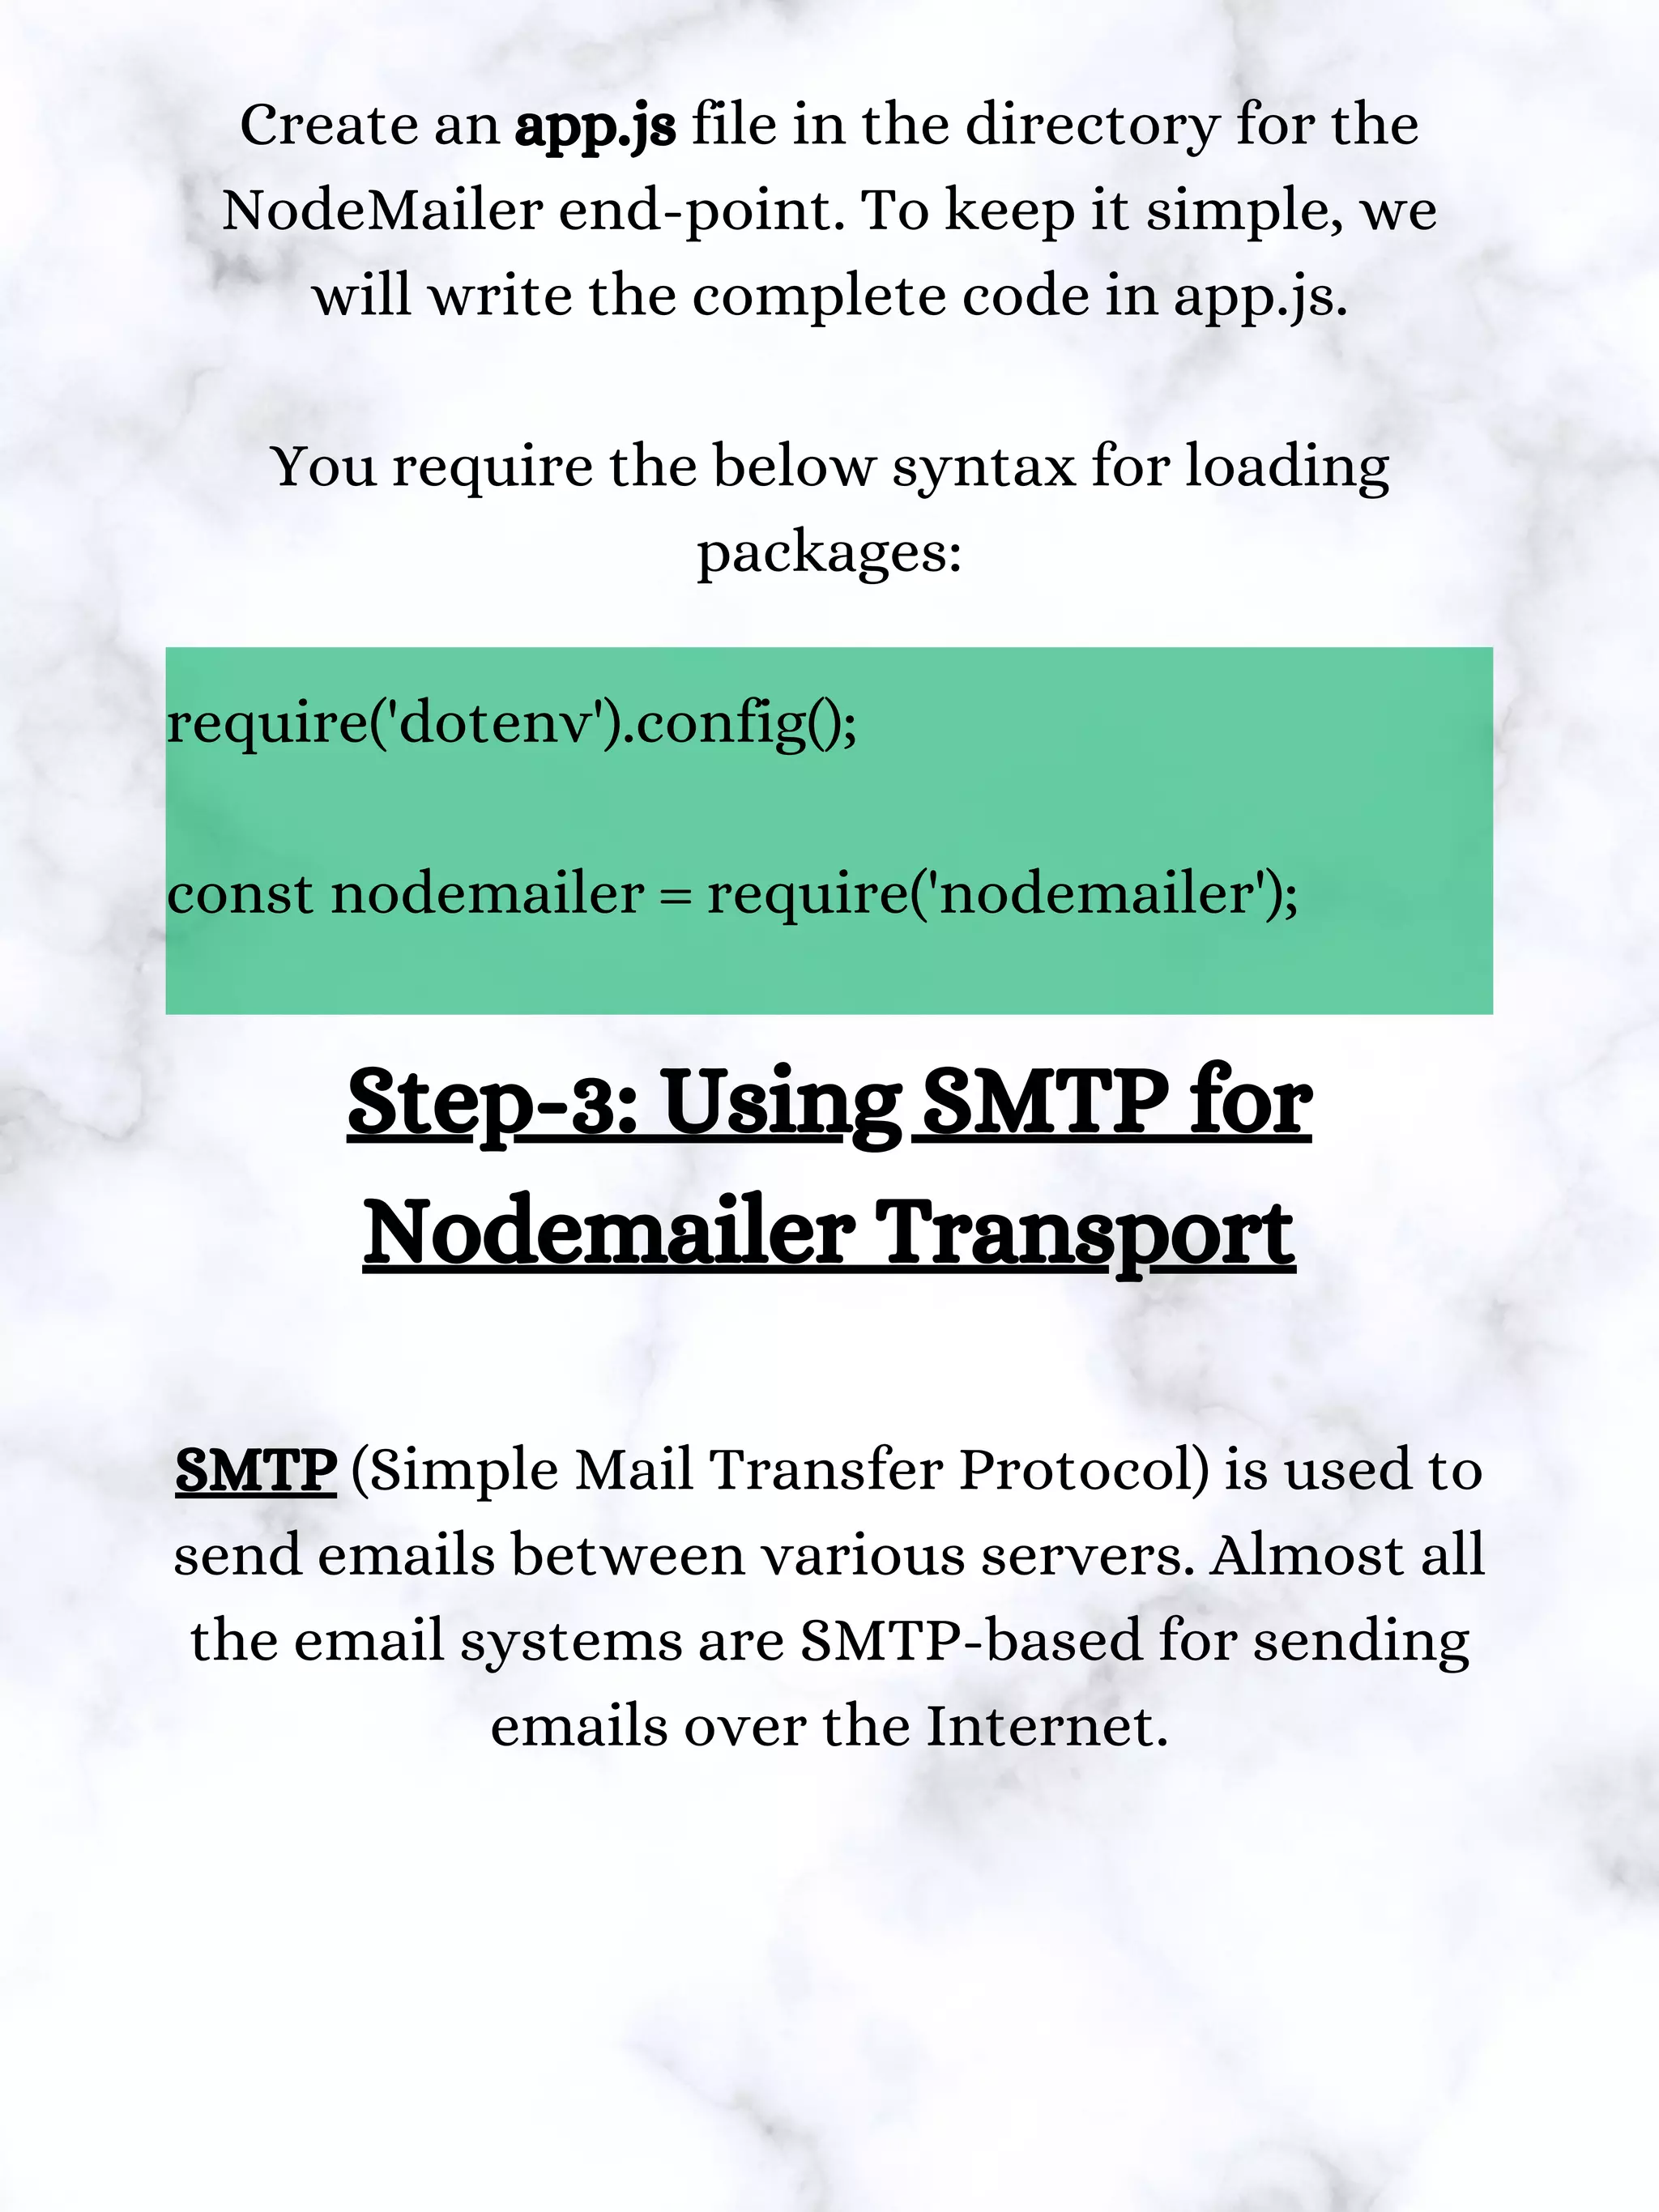
![let transport =
nodemailer.createTransport(options[, defaults])
options – It is an object that is used to connect
with any host.
defaults – It is an object combining into each
message object. With its help, you can define
shared options, e.g., setting the default address
for email.
Nonetheless, for sending a message via our
transport, configuring the connection must.
Moving forward in our NodeMailer example.](https://crownmelresort.com/image.slidesharecdn.com/nodemailerexamplehowtosendemailusingnodemailerwithgmailmailtrap-210714035639/75/Node-mailer-example-how-to-send-email-using-nodemailer-with-gmail-amp-mailtrap-11-2048.jpg)


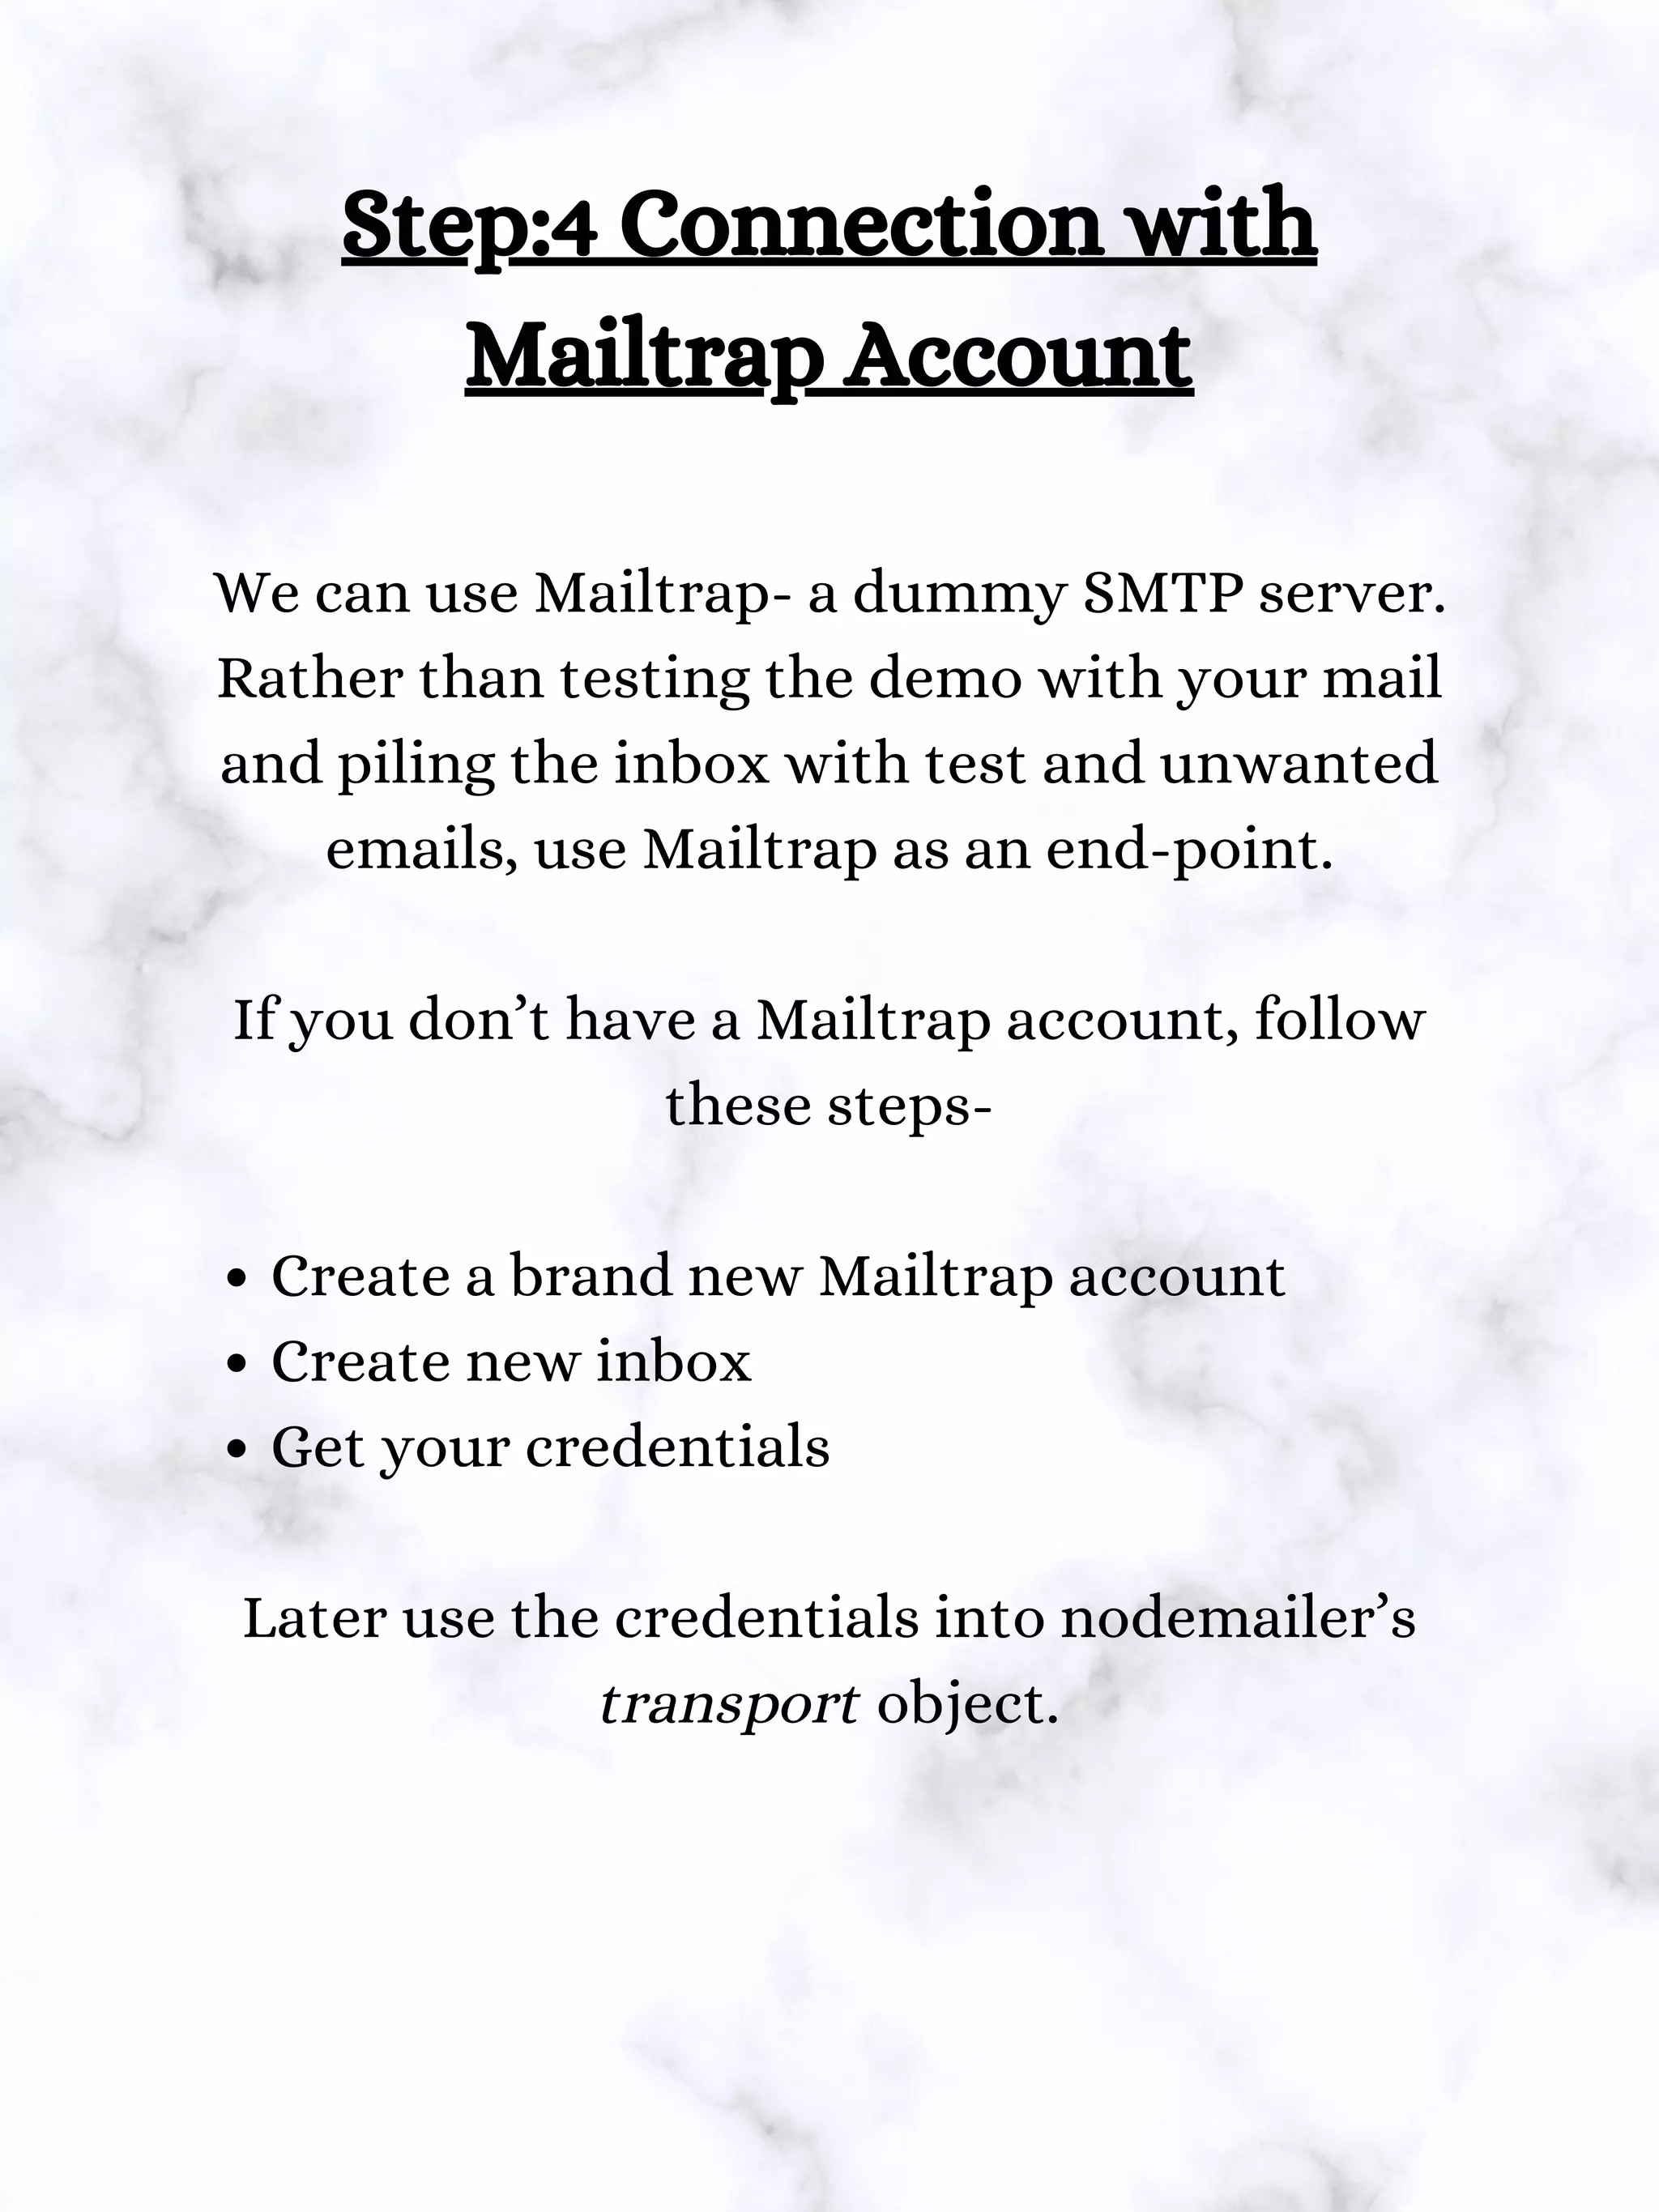
![const mailOptions = {
from: 'sender@gmail.com', // Sender
address
to: 'receiver@gmail.com', // List of
recipients
subject: 'Node Mailer', // Subject line
html: '<h1 style="color:#ff6600;">Hello
People!,
Welcome to Bacancy!</h1>',
attachments: [
{ filename: 'profile.png', path:
'./images/profile.png' }
]
};
Step:7 Sending an Email with
HTML and Attachment
Use the below code snippet for sending an email
with HTML and attachments.](https://crownmelresort.com/image.slidesharecdn.com/nodemailerexamplehowtosendemailusingnodemailerwithgmailmailtrap-210714035639/75/Node-mailer-example-how-to-send-email-using-nodemailer-with-gmail-amp-mailtrap-18-2048.jpg)


This document discusses how to send emails from a Node.js application using Nodemailer. It explains that Nodemailer is a popular module for sending emails and describes how to set up Nodemailer with either a Mailtrap or Gmail account. The document provides step-by-step instructions for sending basic text emails, HTML emails, and emails with attachments from a Nodemailer application.