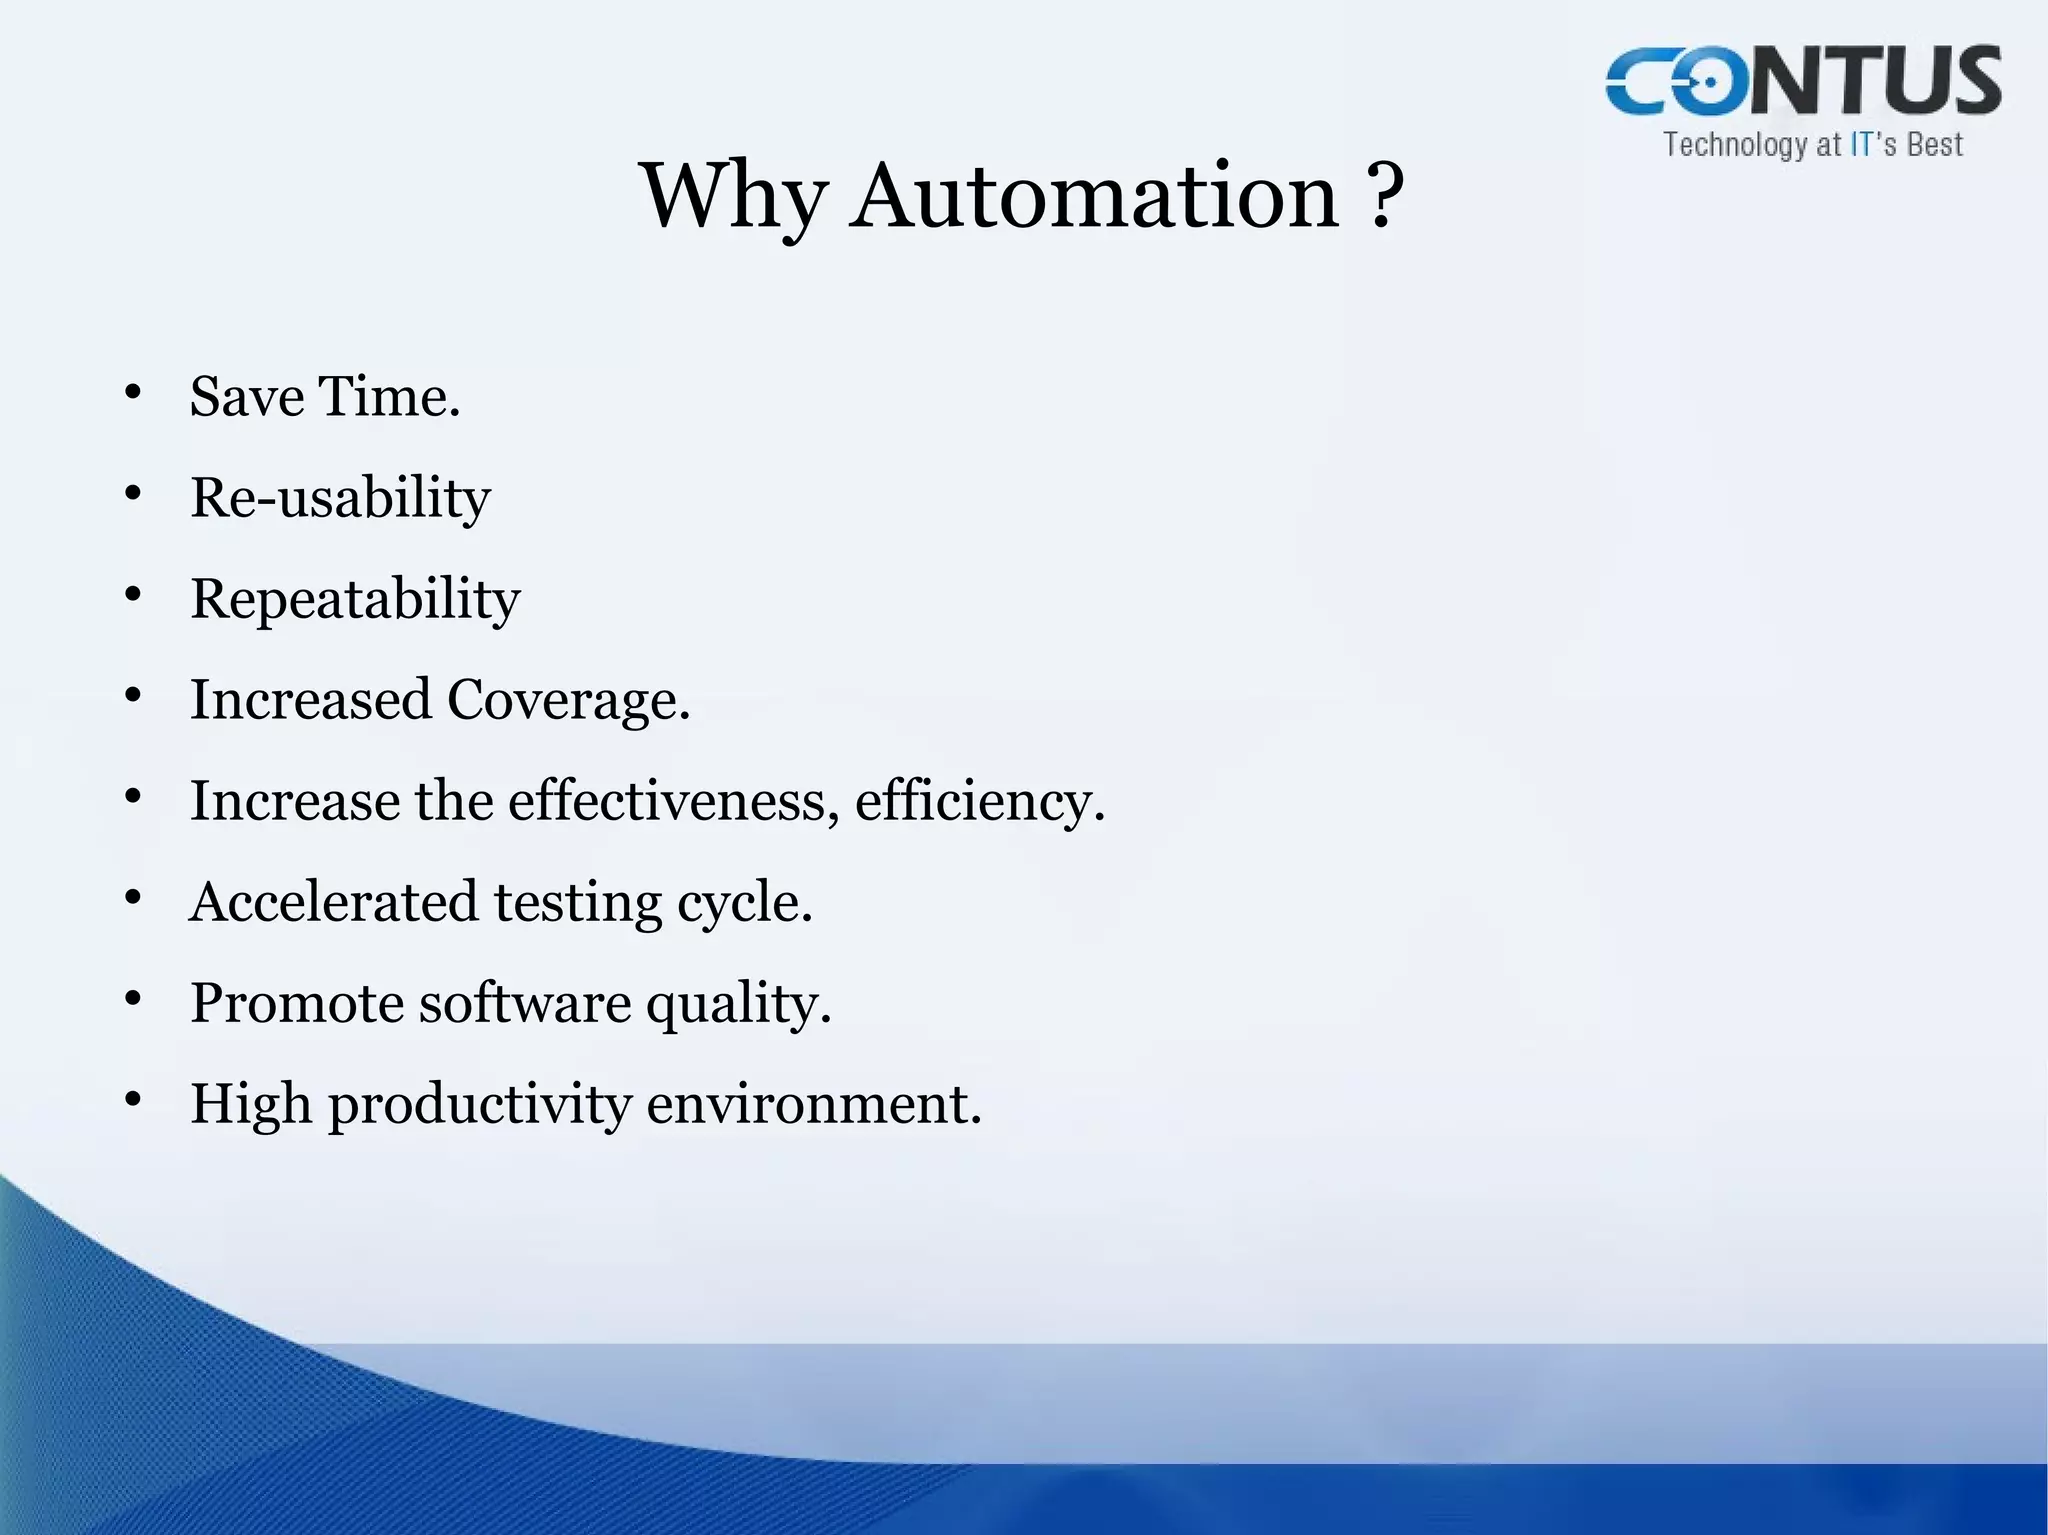
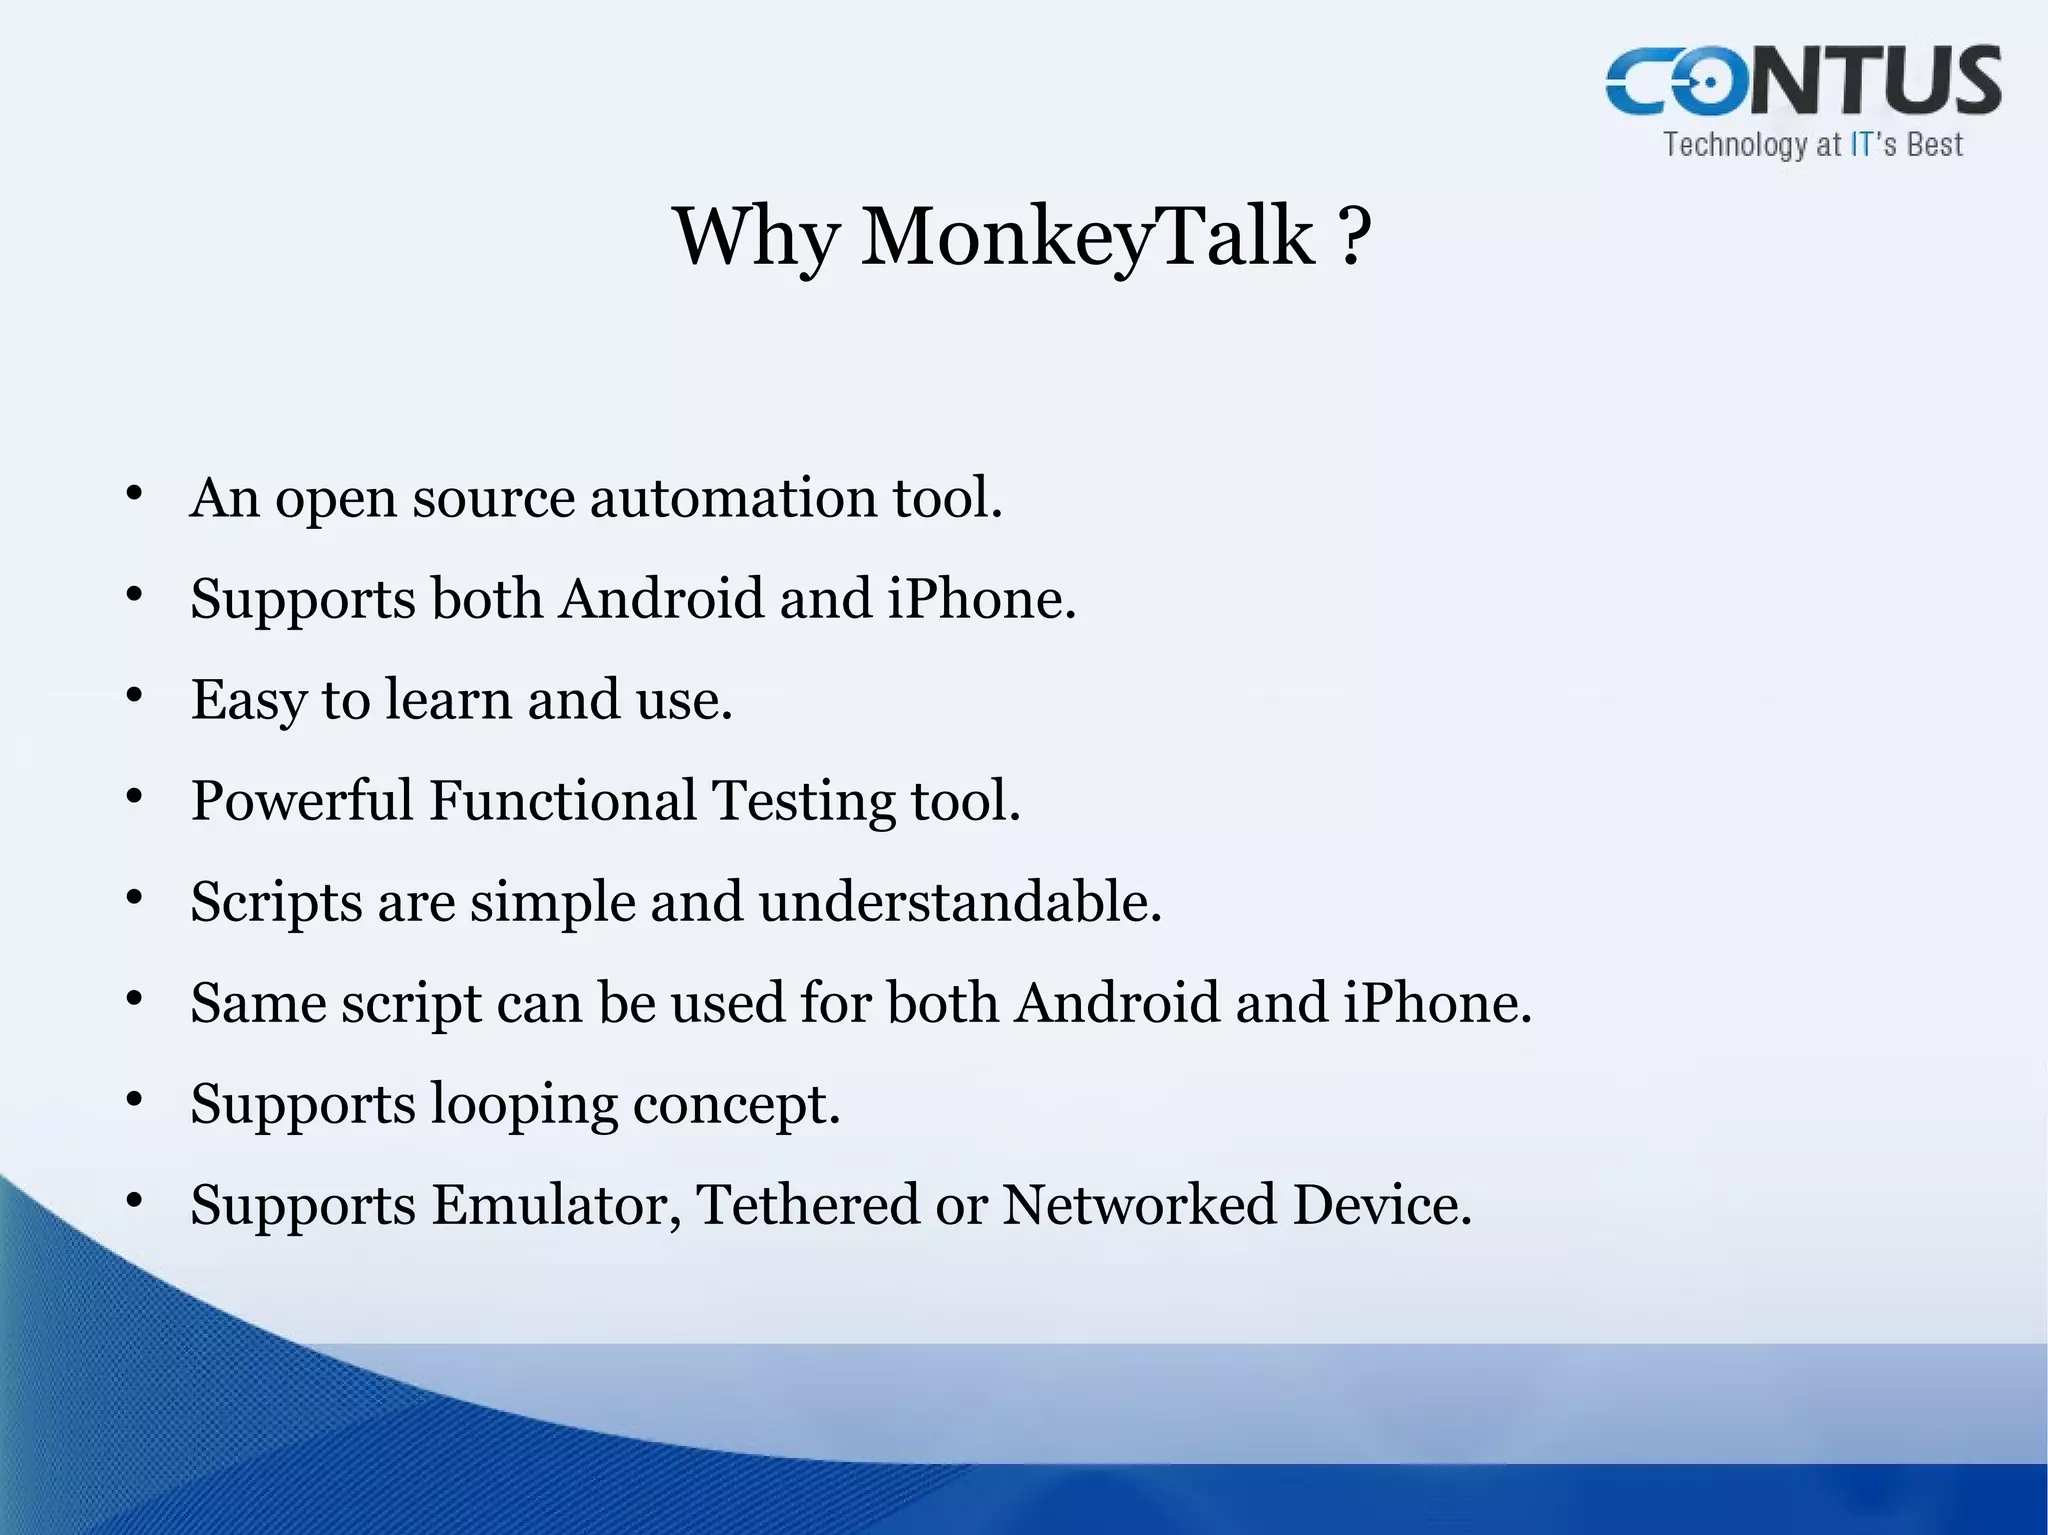
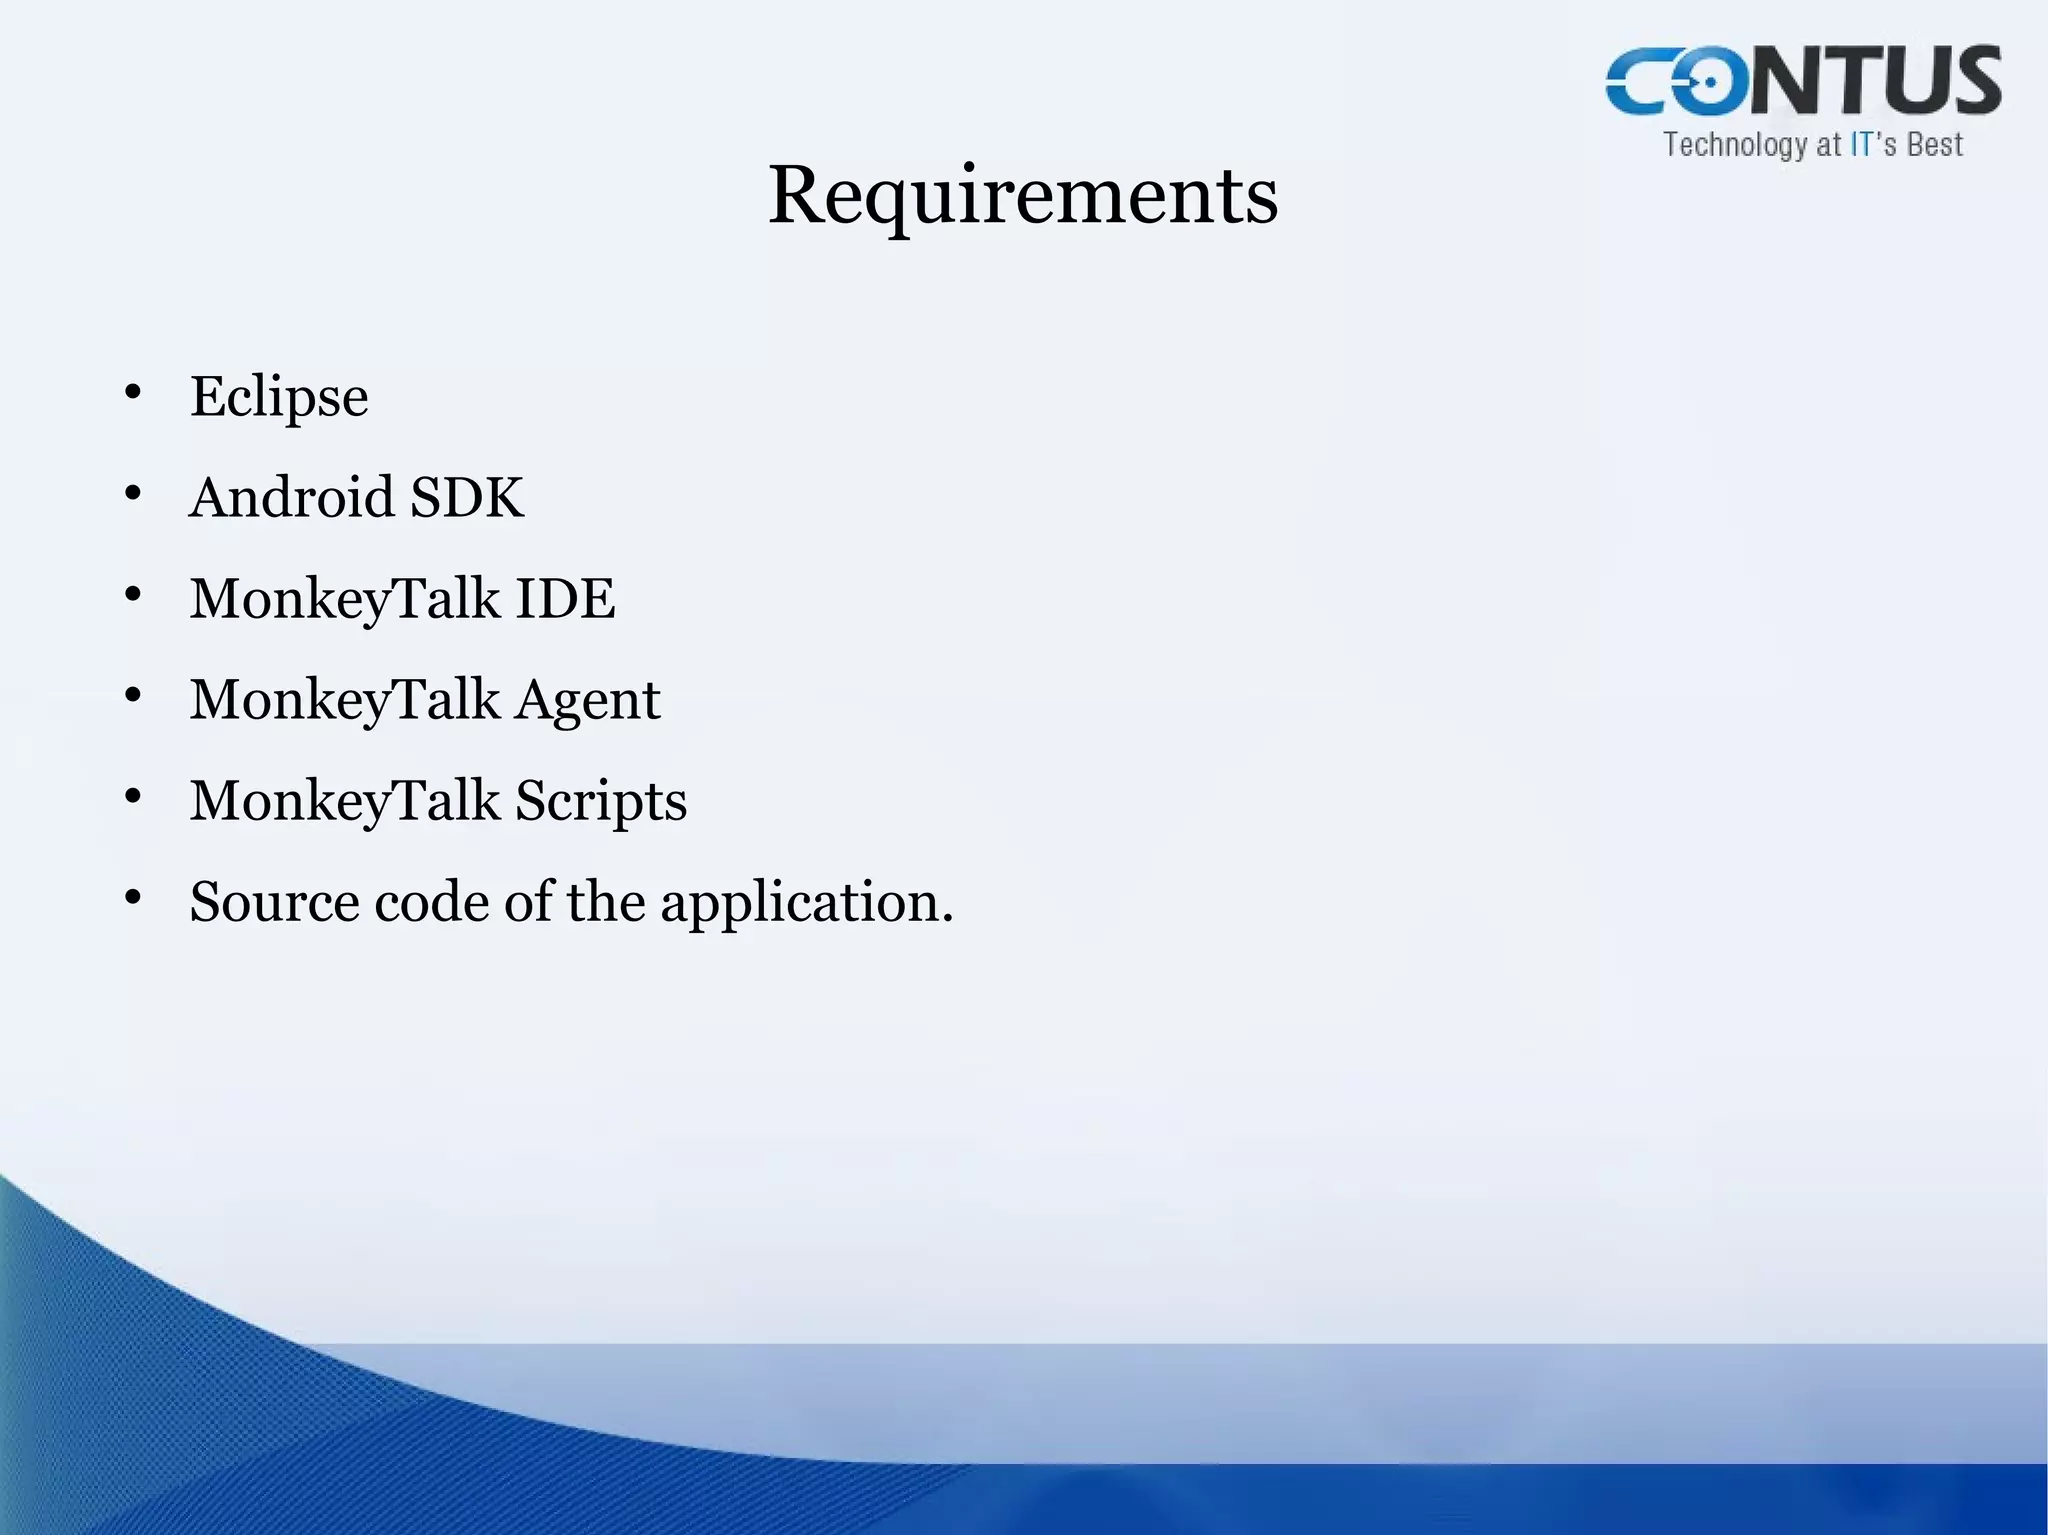
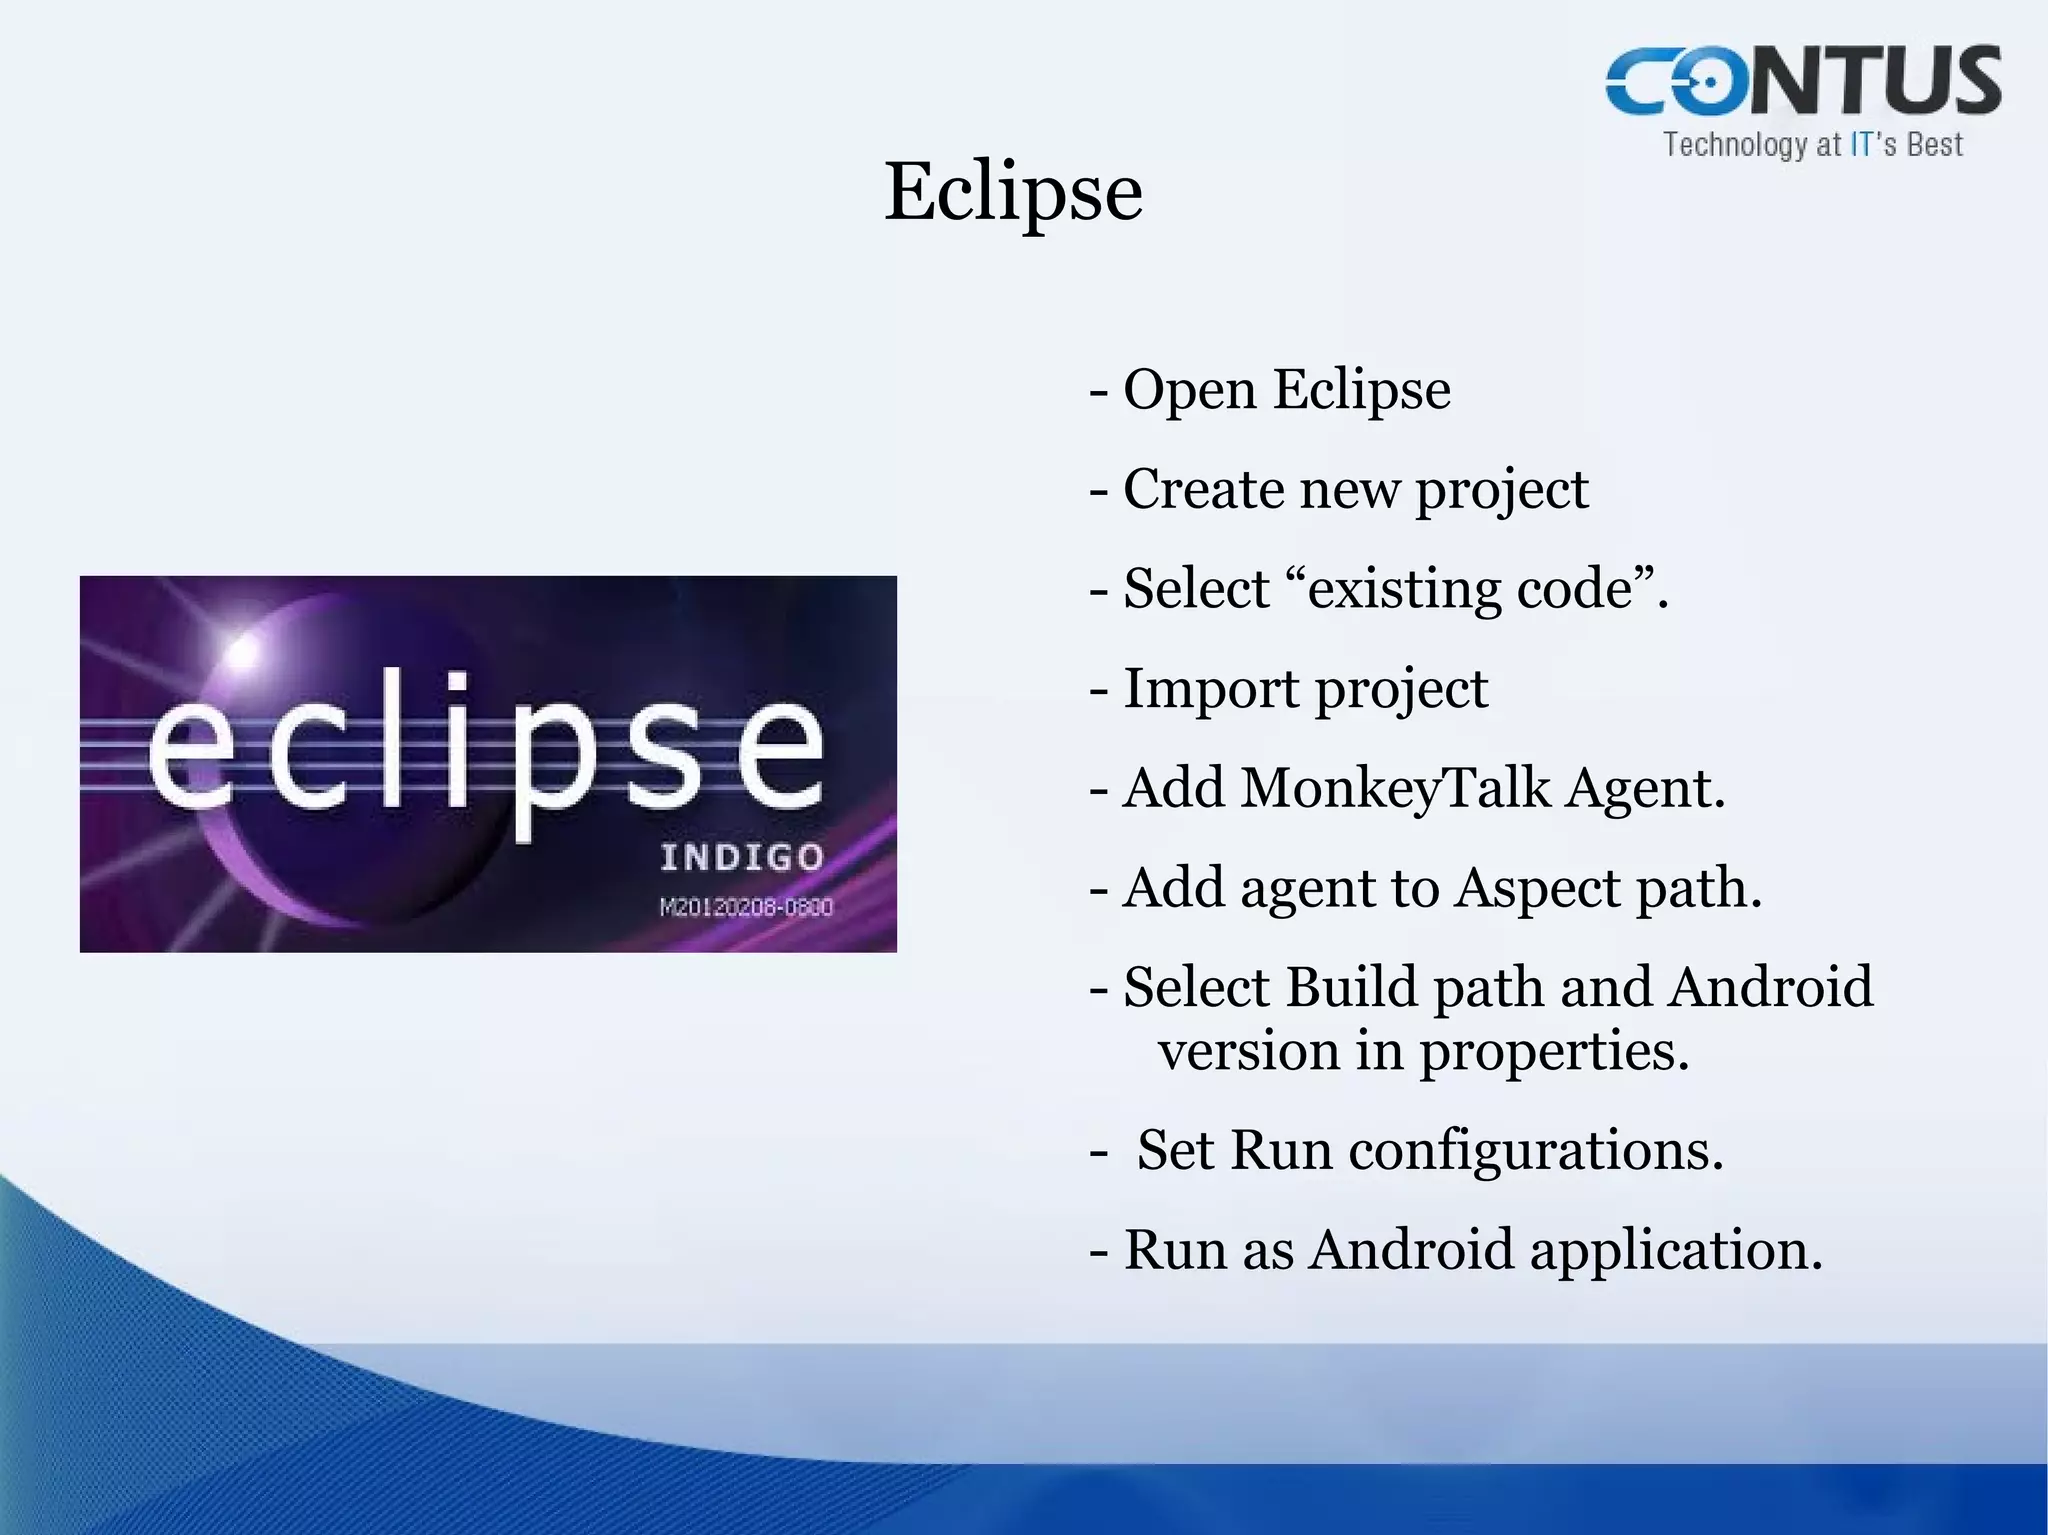
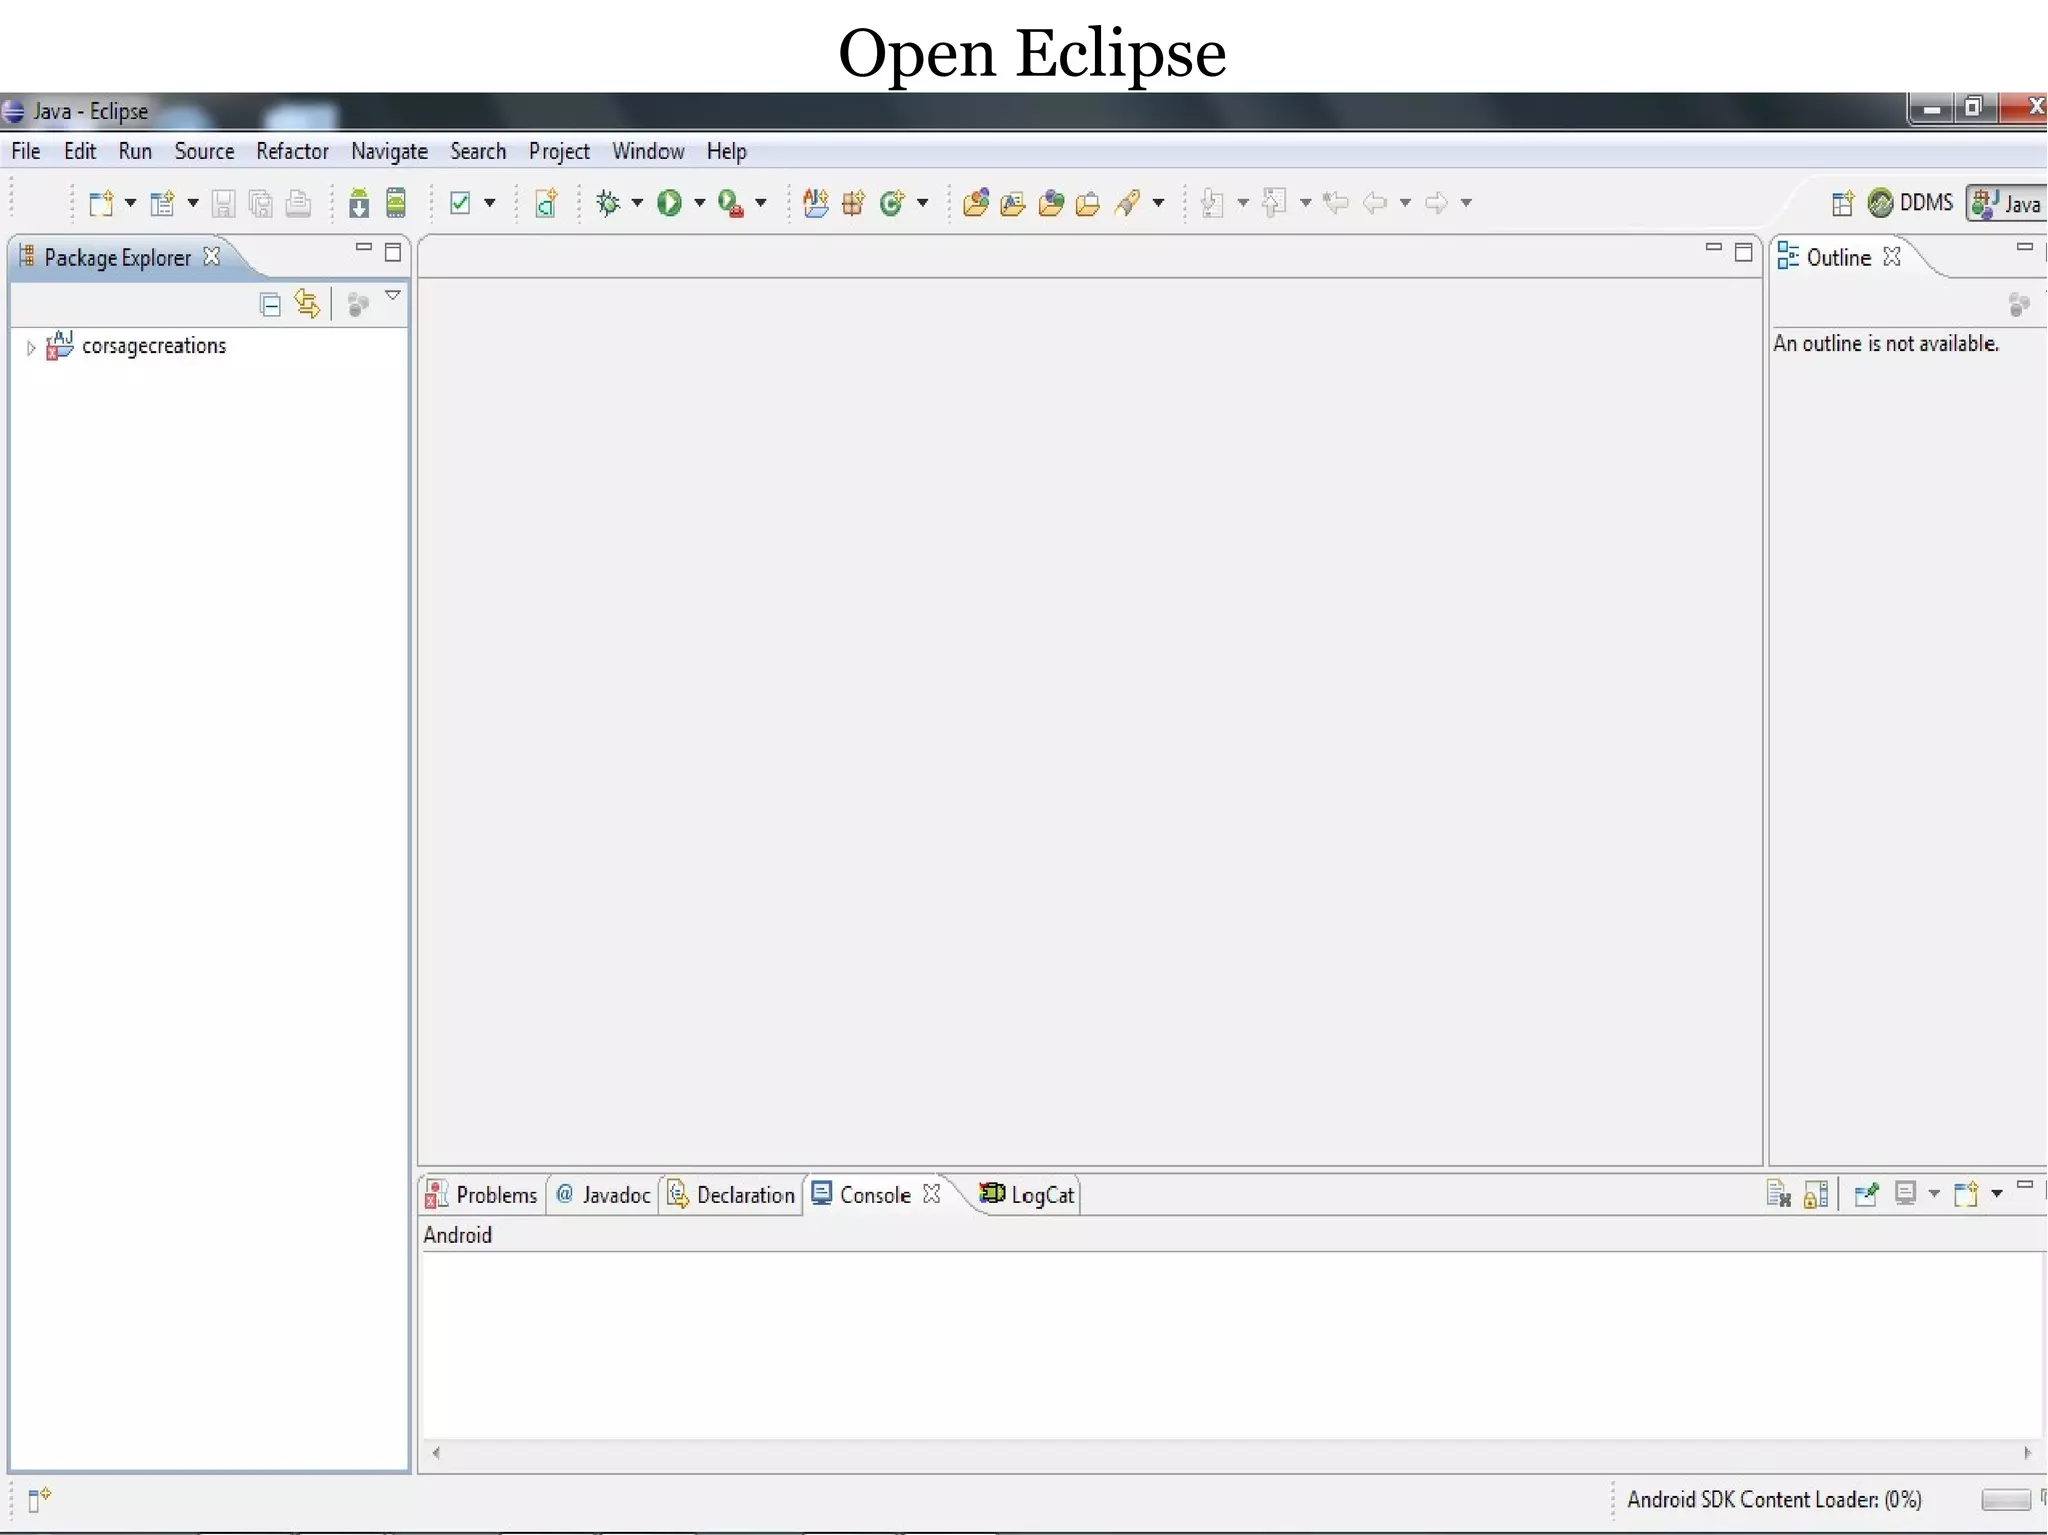
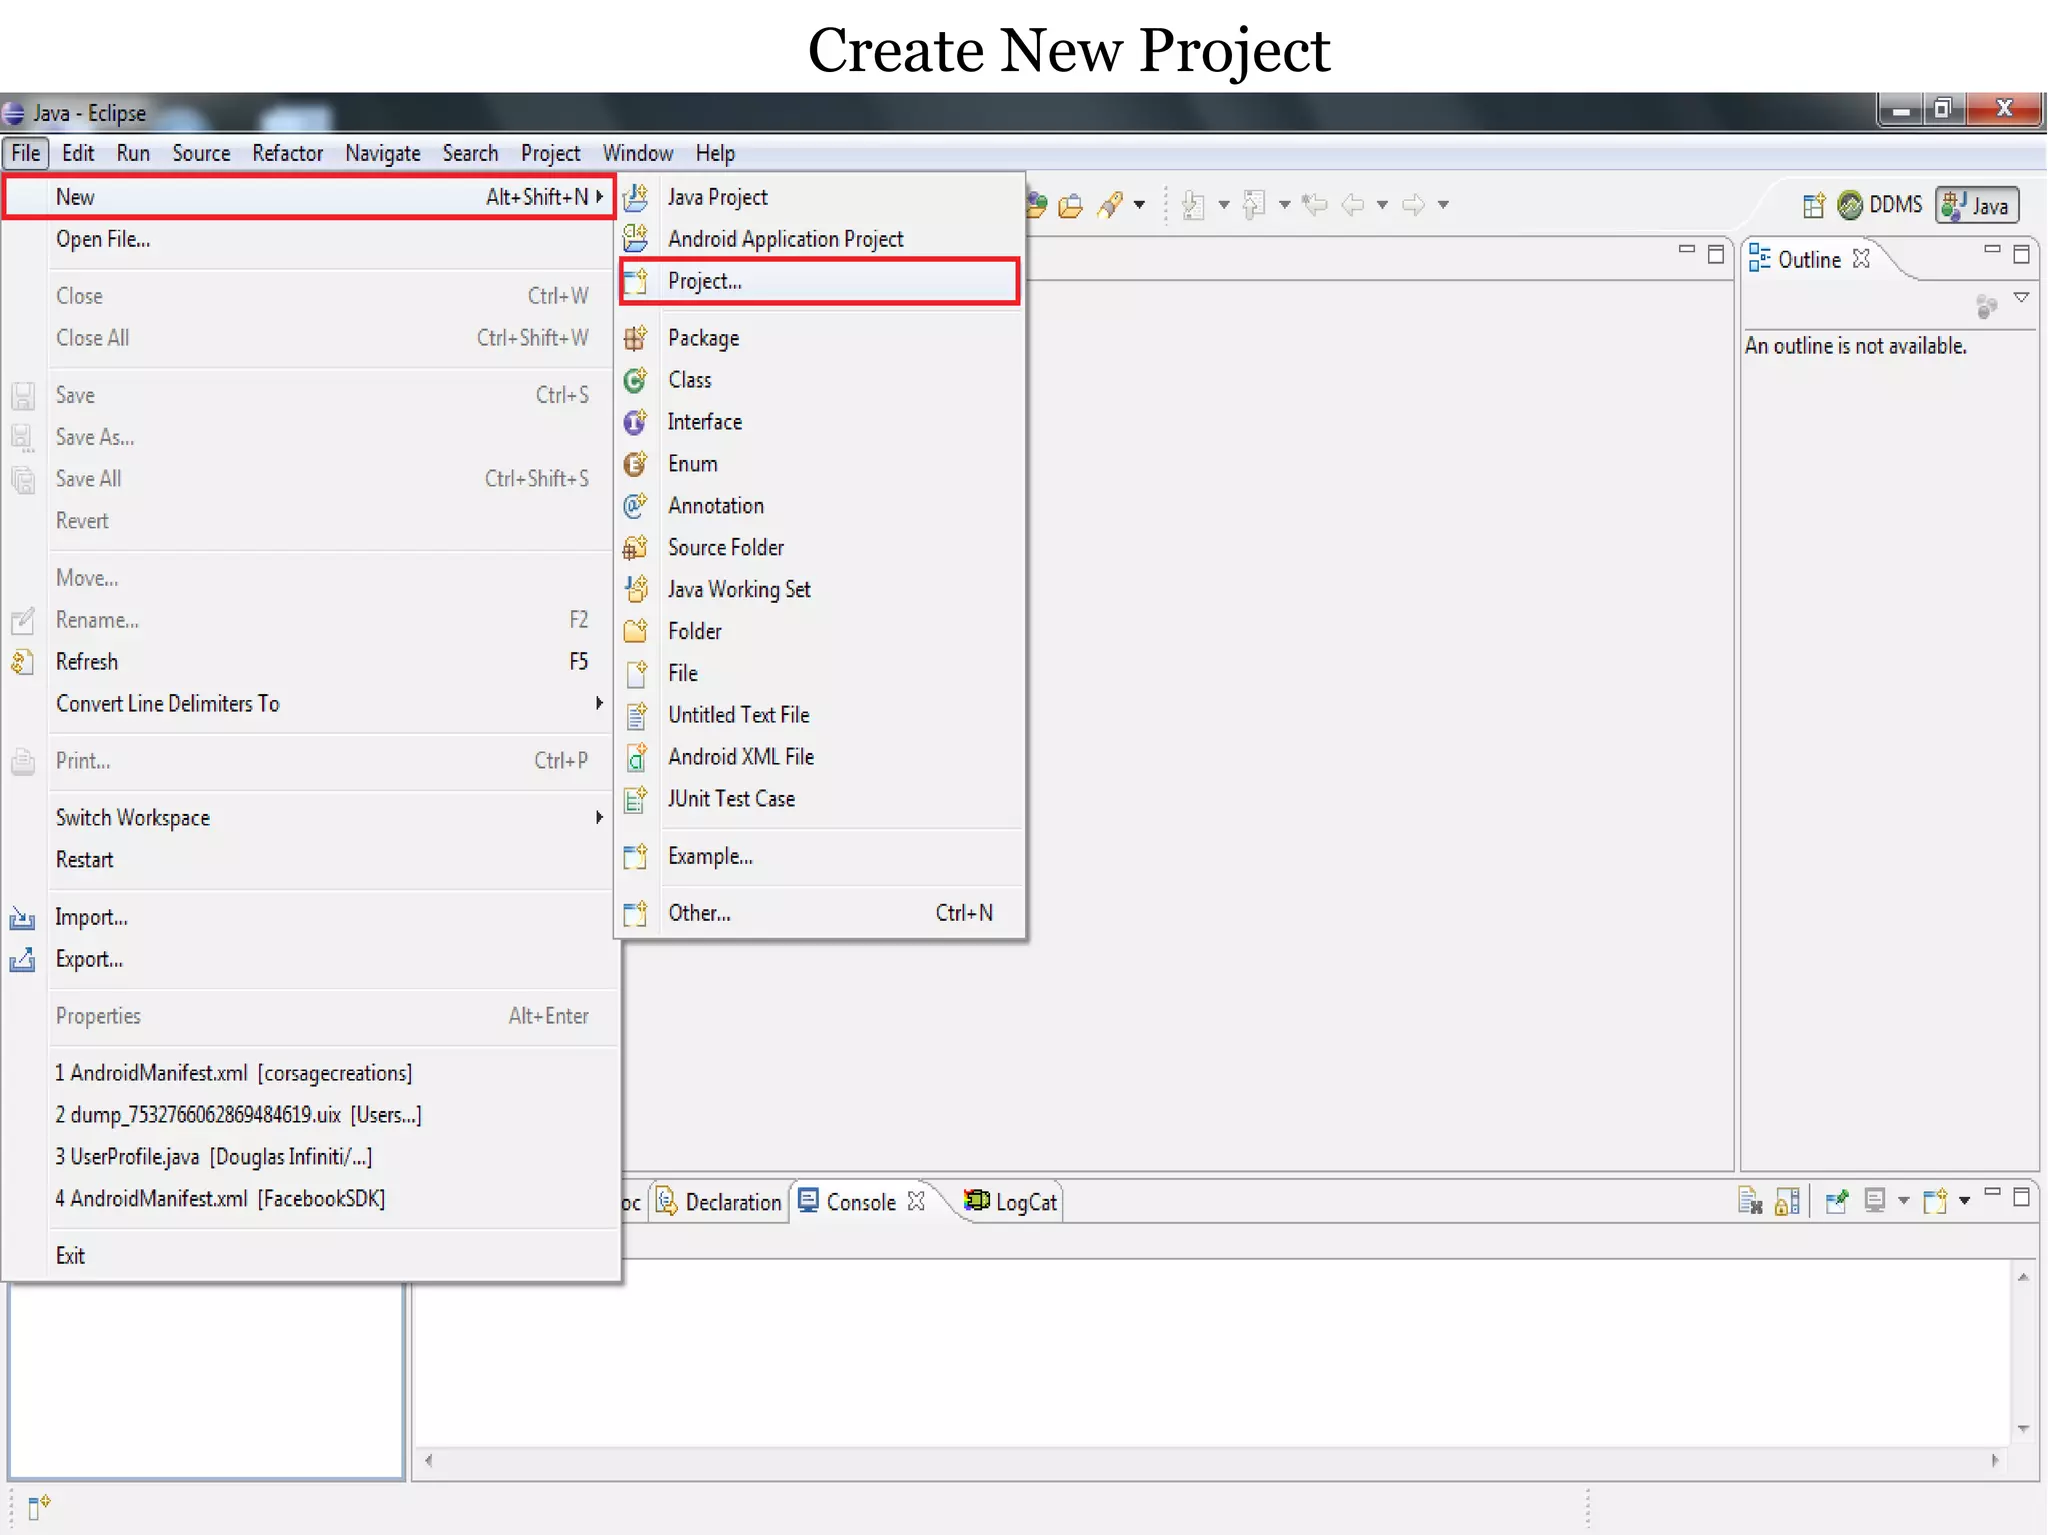
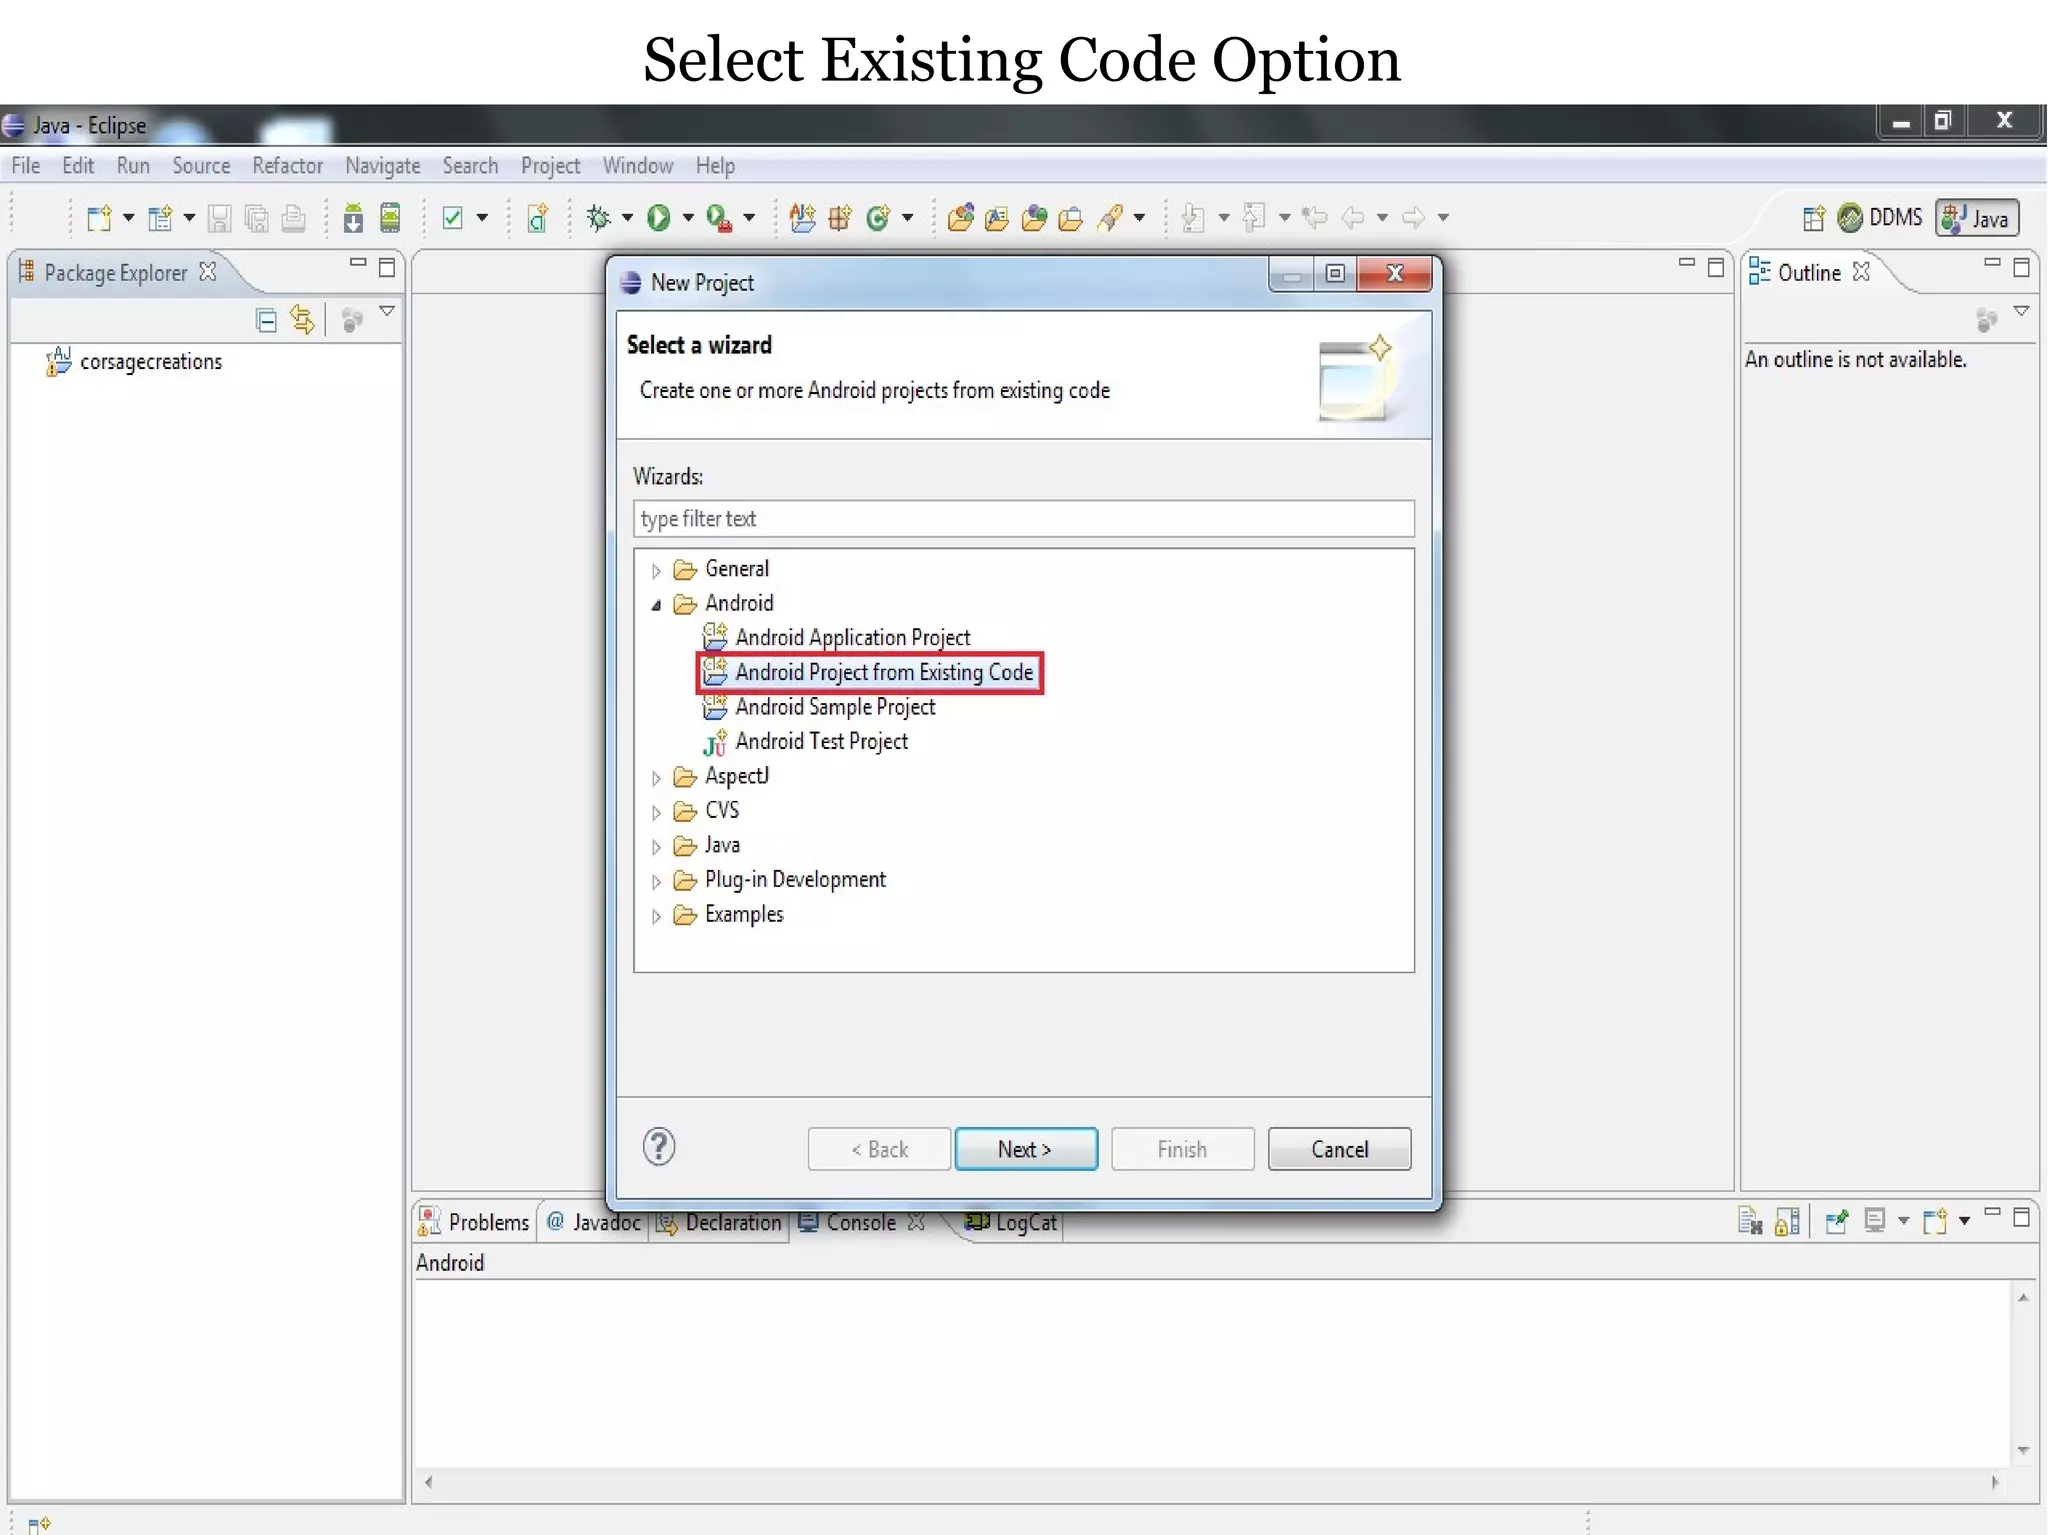
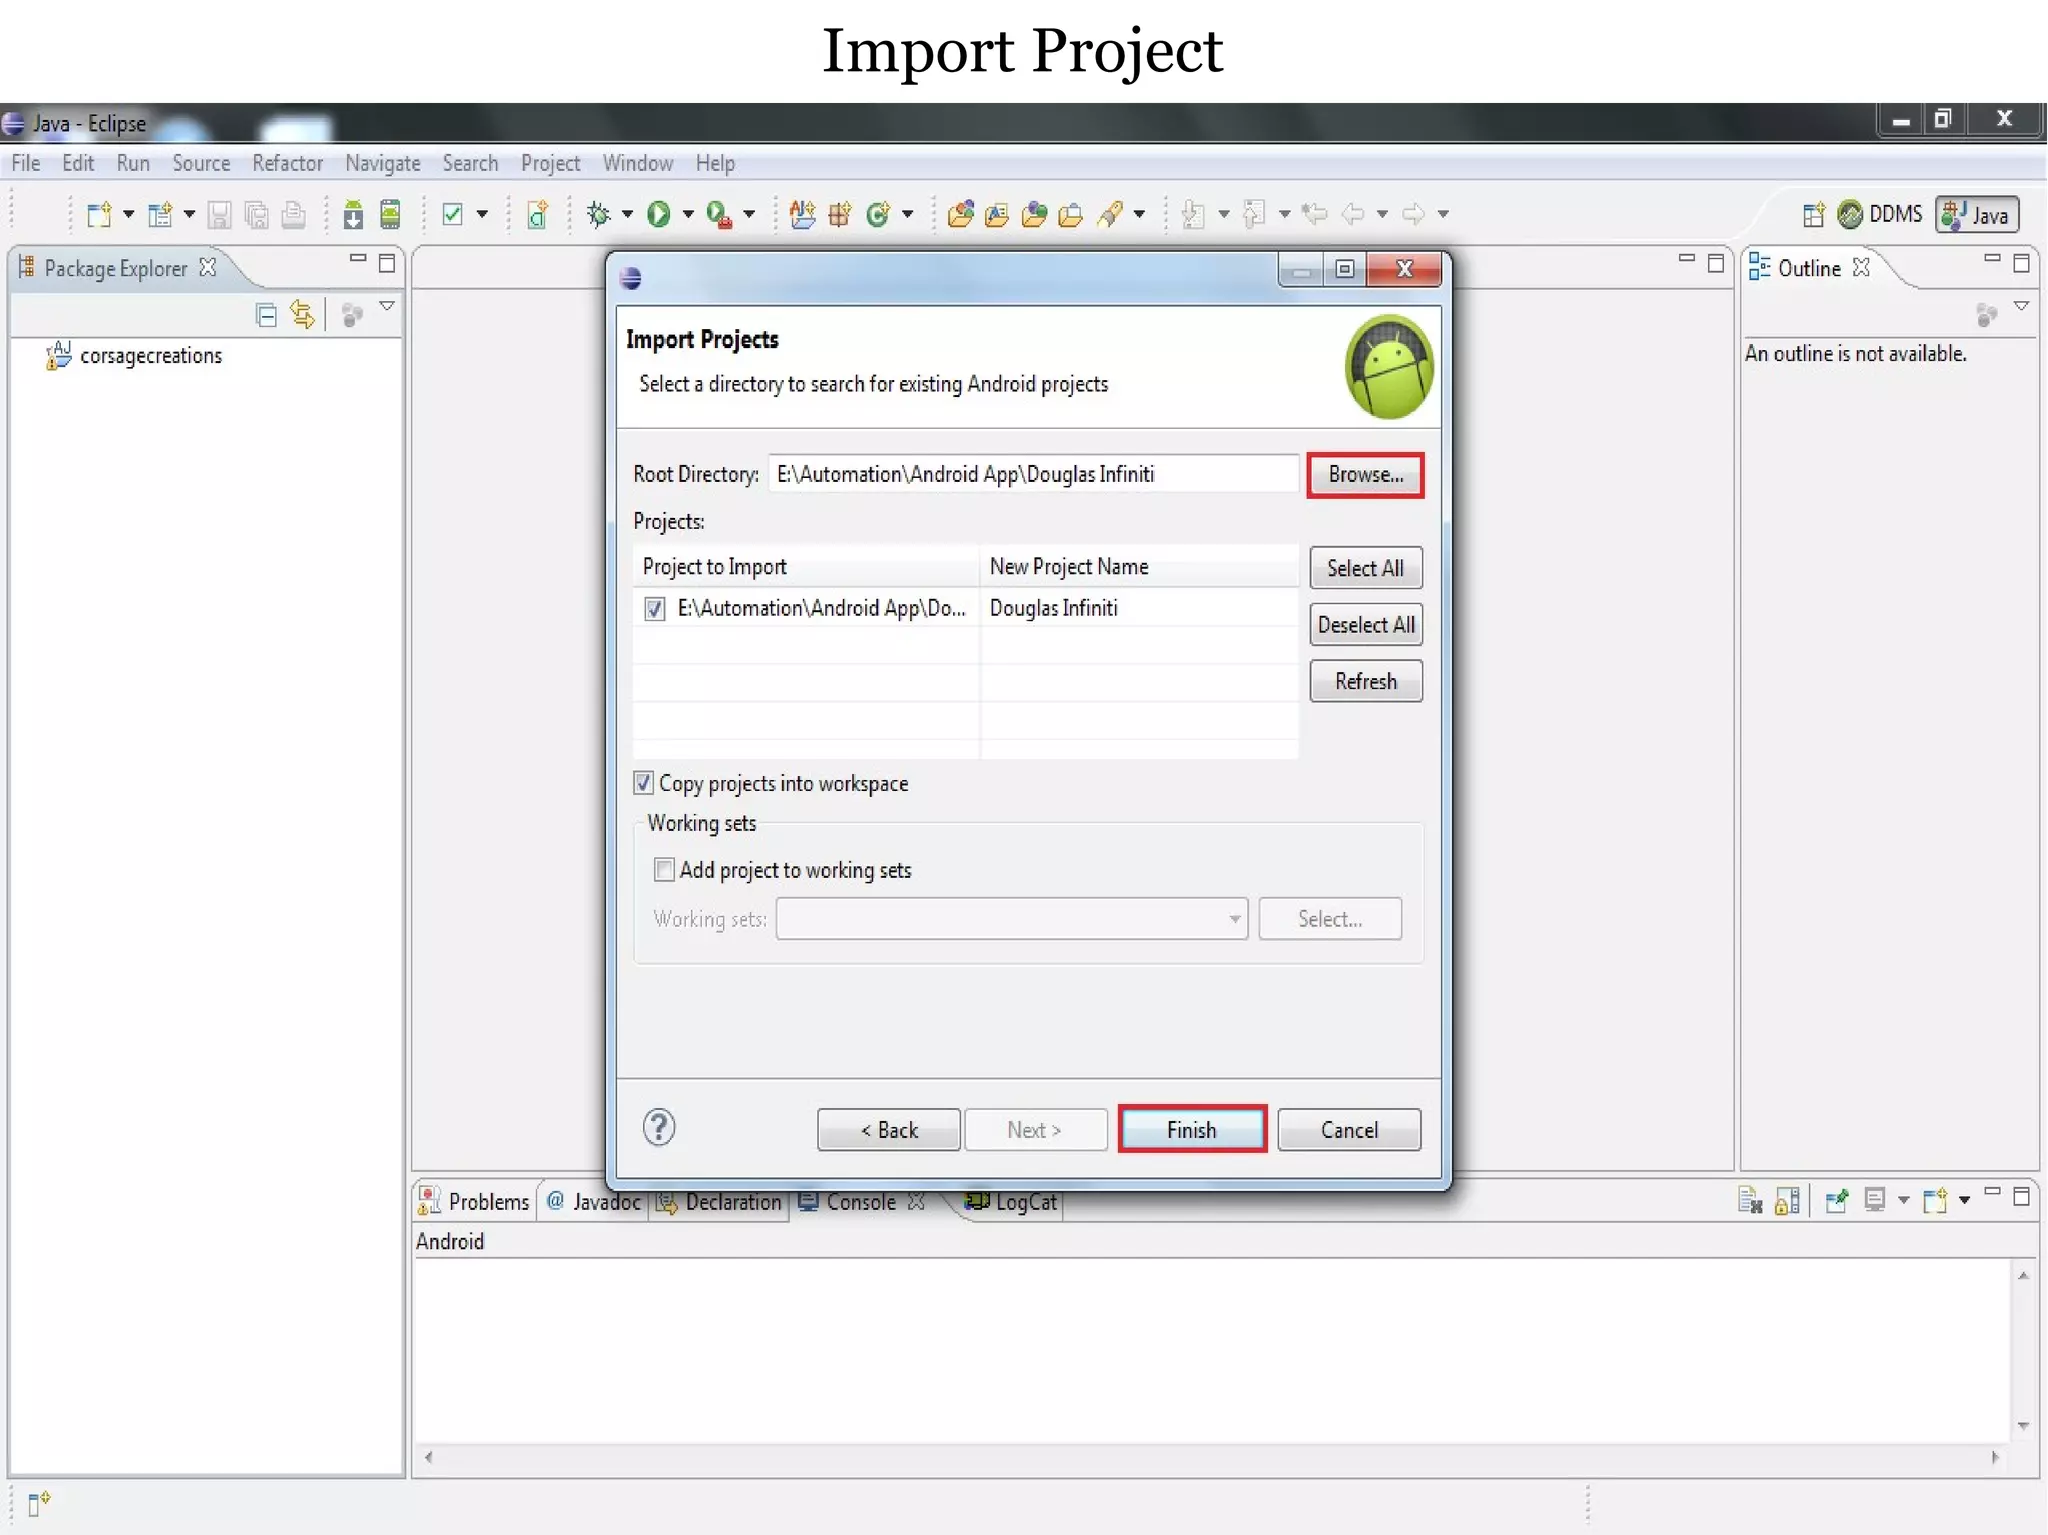
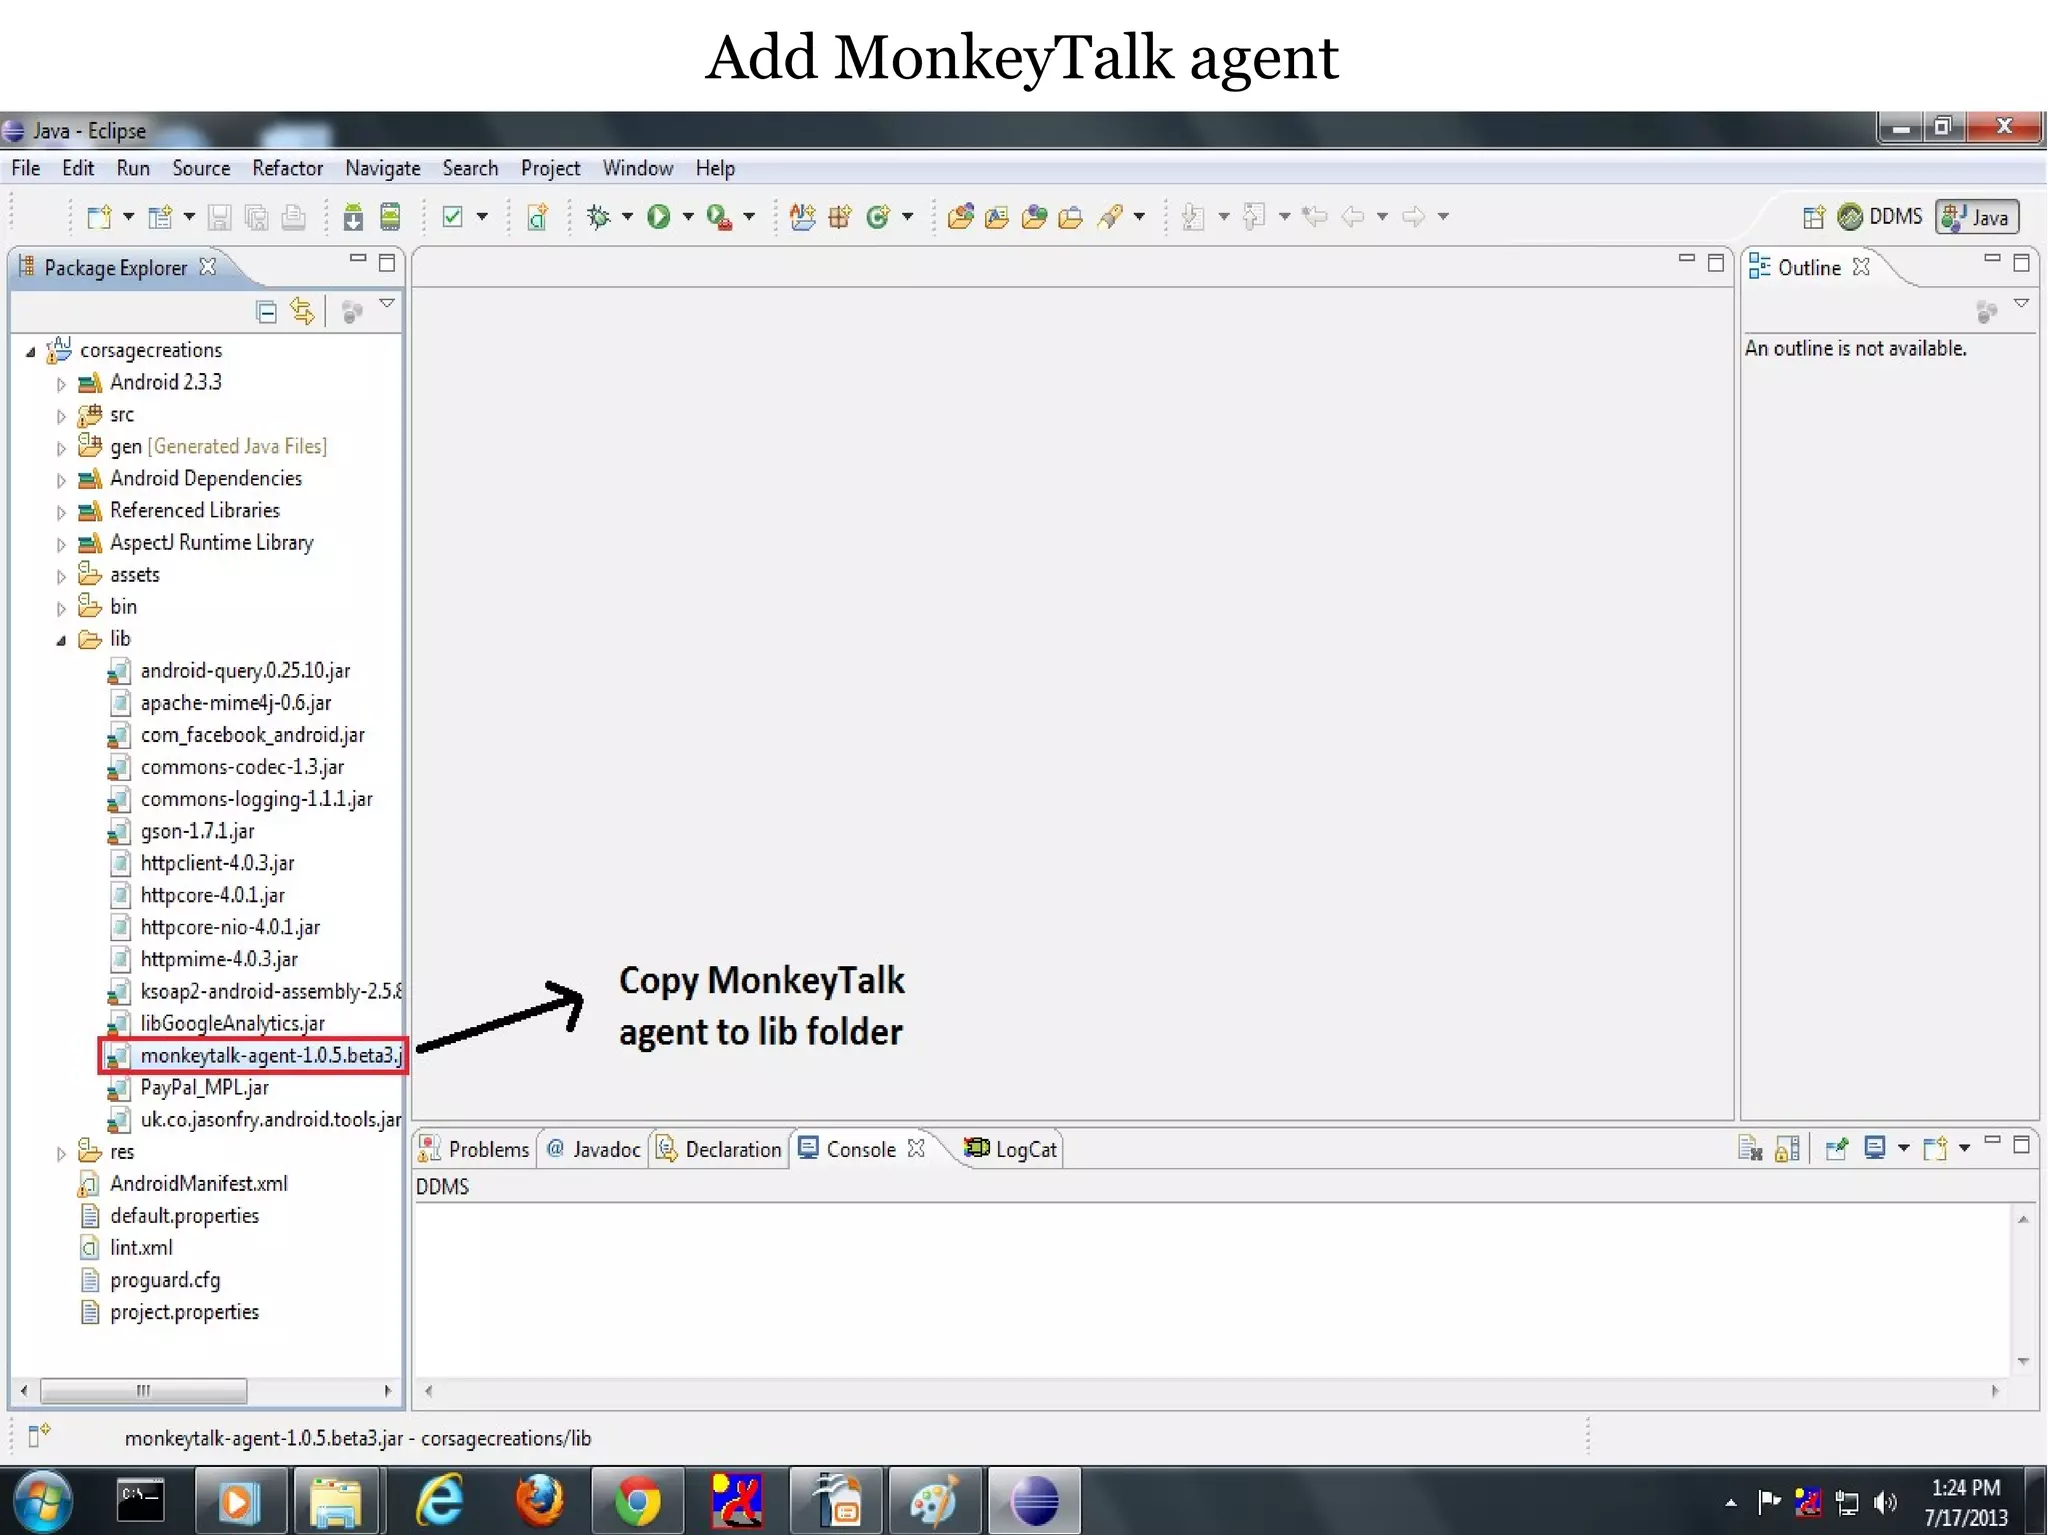
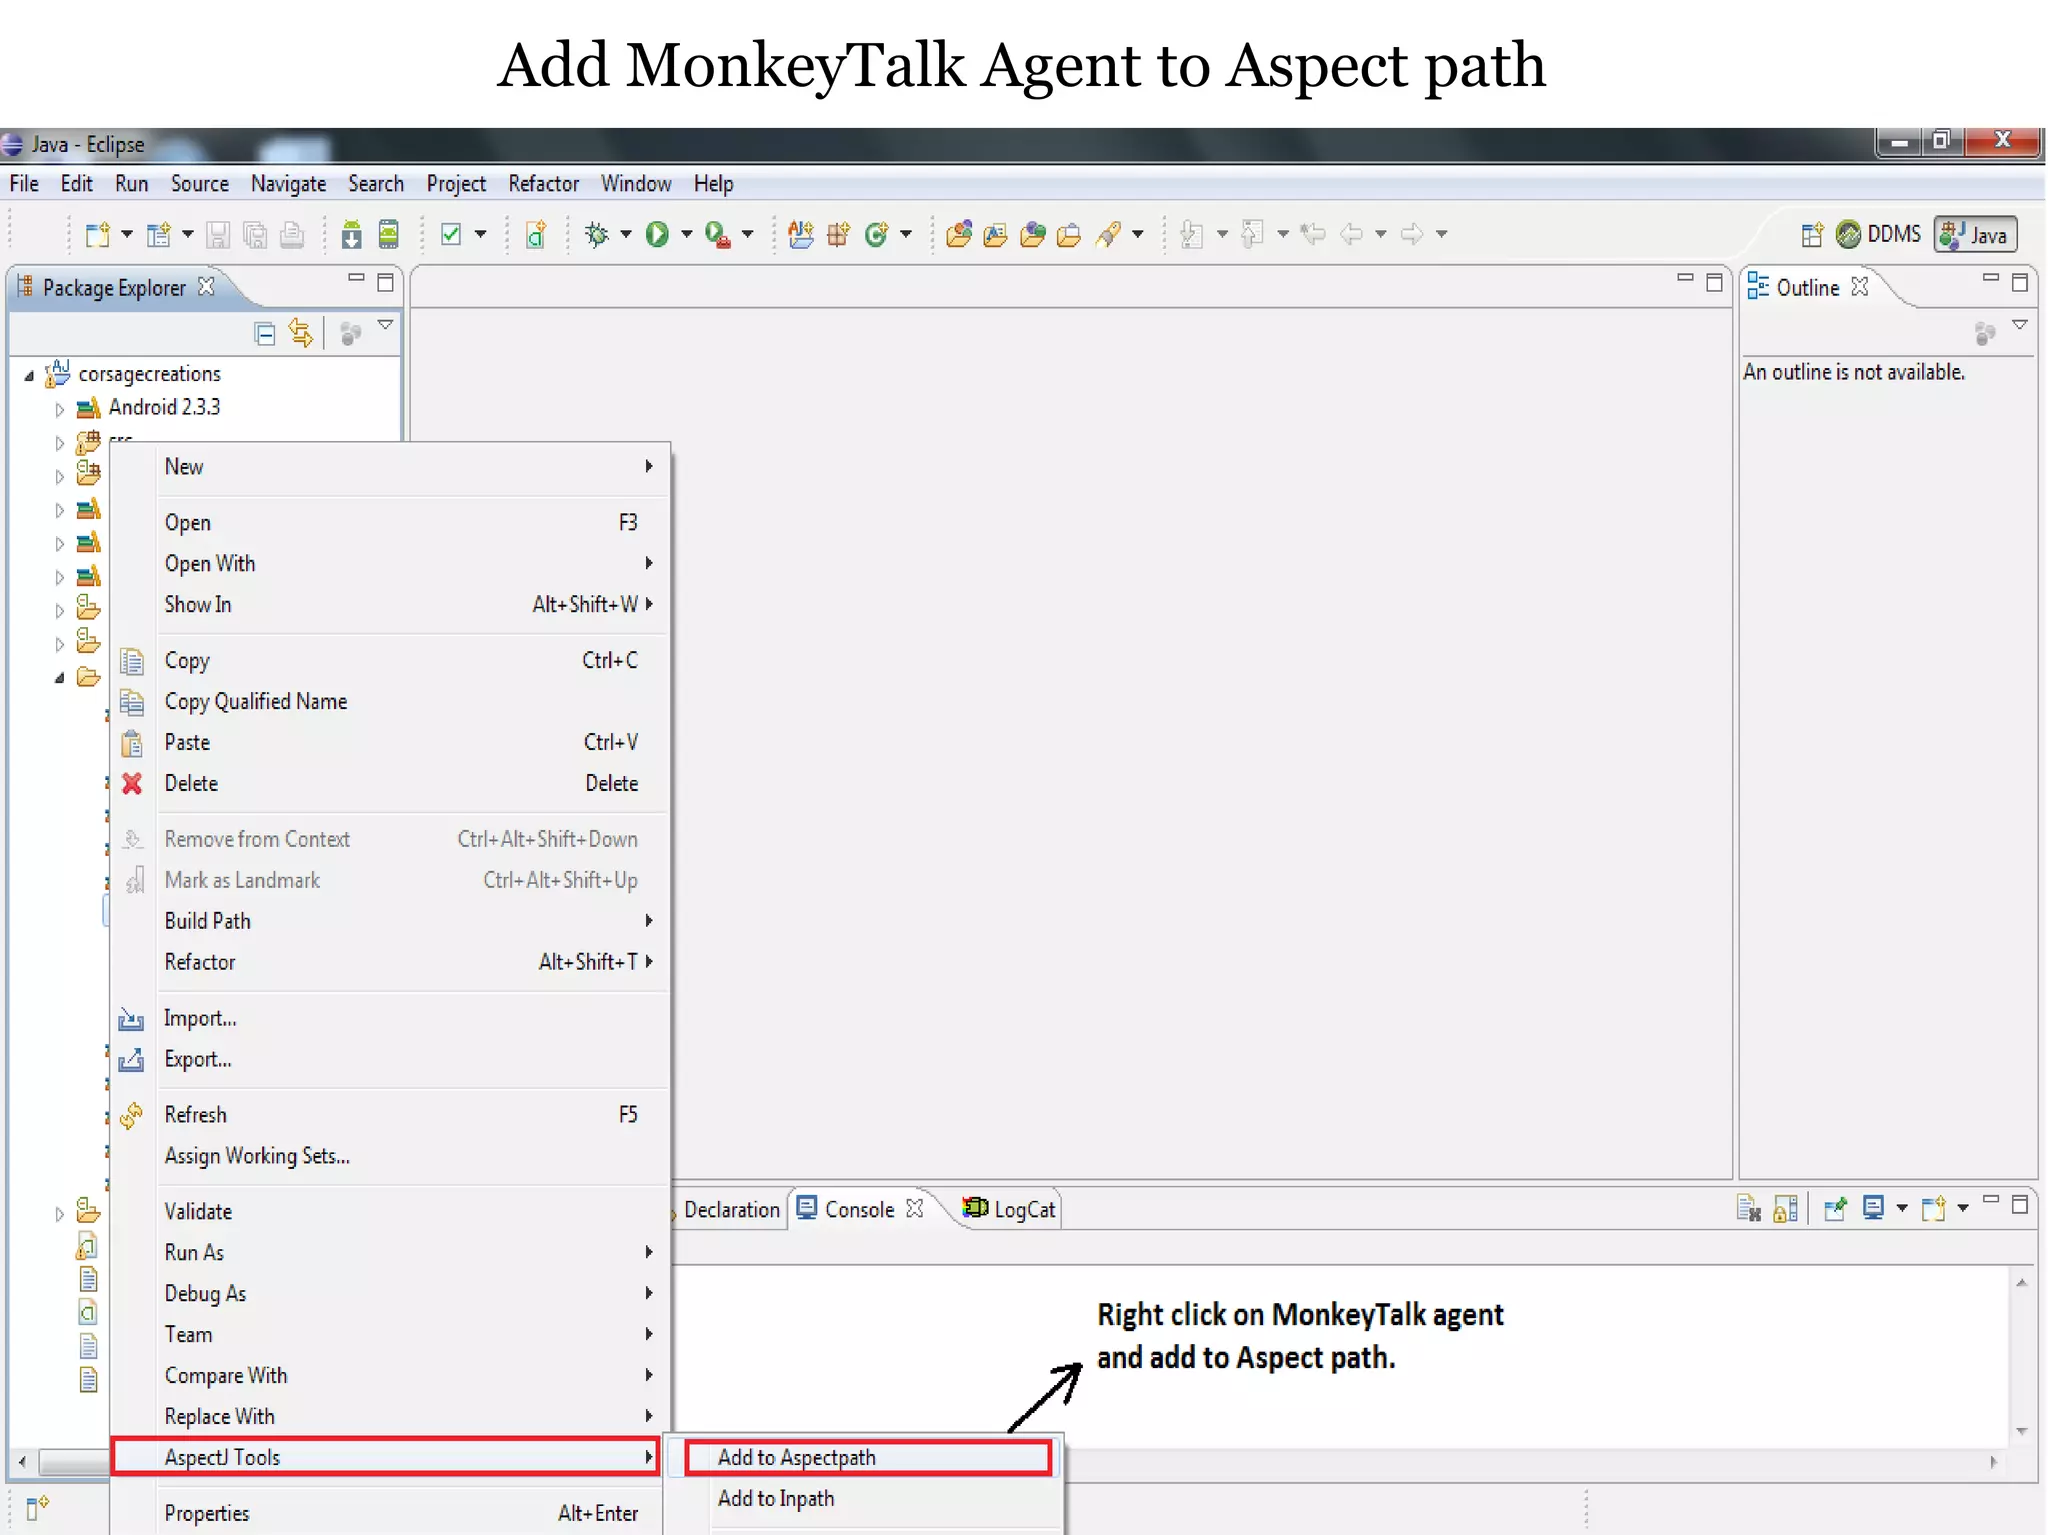
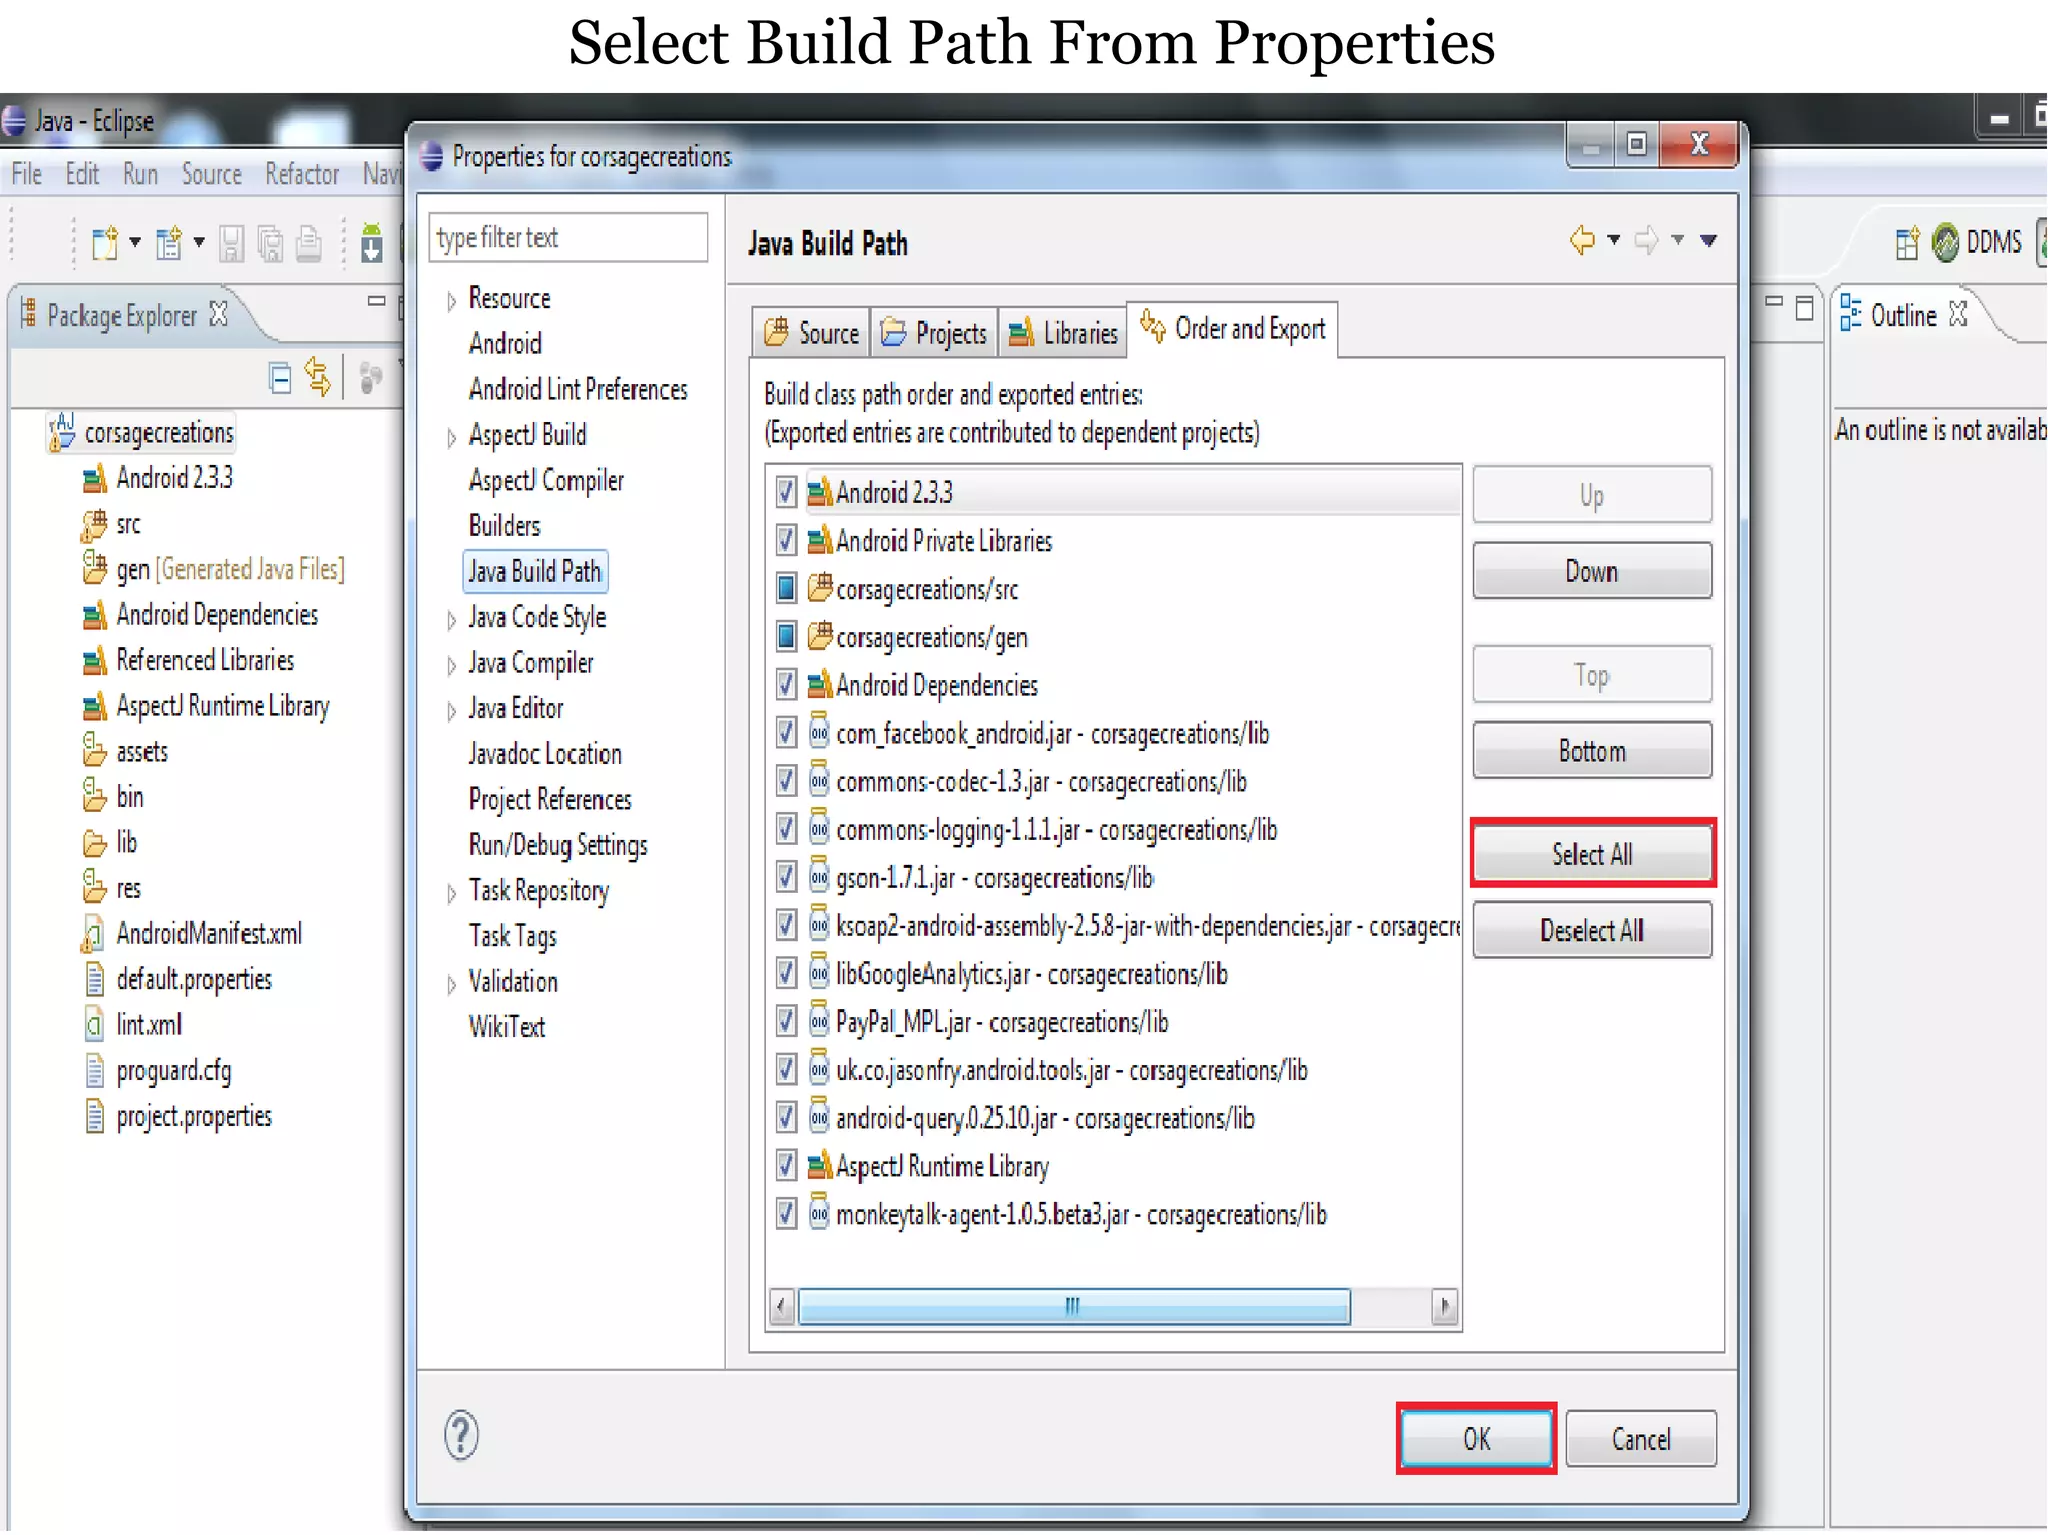
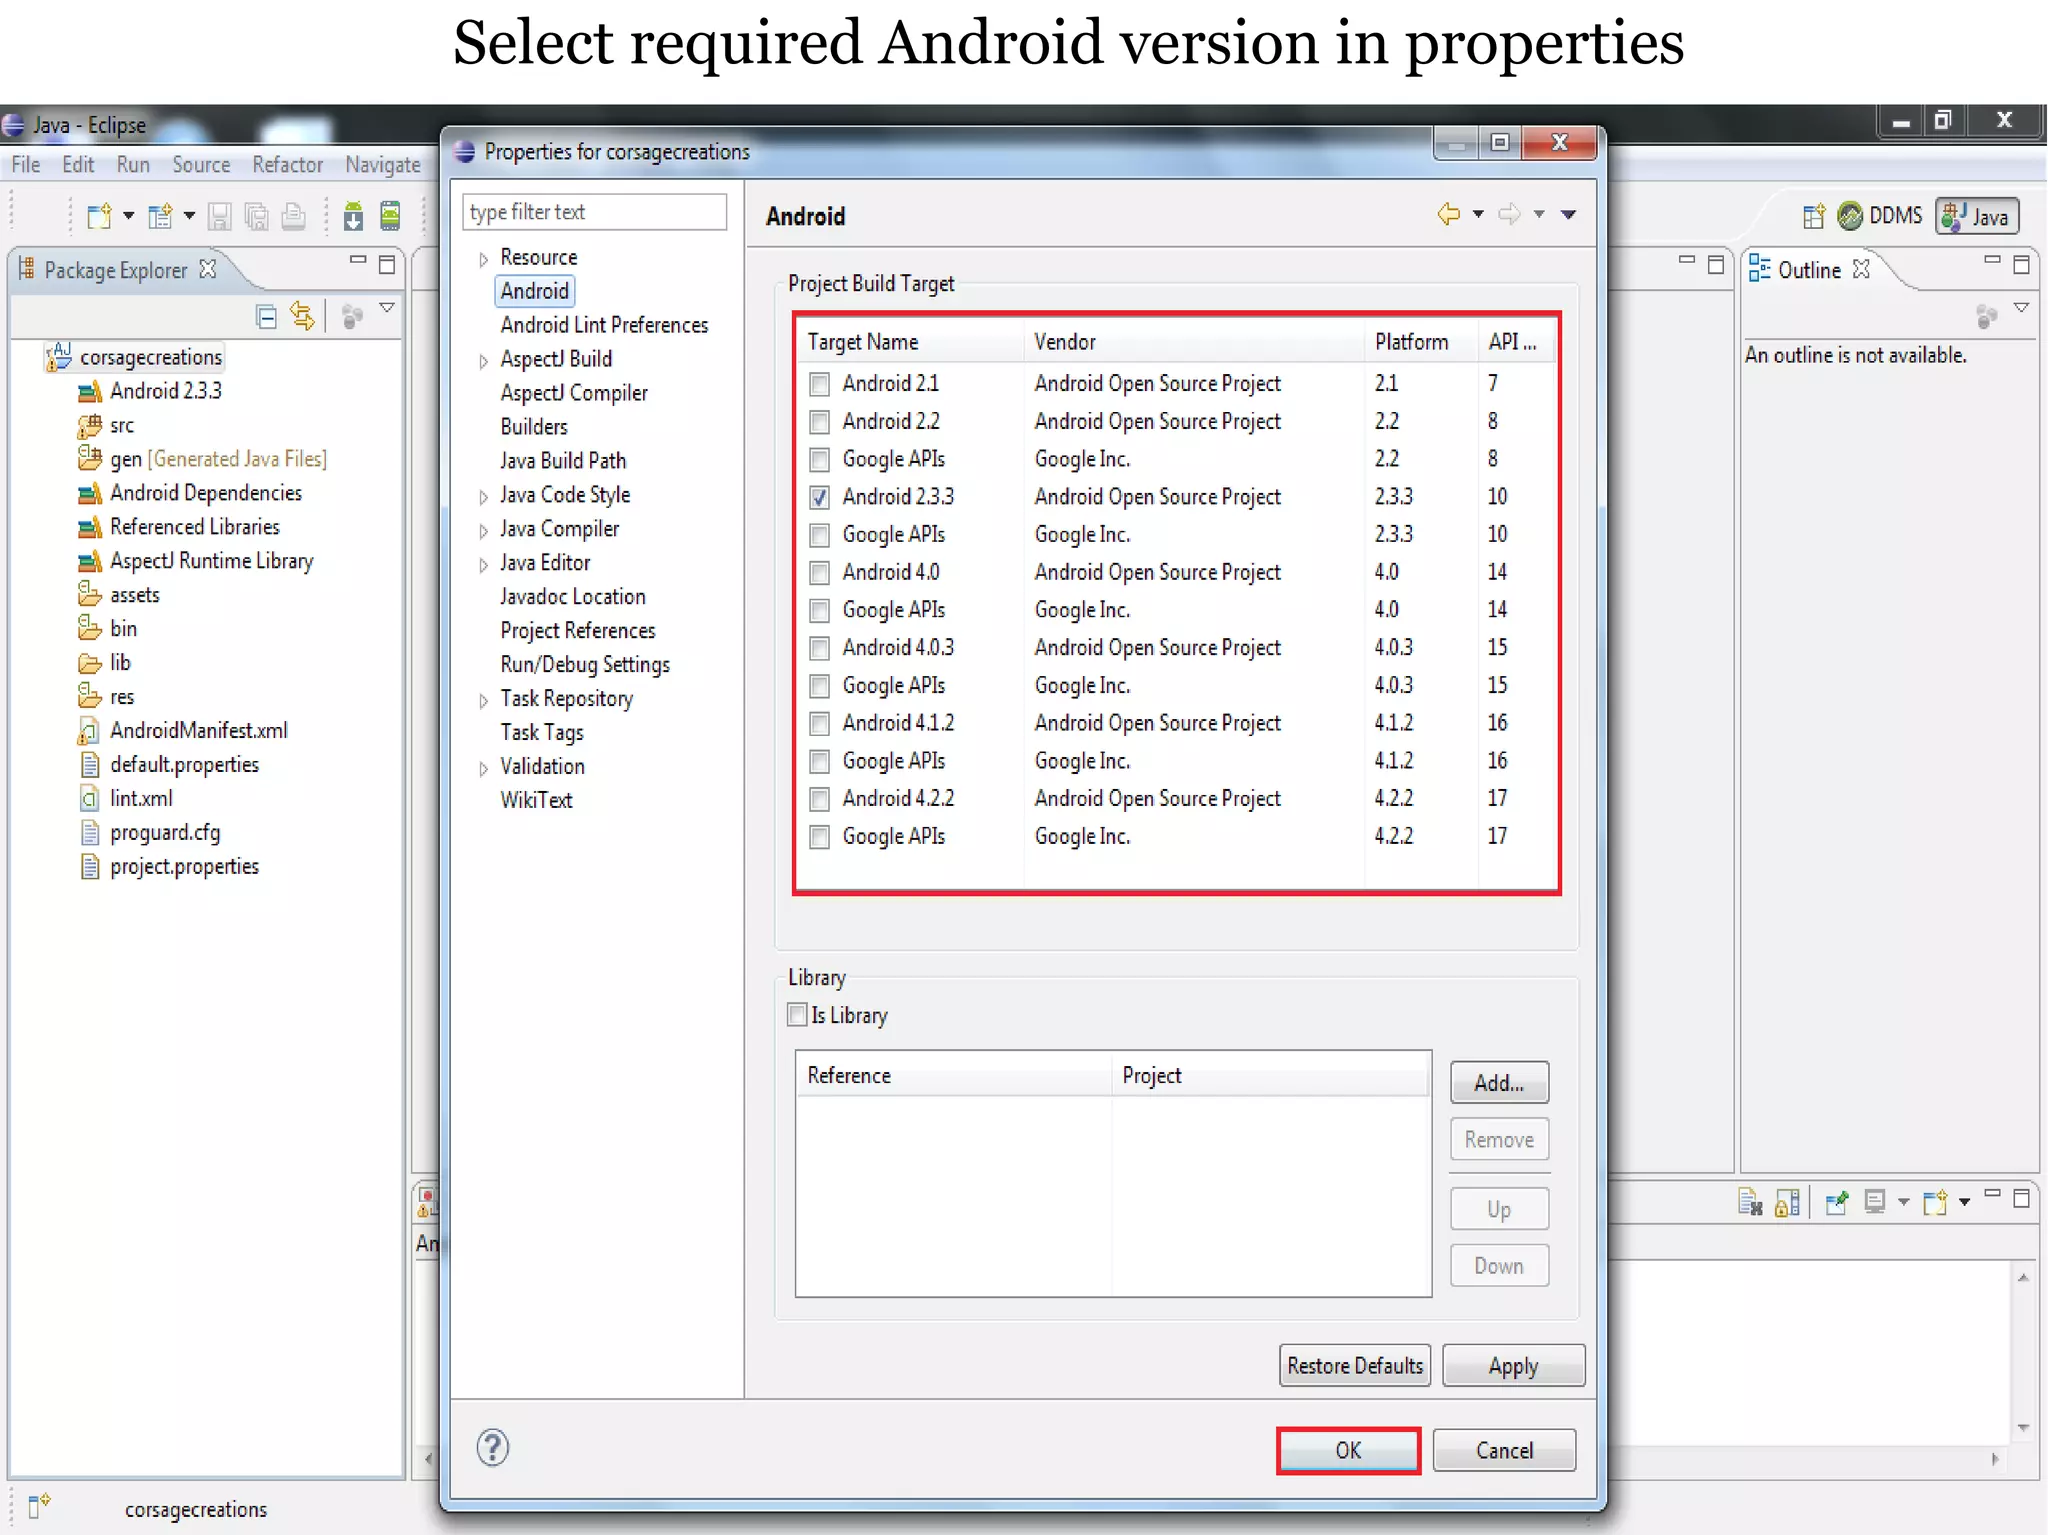
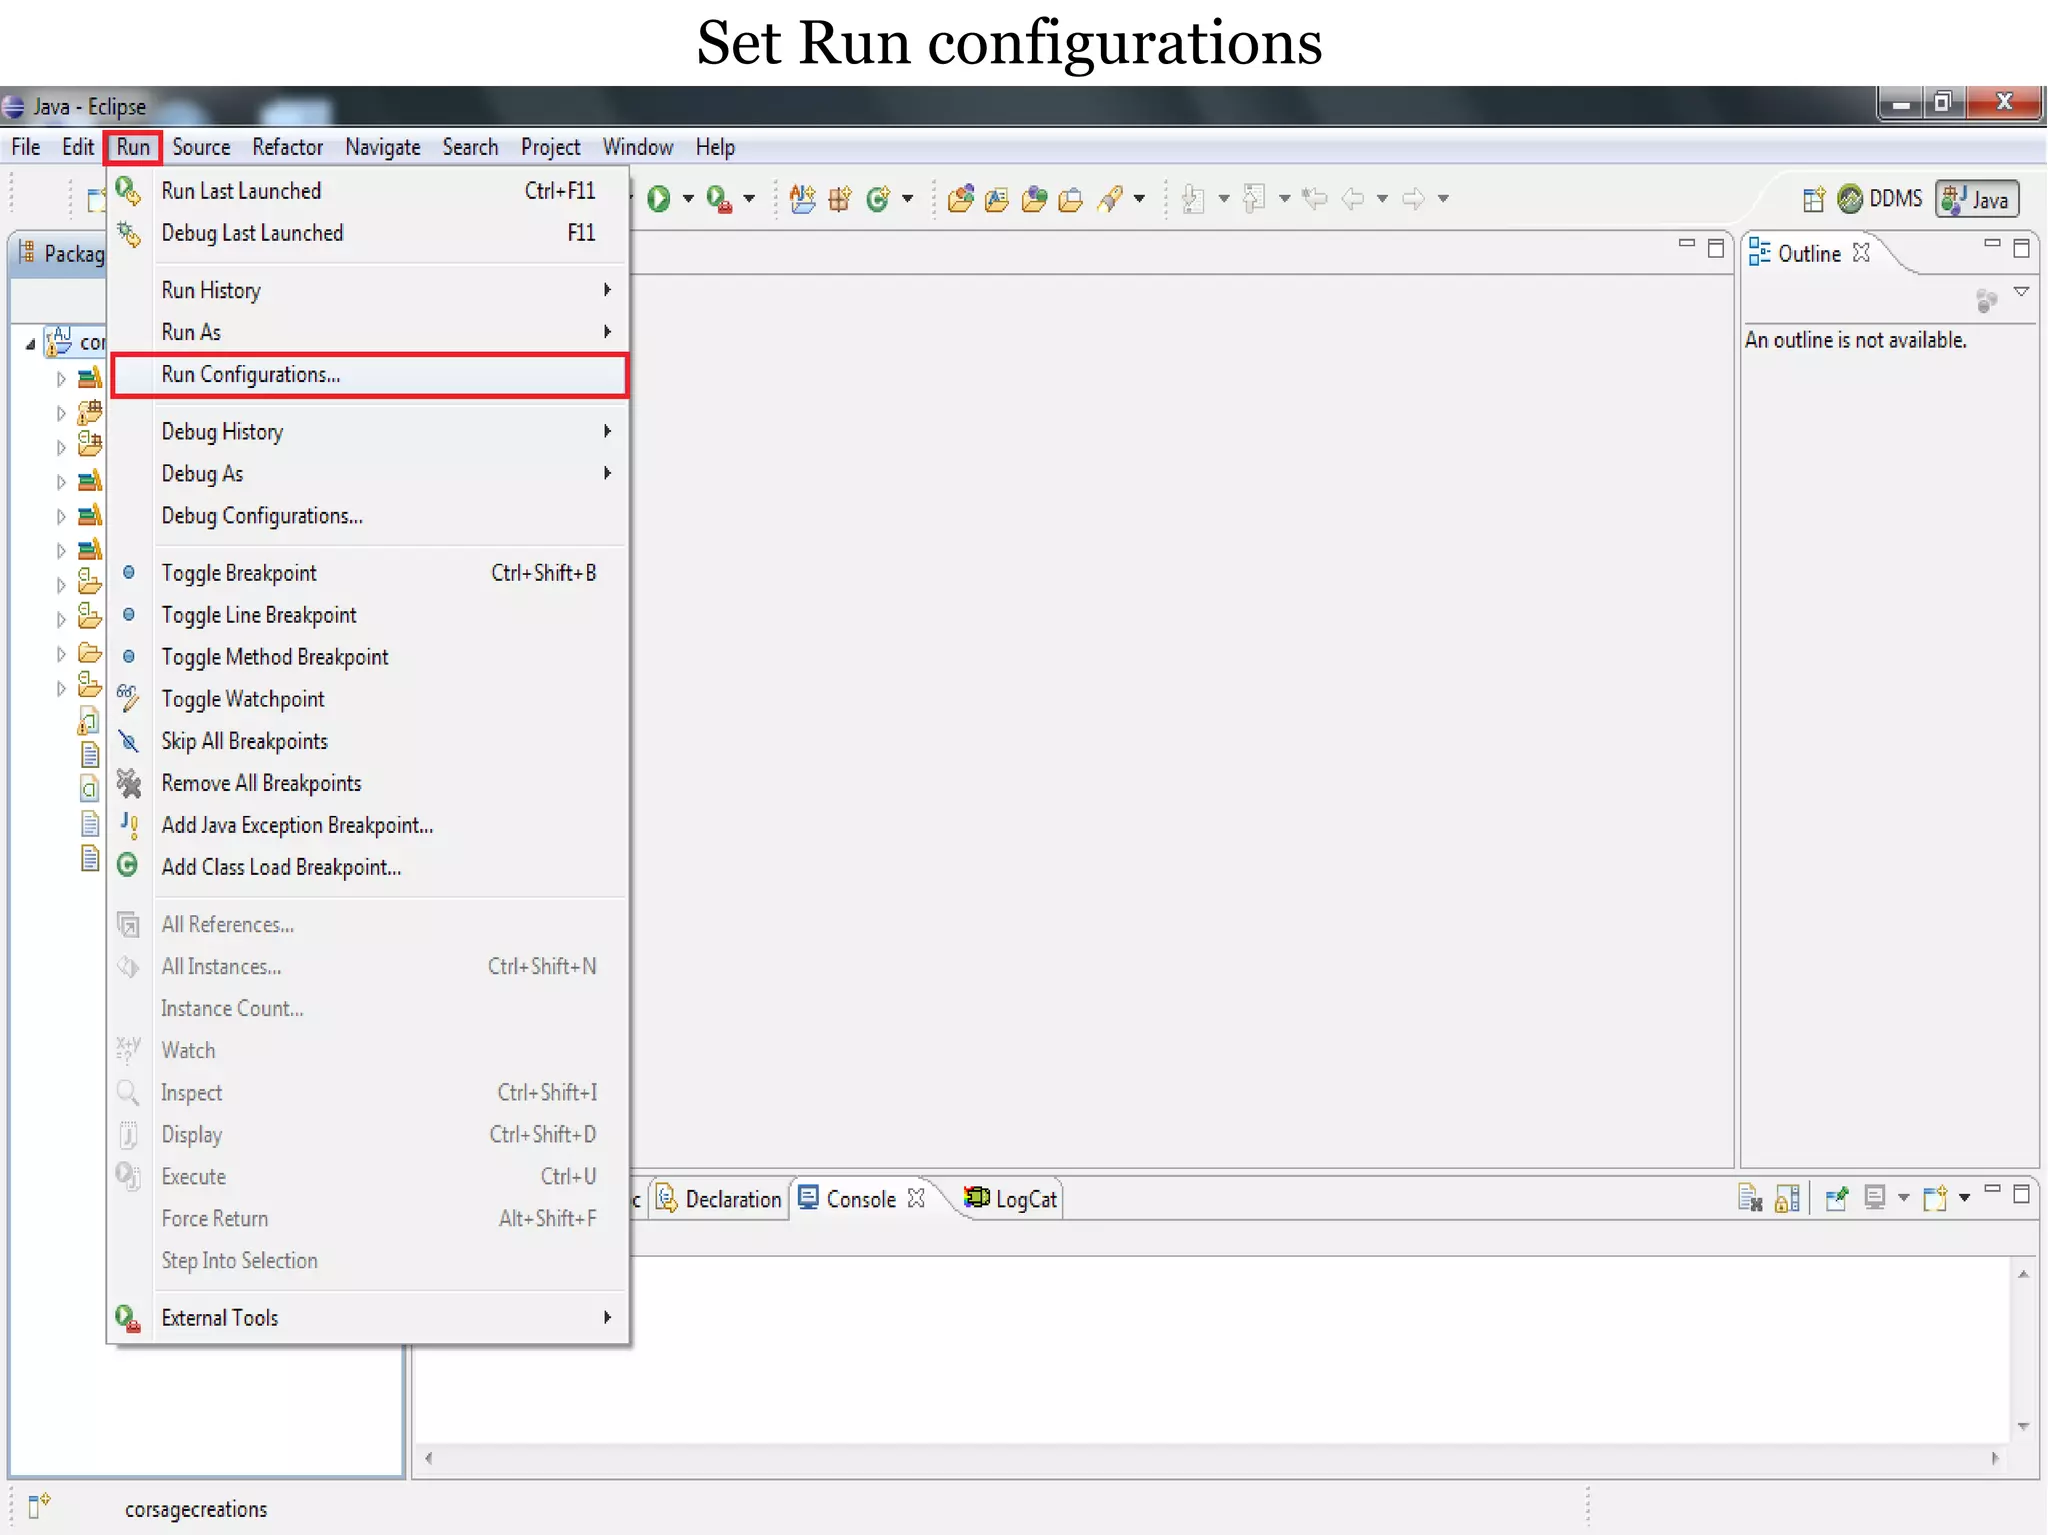
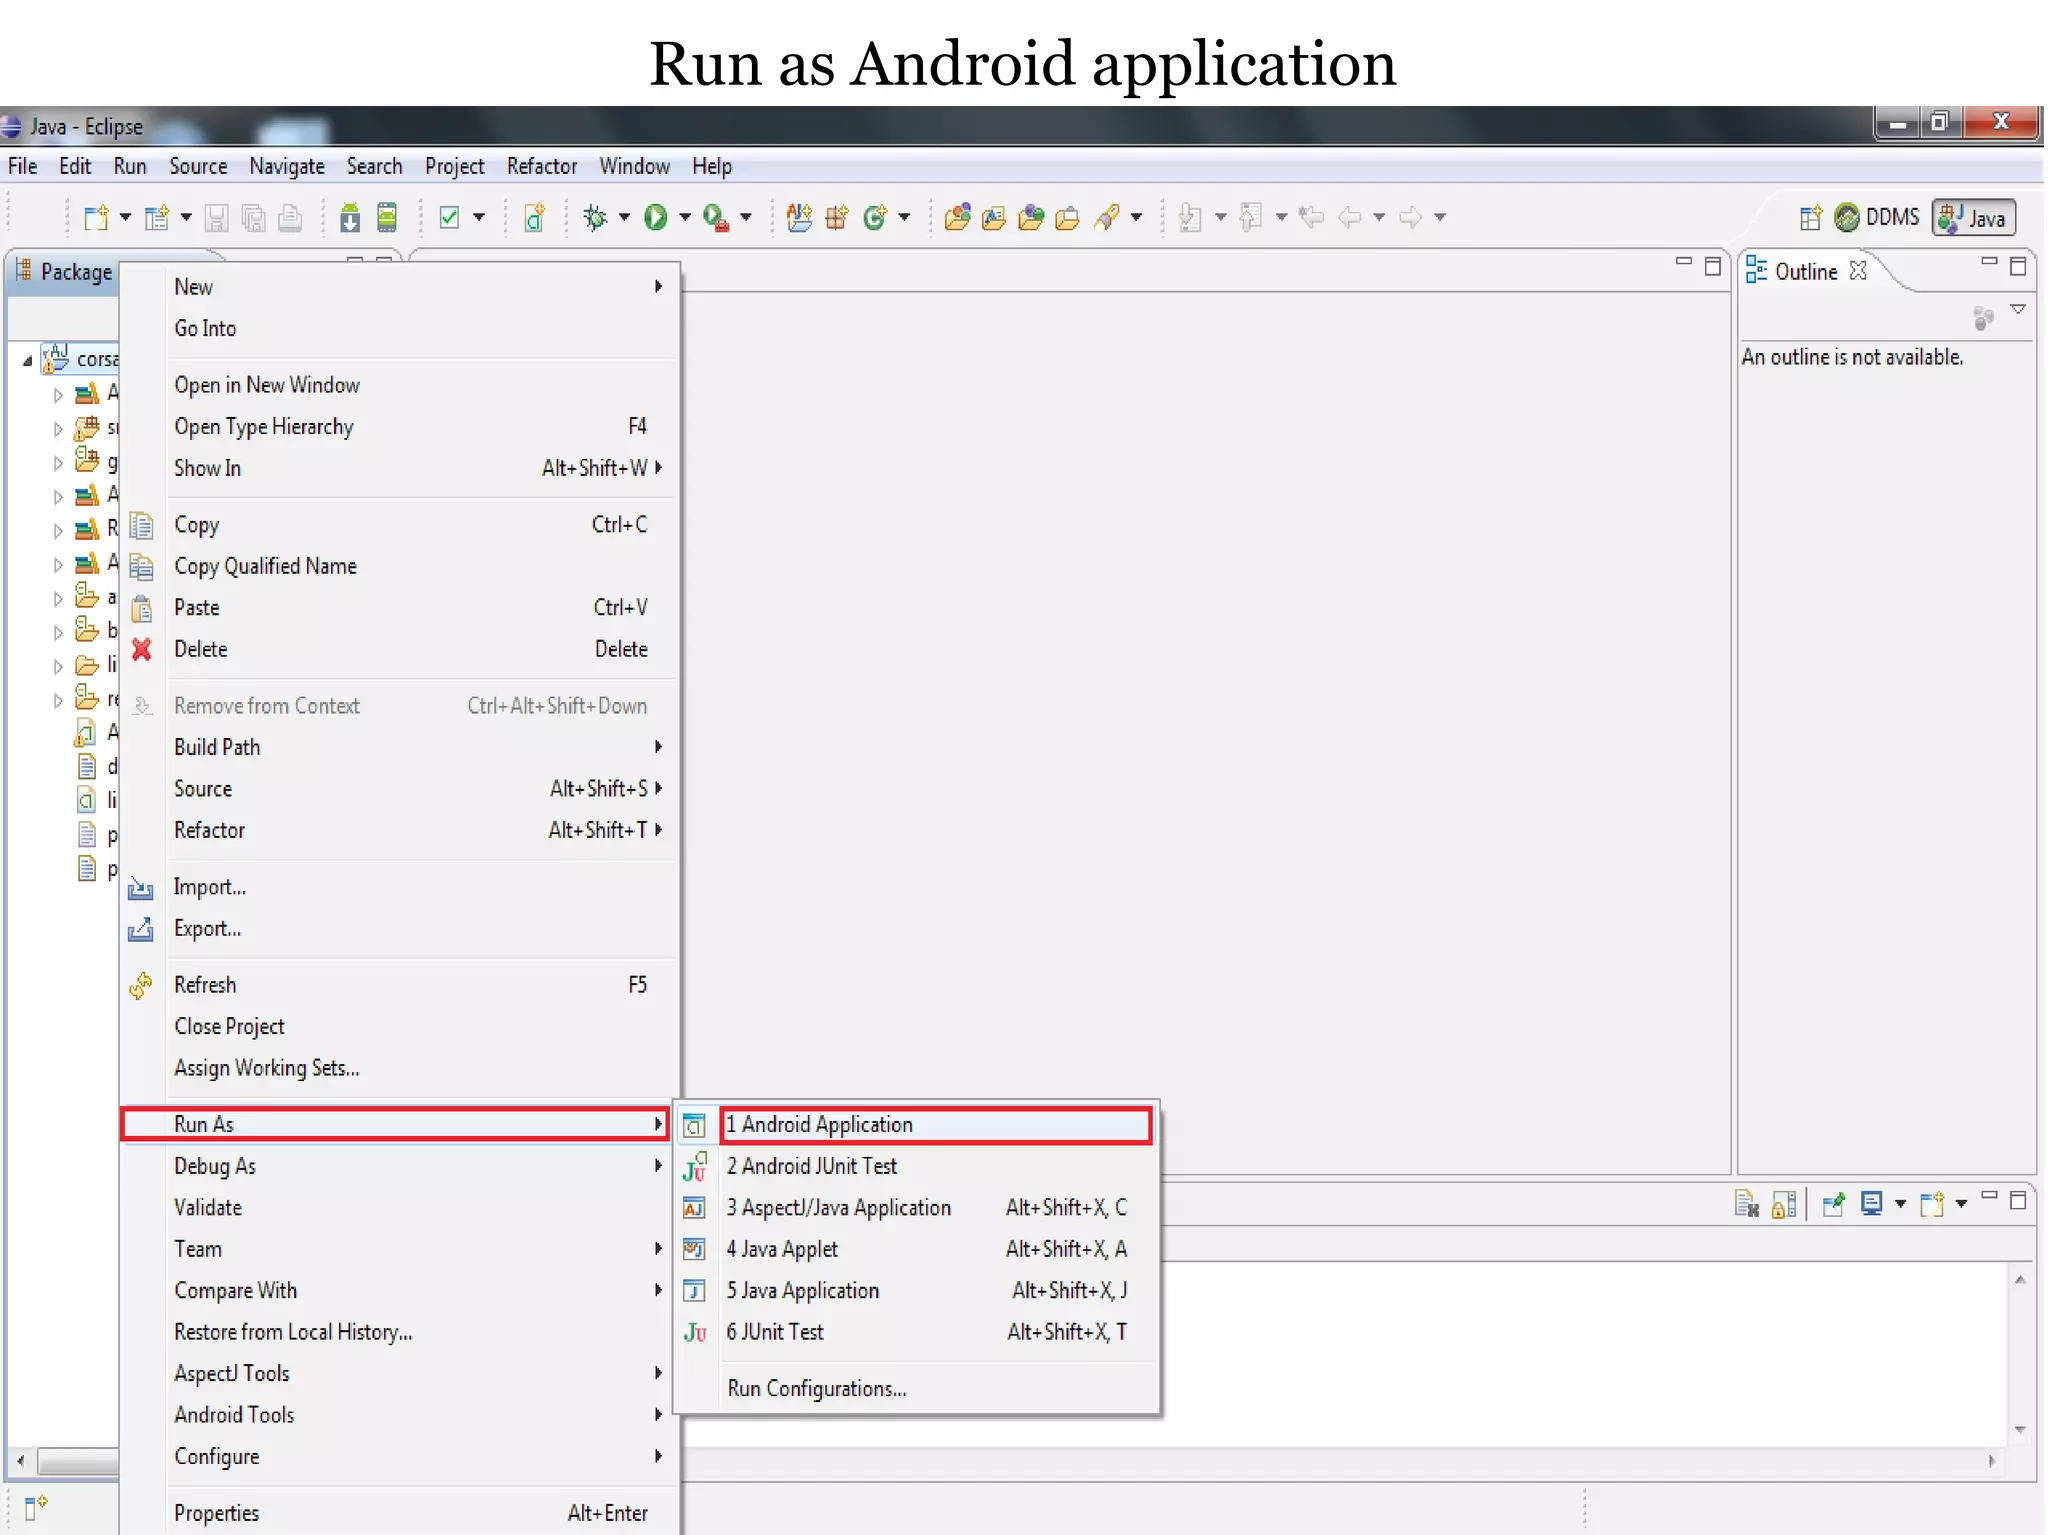
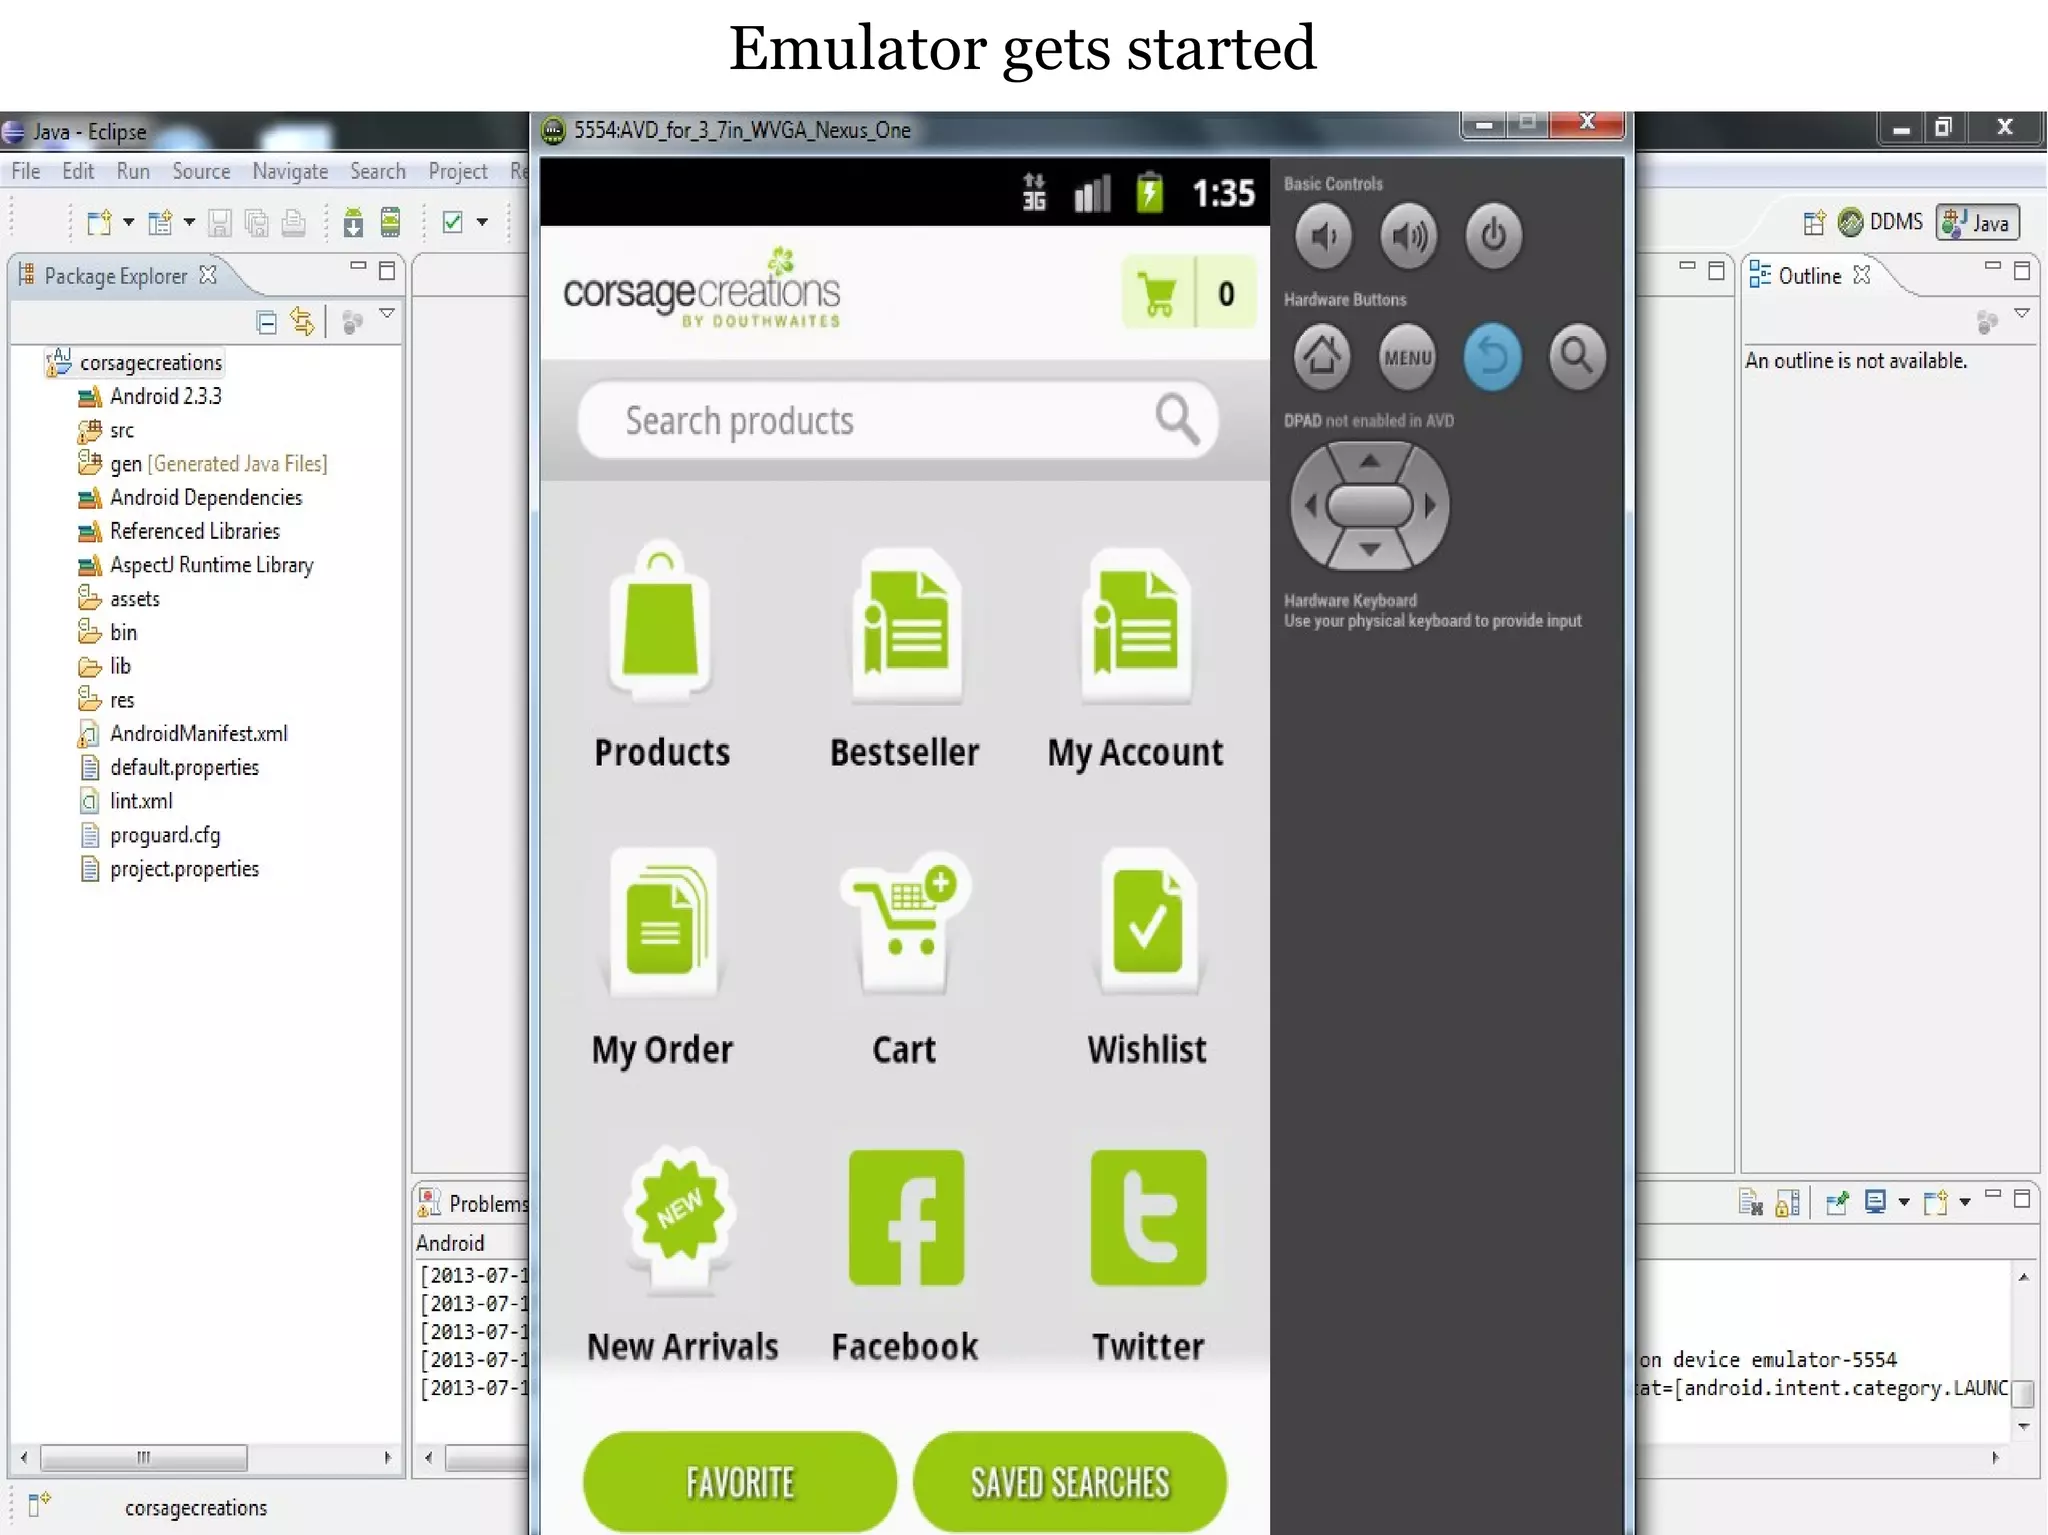
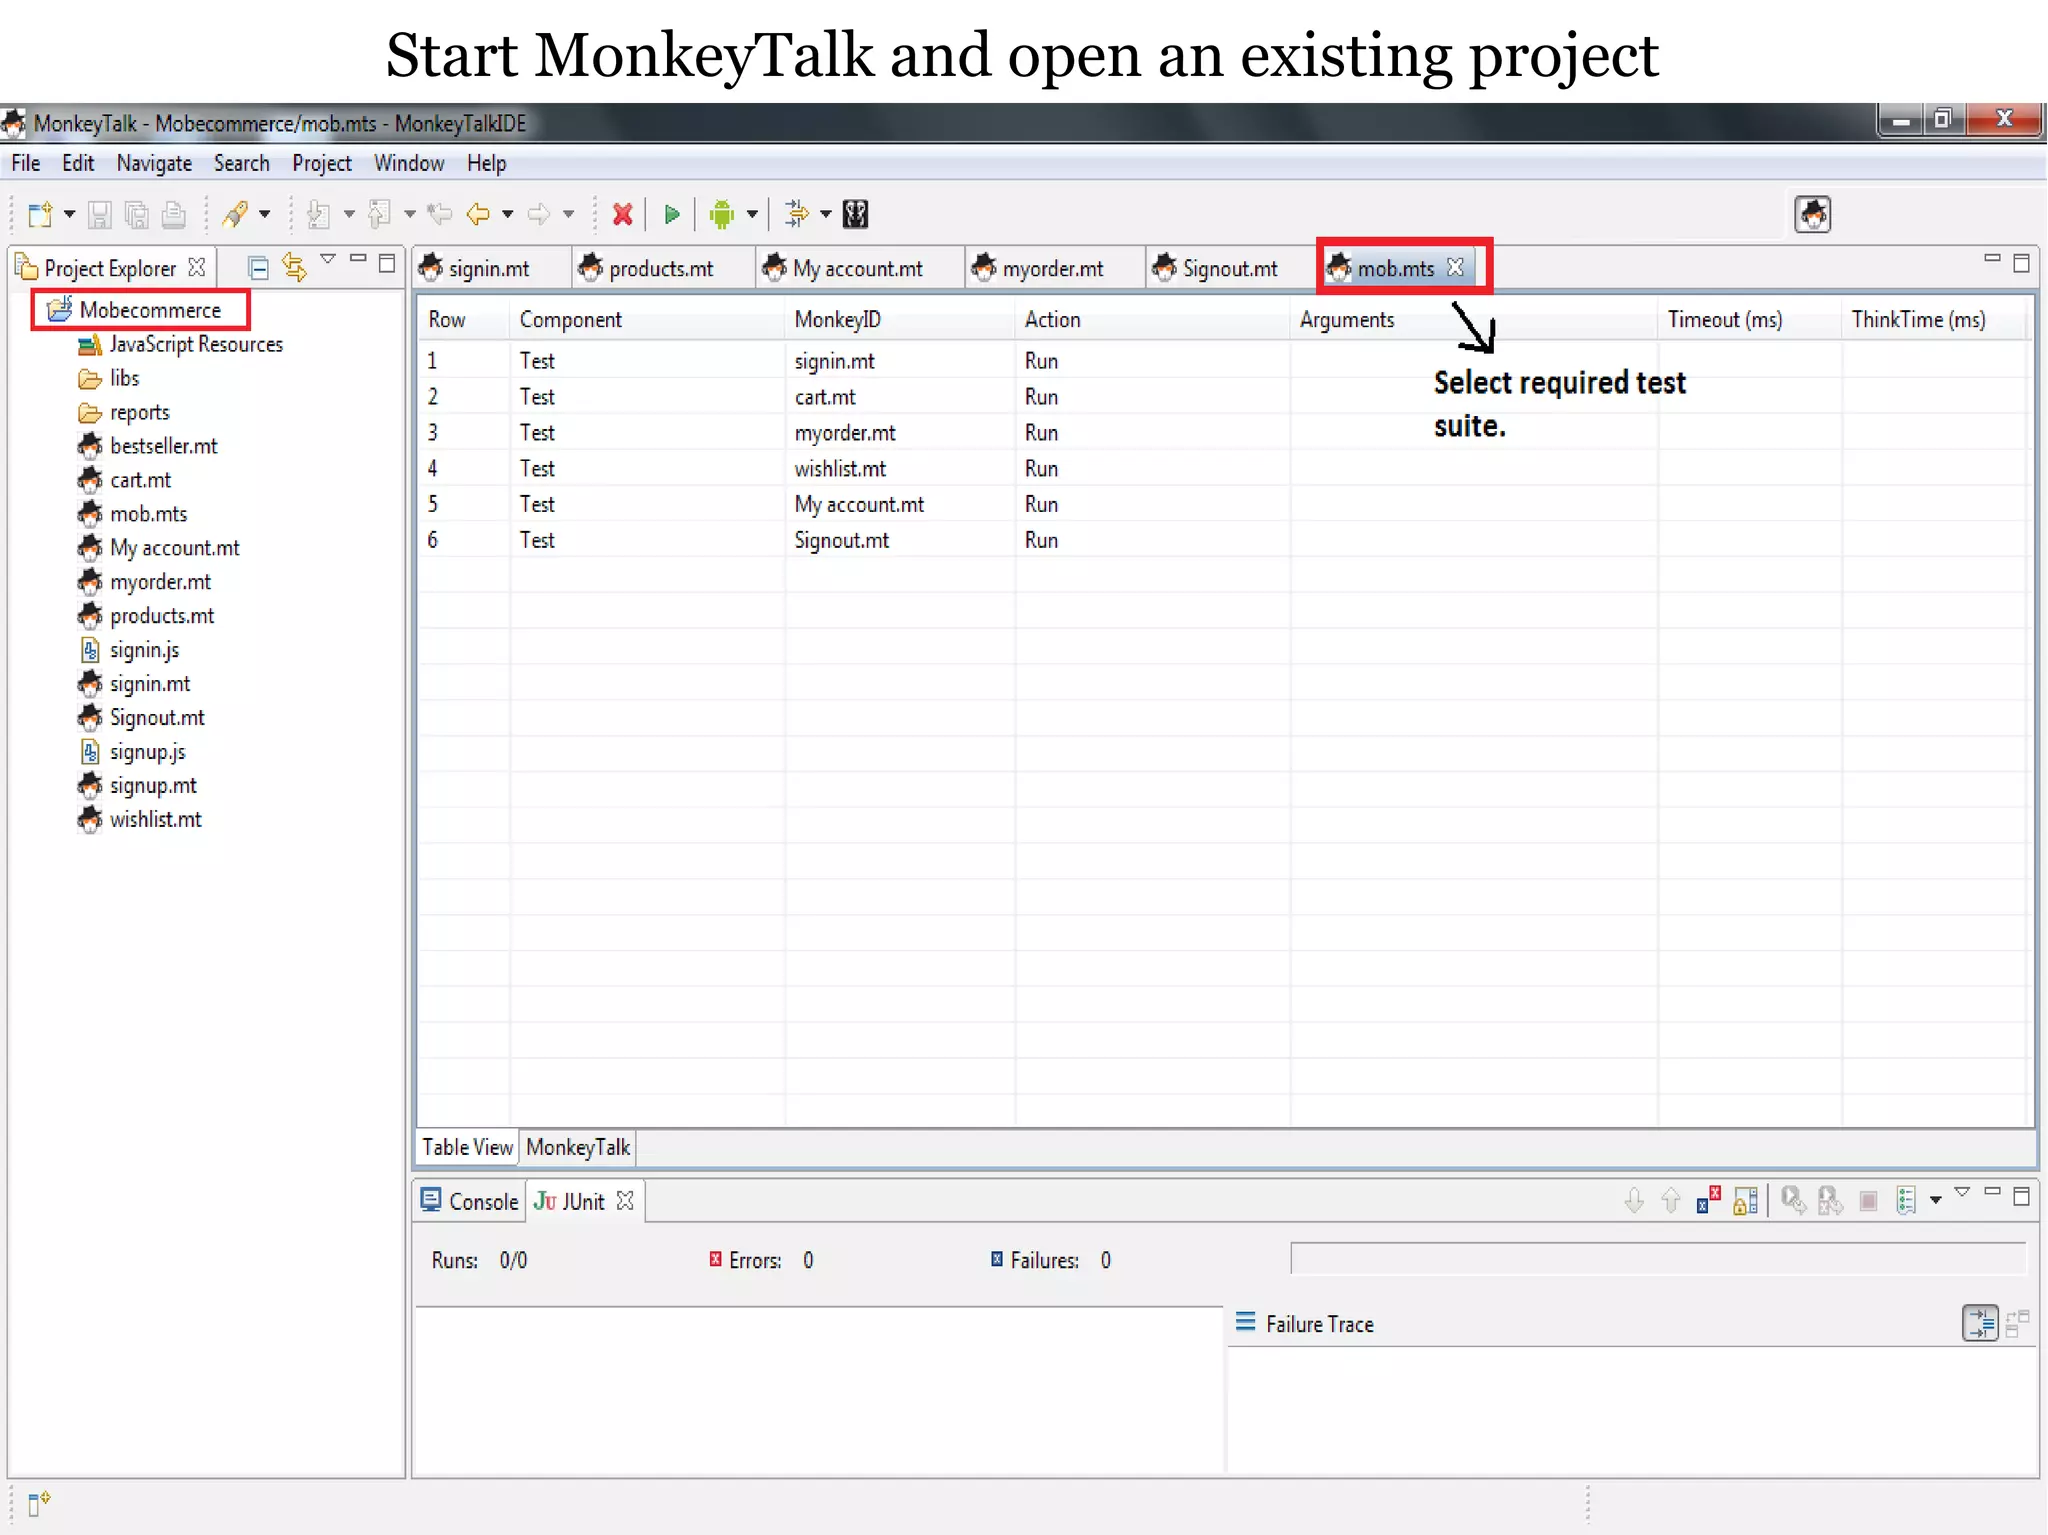
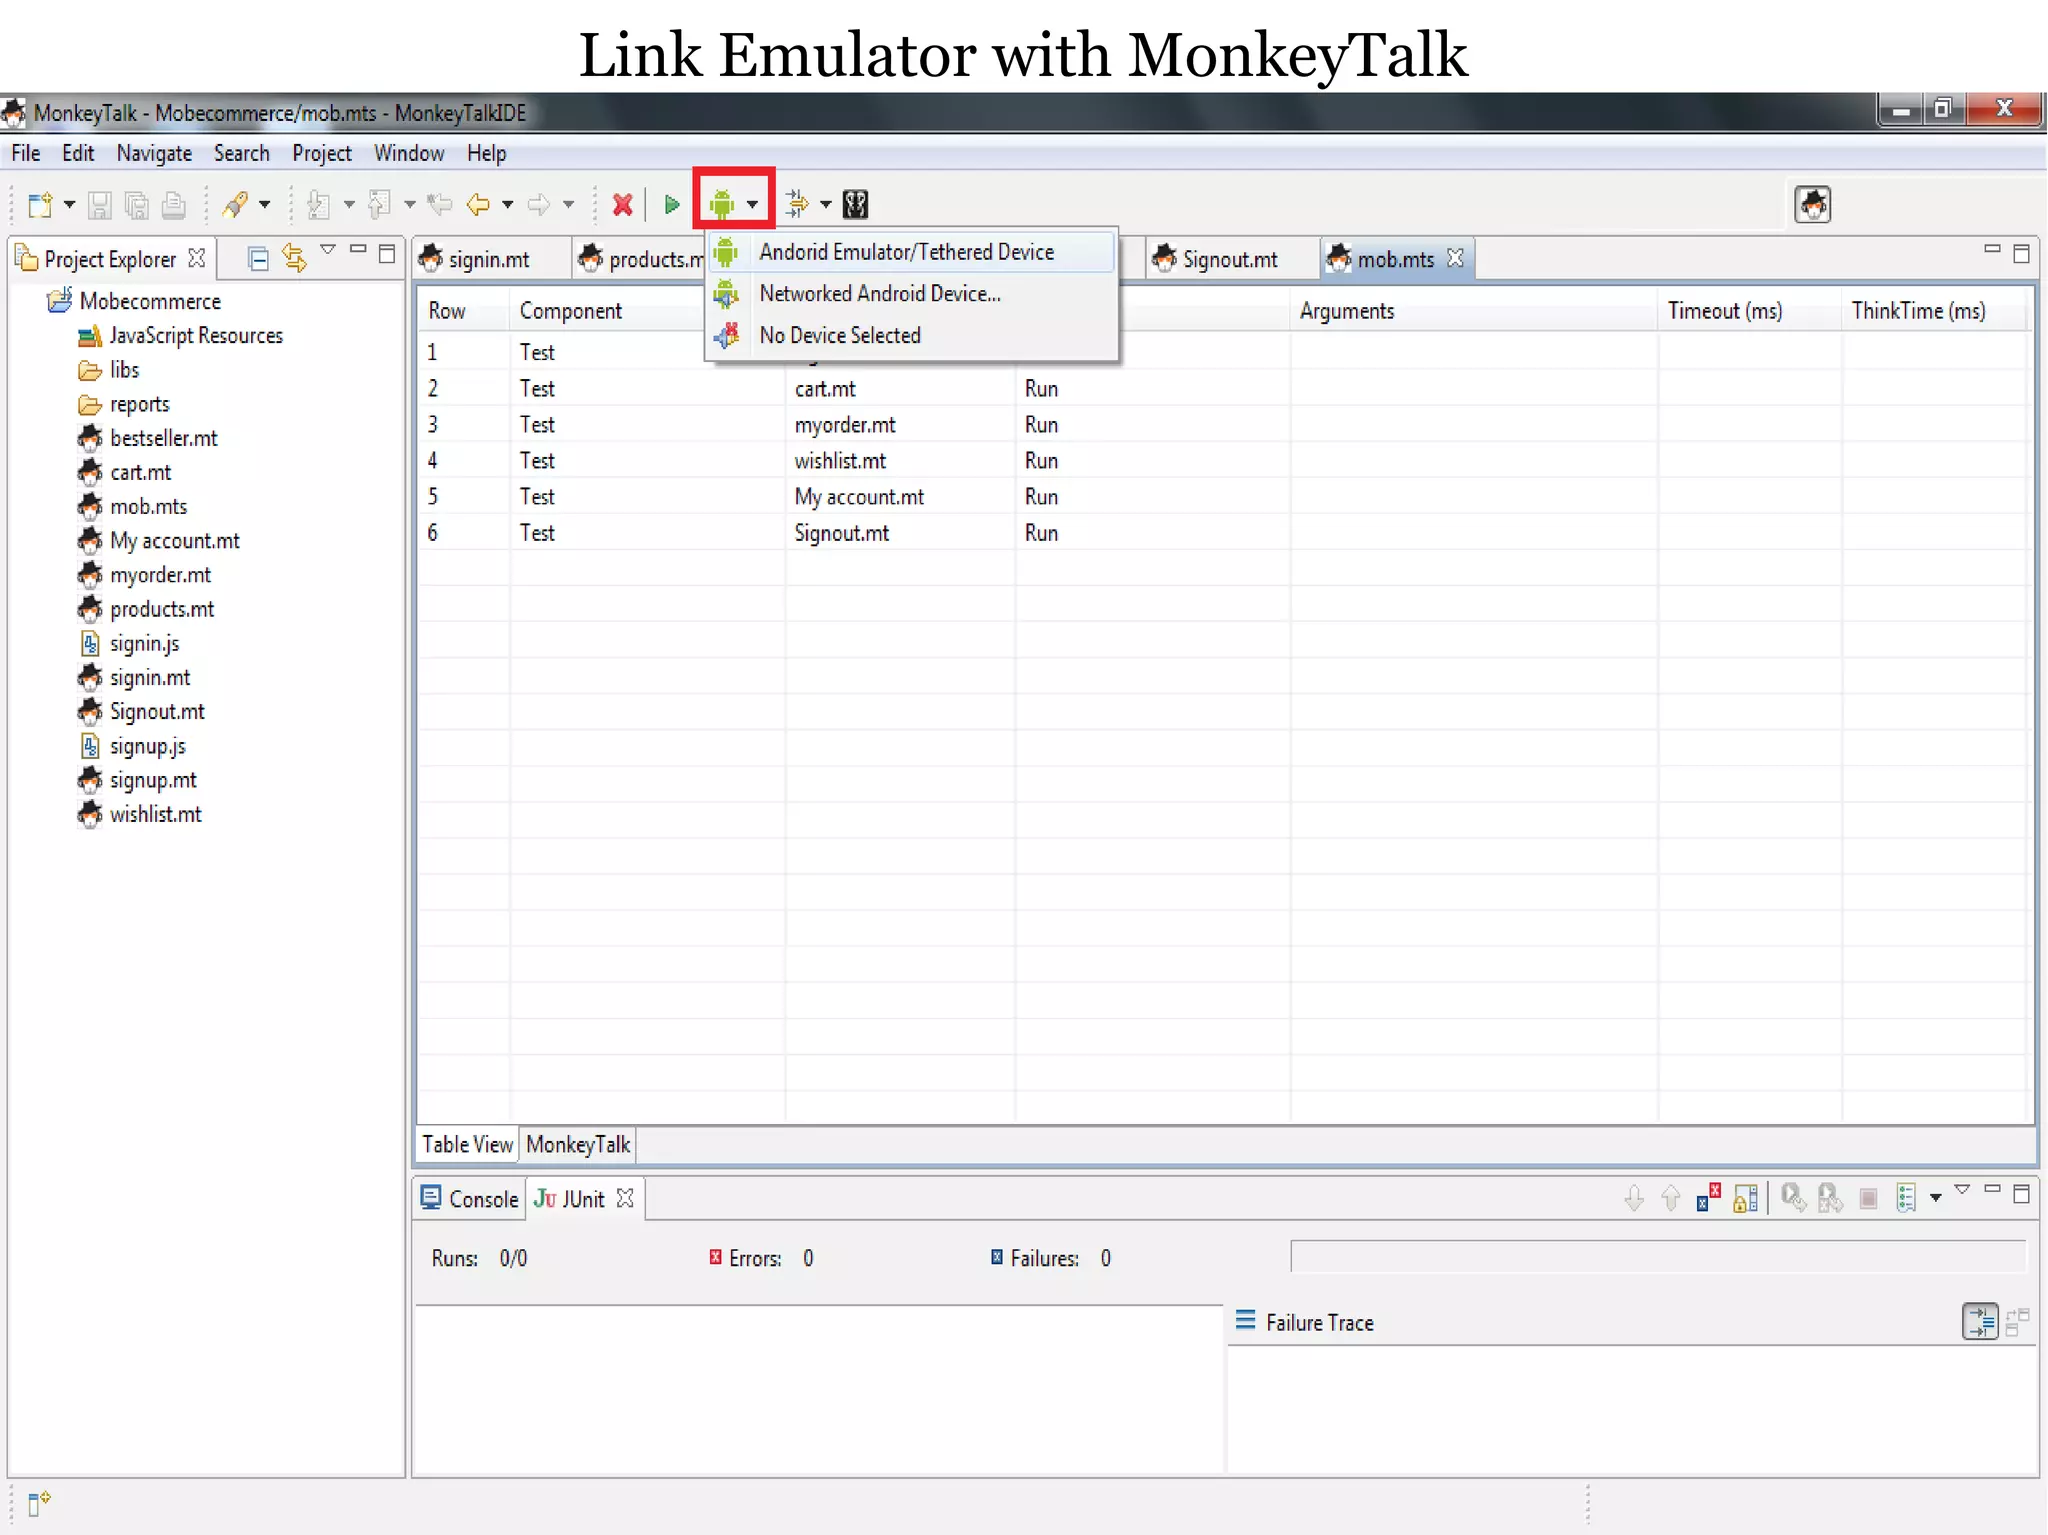
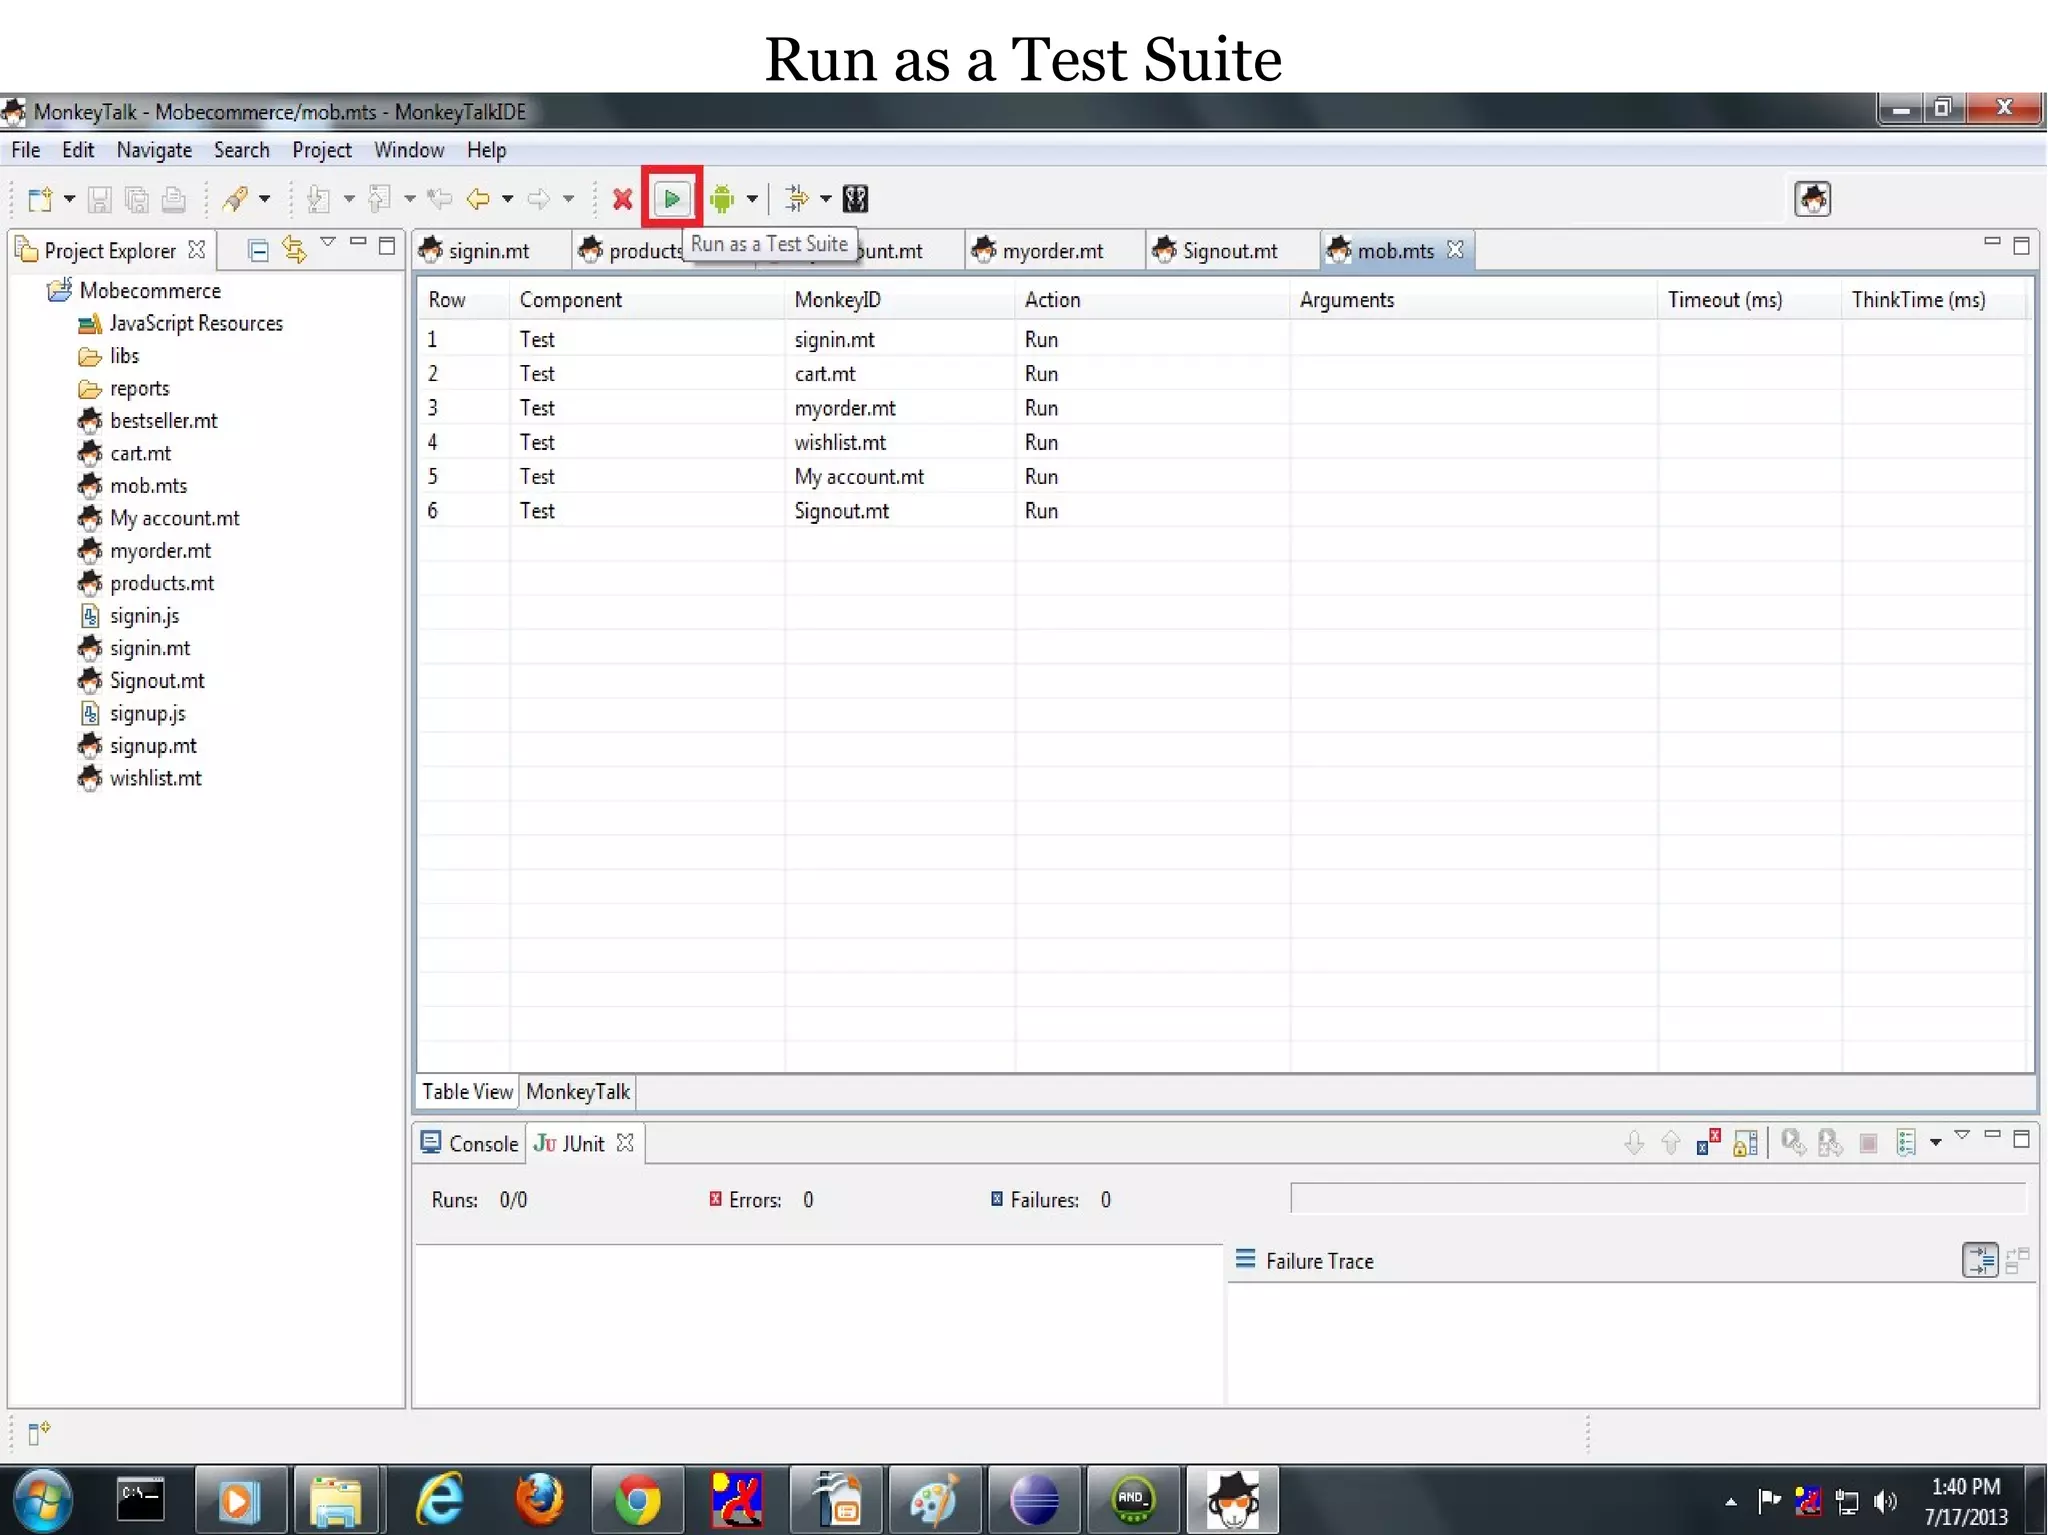
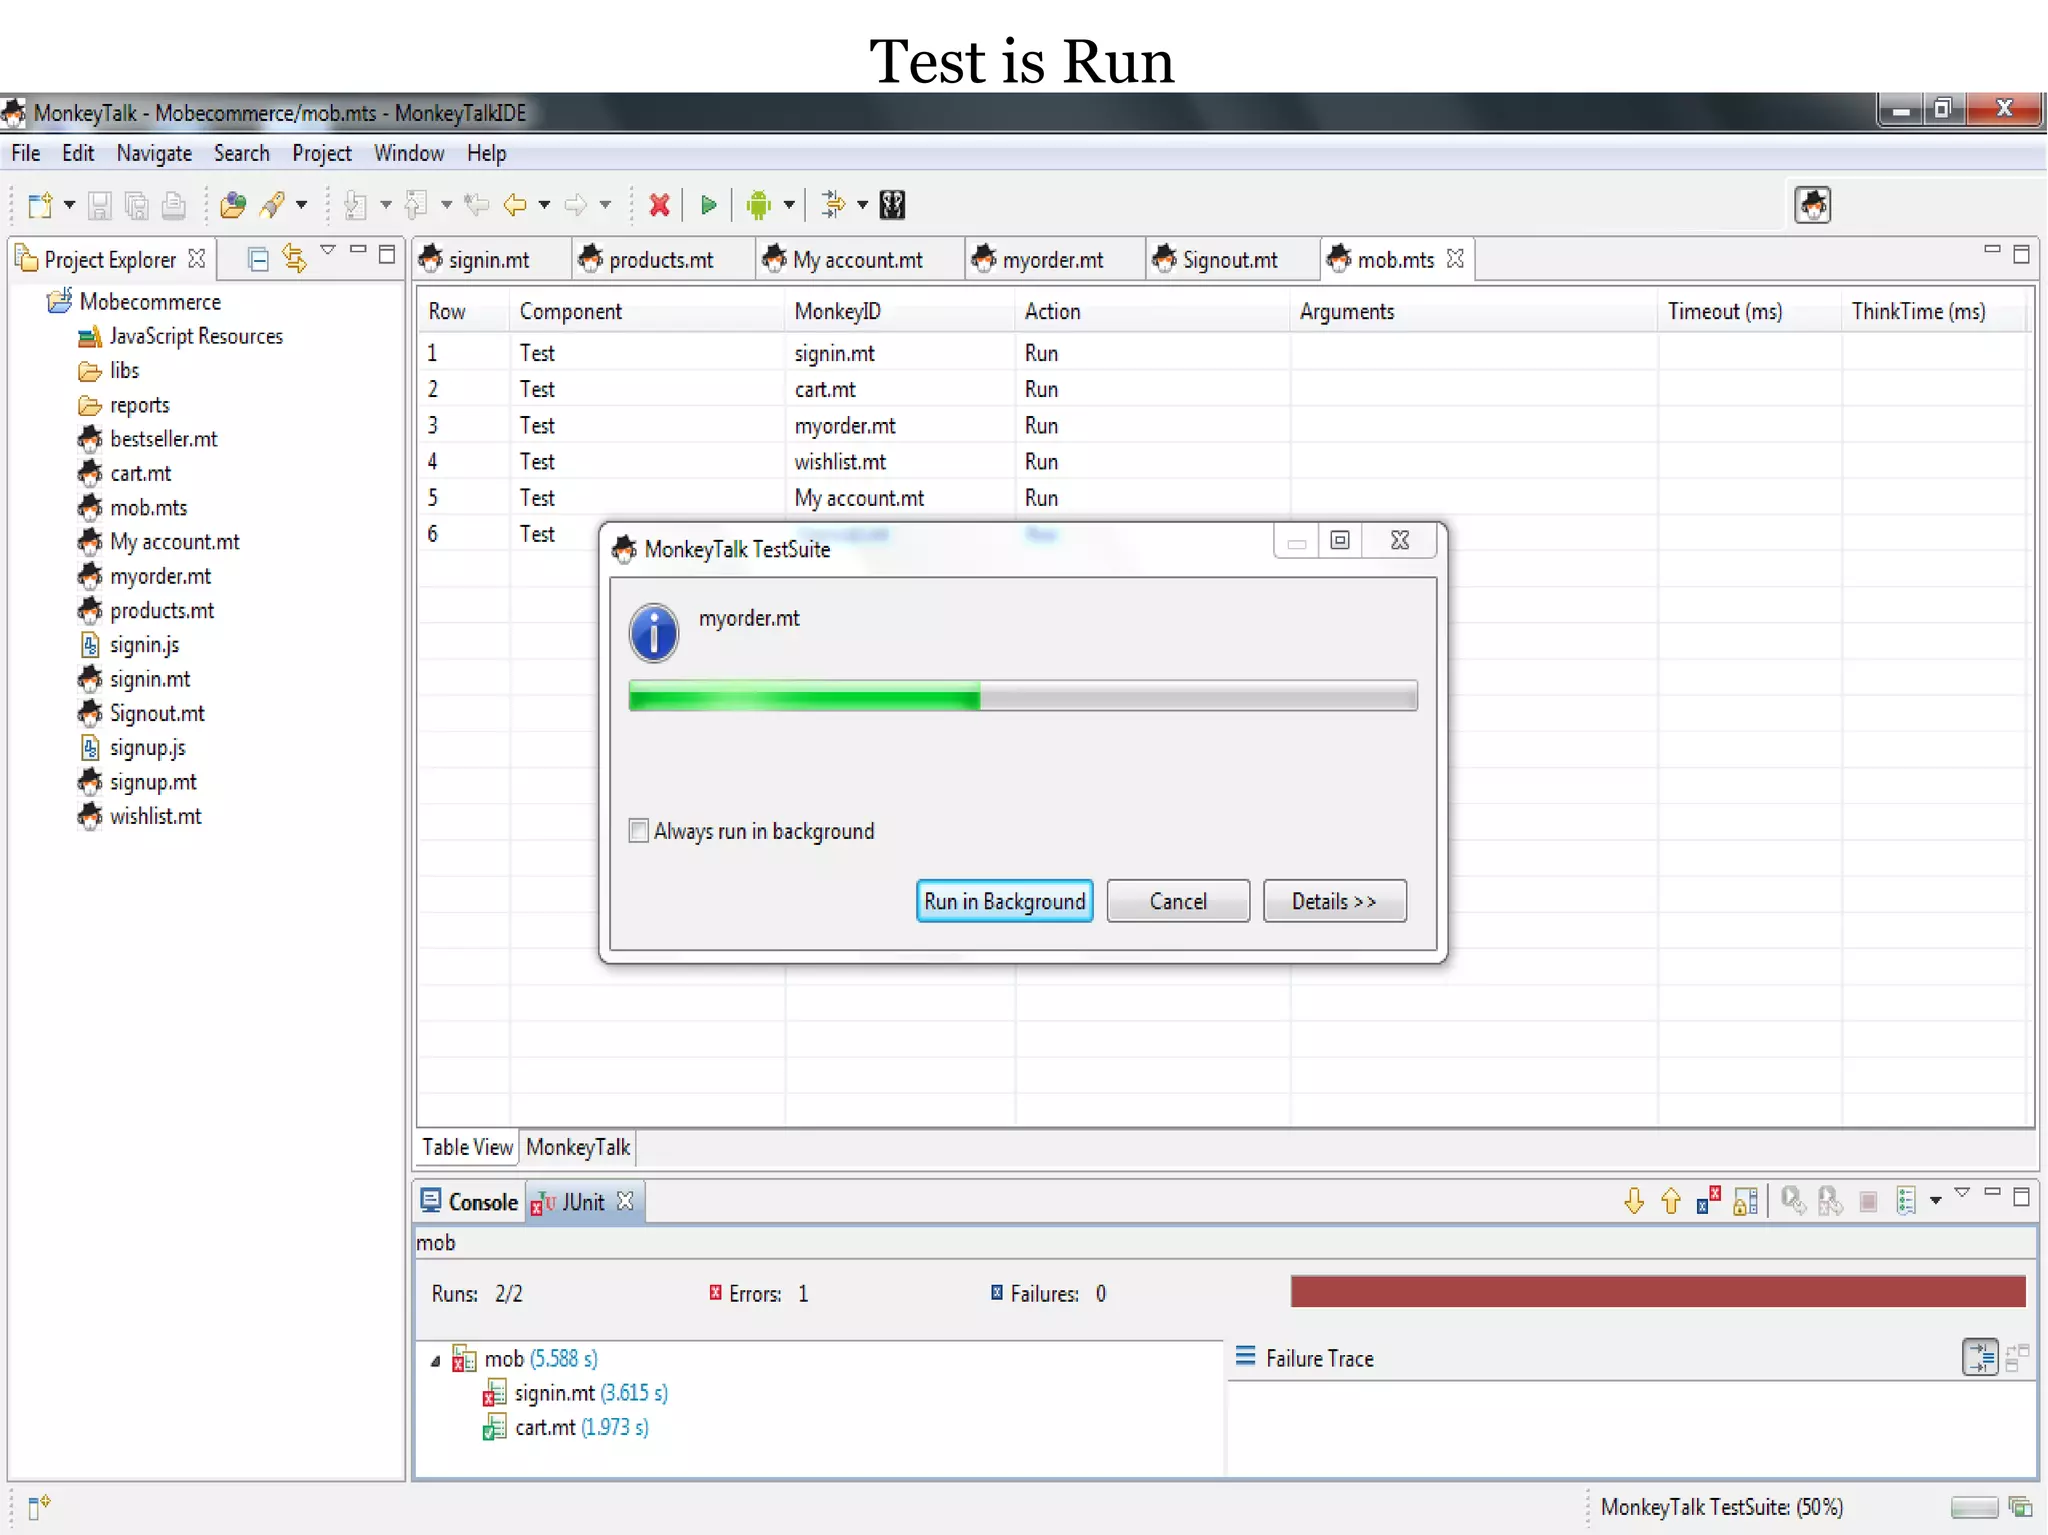
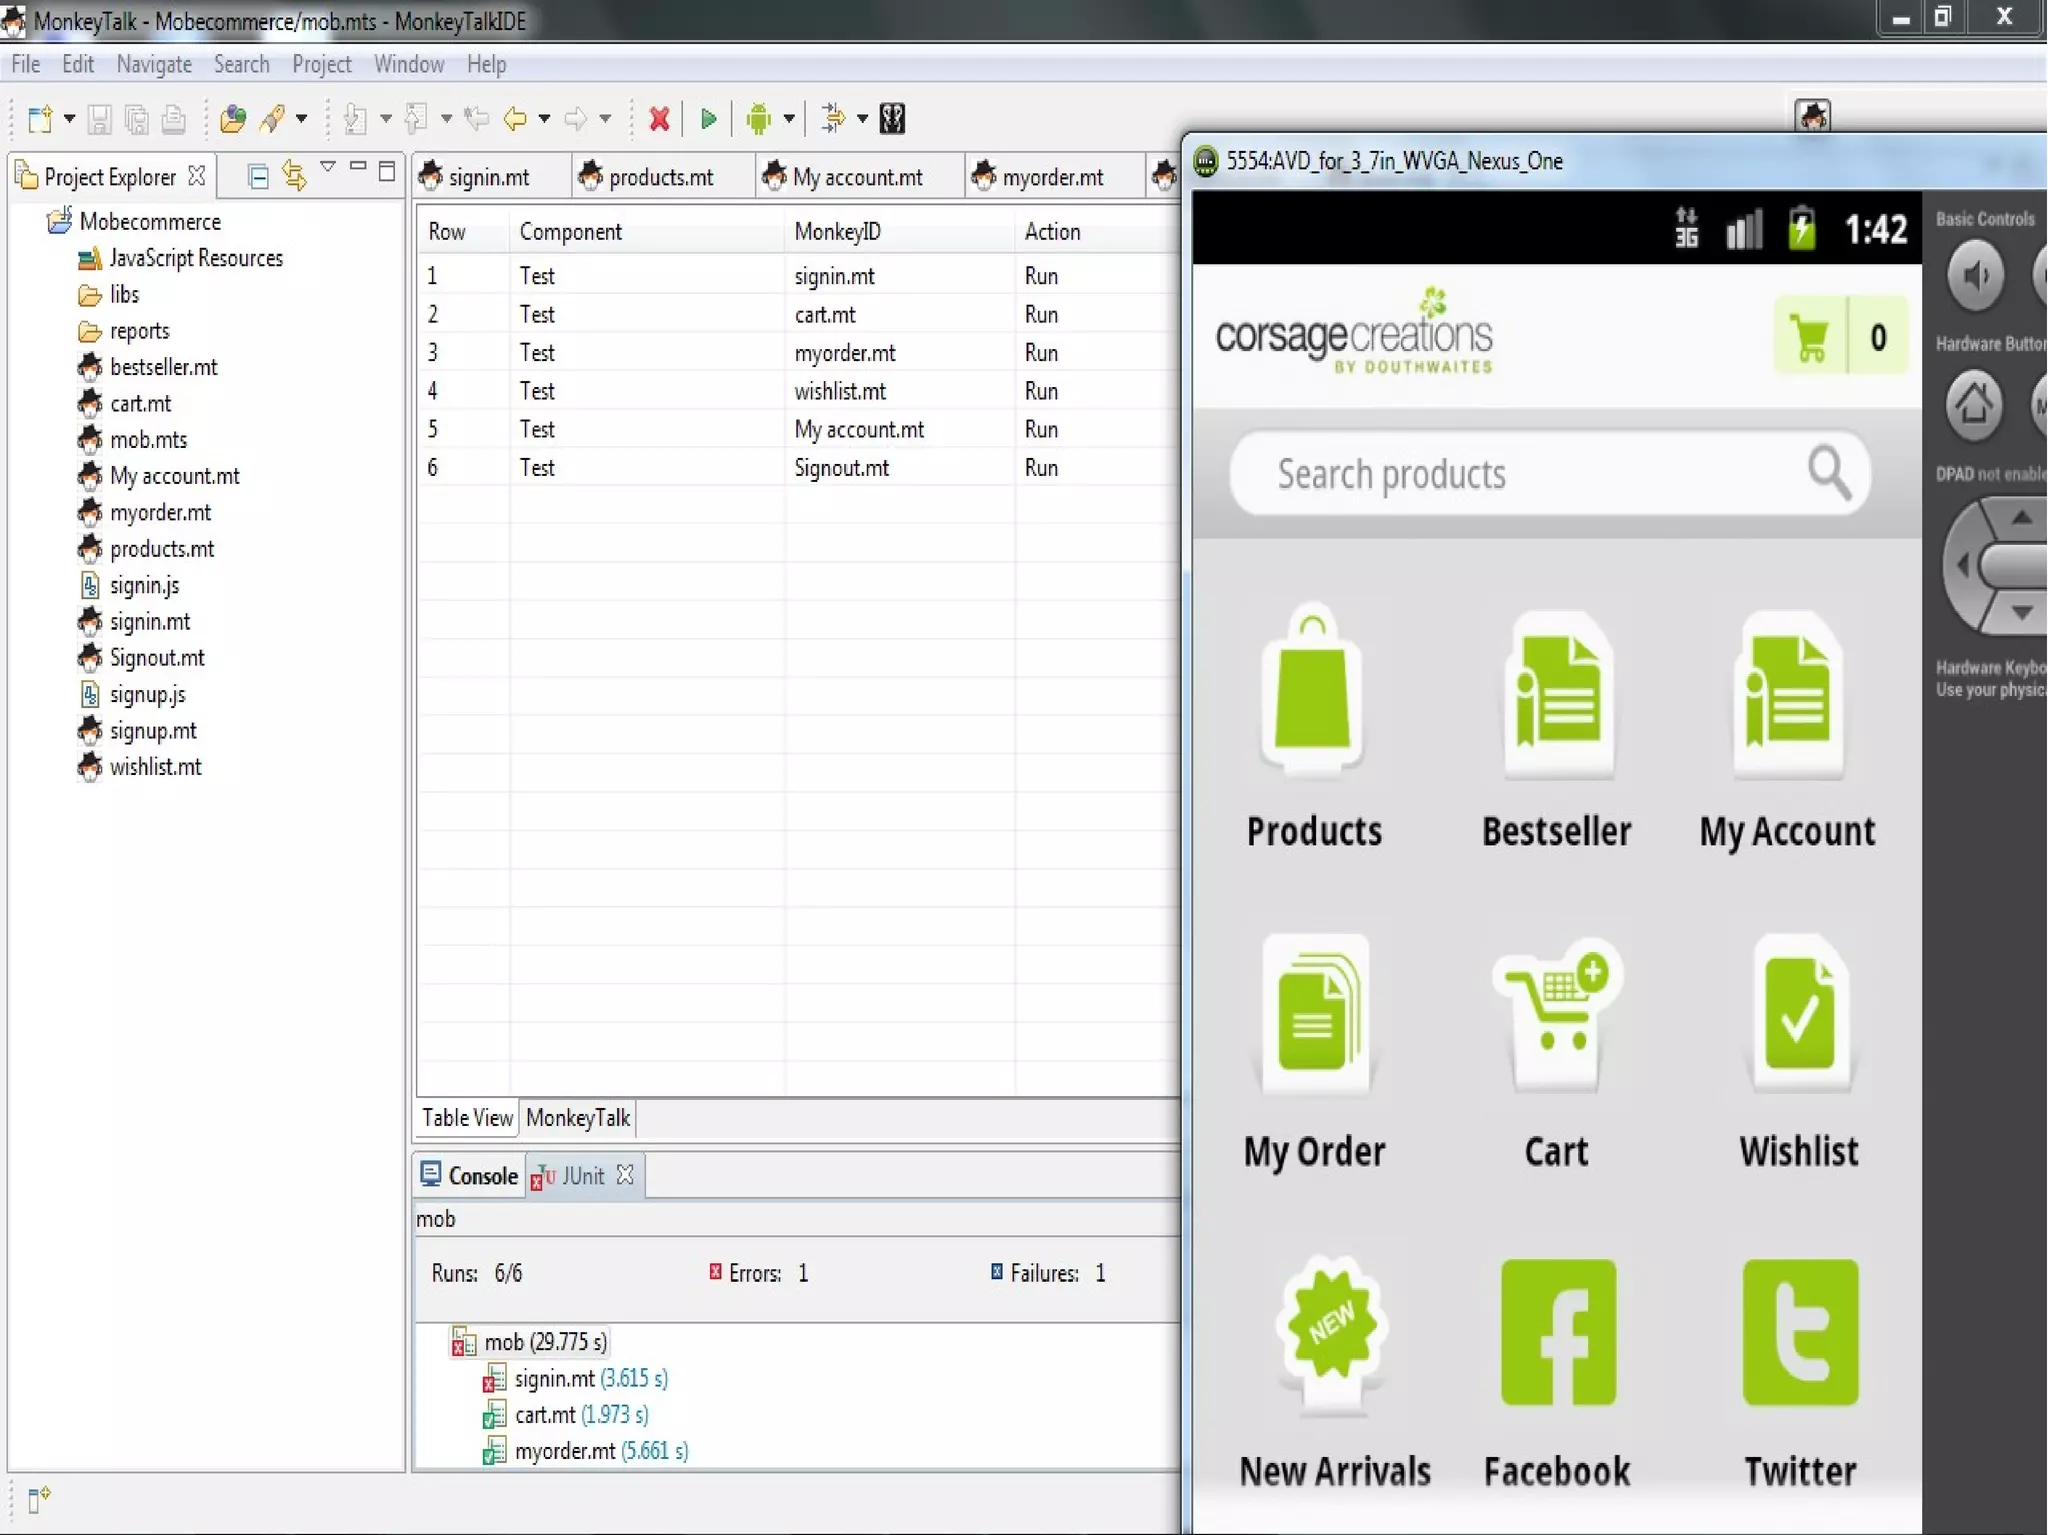
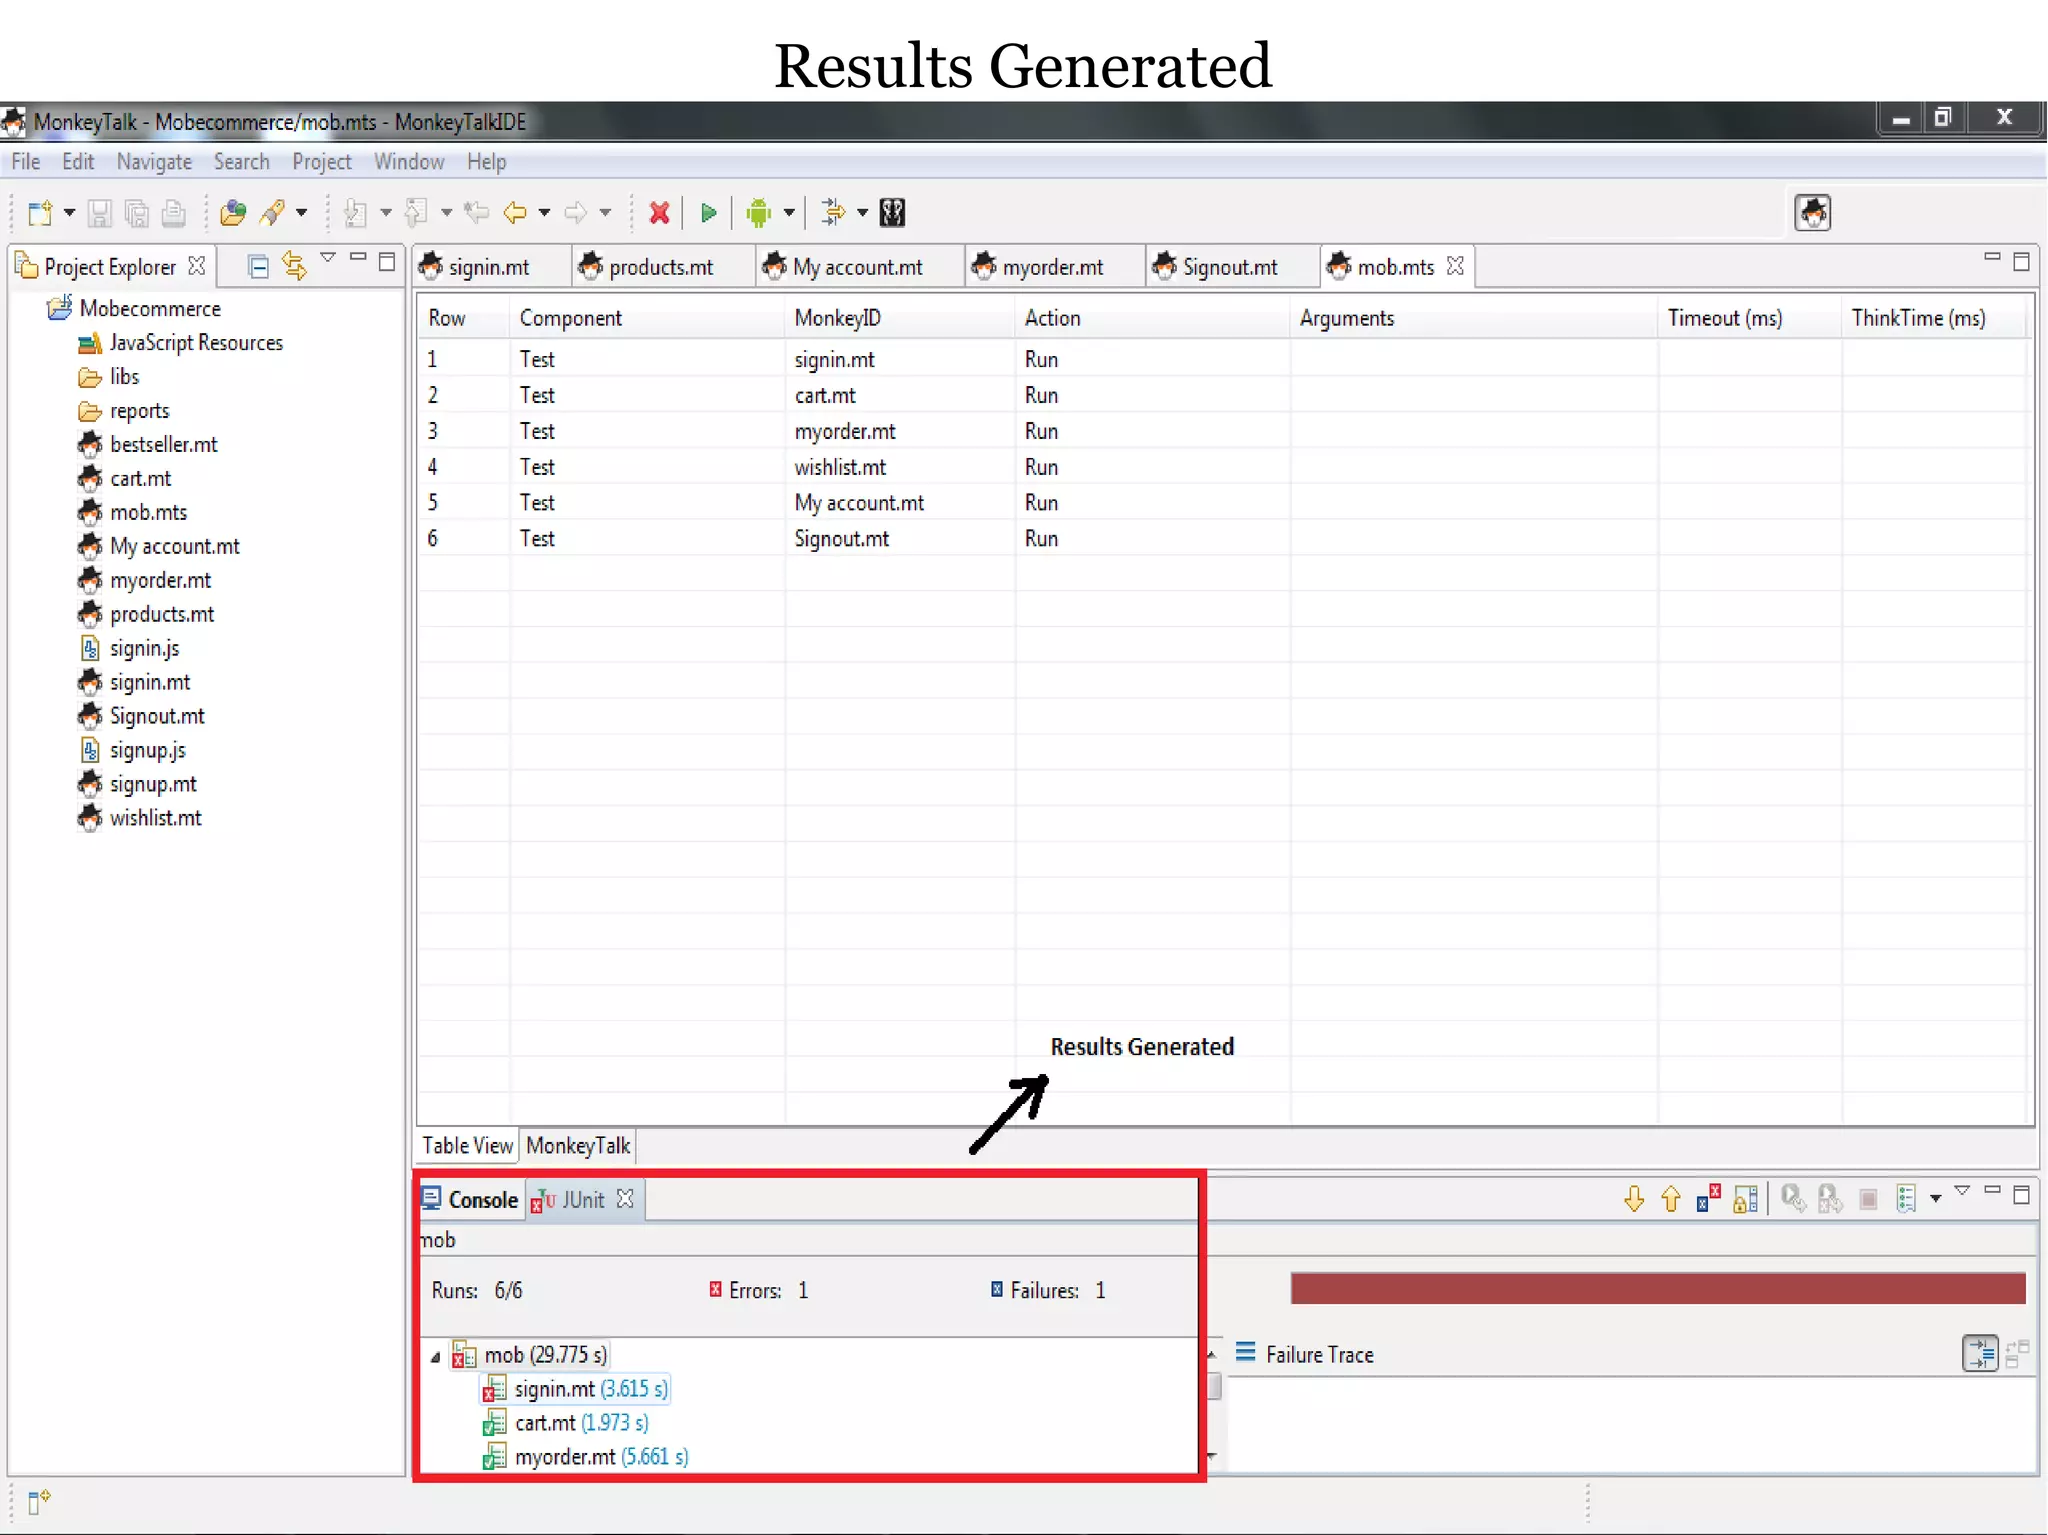
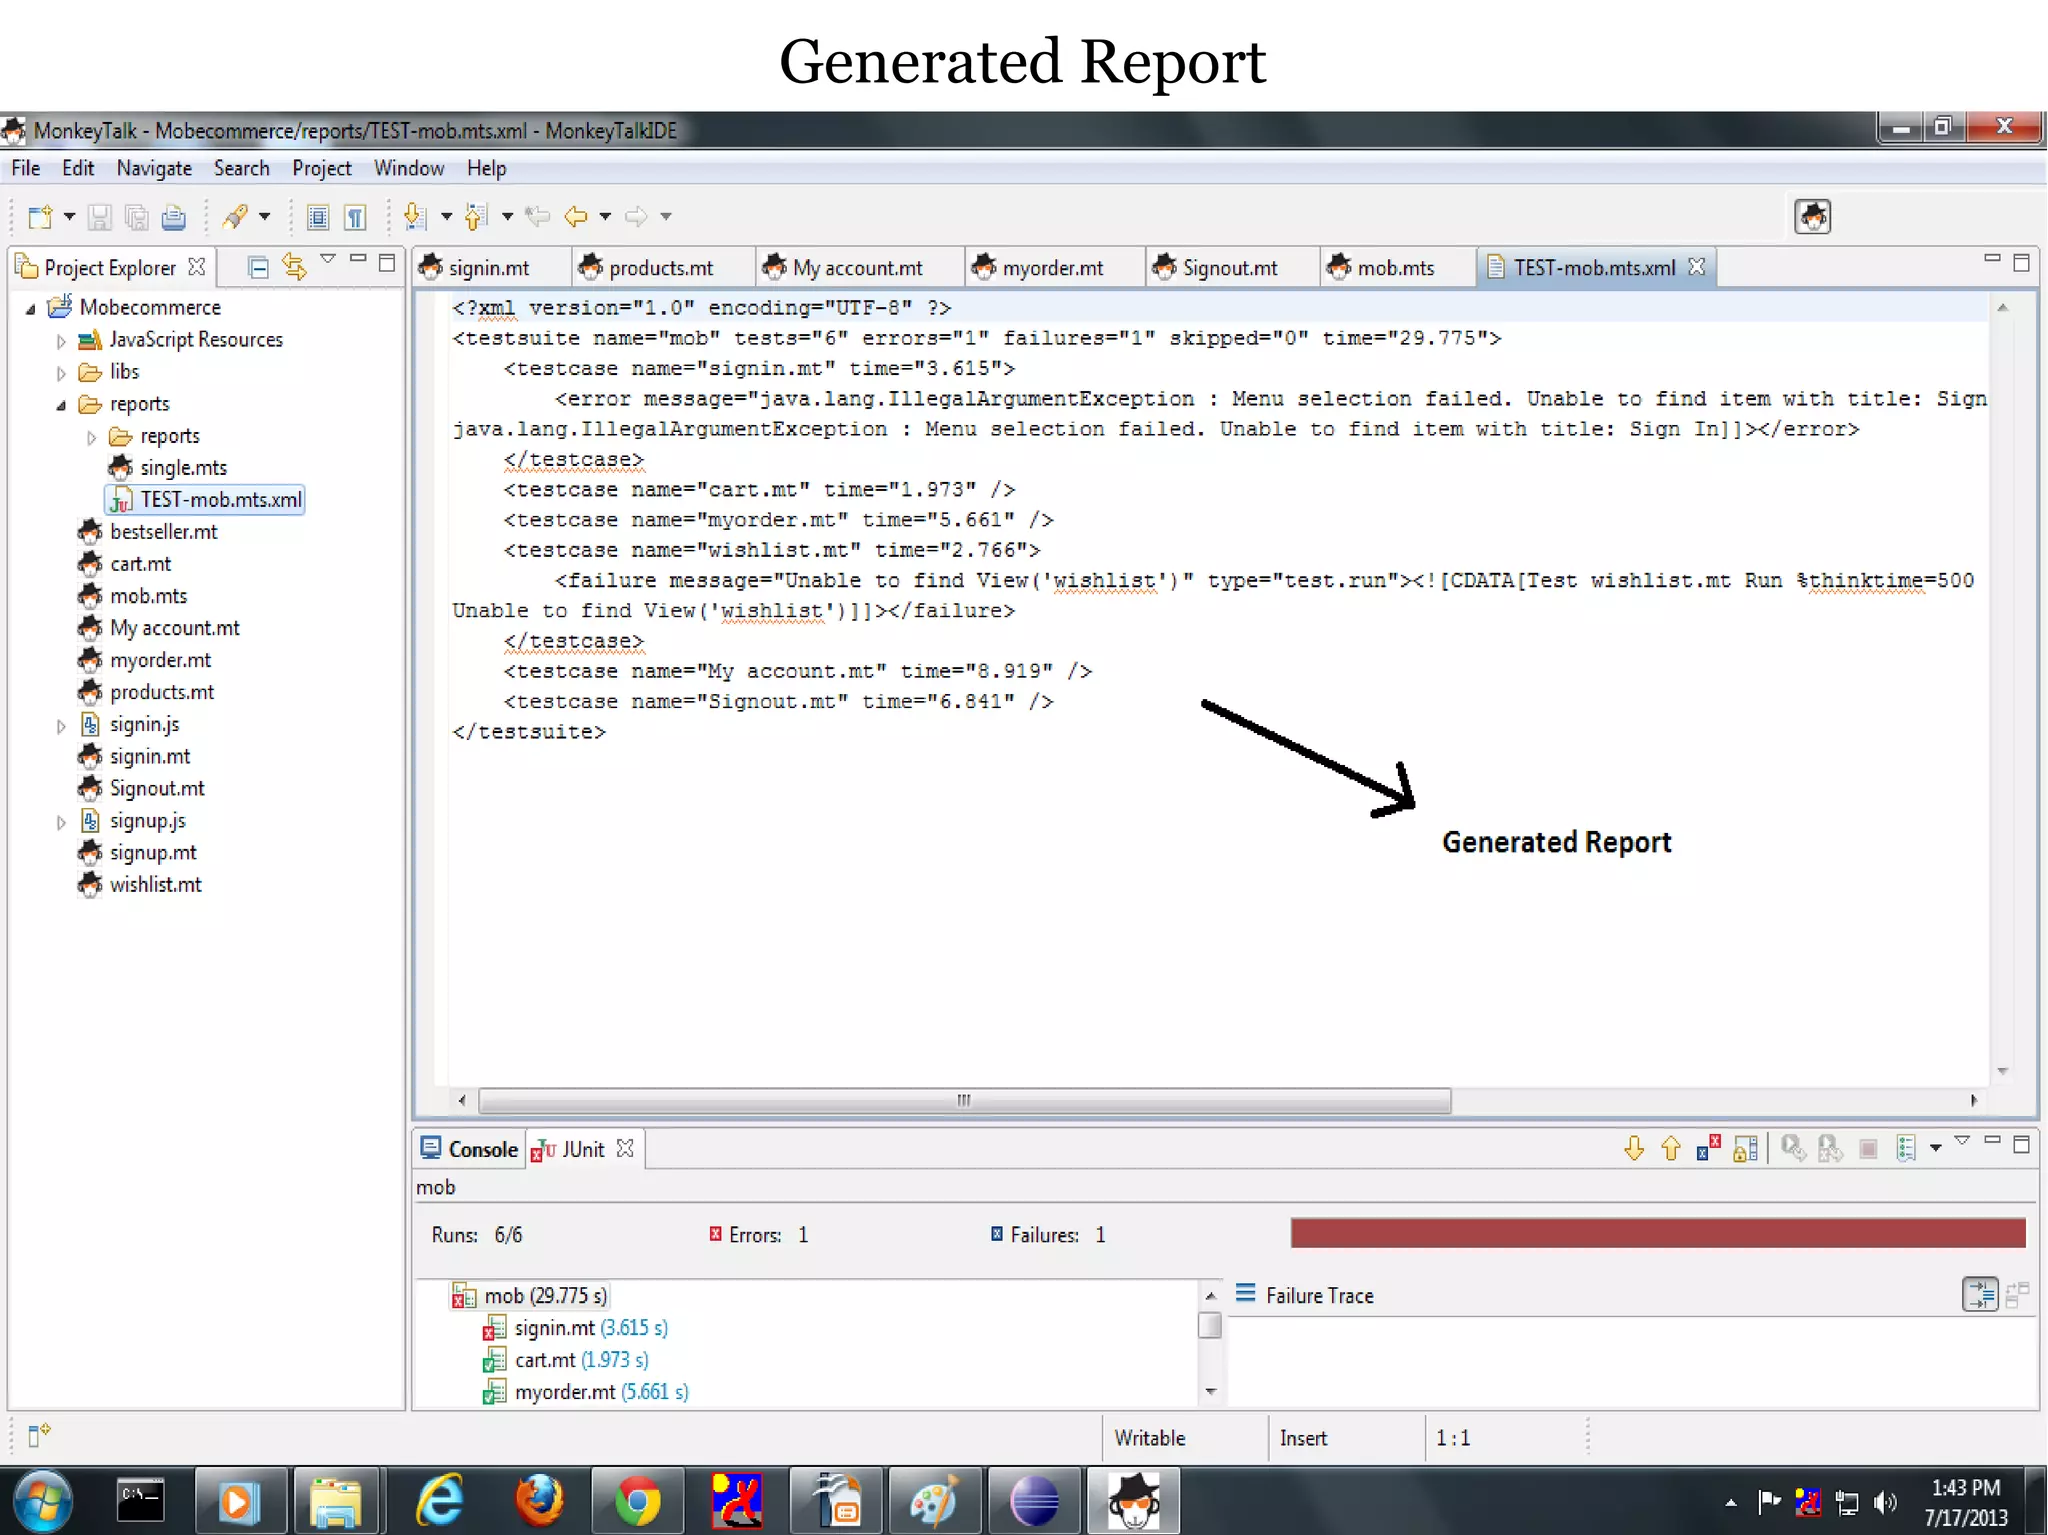
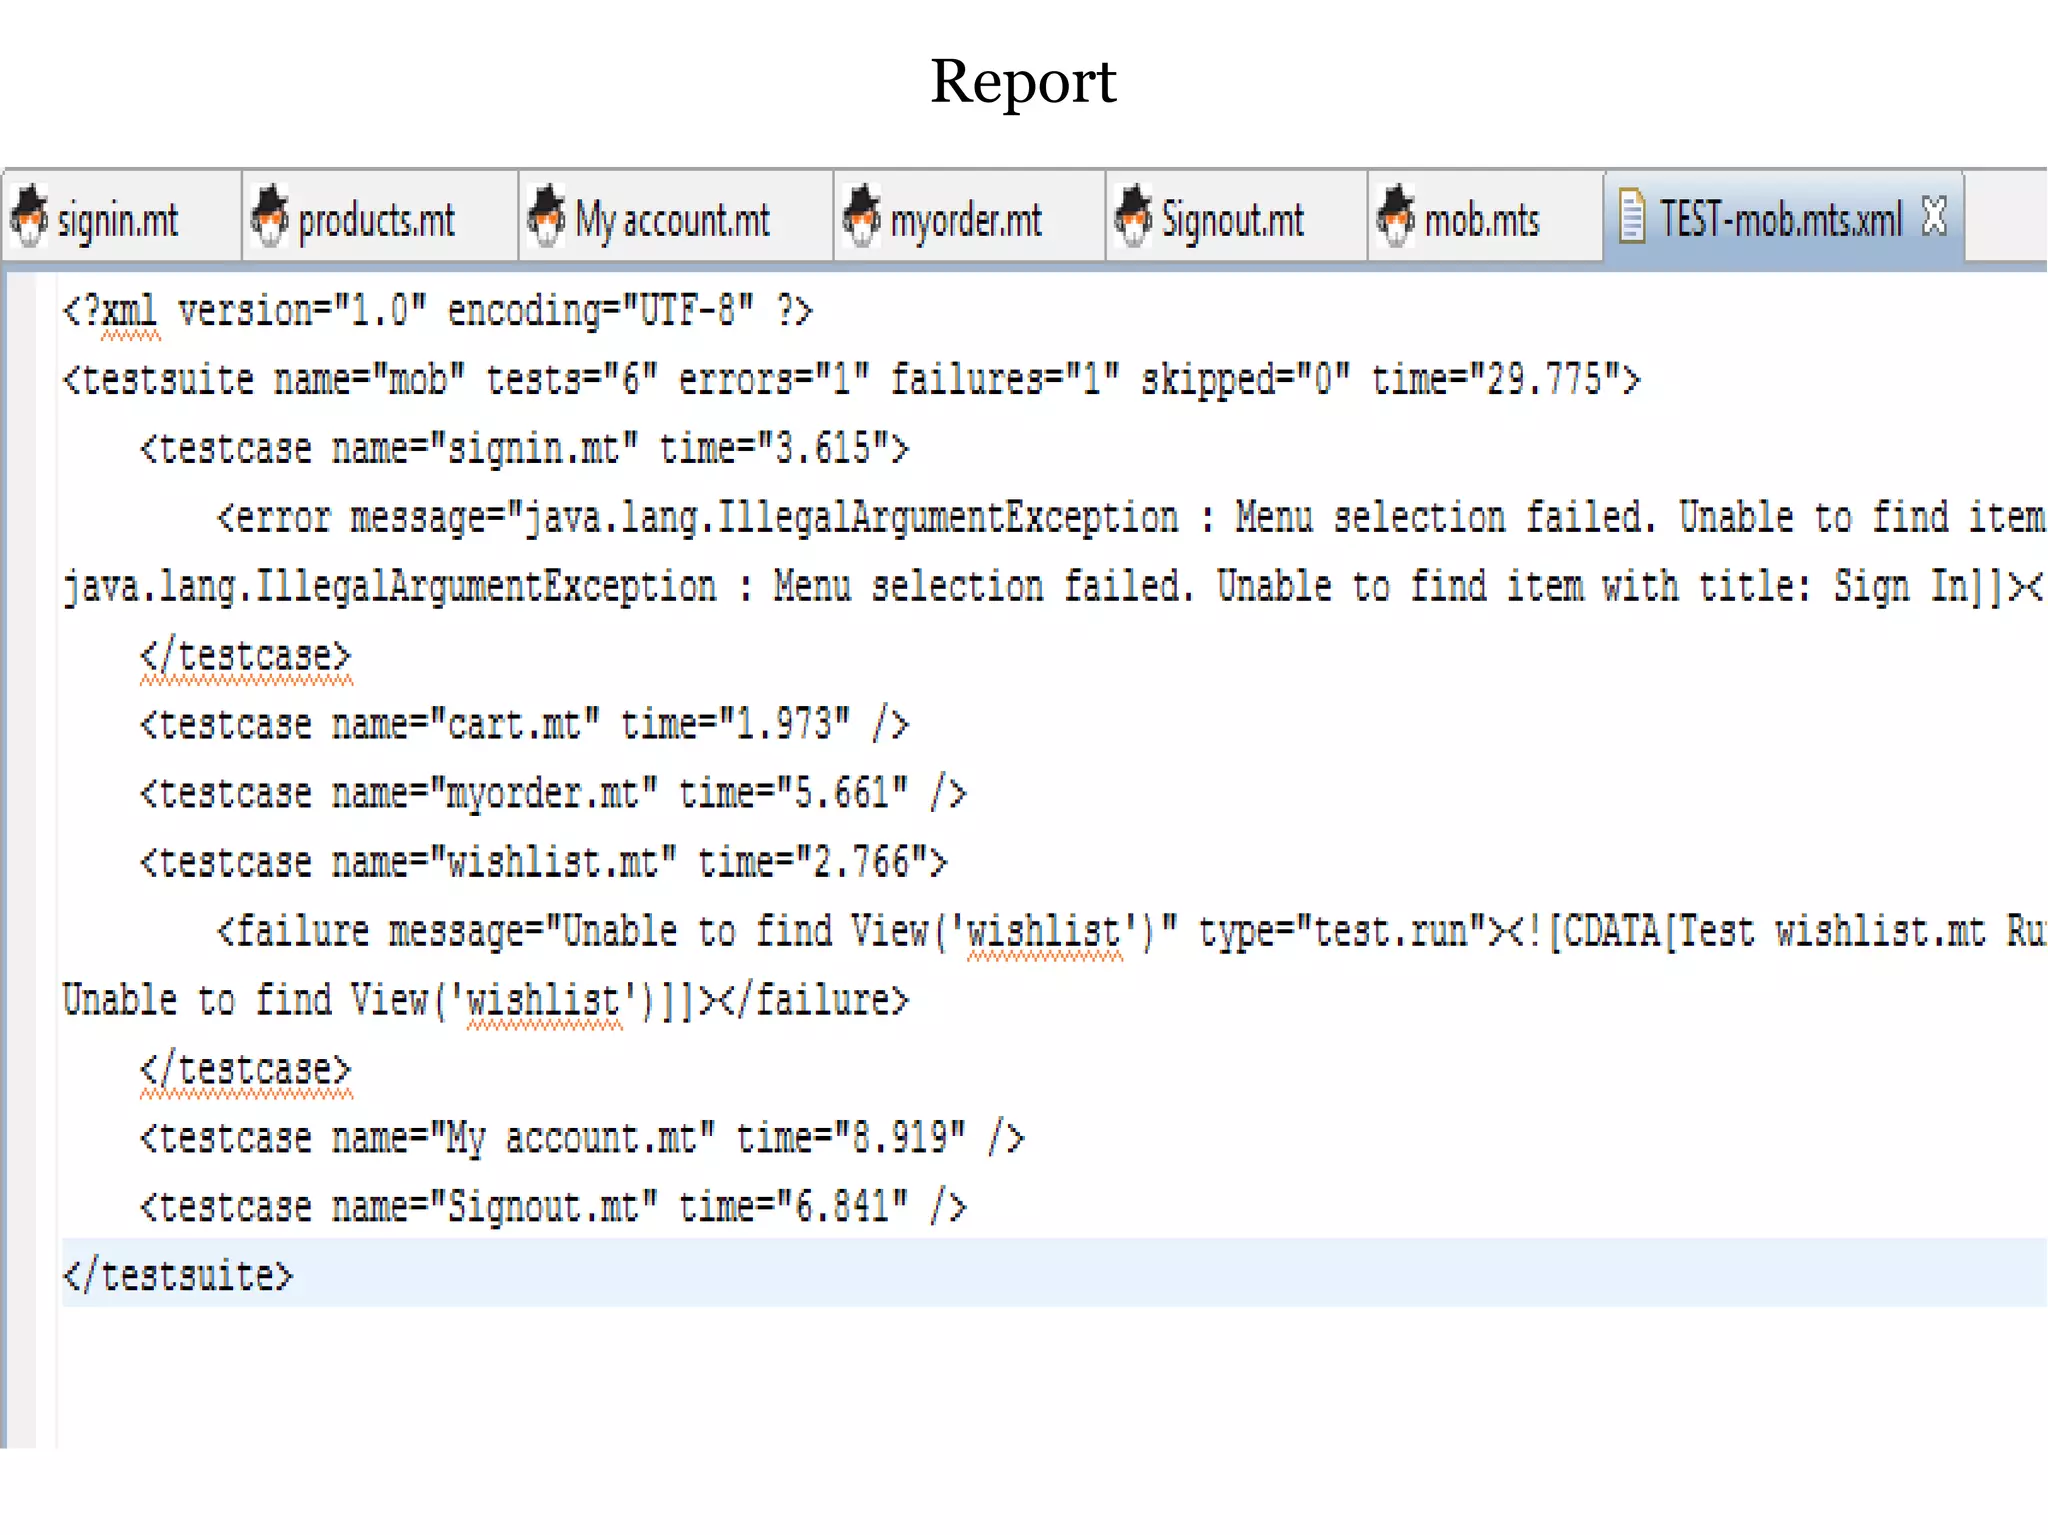
The document outlines the benefits and steps for automating Android applications using MonkeyTalk, an open-source automation tool. It highlights the advantages of automation such as time savings, increased test coverage, and improved software quality. The document also details the requirements and procedures for setting up and executing tests using MonkeyTalk in an Eclipse environment.


![Mobile Automation Meetup Presentation [English]](https://cdn.slidesharecdn.com/ss_thumbnails/mobileautomationmeetuppresentation-english-150430163752-conversion-gate01-thumbnail.jpg?width=640&height=640&fit=bounds)


![Support, Monitoring, Continuous Improvement & Scaling Agentic Automation [3/3]](https://cdn.slidesharecdn.com/ss_thumbnails/agenticcommunityseries-day3-cfd-251120170304-ddef8112-thumbnail.jpg?width=640&height=640&fit=bounds)