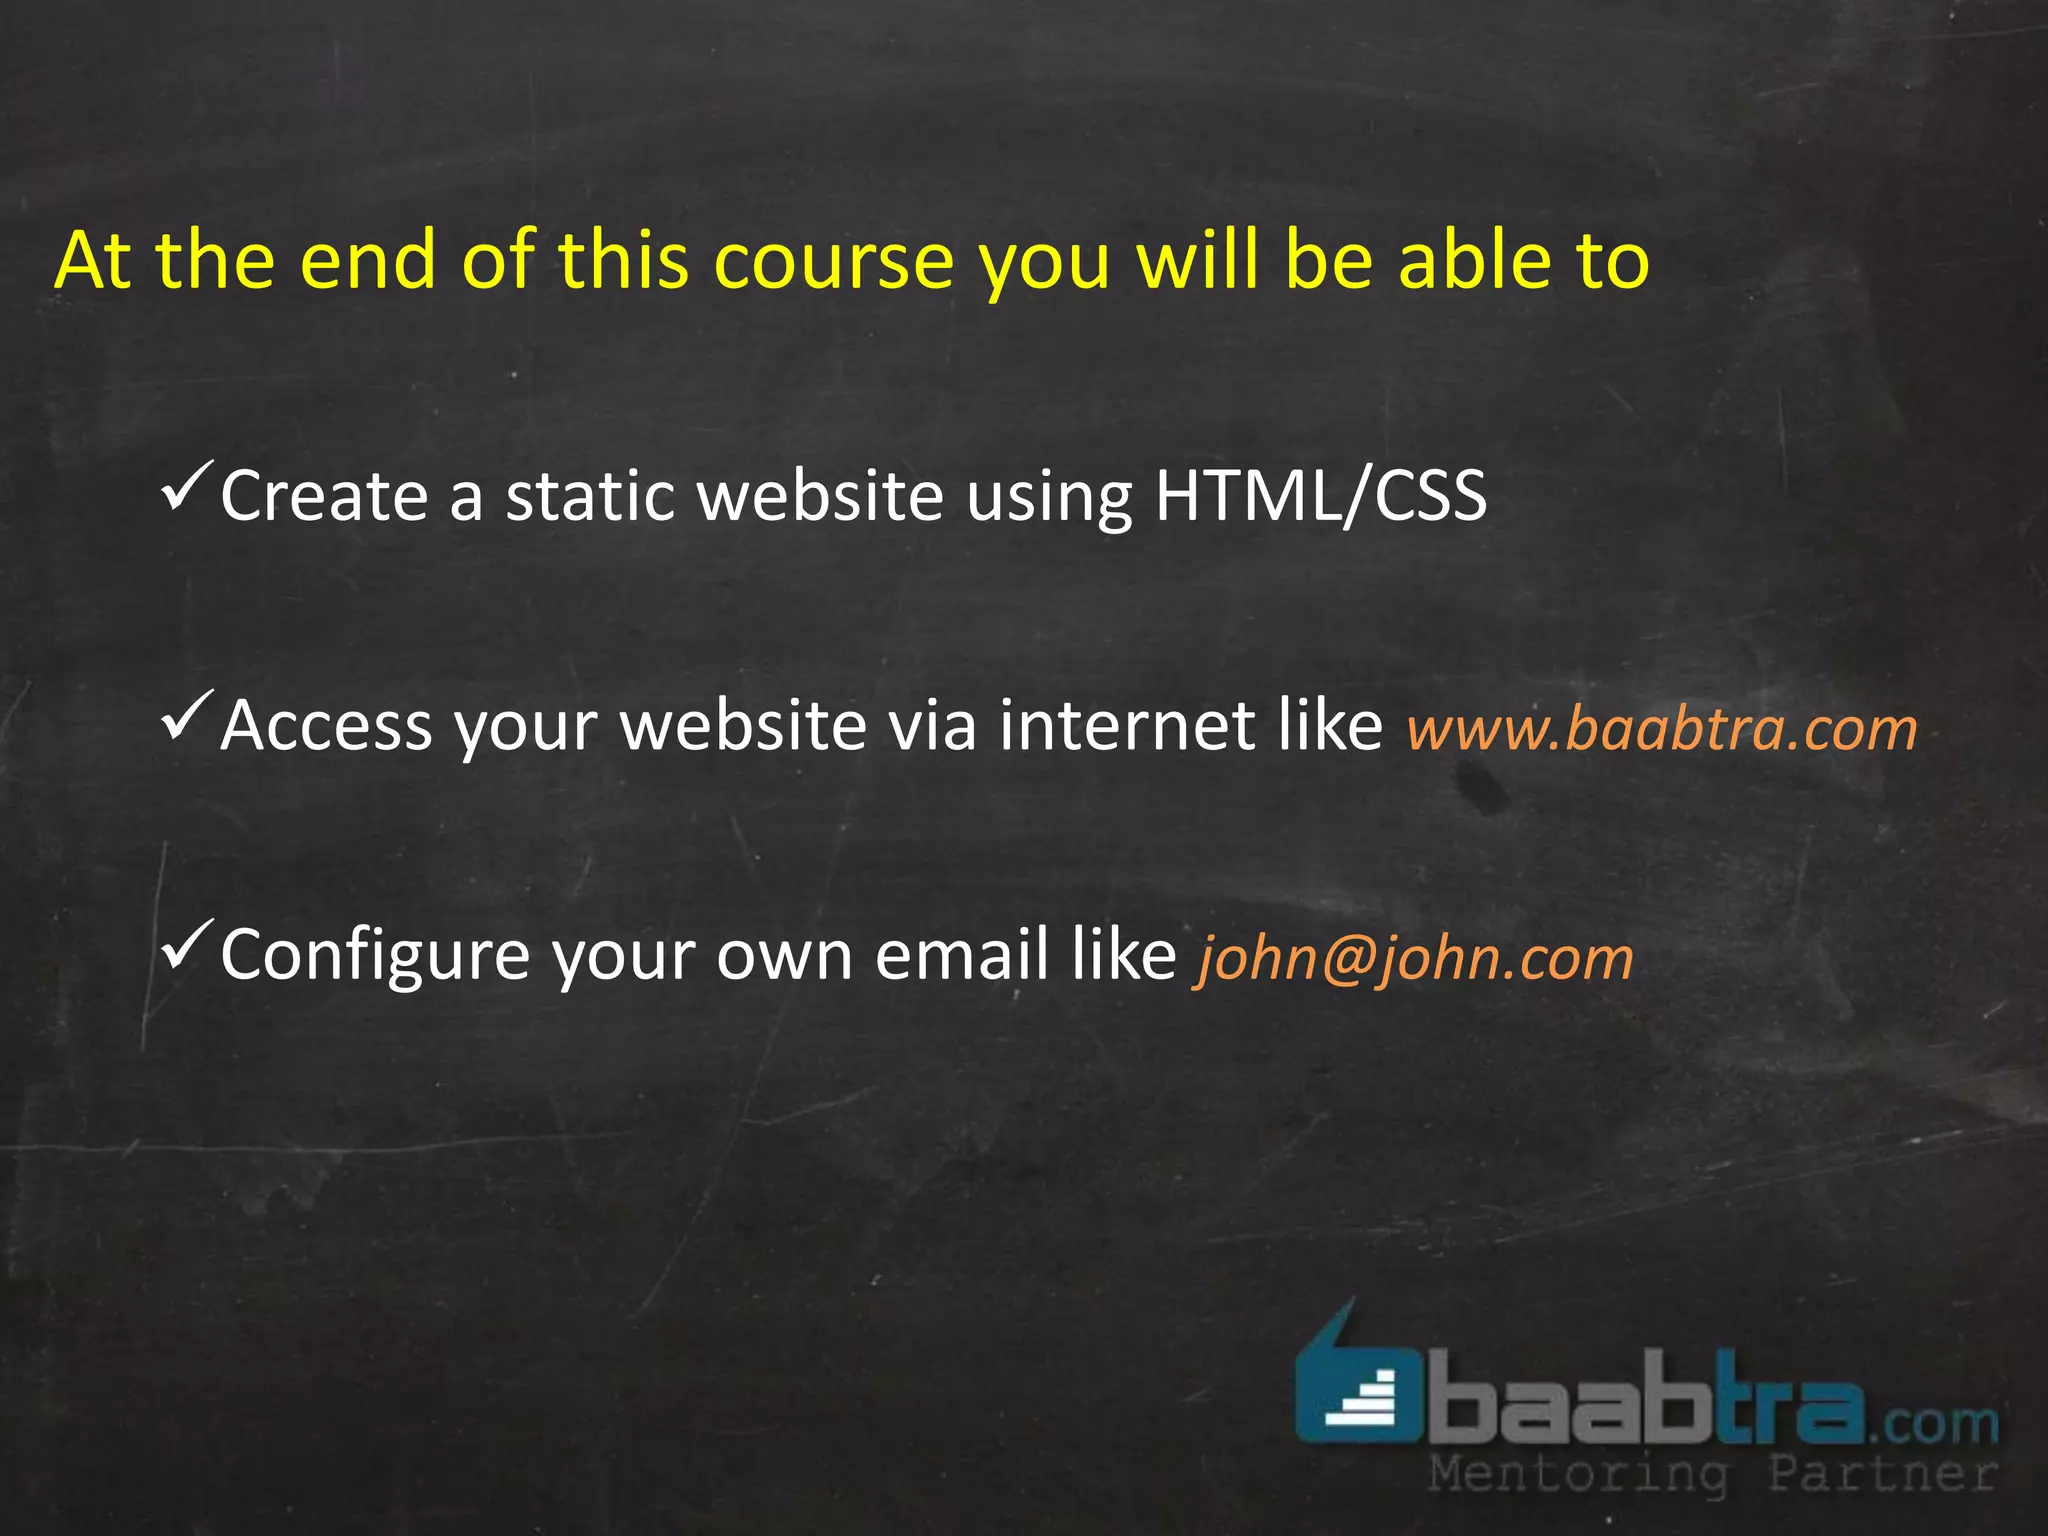
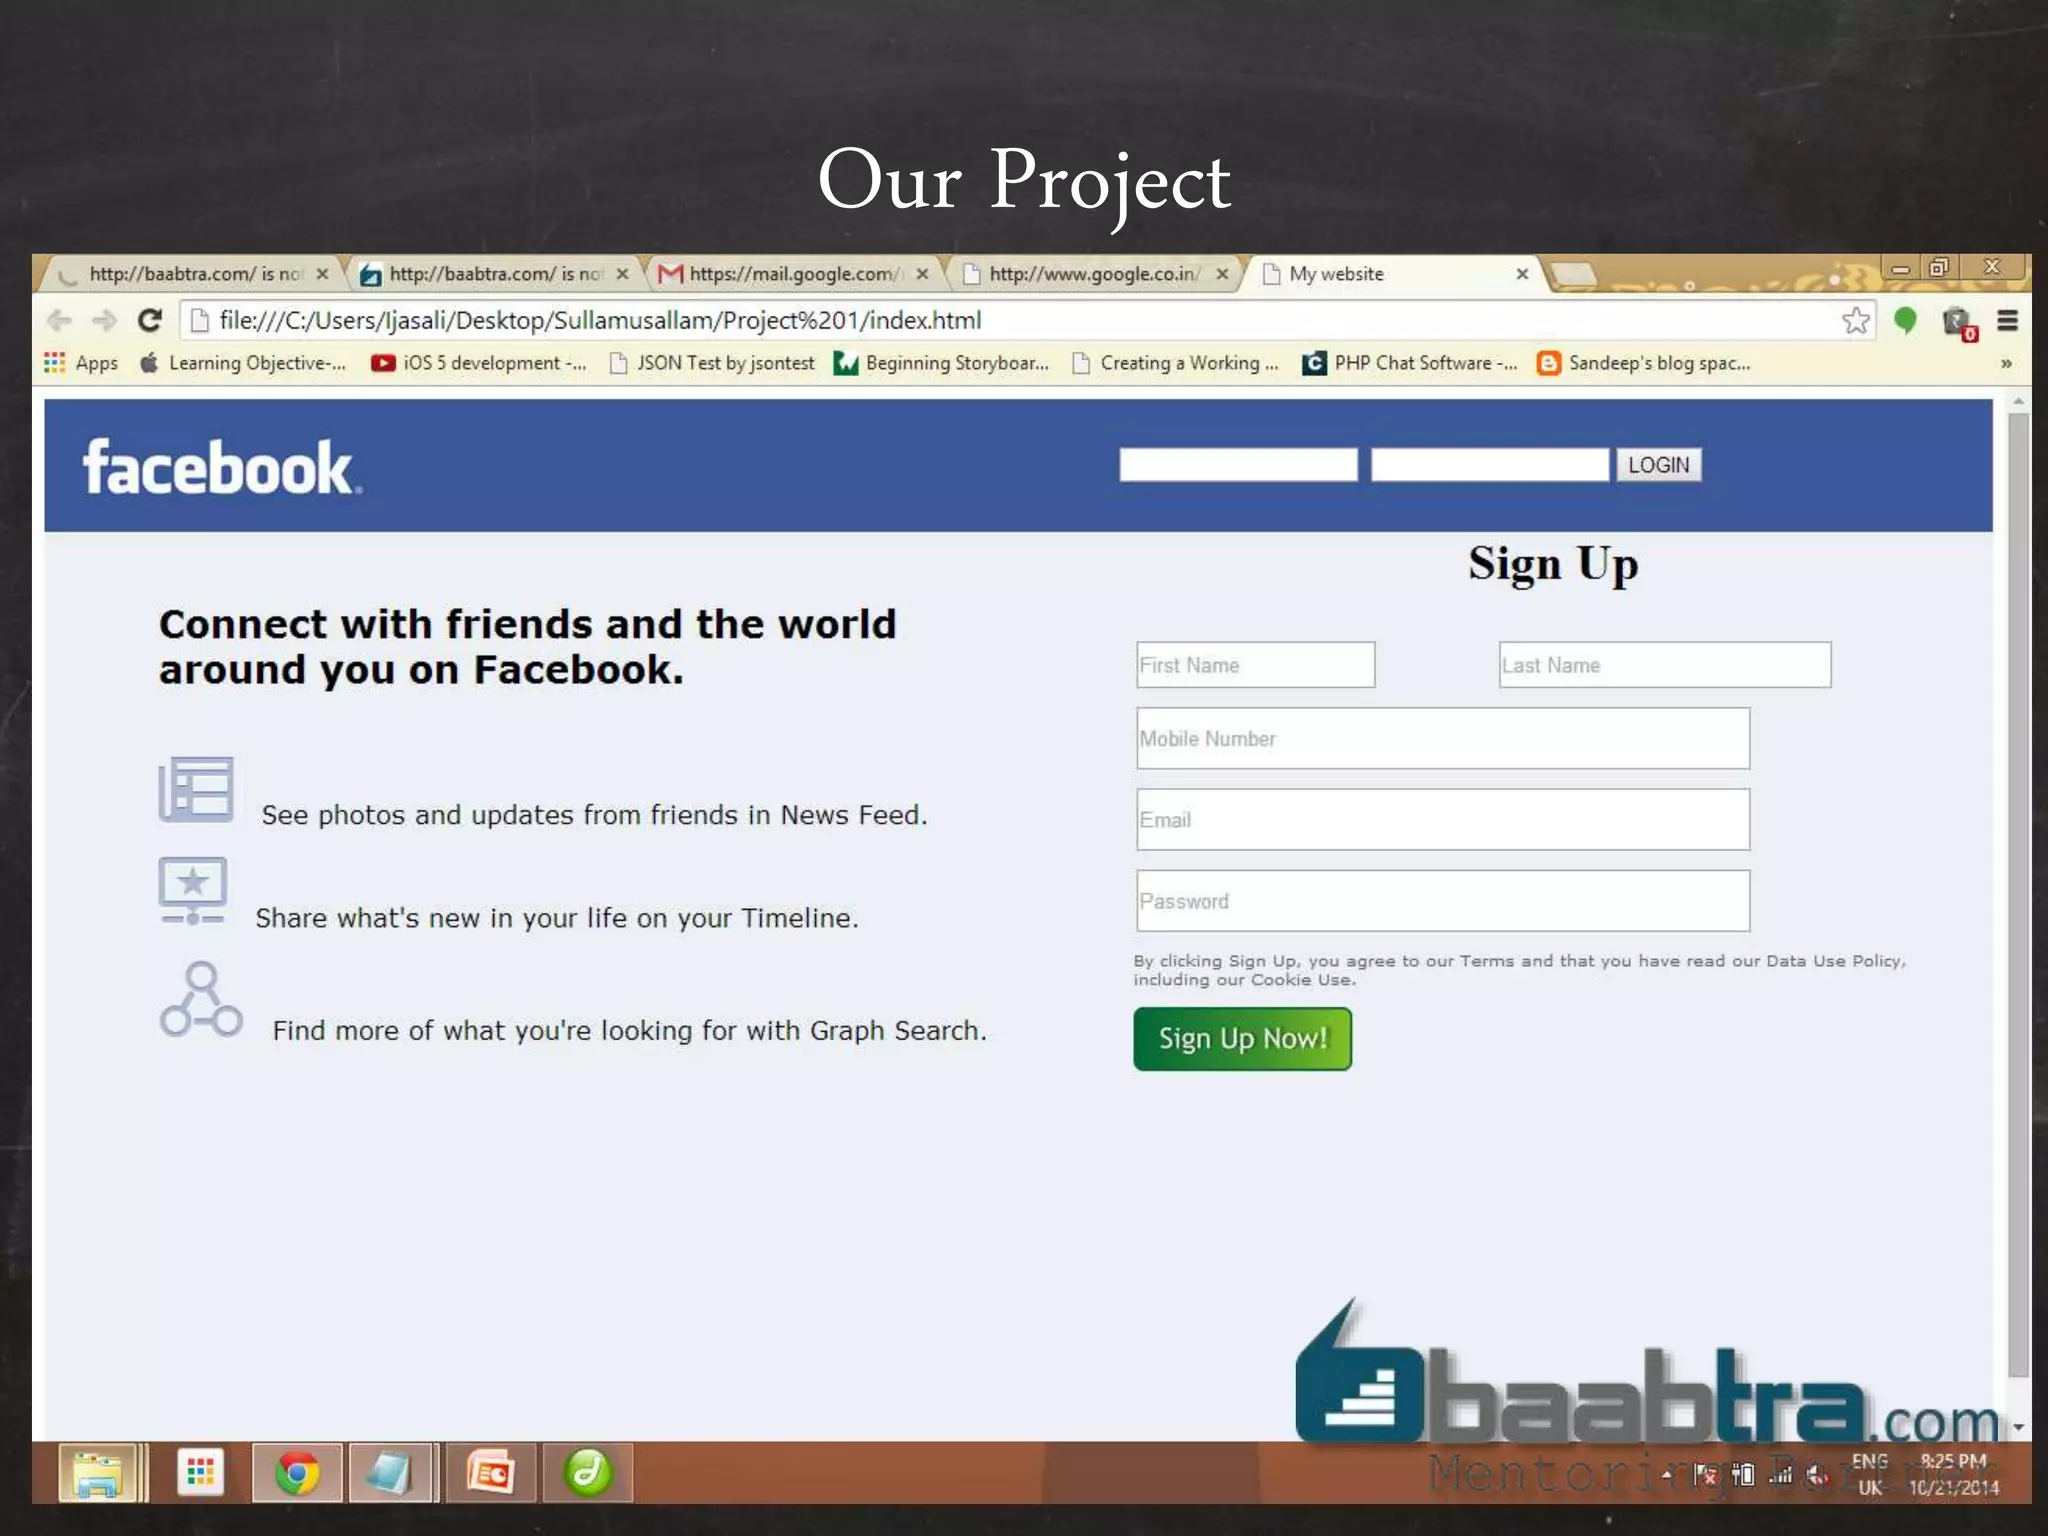
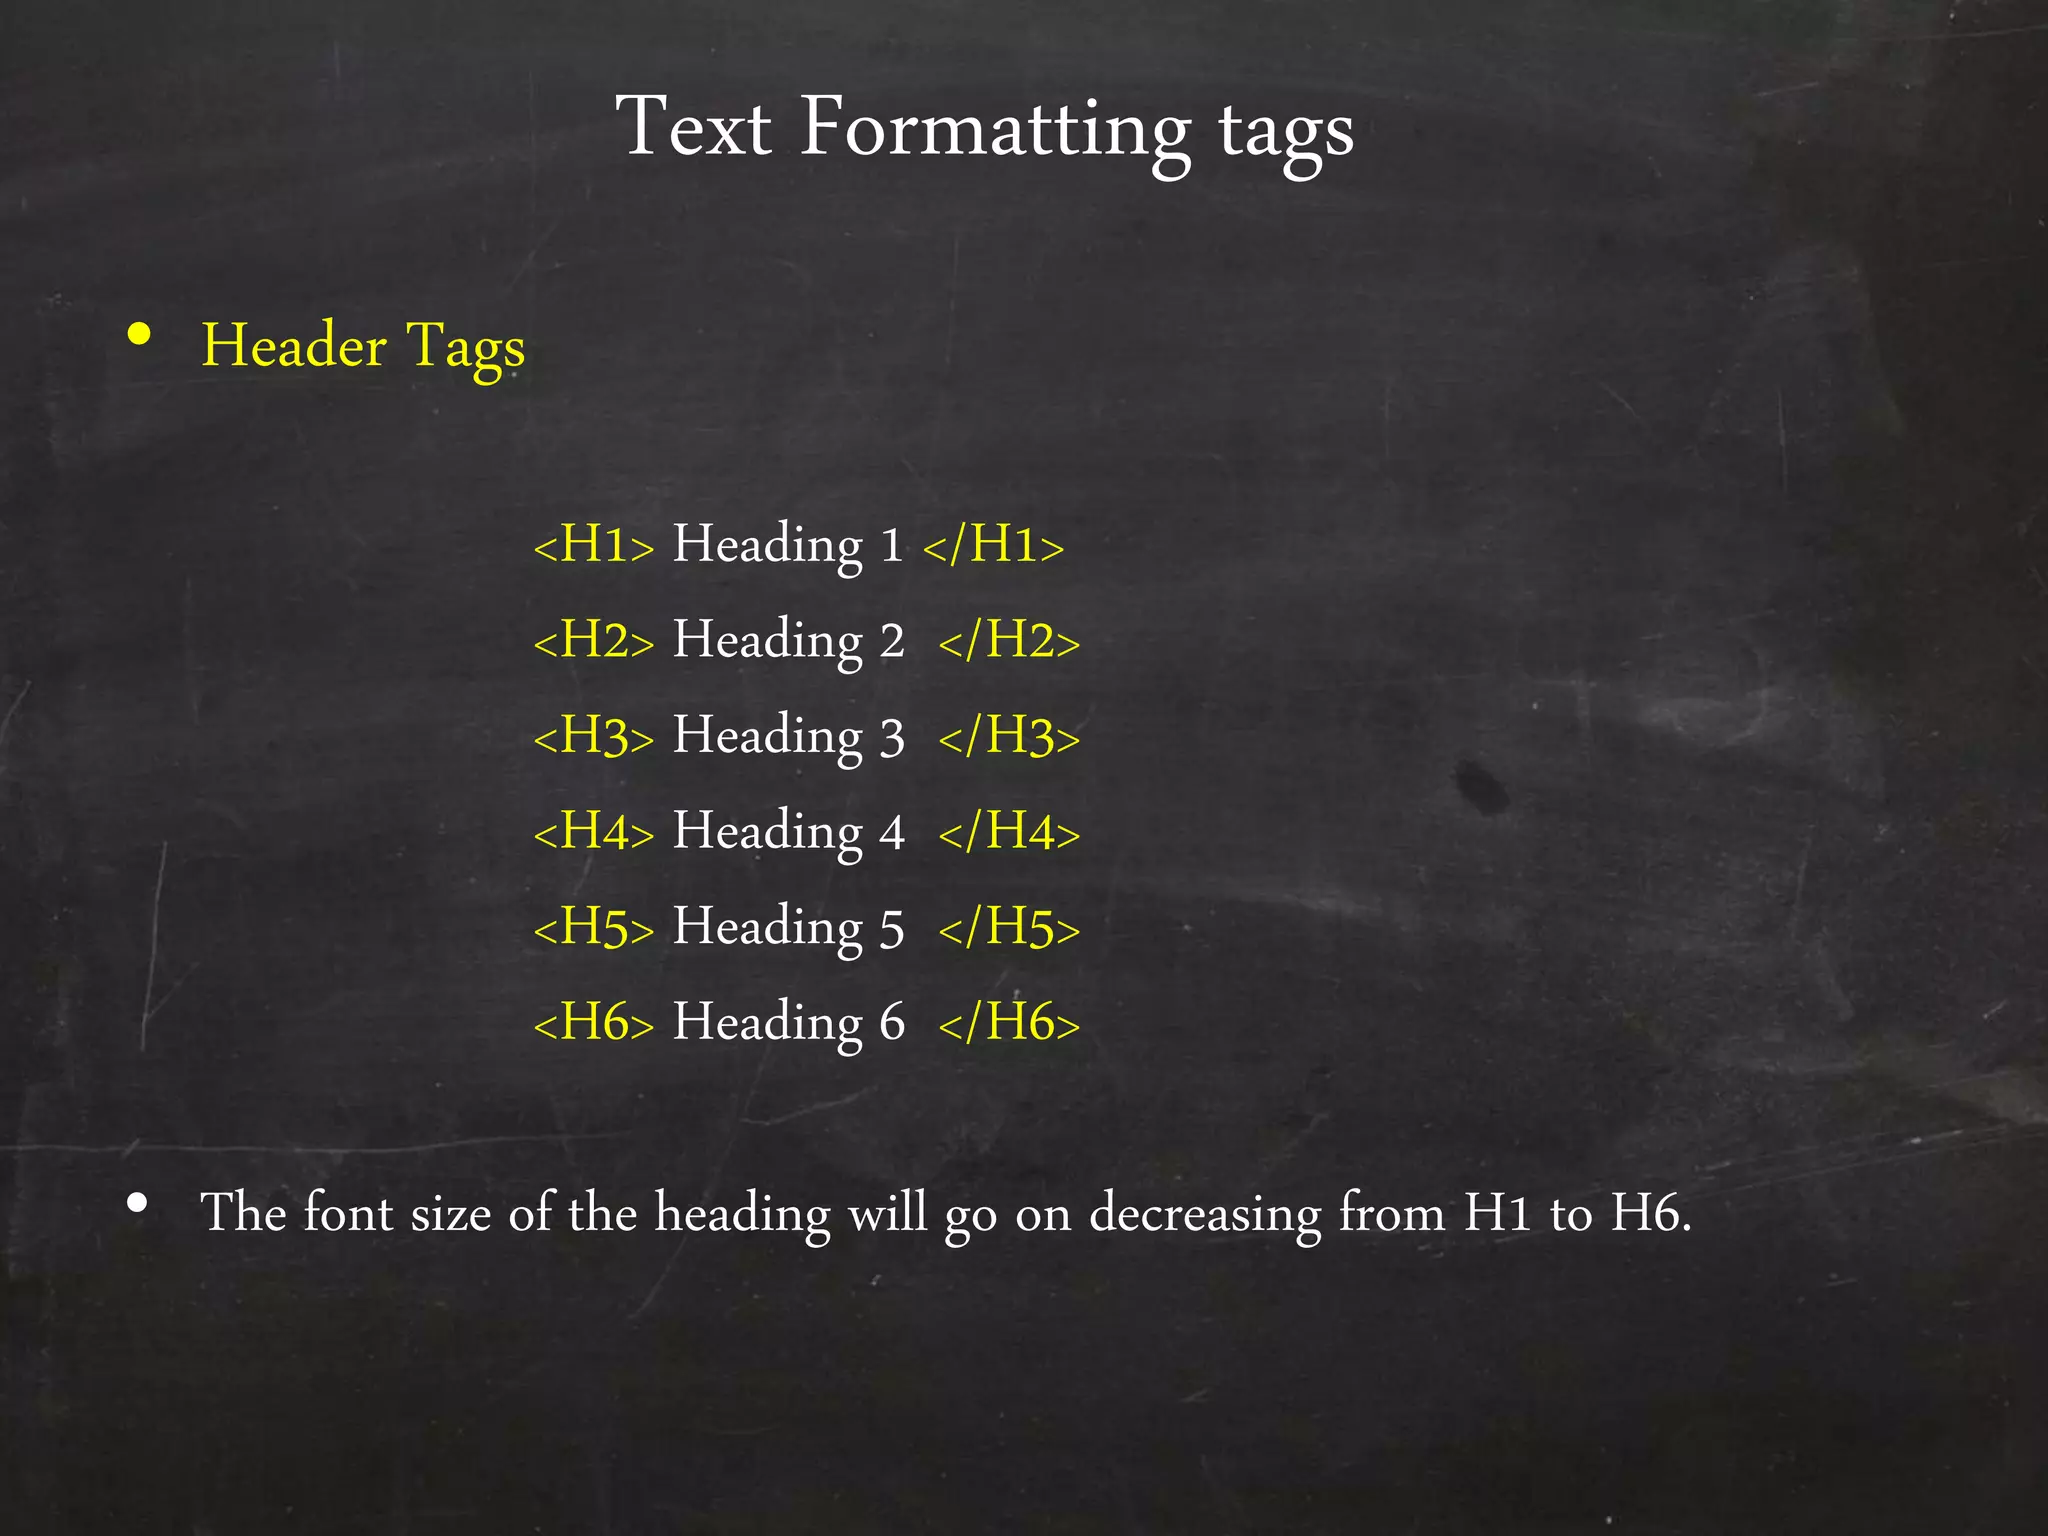
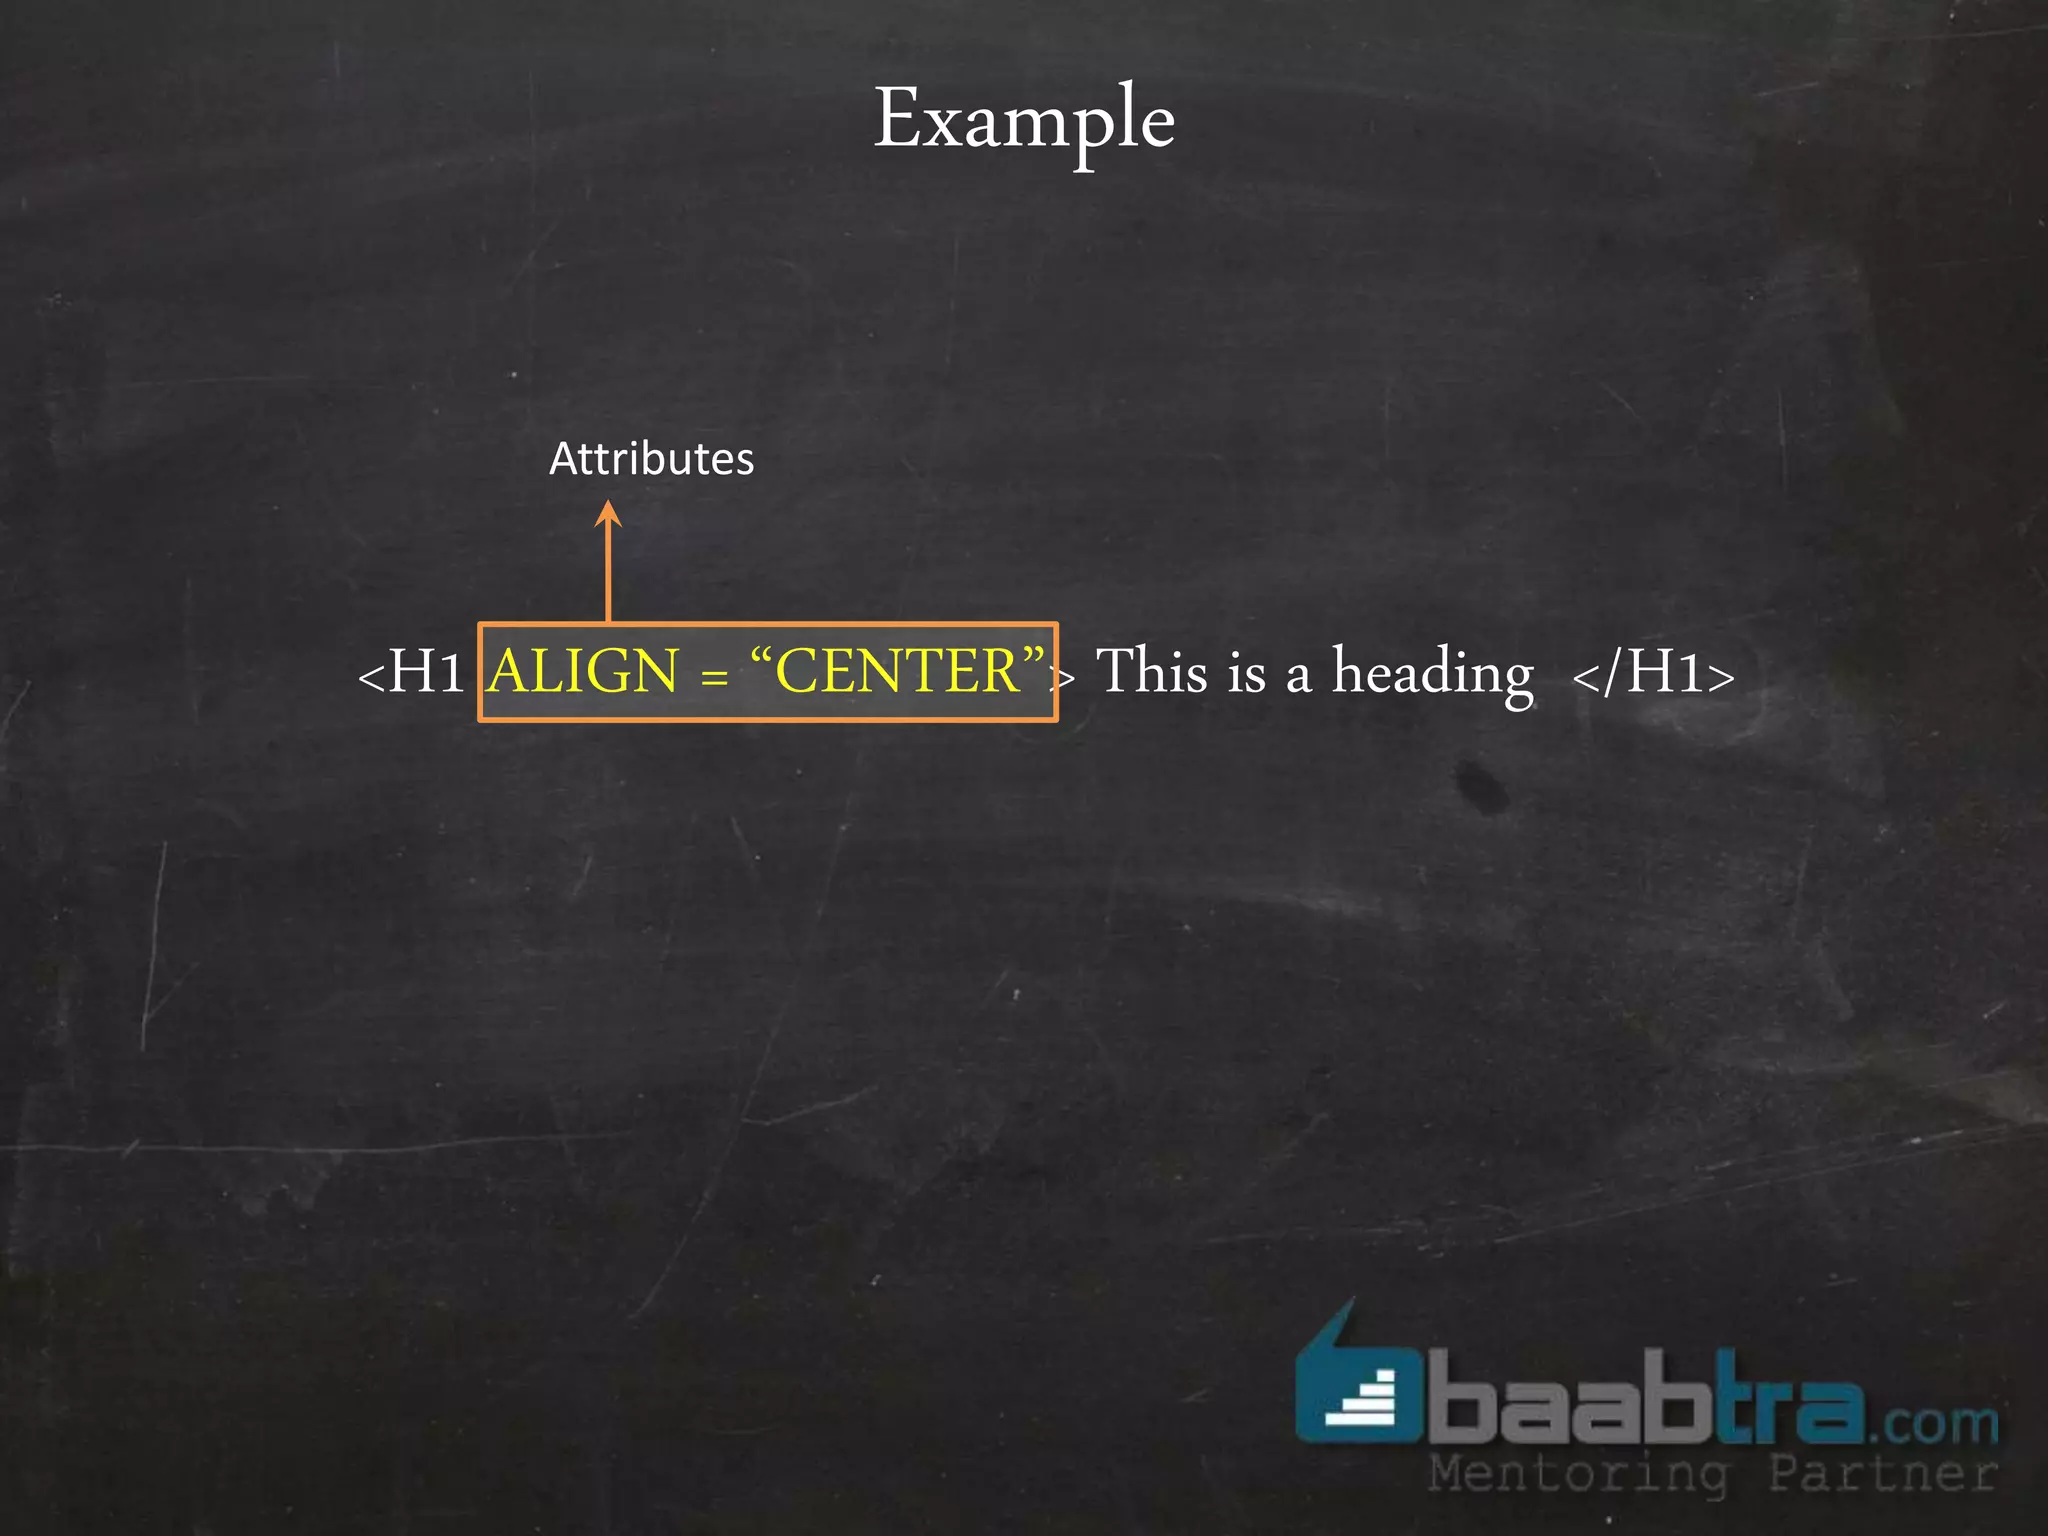
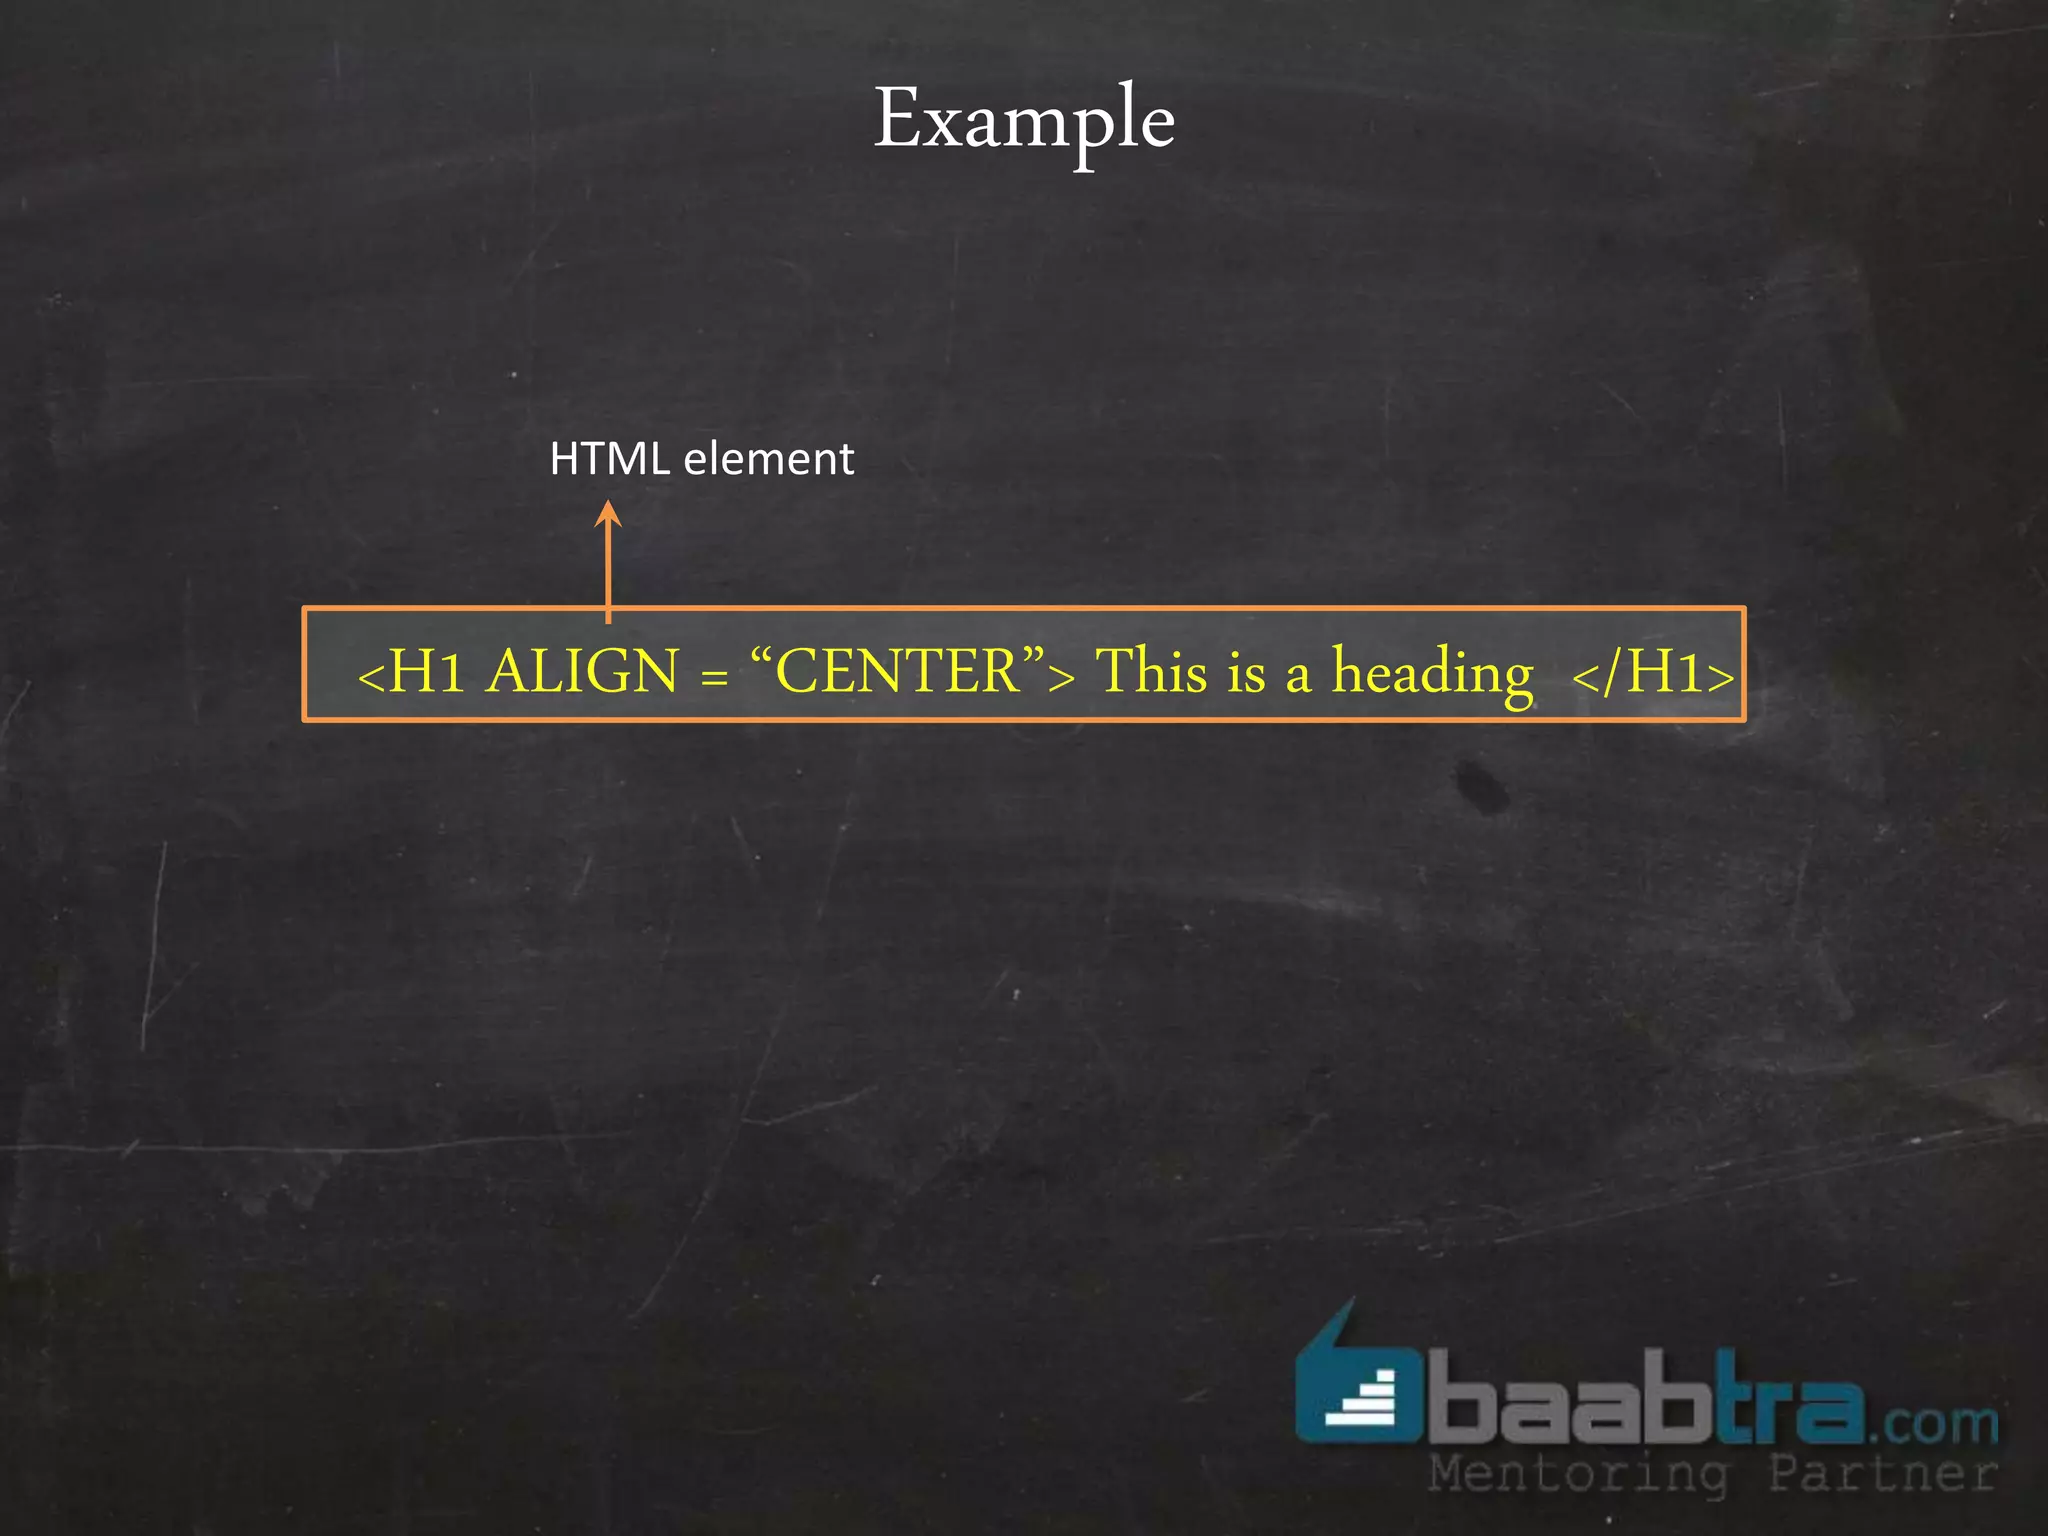
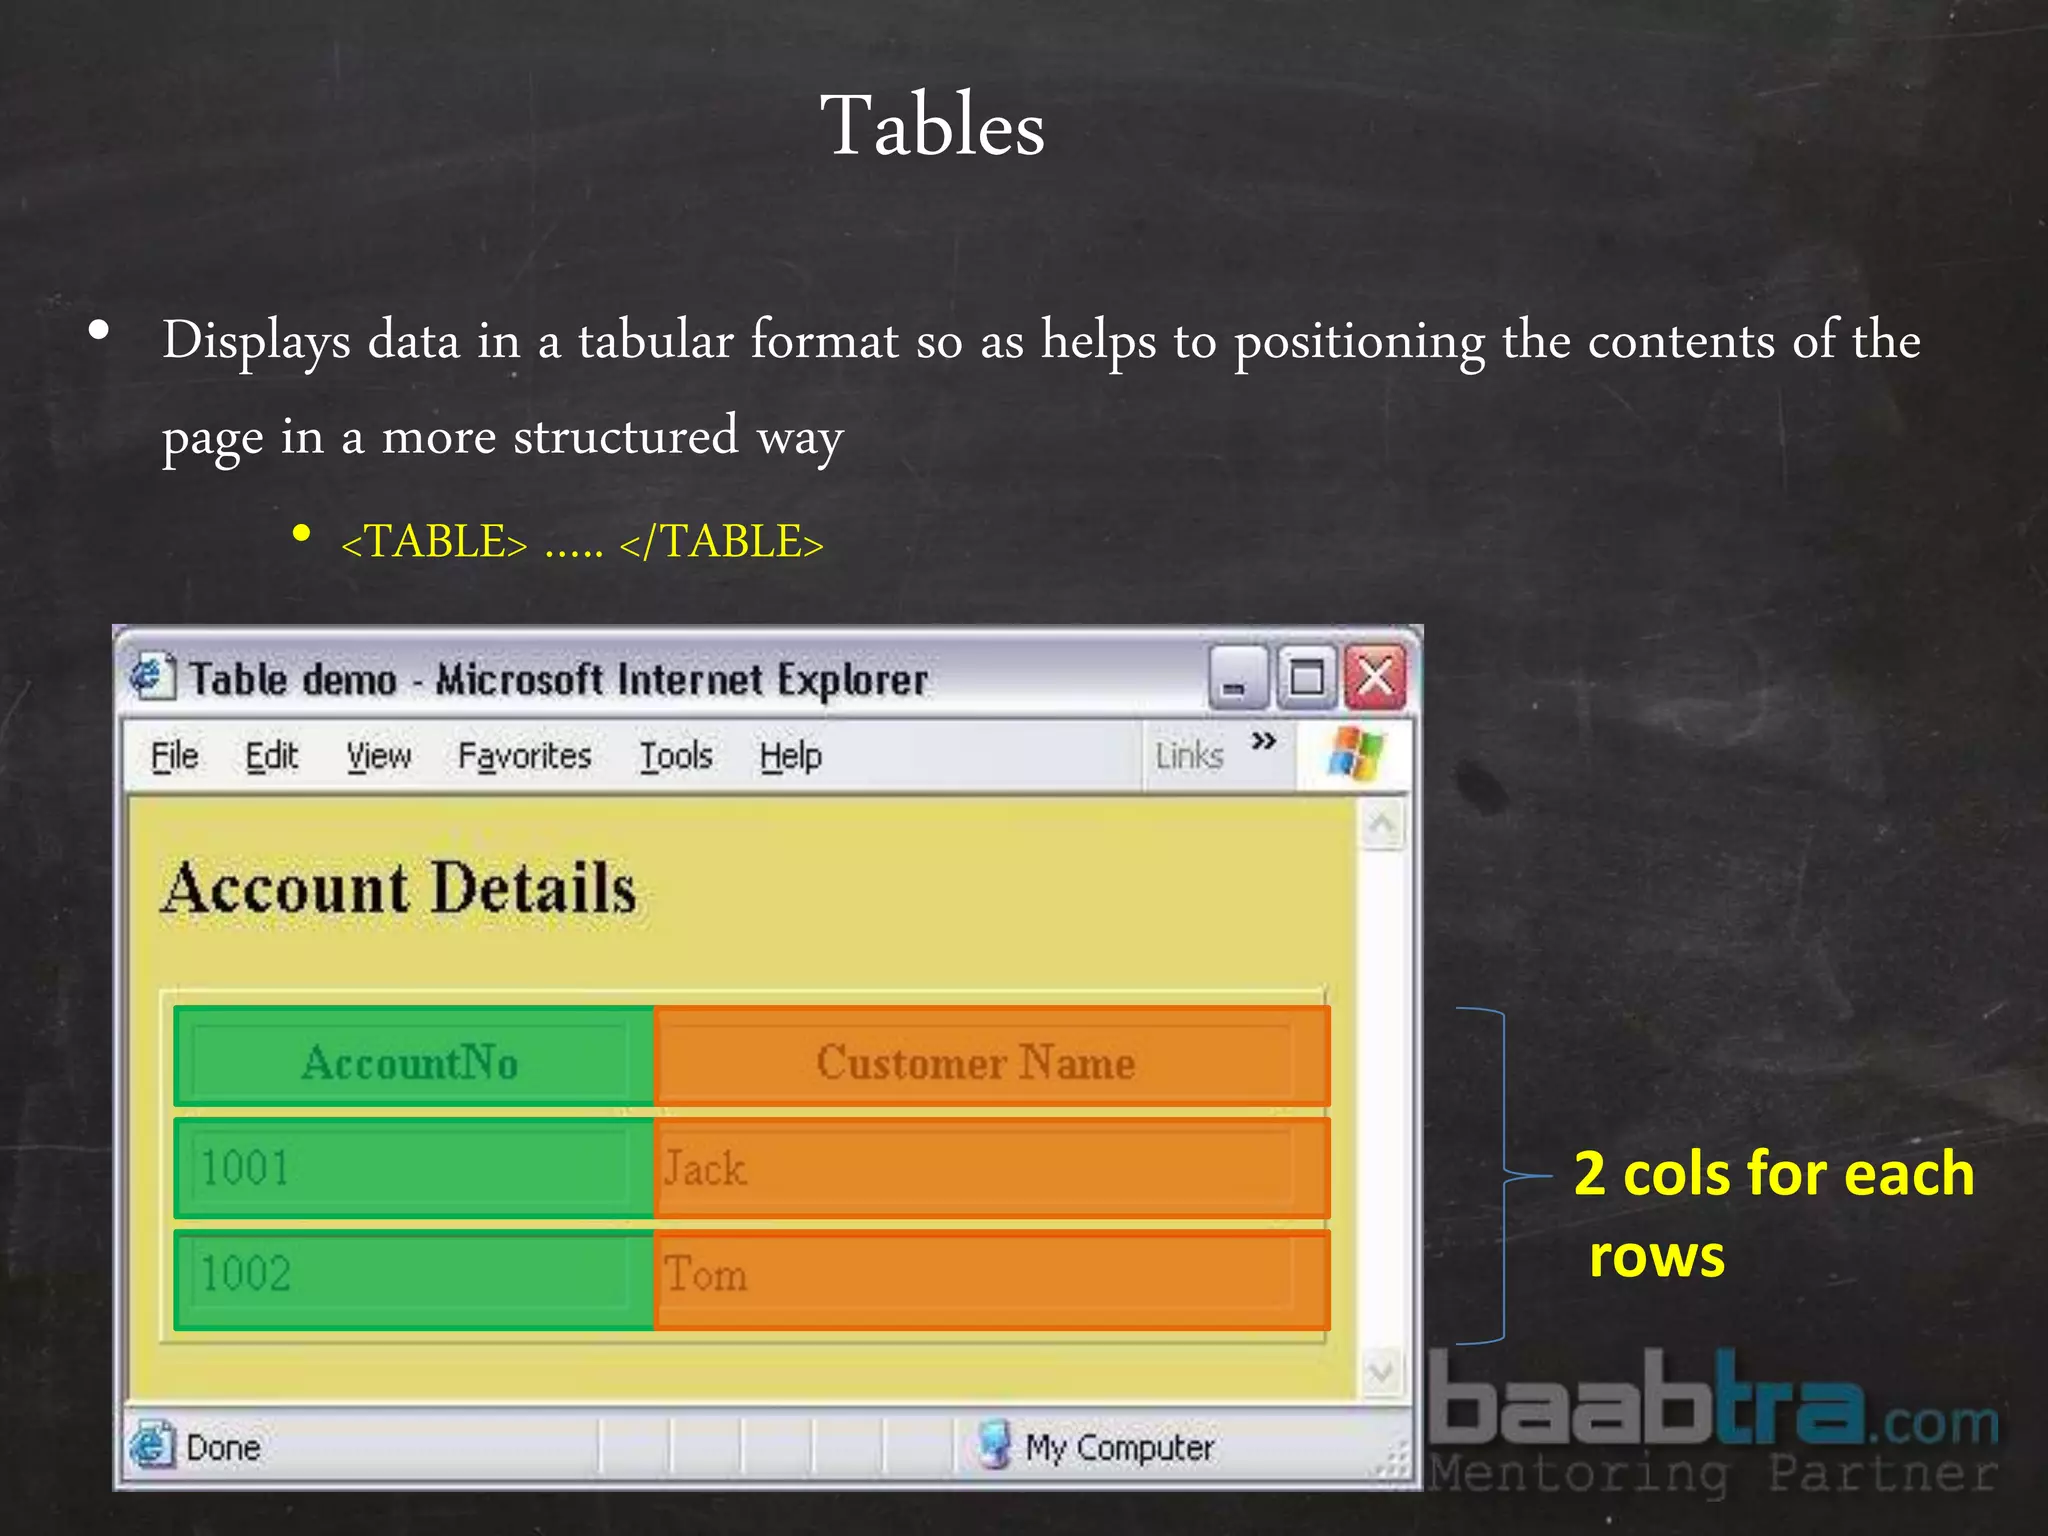
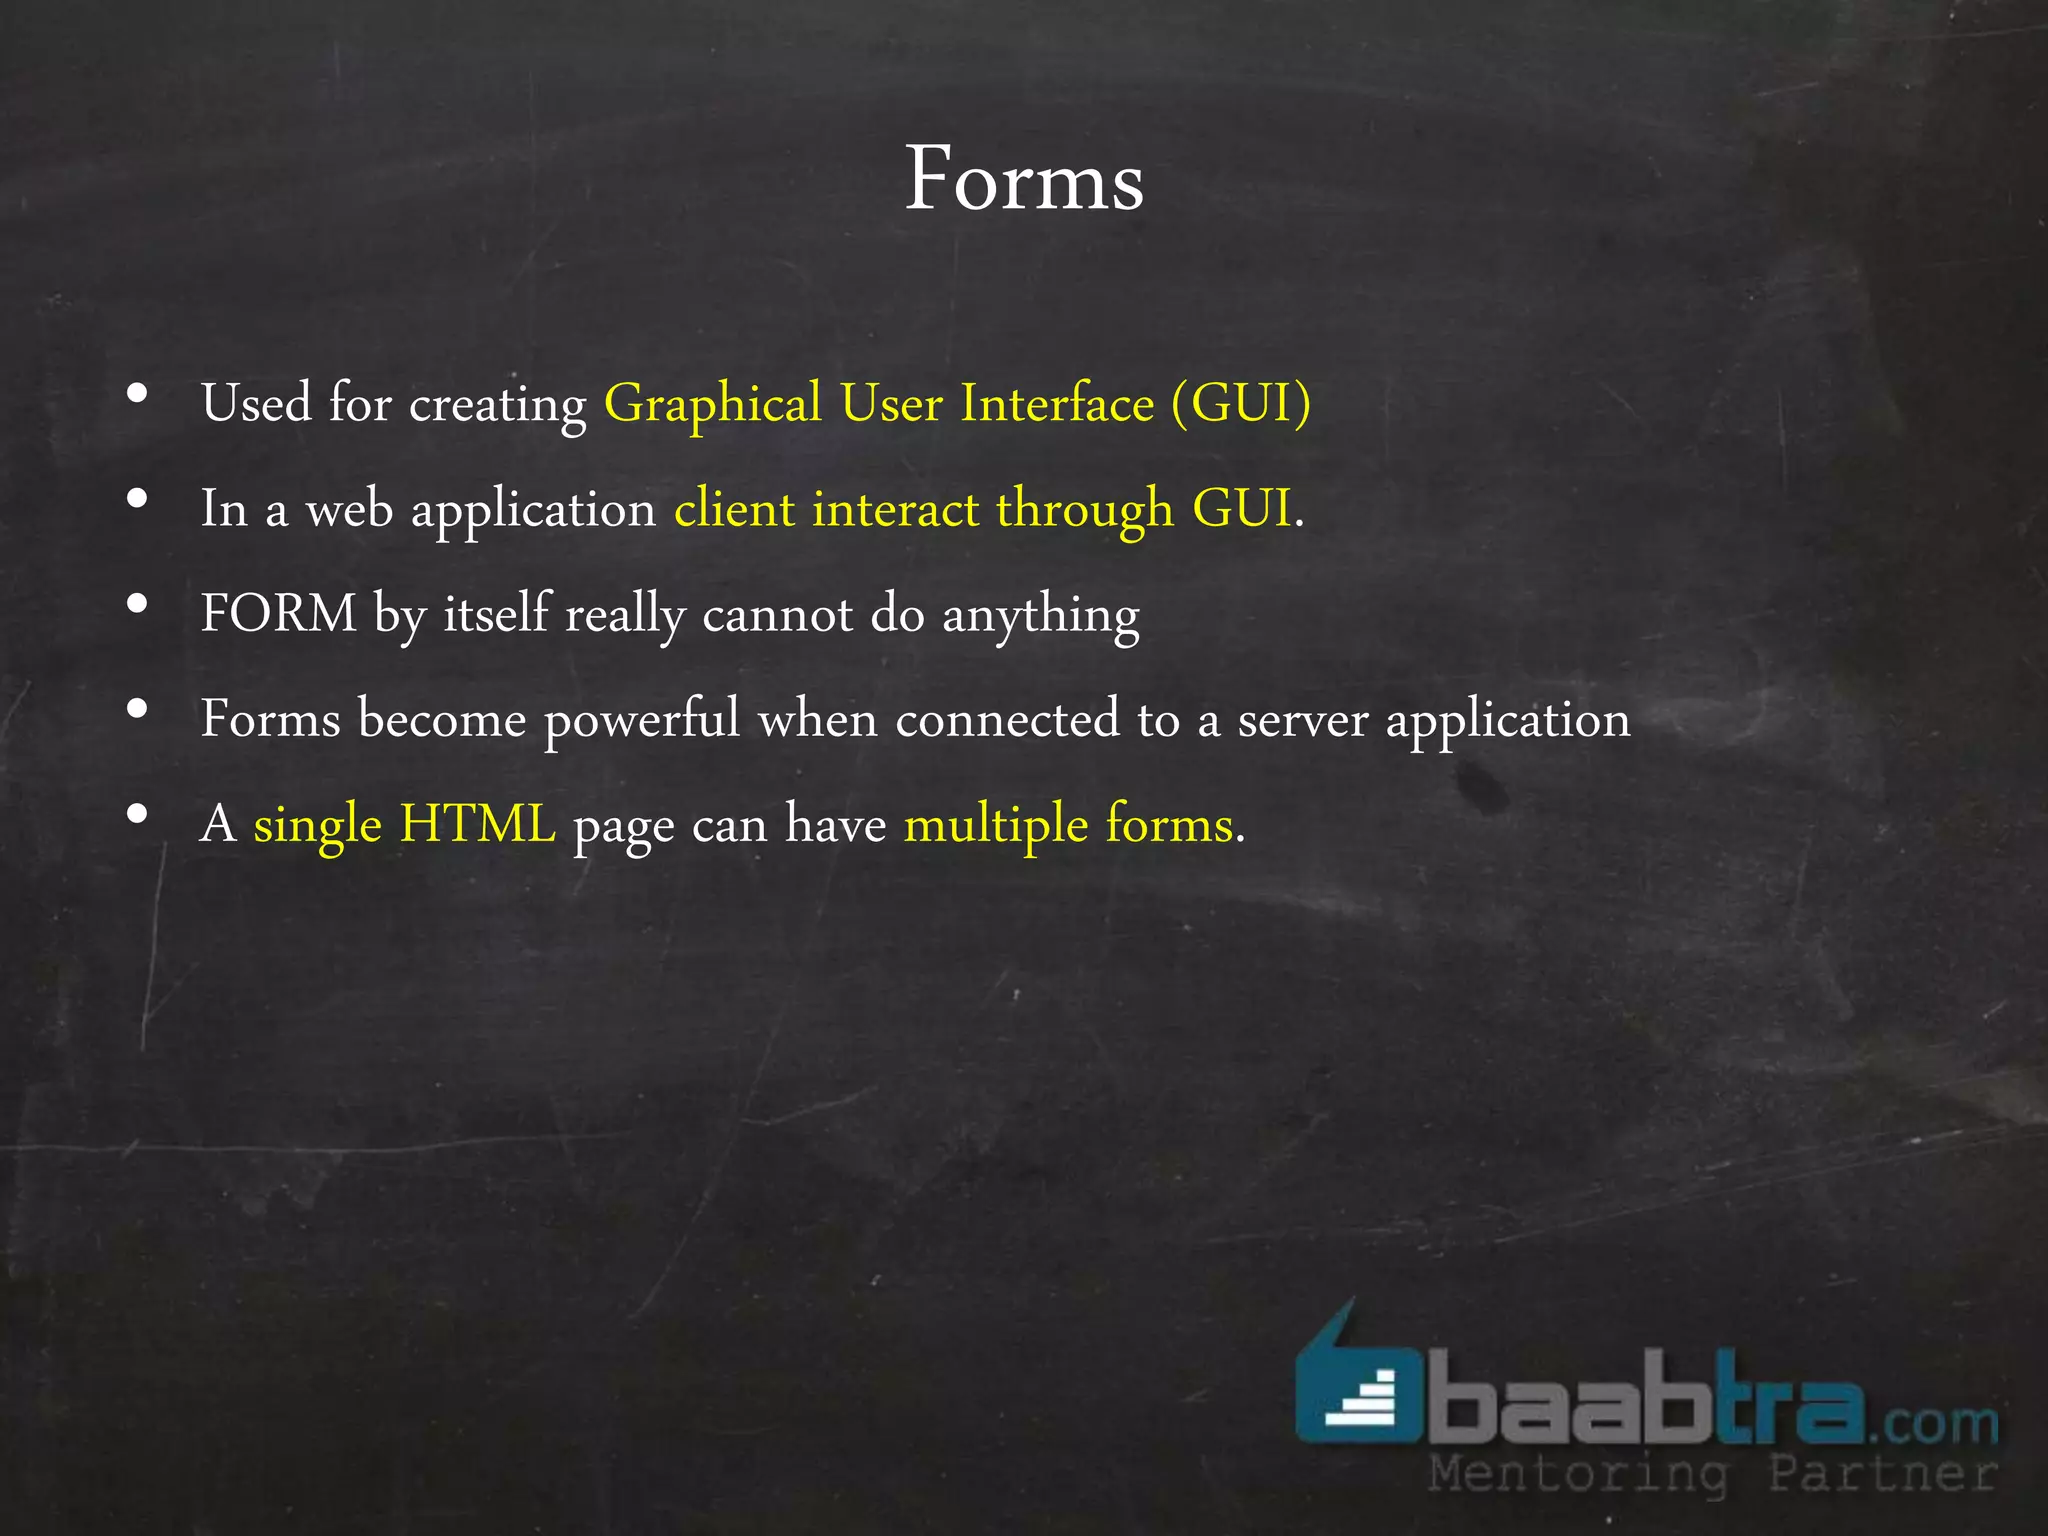
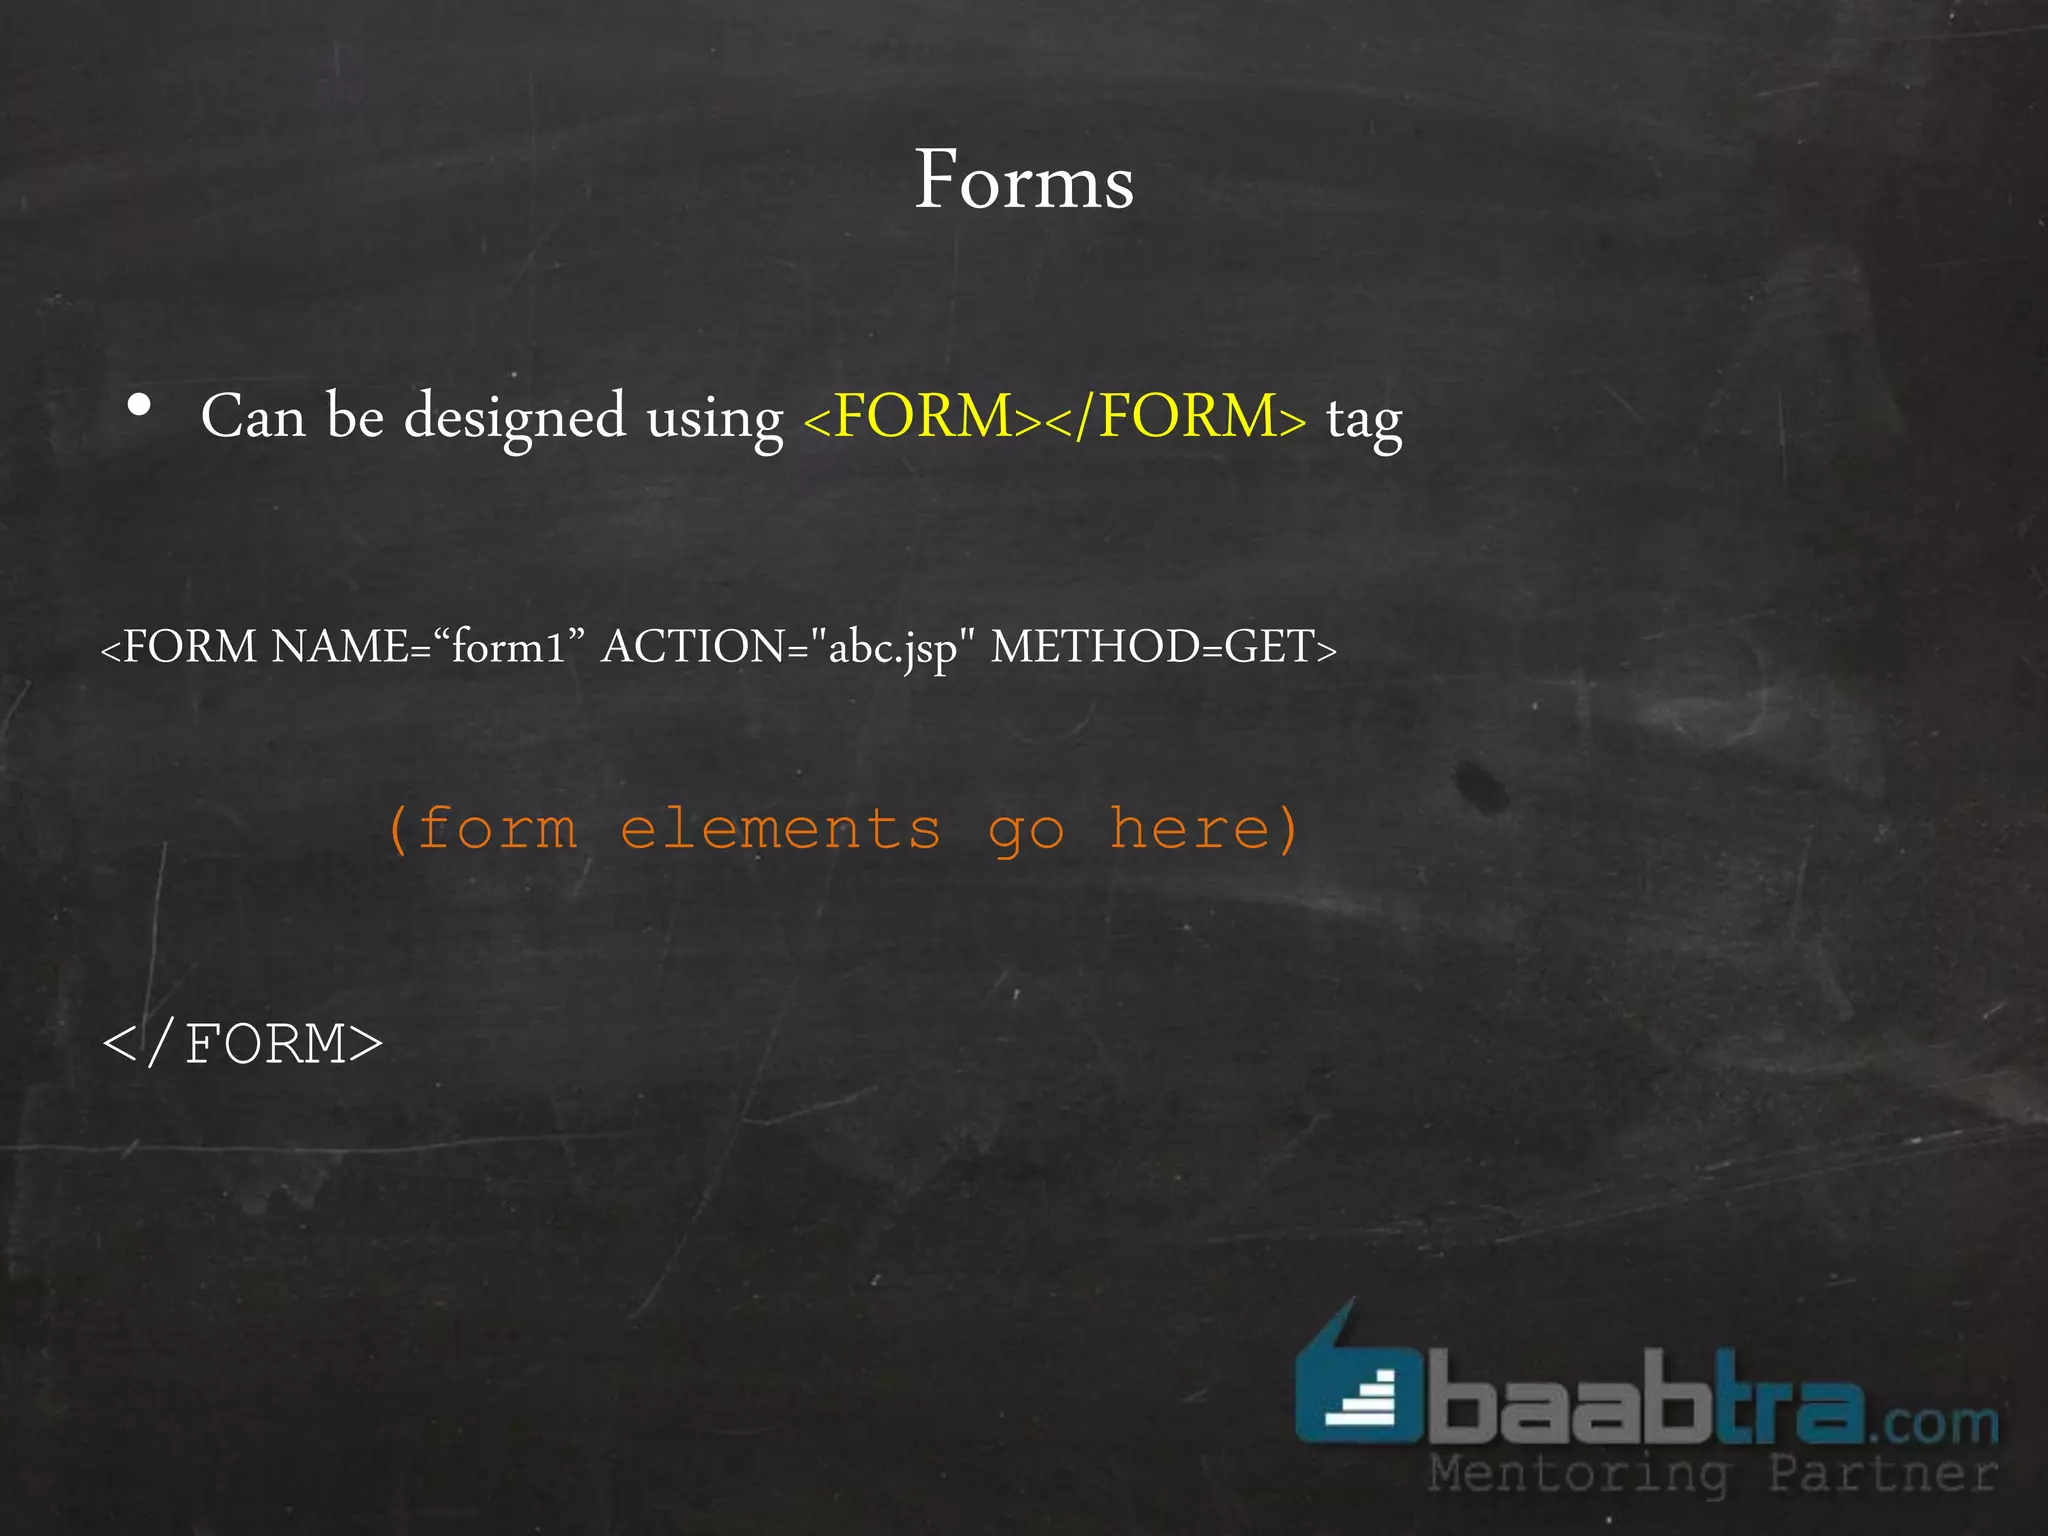
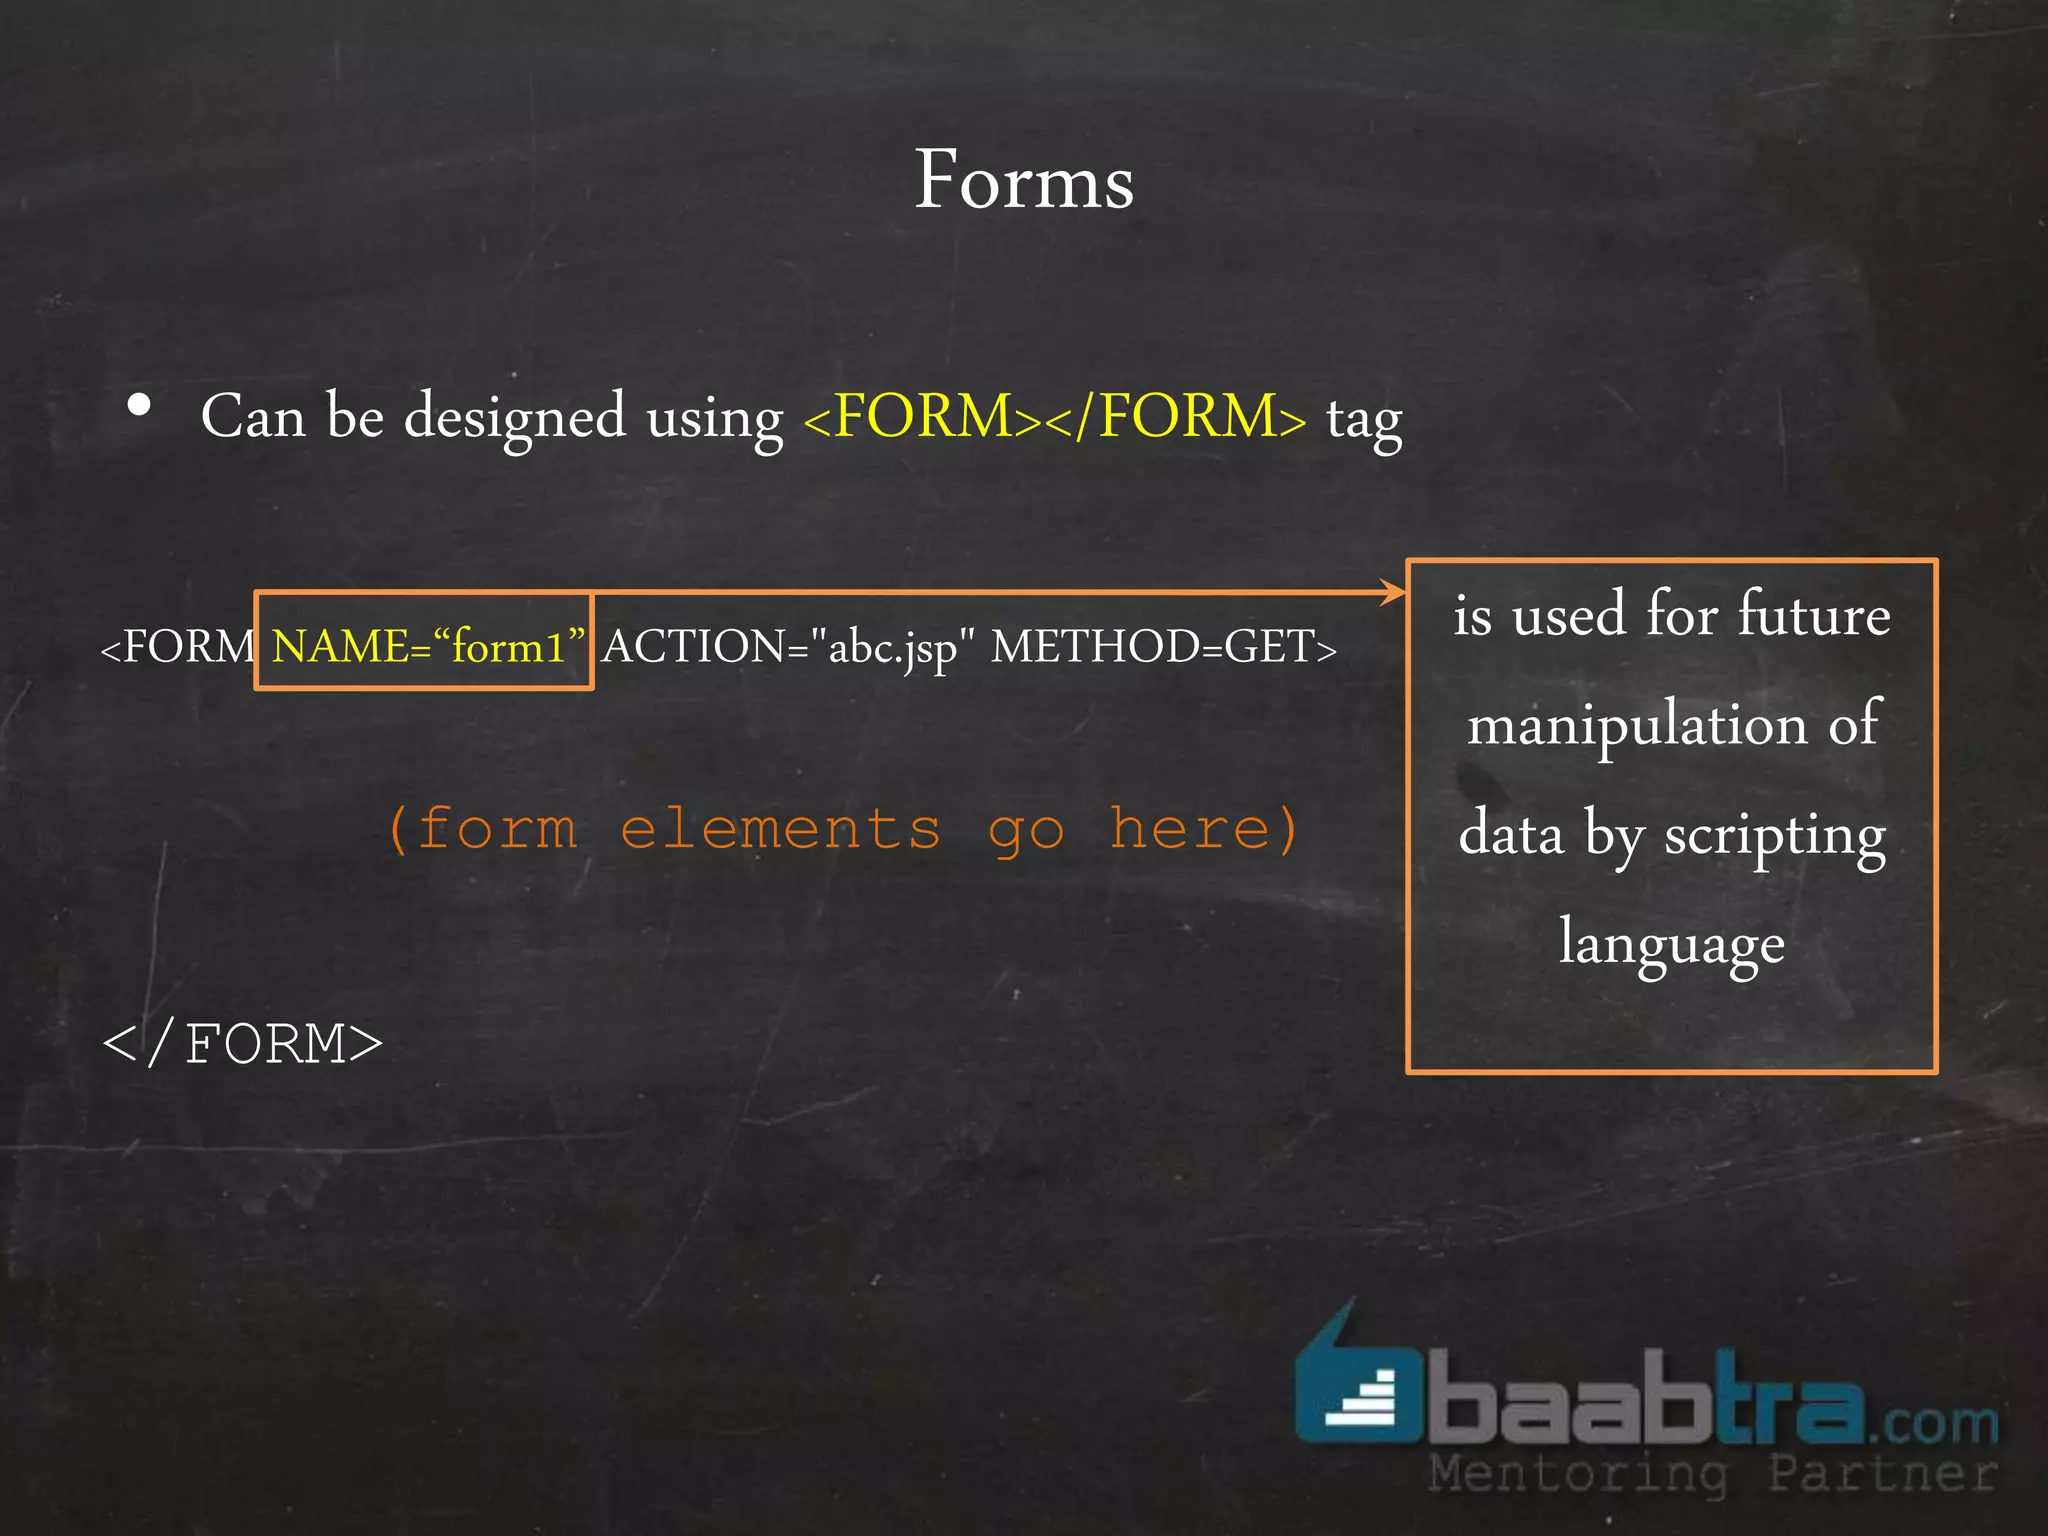
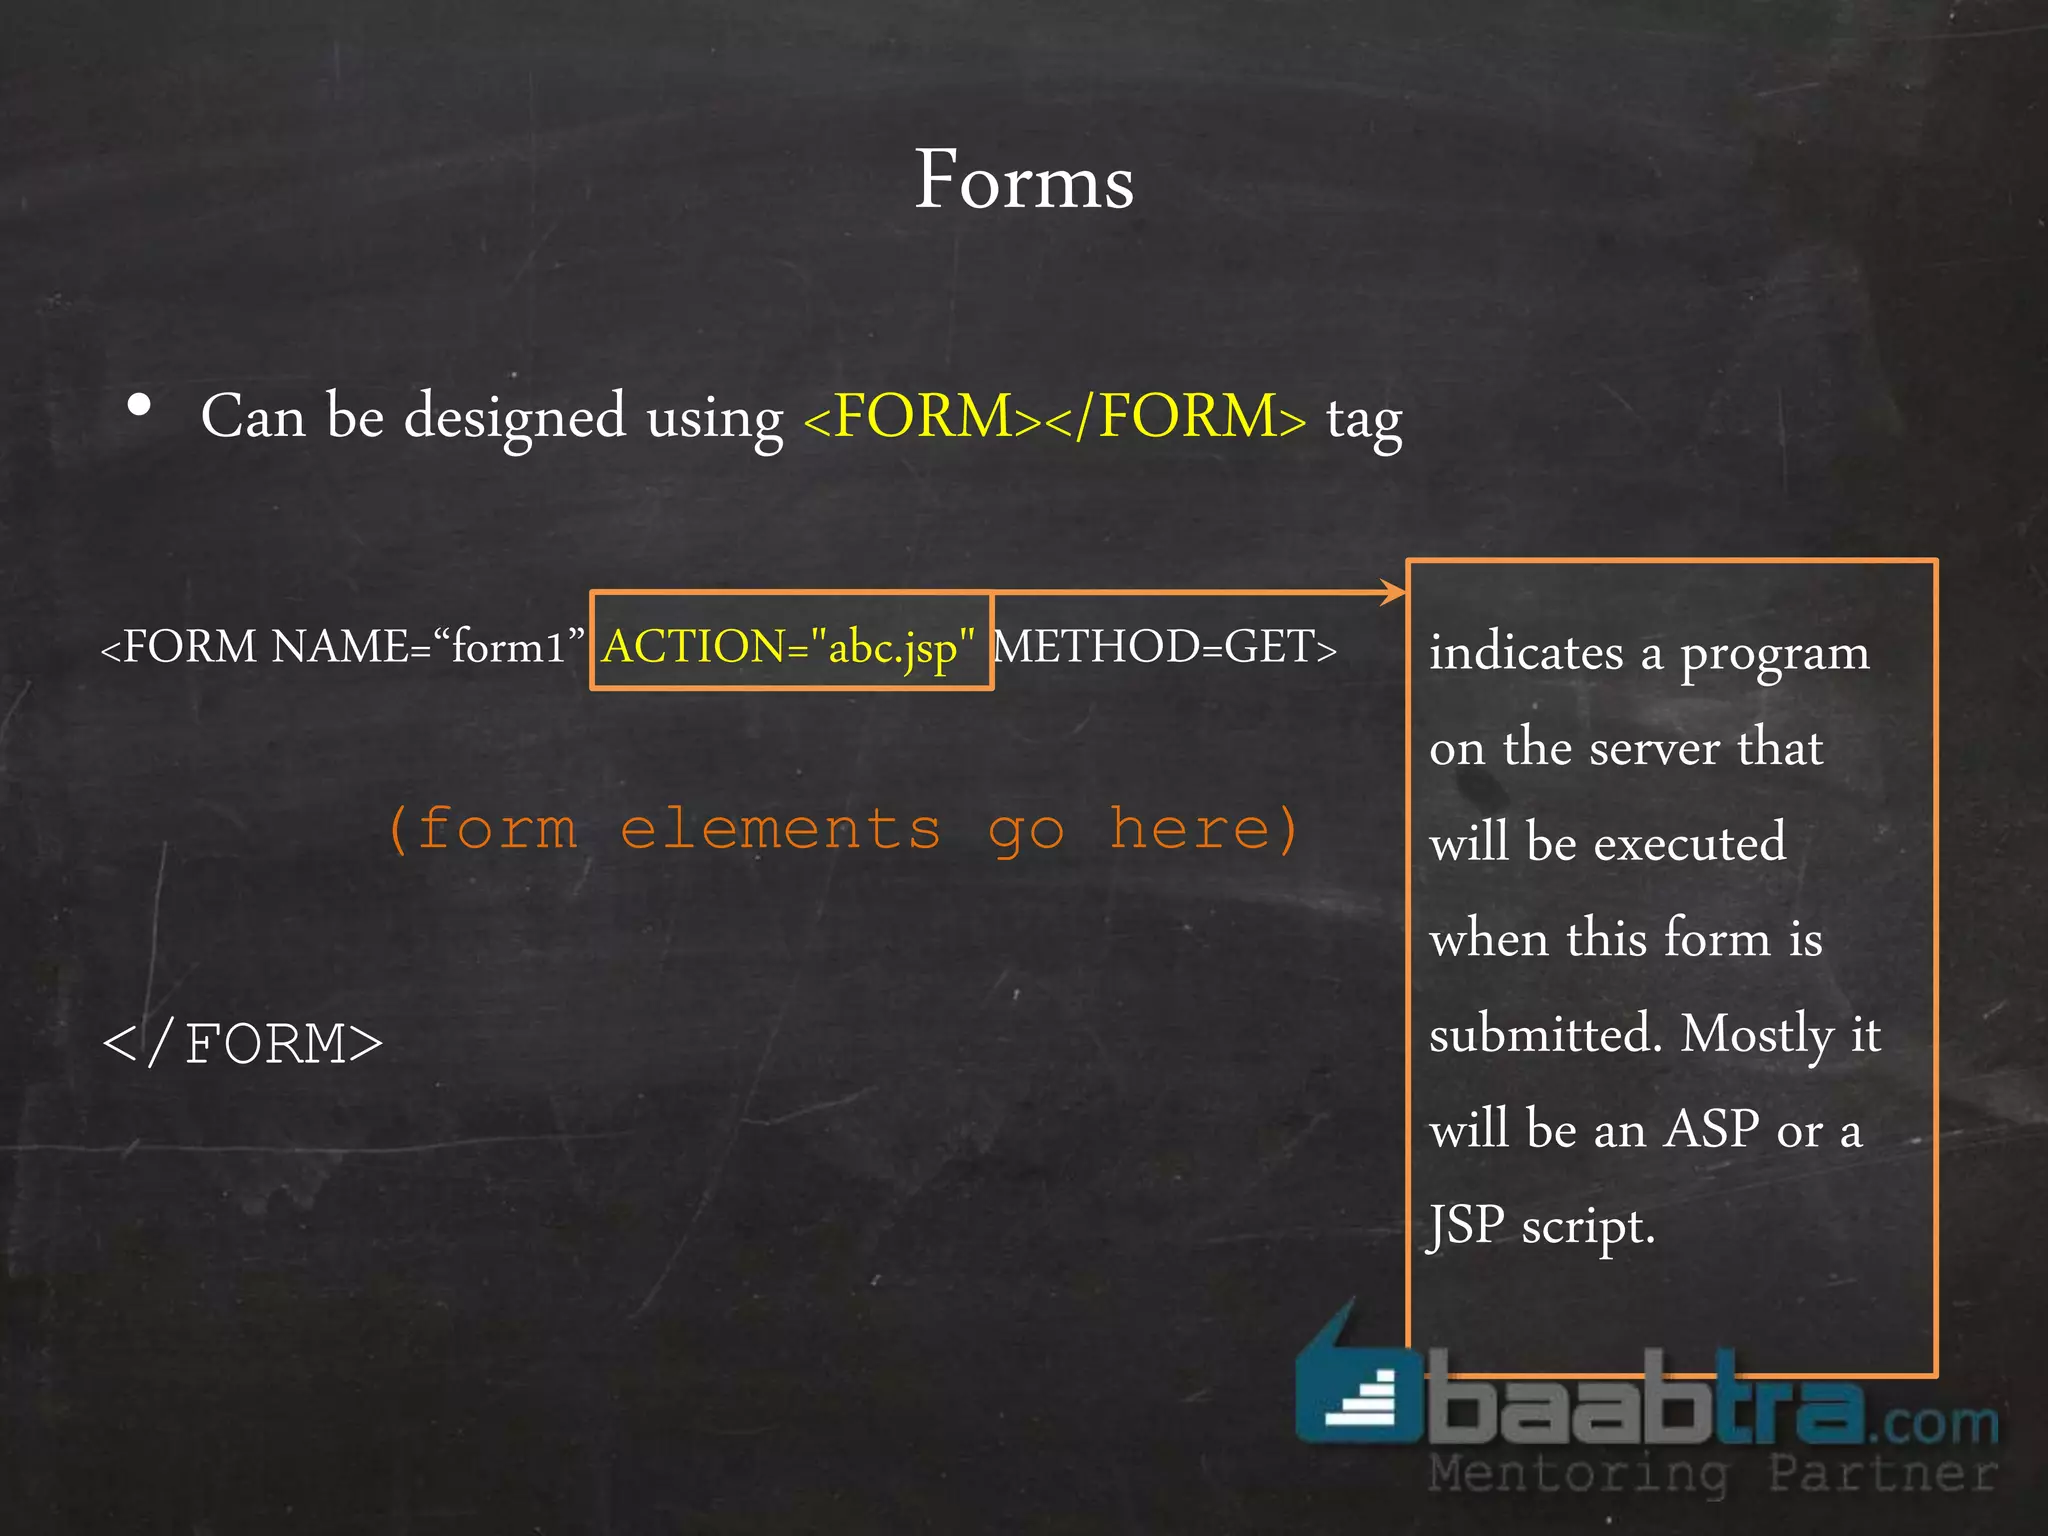
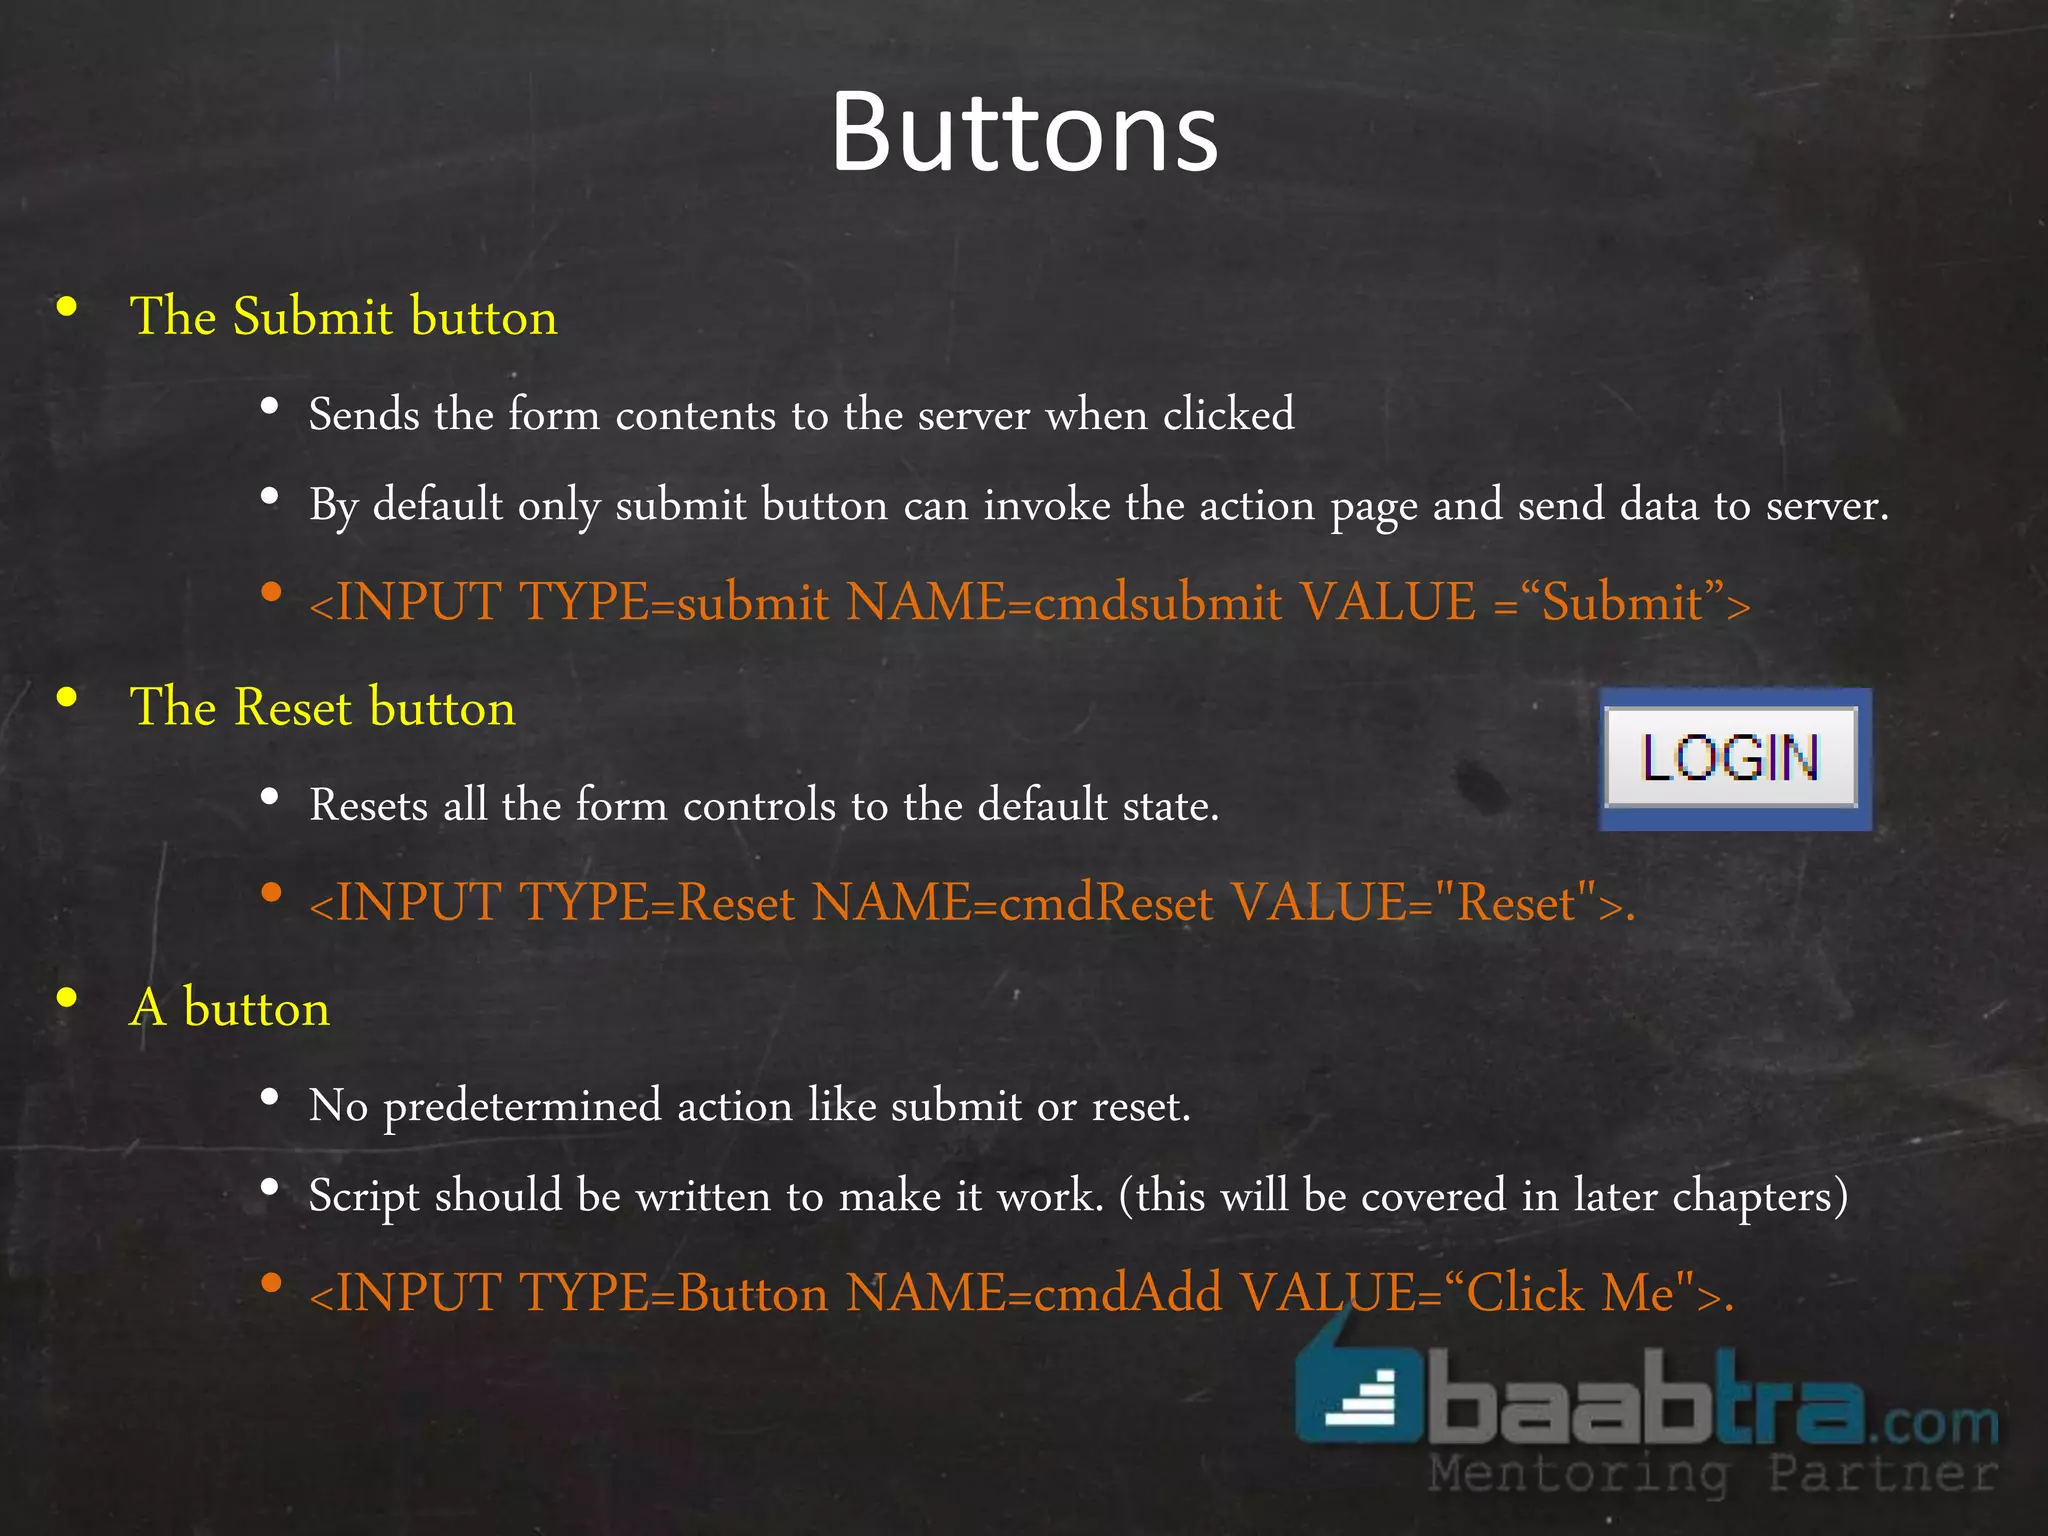
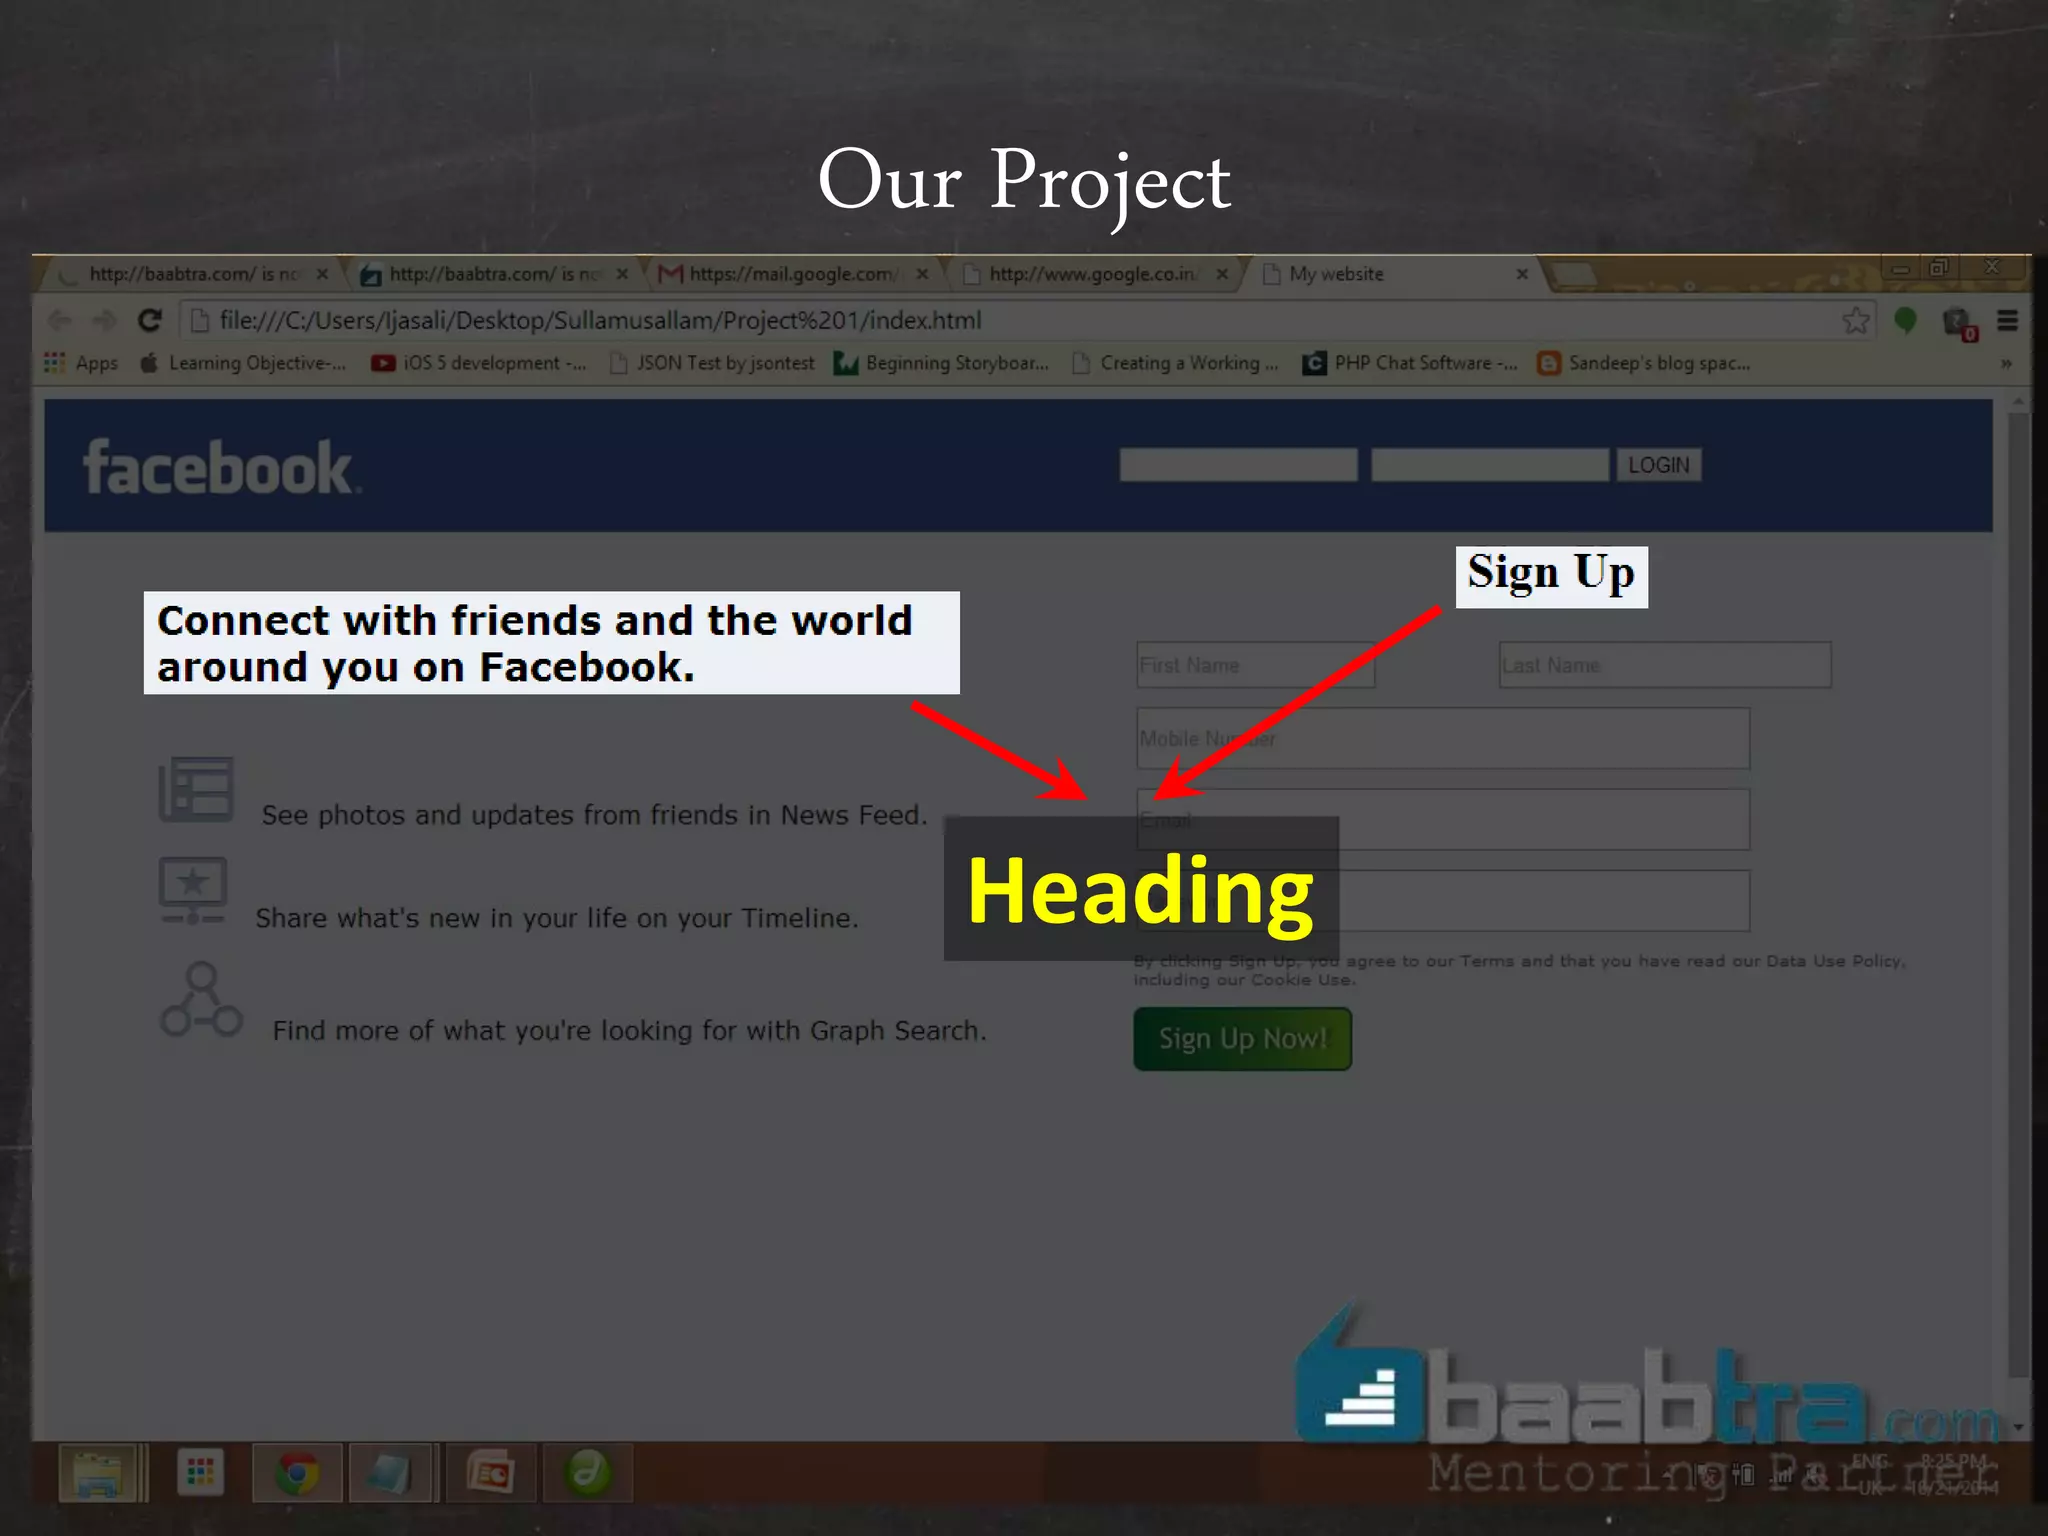
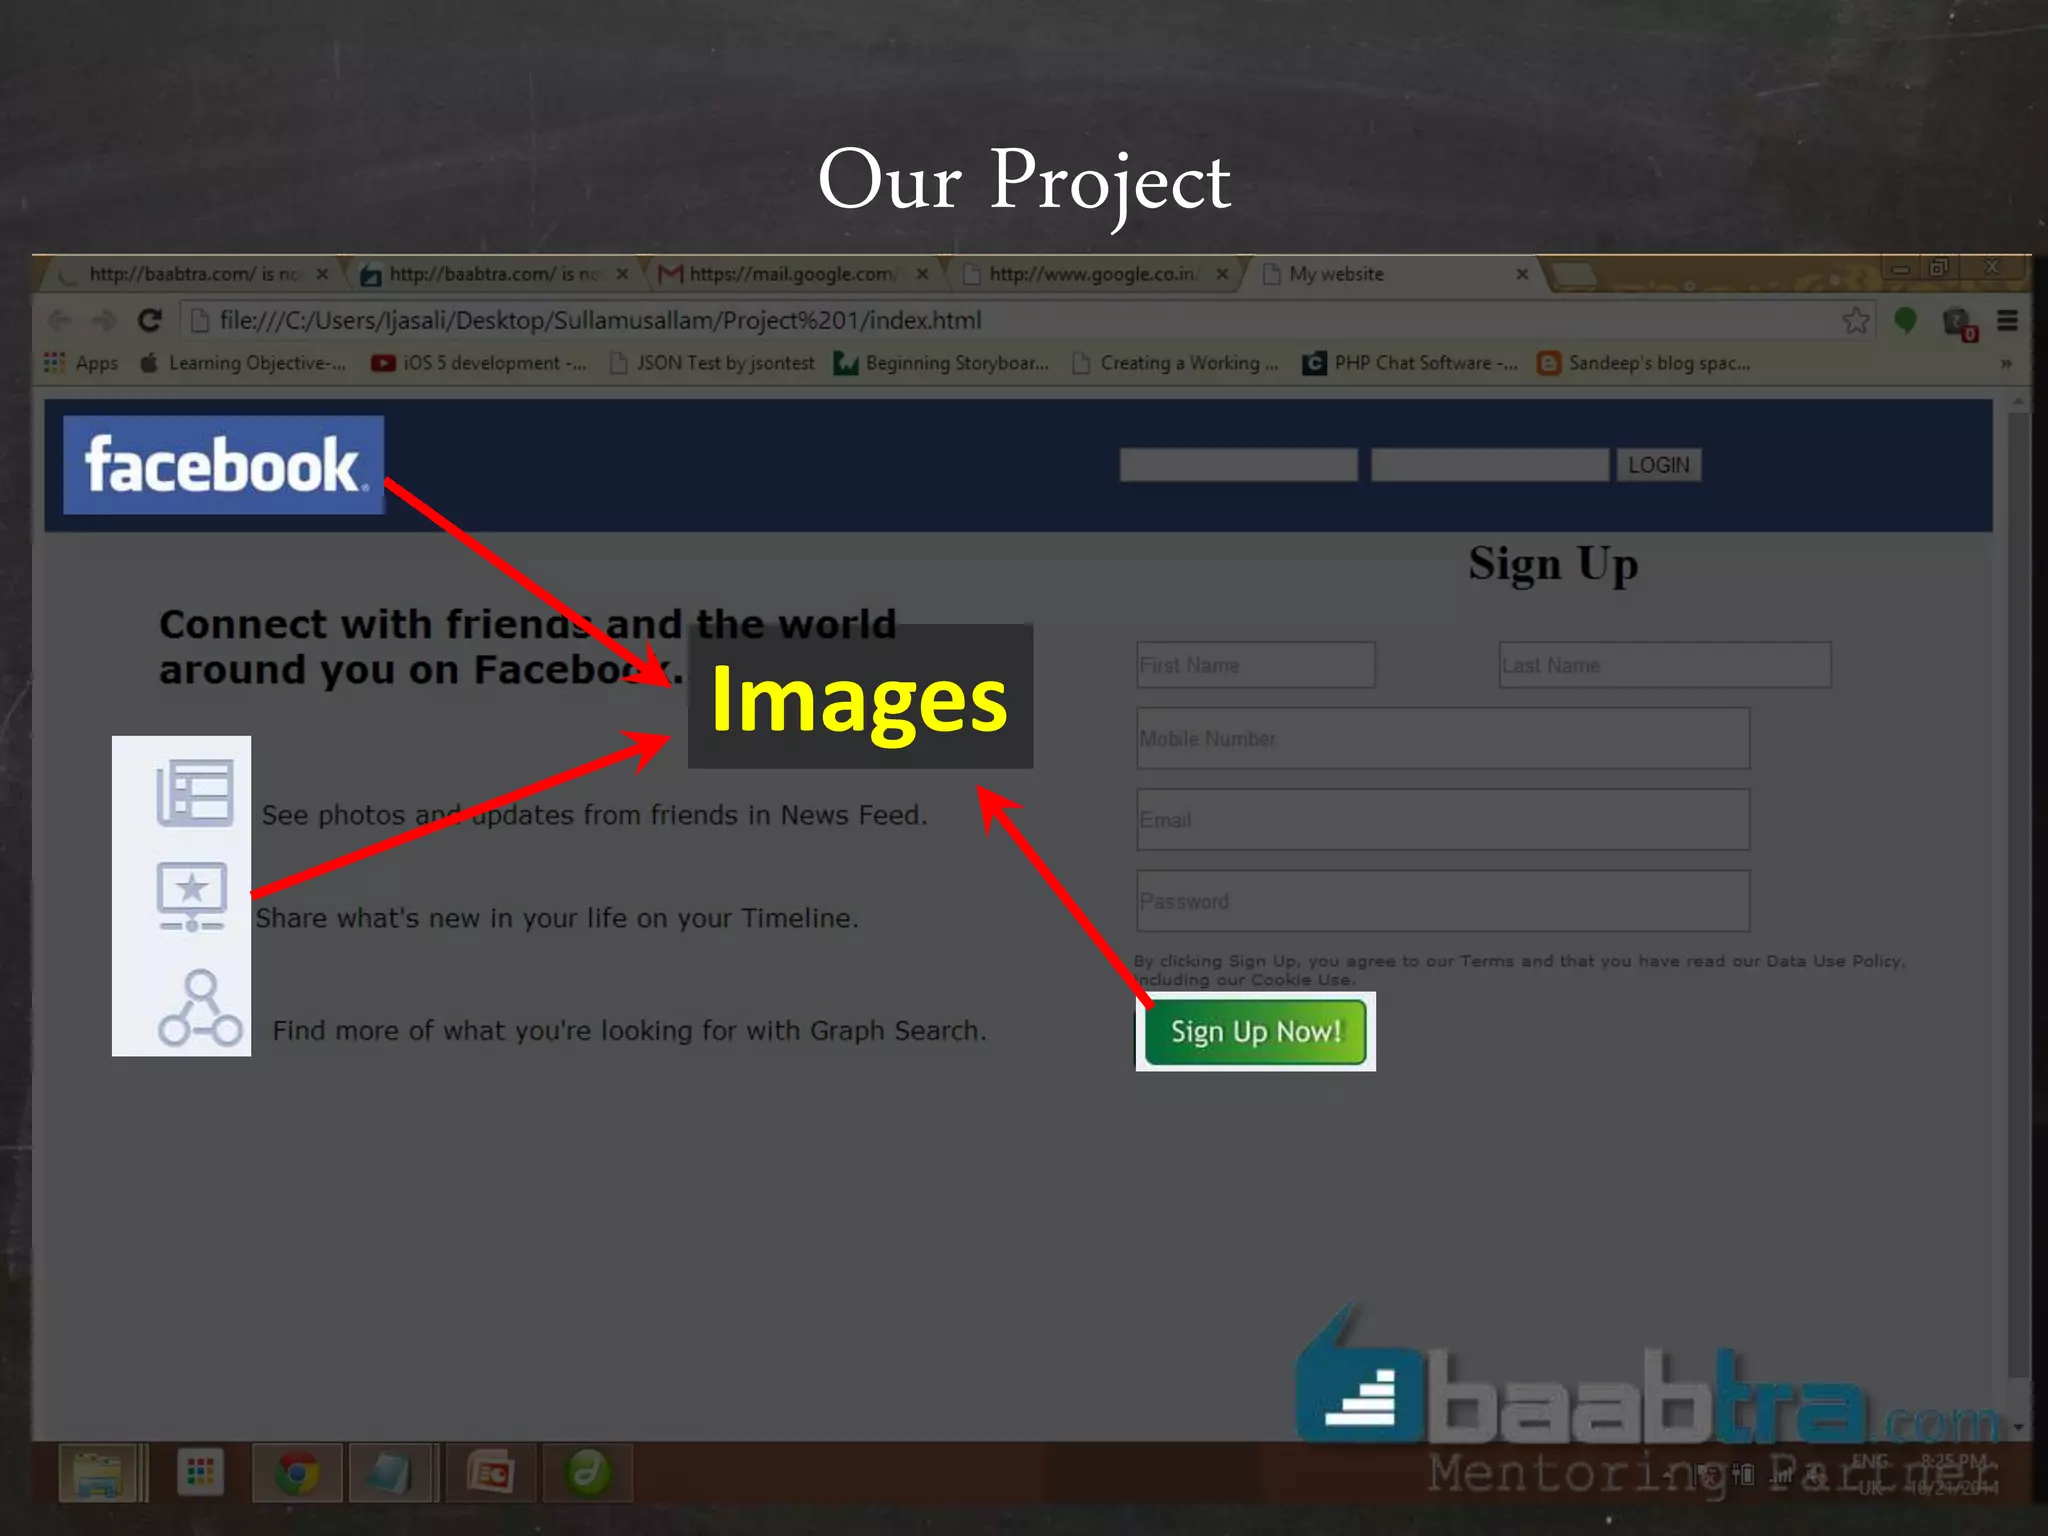
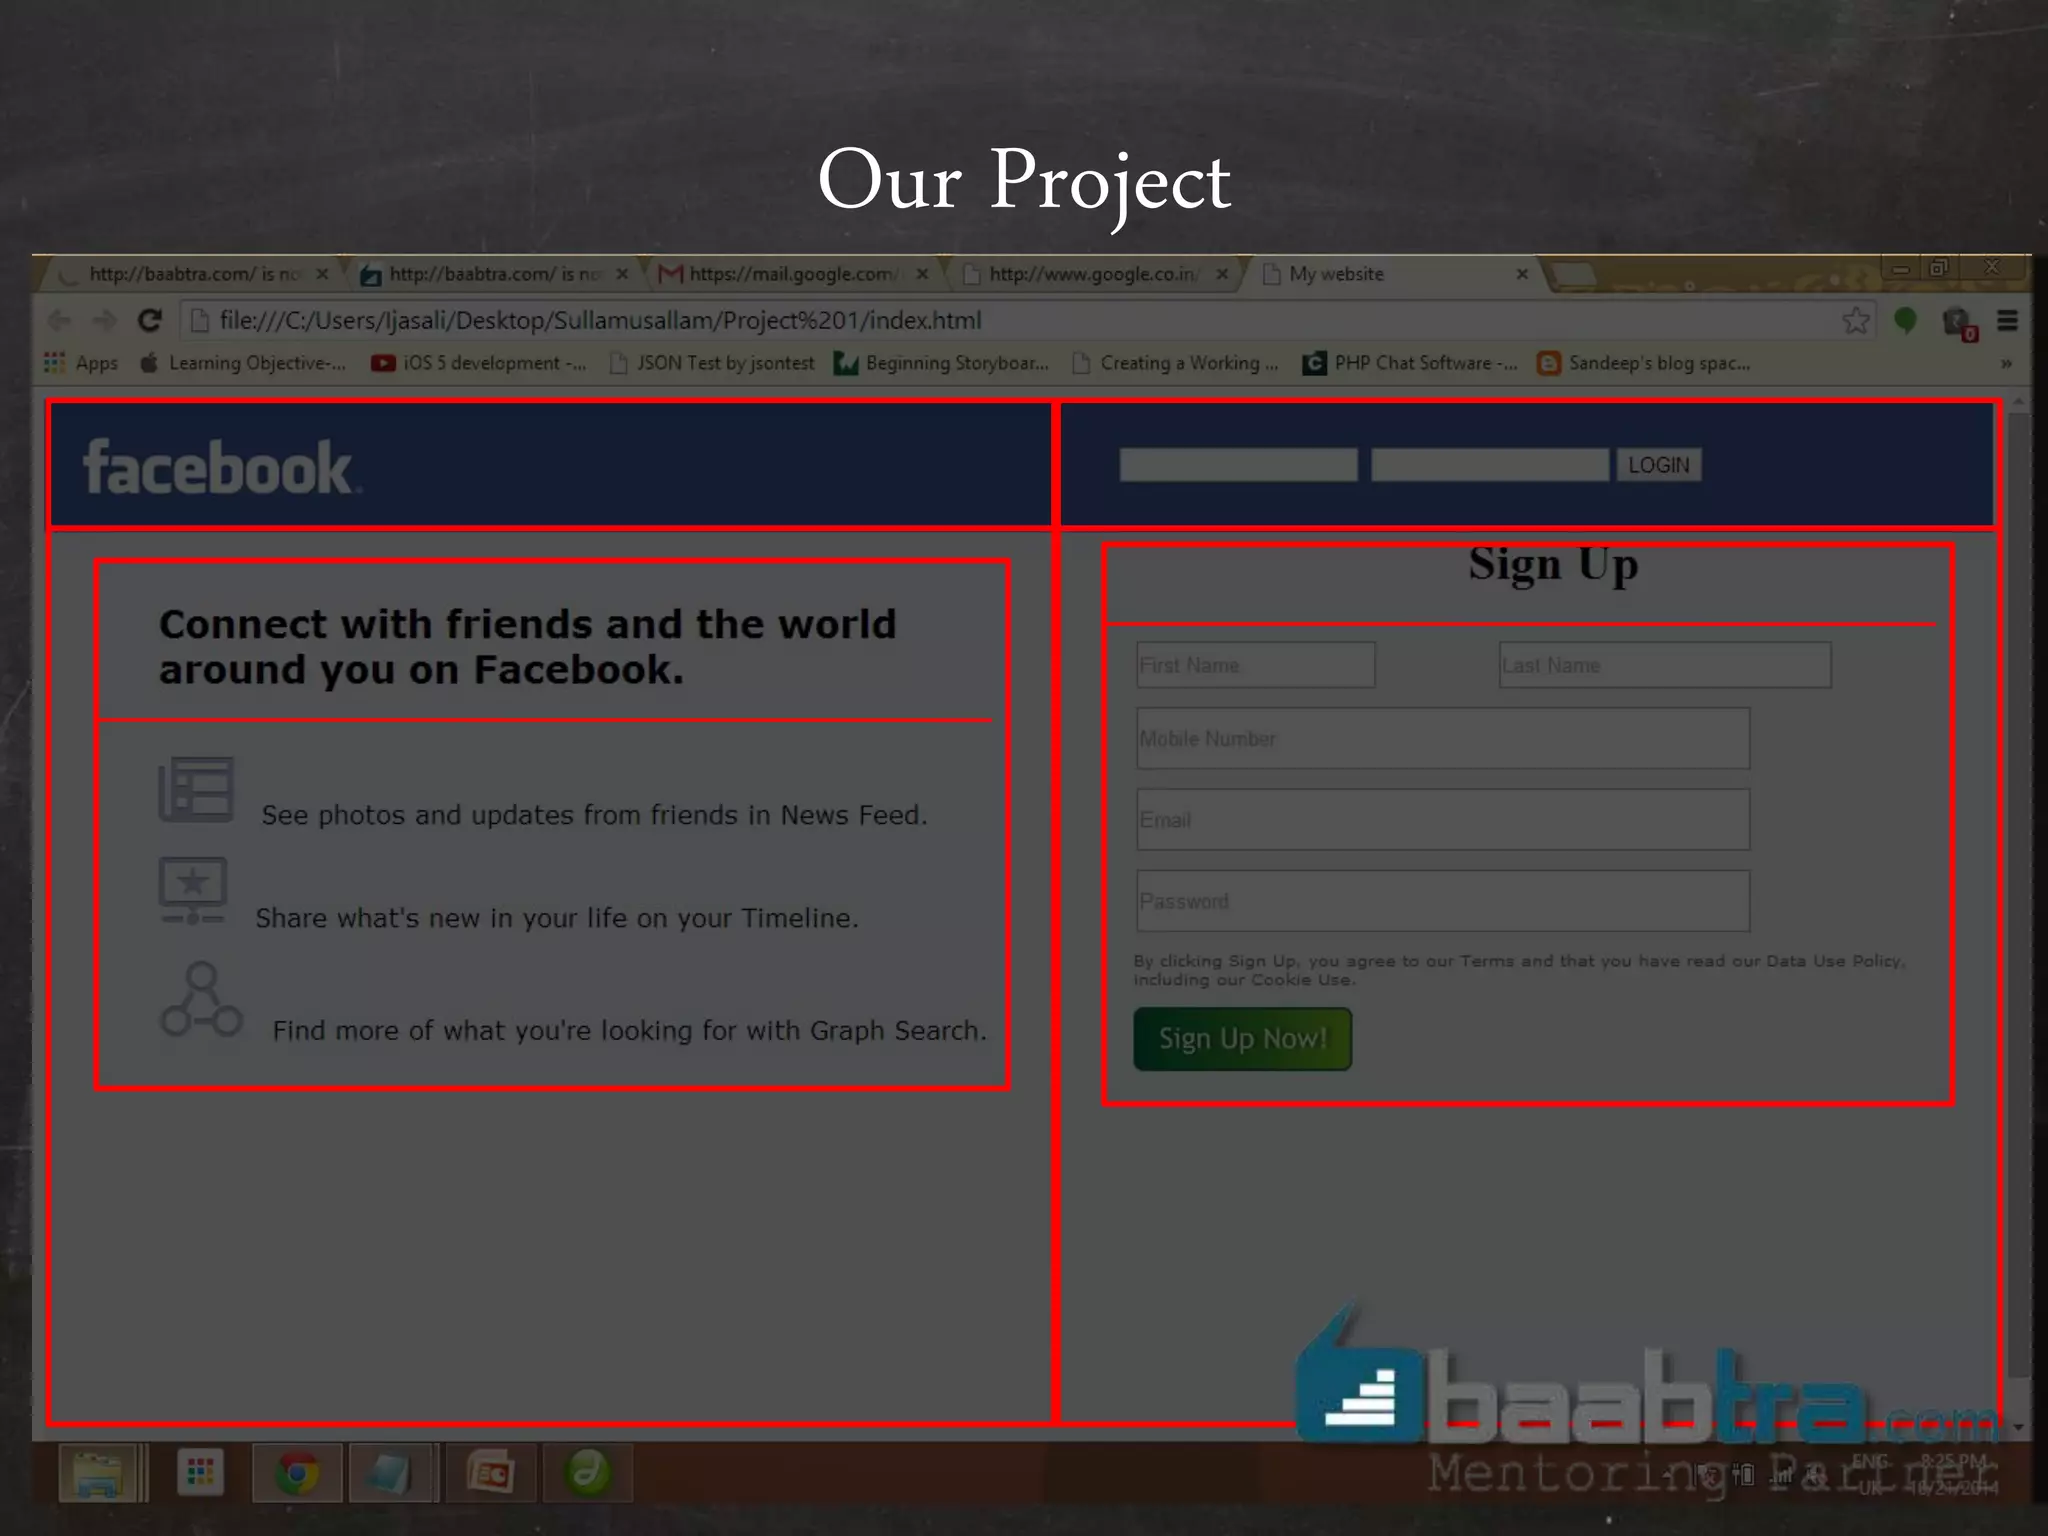
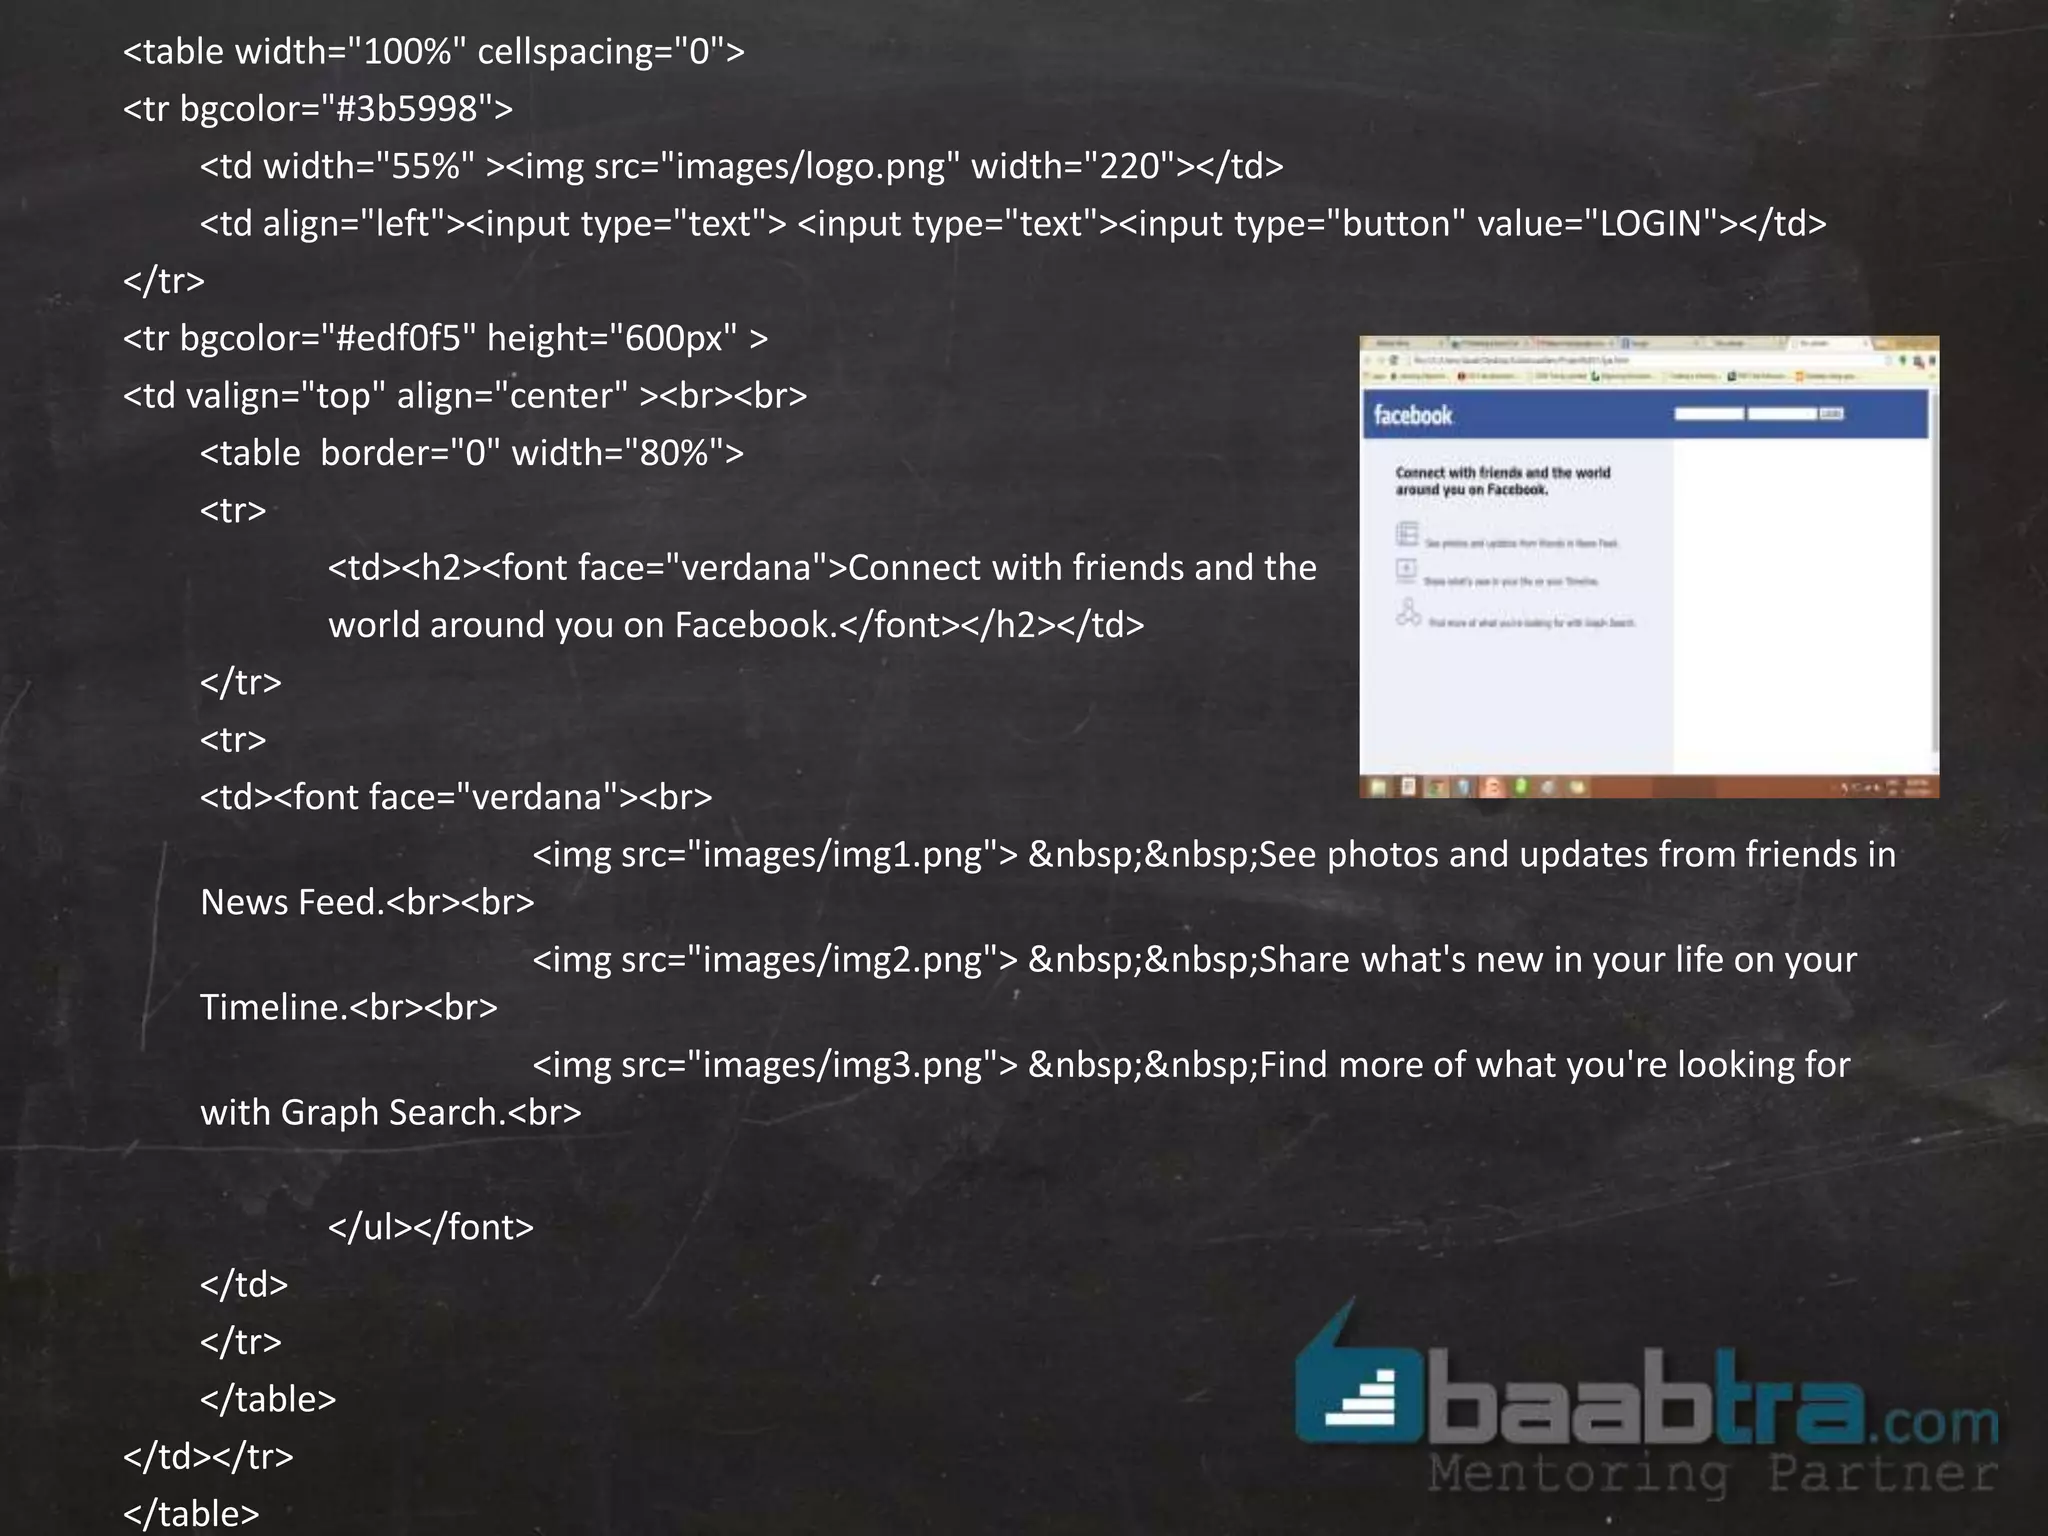
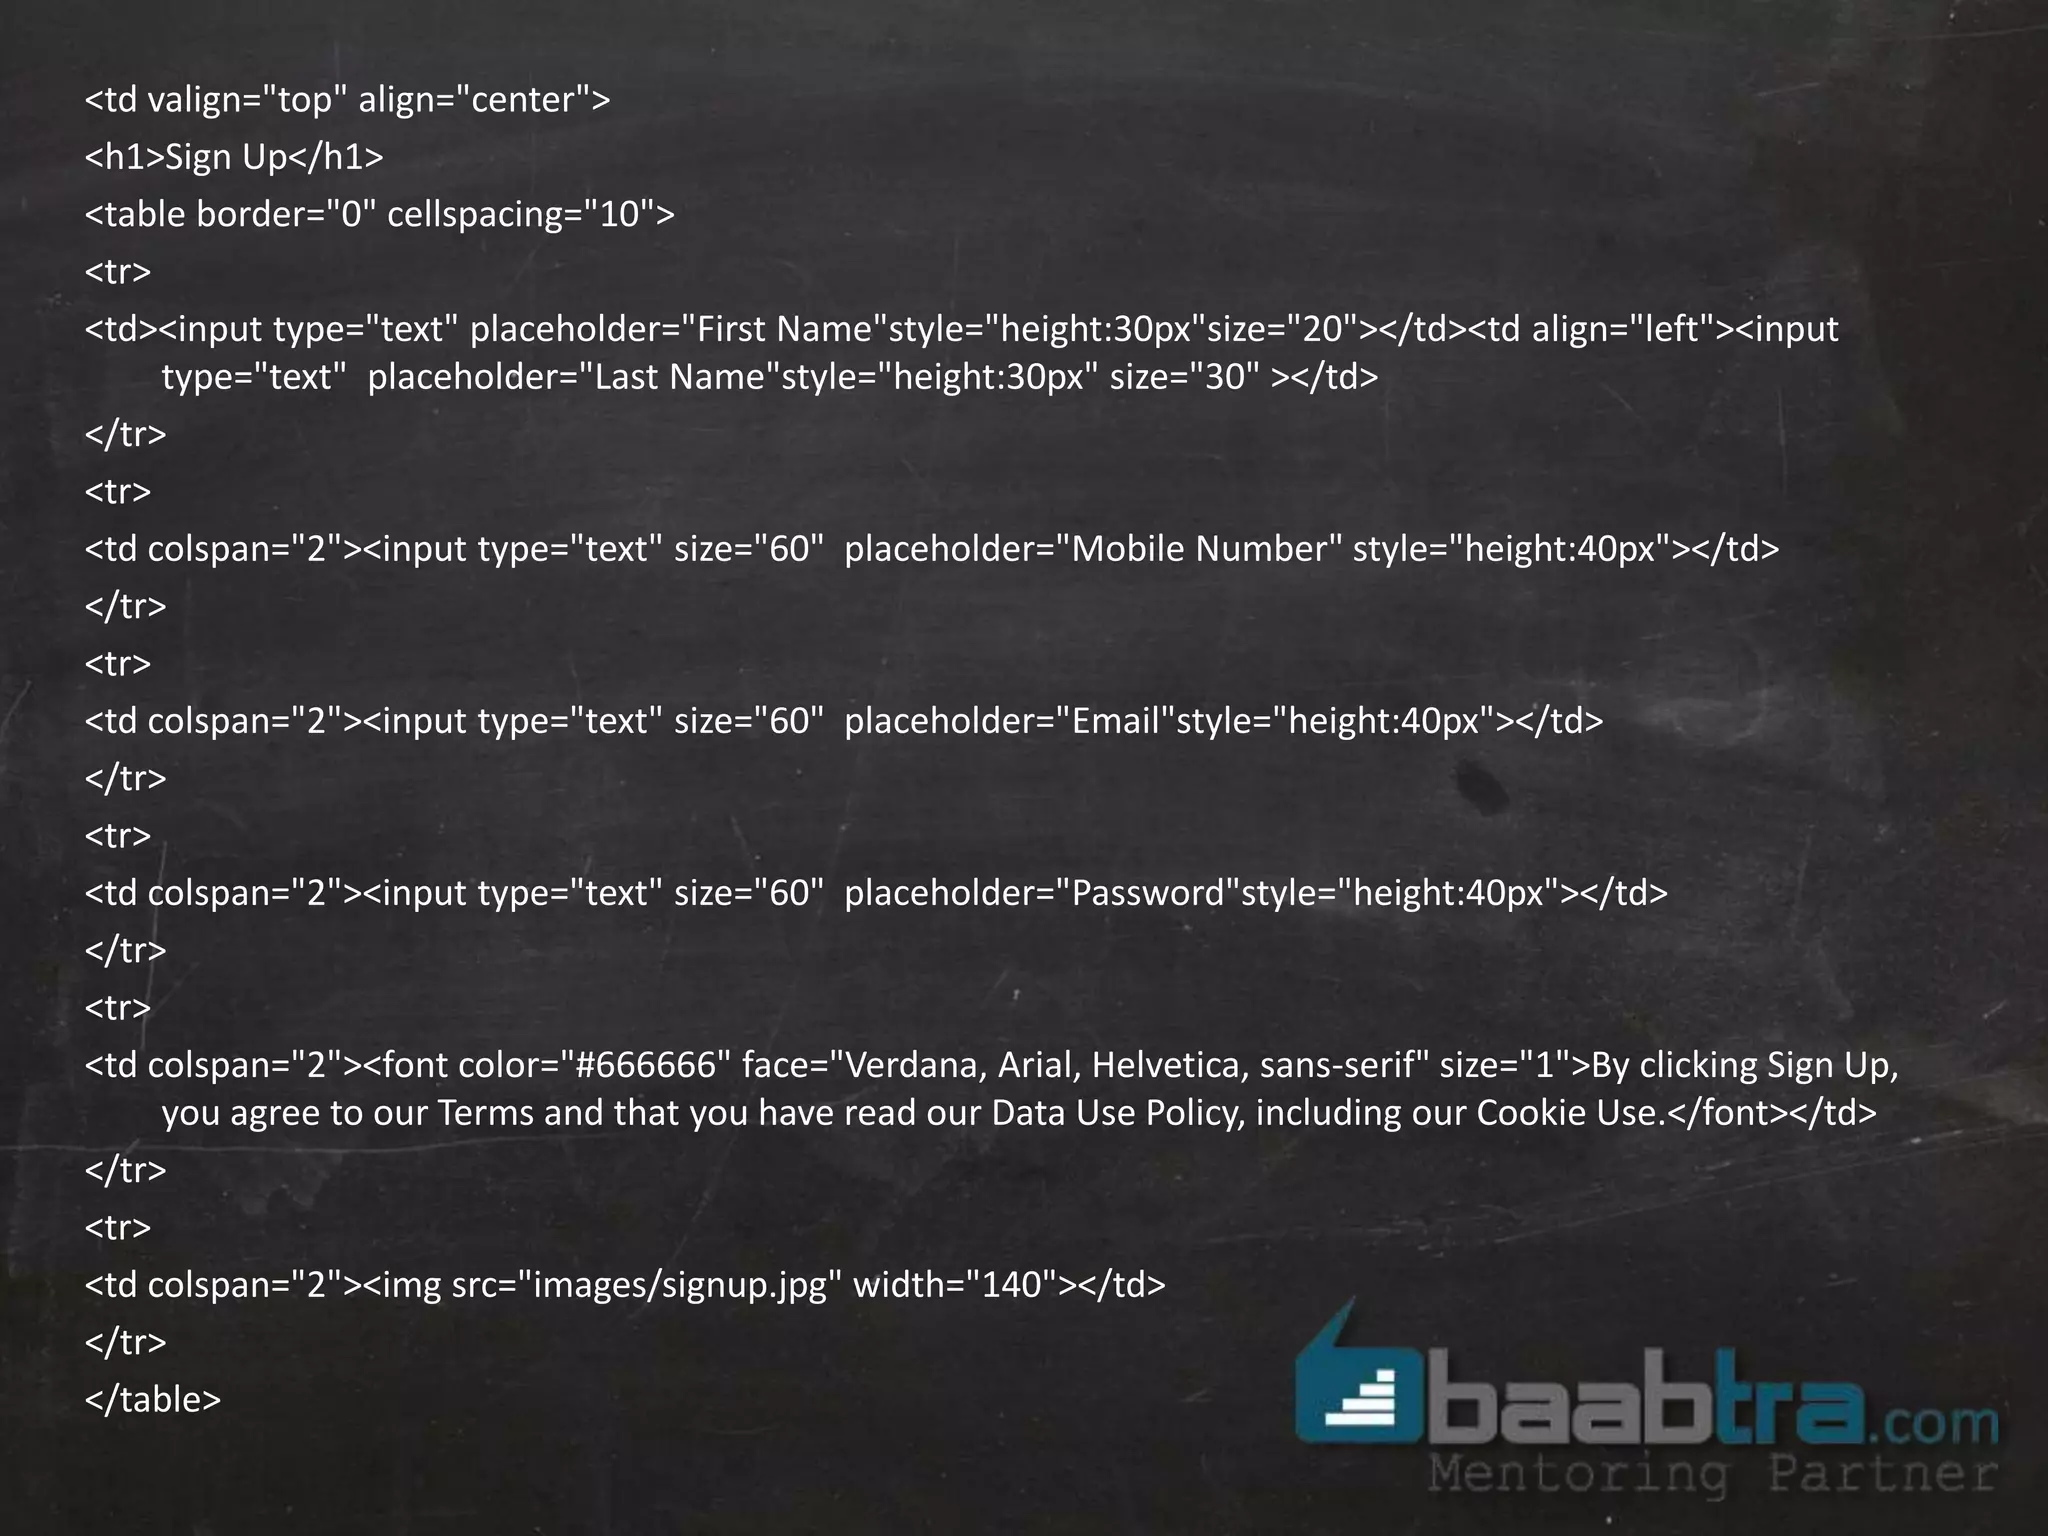
HTML and CSS 
Week 8 – Day1
HTML
At the end of this course you will be able to 
Create a static website using HTML/CSS 
Access your website via internet like www.baabtra.com 
Configure your own email like john@john.com
Creating a static website using 
HTML
Our Project
What is HTML? 
• HTML stands for Hyper Text Markup Language 
• It is used to design and develop Web Pages. 
• Browser/Platform Independent
HTML Tags 
• The HTML instructions are called tags, and look like 
<html> ….. Text here…….. </html>
HTML Tags 
• There are two types of tags 
1. Container tags : Tags that have starting as well as ending part. 
e.g. <TITLE> Title of the Web Page </TITLE> 
2. Empty tags : Tags that do not have the closing part. 
e.g. <BR> , <HR>
HTML Document Structure 
<HTML> 
<HEAD> 
<TITLE>Title of the Web Page </TITLE> 
</HEAD> 
<BODY> 
<H1> Contents </H1> 
</BODY> 
</HTML> 
• An HTML file can be created by using a simple text editor viz notepad, text 
pad, Eclipse IDE editor 
• HTML file must have an extension htm or html.
Text Formatting tags 
• Header Tags 
<H1> Heading 1 </H1> 
<H2> Heading 2 </H2> 
<H3> Heading 3 </H3> 
<H4> Heading 4 </H4> 
<H5> Heading 5 </H5> 
<H6> Heading 6 </H6> 
• The font size of the heading will go on decreasing from H1 to H6.
Example 
<H1 ALIGN = “CENTER”> This is a heading </H1>
Example 
Starting Tag 
<H1 ALIGN = “CENTER”> This is a heading </H1>
Example 
End Tag 
<H1 ALIGN = “CENTER”> This is a heading </H1>
Example 
Attributes 
<H1 ALIGN = “CENTER”> This is a heading </H1>
Example 
HTML element 
<H1 ALIGN = “CENTER”> This is a heading </H1>
Text Formatting tags 
• Paragraphs 
<P> </P> - used to create paragraphs. 
• Line Breaks 
<BR> - to insert returns or blank lines in the document. 
e.g. : <P>This <BR> is a para<BR>graph with line breaks</P> 
• Horizontal Lines 
<HR> - used to draw a horizontal line across the web page. 
E.g: <HR ALIGN = “right” WIDTH = “50%”> 
• Comments in HTML 
<!-- Content here -->
Text Formatting tags 
• <B>….</B> - Bold 
• <I>……</I> - Italic 
• <U>….</U> - Underline 
• <STRIKE>…</STRIKE> - Strikethrough 
• <CENTER></CENTER> - Centers the text on the screen. 
• <SUB>….</SUB> - Subscript 
• <SUP>….</SUP> - Superscript 
17
Image 
<img src=“background.jpg” width=250> 
18
<FONT> 
• Allows you to specify the font face and font size and other fond styling's. 
– Some common attributes are 
• FACE : specifies the font type. 
– Defaults fonts like “Arial”, “Times New Roman”, and “Courier” are 
available in all Systems. 
• SIZE : specifies the font size. 
– Value can range from 1 to 7. The default is 3. 
– SIZE can be set as a relative value using + or – . 
• COLOR : specifies the color 
– The color of a font can be specified using a hexadecimal number value 
six characters long. 
<FONT FACE=“Arial” SIZE=“7” COLOR=“#FF0000”> The Written Word </FONT>
Tables 
• Displays data in a tabular format so as helps to positioning the contents of the 
page in a more structured way 
• <TABLE> ….. </TABLE> 
• Some attributes 
• ALIGN = LEFT | RIGHT | CENTER 
• BORDER = n (Number of Pixels ) 
• BGCOLOR = “color” | “#rrggbb” 
• WIDTH = % Of Parent | n (pixels) 
• CELLSPACING = n (Number of Pixels ) -Specifies the space between the cell wall 
and contents 
• CELLPADDING = n(Number of Pixels )- Specifies the space between cell
Tables 
• Displays data in a tabular format so as helps to positioning the contents of the 
page in a more structured way 
• <TABLE> ….. </TABLE> 
3 rows
Tables 
• Displays data in a tabular format so as helps to positioning the contents of the 
page in a more structured way 
• <TABLE> ….. </TABLE> 
2 cols for each 
rows
Tables 
<TABLE BORDER=1> 
<TR> 
<TH> first header cell contents </TH> 
<TH> last header cell contents </TH> 
</TR> 
<TR> 
<TD> first row, first cell contents </TD> 
<TD> first row, last cell contents </TD> 
</TR> 
<TR> 
<TD> last row, first cell contents </TD> 
<TD> last row, last cell contents </TD> 
</TR> 
</TABLE>
<h2> Account details</h2> 
<TABLE BORDER="1" CELLSPACING="10" CELLPADDING="1" WIDTH=“100%"> 
<TR> 
<TH>AccountNo</TH><TH>Customer Name</TH> 
</TR> 
<TR> 
<TD>1001</TD><TD>Jack</TD> 
</TR> 
<TR> 
<TD>1002</TD><TD>Tom</TD> 
</TR> 
</TABLE> 
Creating tables 1 
24
Creating tables 2 
<TABLE BORDER=2 BGCOLOR="#B45F04"> 
<TR ALIGN="CENTER"> 
<TD COLSPAN=3>MINI STATEMENT</TD> 
</TR> 
<TR ALIGN="CENTER“> 
<TH>Account ID</TH> 
<TH>Date</TH> 
<TH>Amount</TH> 
</TR> 
<TR> <TD>54576989</TD> 
<TD>12-Jan-2009</TD> 
<TD>3000.00</TD> 
</TR> 
<TR> 
<TD>56783297</TD> 
<TD>27-Feb-2009</TD> 
<TD>500.00</TD> 
</TR> 
</TABLE>
Forms 
• Used for creating Graphical User Interface (GUI) 
• In a web application client interact through GUI. 
• FORM by itself really cannot do anything 
• Forms become powerful when connected to a server application 
• A single HTML page can have multiple forms.
Forms 
• Can be designed using <FORM></FORM> tag 
<FORM NAME=“form1” ACTION="abc.jsp" METHOD=GET> 
(form elements go here) 
</FORM>
Forms 
• Can be designed using <FORM></FORM> tag 
<FORM NAME=“form1” ACTION="abc.jsp" METHOD=GET> 
(form elements go here) 
</FORM> 
is used for future 
manipulation of 
data by scripting 
language
Forms 
• Can be designed using <FORM></FORM> tag 
<FORM NAME=“form1” ACTION="abc.jsp" METHOD=GET> 
(form elements go here) 
</FORM> 
indicates a program 
on the server that 
will be executed 
when this form is 
submitted. Mostly it 
will be an ASP or a 
JSP script.
Forms 
• Can be designed using <FORM></FORM> tag 
<FORM NAME=“form1” ACTION="abc.jsp" METHOD=GET> 
(form elements go here) 
</FORM> 
indicates the way the 
form is submitted to 
the server - popular 
options are 
GET/POST
Form elements 
• <INPUT> tag is used to add elements to the form 
• NAME = “controlname” 
• TYPE = text / password / checkbox / radio/ submit / reset /button / hidden / 
file 
• VALUE 
• MAXLENGTH 
• SIZE 
• All elements should be named by setting a unique value to the name 
attribute. 
• The value attribute is used to set a default value for the control.
Text Box 
• A text field can be added to the form by typing 
– <INPUT TYPE=“TEXT" NAME=“txtcompany" VALUE=”XYZ” SIZE="10" MAXLENGTH="15"> 
• Attributes are 
– VALUE : is the default value loaded 
– SIZE 
– MAXLENGTH : specifies max number of characters that can be entered to the 
control
List Box ( Drop-down box) 
<SELECT NAME=“Hobbies”> 
<OPTION VALUE=“T”>Travel 
<OPTION VALUE=“R” SELECTED>Reading 
<OPTION VALUE=“S”>Sleeping 
<OPTION VALUE=“W”>Walking 
</SELECT> 
• SIZE : number of lines to display 
• VALUE : indicates what will be sent to the server 
• SELECTED : sets the default selected item 
• MULTIPLE : will allow multiple selection of items 
– Eg: <SELECT NAME=“Hobbies” MULTIPLE SIZE=“3”>
Buttons 
• The Submit button 
• Sends the form contents to the server when clicked 
• By default only submit button can invoke the action page and send data to server. 
• <INPUT TYPE=submit NAME=cmdsubmit VALUE =“Submit”> 
• The Reset button 
• Resets all the form controls to the default state. 
• <INPUT TYPE=Reset NAME=cmdReset VALUE="Reset">. 
• A button 
• No predetermined action like submit or reset. 
• Script should be written to make it work. (this will be covered in later chapters) 
• <INPUT TYPE=Button NAME=cmdAdd VALUE=“Click Me">.
Our Project
Our Project 
Heading
Our Project 
Images
Our Project 
font
Our Project
<html> 
<head> 
<title> My website</title> 
</head> 
<body> 
<table width="100%" cellspacing="0"> 
<tr bgcolor="#3b5998"> 
<td width="55%" ><img src="images/logo.png" width="220"></td> 
<td align="left"><input type="text"> <input type="text"><input 
type="button" value="LOGIN"></td> 
</tr> 
</table>
<table width="100%" cellspacing="0"> 
<tr bgcolor="#3b5998"> 
<td width="55%" ><img src="images/logo.png" width="220"></td> 
<td align="left"><input type="text"> <input type="text"><input type="button" value="LOGIN"></td> 
</tr> 
<tr bgcolor="#edf0f5" height="600px" > 
<td valign="top" align="center" ><br><br> 
<table border="0" width="80%"> 
<tr> 
<td><h2><font face="verdana">Connect with friends and the 
world around you on Facebook.</font></h2></td> 
</tr> 
<tr> 
<td><font face="verdana"><br> 
<img src="images/img1.png"> &nbsp;&nbsp;See photos and updates from friends in 
News Feed.<br><br> 
<img src="images/img2.png"> &nbsp;&nbsp;Share what's new in your life on your 
Timeline.<br><br> 
<img src="images/img3.png"> &nbsp;&nbsp;Find more of what you're looking for 
with Graph Search.<br> 
</ul></font> 
</td> 
</tr> 
</table> 
</td></tr> 
</table>
<td valign="top" align="center"> 
<h1>Sign Up</h1> 
<table border="0" cellspacing="10"> 
<tr> 
<td><input type="text" placeholder="First Name"style="height:30px"size="20"></td><td align="left"><input 
type="text" placeholder="Last Name"style="height:30px" size="30" ></td> 
</tr> 
<tr> 
<td colspan="2"><input type="text" size="60" placeholder="Mobile Number" style="height:40px"></td> 
</tr> 
<tr> 
<td colspan="2"><input type="text" size="60" placeholder="Email"style="height:40px"></td> 
</tr> 
<tr> 
<td colspan="2"><input type="text" size="60" placeholder="Password"style="height:40px"></td> 
</tr> 
<tr> 
<td colspan="2"><font color="#666666" face="Verdana, Arial, Helvetica, sans-serif" size="1">By clicking Sign Up, 
you agree to our Terms and that you have read our Data Use Policy, including our Cookie Use.</font></td> 
</tr> 
<tr> 
<td colspan="2"><img src="images/signup.jpg" width="140"></td> 
</tr> 
</table>
End

Html and css

  • 1.
    HTML and CSS Week 8 – Day1
  • 2.
  • 3.
    At the endof this course you will be able to Create a static website using HTML/CSS Access your website via internet like www.baabtra.com Configure your own email like john@john.com
  • 4.
    Creating a staticwebsite using HTML
  • 5.
  • 6.
    What is HTML? • HTML stands for Hyper Text Markup Language • It is used to design and develop Web Pages. • Browser/Platform Independent
  • 7.
    HTML Tags •The HTML instructions are called tags, and look like <html> ….. Text here…….. </html>
  • 8.
    HTML Tags •There are two types of tags 1. Container tags : Tags that have starting as well as ending part. e.g. <TITLE> Title of the Web Page </TITLE> 2. Empty tags : Tags that do not have the closing part. e.g. <BR> , <HR>
  • 9.
    HTML Document Structure <HTML> <HEAD> <TITLE>Title of the Web Page </TITLE> </HEAD> <BODY> <H1> Contents </H1> </BODY> </HTML> • An HTML file can be created by using a simple text editor viz notepad, text pad, Eclipse IDE editor • HTML file must have an extension htm or html.
  • 10.
    Text Formatting tags • Header Tags <H1> Heading 1 </H1> <H2> Heading 2 </H2> <H3> Heading 3 </H3> <H4> Heading 4 </H4> <H5> Heading 5 </H5> <H6> Heading 6 </H6> • The font size of the heading will go on decreasing from H1 to H6.
  • 11.
    Example <H1 ALIGN= “CENTER”> This is a heading </H1>
  • 12.
    Example Starting Tag <H1 ALIGN = “CENTER”> This is a heading </H1>
  • 13.
    Example End Tag <H1 ALIGN = “CENTER”> This is a heading </H1>
  • 14.
    Example Attributes <H1ALIGN = “CENTER”> This is a heading </H1>
  • 15.
    Example HTML element <H1 ALIGN = “CENTER”> This is a heading </H1>
  • 16.
    Text Formatting tags • Paragraphs <P> </P> - used to create paragraphs. • Line Breaks <BR> - to insert returns or blank lines in the document. e.g. : <P>This <BR> is a para<BR>graph with line breaks</P> • Horizontal Lines <HR> - used to draw a horizontal line across the web page. E.g: <HR ALIGN = “right” WIDTH = “50%”> • Comments in HTML <!-- Content here -->
  • 17.
    Text Formatting tags • <B>….</B> - Bold • <I>……</I> - Italic • <U>….</U> - Underline • <STRIKE>…</STRIKE> - Strikethrough • <CENTER></CENTER> - Centers the text on the screen. • <SUB>….</SUB> - Subscript • <SUP>….</SUP> - Superscript 17
  • 18.
  • 19.
    <FONT> • Allowsyou to specify the font face and font size and other fond styling's. – Some common attributes are • FACE : specifies the font type. – Defaults fonts like “Arial”, “Times New Roman”, and “Courier” are available in all Systems. • SIZE : specifies the font size. – Value can range from 1 to 7. The default is 3. – SIZE can be set as a relative value using + or – . • COLOR : specifies the color – The color of a font can be specified using a hexadecimal number value six characters long. <FONT FACE=“Arial” SIZE=“7” COLOR=“#FF0000”> The Written Word </FONT>
  • 20.
    Tables • Displaysdata in a tabular format so as helps to positioning the contents of the page in a more structured way • <TABLE> ….. </TABLE> • Some attributes • ALIGN = LEFT | RIGHT | CENTER • BORDER = n (Number of Pixels ) • BGCOLOR = “color” | “#rrggbb” • WIDTH = % Of Parent | n (pixels) • CELLSPACING = n (Number of Pixels ) -Specifies the space between the cell wall and contents • CELLPADDING = n(Number of Pixels )- Specifies the space between cell
  • 21.
    Tables • Displaysdata in a tabular format so as helps to positioning the contents of the page in a more structured way • <TABLE> ….. </TABLE> 3 rows
  • 22.
    Tables • Displaysdata in a tabular format so as helps to positioning the contents of the page in a more structured way • <TABLE> ….. </TABLE> 2 cols for each rows
  • 23.
    Tables <TABLE BORDER=1> <TR> <TH> first header cell contents </TH> <TH> last header cell contents </TH> </TR> <TR> <TD> first row, first cell contents </TD> <TD> first row, last cell contents </TD> </TR> <TR> <TD> last row, first cell contents </TD> <TD> last row, last cell contents </TD> </TR> </TABLE>
  • 24.
    <h2> Account details</h2> <TABLE BORDER="1" CELLSPACING="10" CELLPADDING="1" WIDTH=“100%"> <TR> <TH>AccountNo</TH><TH>Customer Name</TH> </TR> <TR> <TD>1001</TD><TD>Jack</TD> </TR> <TR> <TD>1002</TD><TD>Tom</TD> </TR> </TABLE> Creating tables 1 24
  • 25.
    Creating tables 2 <TABLE BORDER=2 BGCOLOR="#B45F04"> <TR ALIGN="CENTER"> <TD COLSPAN=3>MINI STATEMENT</TD> </TR> <TR ALIGN="CENTER“> <TH>Account ID</TH> <TH>Date</TH> <TH>Amount</TH> </TR> <TR> <TD>54576989</TD> <TD>12-Jan-2009</TD> <TD>3000.00</TD> </TR> <TR> <TD>56783297</TD> <TD>27-Feb-2009</TD> <TD>500.00</TD> </TR> </TABLE>
  • 26.
    Forms • Usedfor creating Graphical User Interface (GUI) • In a web application client interact through GUI. • FORM by itself really cannot do anything • Forms become powerful when connected to a server application • A single HTML page can have multiple forms.
  • 27.
    Forms • Canbe designed using <FORM></FORM> tag <FORM NAME=“form1” ACTION="abc.jsp" METHOD=GET> (form elements go here) </FORM>
  • 28.
    Forms • Canbe designed using <FORM></FORM> tag <FORM NAME=“form1” ACTION="abc.jsp" METHOD=GET> (form elements go here) </FORM> is used for future manipulation of data by scripting language
  • 29.
    Forms • Canbe designed using <FORM></FORM> tag <FORM NAME=“form1” ACTION="abc.jsp" METHOD=GET> (form elements go here) </FORM> indicates a program on the server that will be executed when this form is submitted. Mostly it will be an ASP or a JSP script.
  • 30.
    Forms • Canbe designed using <FORM></FORM> tag <FORM NAME=“form1” ACTION="abc.jsp" METHOD=GET> (form elements go here) </FORM> indicates the way the form is submitted to the server - popular options are GET/POST
  • 31.
    Form elements •<INPUT> tag is used to add elements to the form • NAME = “controlname” • TYPE = text / password / checkbox / radio/ submit / reset /button / hidden / file • VALUE • MAXLENGTH • SIZE • All elements should be named by setting a unique value to the name attribute. • The value attribute is used to set a default value for the control.
  • 32.
    Text Box •A text field can be added to the form by typing – <INPUT TYPE=“TEXT" NAME=“txtcompany" VALUE=”XYZ” SIZE="10" MAXLENGTH="15"> • Attributes are – VALUE : is the default value loaded – SIZE – MAXLENGTH : specifies max number of characters that can be entered to the control
  • 33.
    List Box (Drop-down box) <SELECT NAME=“Hobbies”> <OPTION VALUE=“T”>Travel <OPTION VALUE=“R” SELECTED>Reading <OPTION VALUE=“S”>Sleeping <OPTION VALUE=“W”>Walking </SELECT> • SIZE : number of lines to display • VALUE : indicates what will be sent to the server • SELECTED : sets the default selected item • MULTIPLE : will allow multiple selection of items – Eg: <SELECT NAME=“Hobbies” MULTIPLE SIZE=“3”>
  • 34.
    Buttons • TheSubmit button • Sends the form contents to the server when clicked • By default only submit button can invoke the action page and send data to server. • <INPUT TYPE=submit NAME=cmdsubmit VALUE =“Submit”> • The Reset button • Resets all the form controls to the default state. • <INPUT TYPE=Reset NAME=cmdReset VALUE="Reset">. • A button • No predetermined action like submit or reset. • Script should be written to make it work. (this will be covered in later chapters) • <INPUT TYPE=Button NAME=cmdAdd VALUE=“Click Me">.
  • 35.
  • 36.
  • 37.
  • 38.
  • 39.
  • 40.
    <html> <head> <title>My website</title> </head> <body> <table width="100%" cellspacing="0"> <tr bgcolor="#3b5998"> <td width="55%" ><img src="images/logo.png" width="220"></td> <td align="left"><input type="text"> <input type="text"><input type="button" value="LOGIN"></td> </tr> </table>
  • 41.
    <table width="100%" cellspacing="0"> <tr bgcolor="#3b5998"> <td width="55%" ><img src="images/logo.png" width="220"></td> <td align="left"><input type="text"> <input type="text"><input type="button" value="LOGIN"></td> </tr> <tr bgcolor="#edf0f5" height="600px" > <td valign="top" align="center" ><br><br> <table border="0" width="80%"> <tr> <td><h2><font face="verdana">Connect with friends and the world around you on Facebook.</font></h2></td> </tr> <tr> <td><font face="verdana"><br> <img src="images/img1.png"> &nbsp;&nbsp;See photos and updates from friends in News Feed.<br><br> <img src="images/img2.png"> &nbsp;&nbsp;Share what's new in your life on your Timeline.<br><br> <img src="images/img3.png"> &nbsp;&nbsp;Find more of what you're looking for with Graph Search.<br> </ul></font> </td> </tr> </table> </td></tr> </table>
  • 42.
    <td valign="top" align="center"> <h1>Sign Up</h1> <table border="0" cellspacing="10"> <tr> <td><input type="text" placeholder="First Name"style="height:30px"size="20"></td><td align="left"><input type="text" placeholder="Last Name"style="height:30px" size="30" ></td> </tr> <tr> <td colspan="2"><input type="text" size="60" placeholder="Mobile Number" style="height:40px"></td> </tr> <tr> <td colspan="2"><input type="text" size="60" placeholder="Email"style="height:40px"></td> </tr> <tr> <td colspan="2"><input type="text" size="60" placeholder="Password"style="height:40px"></td> </tr> <tr> <td colspan="2"><font color="#666666" face="Verdana, Arial, Helvetica, sans-serif" size="1">By clicking Sign Up, you agree to our Terms and that you have read our Data Use Policy, including our Cookie Use.</font></td> </tr> <tr> <td colspan="2"><img src="images/signup.jpg" width="140"></td> </tr> </table>
  • 43.