Arduino: Your Gatewayto Electronics and Robotics
What is Arduino?
• Arduino is an open-source electronics platform based on
easy-to-use hardware and software.
• It's designed to make it easy for anyone to get started with
electronics and programming.
Key Components of Arduino:
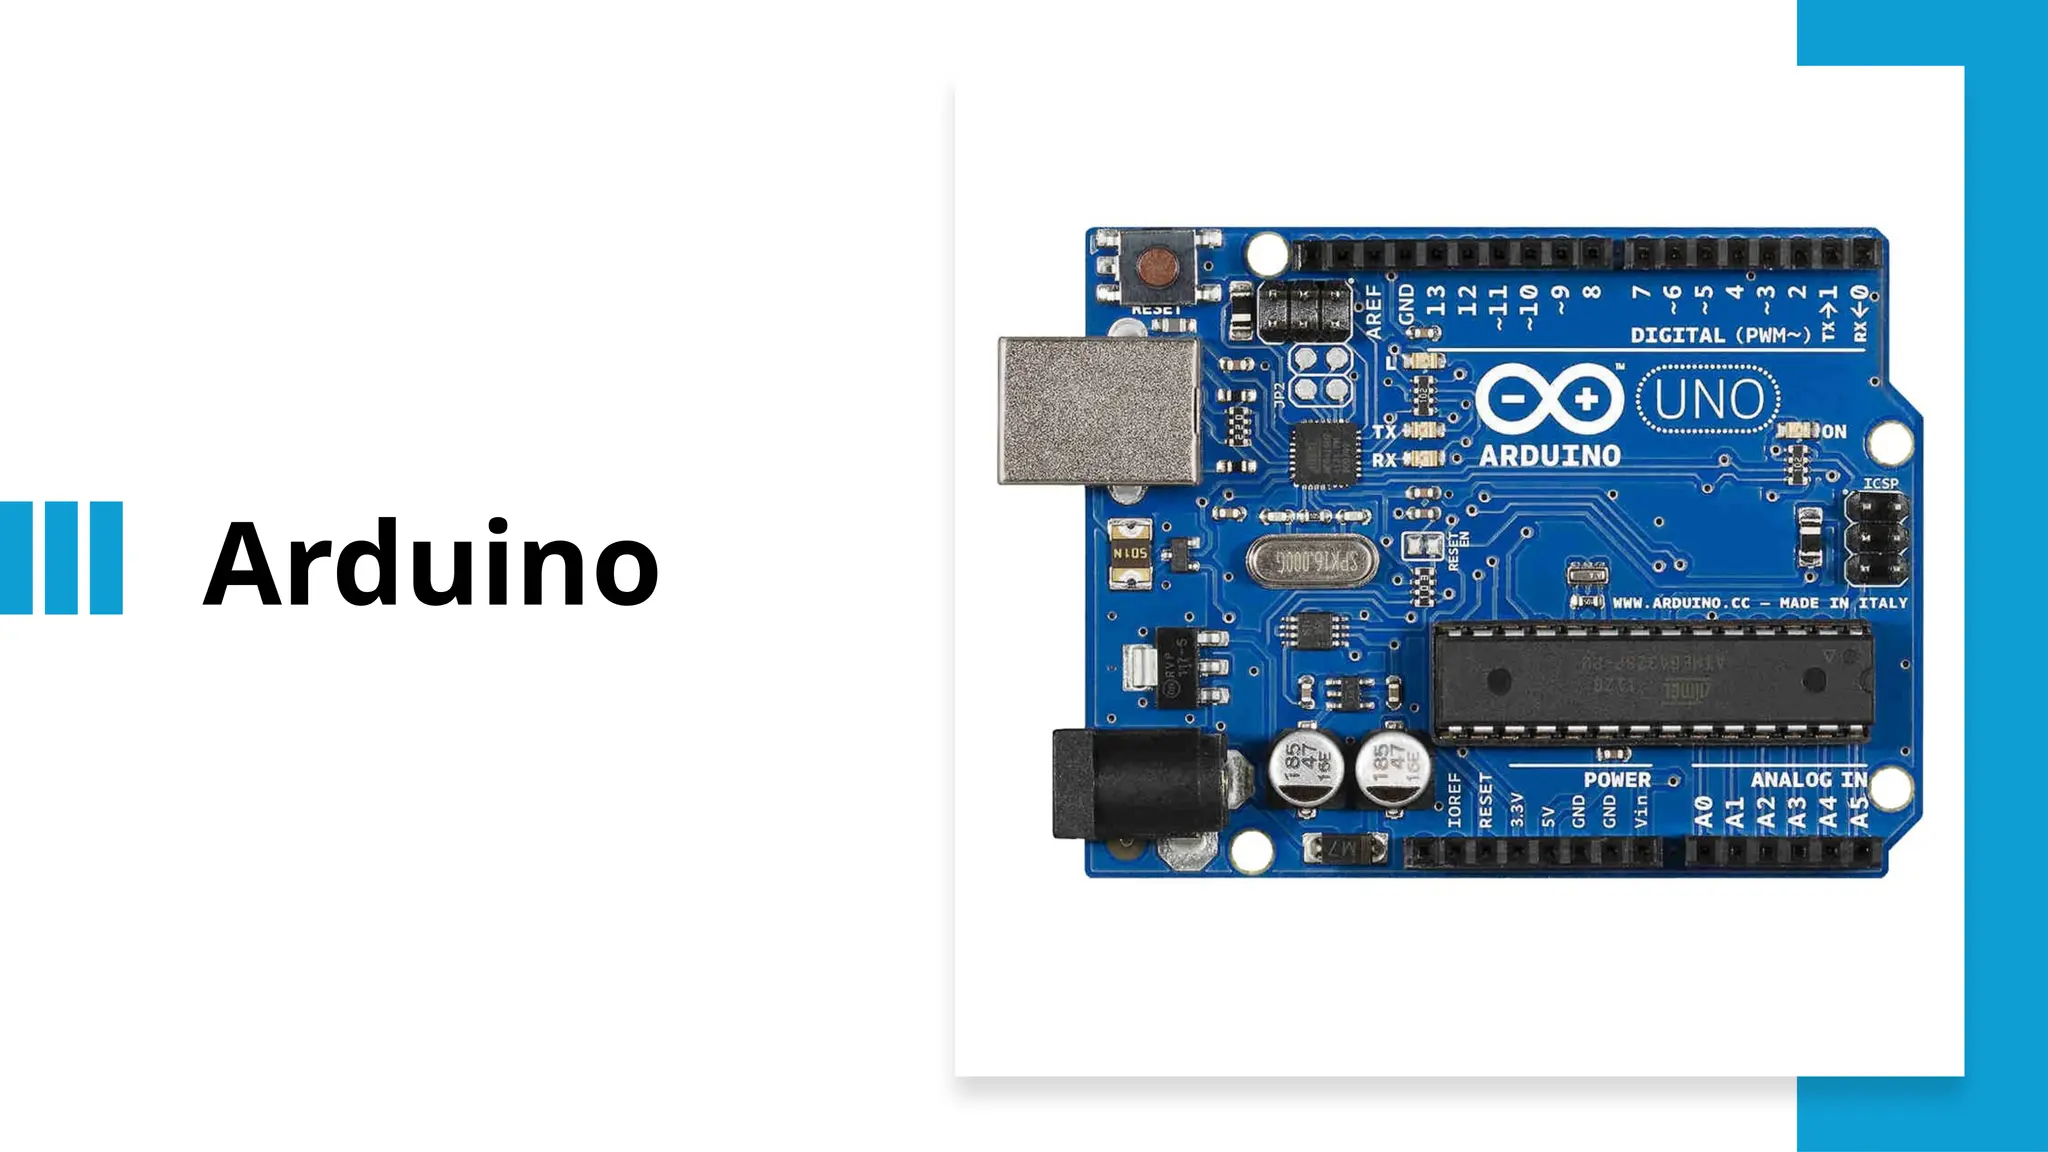
Microcontroller Board: The physical hardware that runs the
code. Popular boards include the Arduino Uno, Nano, and
Mega.
Integrated Development Environment (IDE): The software
3.
Why Use Arduino?
Easyto Learn: Arduino's simple programming language and
user-friendly interface make it accessible to beginners.
Versatile: It can be used to create a wide range of projects,
from simple LED blinking to complex robots and IoT devices.
Open-Source Community: A large and active community
provides support, tutorials, and libraries.
Affordable: Arduino boards and components are relatively
inexpensive.
4.
Getting Started withArduino:
Purchase an Arduino Board: Choose a board that suits your
needs, such as the popular Arduino Uno.
Install the Arduino IDE: Download and install the IDE from the
official Arduino website.
Write Your First Code: Start with a simple program, like
blinking an LED. The IDE provides a clear structure and syntax
highlighting to help you write code easily.
Upload the Code: Connect your Arduino board to your
computer using a USB cable and upload the code to the board.
5.
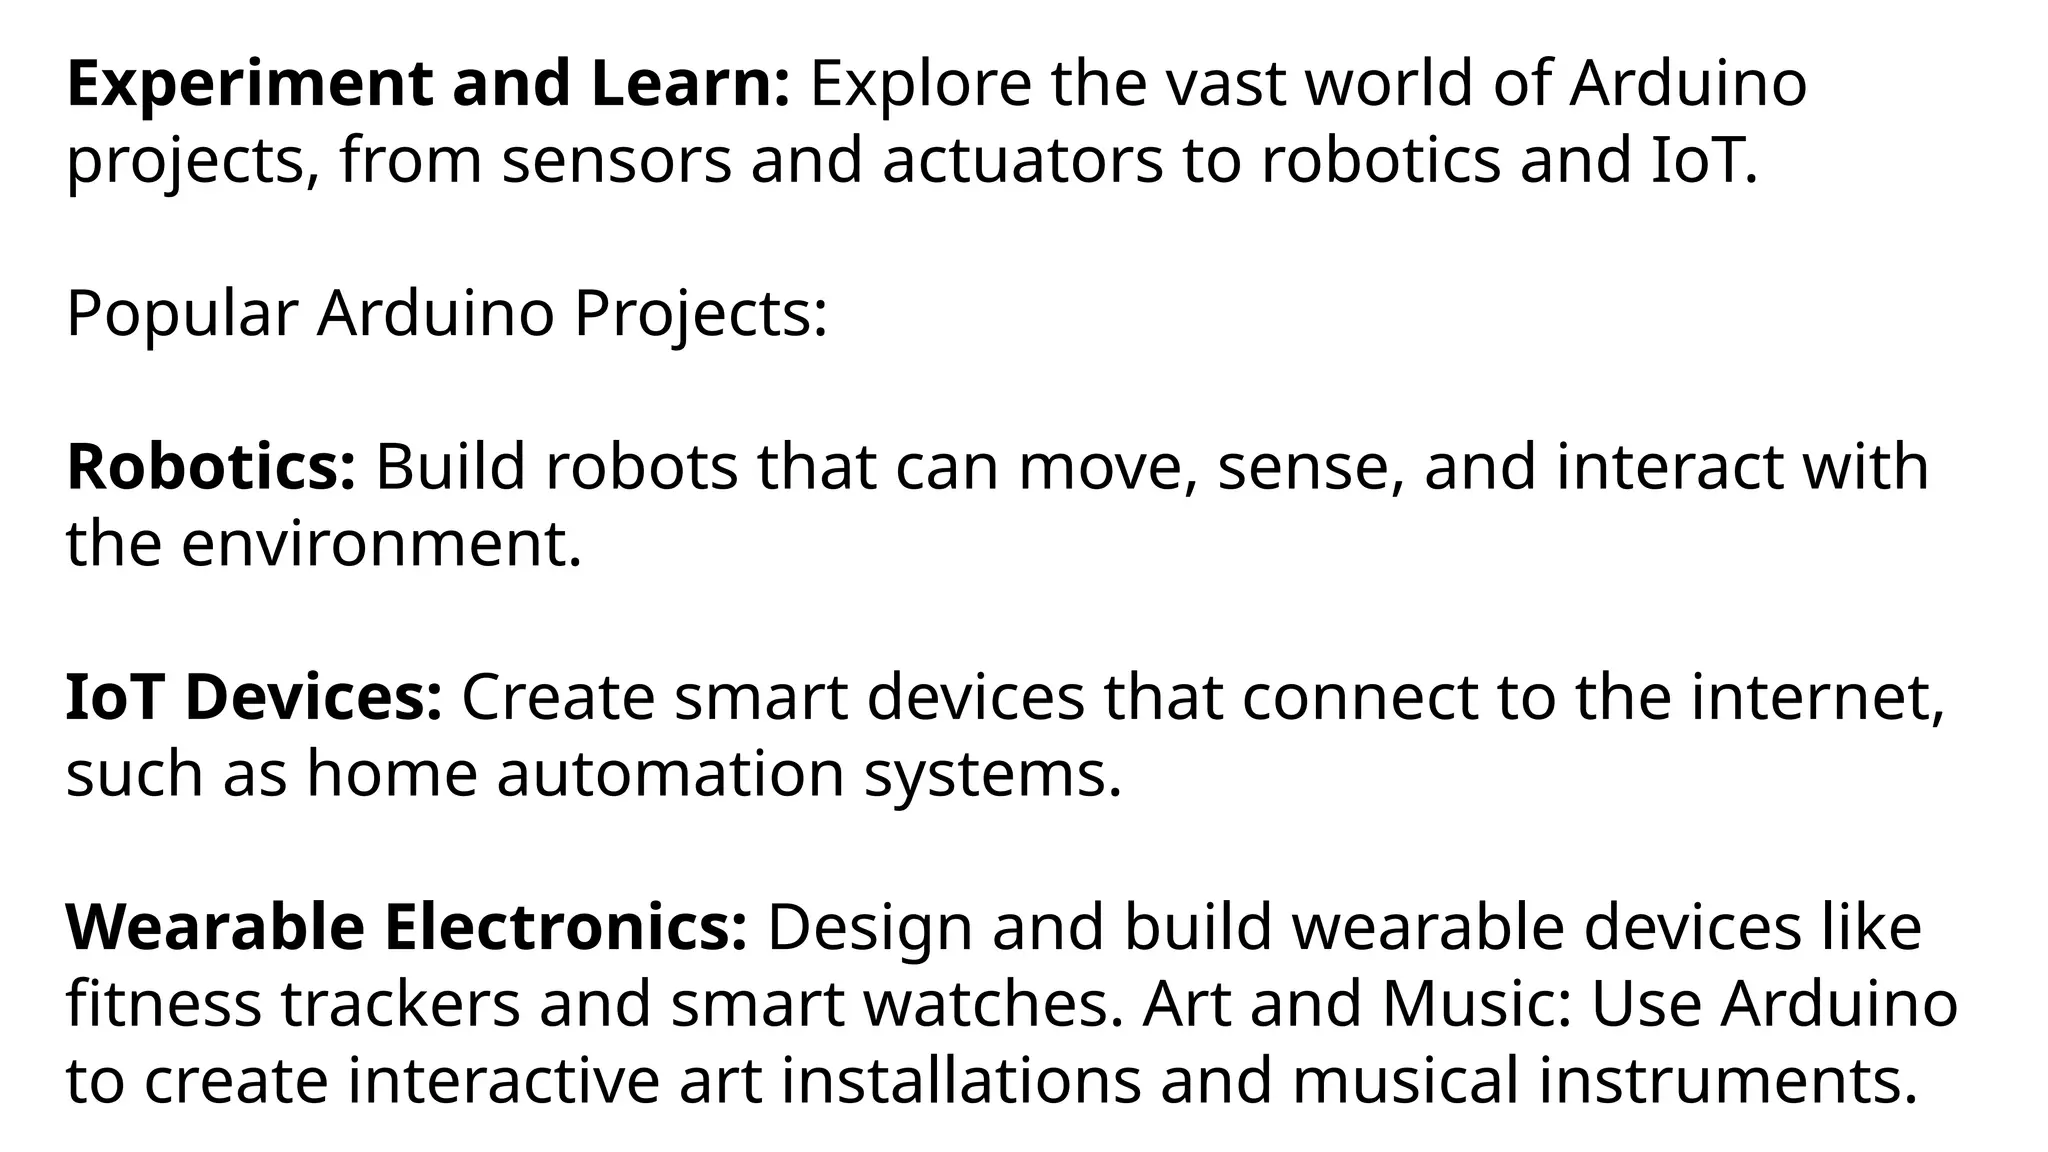
Experiment and Learn:Explore the vast world of Arduino
projects, from sensors and actuators to robotics and IoT.
Popular Arduino Projects:
Robotics: Build robots that can move, sense, and interact with
the environment.
IoT Devices: Create smart devices that connect to the internet,
such as home automation systems.
Wearable Electronics: Design and build wearable devices like
fitness trackers and smart watches. Art and Music: Use Arduino
to create interactive art installations and musical instruments.
6.
Art and Music:Use Arduino to create interactive art
installations and musical instruments.
7.
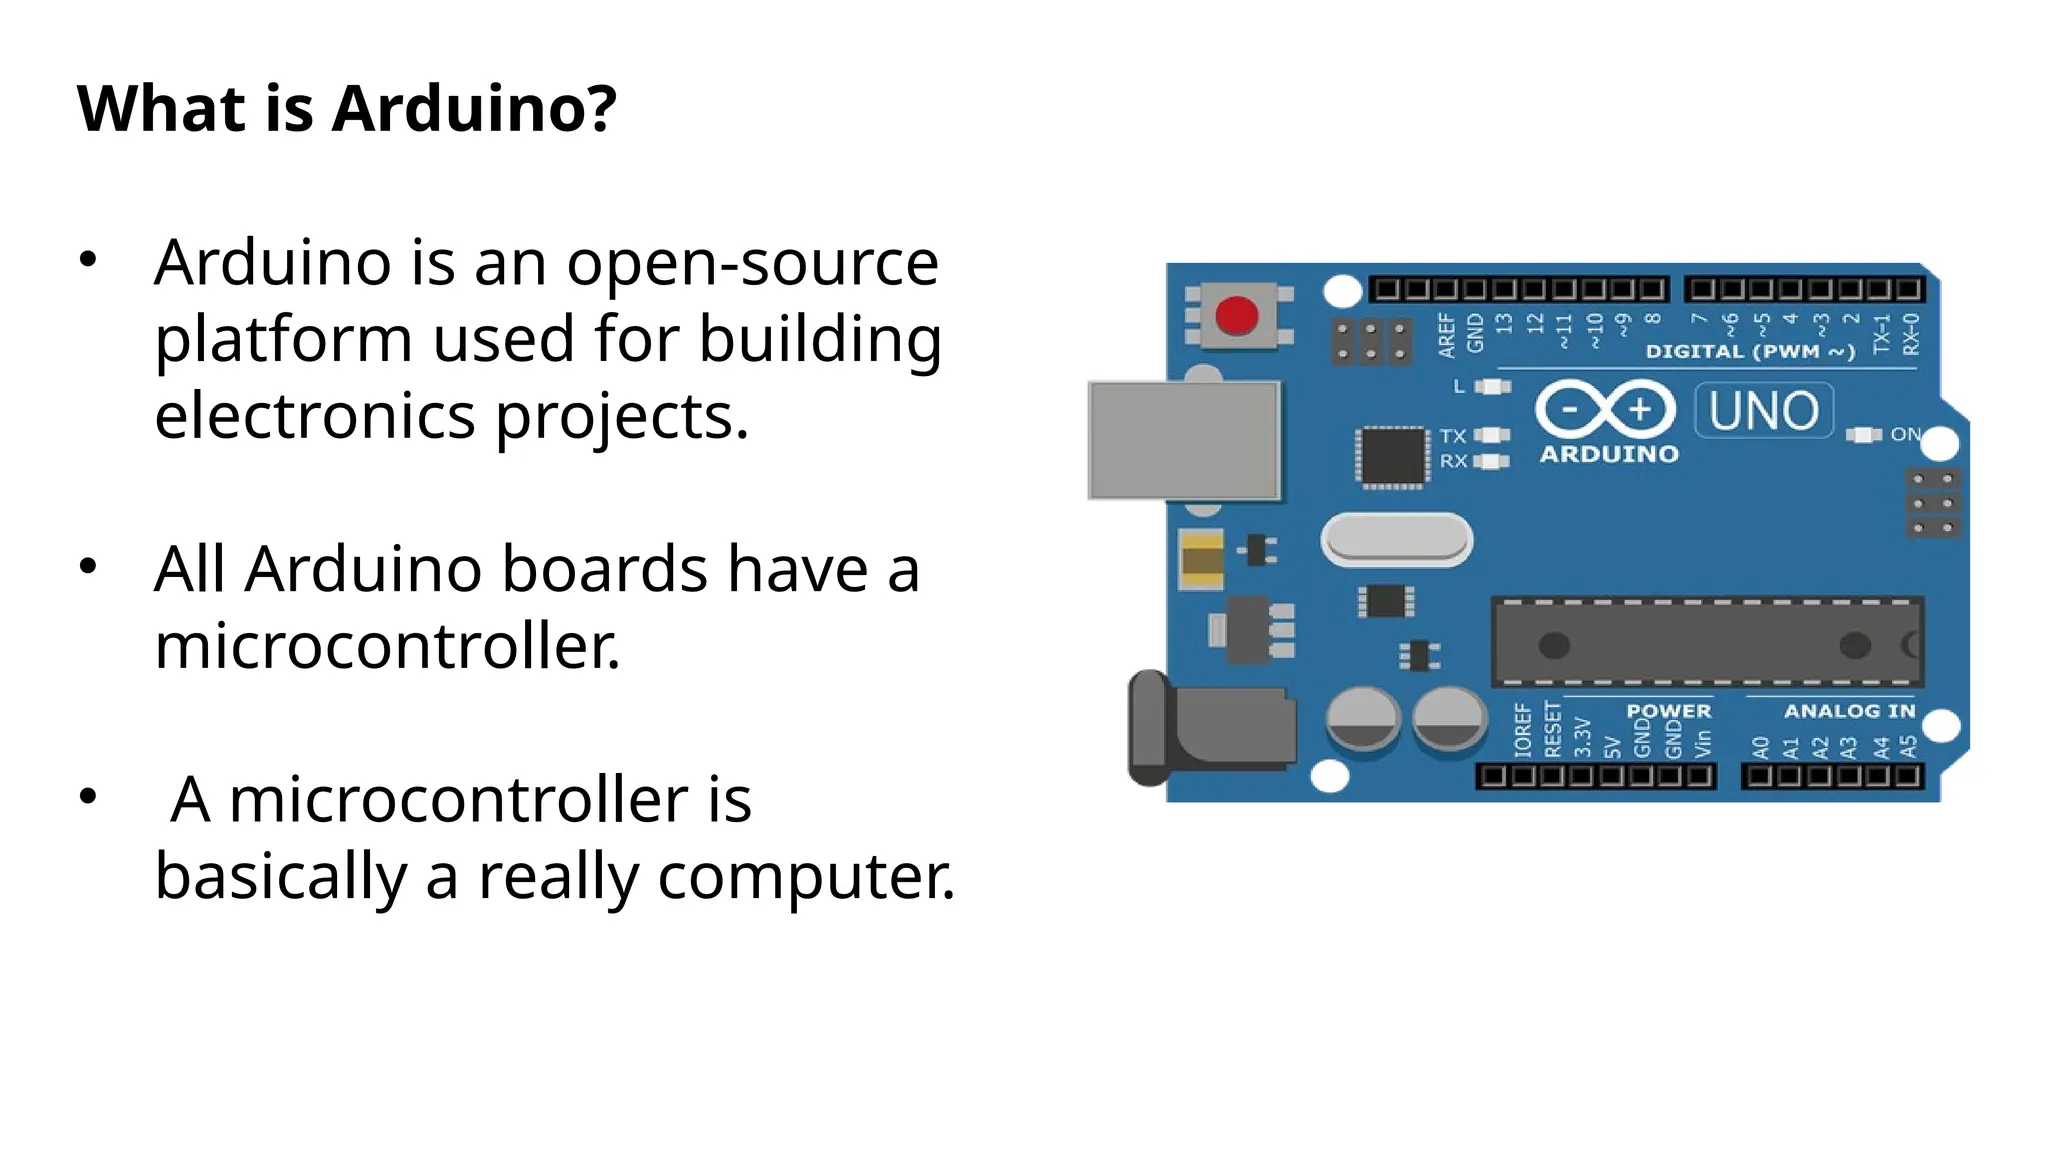
What is Arduino?
•Arduino is an open-source
platform used for building
electronics projects.
• All Arduino boards have a
microcontroller.
• A microcontroller is
basically a really computer.
8.
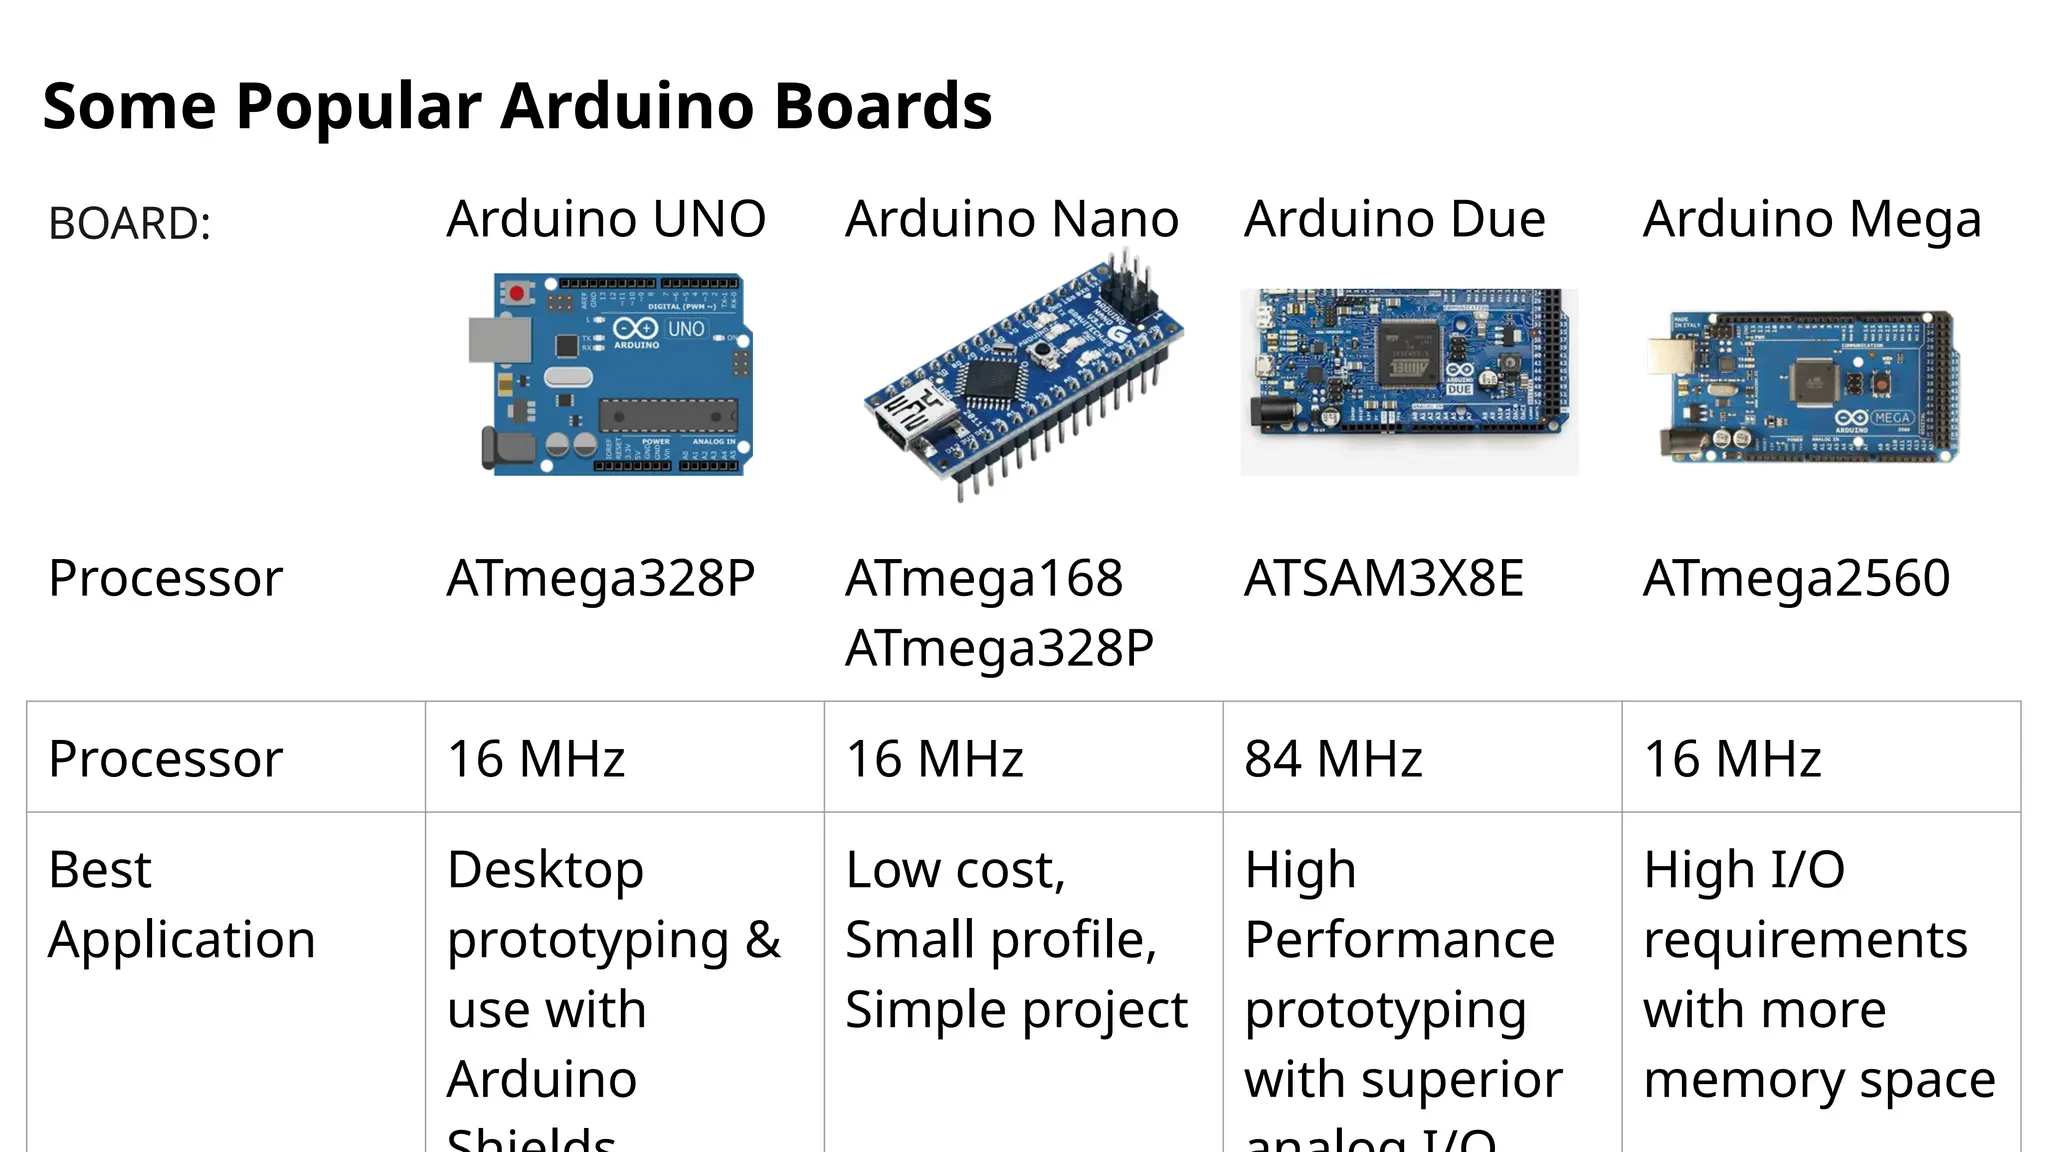
BOARD: Arduino UNOArduino Nano Arduino Due Arduino Mega
Processor ATmega328P ATmega168
ATmega328P
ATSAM3X8E ATmega2560
Processor 16 MHz 16 MHz 84 MHz 16 MHz
Best
Application
Desktop
prototyping &
use with
Arduino
Low cost,
Small profile,
Simple project
High
Performance
prototyping
with superior
High I/O
requirements
with more
memory space
Some Popular Arduino Boards
9.
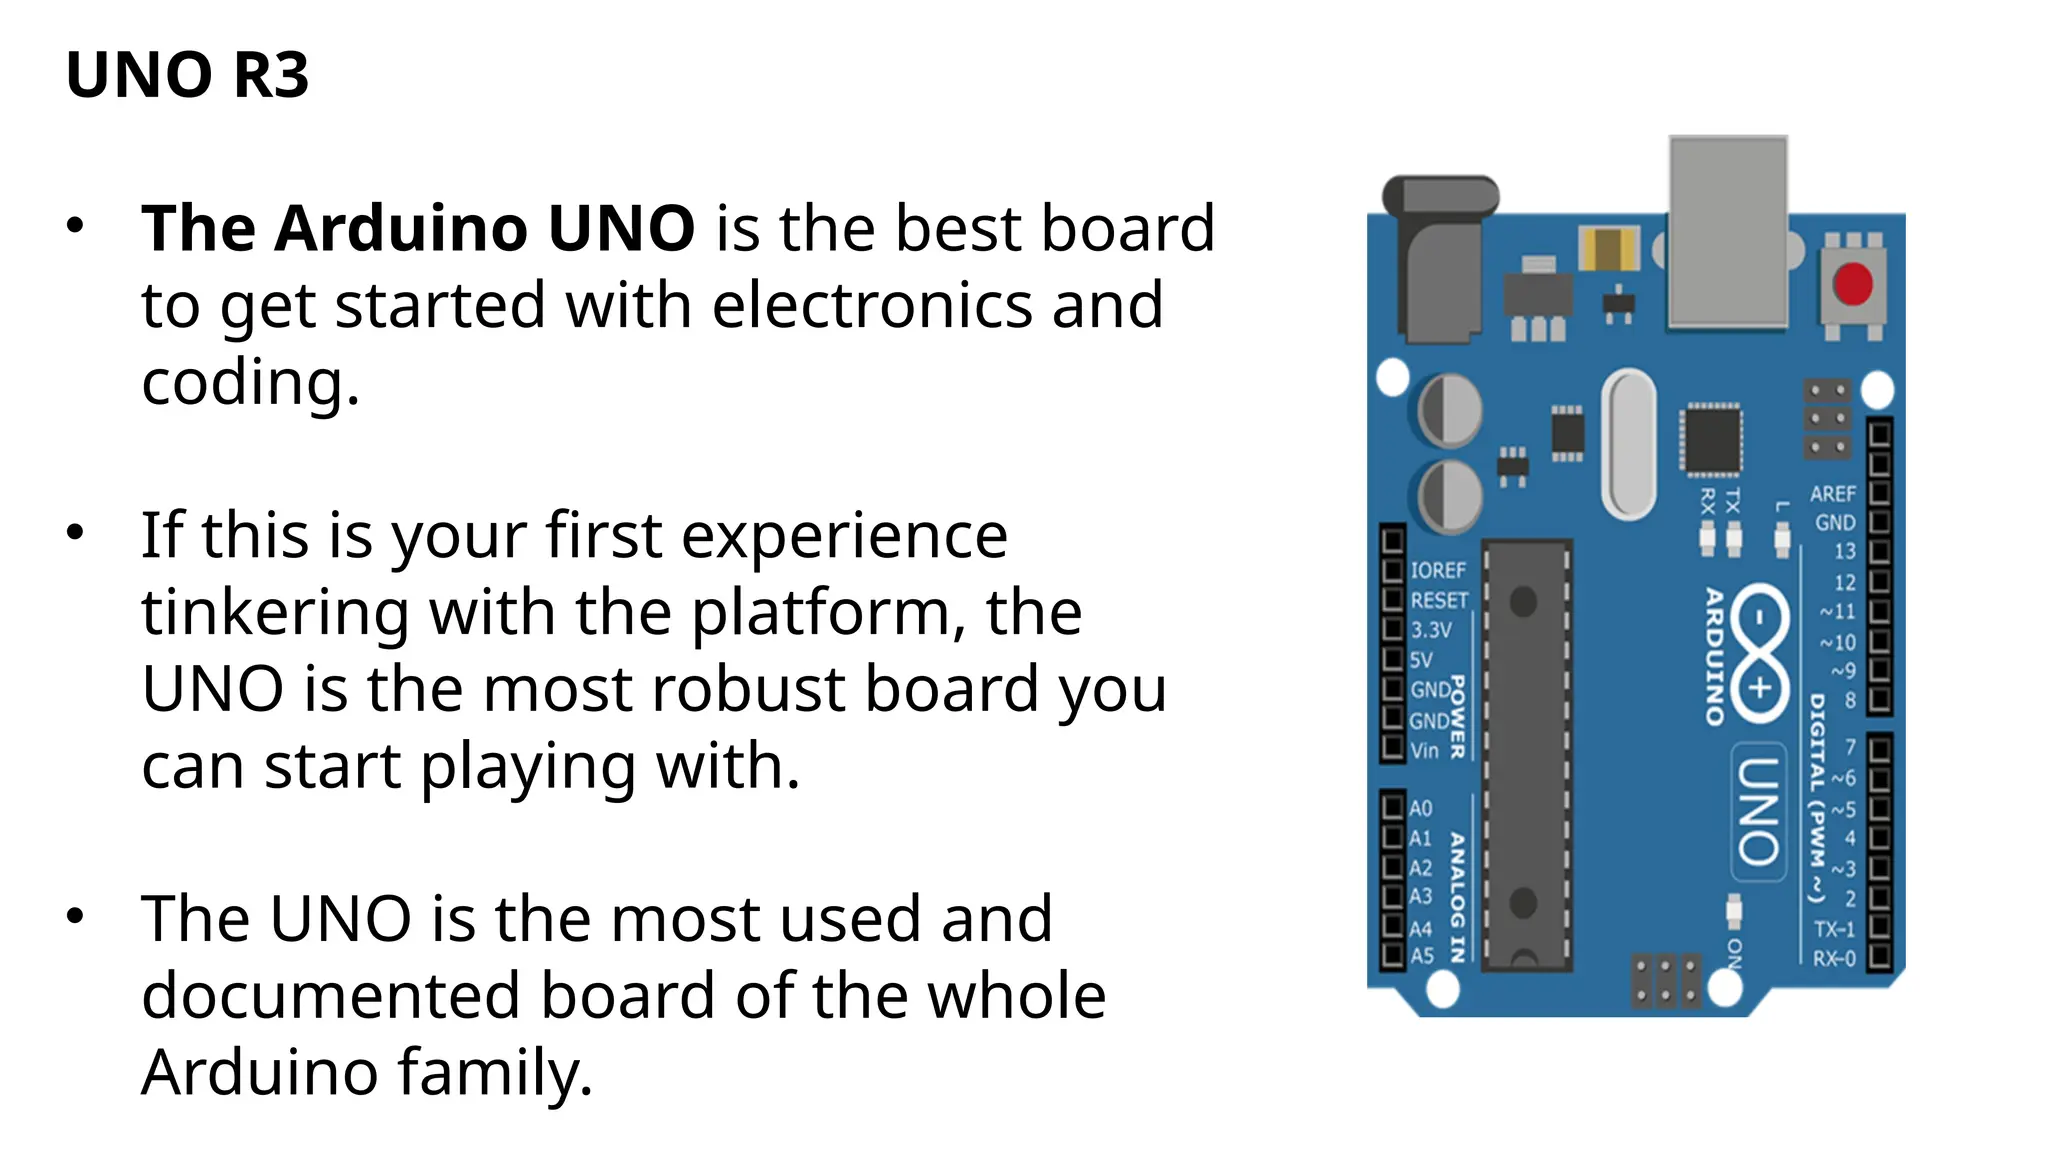
UNO R3
• TheArduino UNO is the best board
to get started with electronics and
coding.
• If this is your first experience
tinkering with the platform, the
UNO is the most robust board you
can start playing with.
• The UNO is the most used and
documented board of the whole
Arduino family.
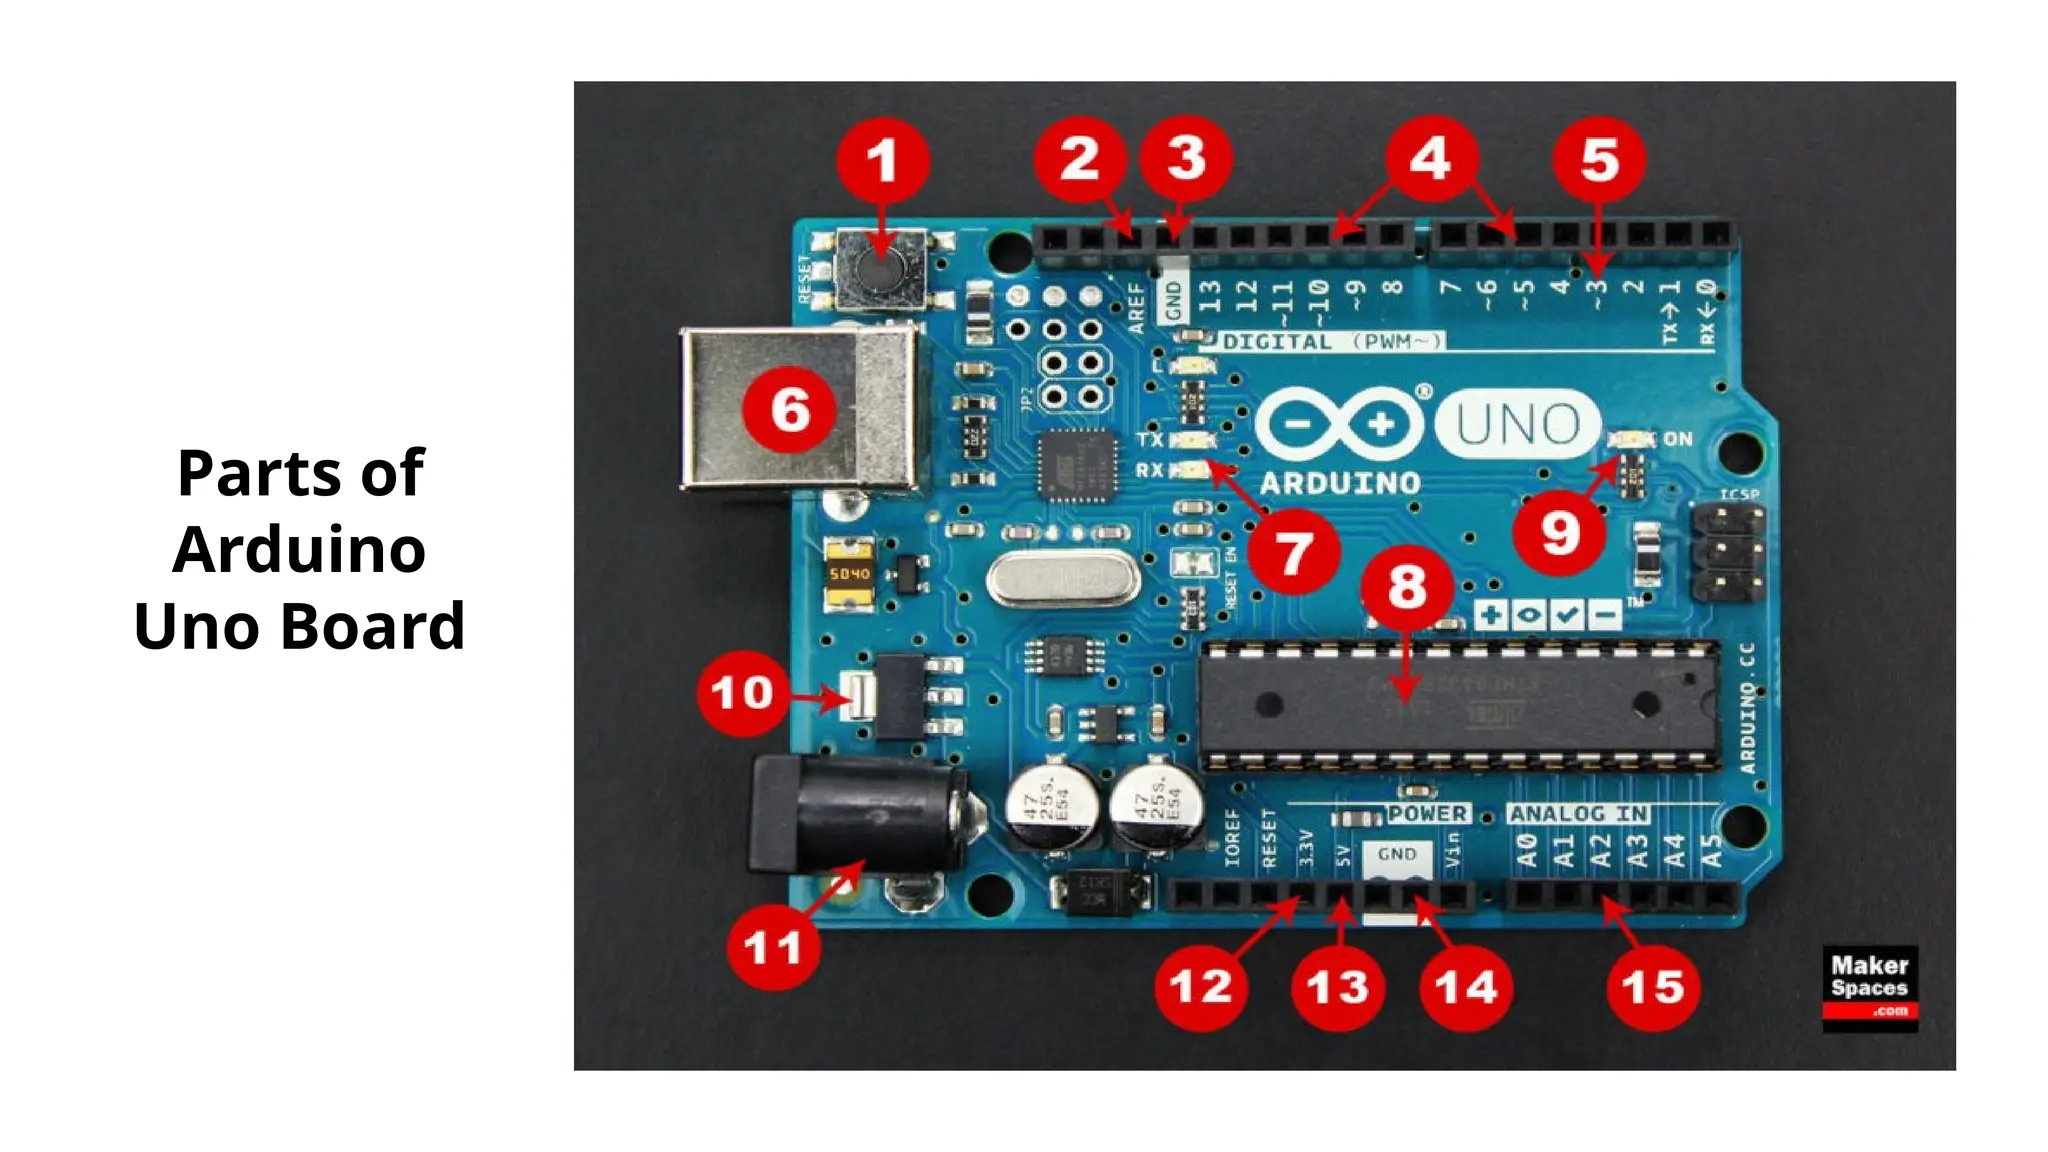
Board Breakdown
Here arethe components that make up an Arduino board and
what each of their functions are.
1. Reset Button – This will restart any code that is loaded to
the Arduino board
2. AREF – Stands for “Analog Reference” and is used to set an
external reference voltage
3. Ground Pin – There are a few ground pins on the Arduino
and they all work the same
12.
4. Digital Input/Output– Pins 0-13 can be used for digital
input or output
5. PWM – The pins marked with the (~) symbol can simulate
analog output
6. USB Connection – Used for powering up your Arduino and
uploading sketches
7. TX/RX – Transmit and receive data indication LEDs
8. ATmega Microcontroller – This is the brains and is where
the programs are stored
13.
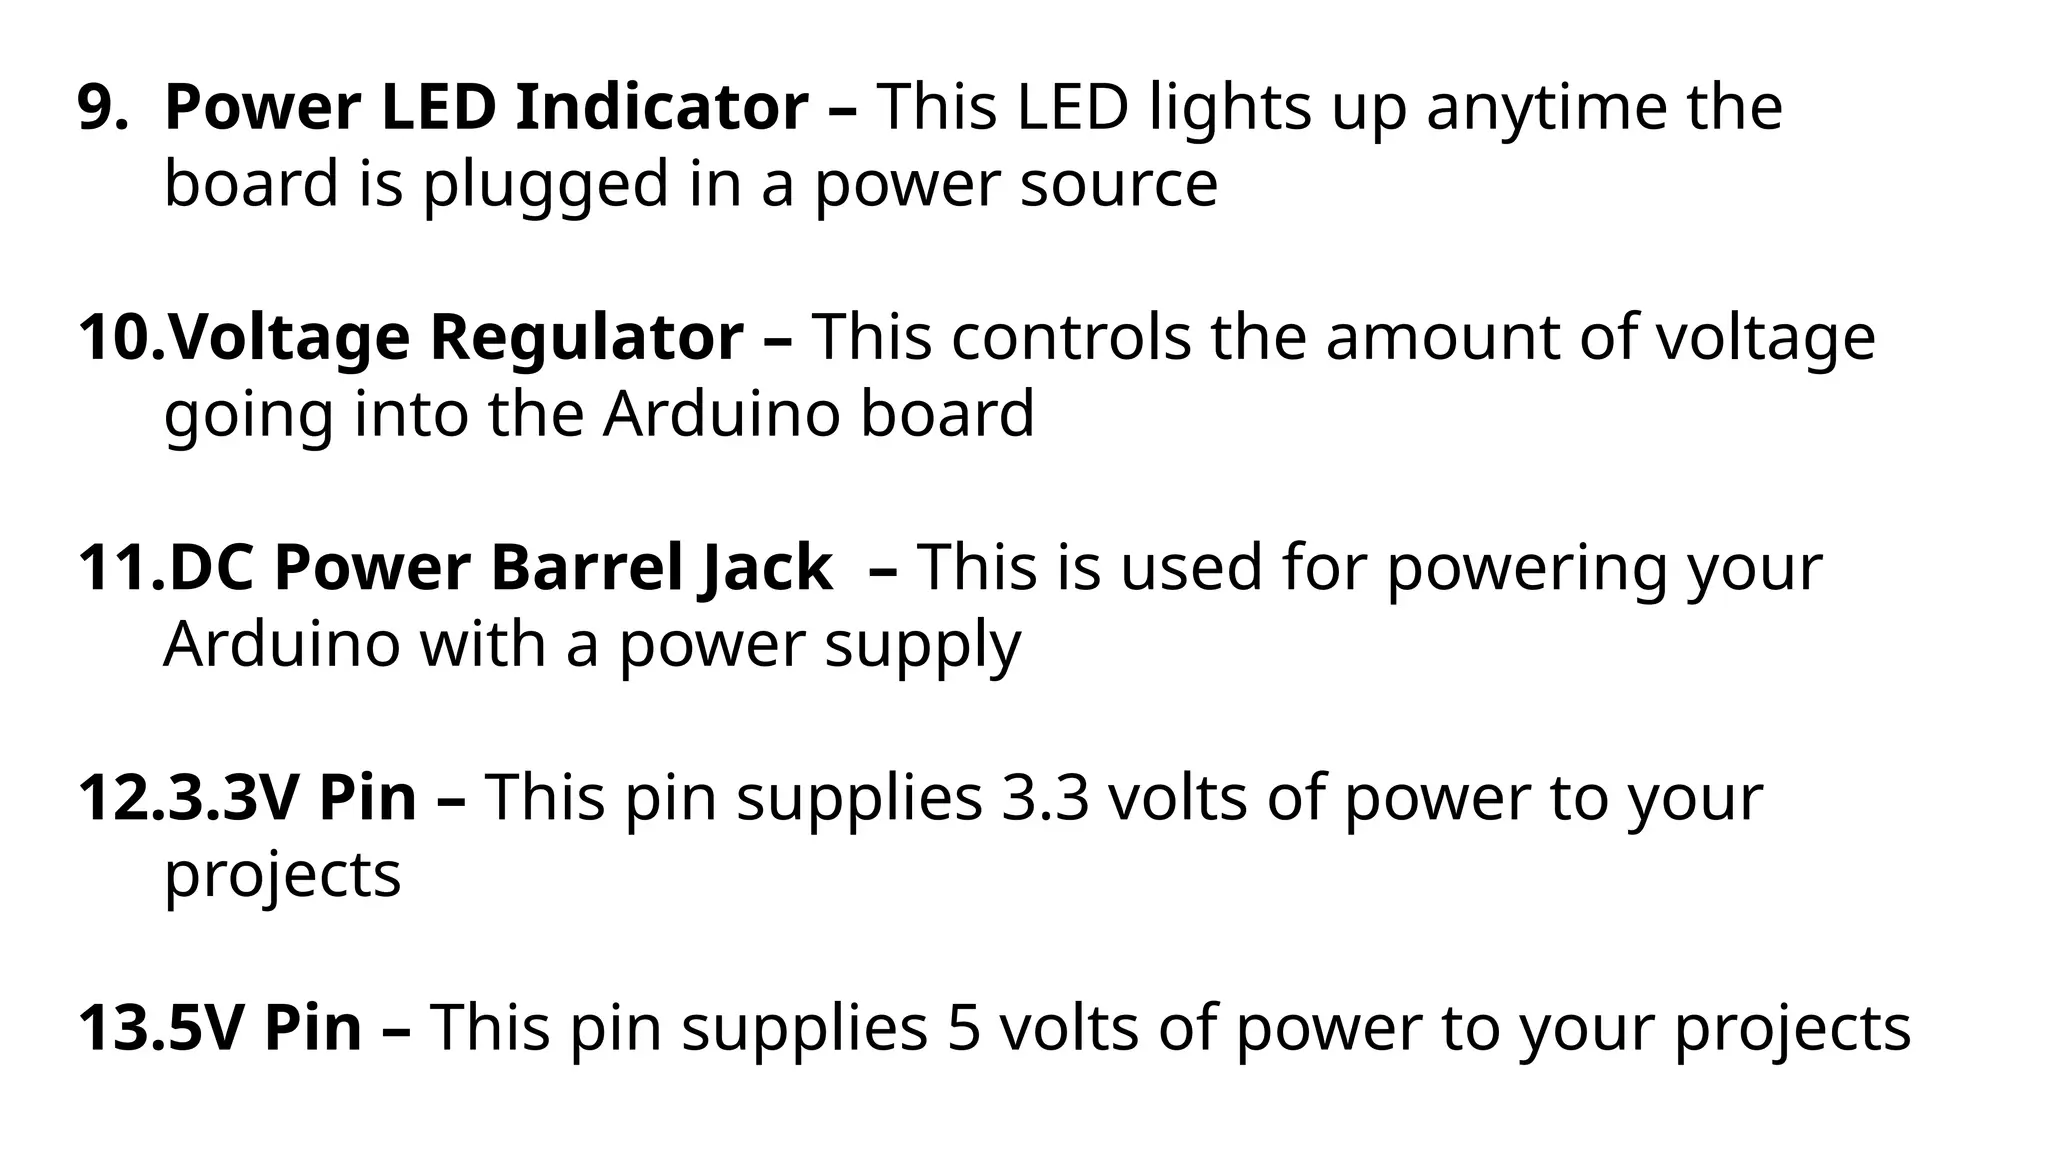
9. Power LEDIndicator – This LED lights up anytime the
board is plugged in a power source
10.Voltage Regulator – This controls the amount of voltage
going into the Arduino board
11.DC Power Barrel Jack – This is used for powering your
Arduino with a power supply
12.3.3V Pin – This pin supplies 3.3 volts of power to your
projects
13.5V Pin – This pin supplies 5 volts of power to your projects
14.
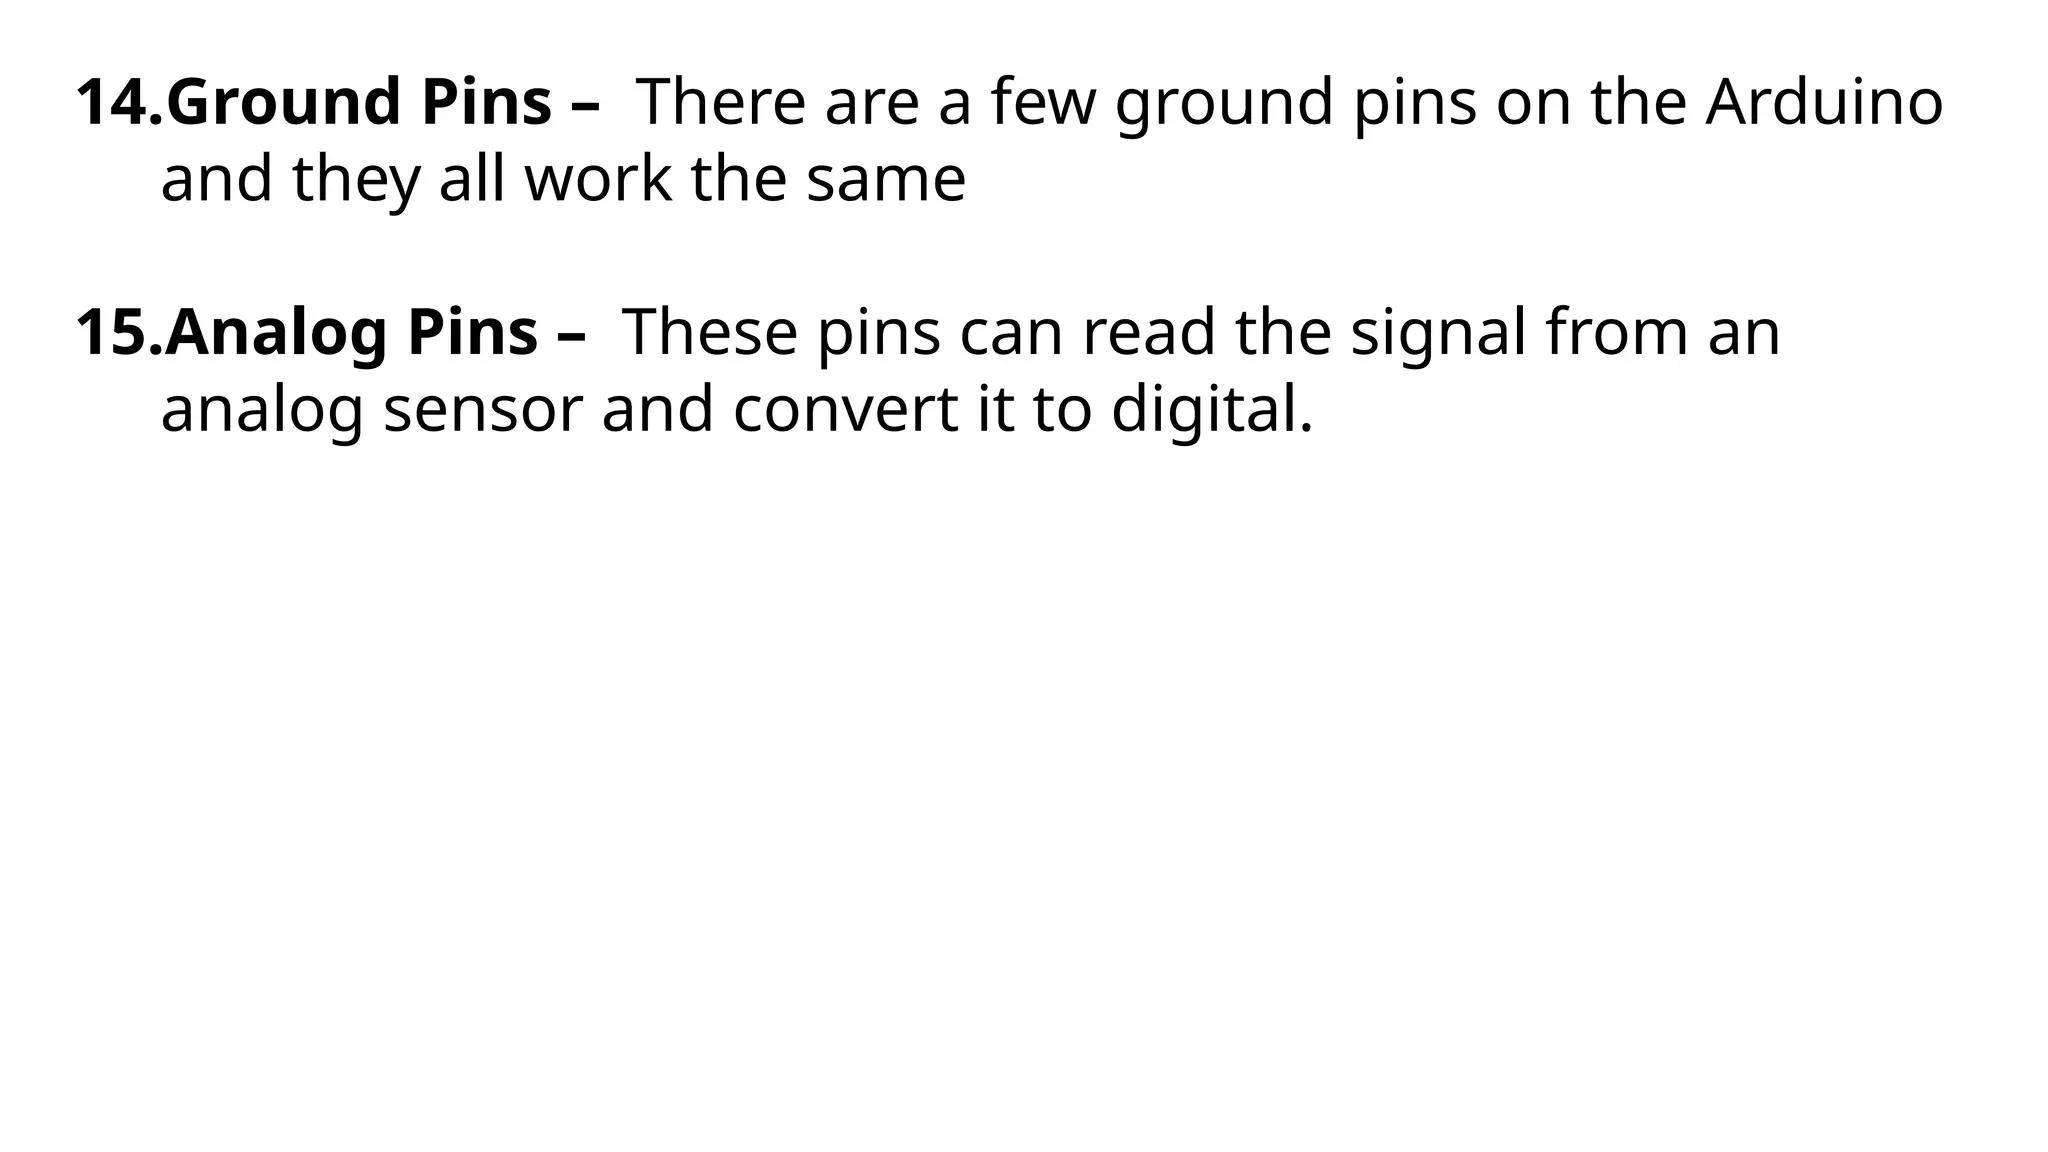
14.Ground Pins –There are a few ground pins on the Arduino
and they all work the same
15.Analog Pins – These pins can read the signal from an
analog sensor and convert it to digital.


![Support, Monitoring, Continuous Improvement & Scaling Agentic Automation [3/3]](https://cdn.slidesharecdn.com/ss_thumbnails/agenticcommunityseries-day3-cfd-251120170304-ddef8112-thumbnail.jpg?width=640&height=640&fit=bounds)


