Download as PDF, PPTX


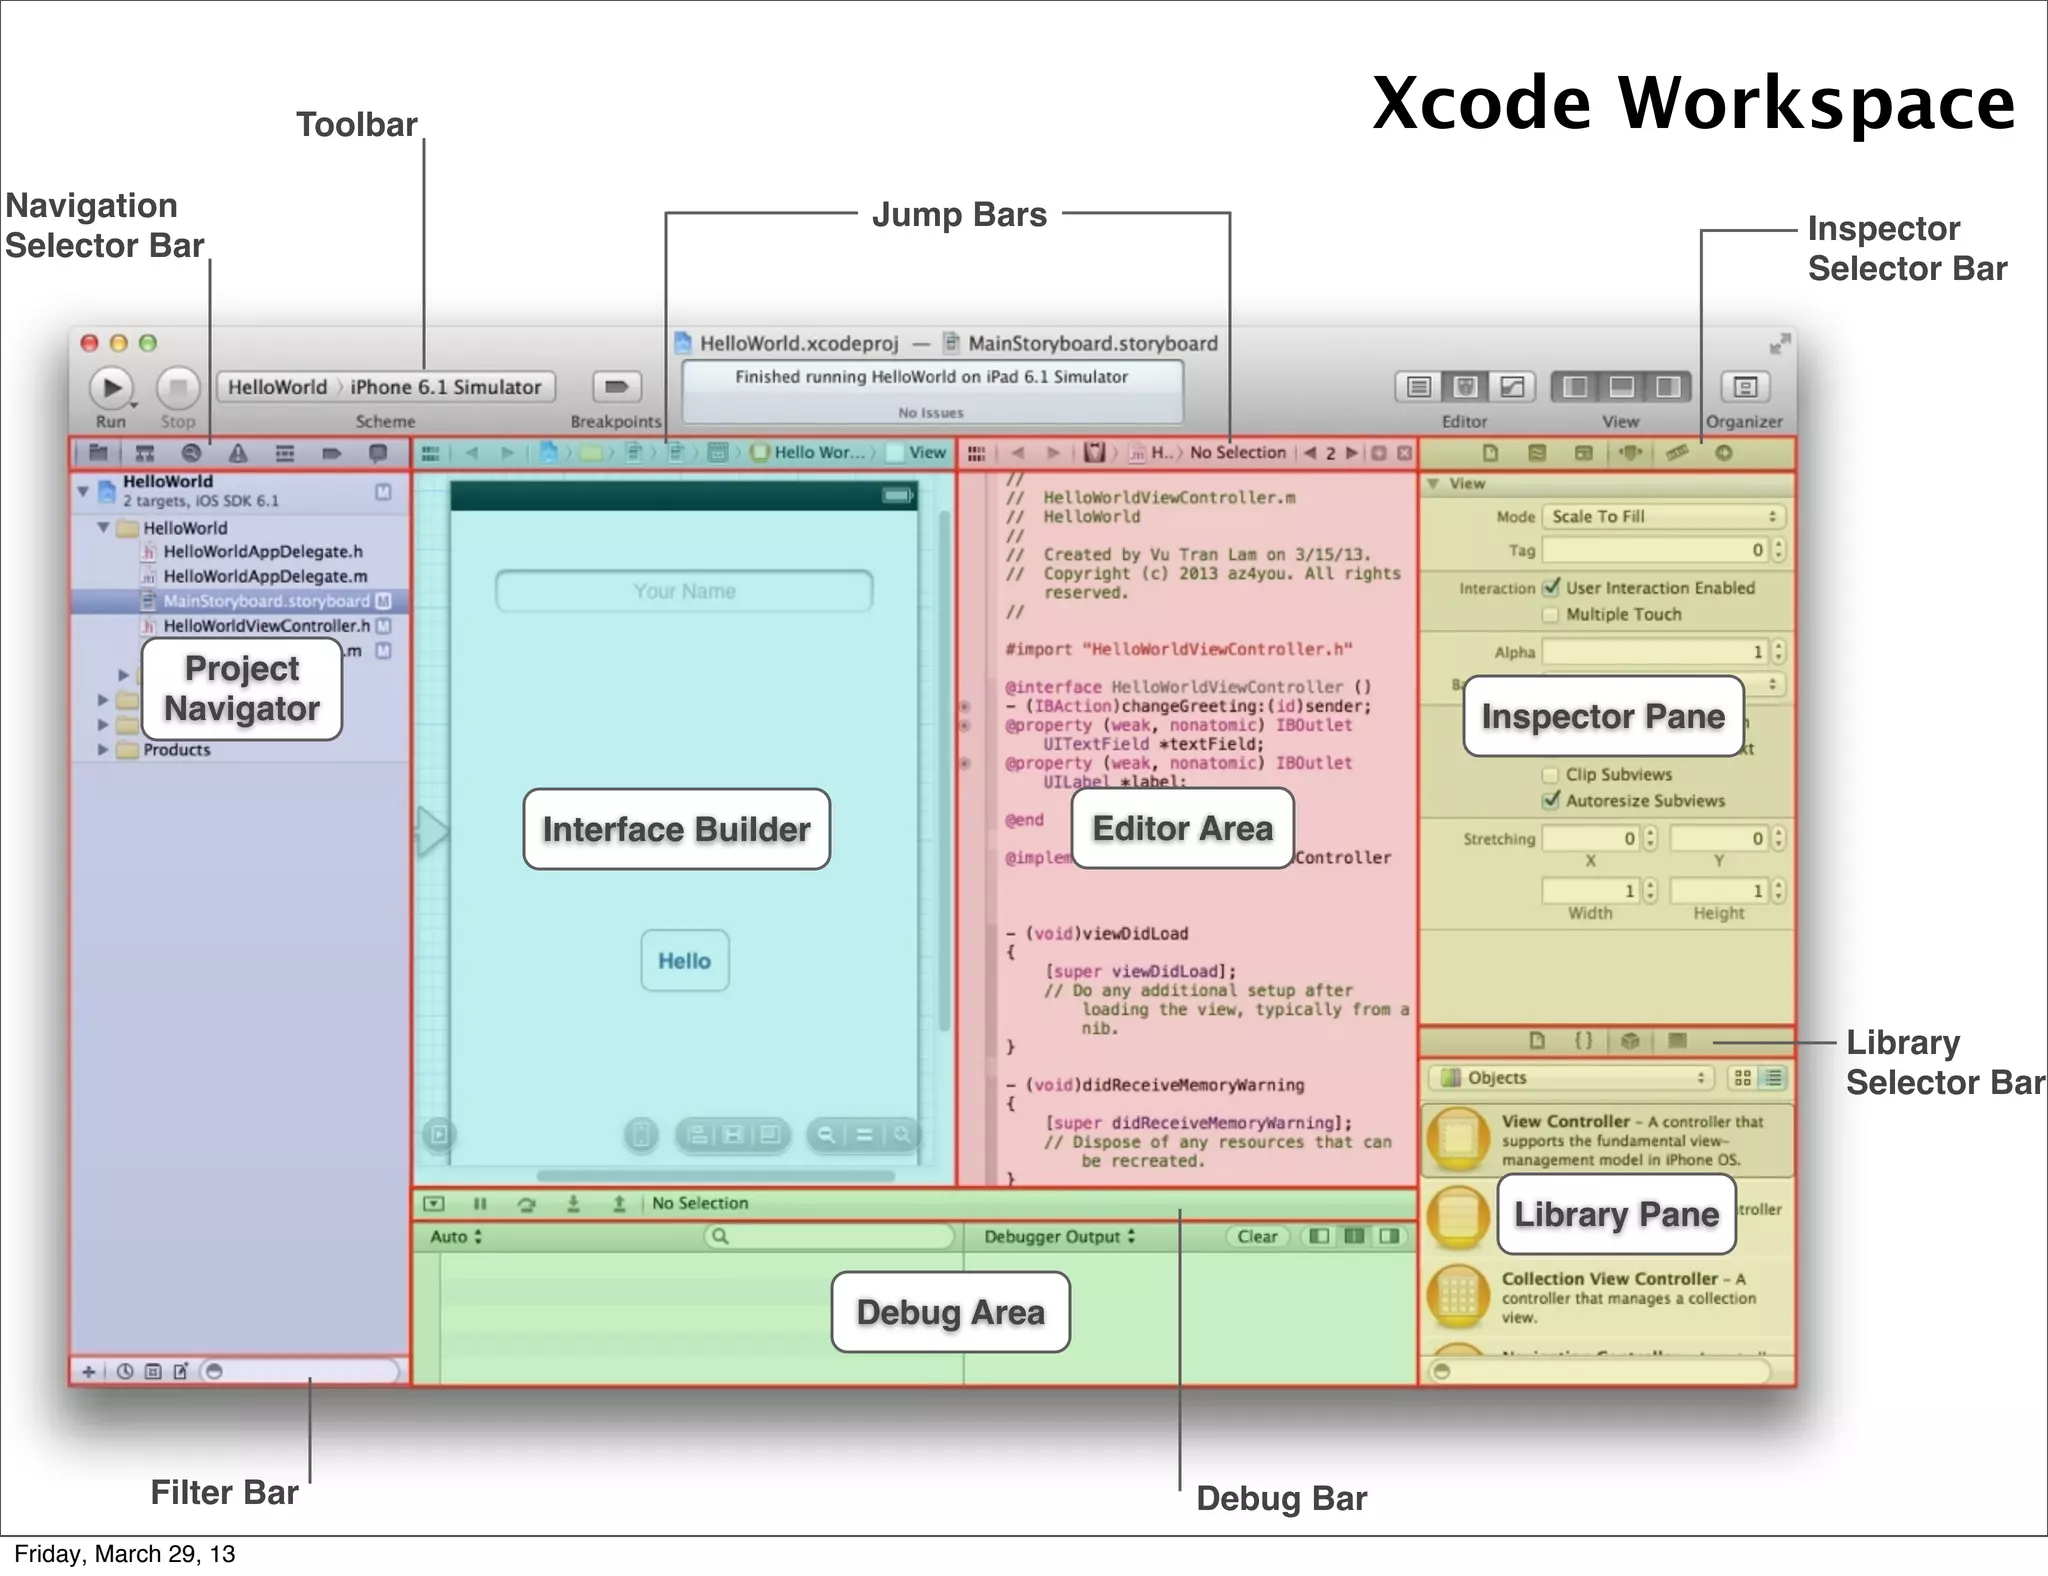


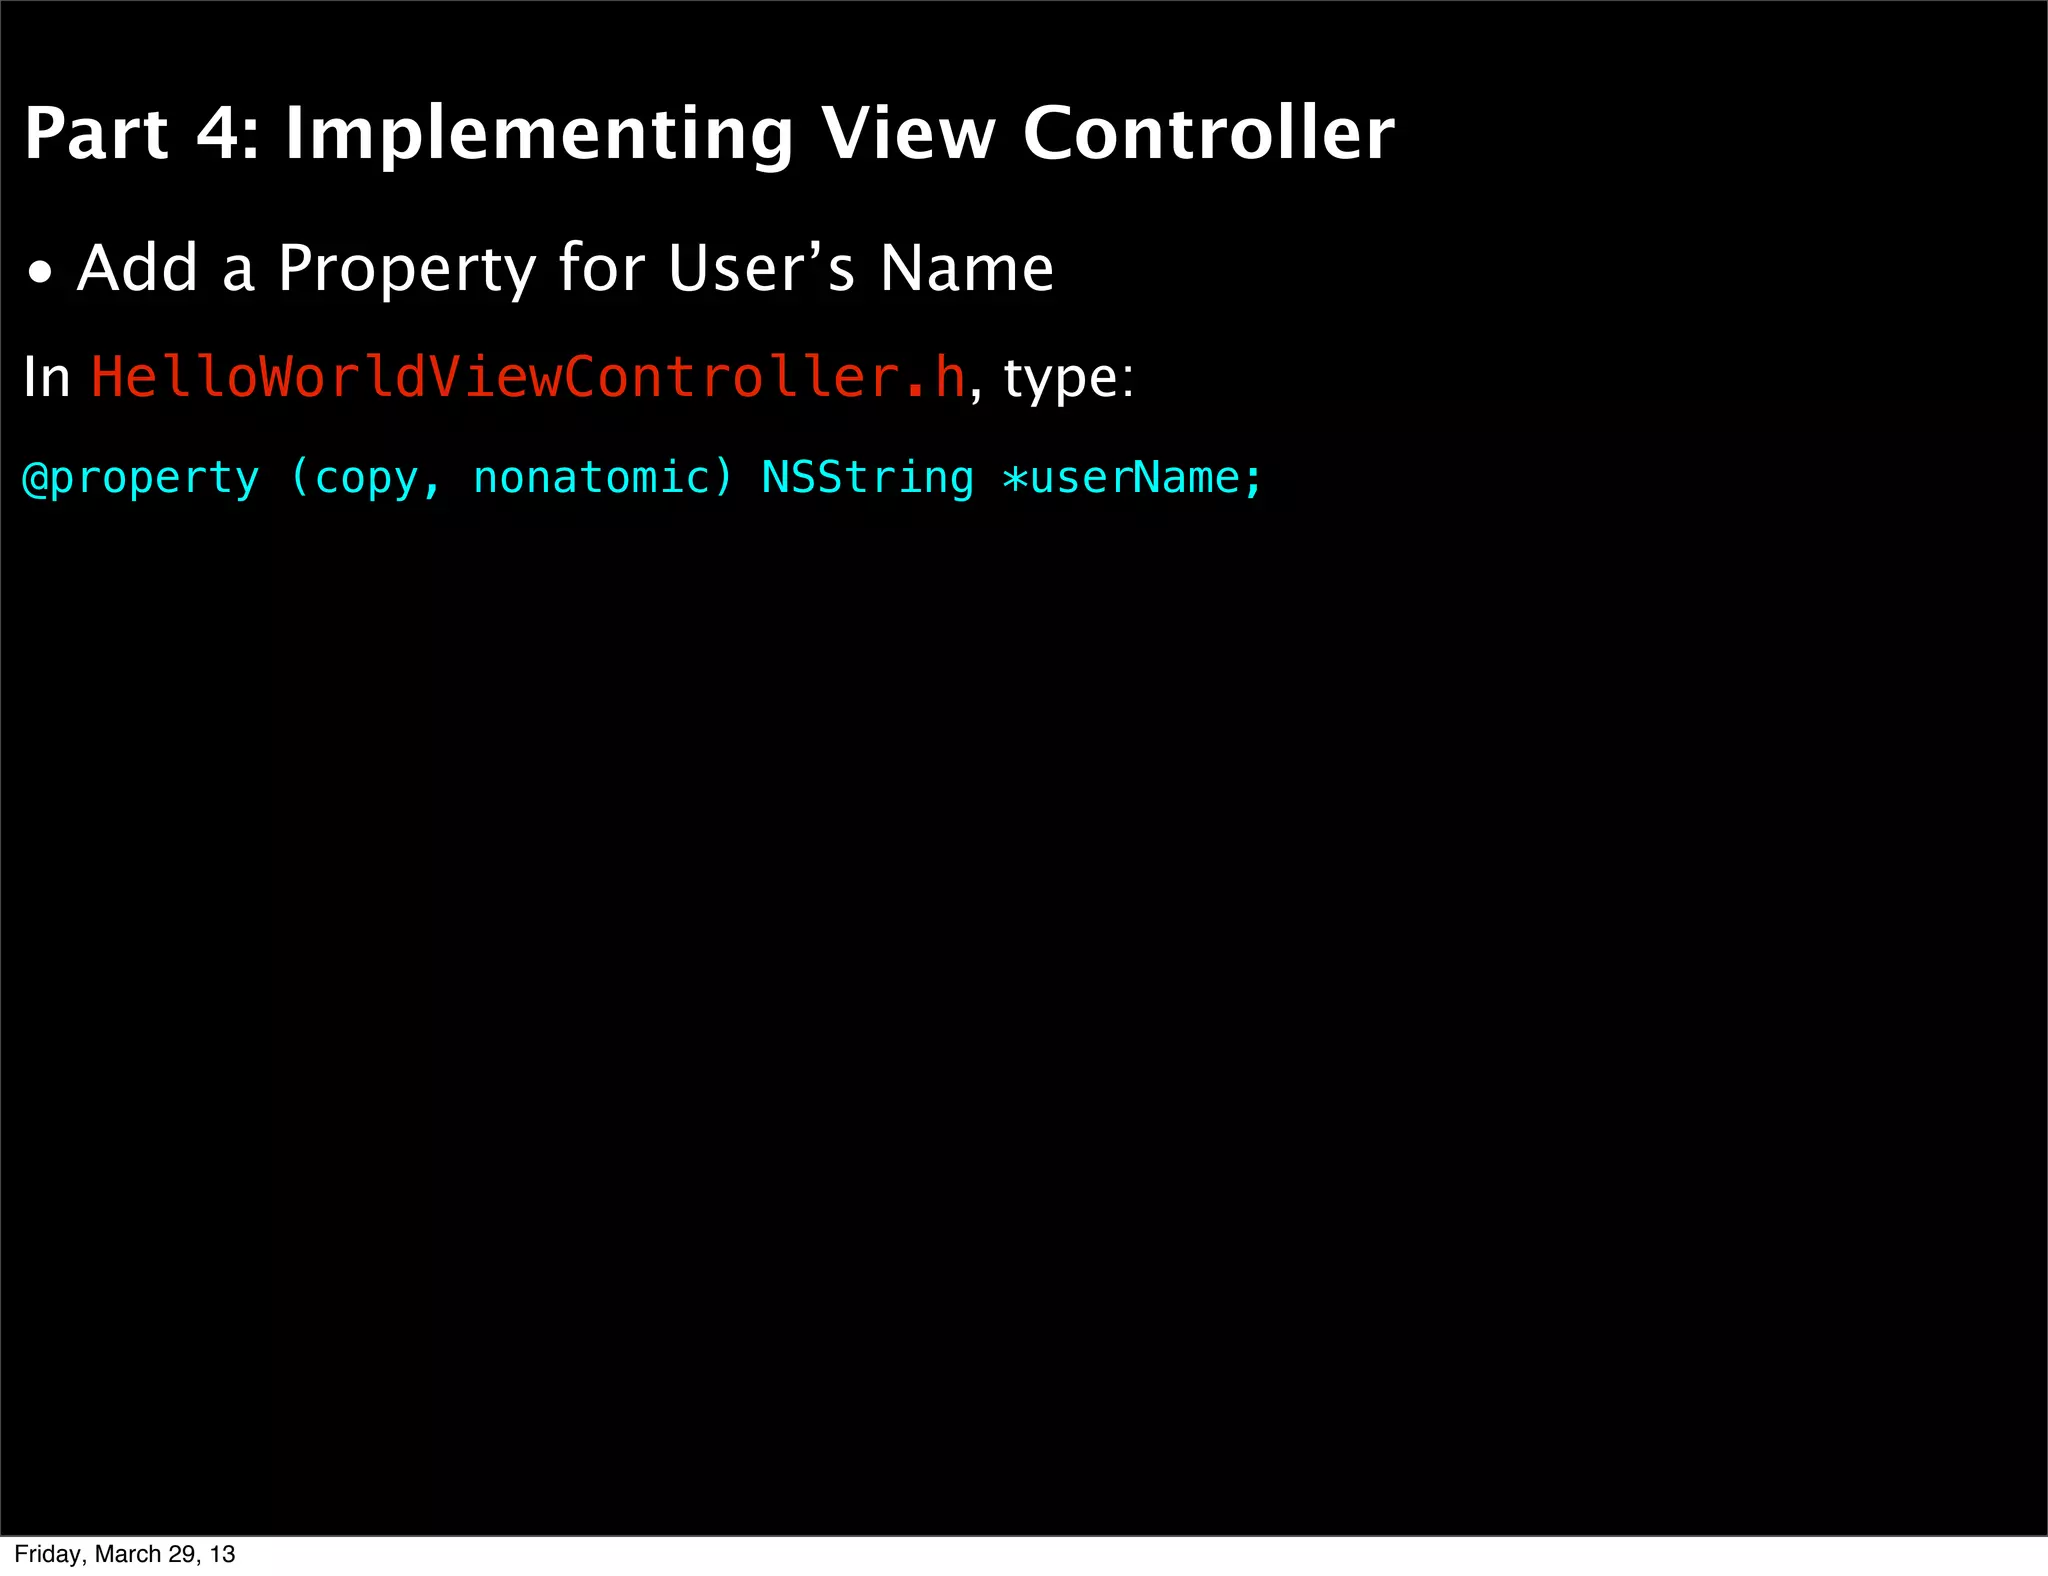
![Part 4: Implementing View Controller
• Add a Property for User’s Name
• Implement changeGreeting: Method
- (IBAction)changeGreeting:(id)sender
{
self.userName = self.textField.text;
NSString *nameString = self.userName;
if (nameString.length == 0)
{
nameString = @"World";
}
NSString *greeting = [[NSString alloc] initWithFormat: @"Hello, %@!",
nameString];
self.label.text = greeting;
}
In HelloWorldViewController.m, type:
Friday, March 29, 13](https://image.slidesharecdn.com/buildingacompletediphoneapp-130328125743-phpapp01/75/Building-a-Completed-iPhone-App-67-2048.jpg)
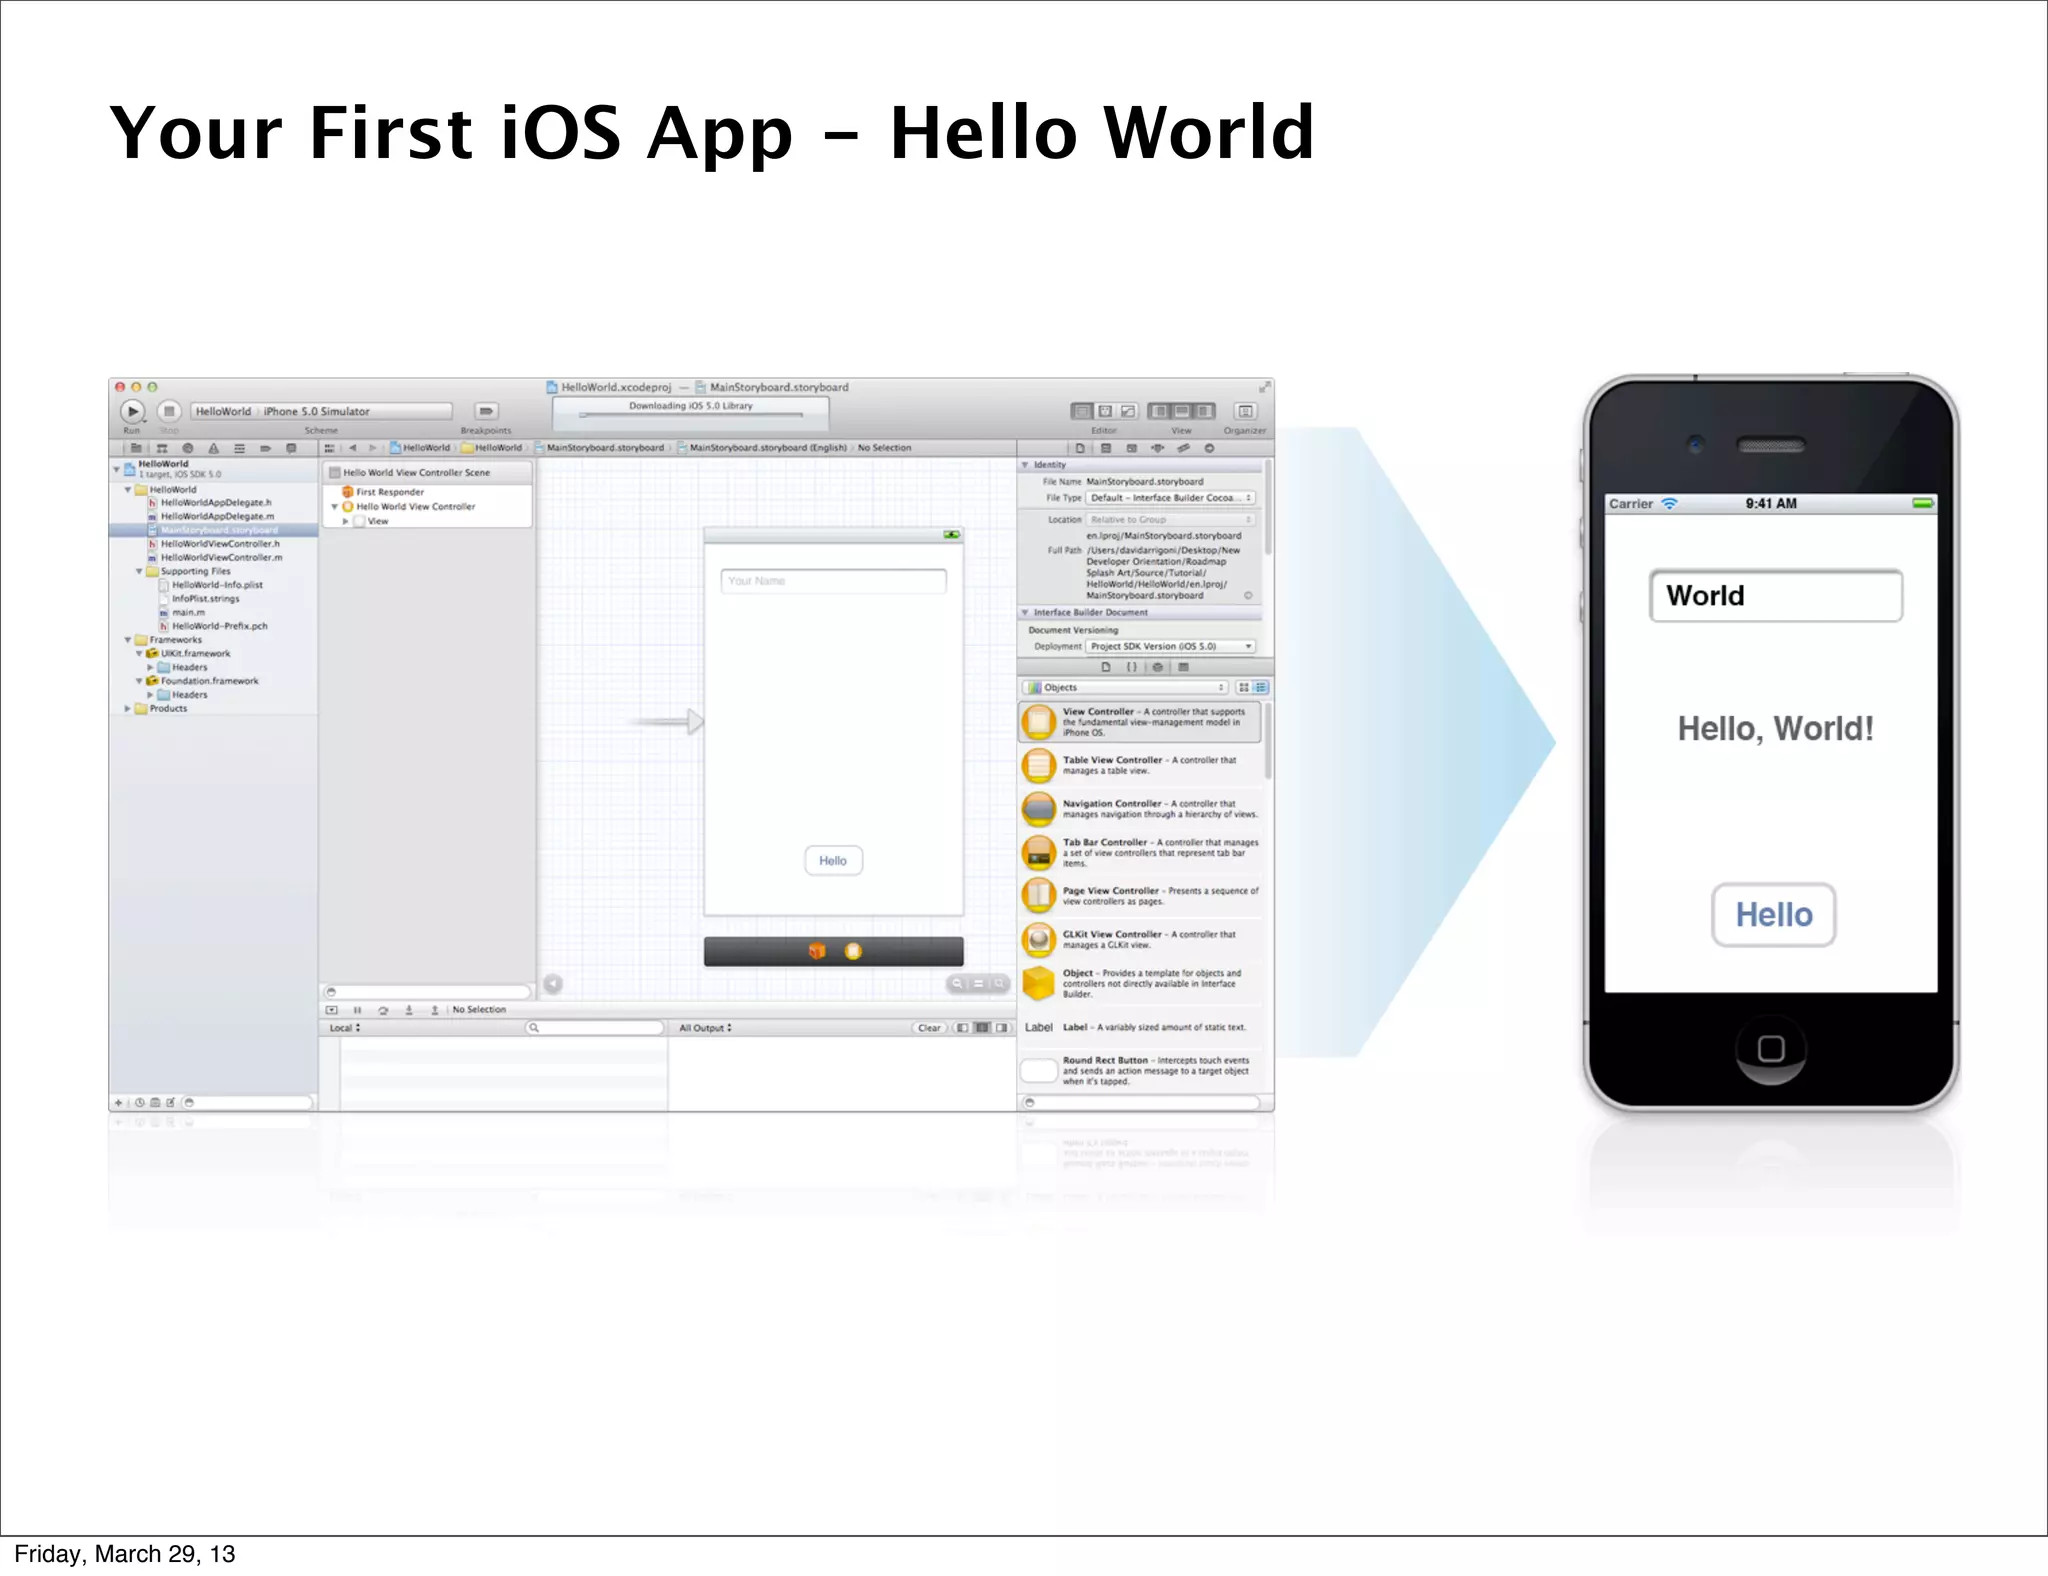
![Part 4: Implementing View Controller
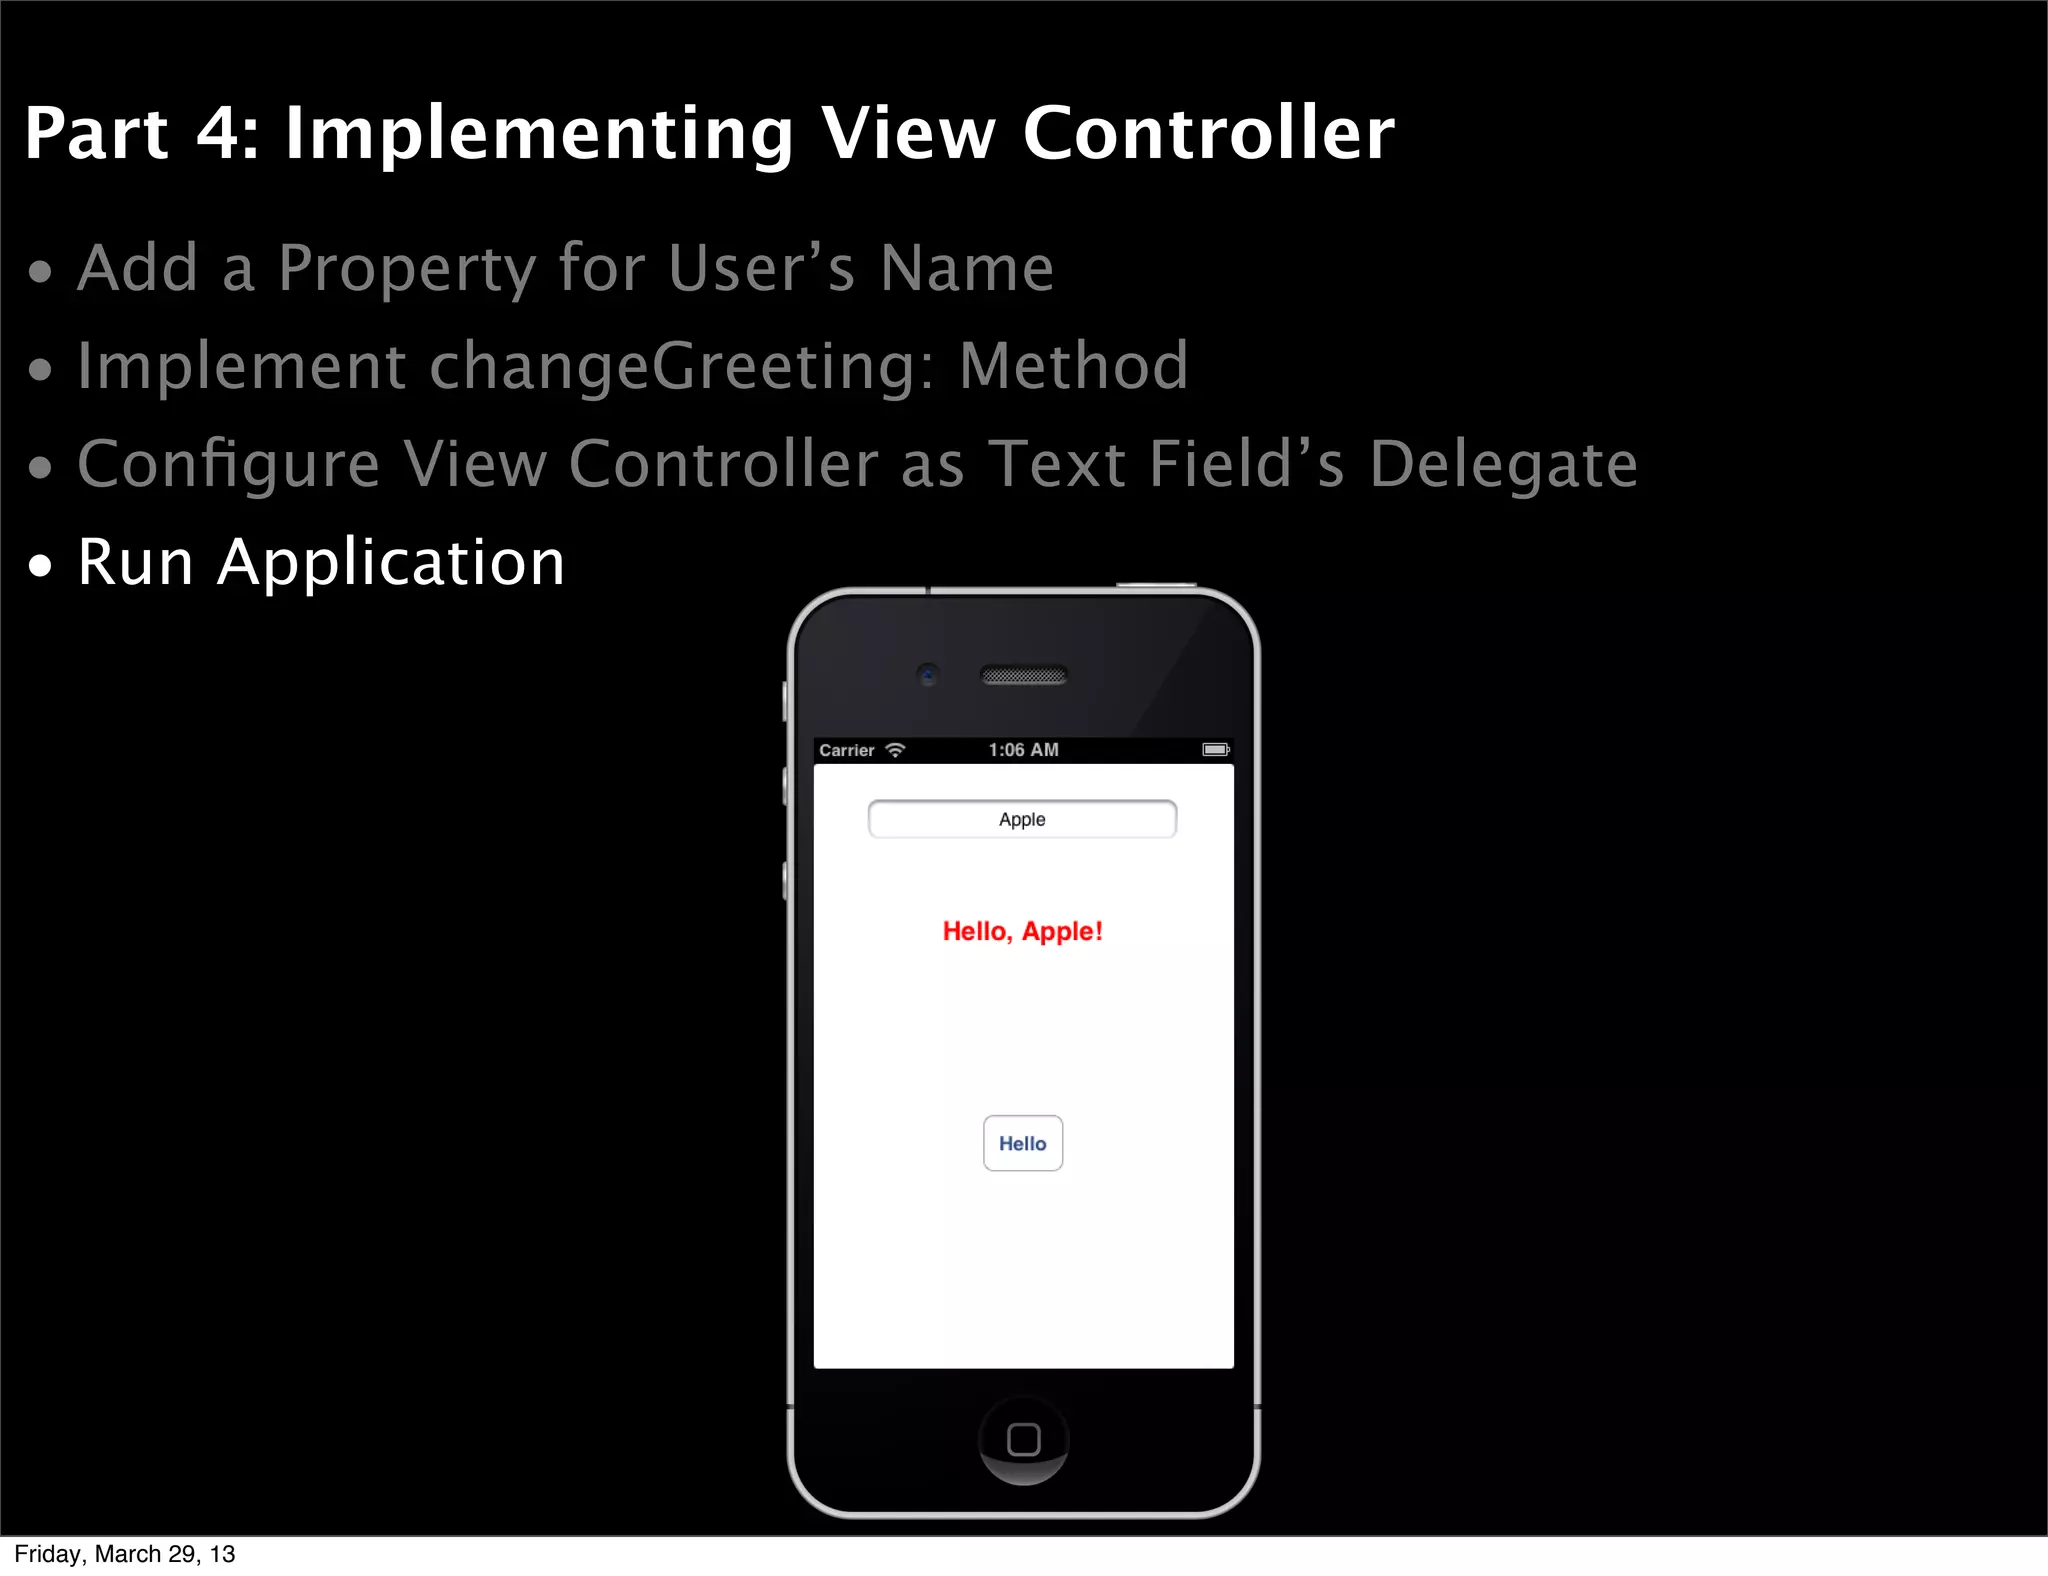
• Add a Property for User’s Name
• Implement changeGreeting: Method
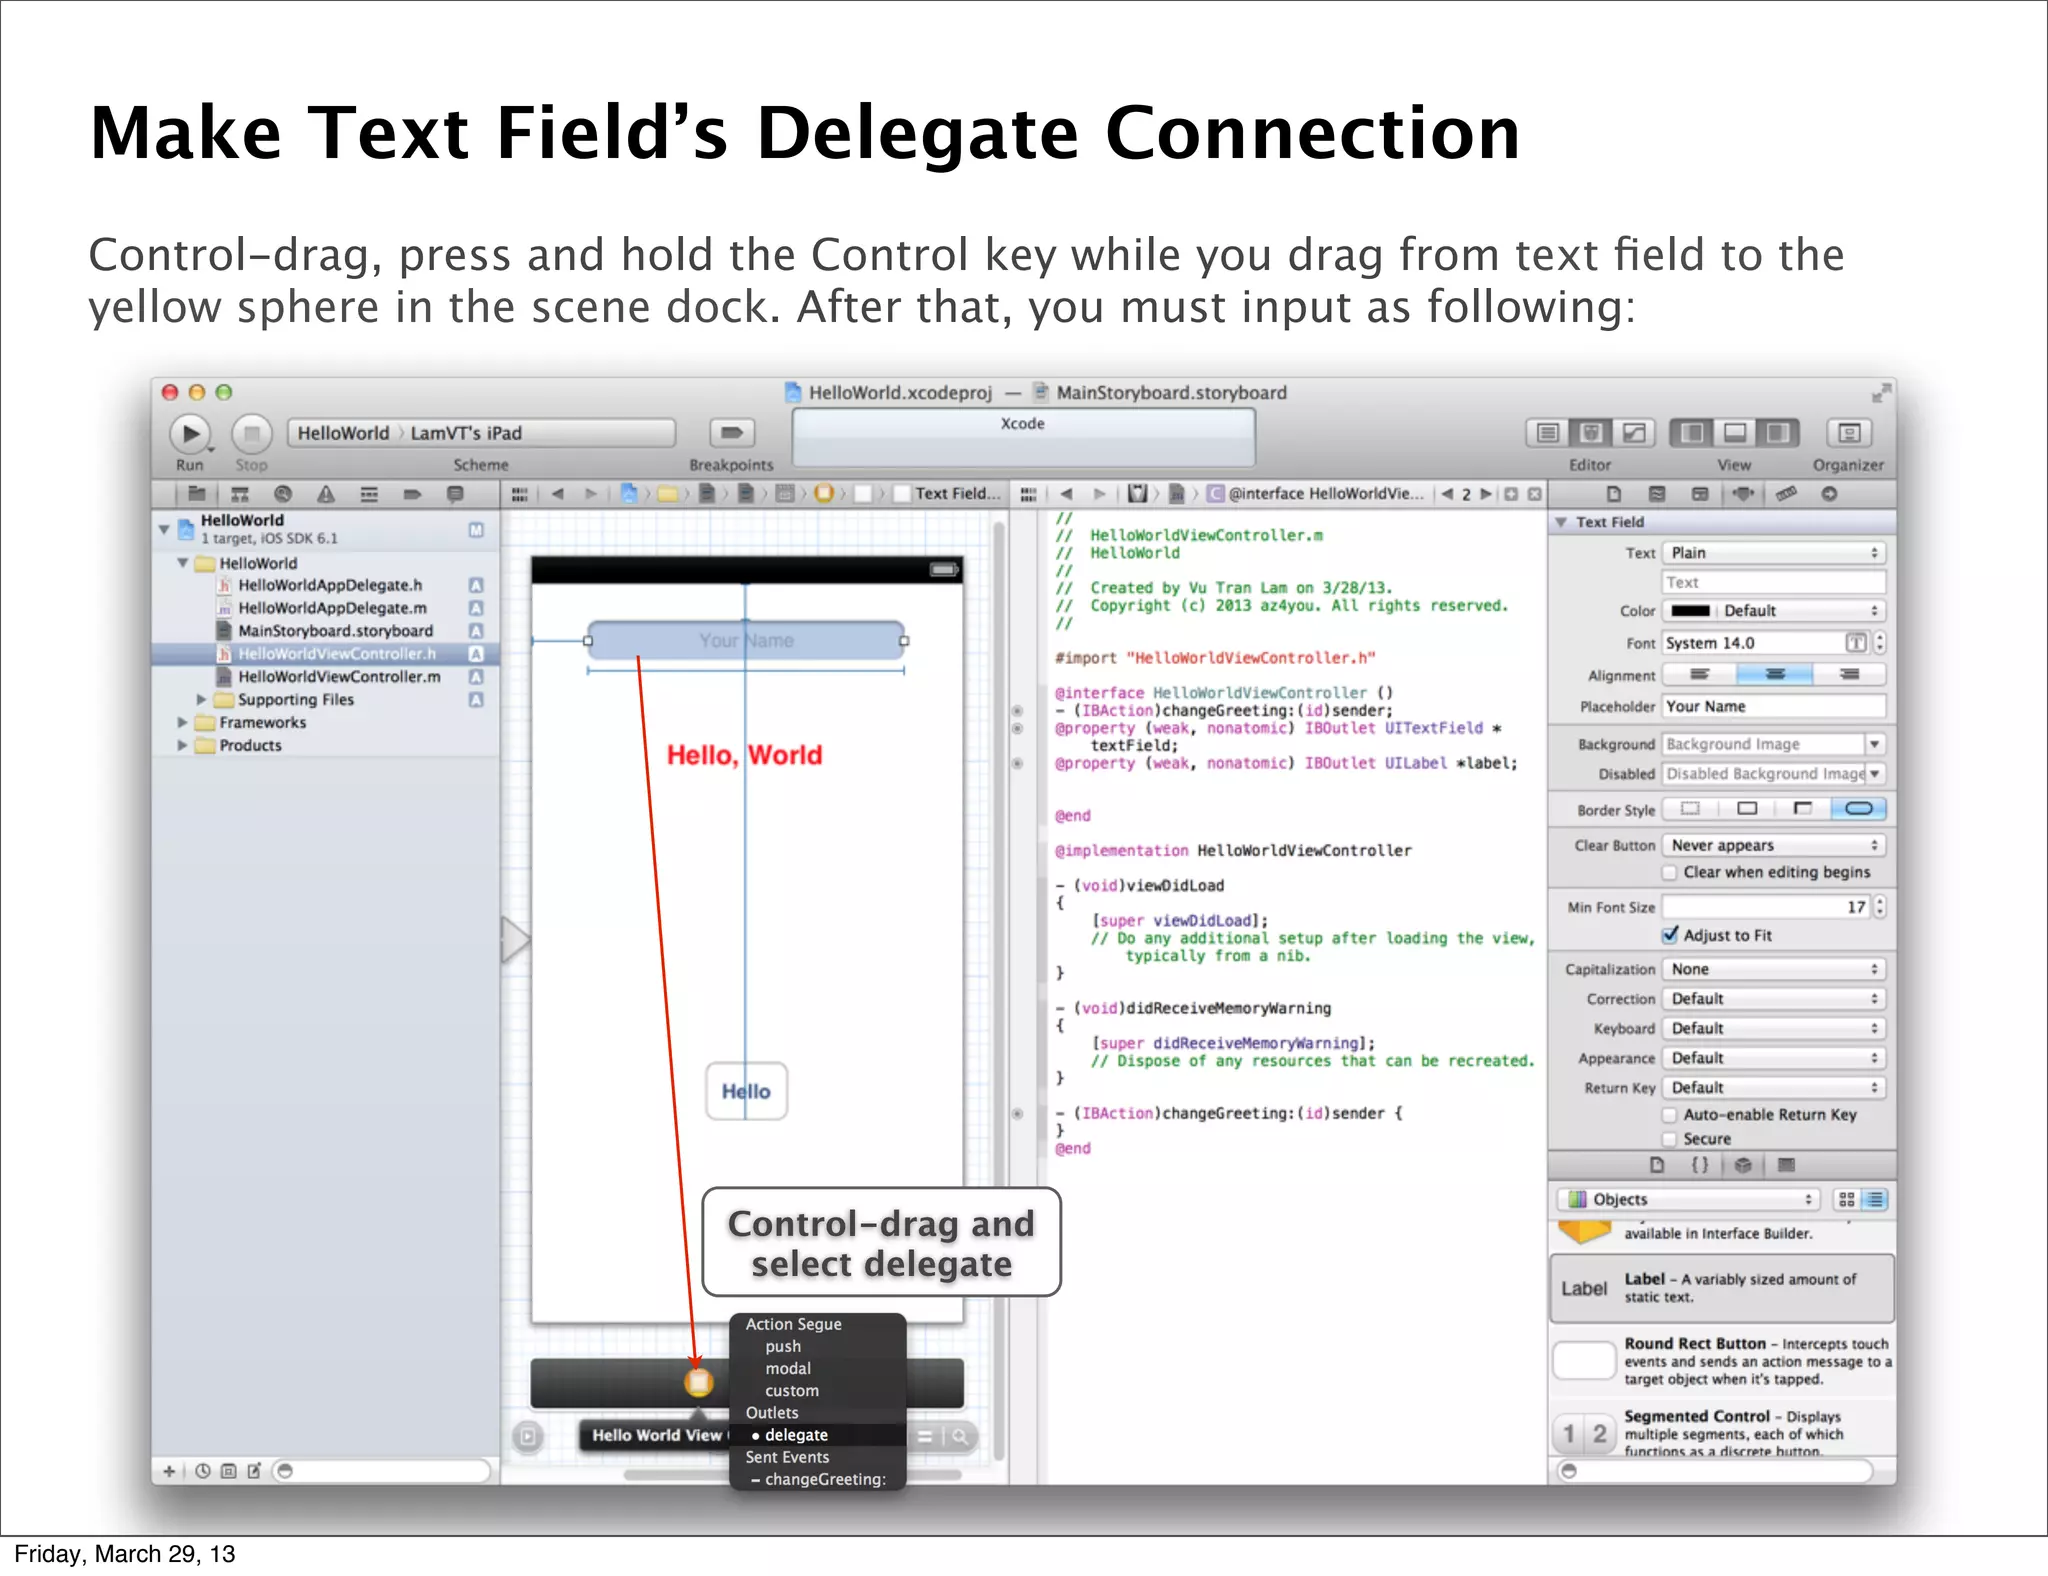
• Configure View Controller as Text Field’s Delegate
- (BOOL) textFieldShouldReturn: (UITextField *)theTextField
{
if (theTextField == self.textField)
{
[theTextField resignFirstResponder];
}
return YES;
}
@end
In HelloWorldViewController.m, type:
In HelloWorldViewController.h, add <UITextFieldDelegate>:
@interface HelloWorldViewController : UIViewController <UITextFieldDelegate>
Friday, March 29, 13](https://image.slidesharecdn.com/buildingacompletediphoneapp-130328125743-phpapp01/75/Building-a-Completed-iPhone-App-69-2048.jpg)


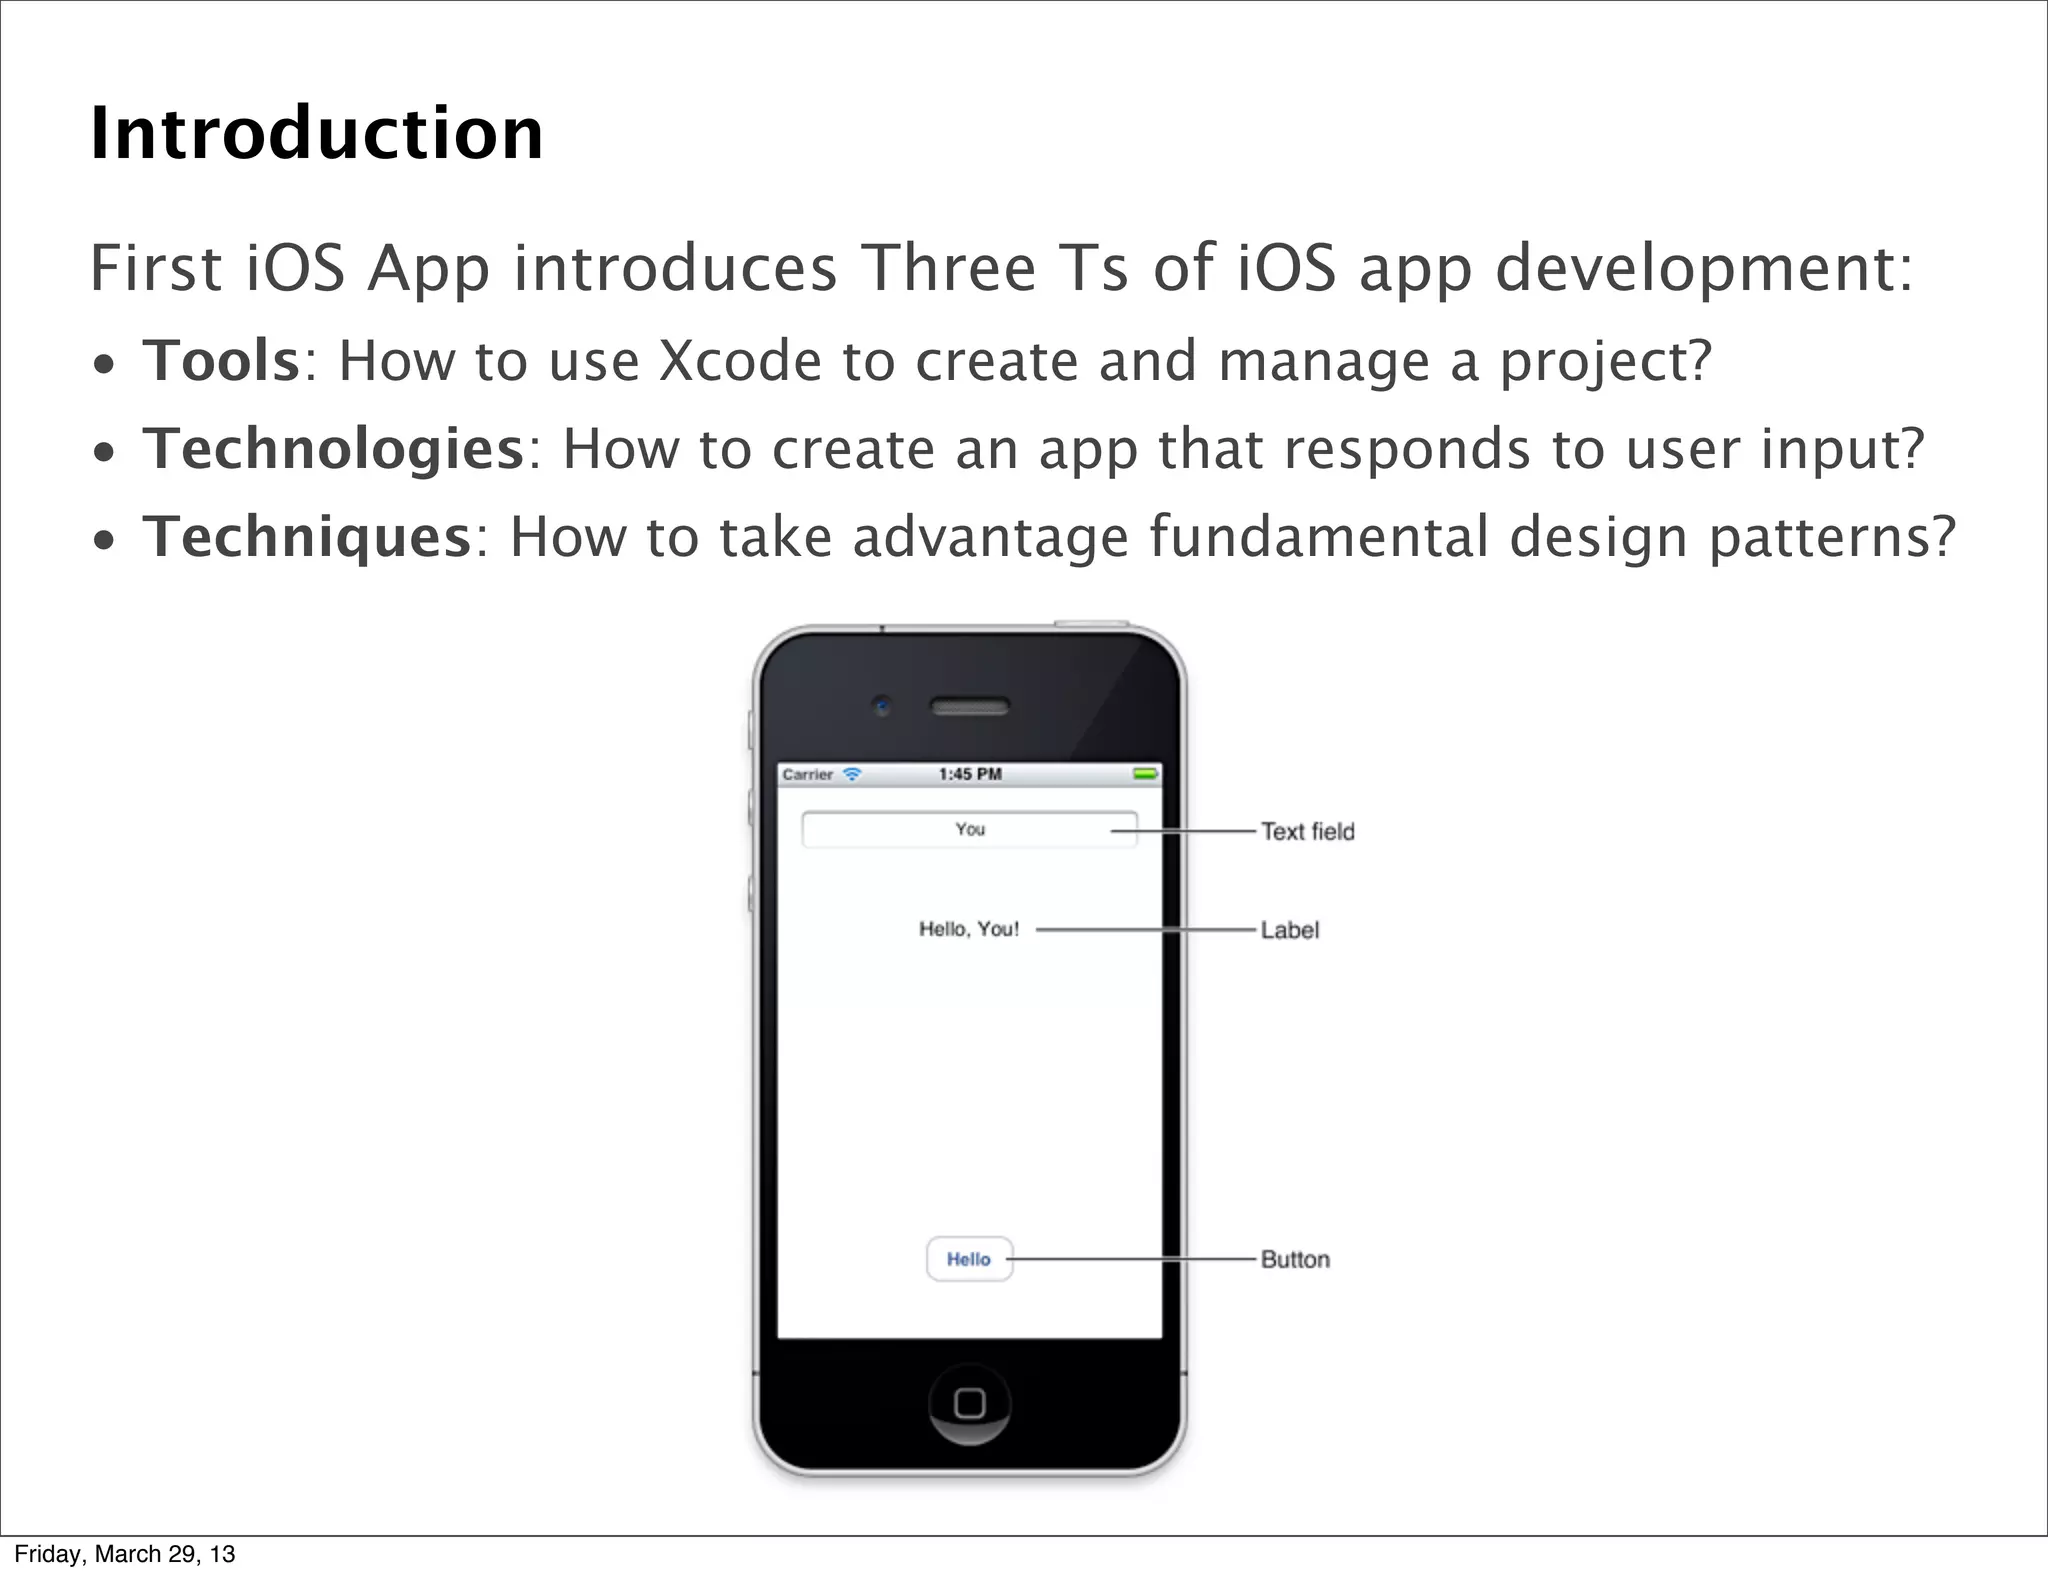
![Part 4: Implementing View Controller
• Add a Property for User’s Name
• Implement changeGreeting: Method
- (IBAction)changeGreeting:(id)sender
{
self.userName = self.textField.text;
NSString *nameString = self.userName;
if (nameString.length == 0)
{
nameString = @"World";
}
NSString *greeting = [[NSString alloc] initWithFormat: @"Hello, %@!",
nameString];
self.label.text = greeting;
}
In HelloWorldViewController.m, type:
Friday, March 29, 13](https://crownmelresort.com/image.slidesharecdn.com/buildingacompletediphoneapp-130328125743-phpapp01/75/Building-a-Completed-iPhone-App-67-2048.jpg)

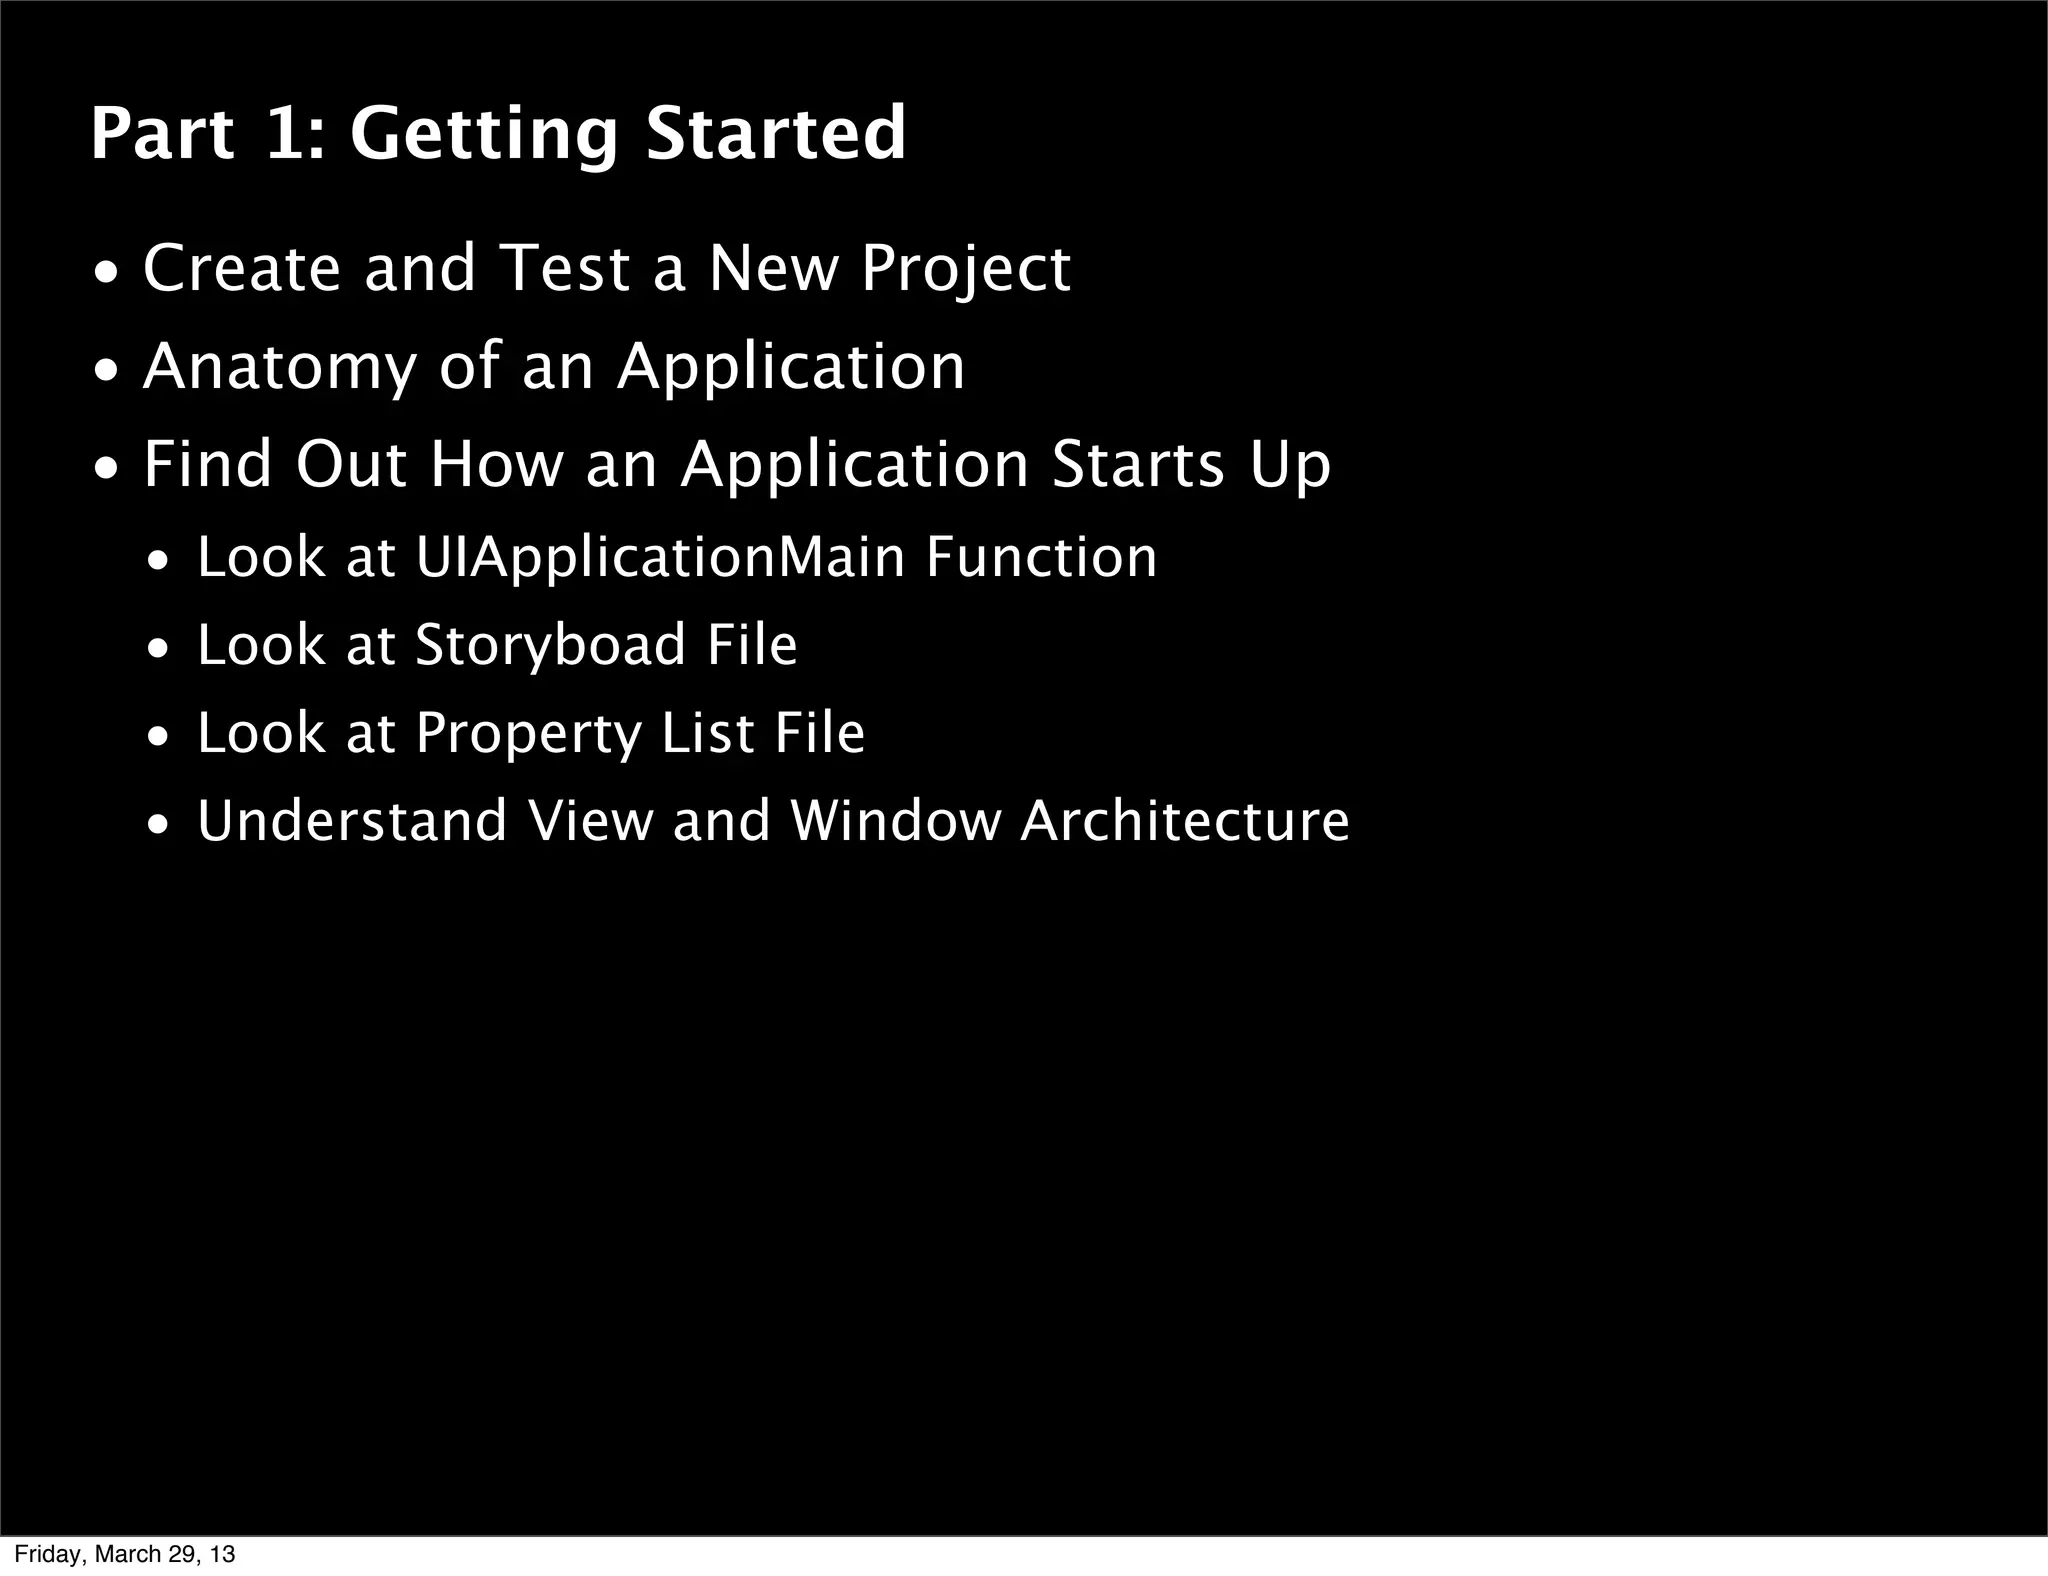
![Part 4: Implementing View Controller
• Add a Property for User’s Name
• Implement changeGreeting: Method
• Configure View Controller as Text Field’s Delegate
- (BOOL) textFieldShouldReturn: (UITextField *)theTextField
{
if (theTextField == self.textField)
{
[theTextField resignFirstResponder];
}
return YES;
}
@end
In HelloWorldViewController.m, type:
In HelloWorldViewController.h, add <UITextFieldDelegate>:
@interface HelloWorldViewController : UIViewController <UITextFieldDelegate>
Friday, March 29, 13](https://crownmelresort.com/image.slidesharecdn.com/buildingacompletediphoneapp-130328125743-phpapp01/75/Building-a-Completed-iPhone-App-69-2048.jpg)


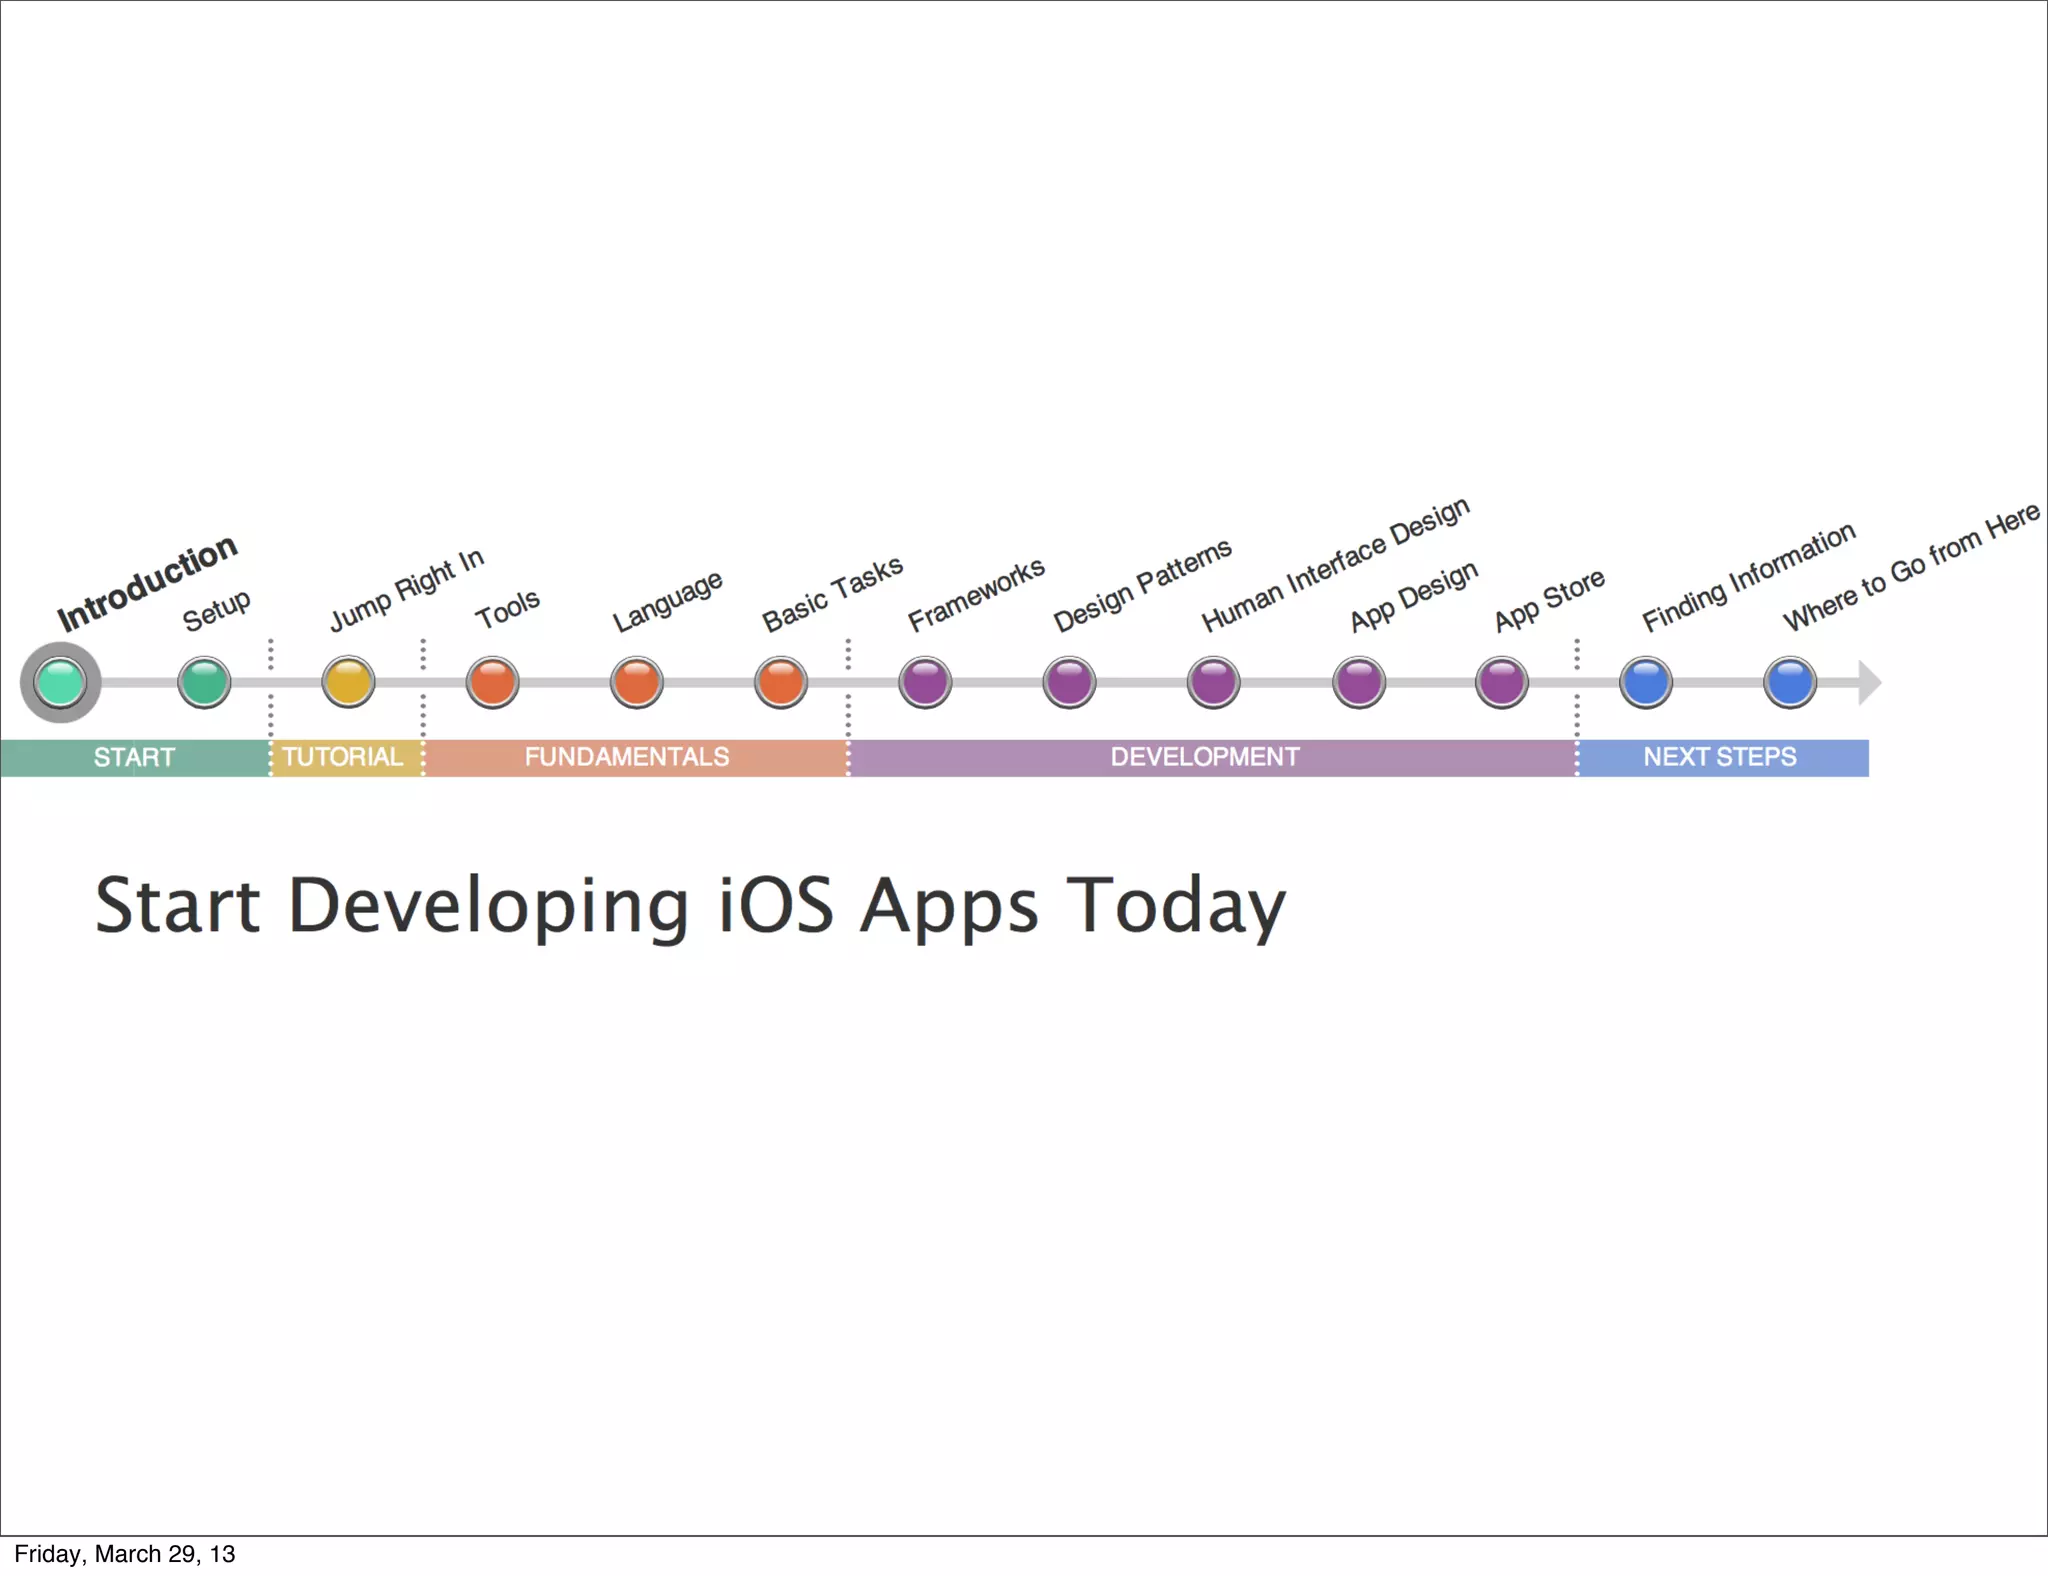
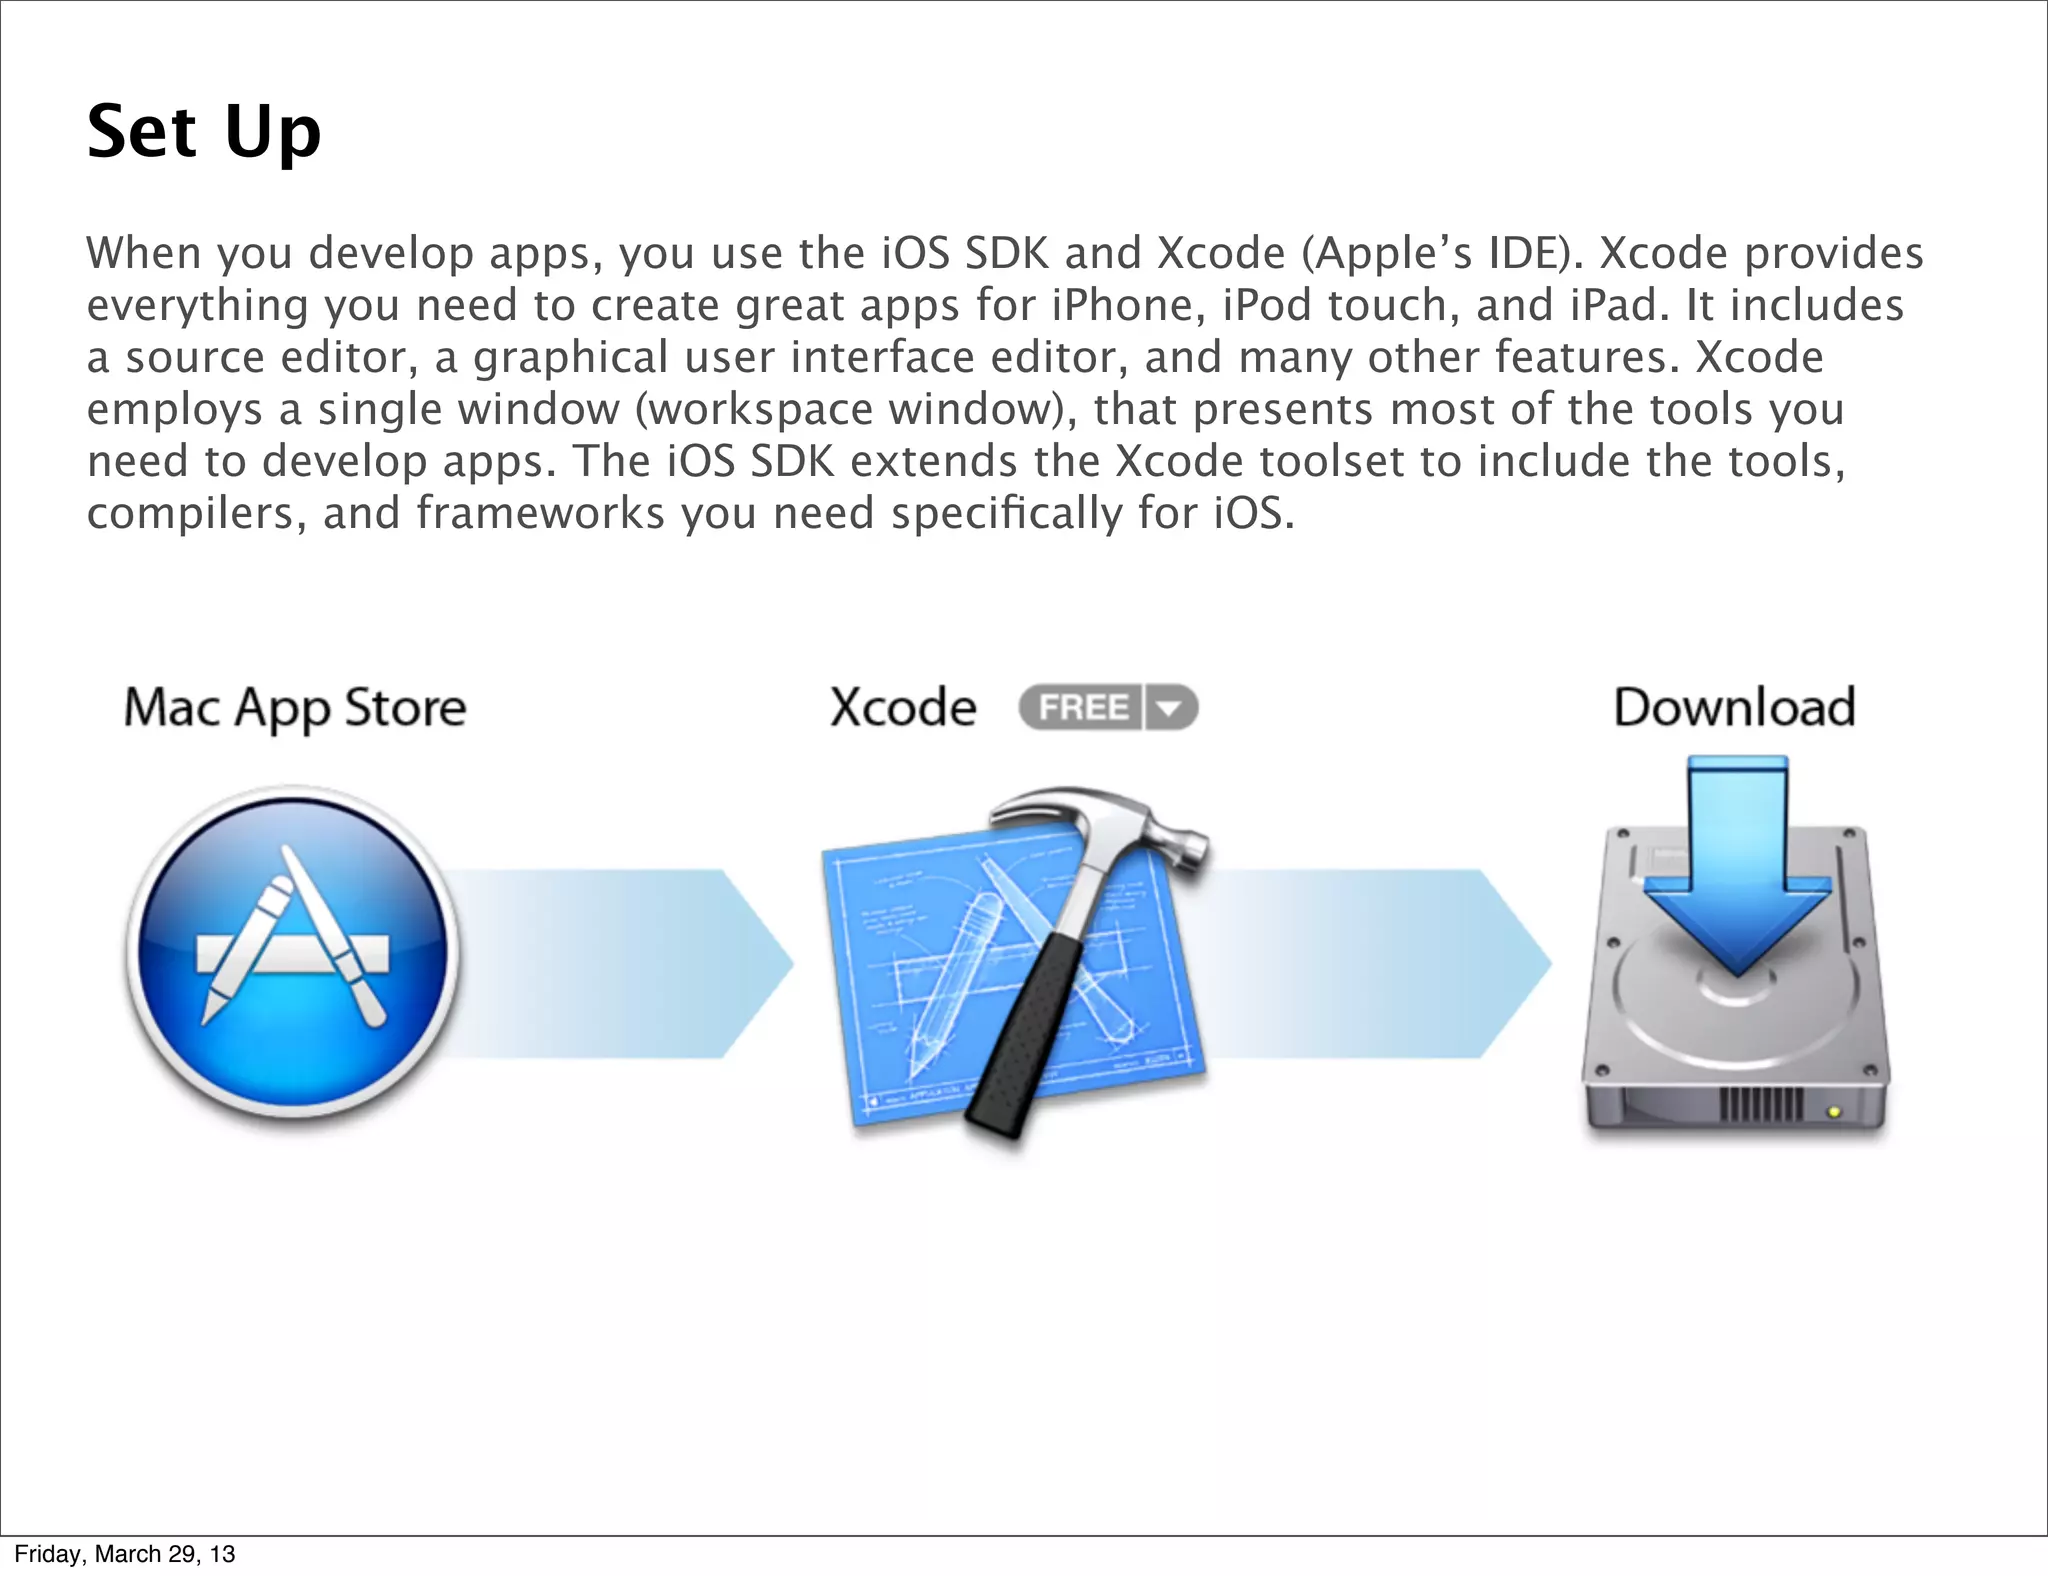
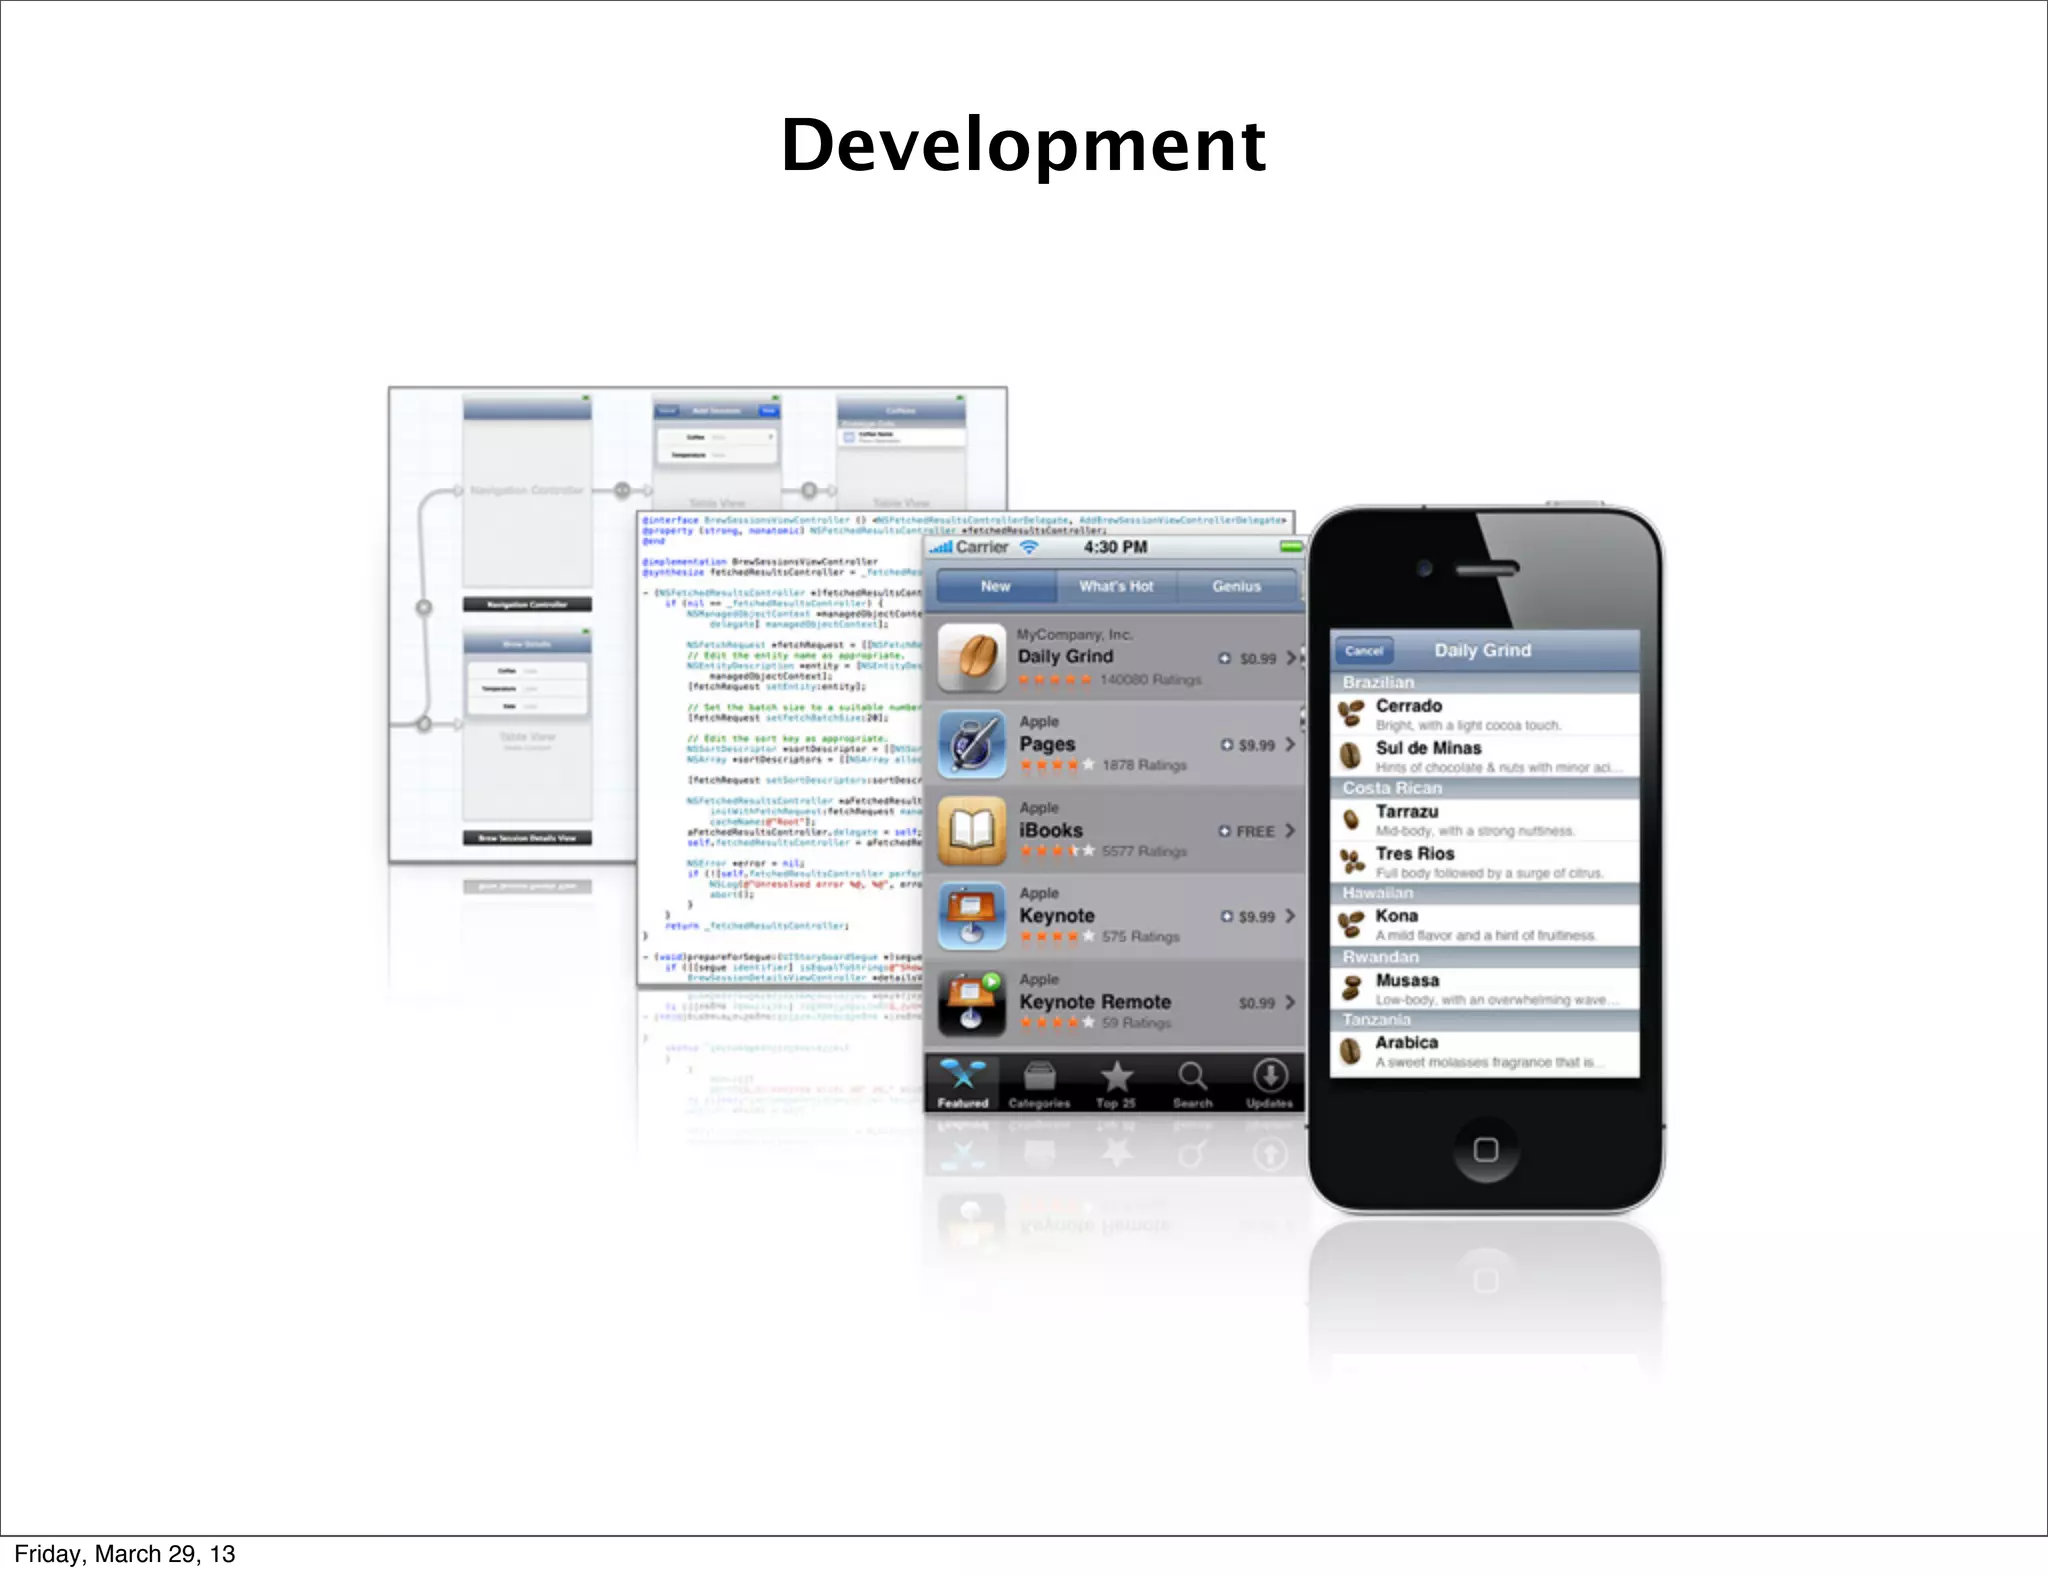
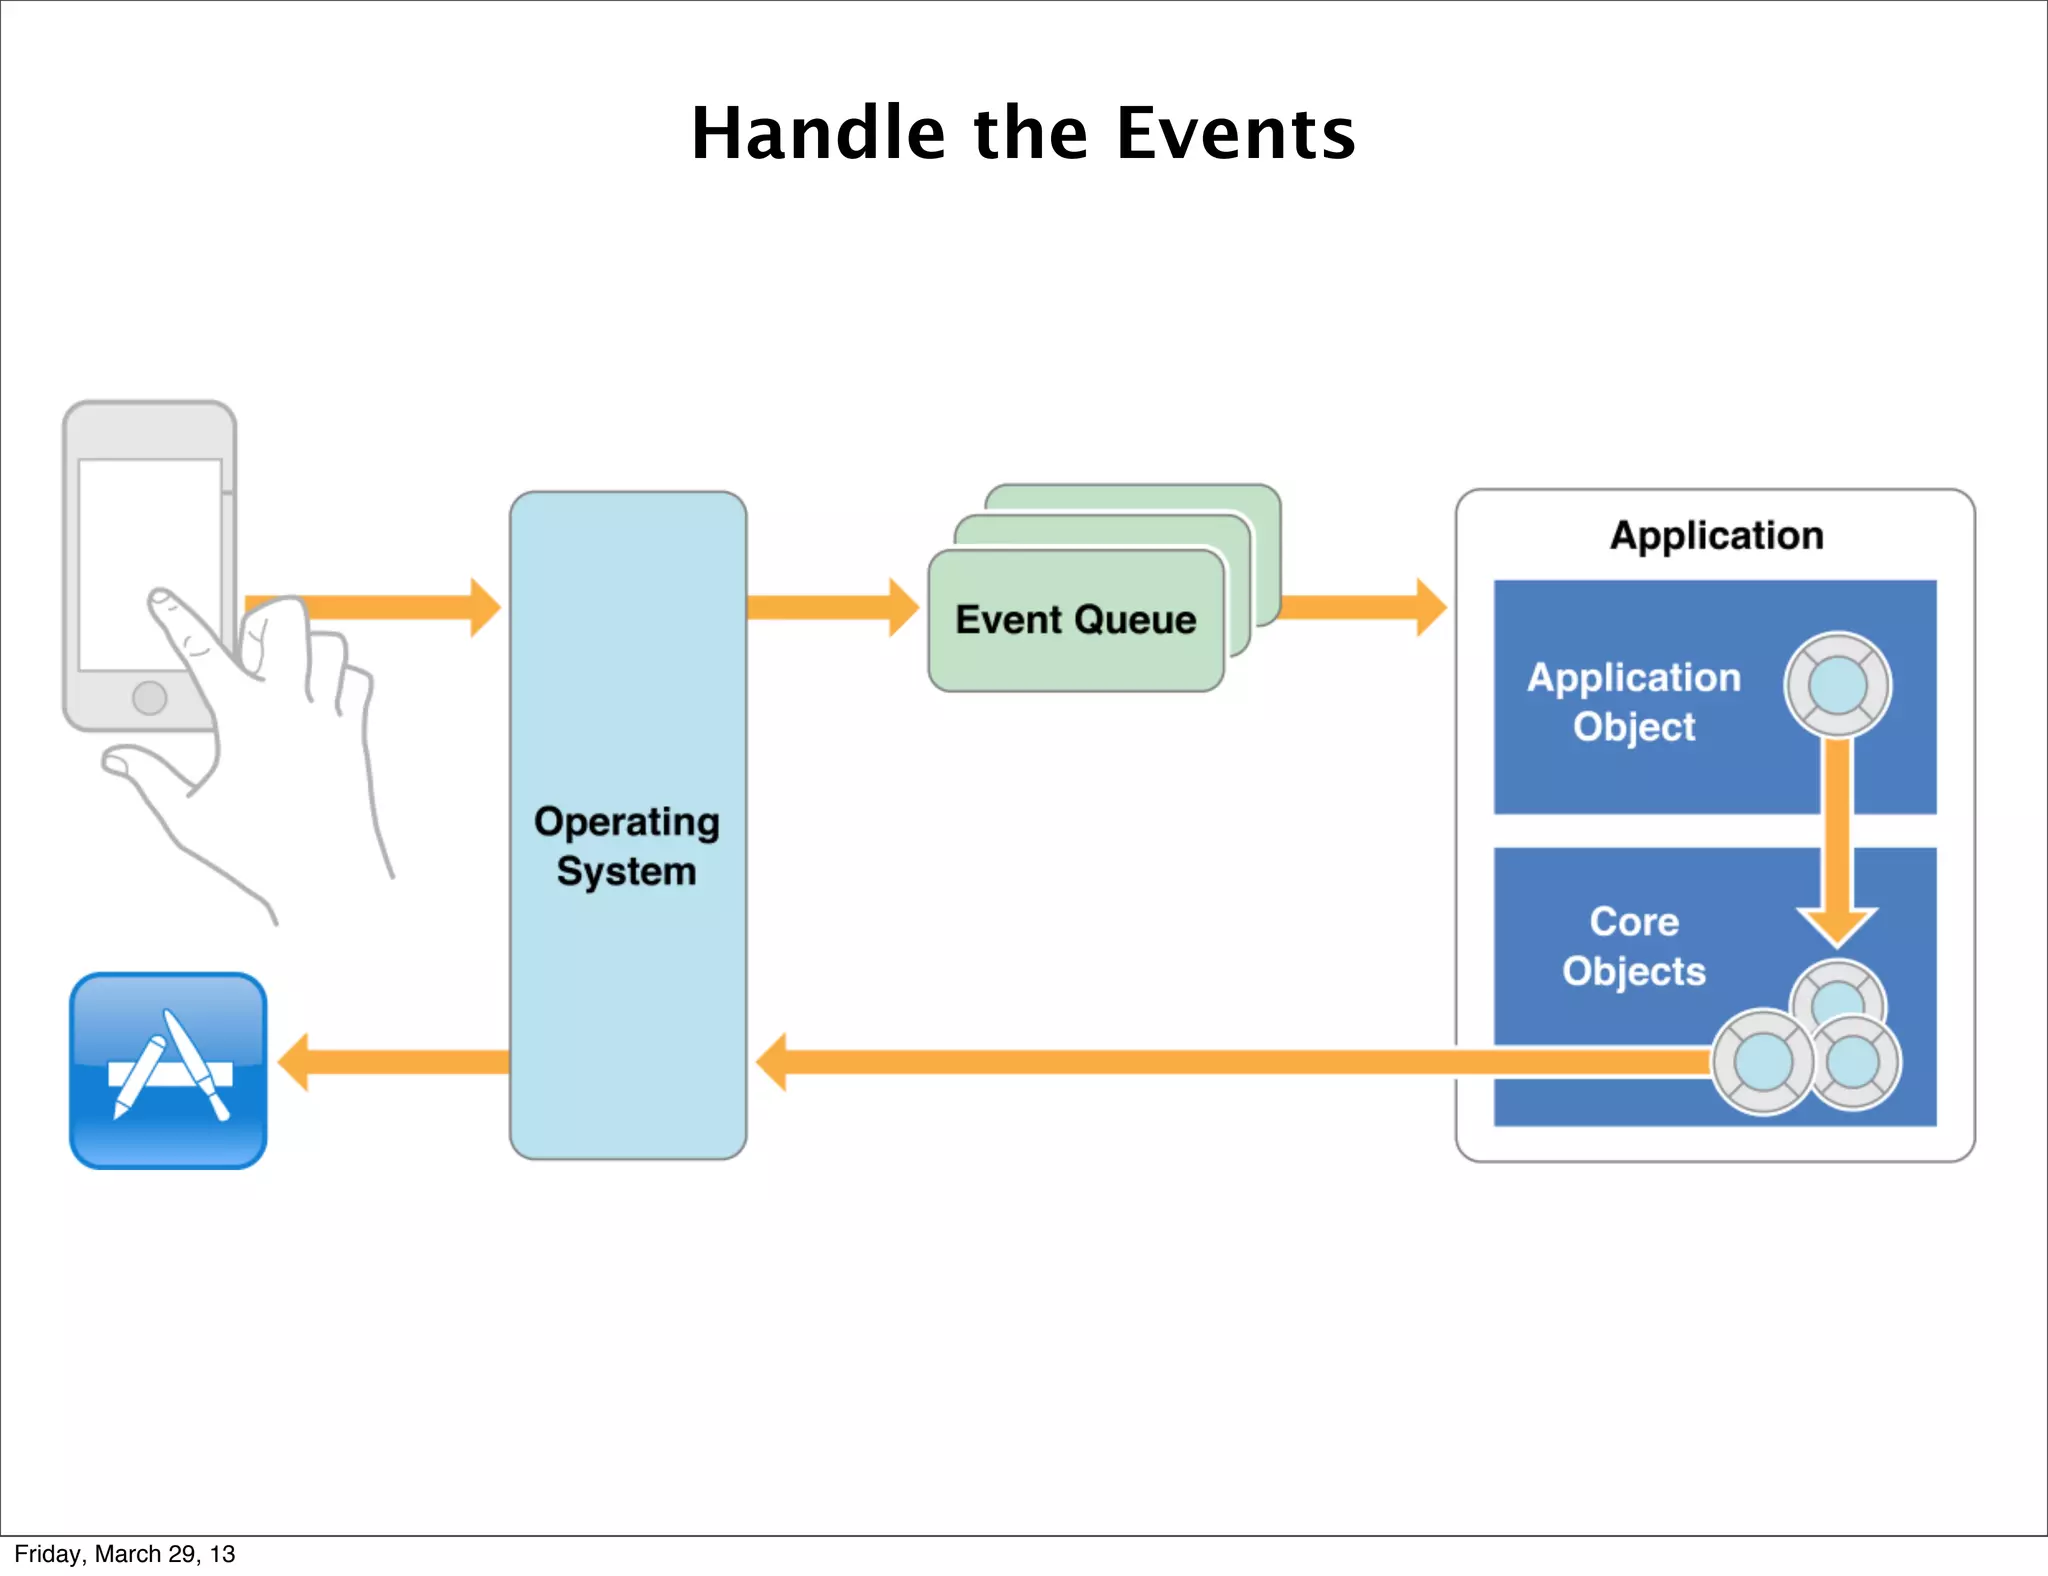
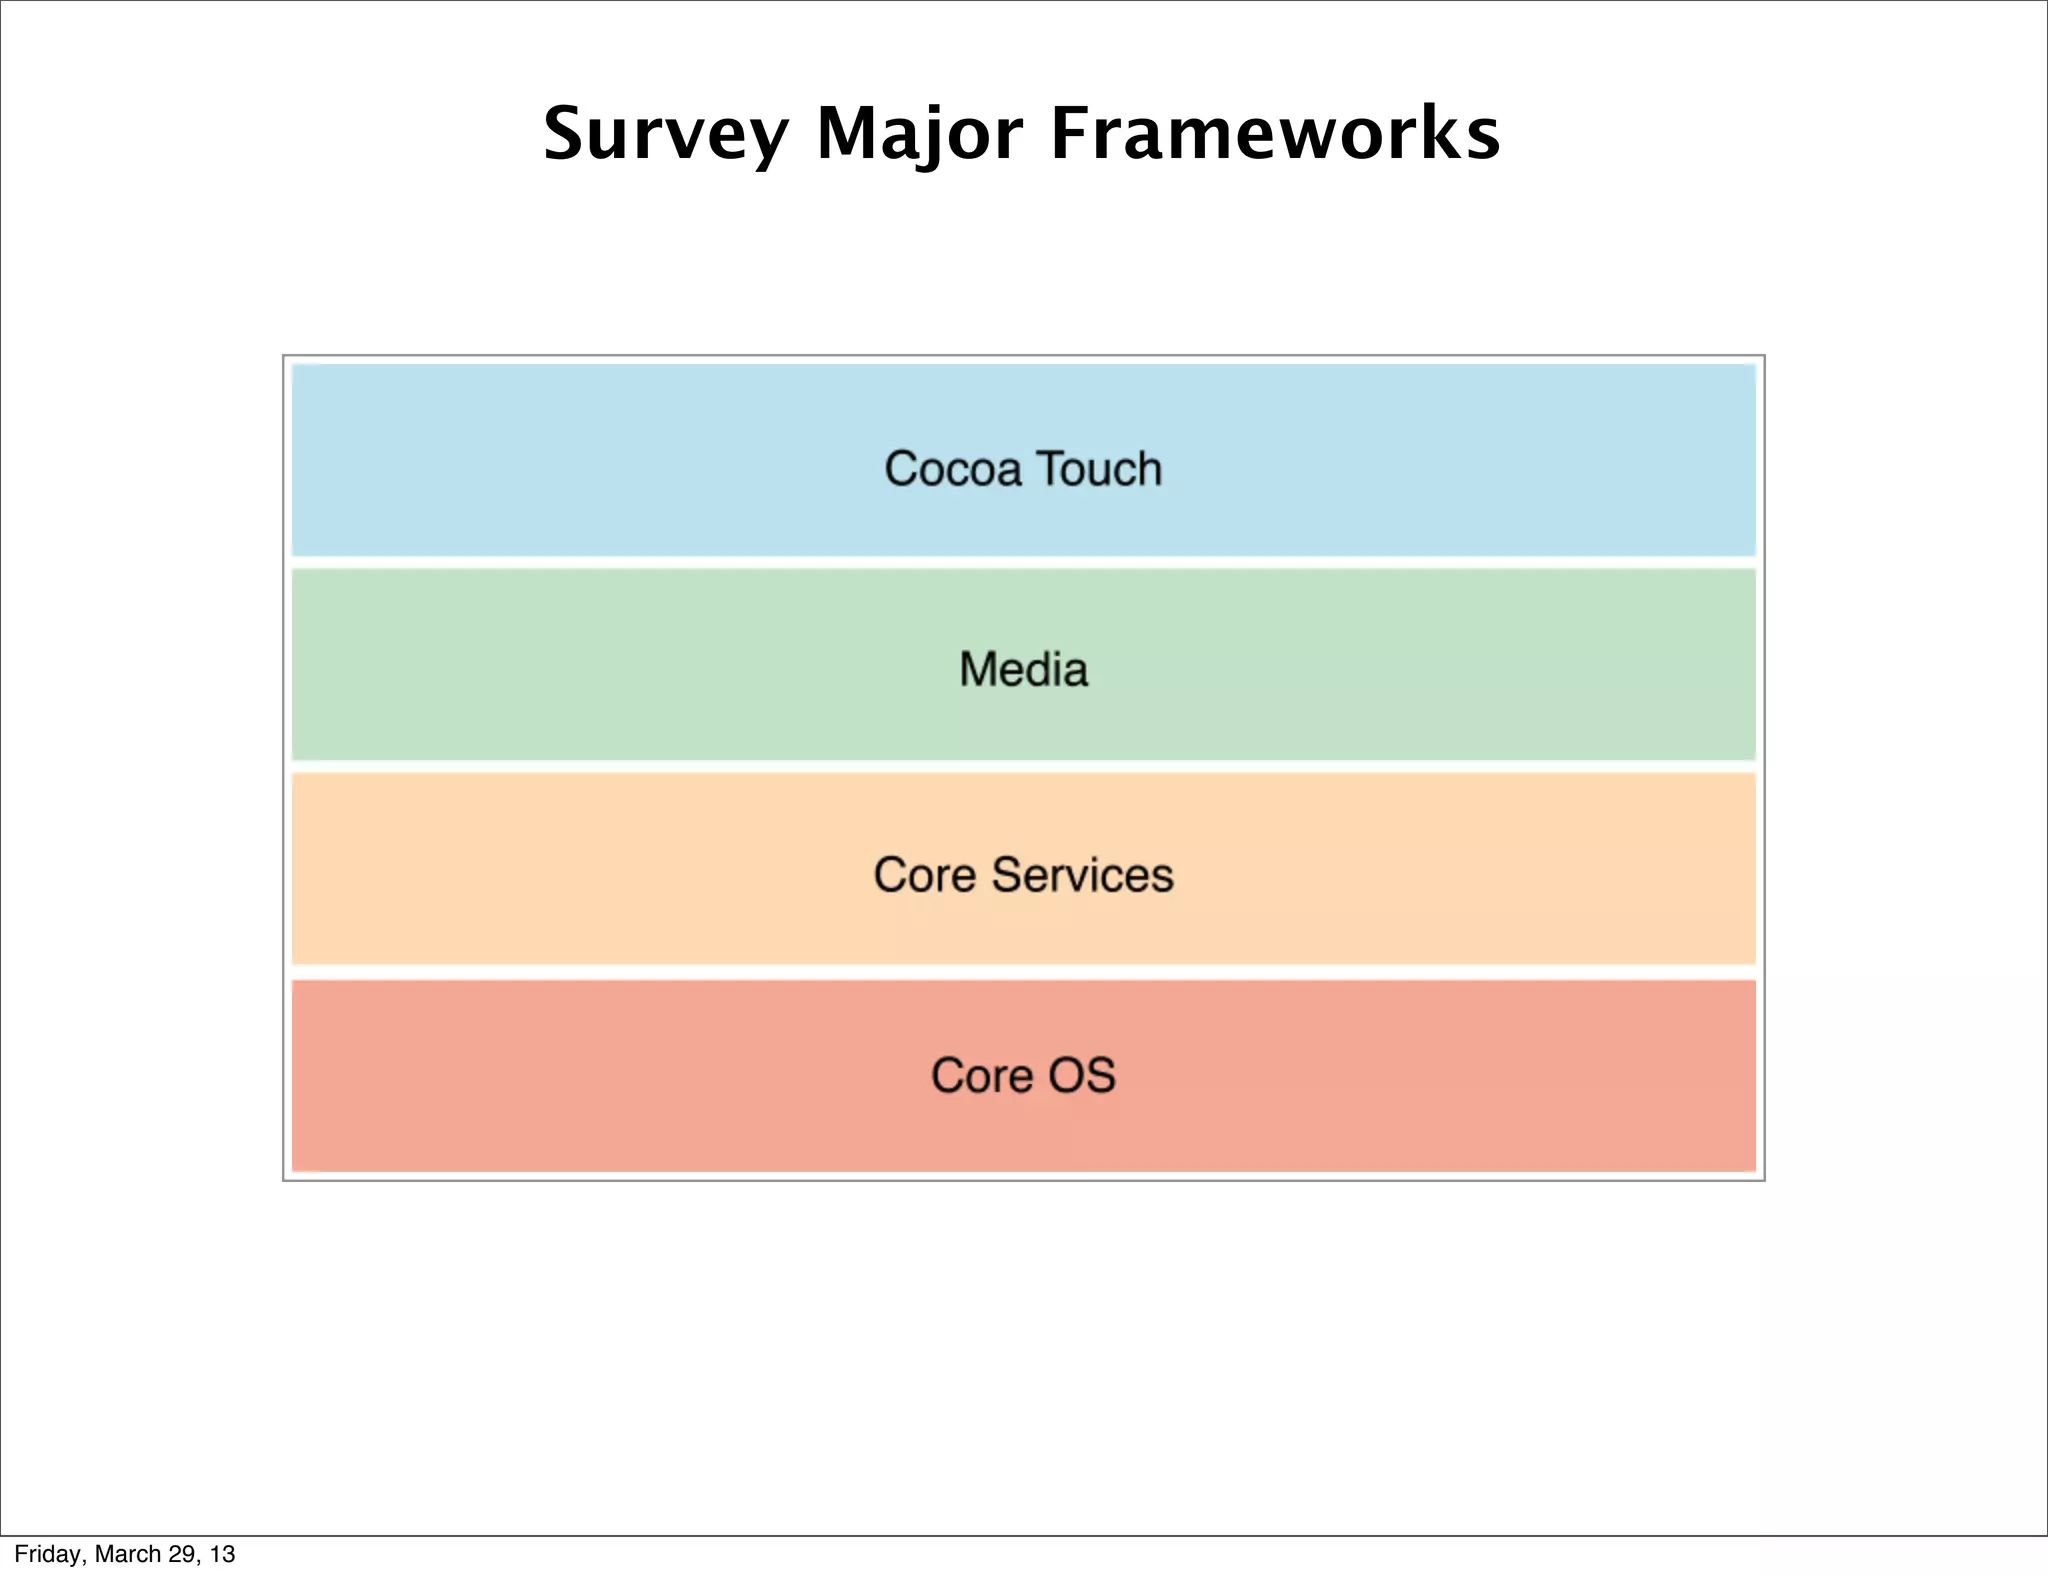
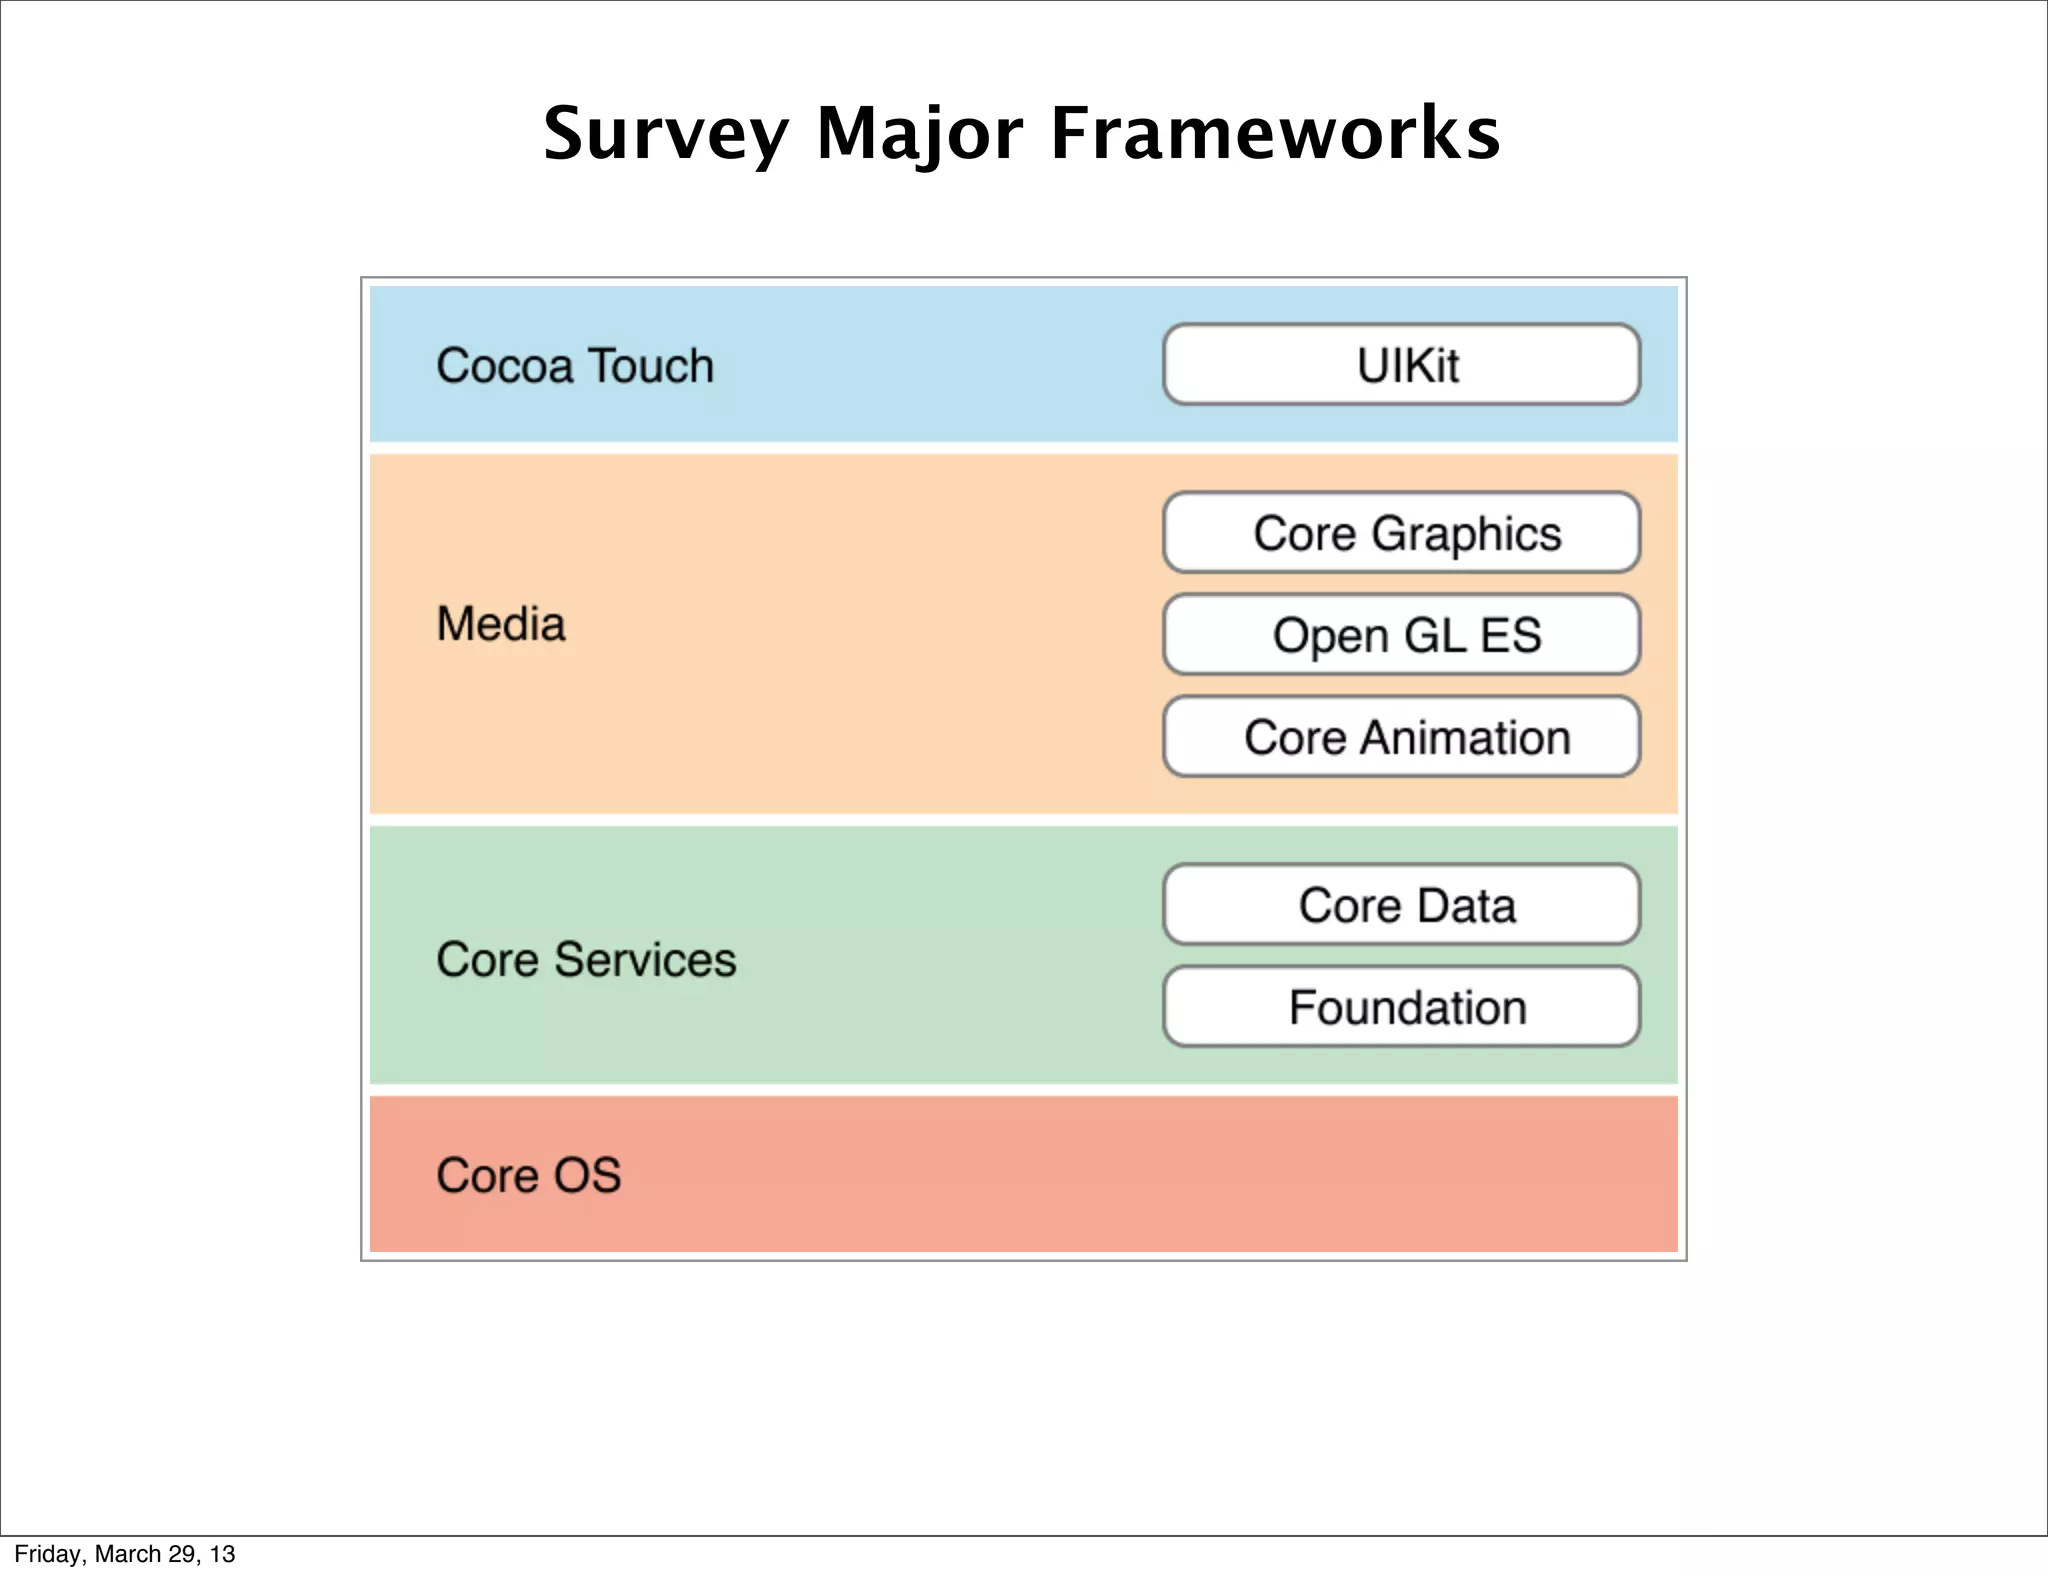
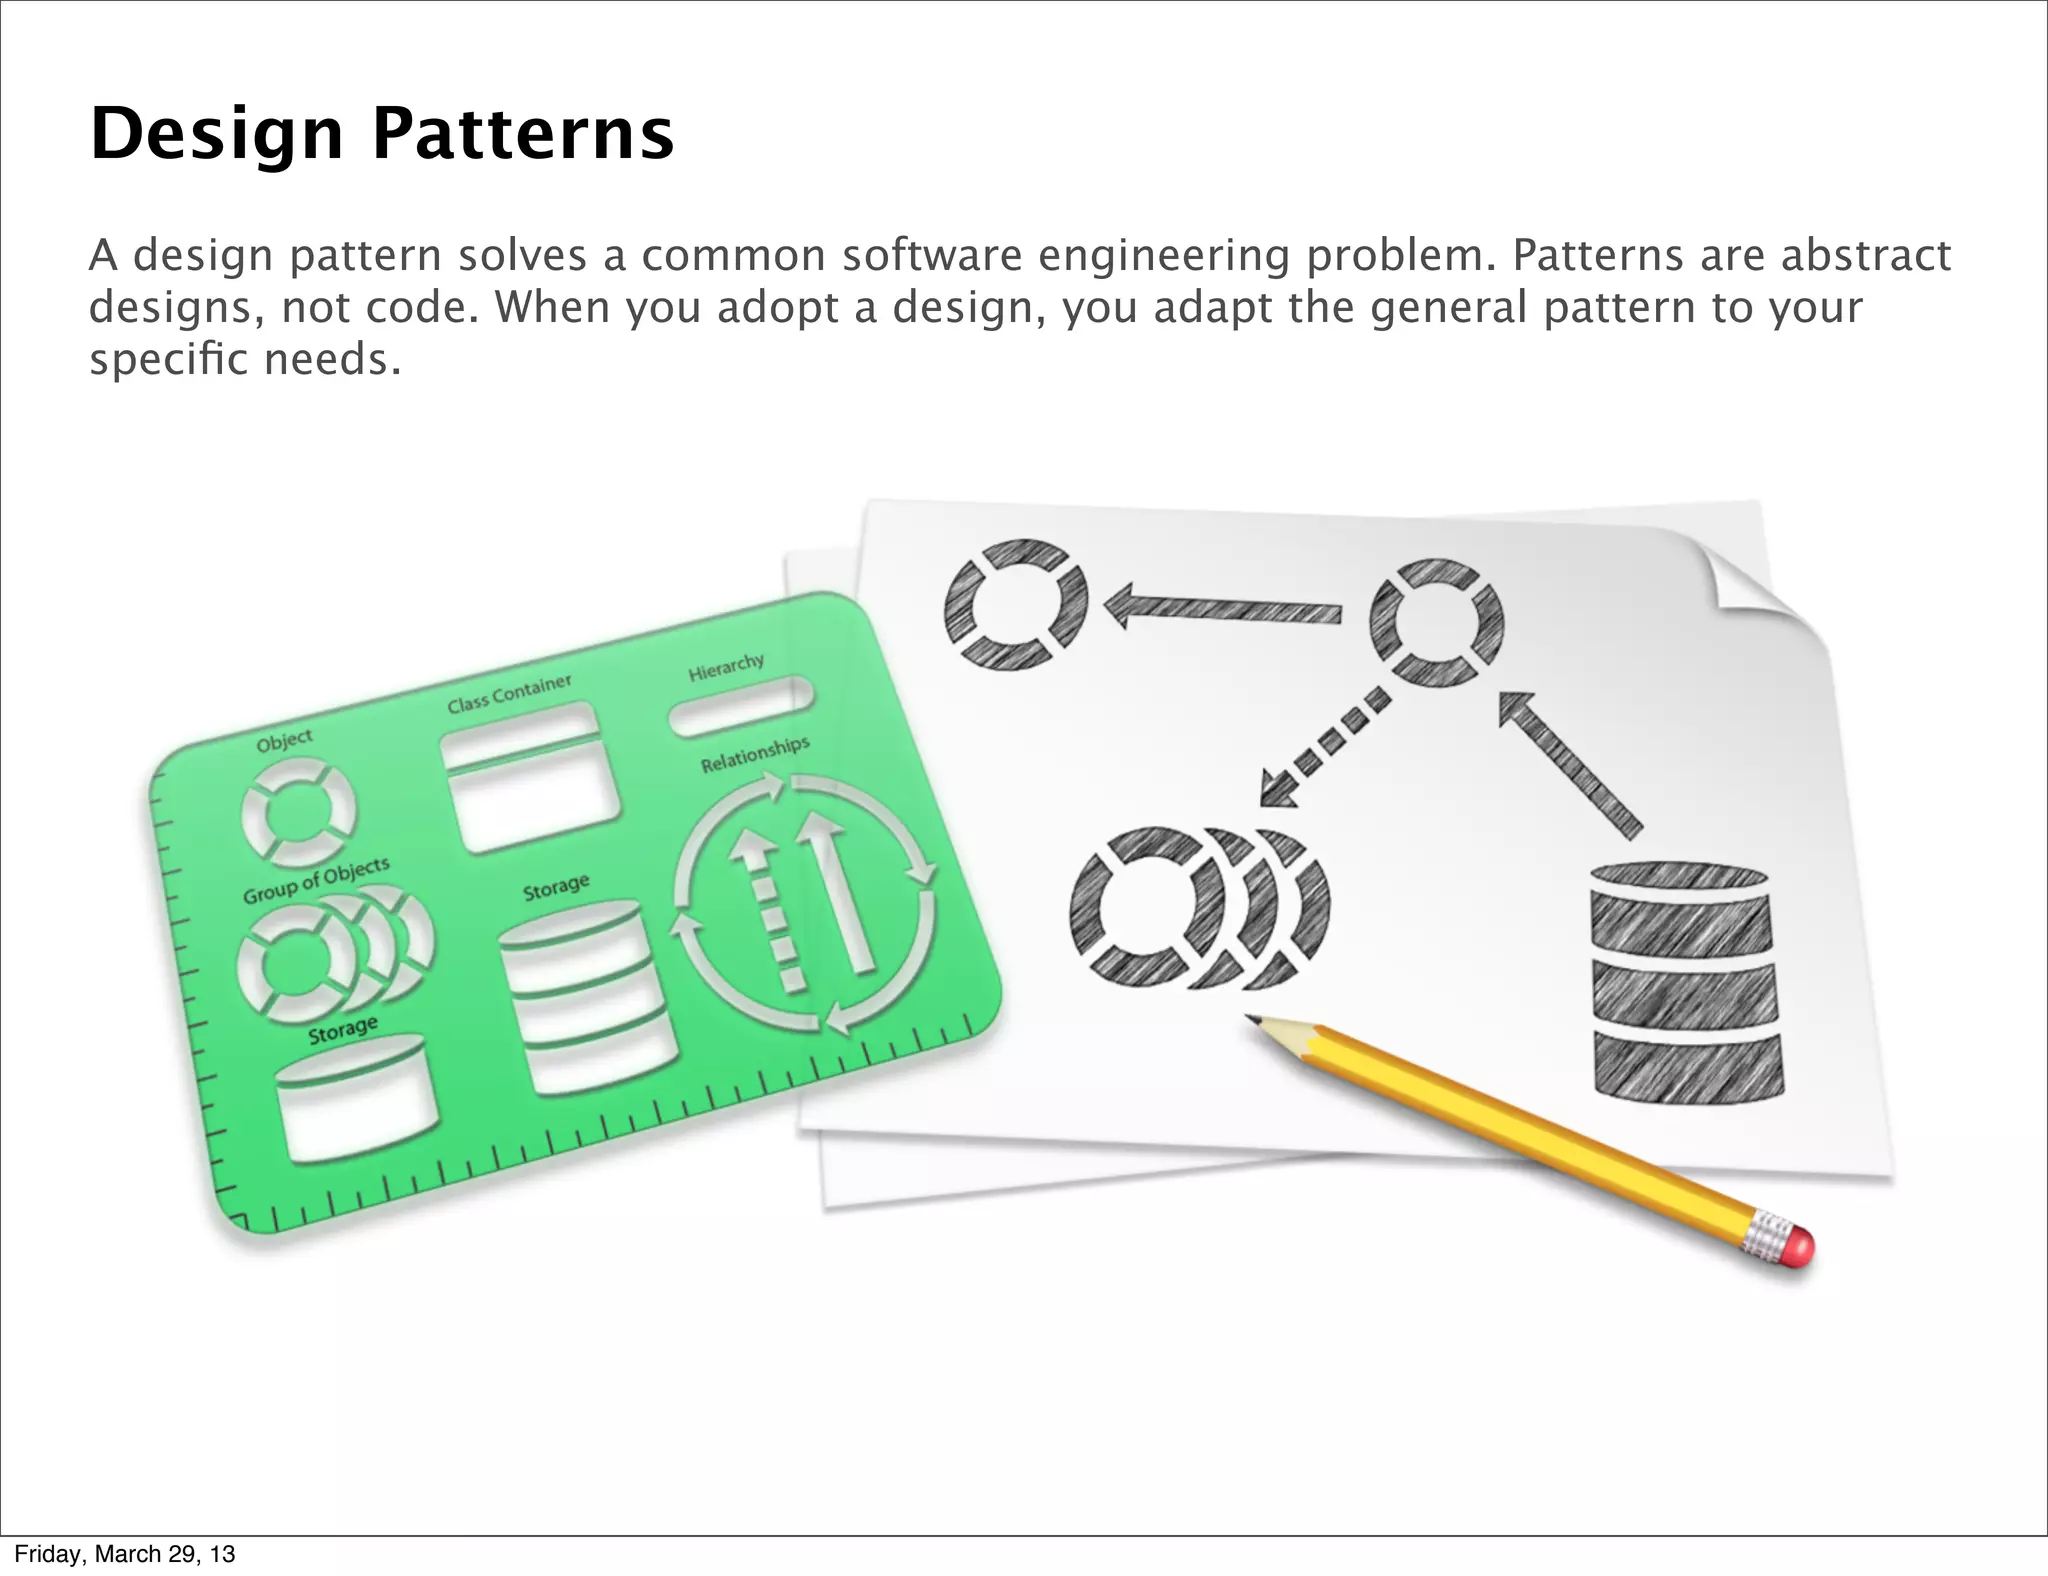
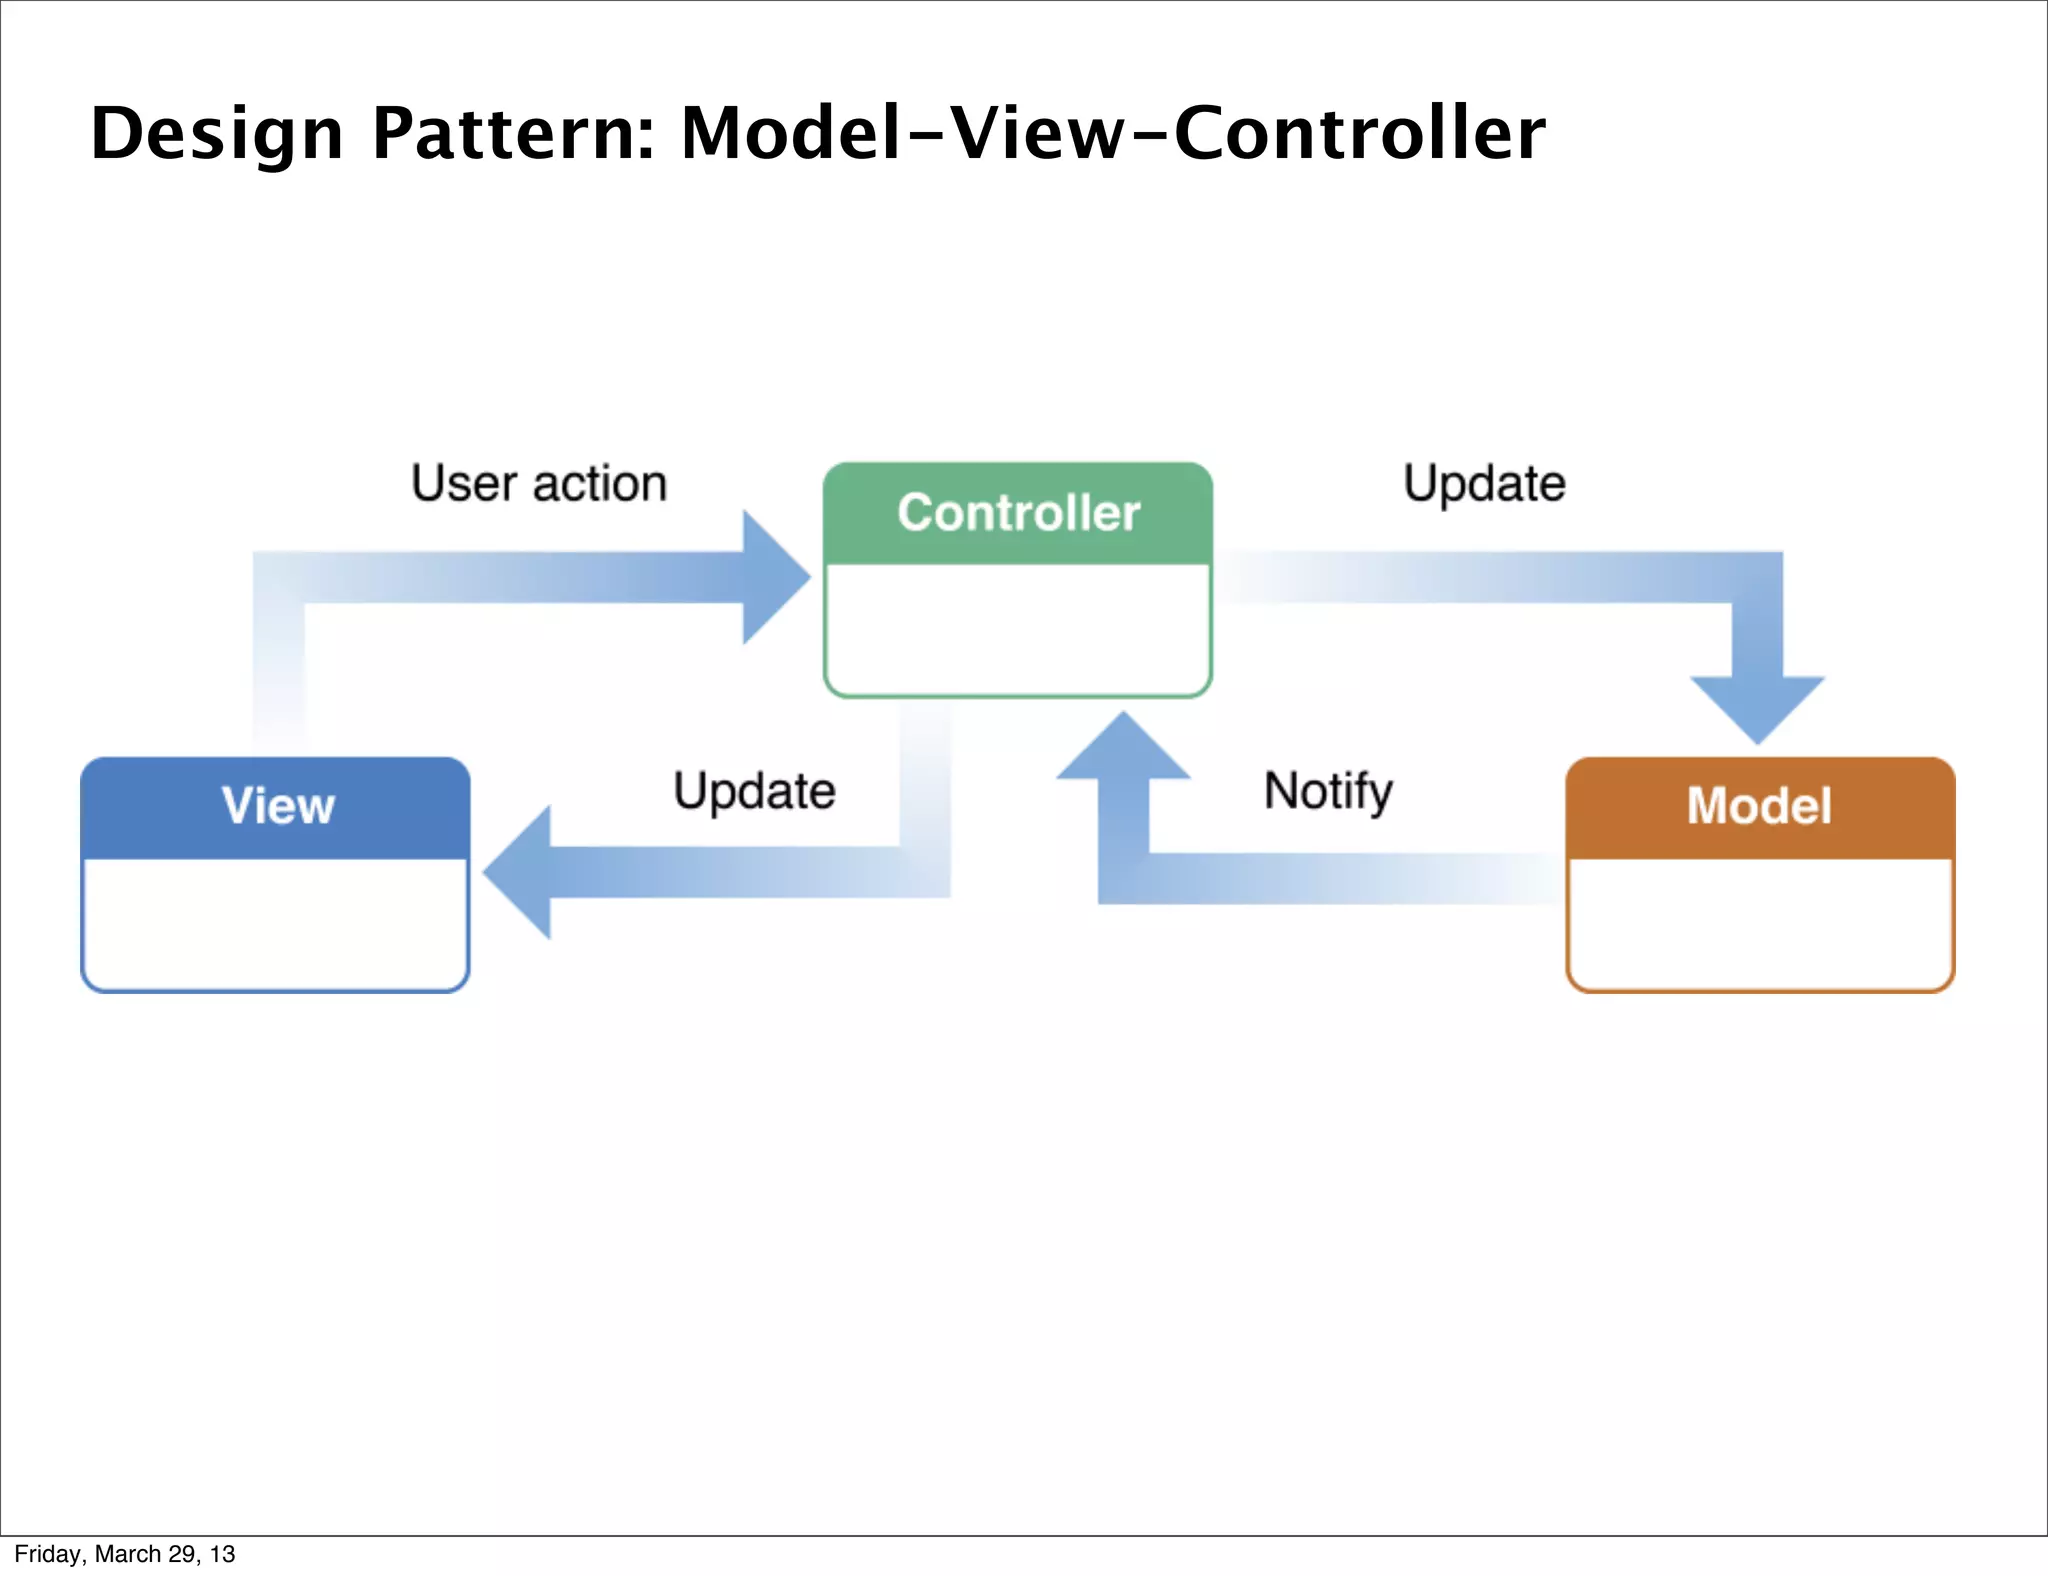
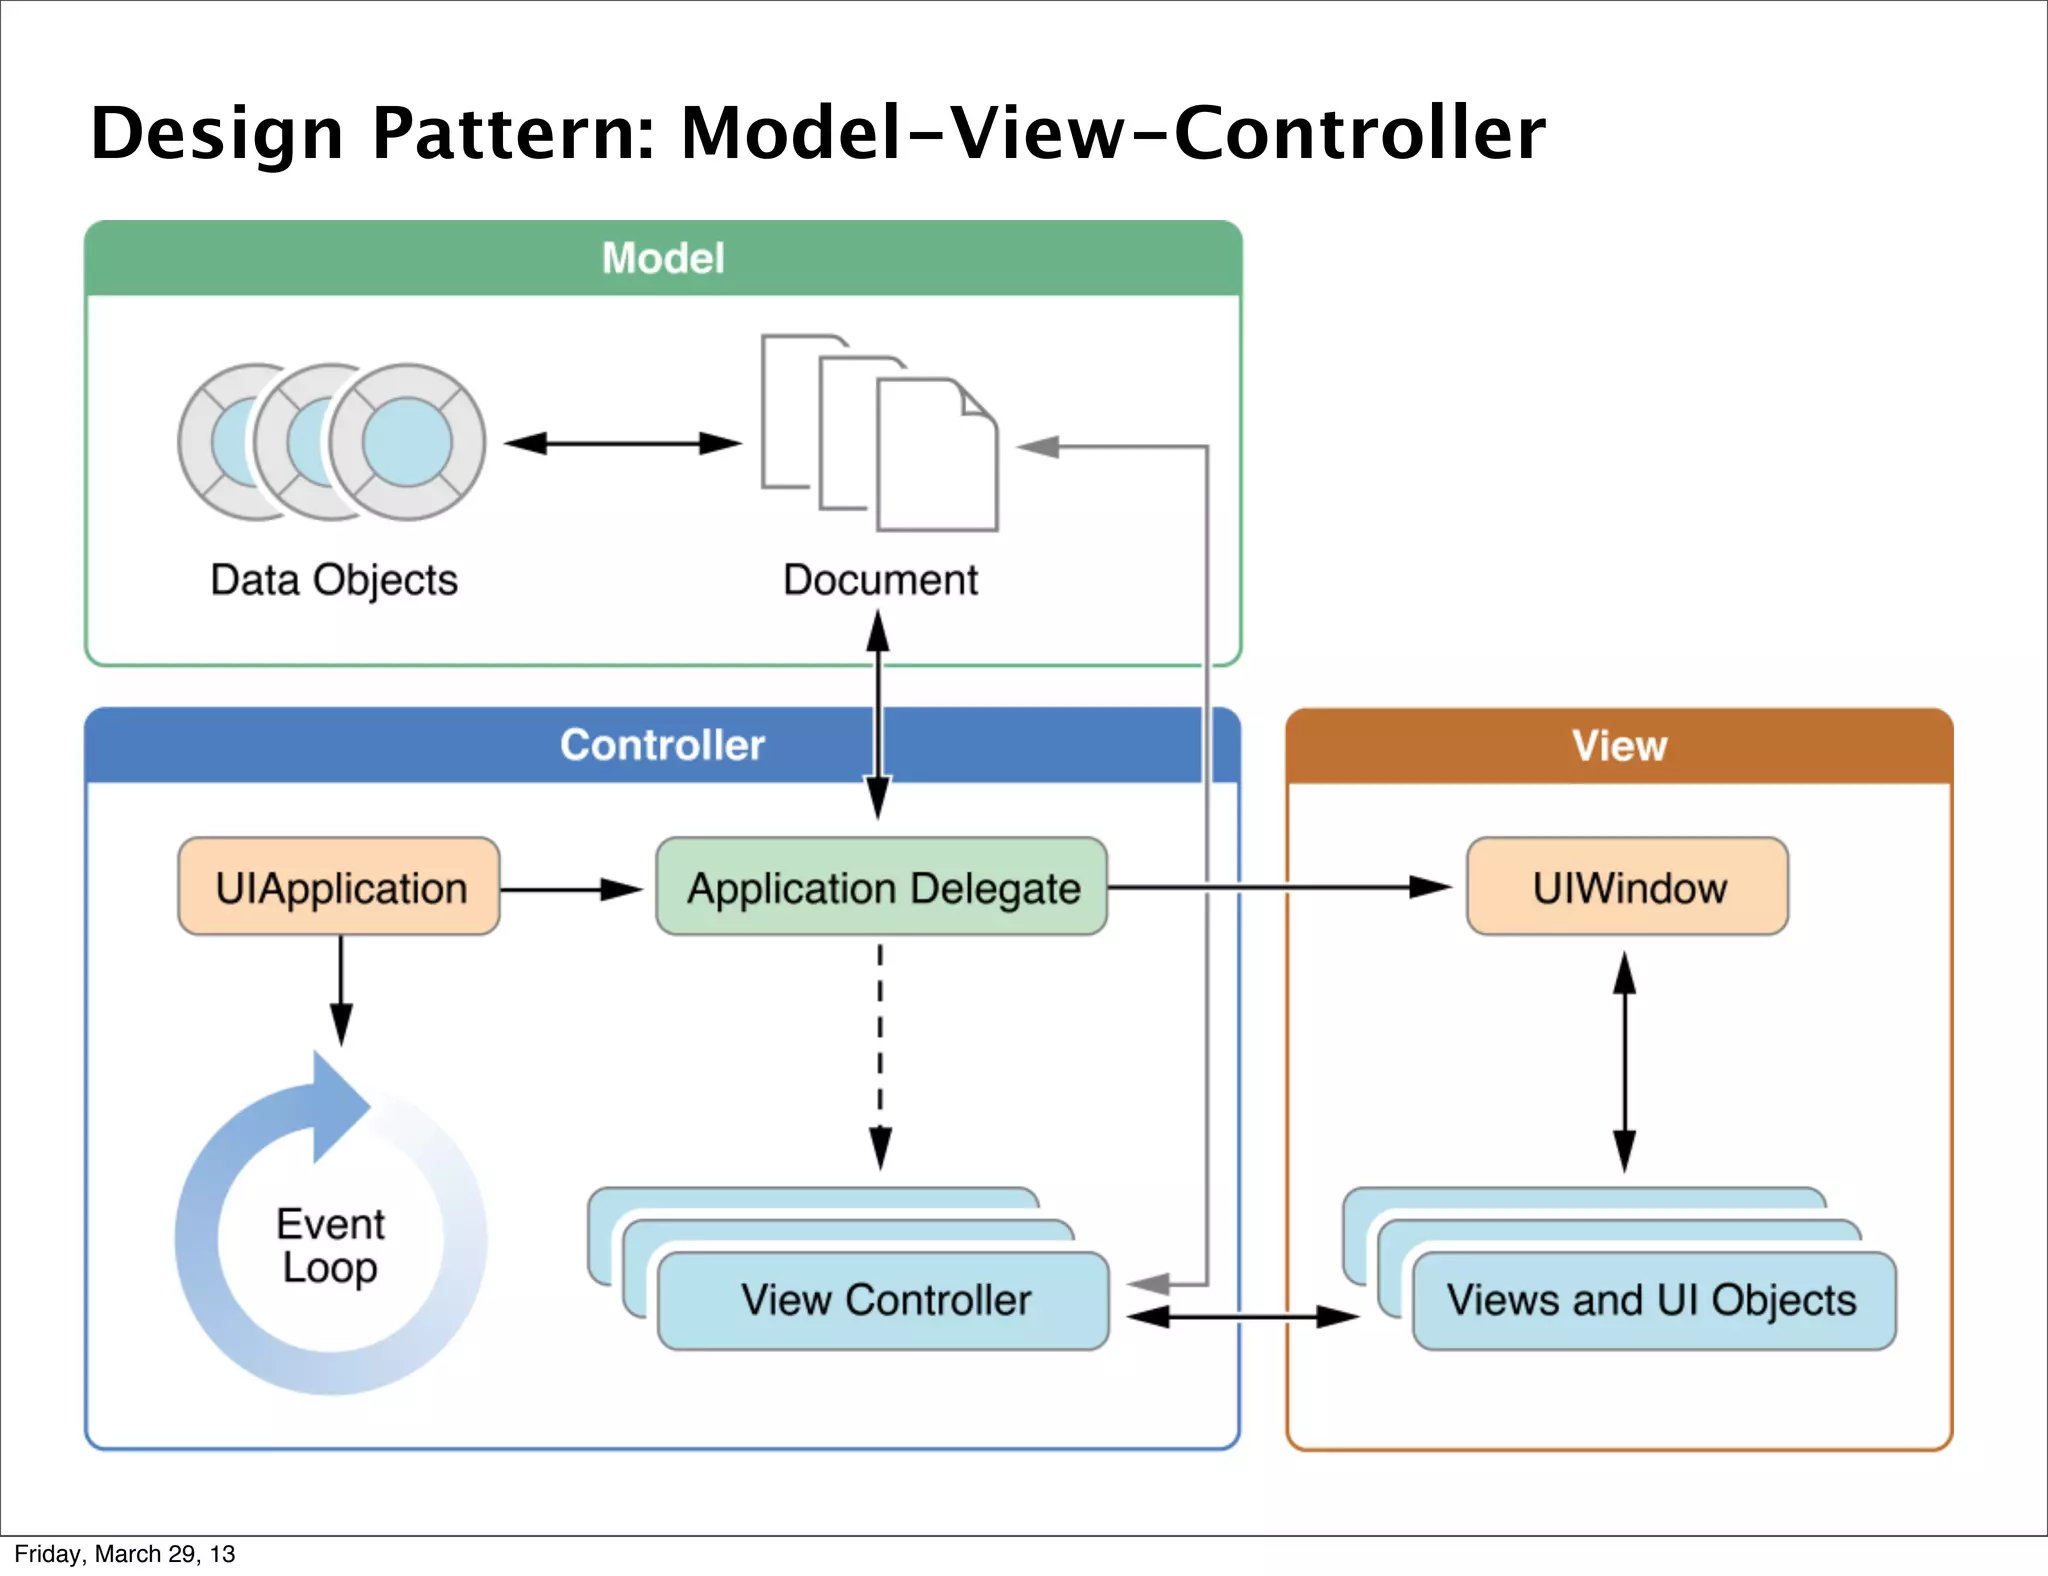
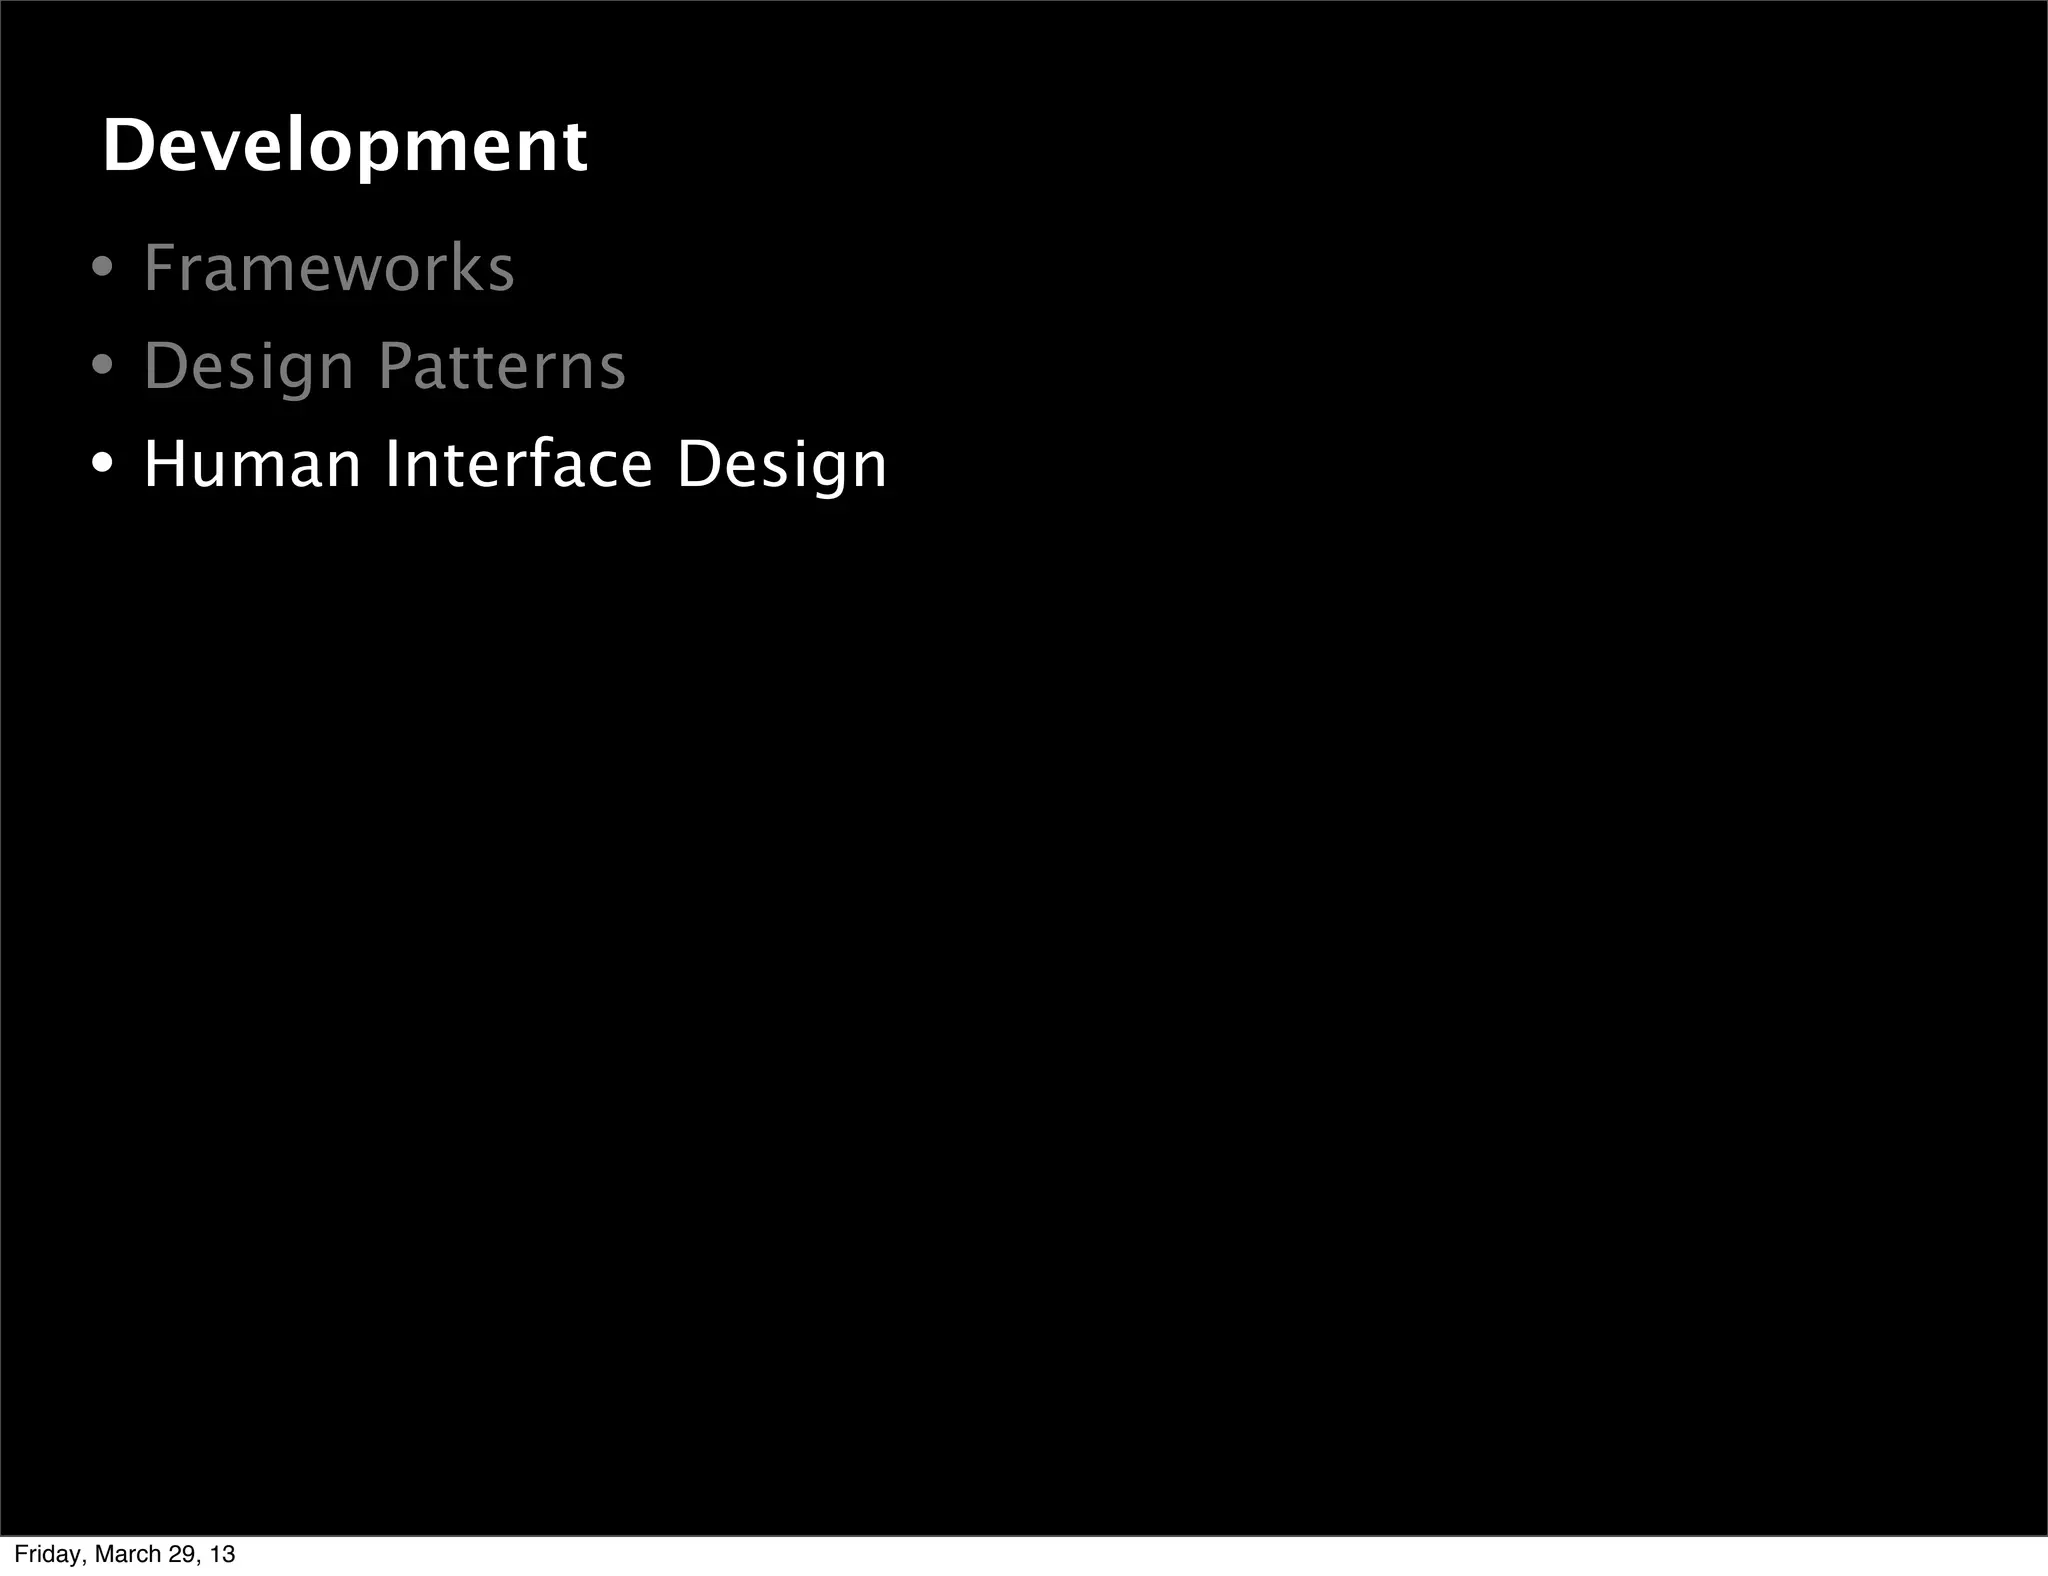
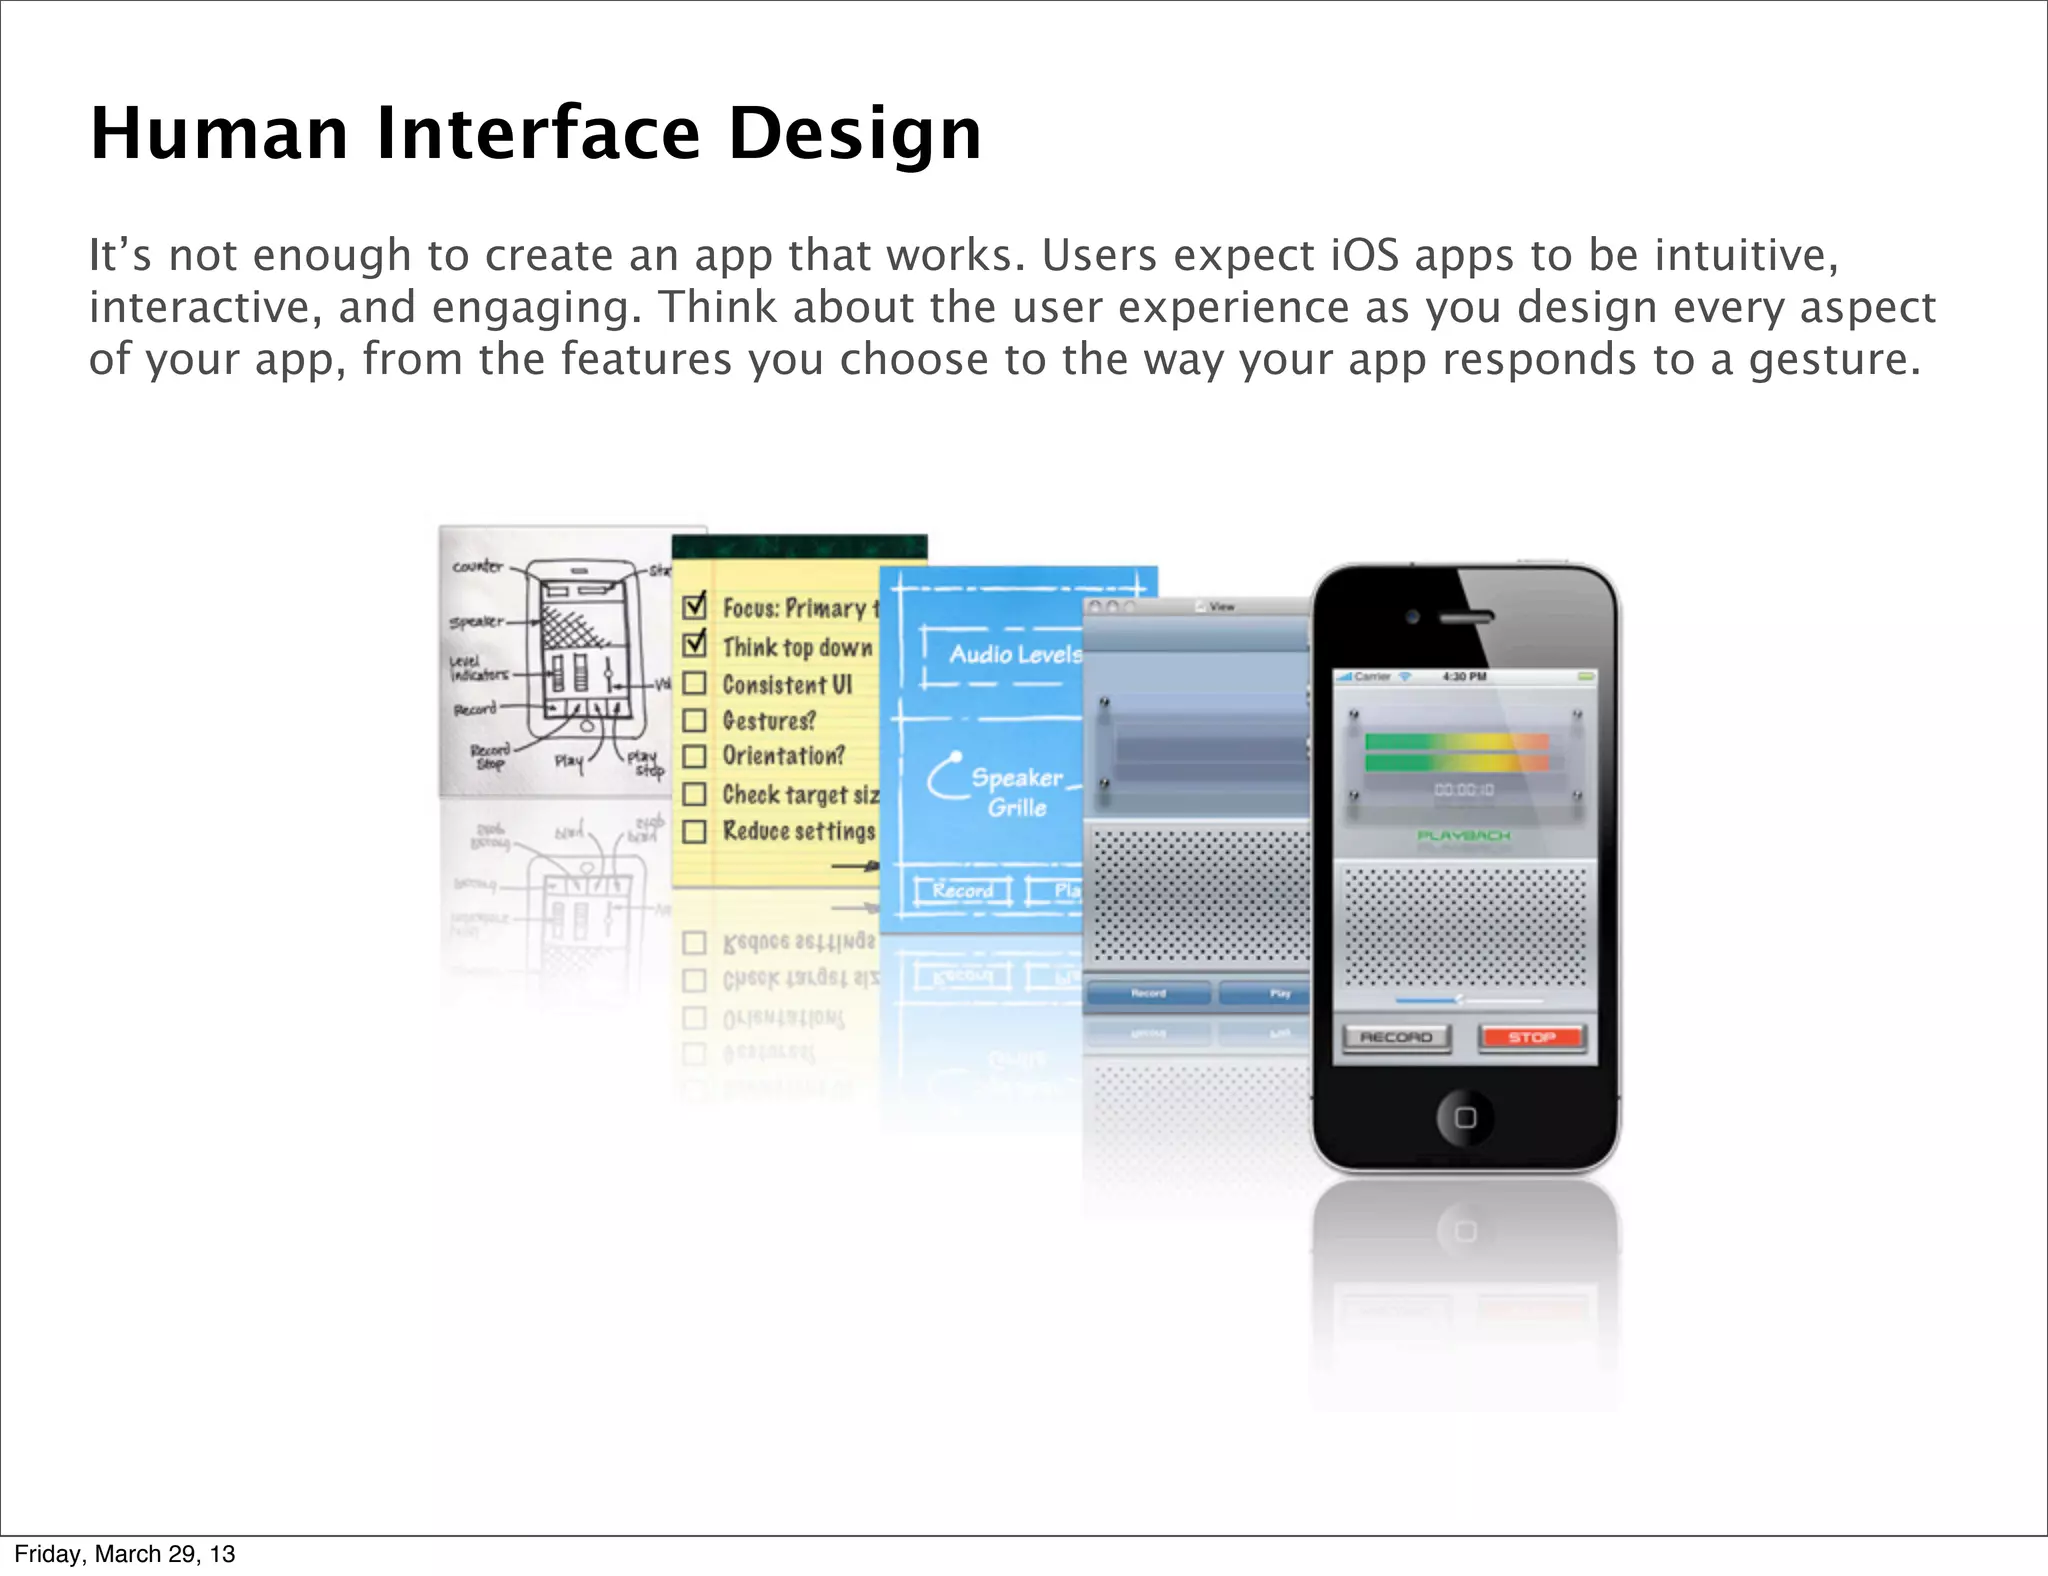
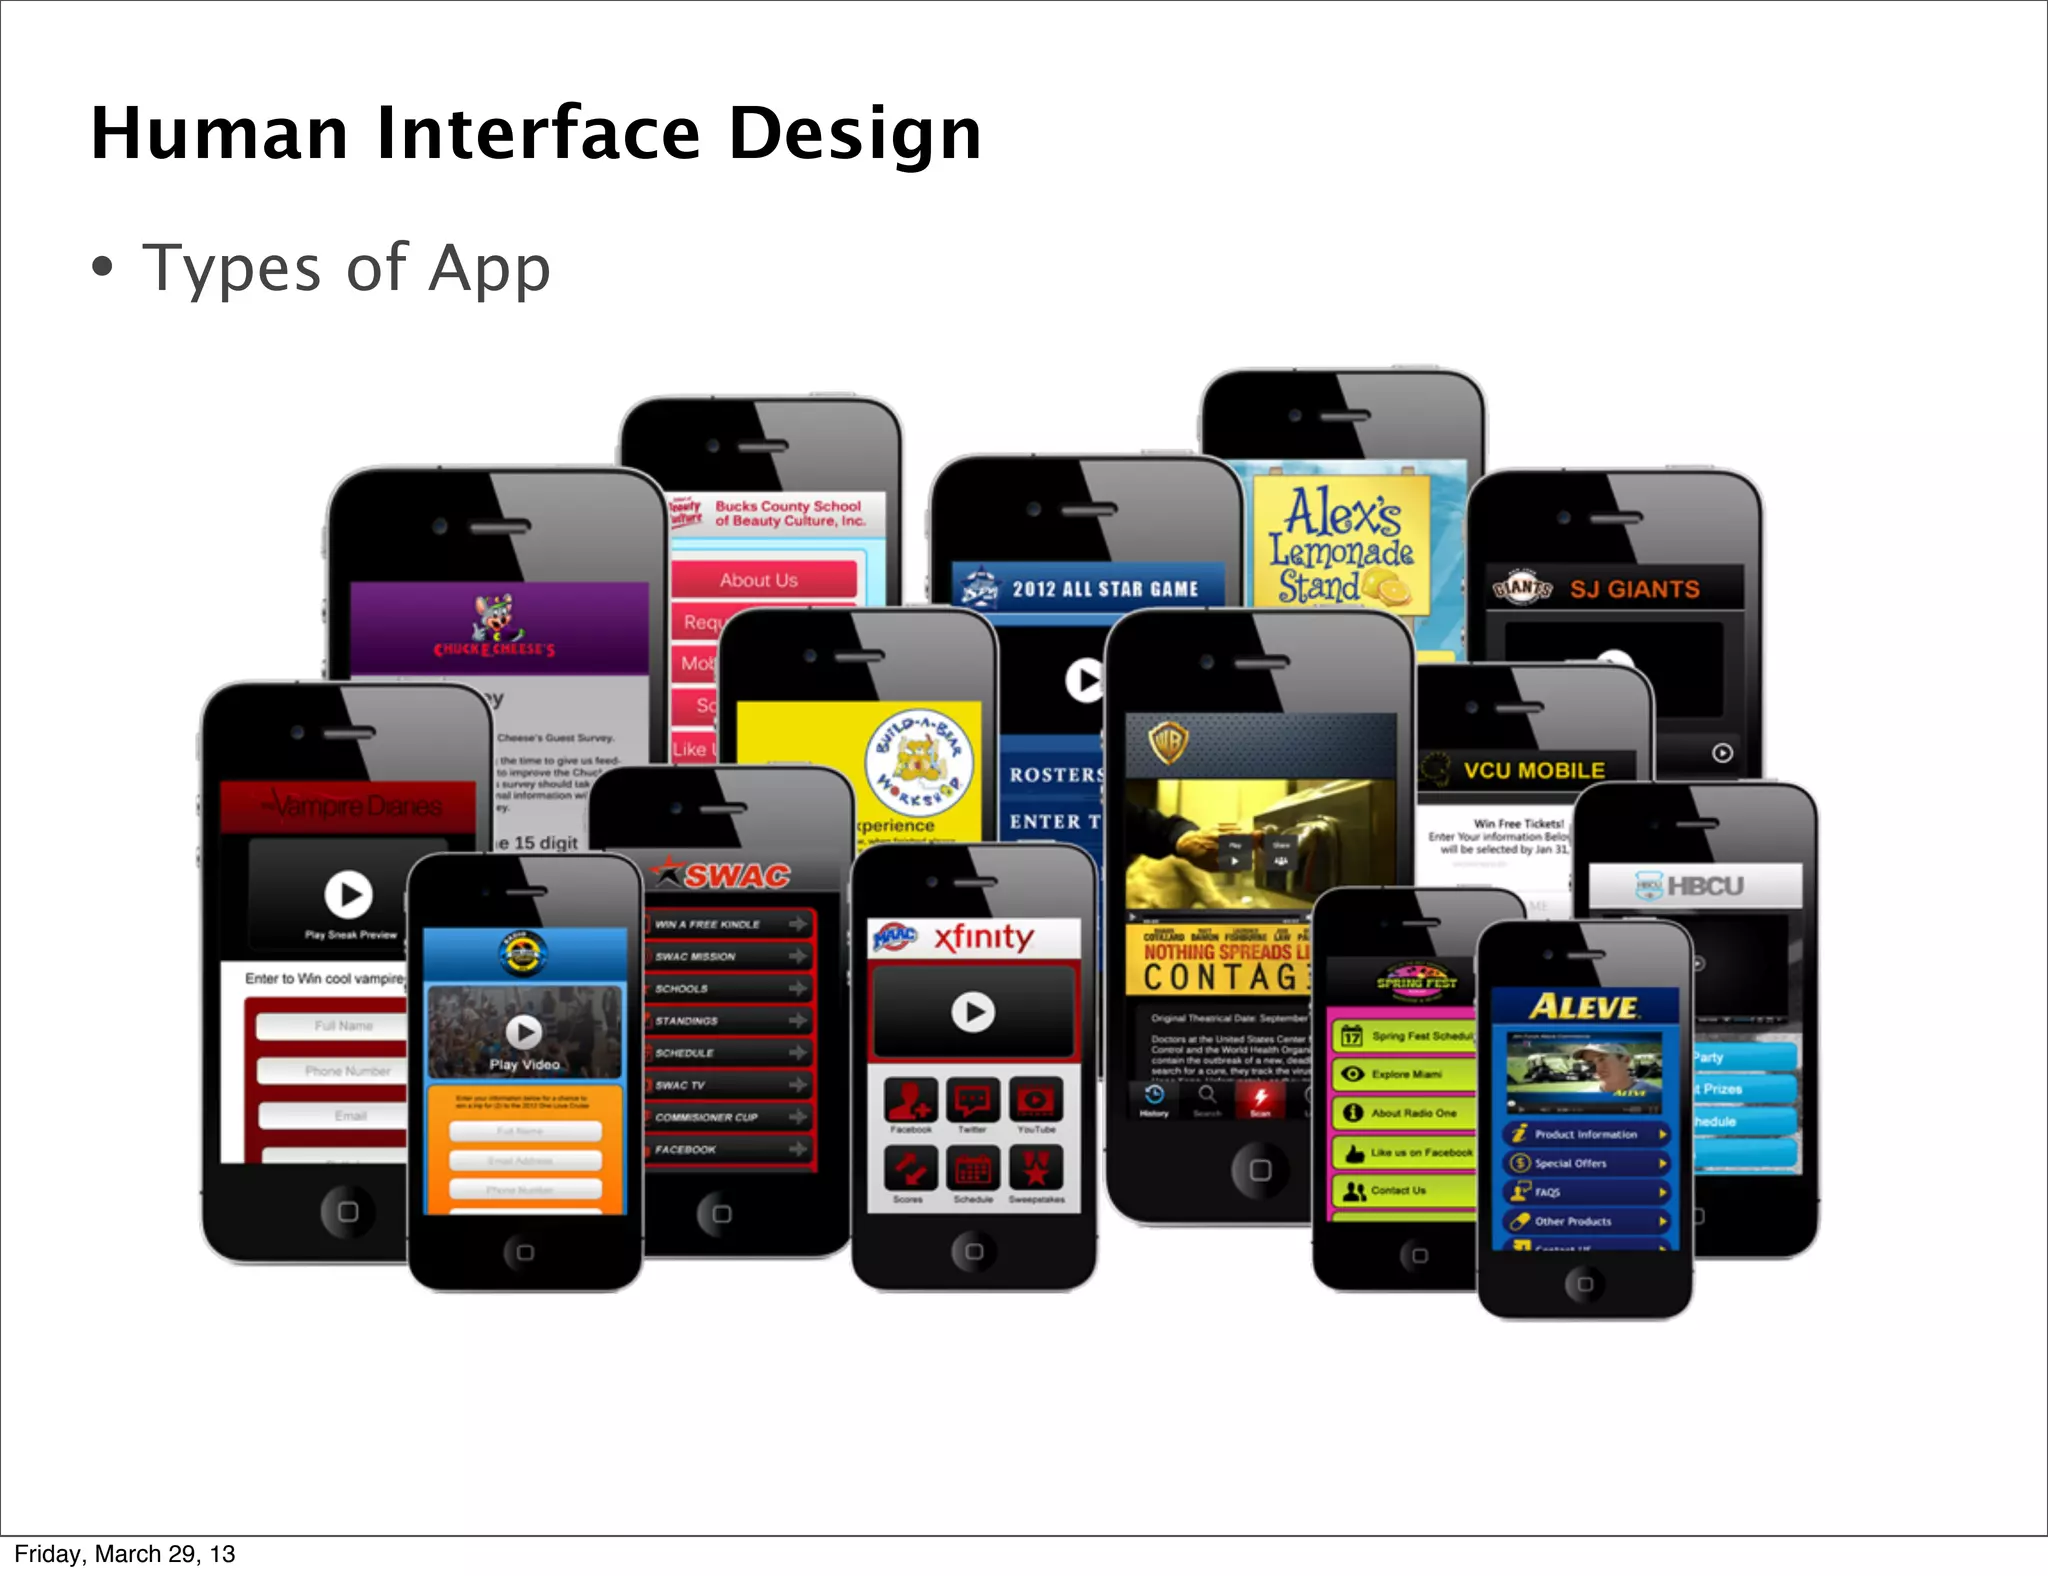
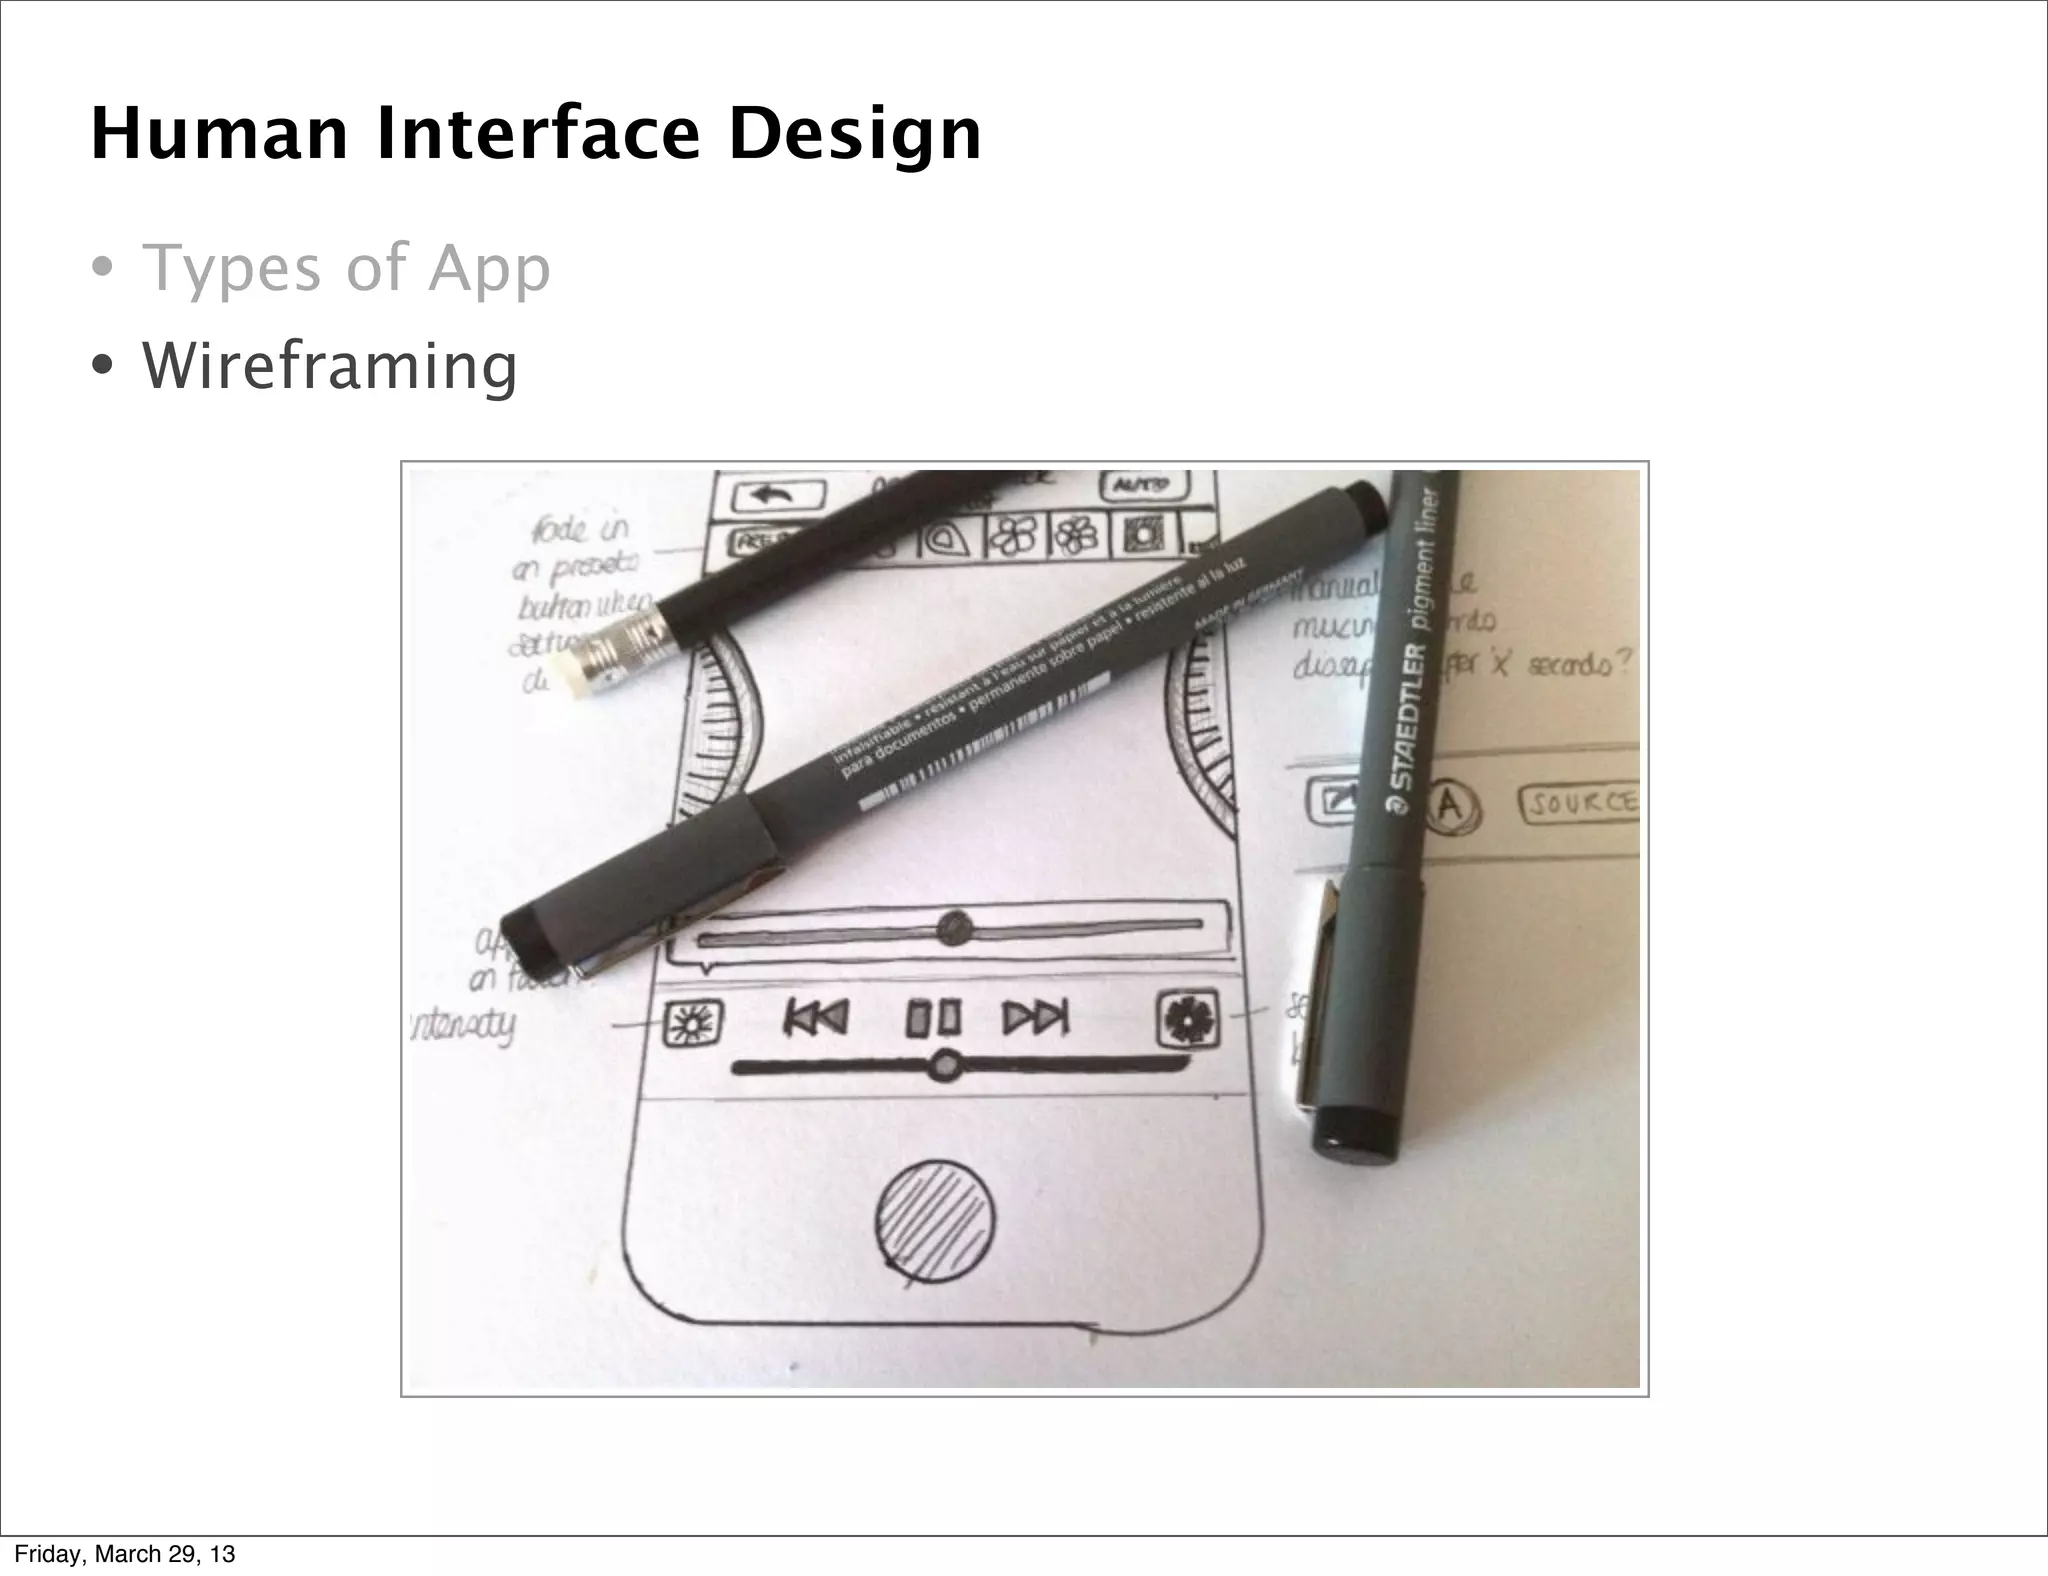
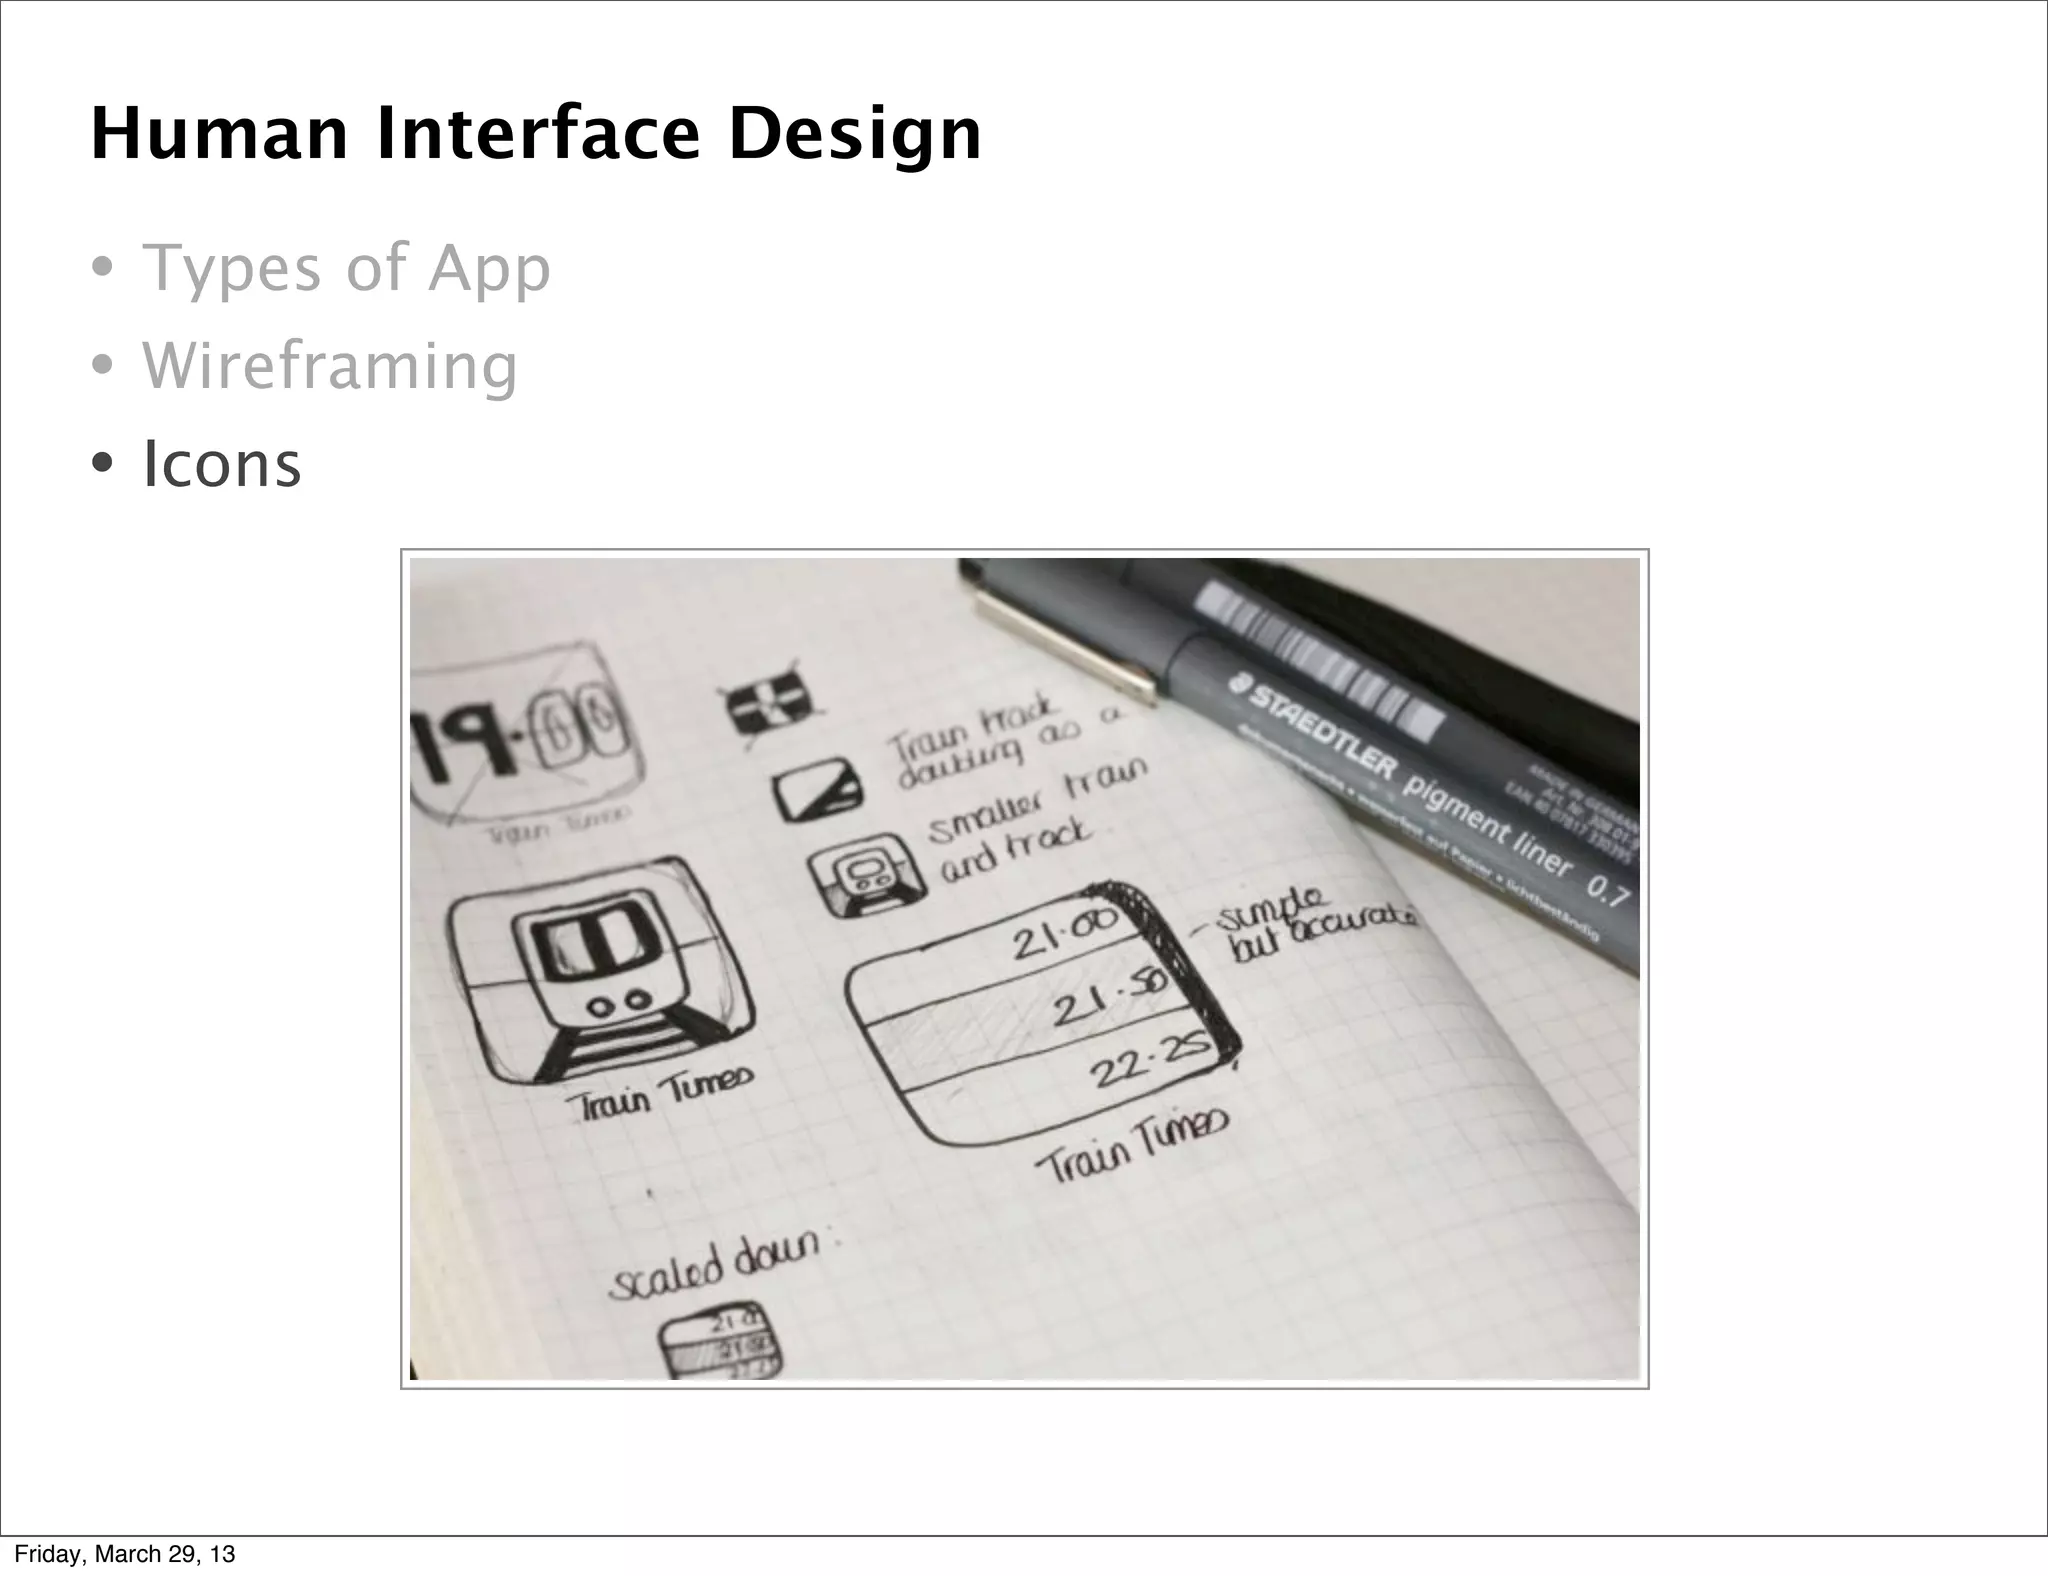
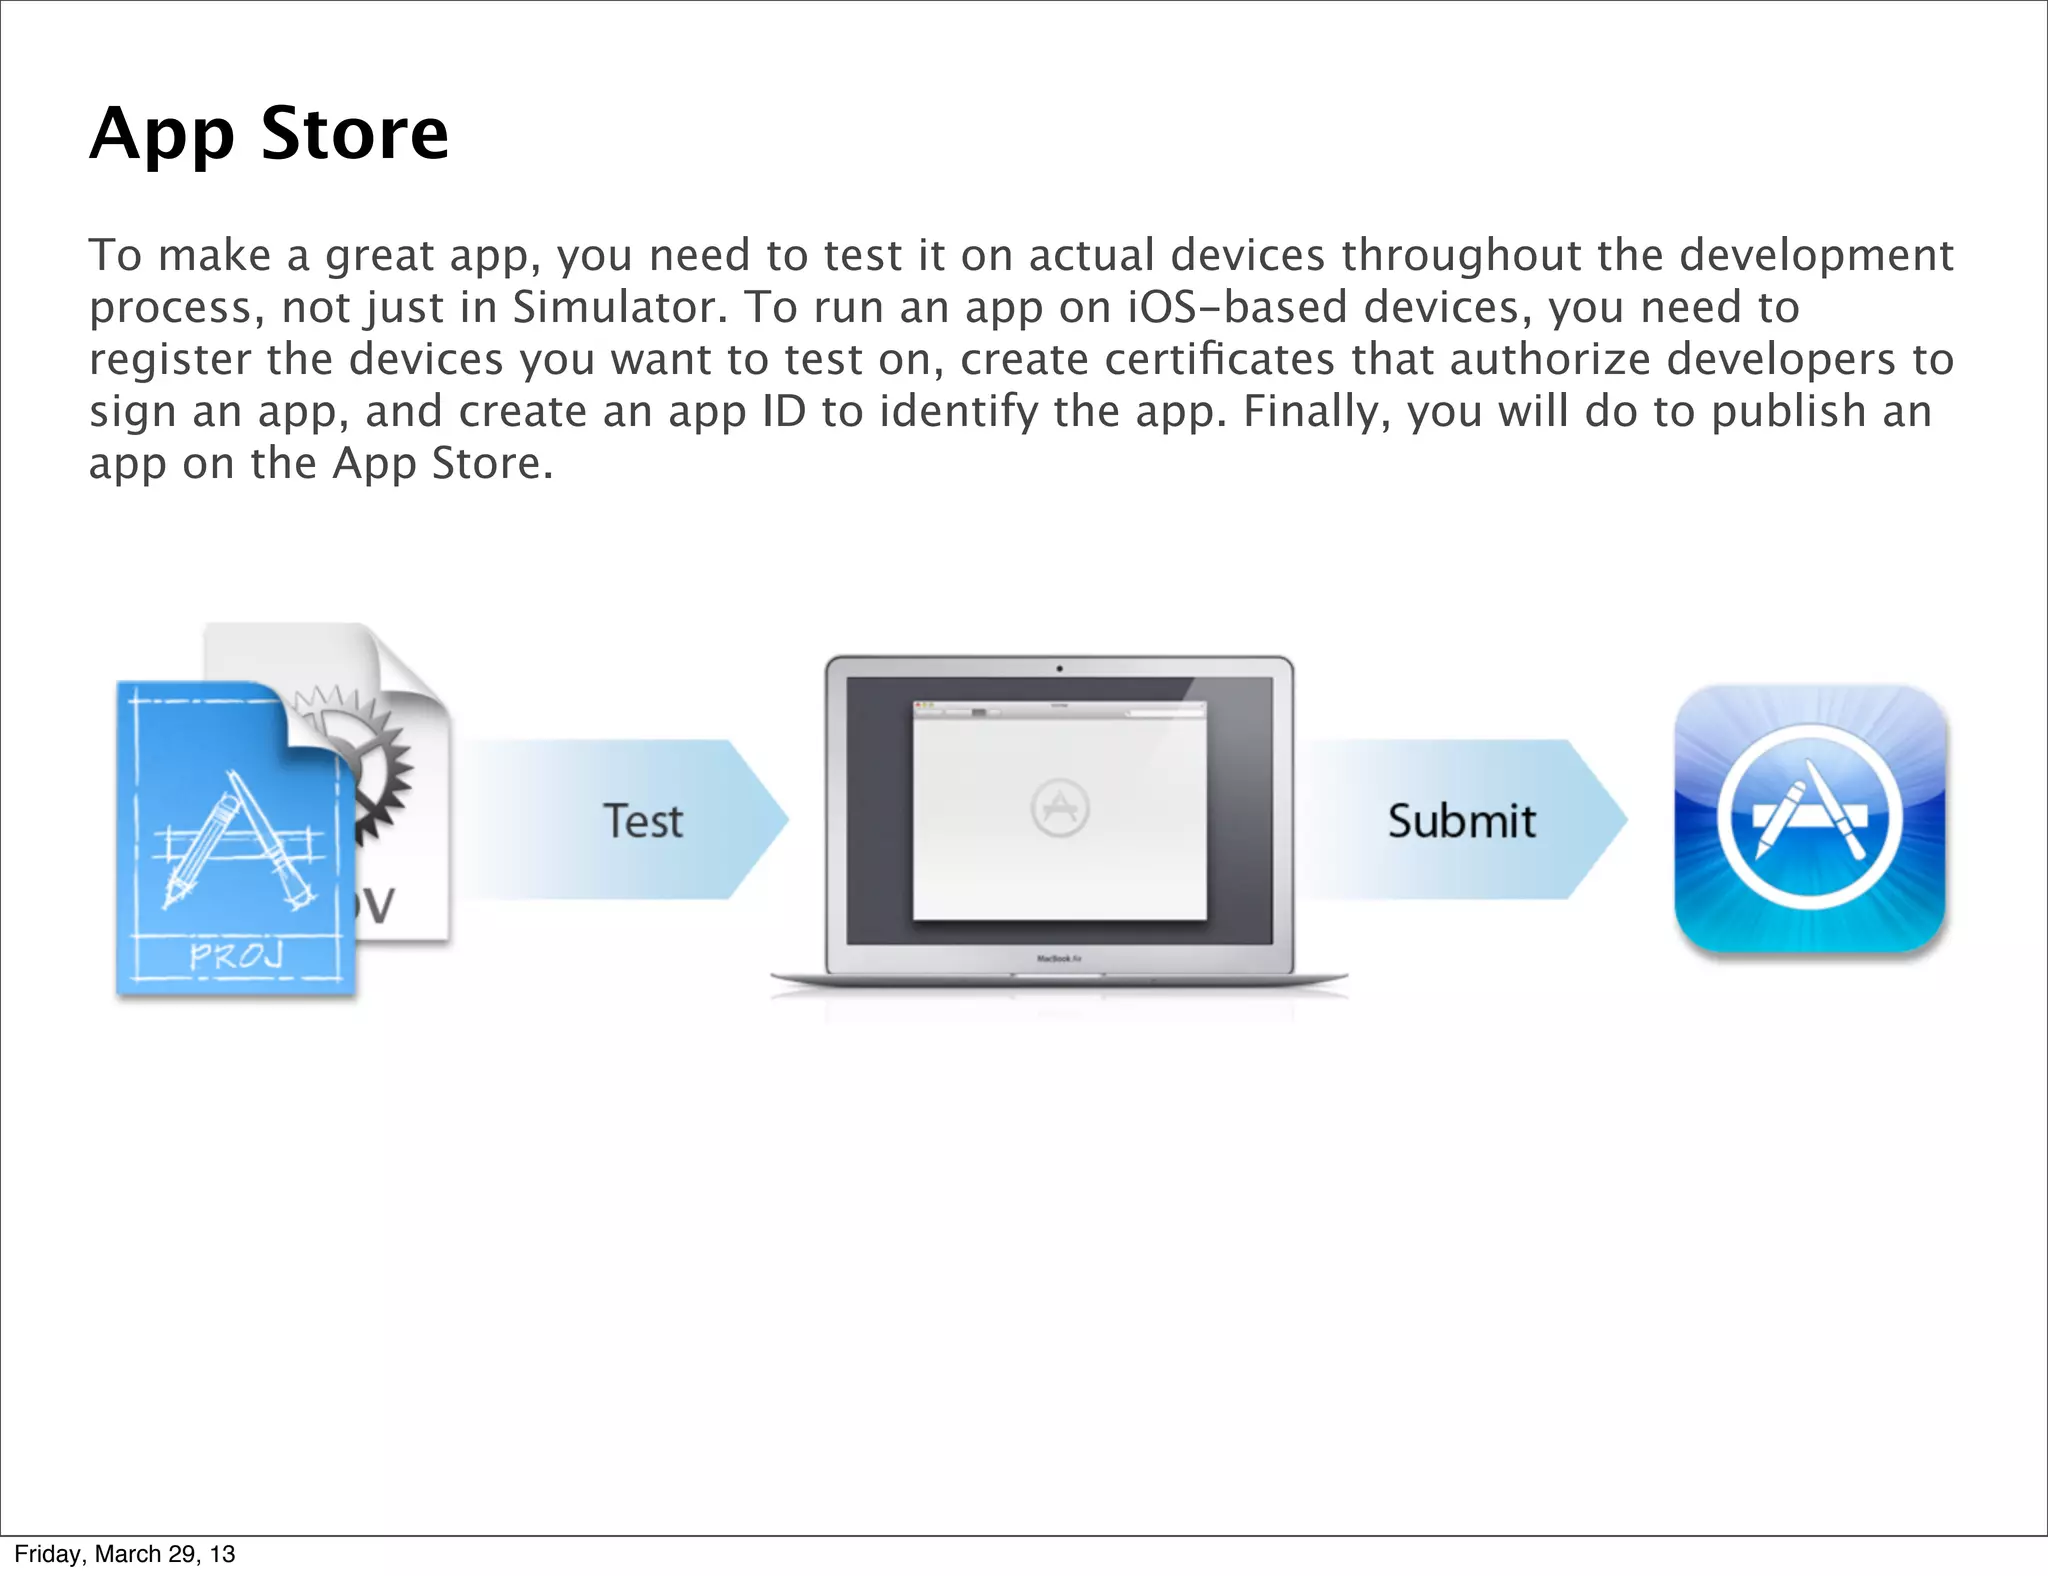
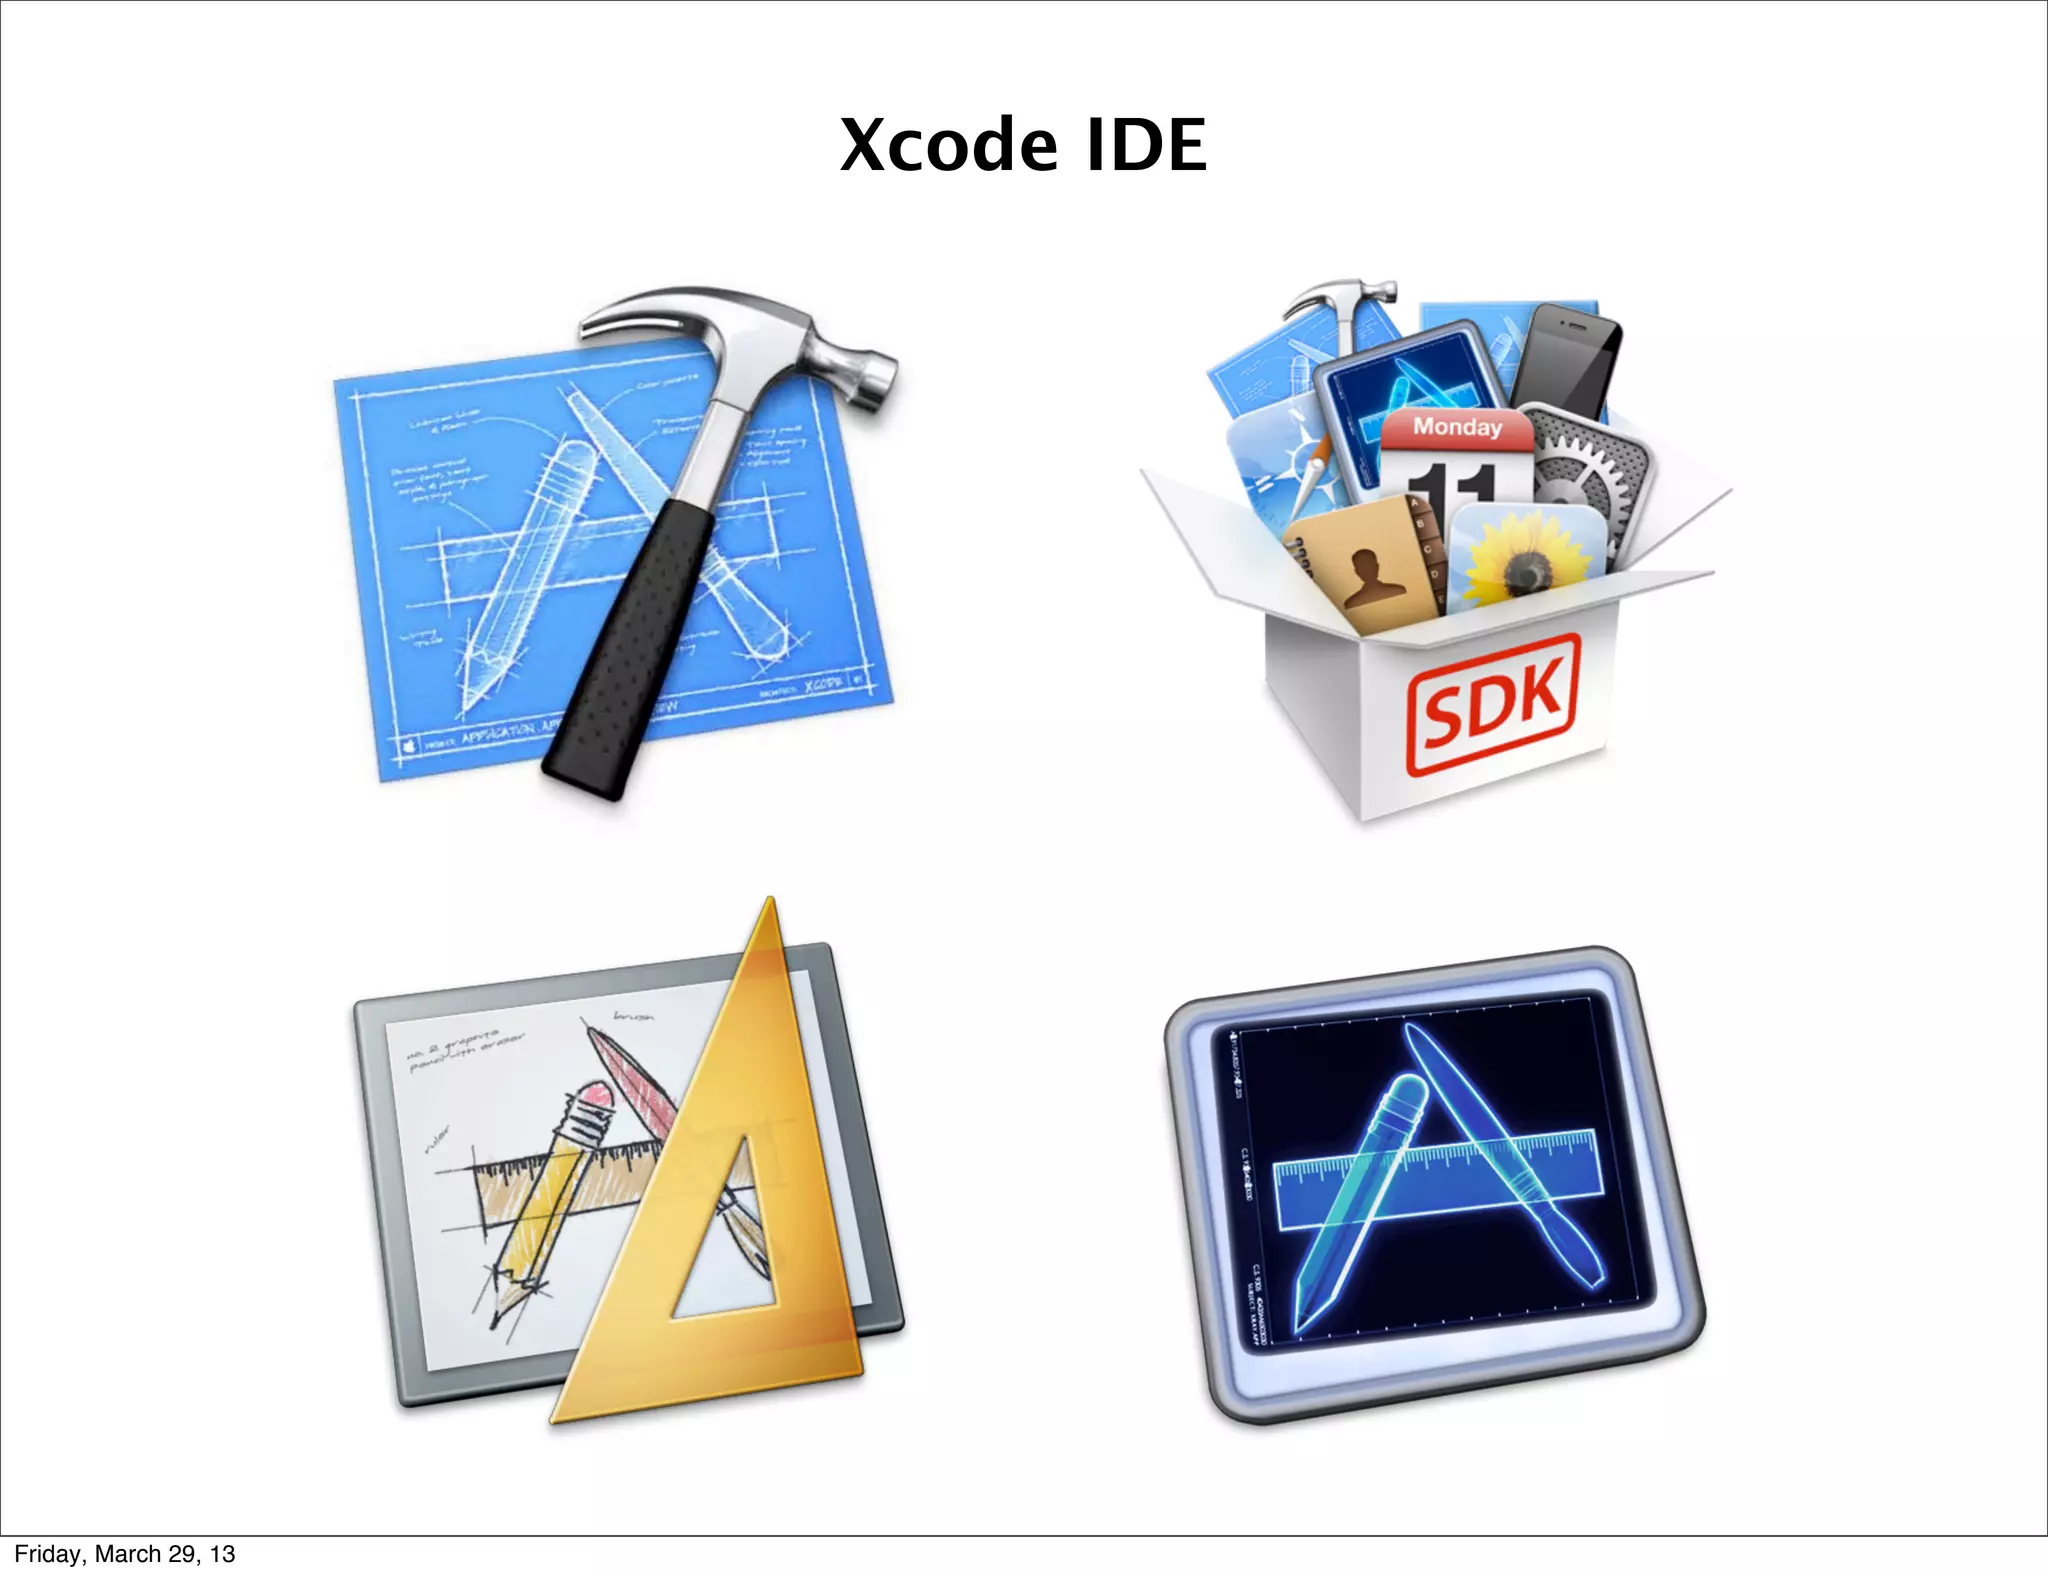
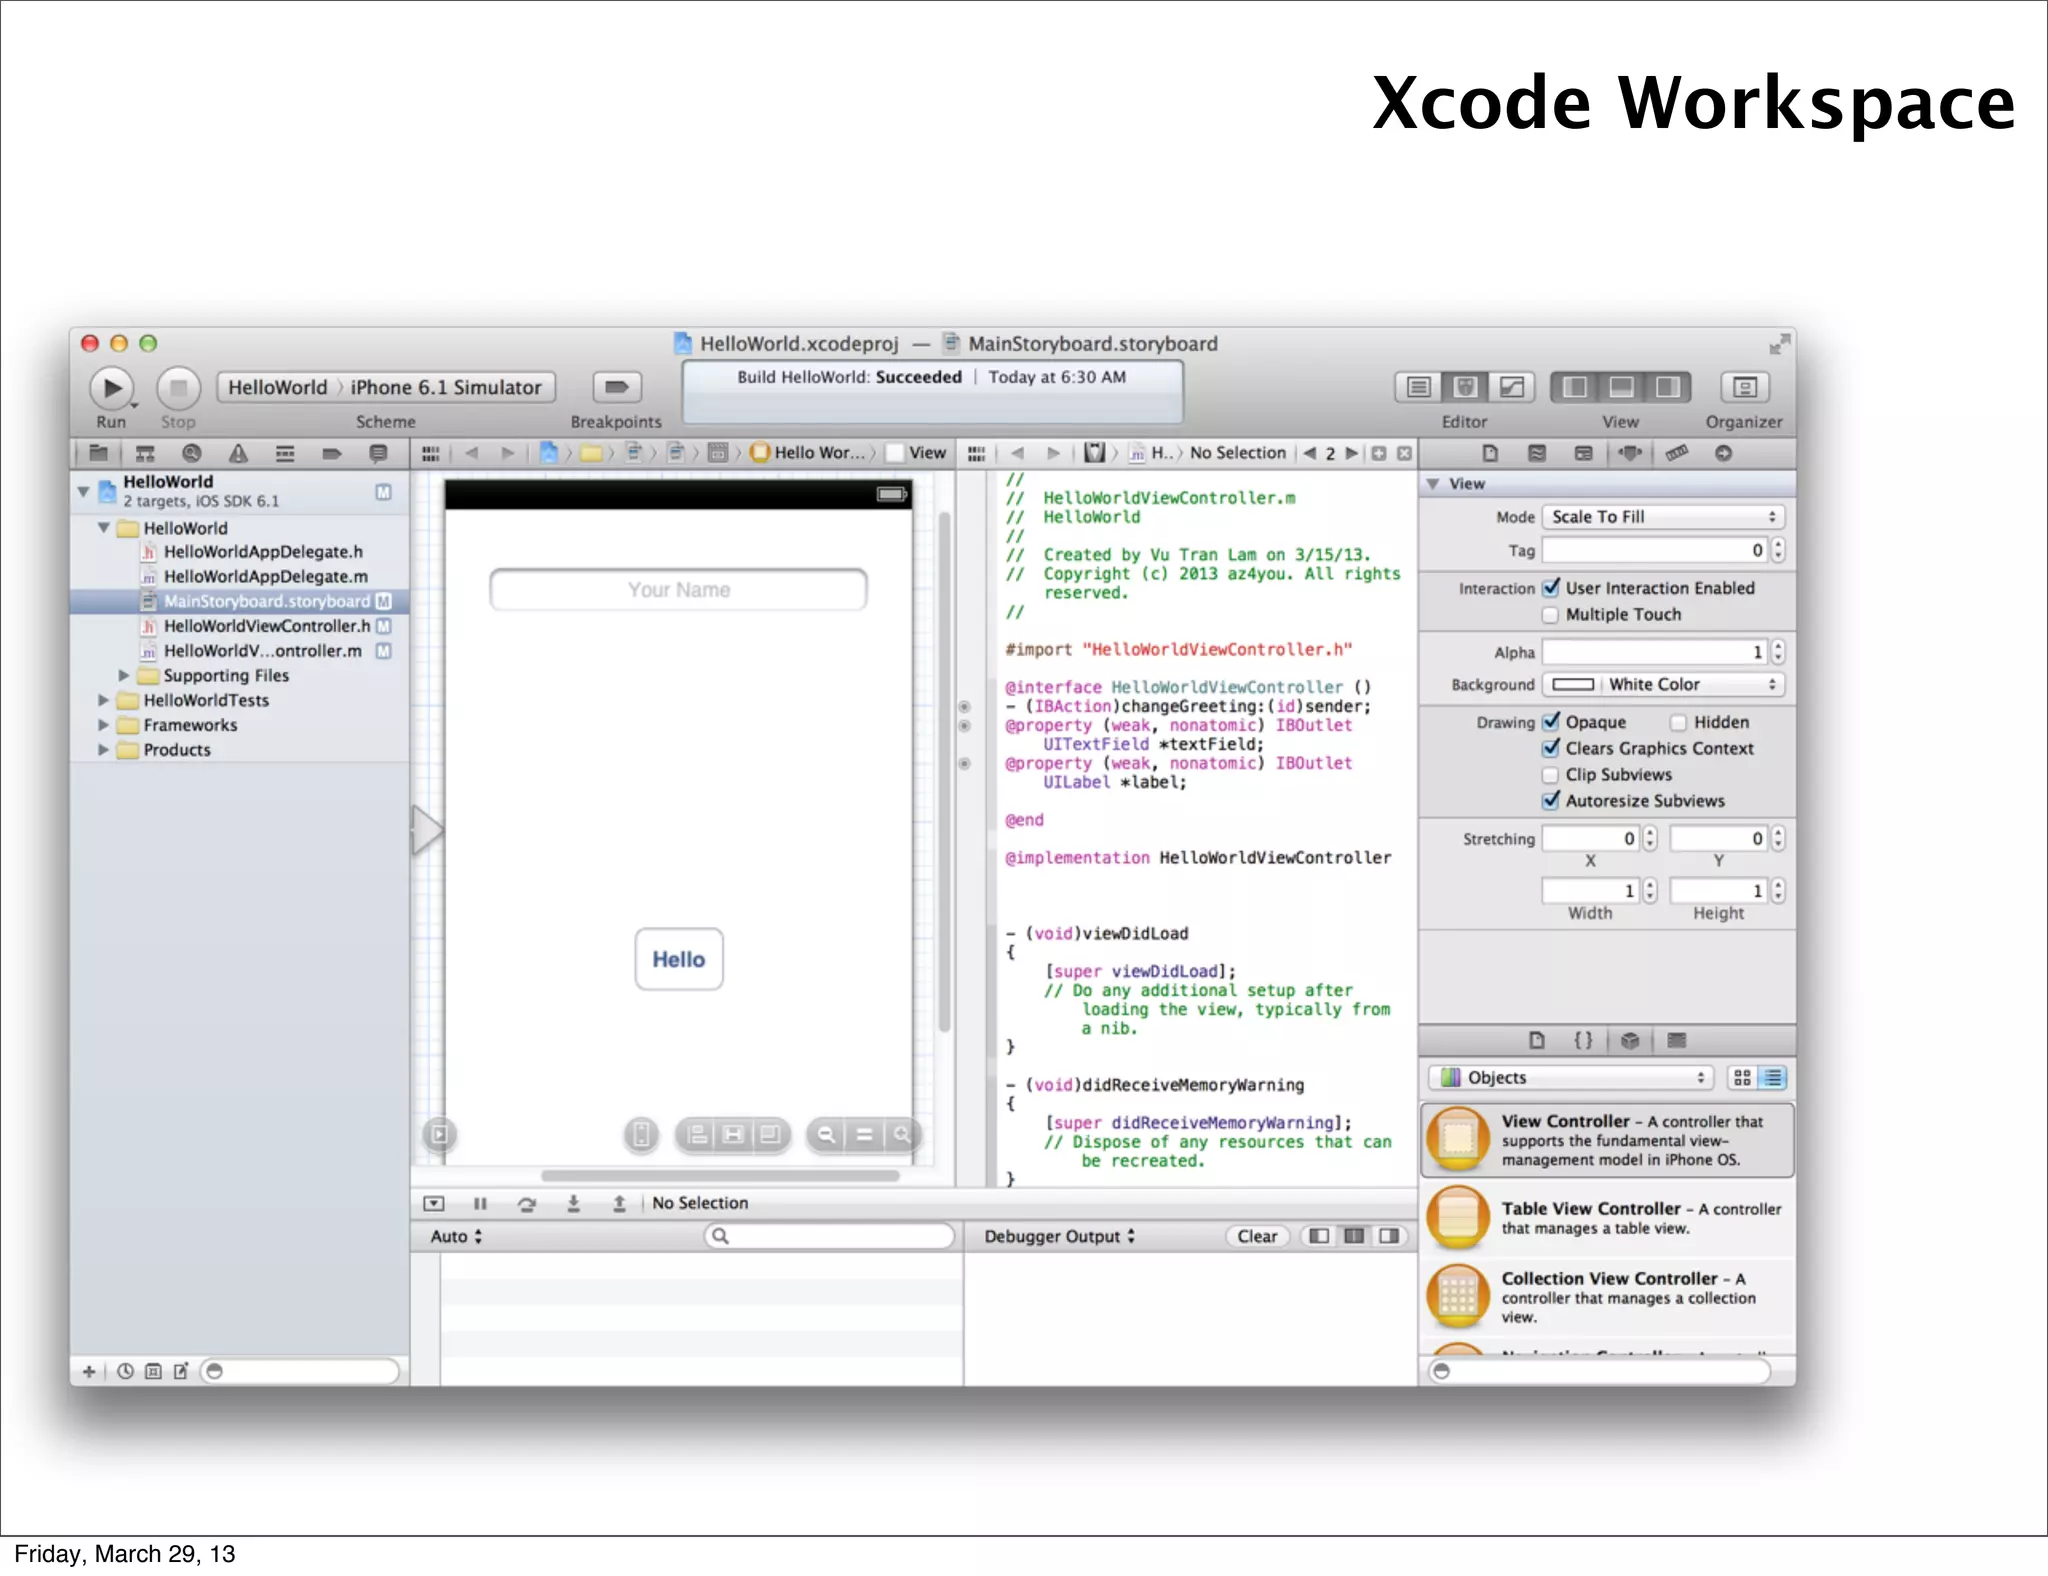
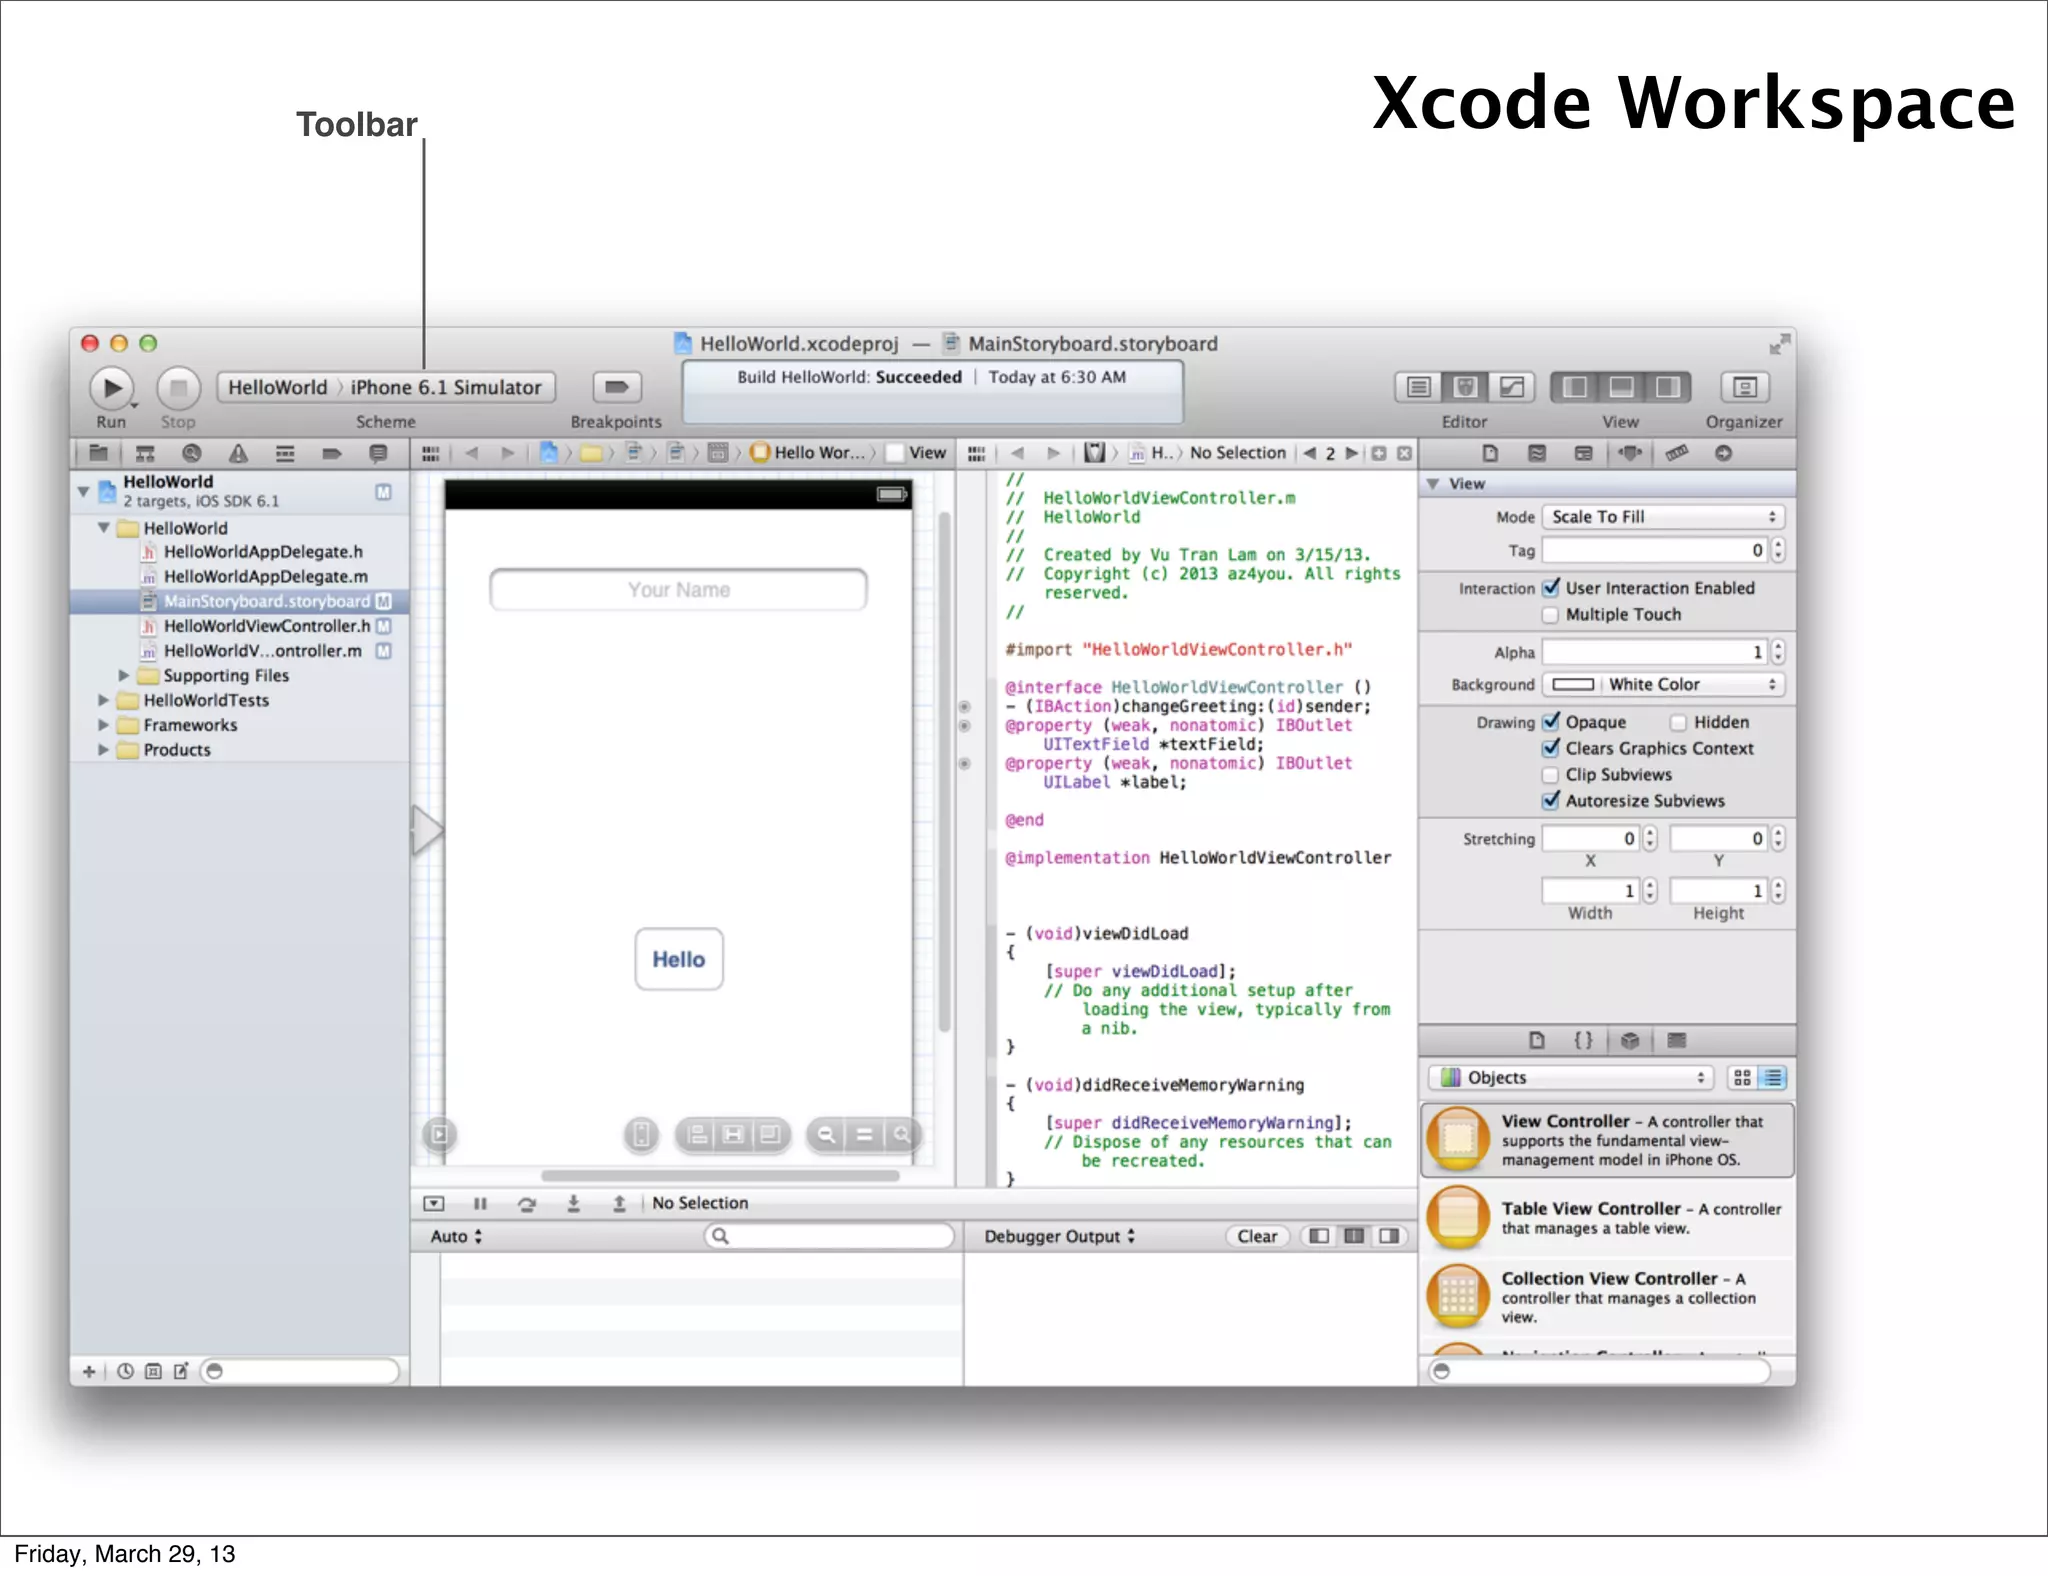
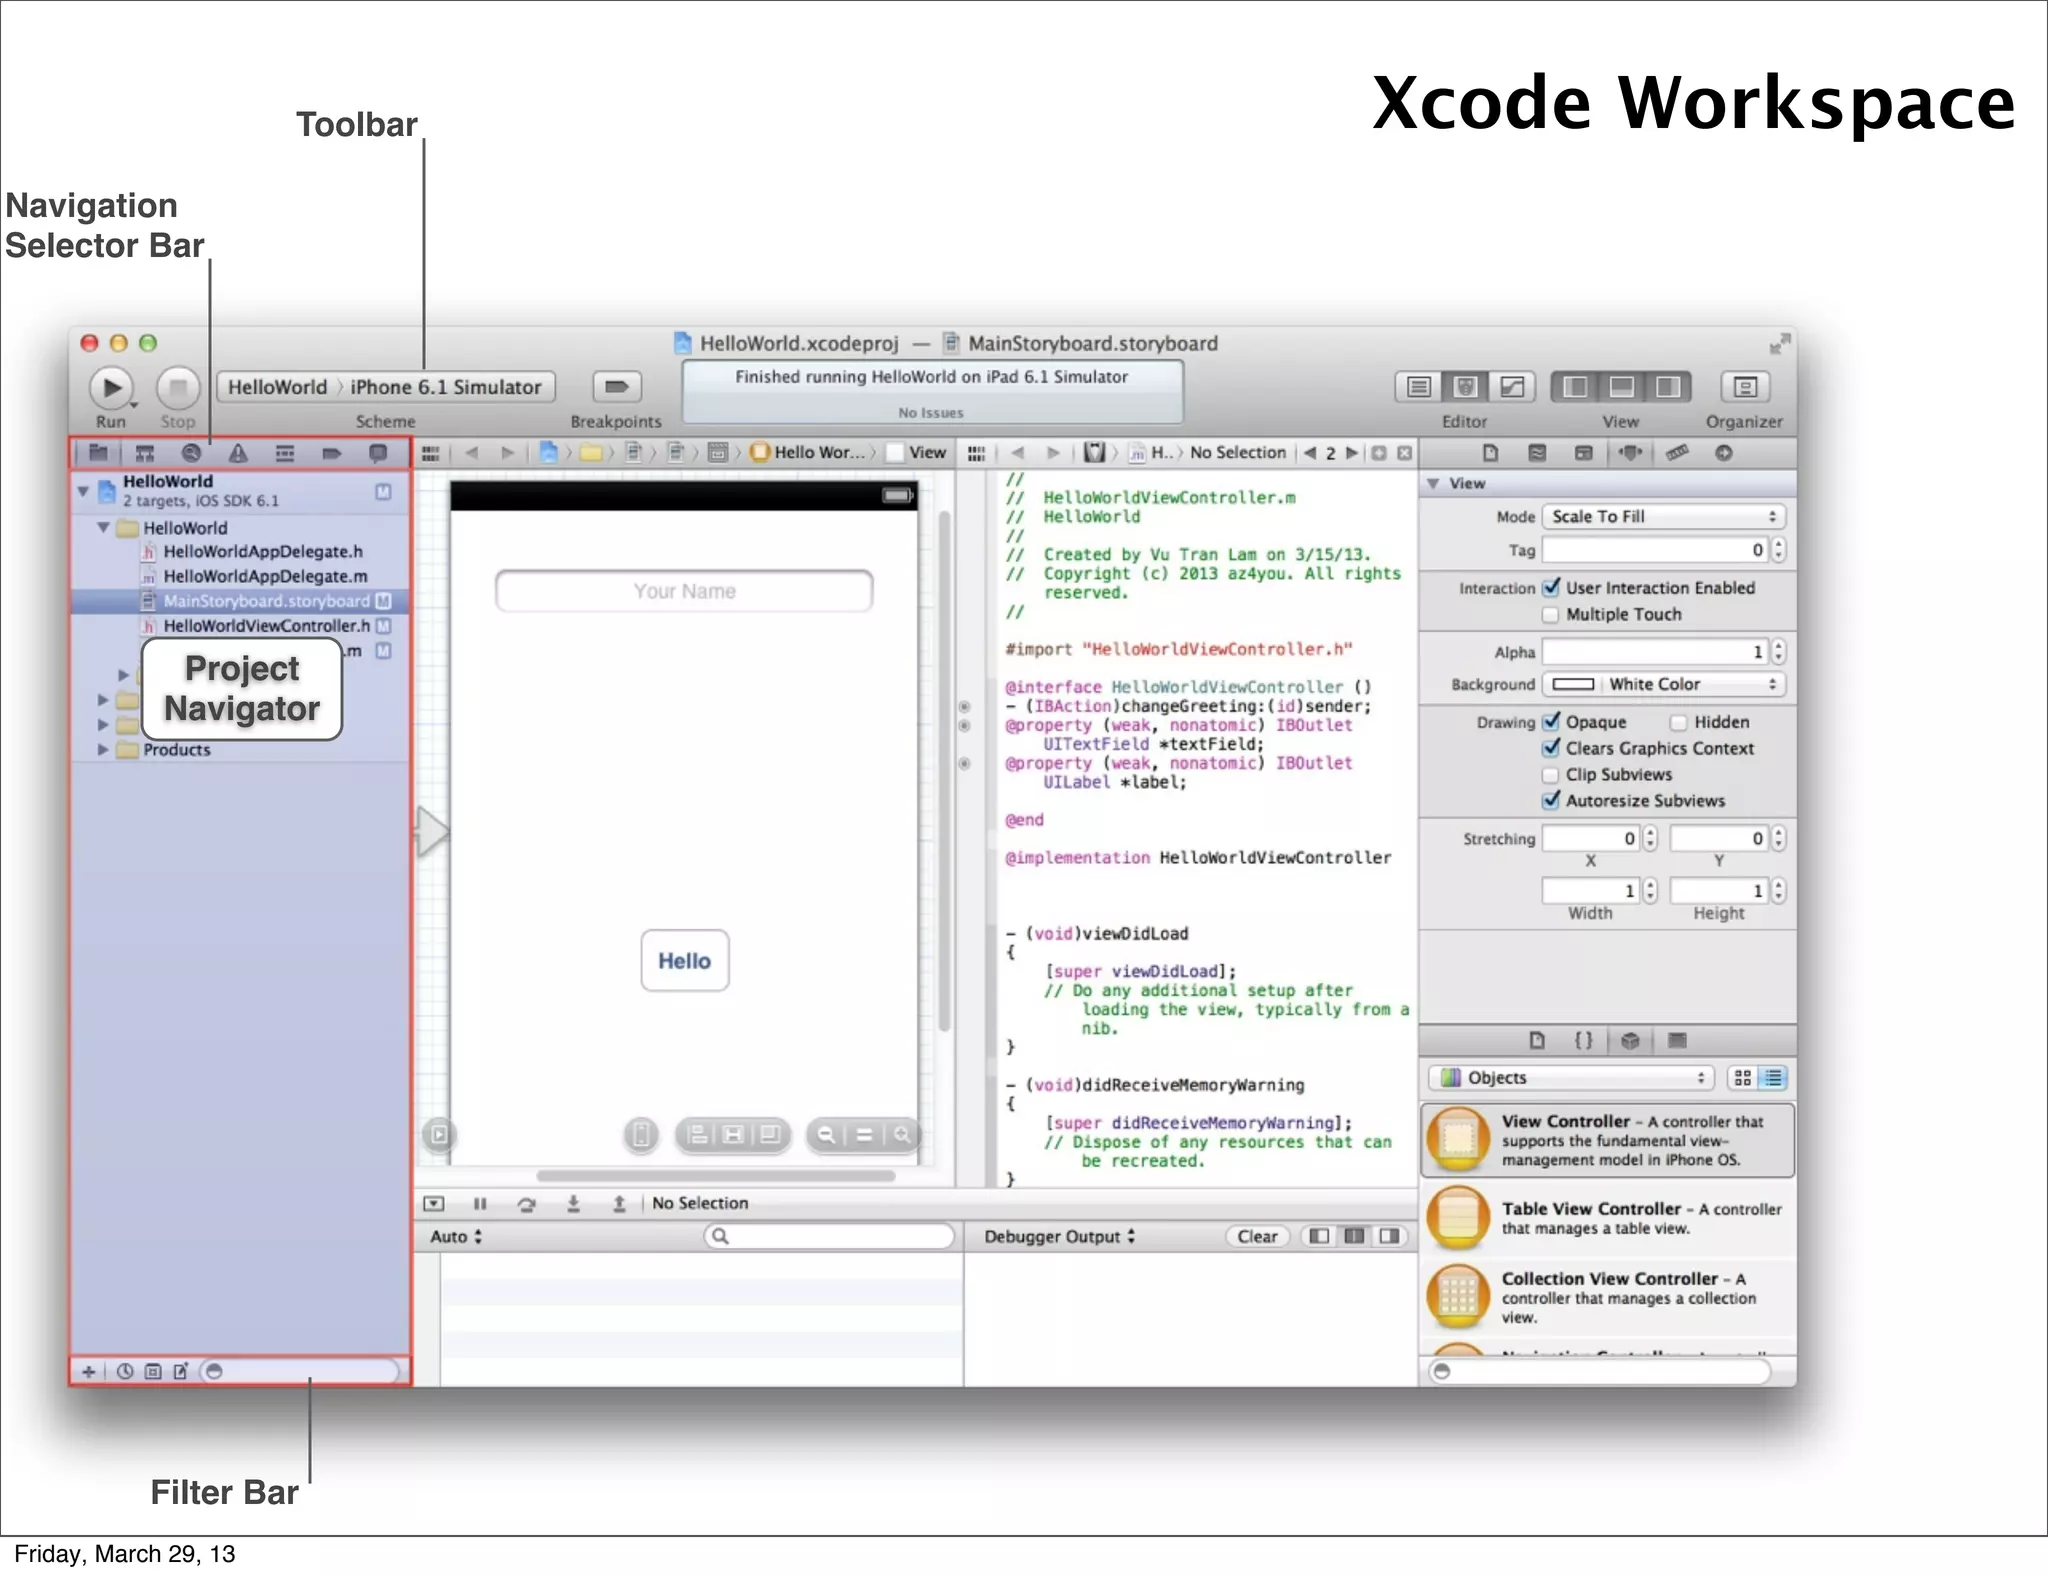
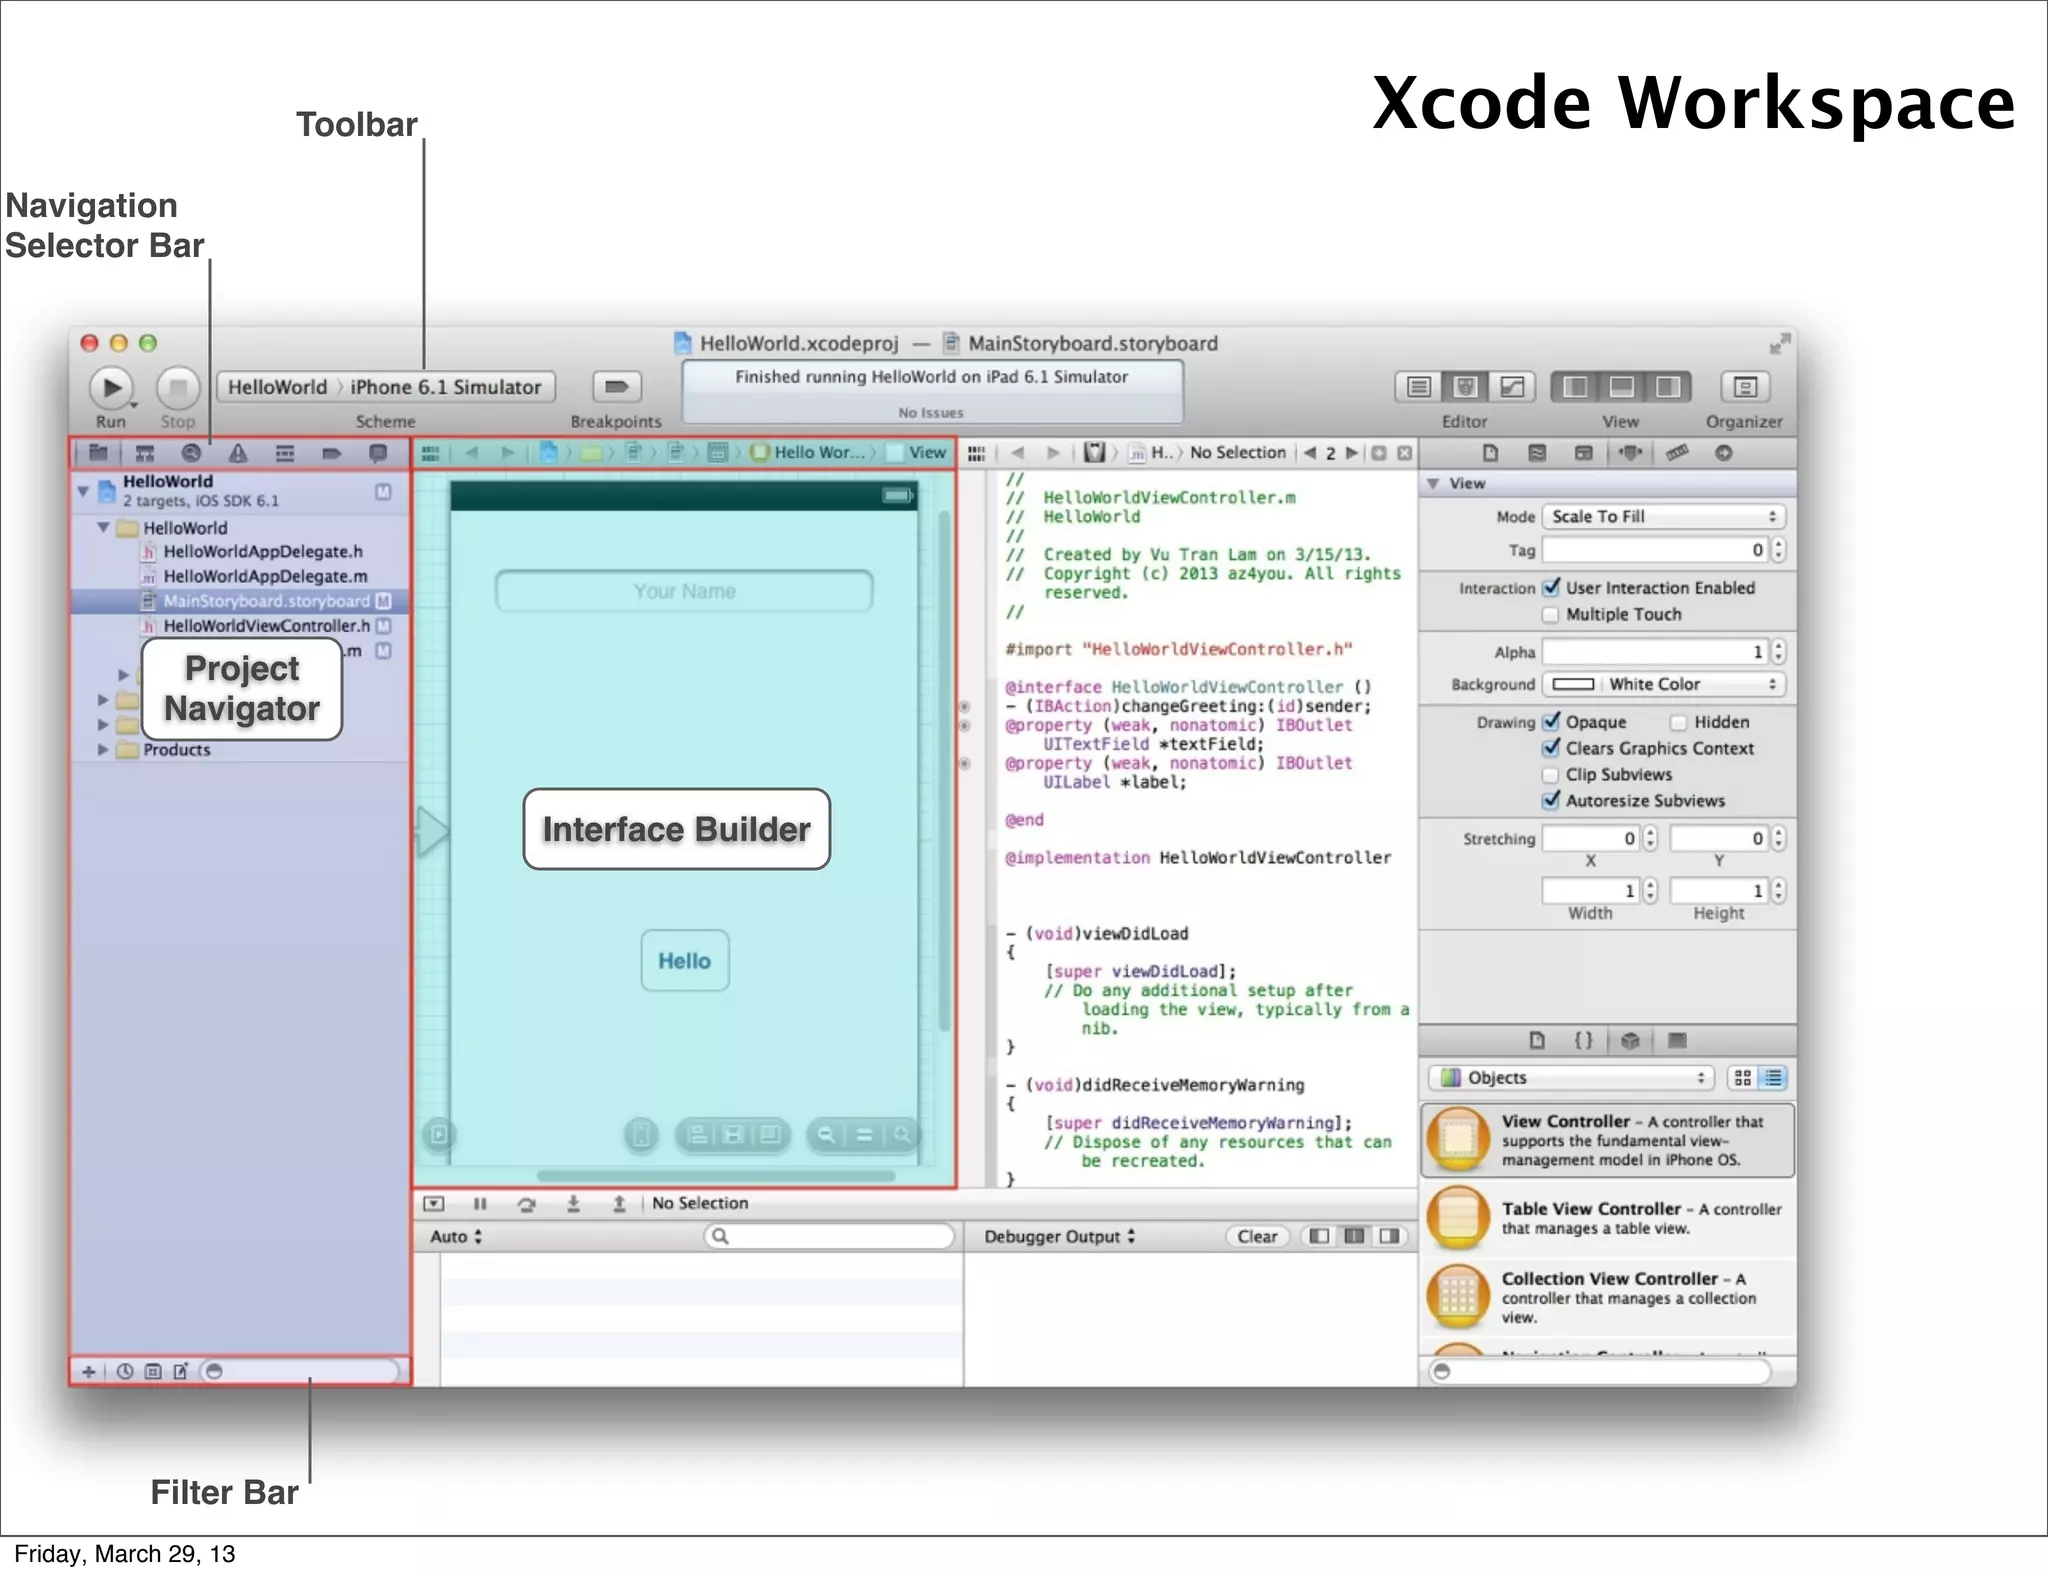
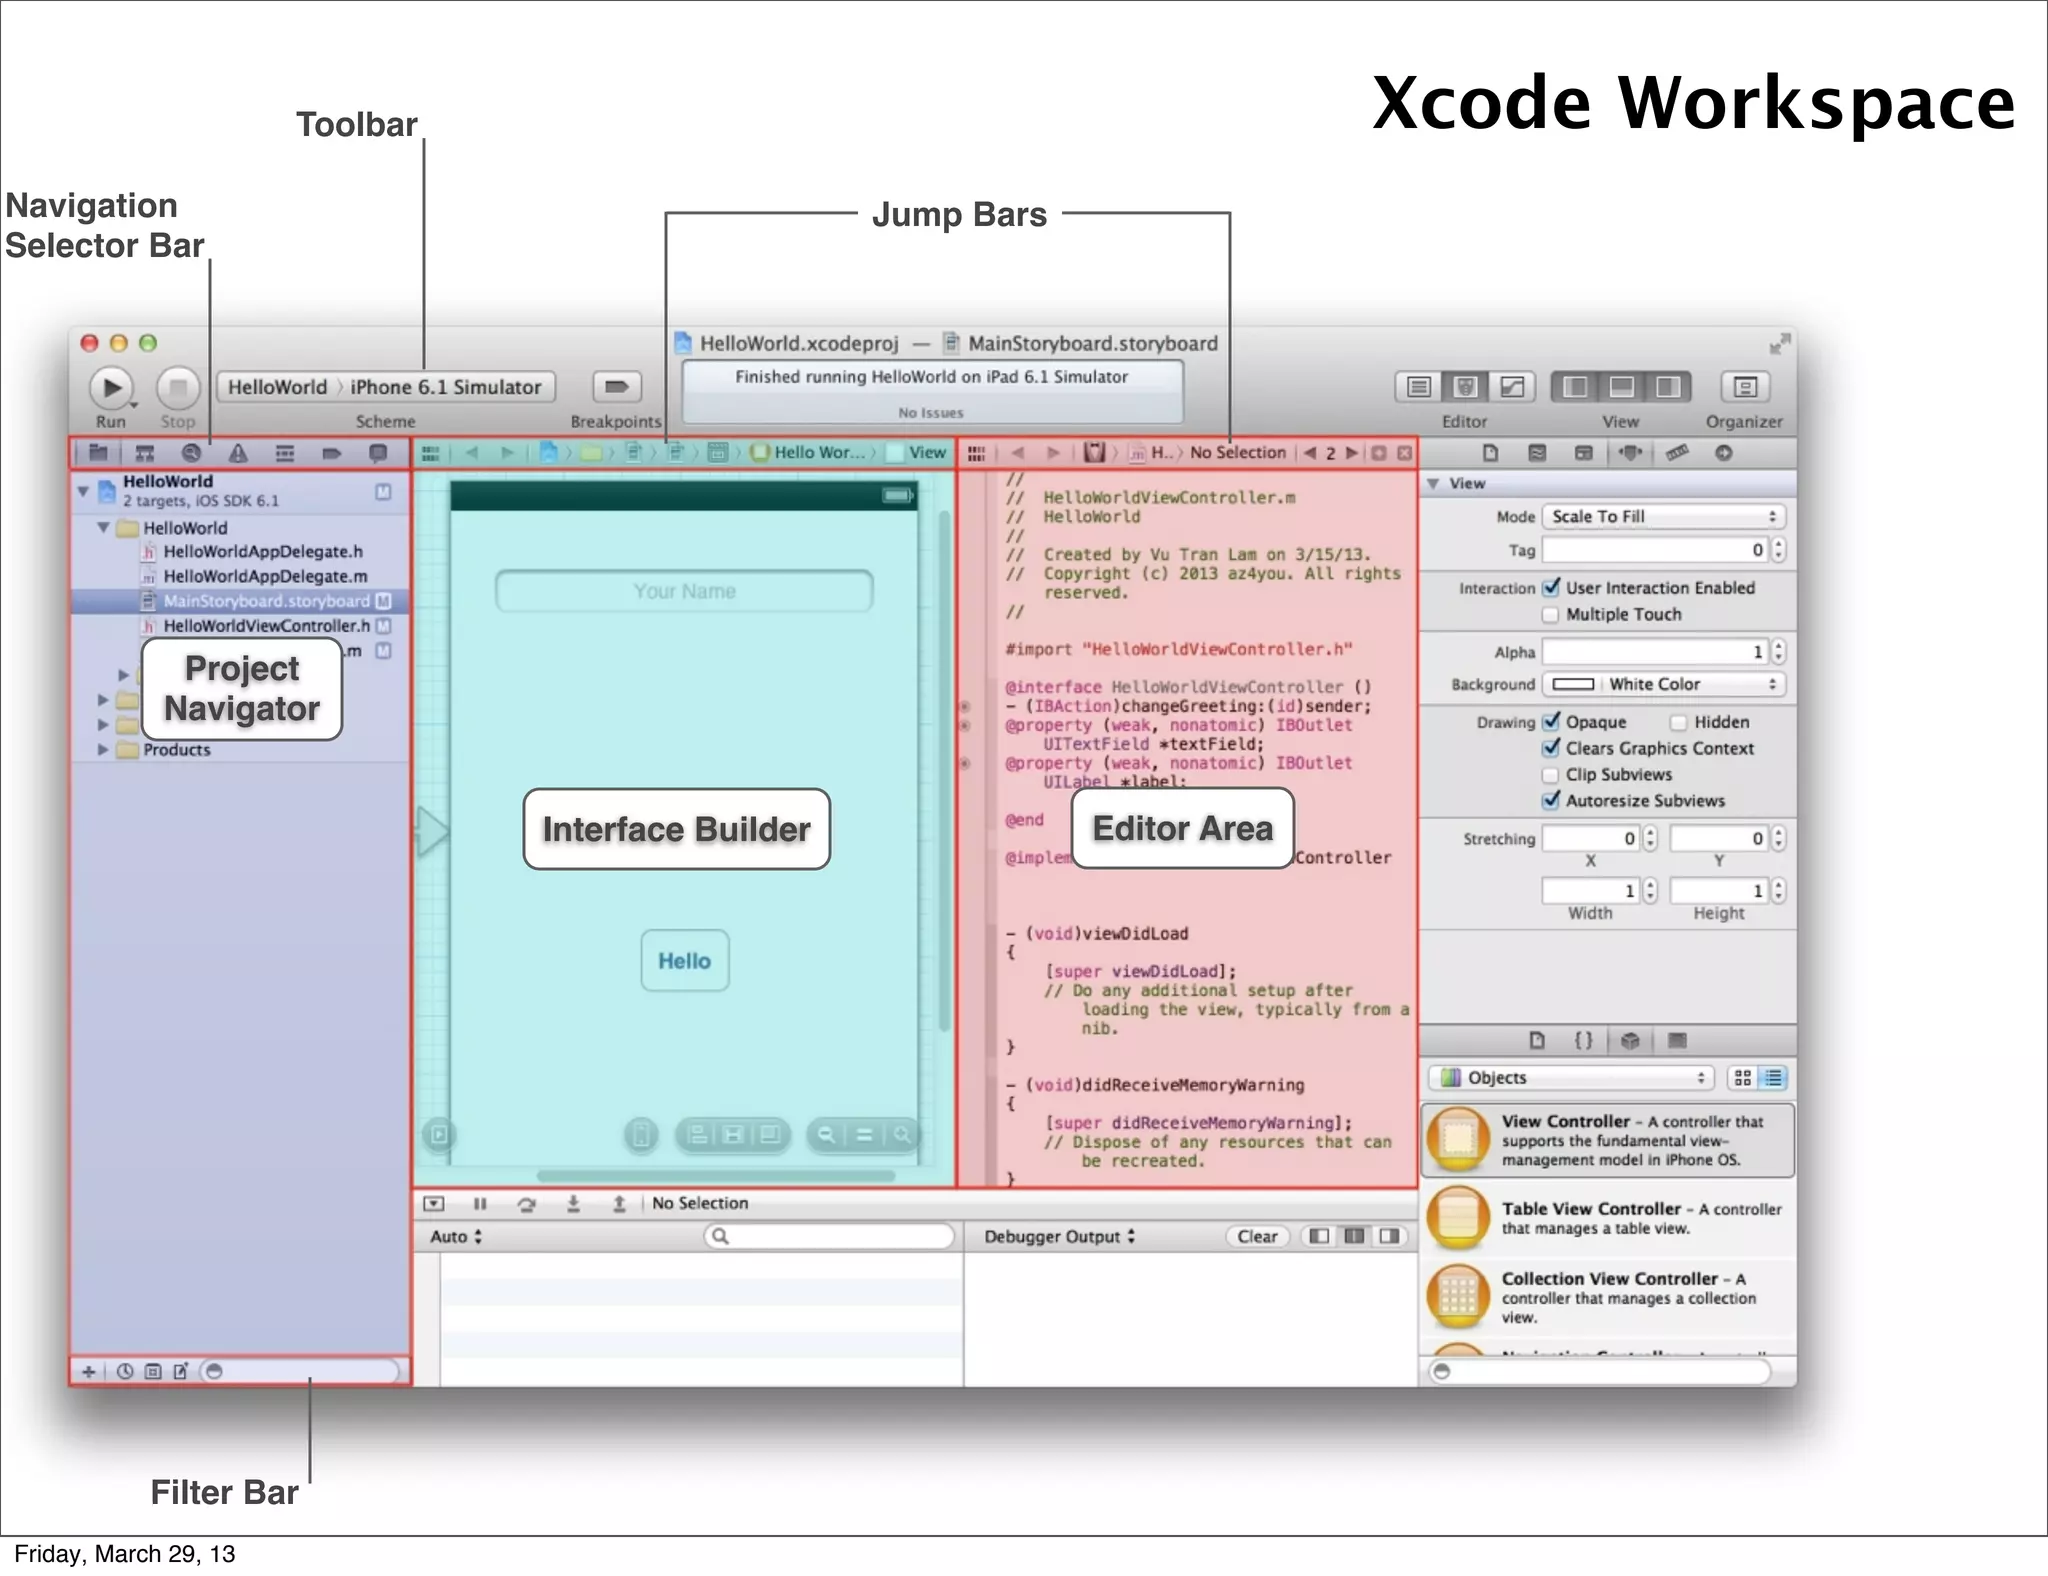
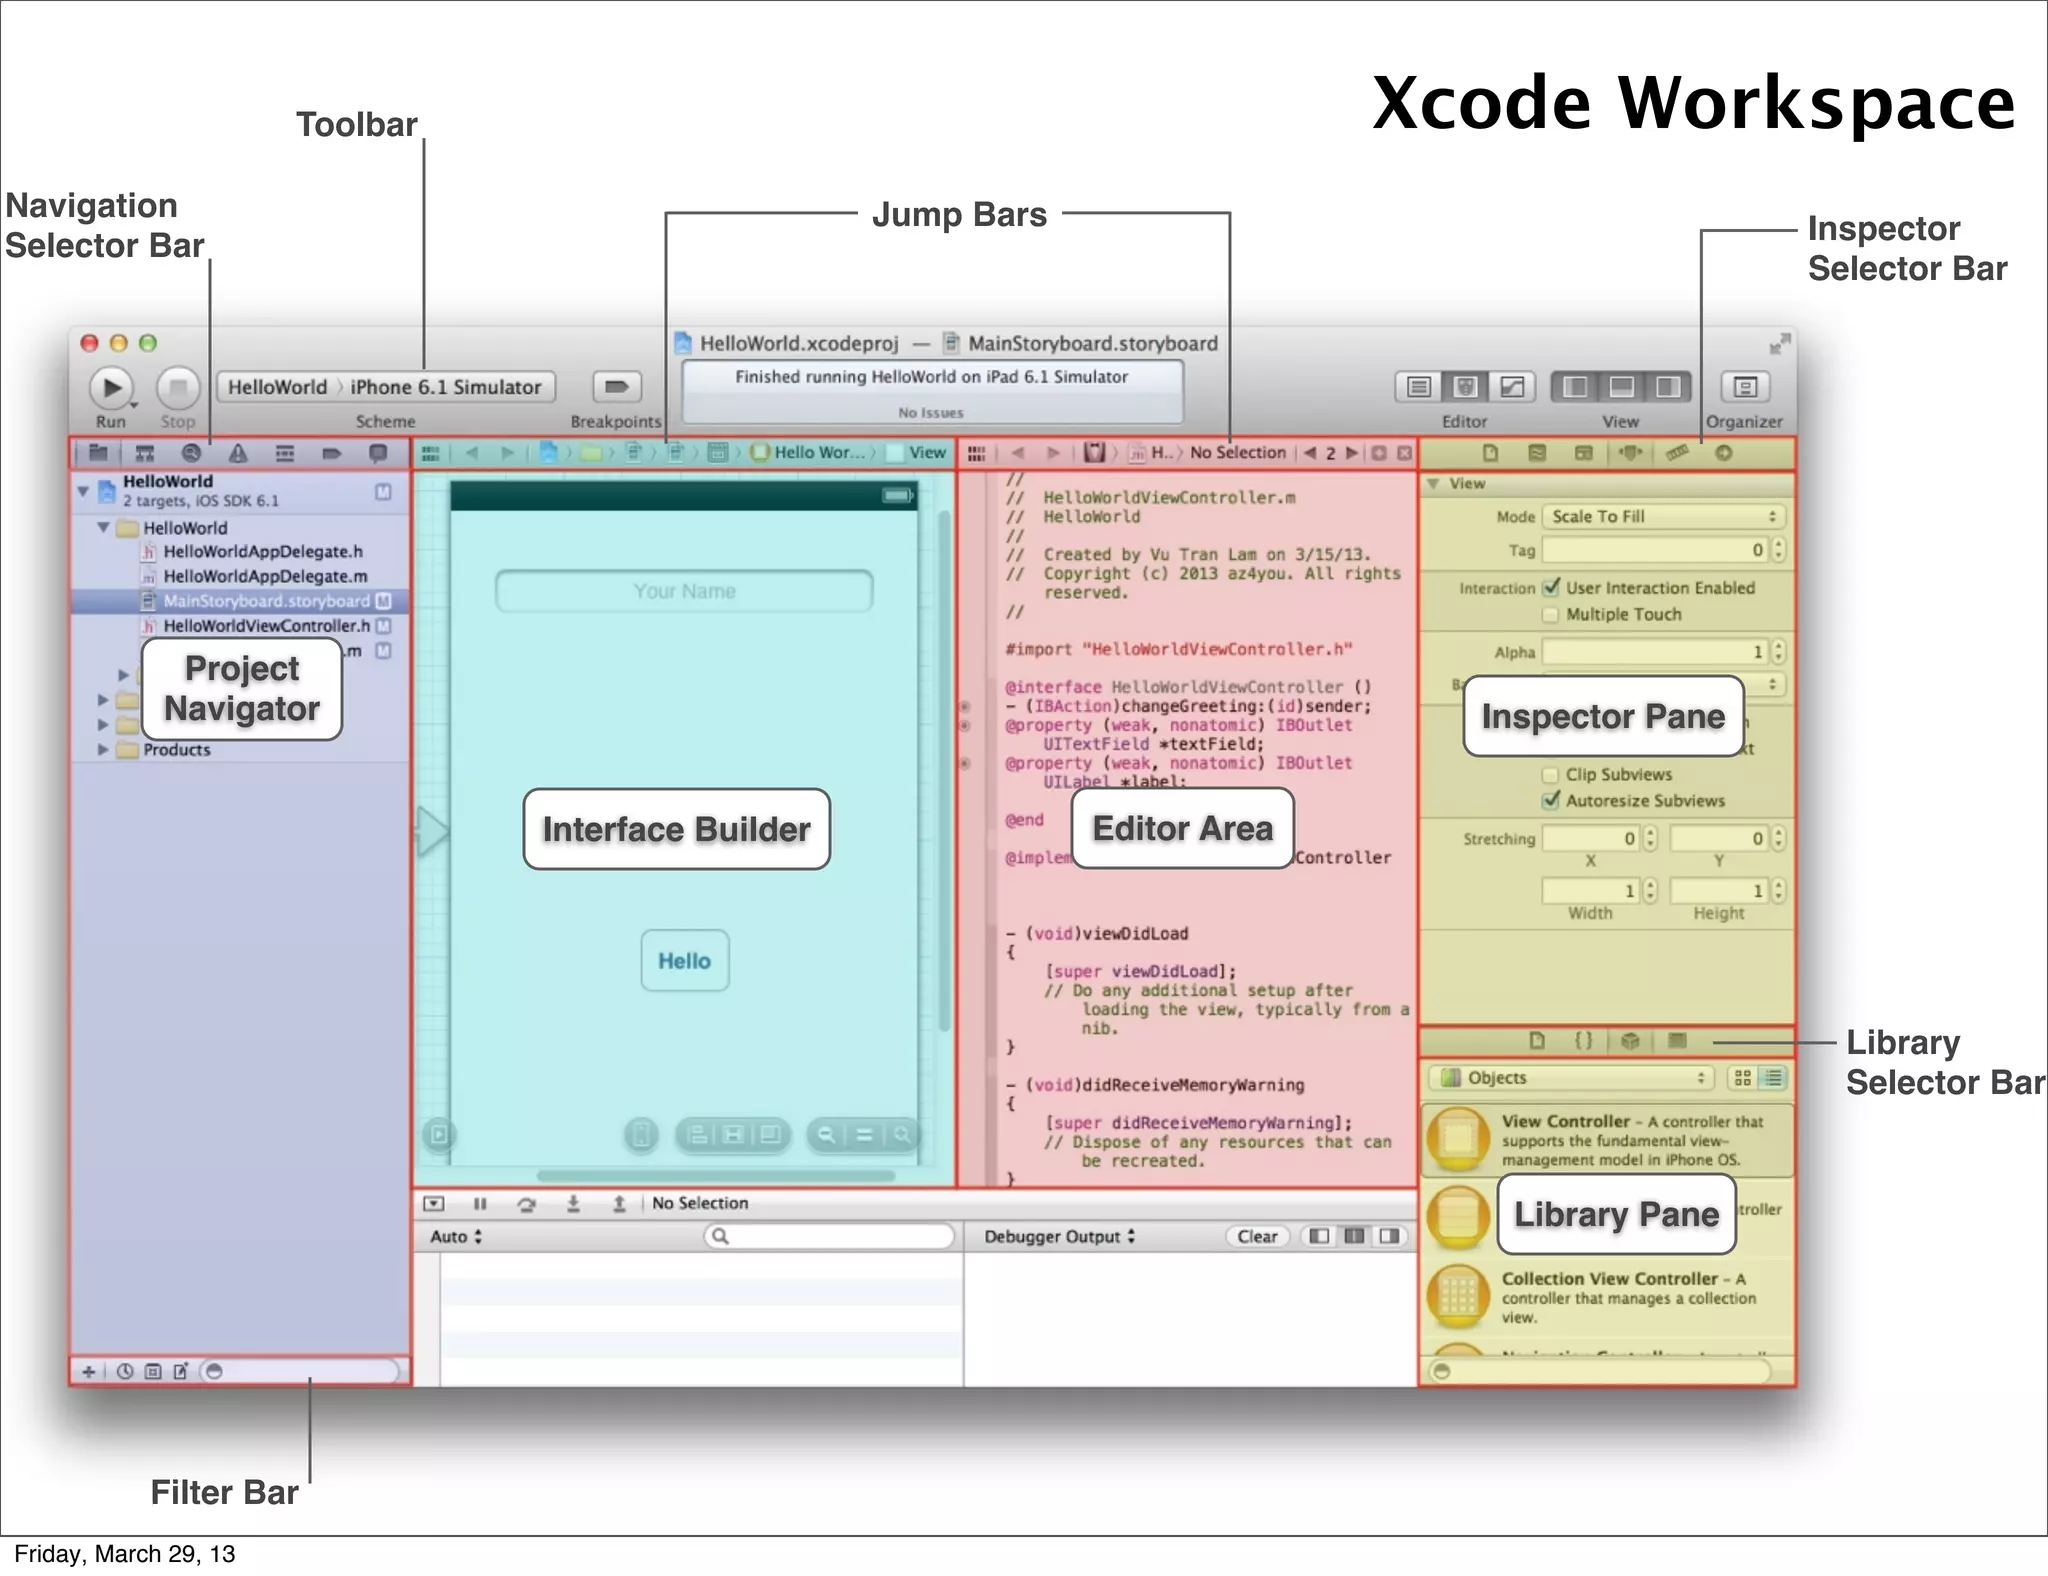
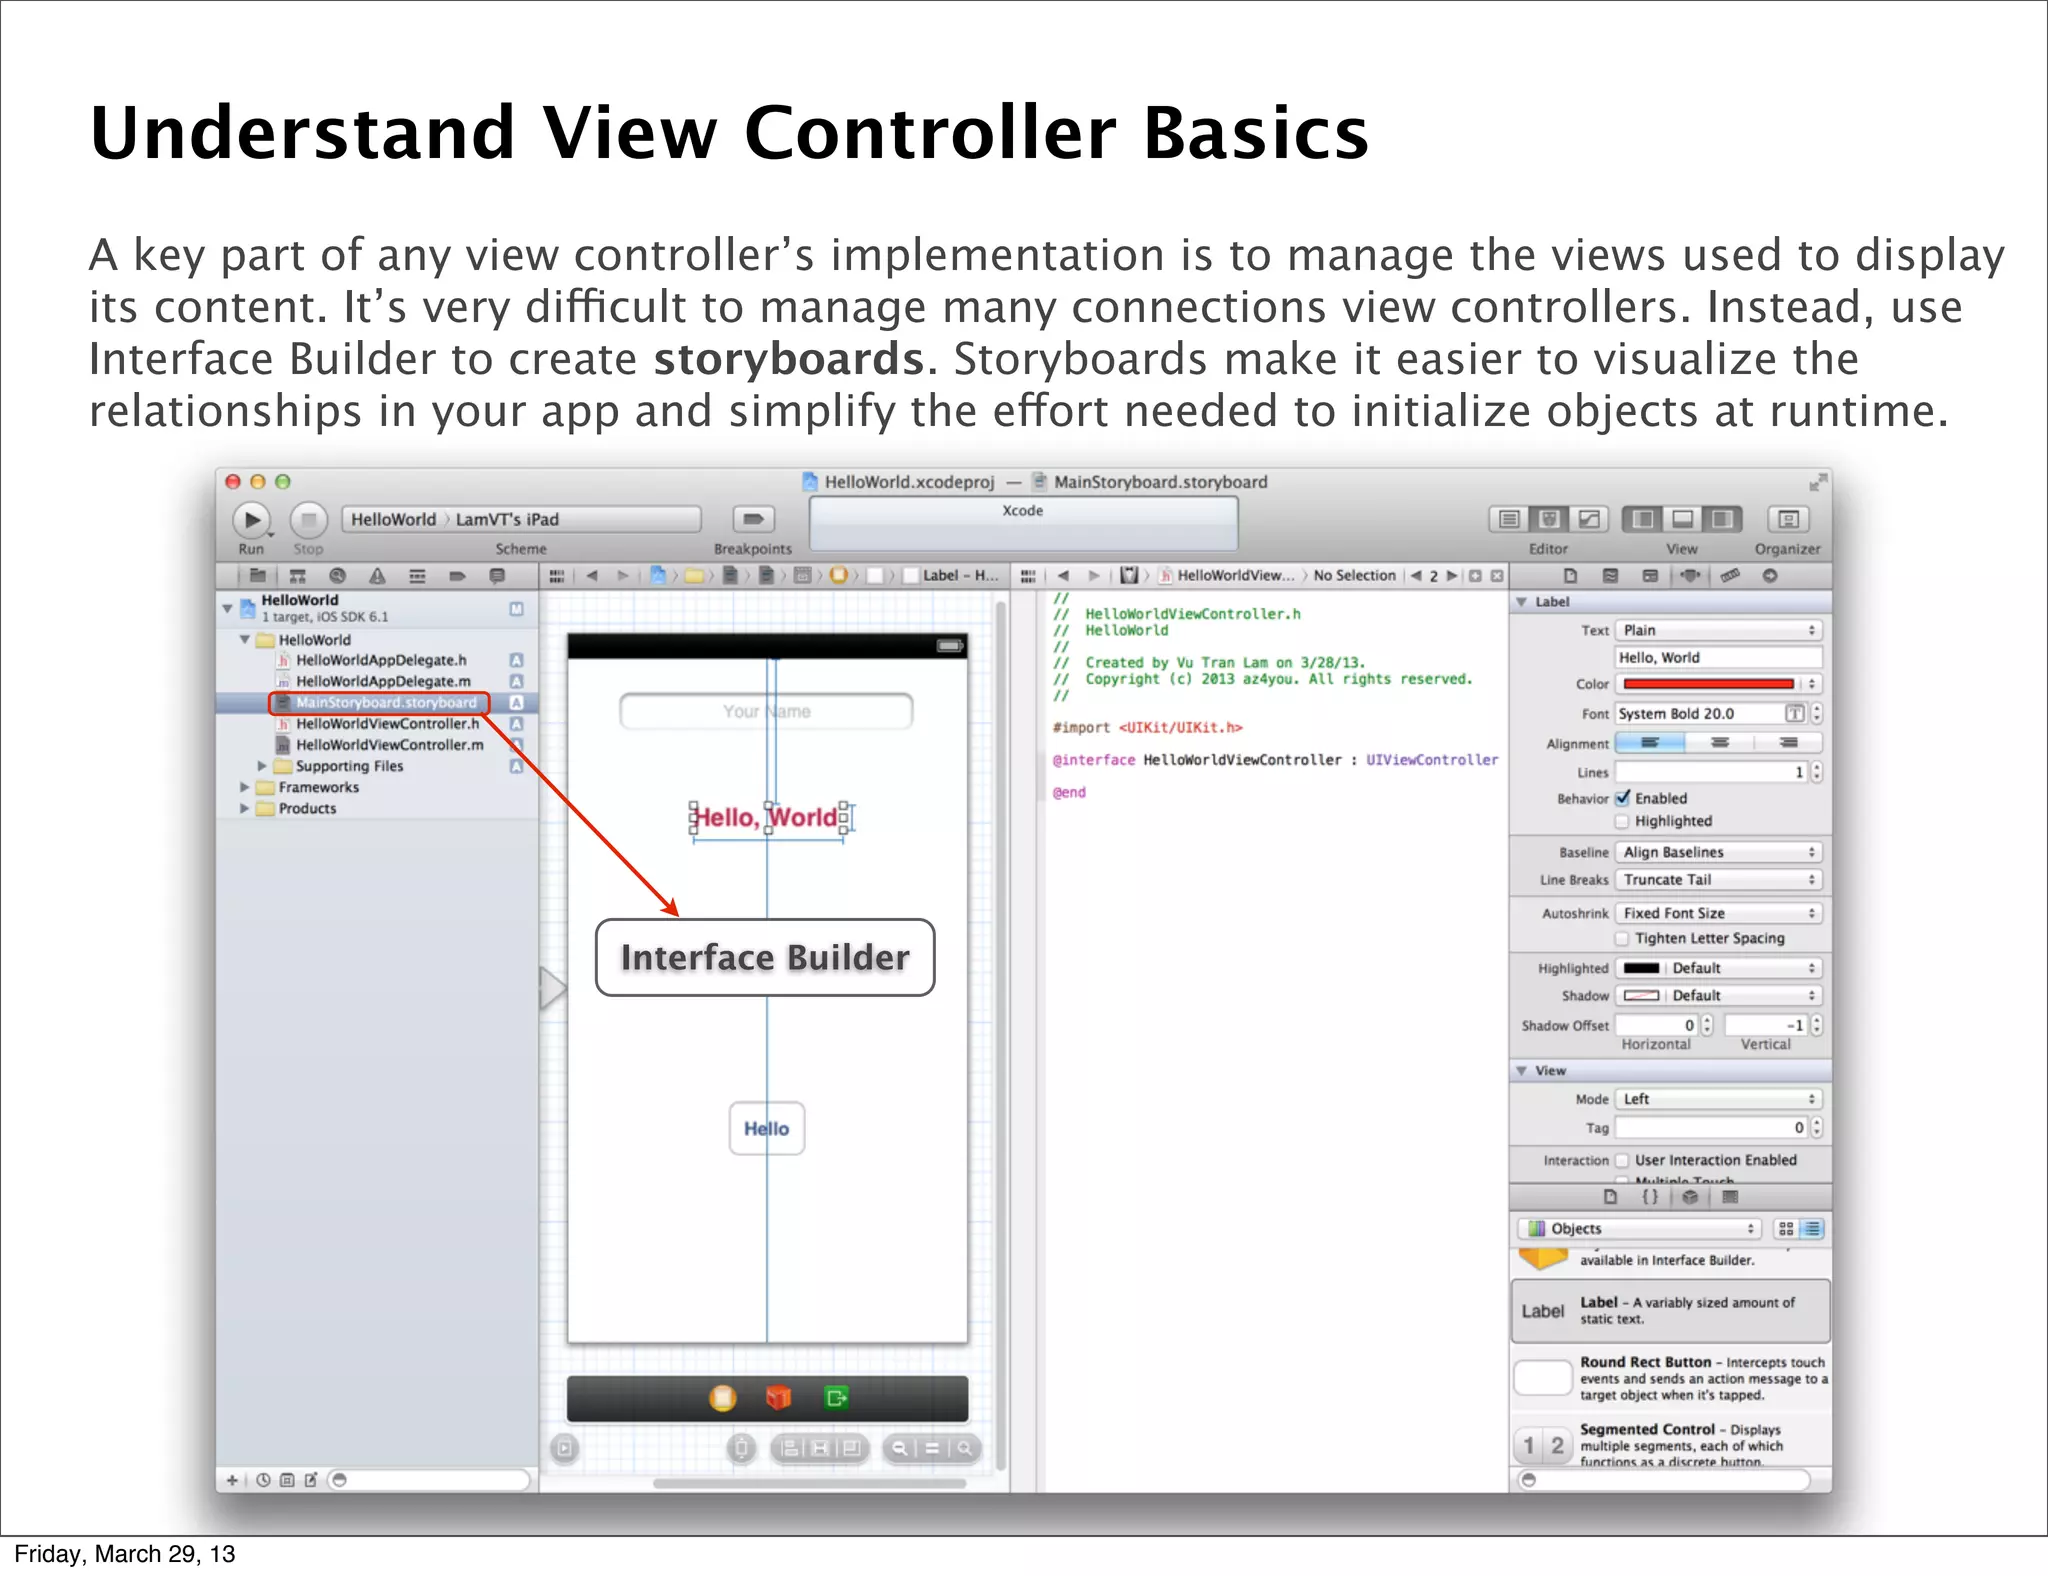
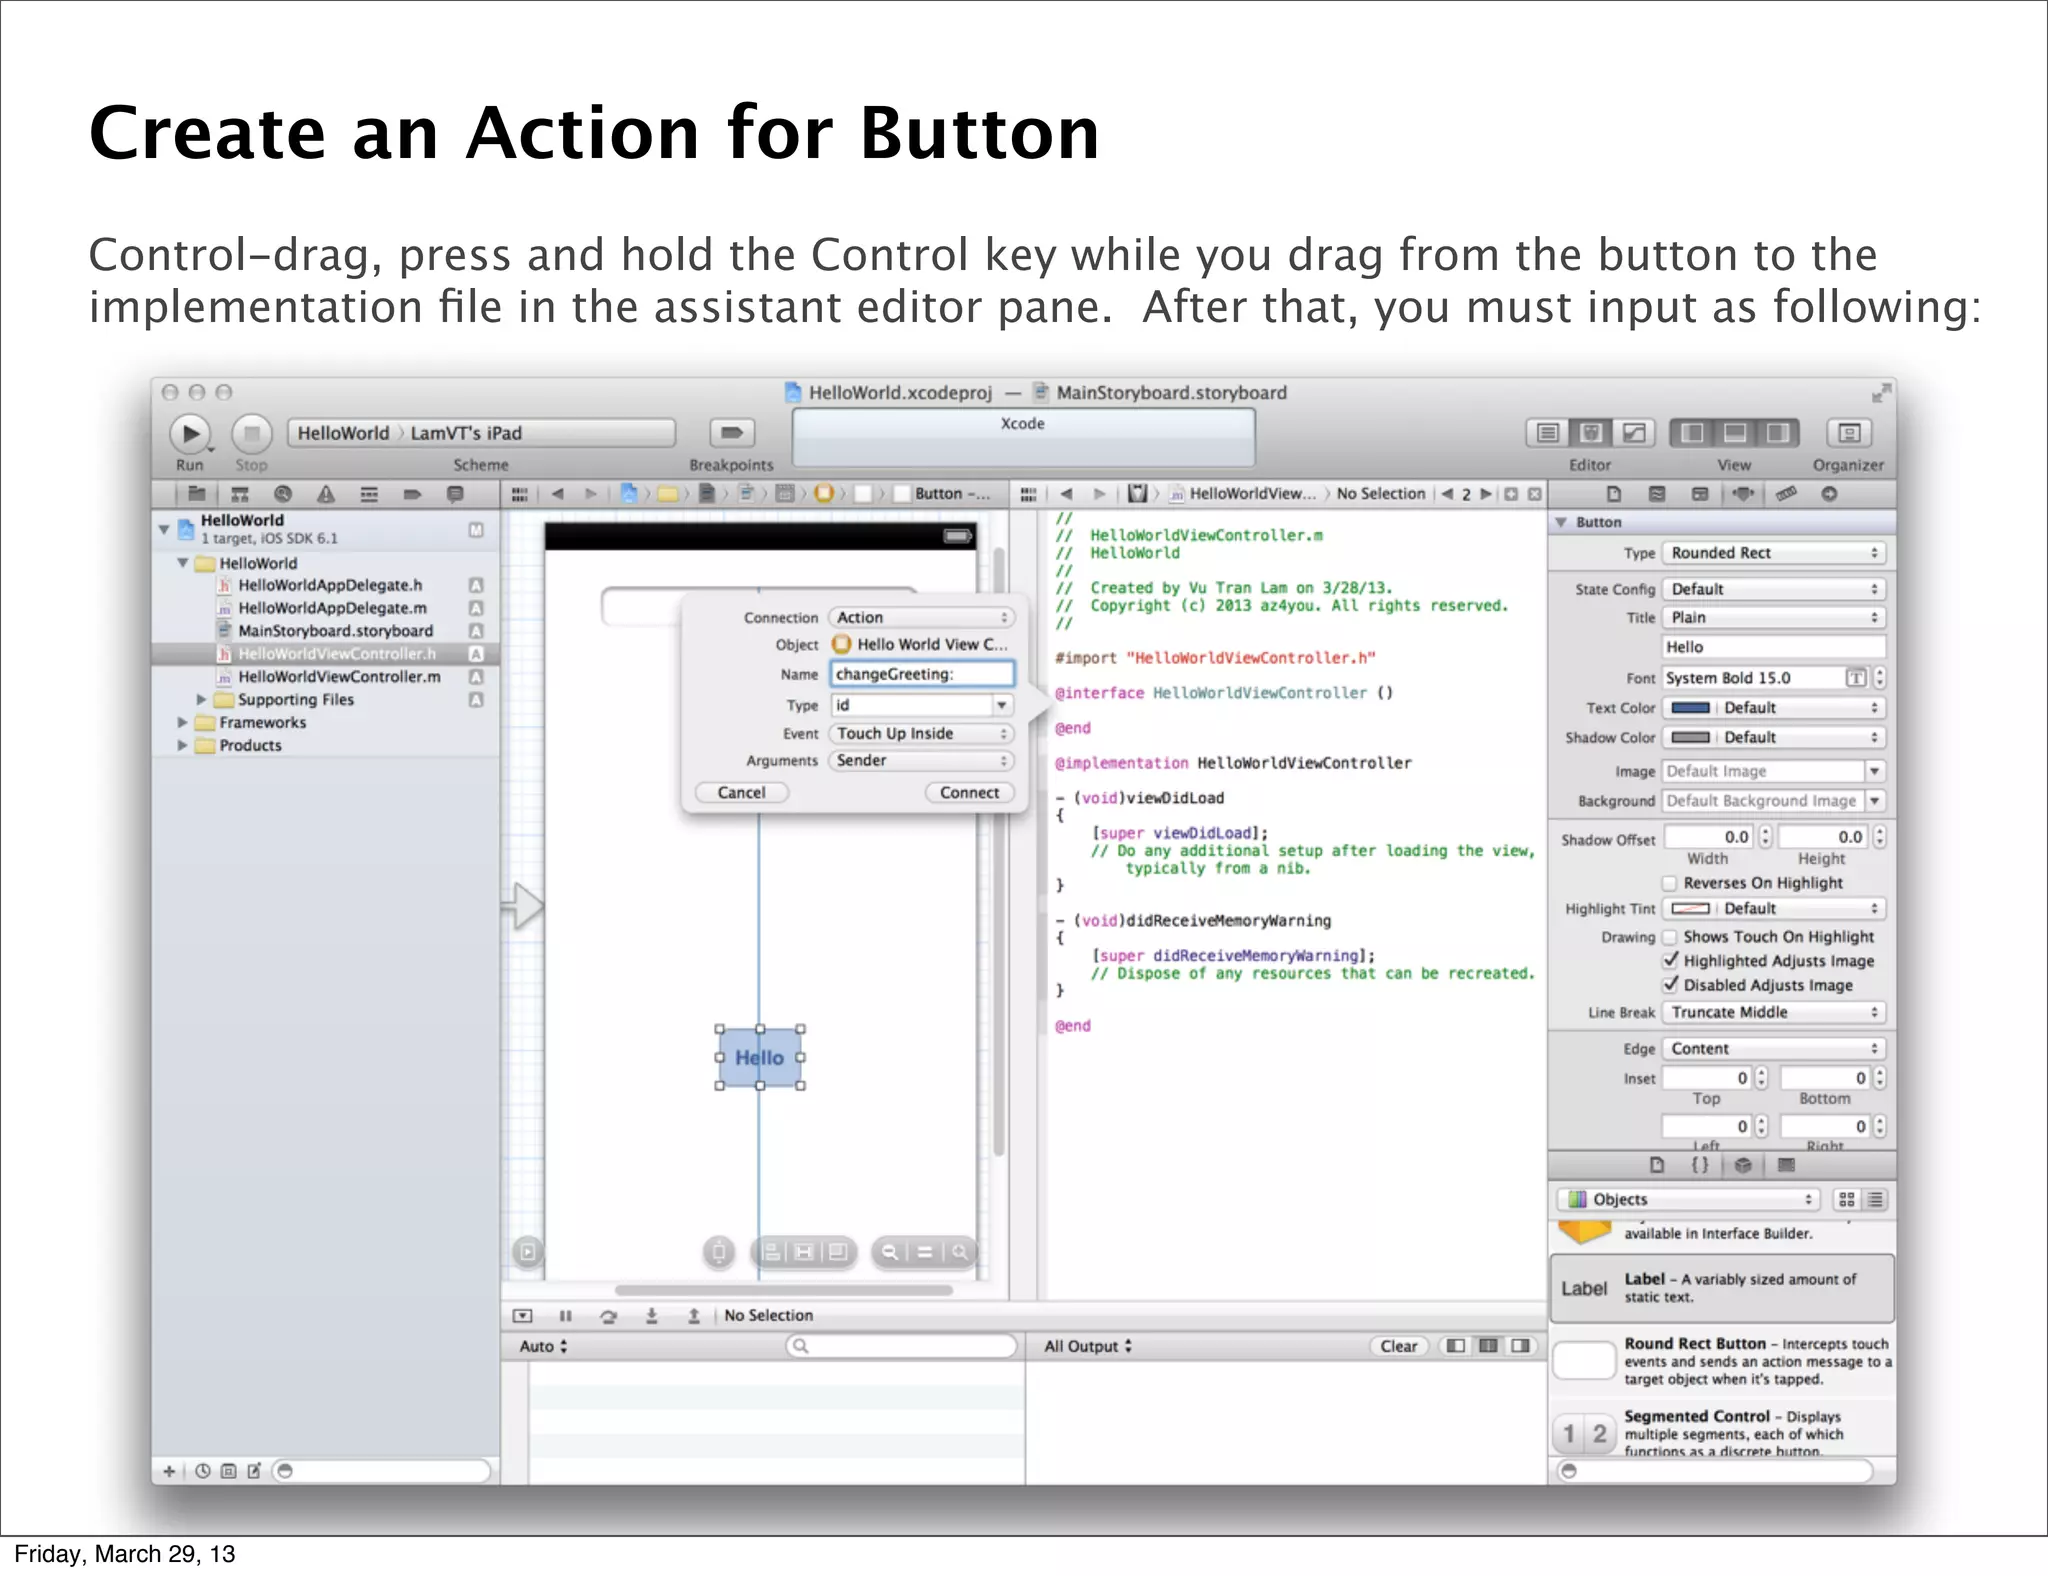
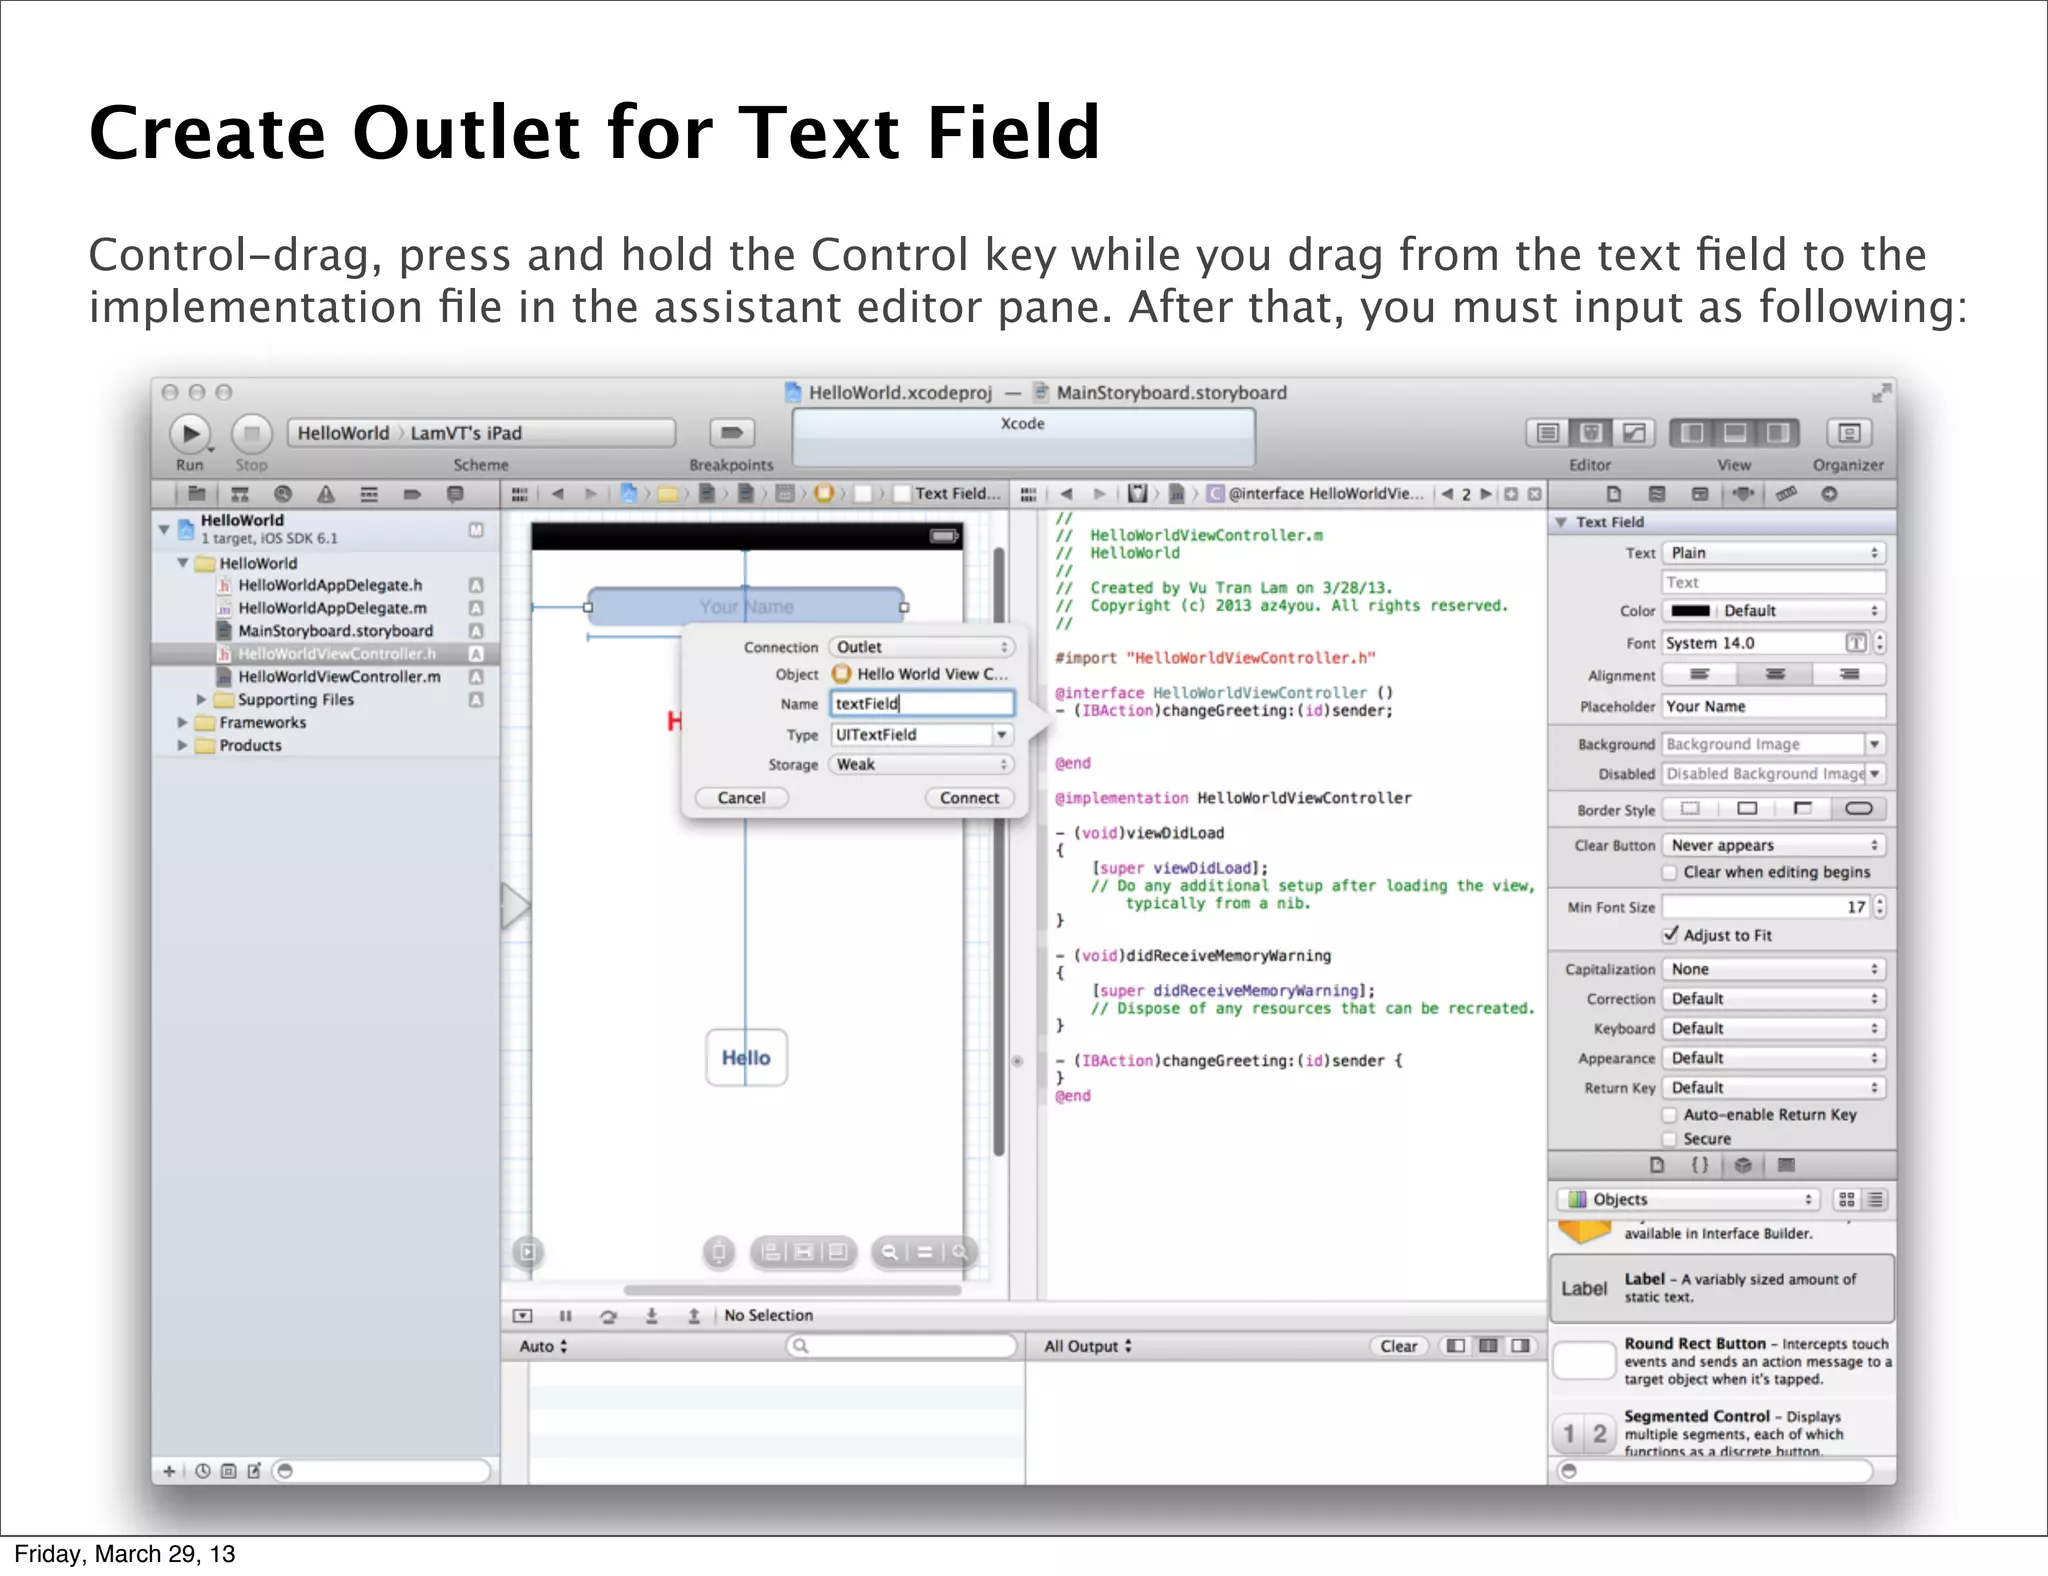
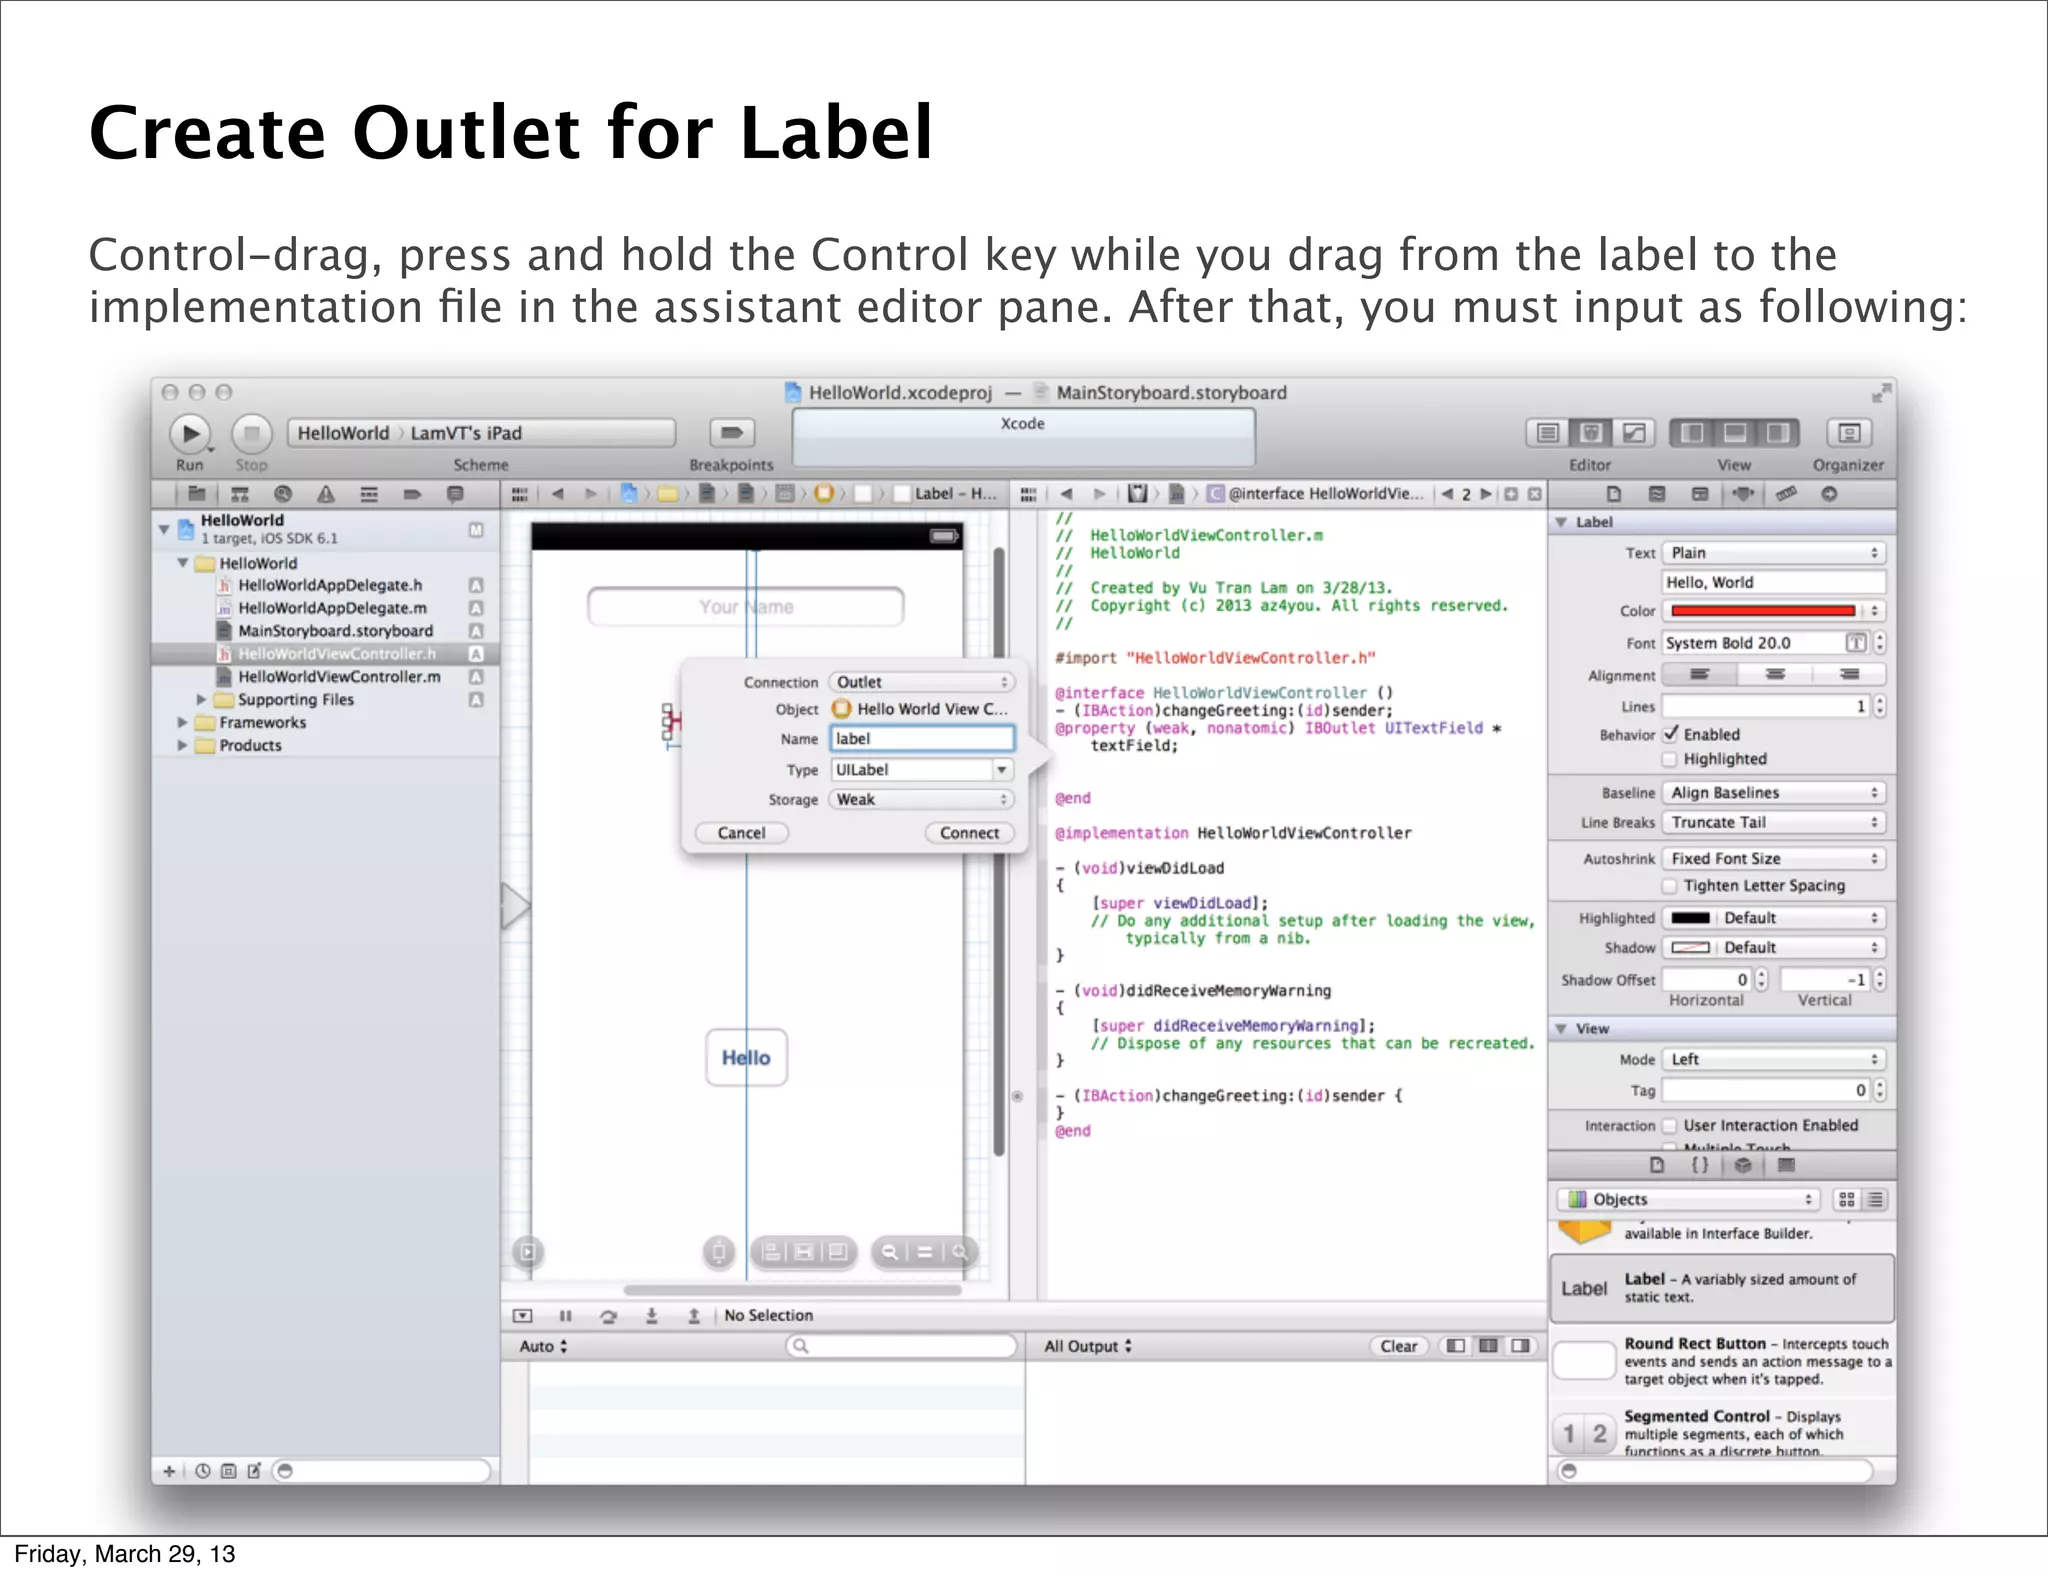
This document provides an overview of building a completed iPhone app. It discusses setting up with Xcode and the iOS SDK, using Objective-C as the programming language. It covers major frameworks, design patterns like MVC, and aspects of human interface design like wireframing. The document outlines steps for app design, distribution through the App Store, and demonstrates a "Hello World" example app. It shows how to configure views and view controllers through Xcode's interface builder.