Download to read offline
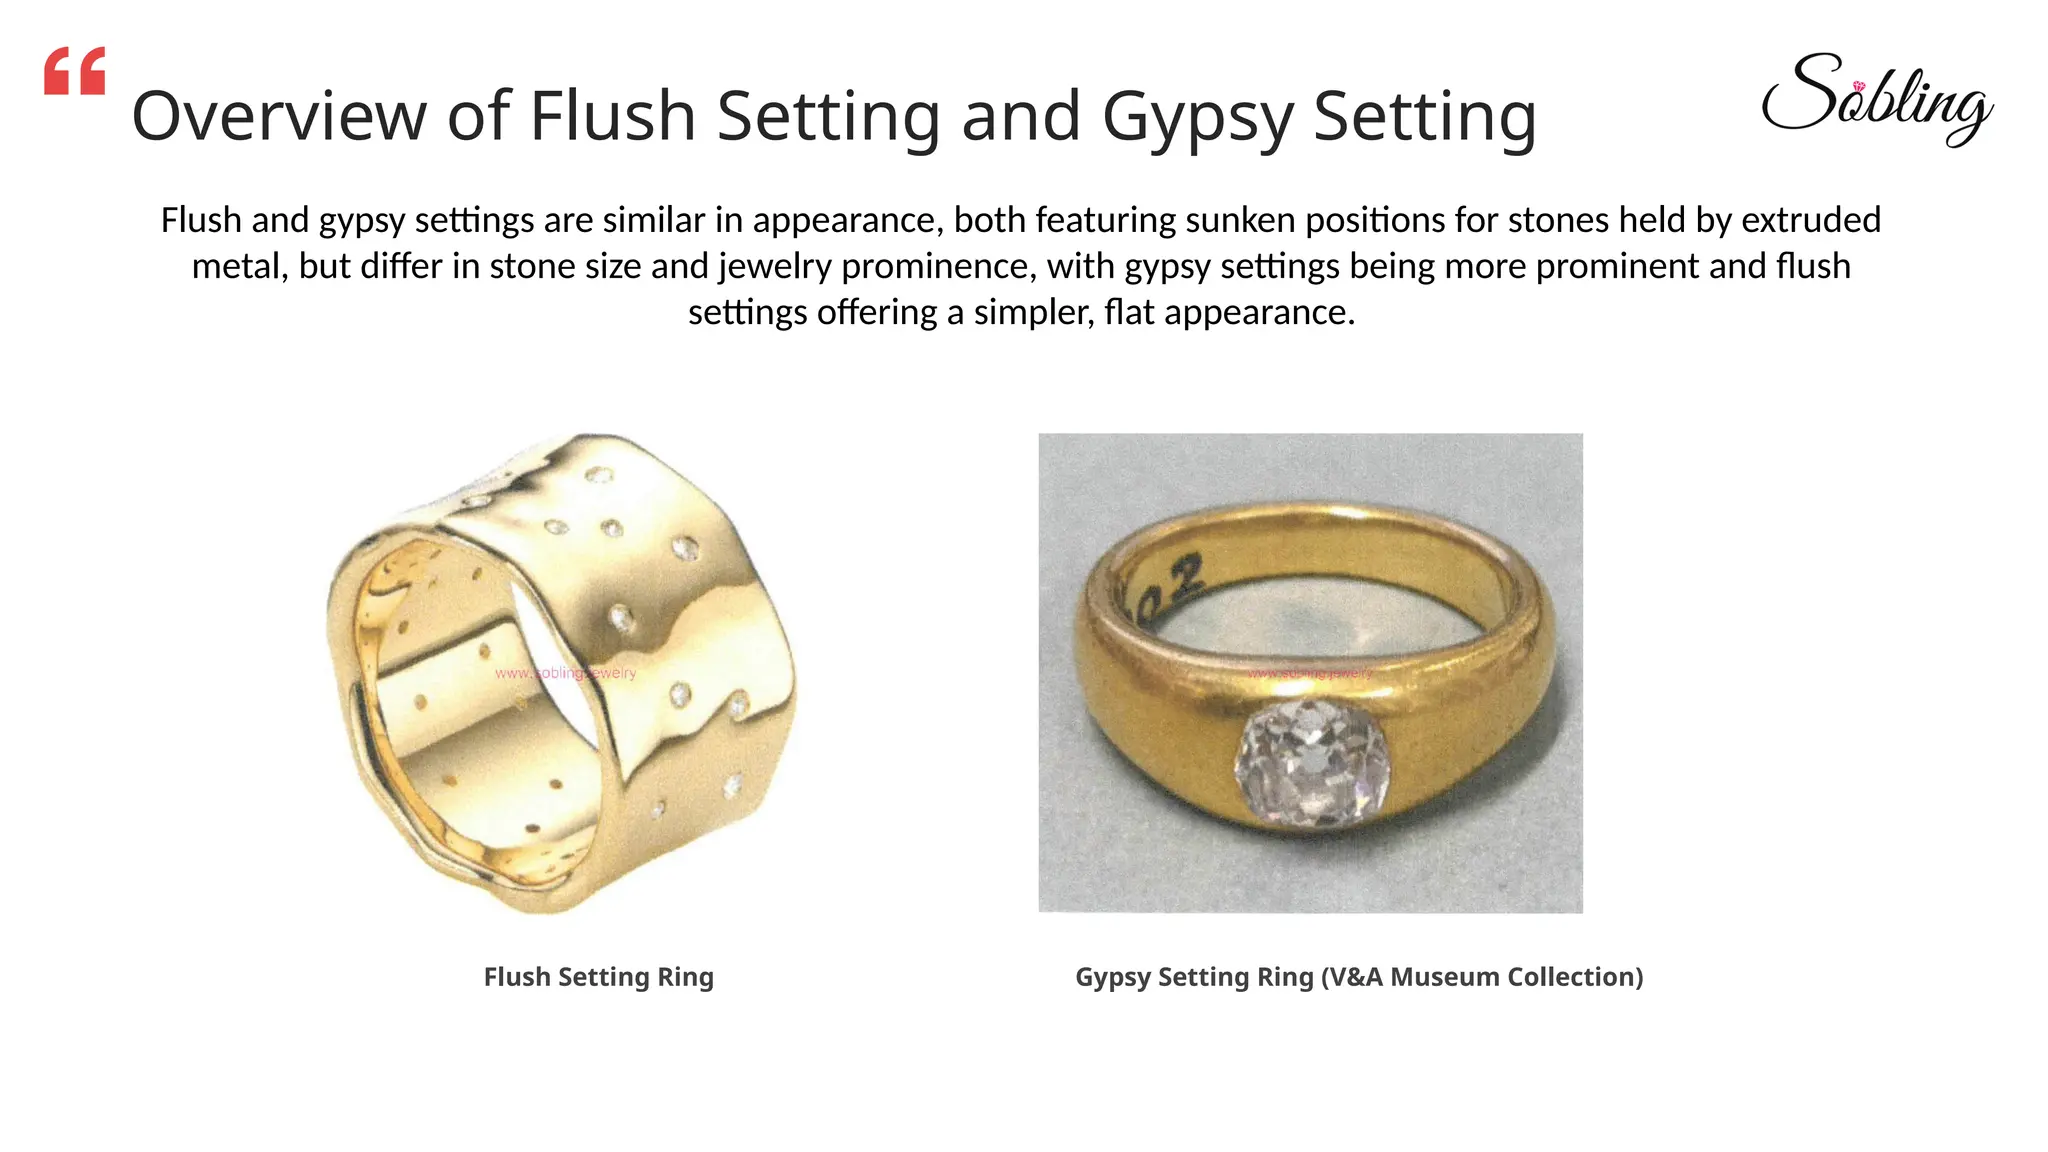
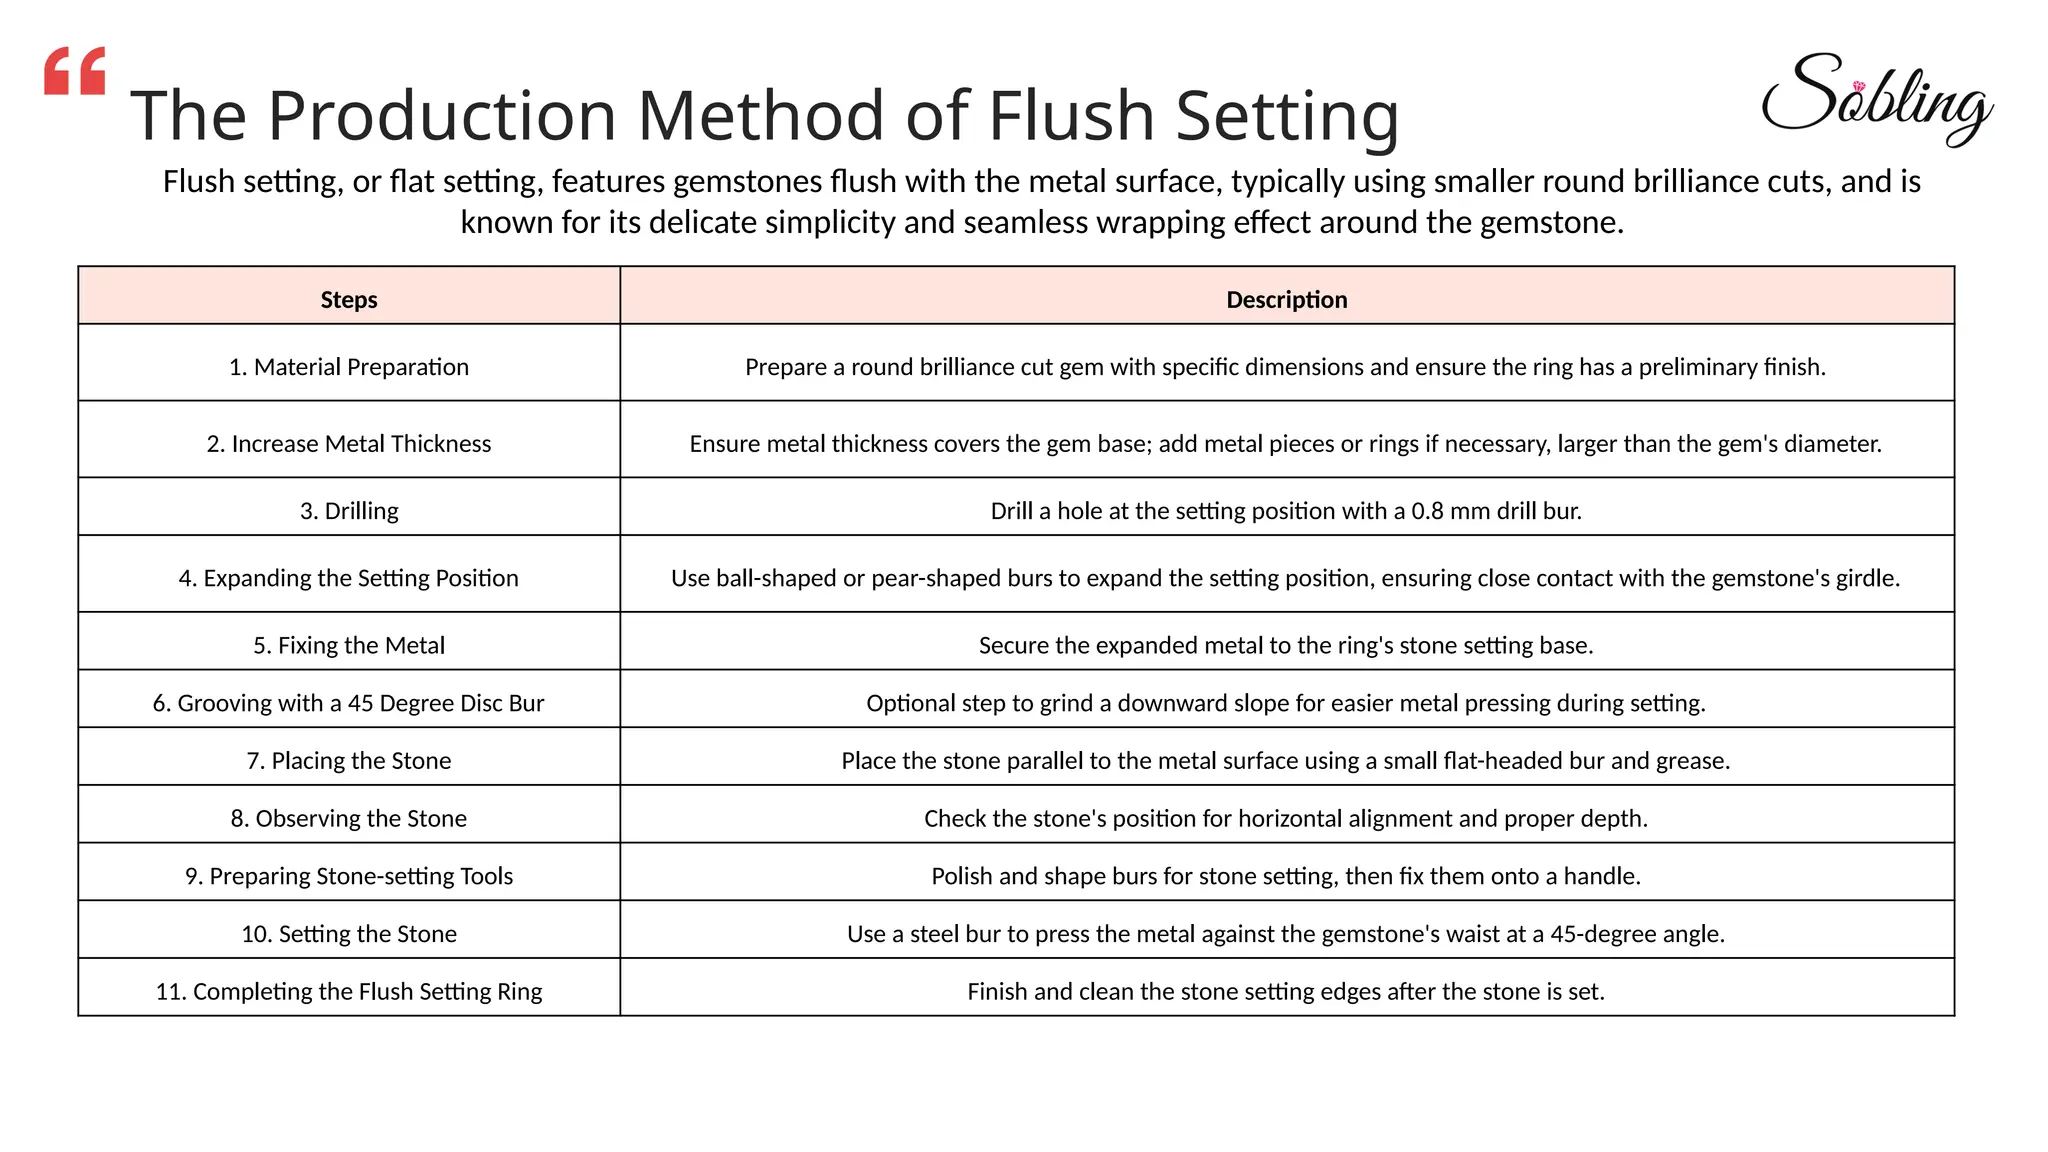
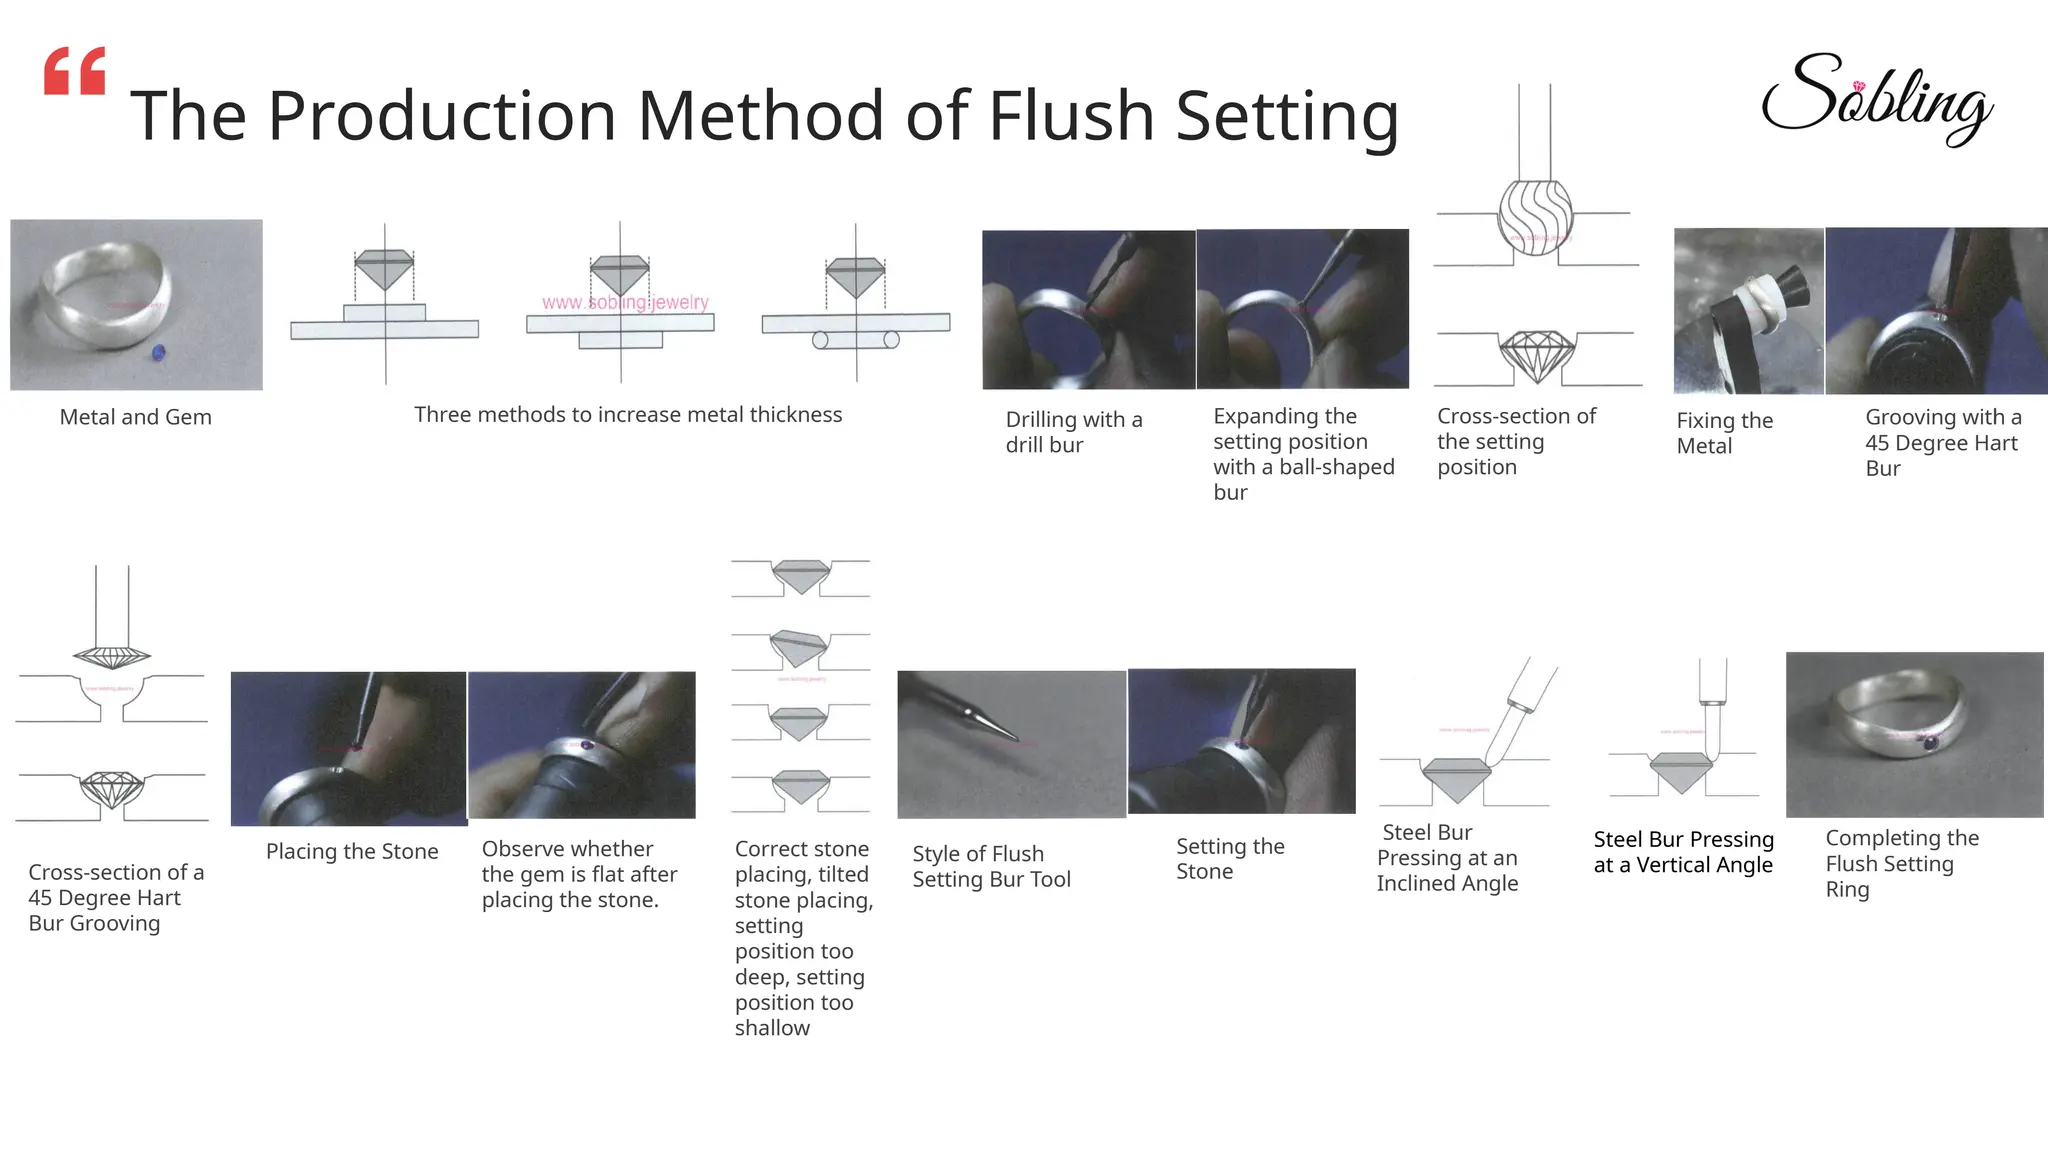
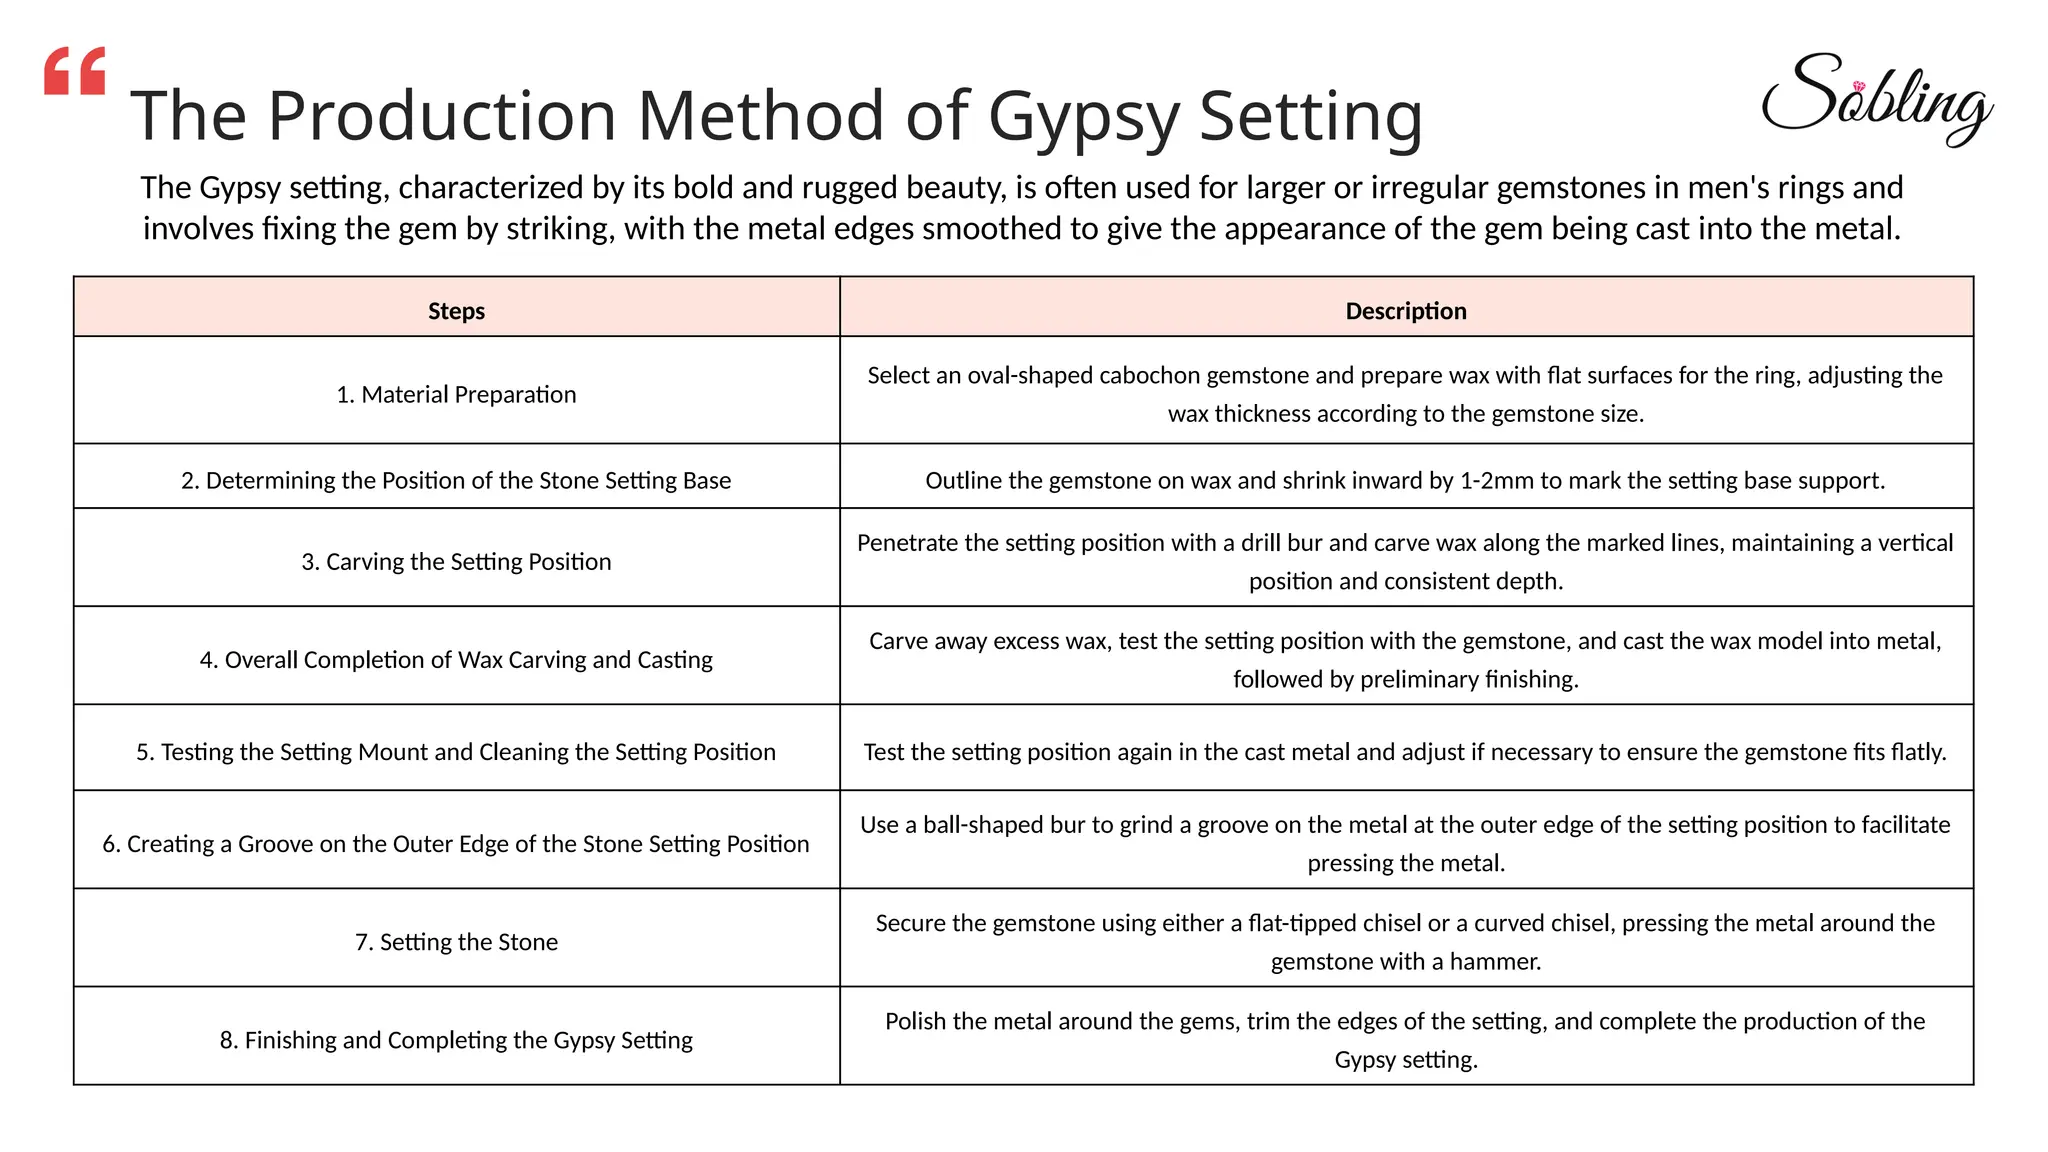
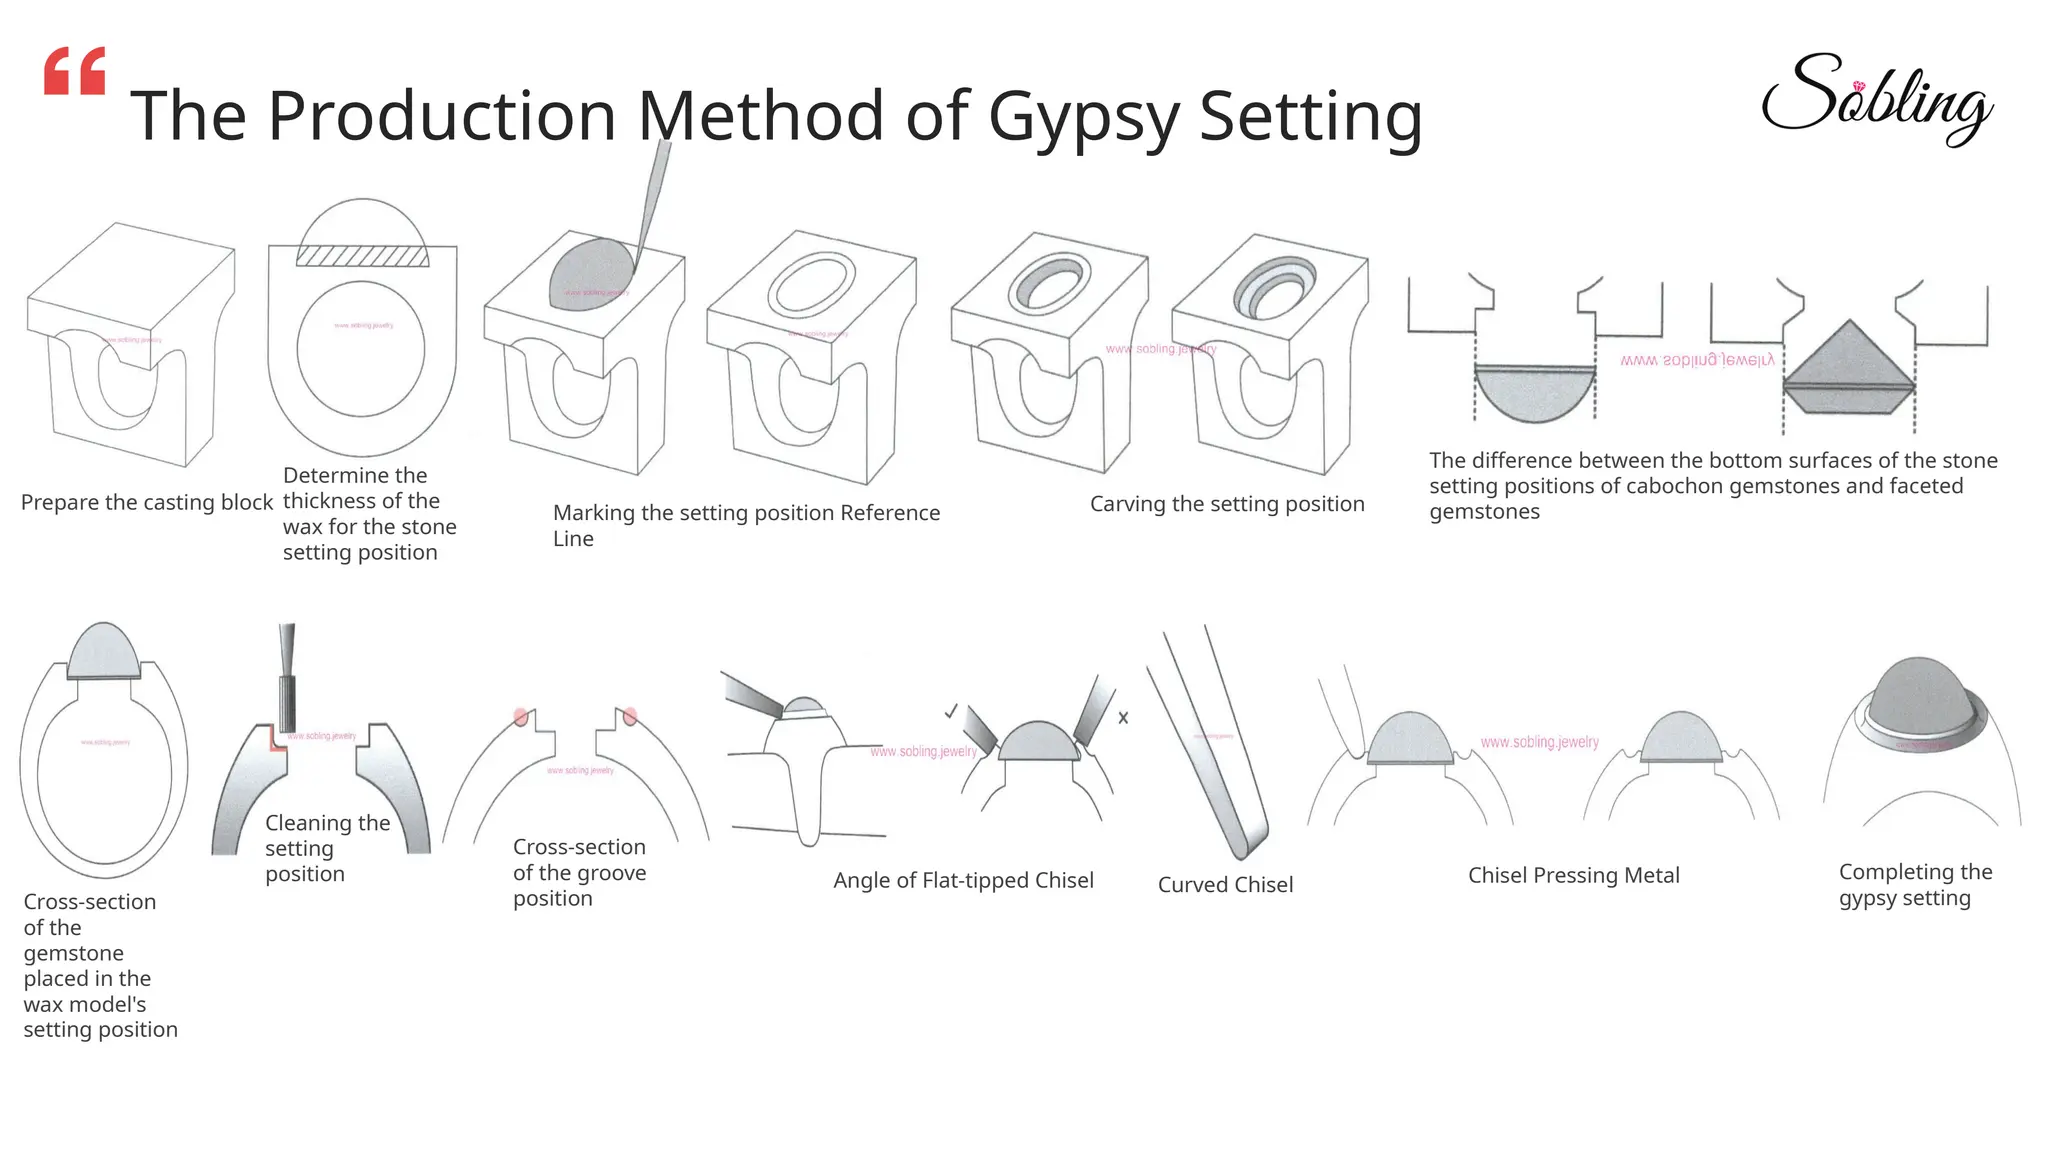
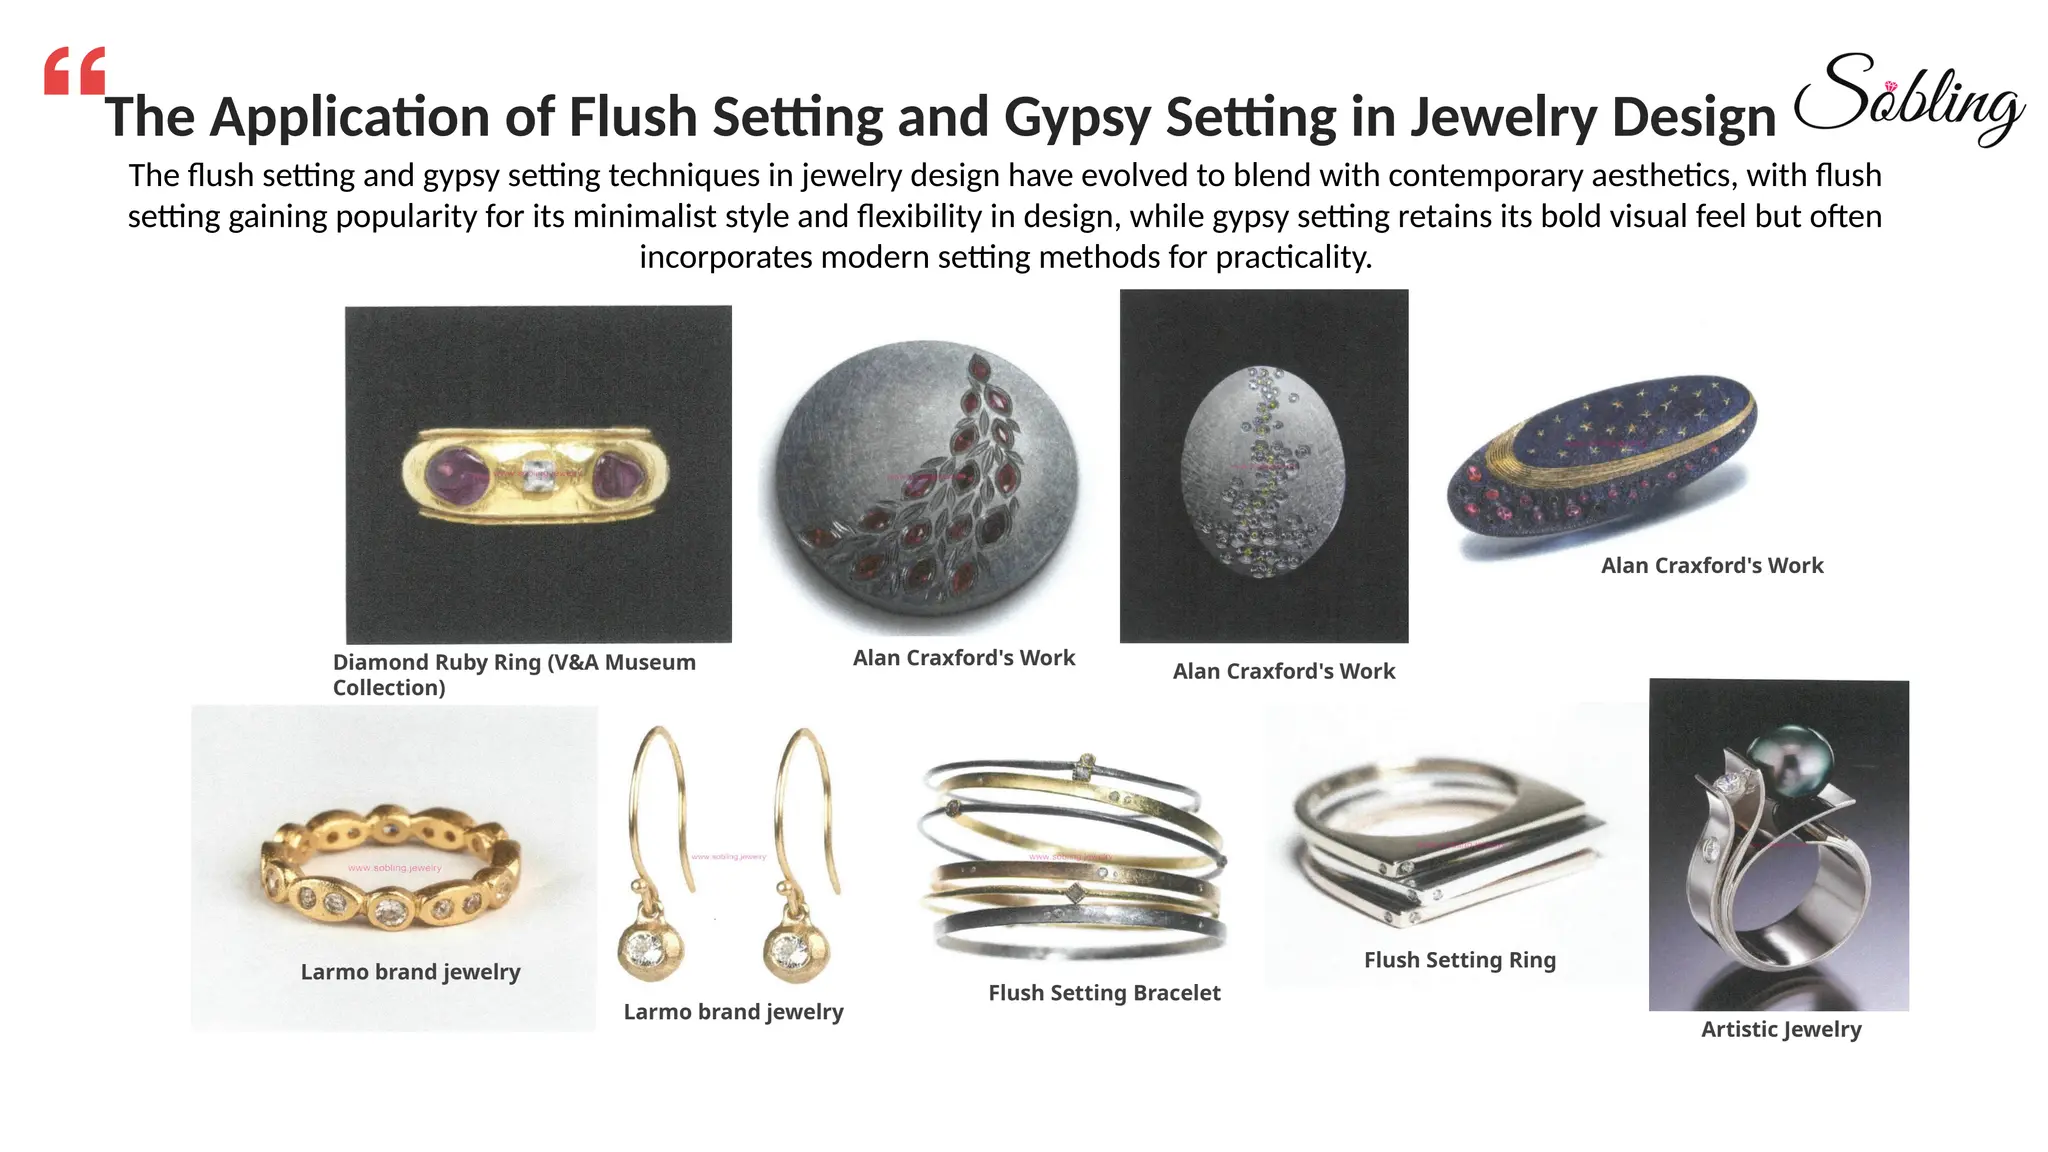
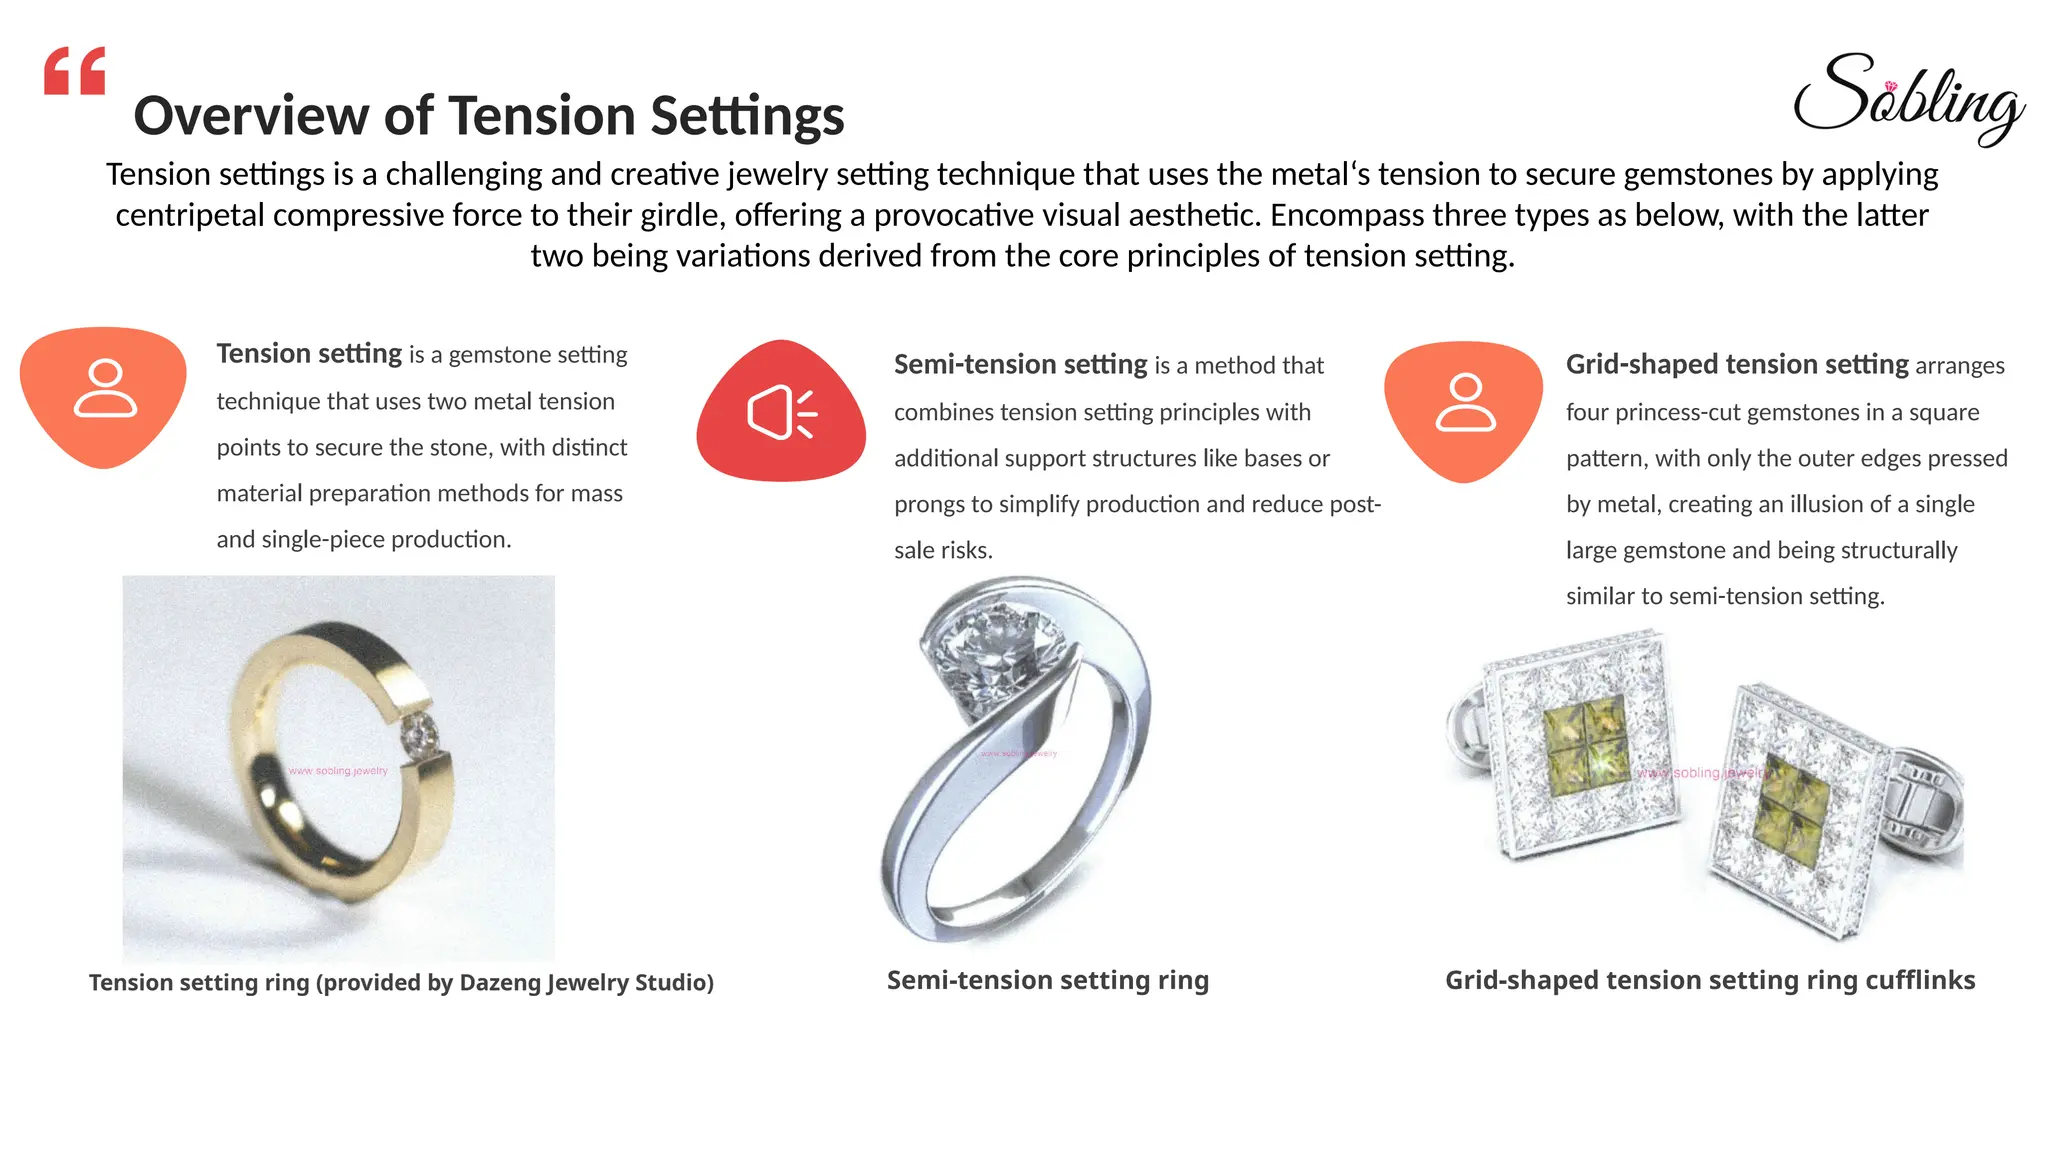
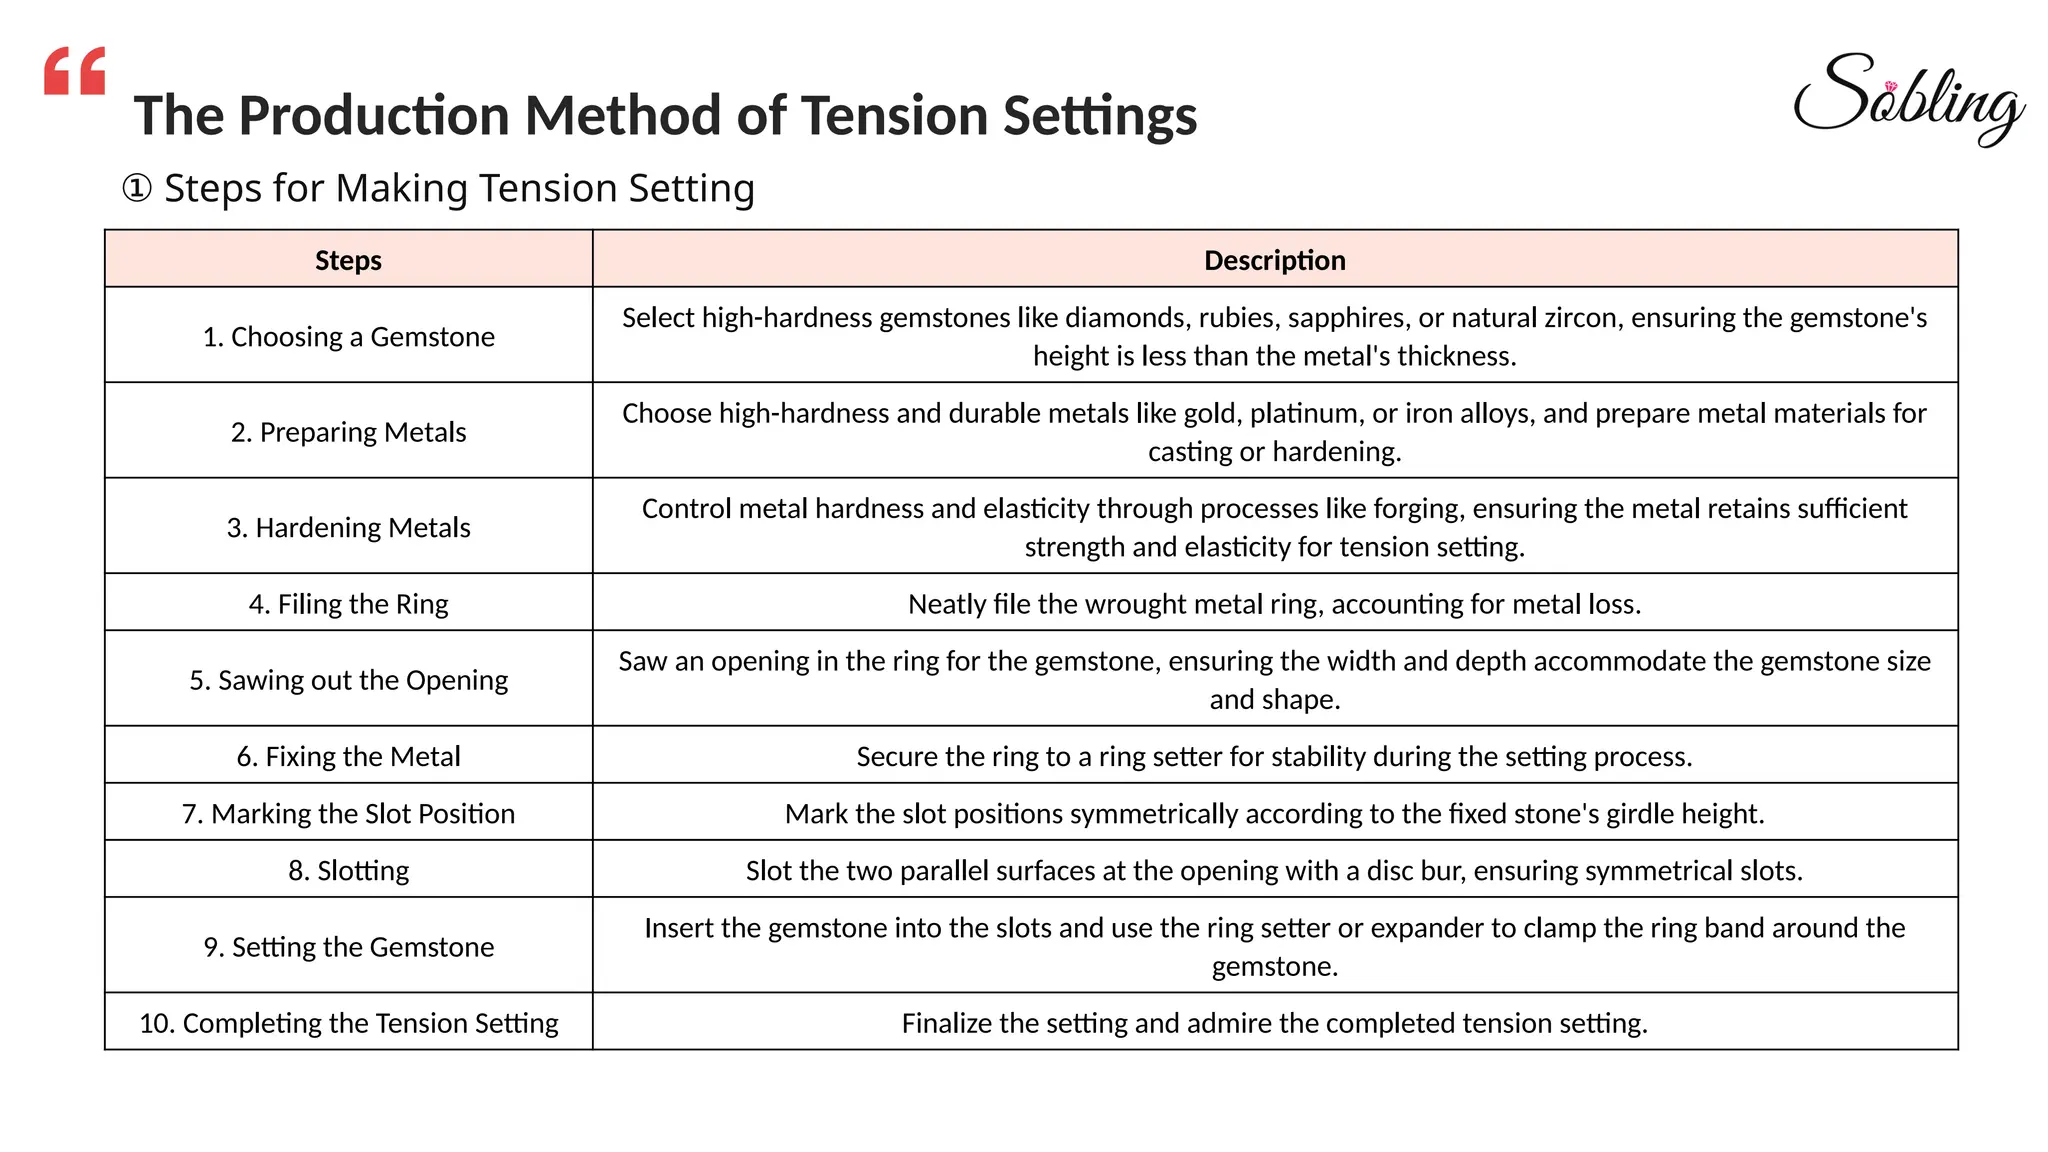
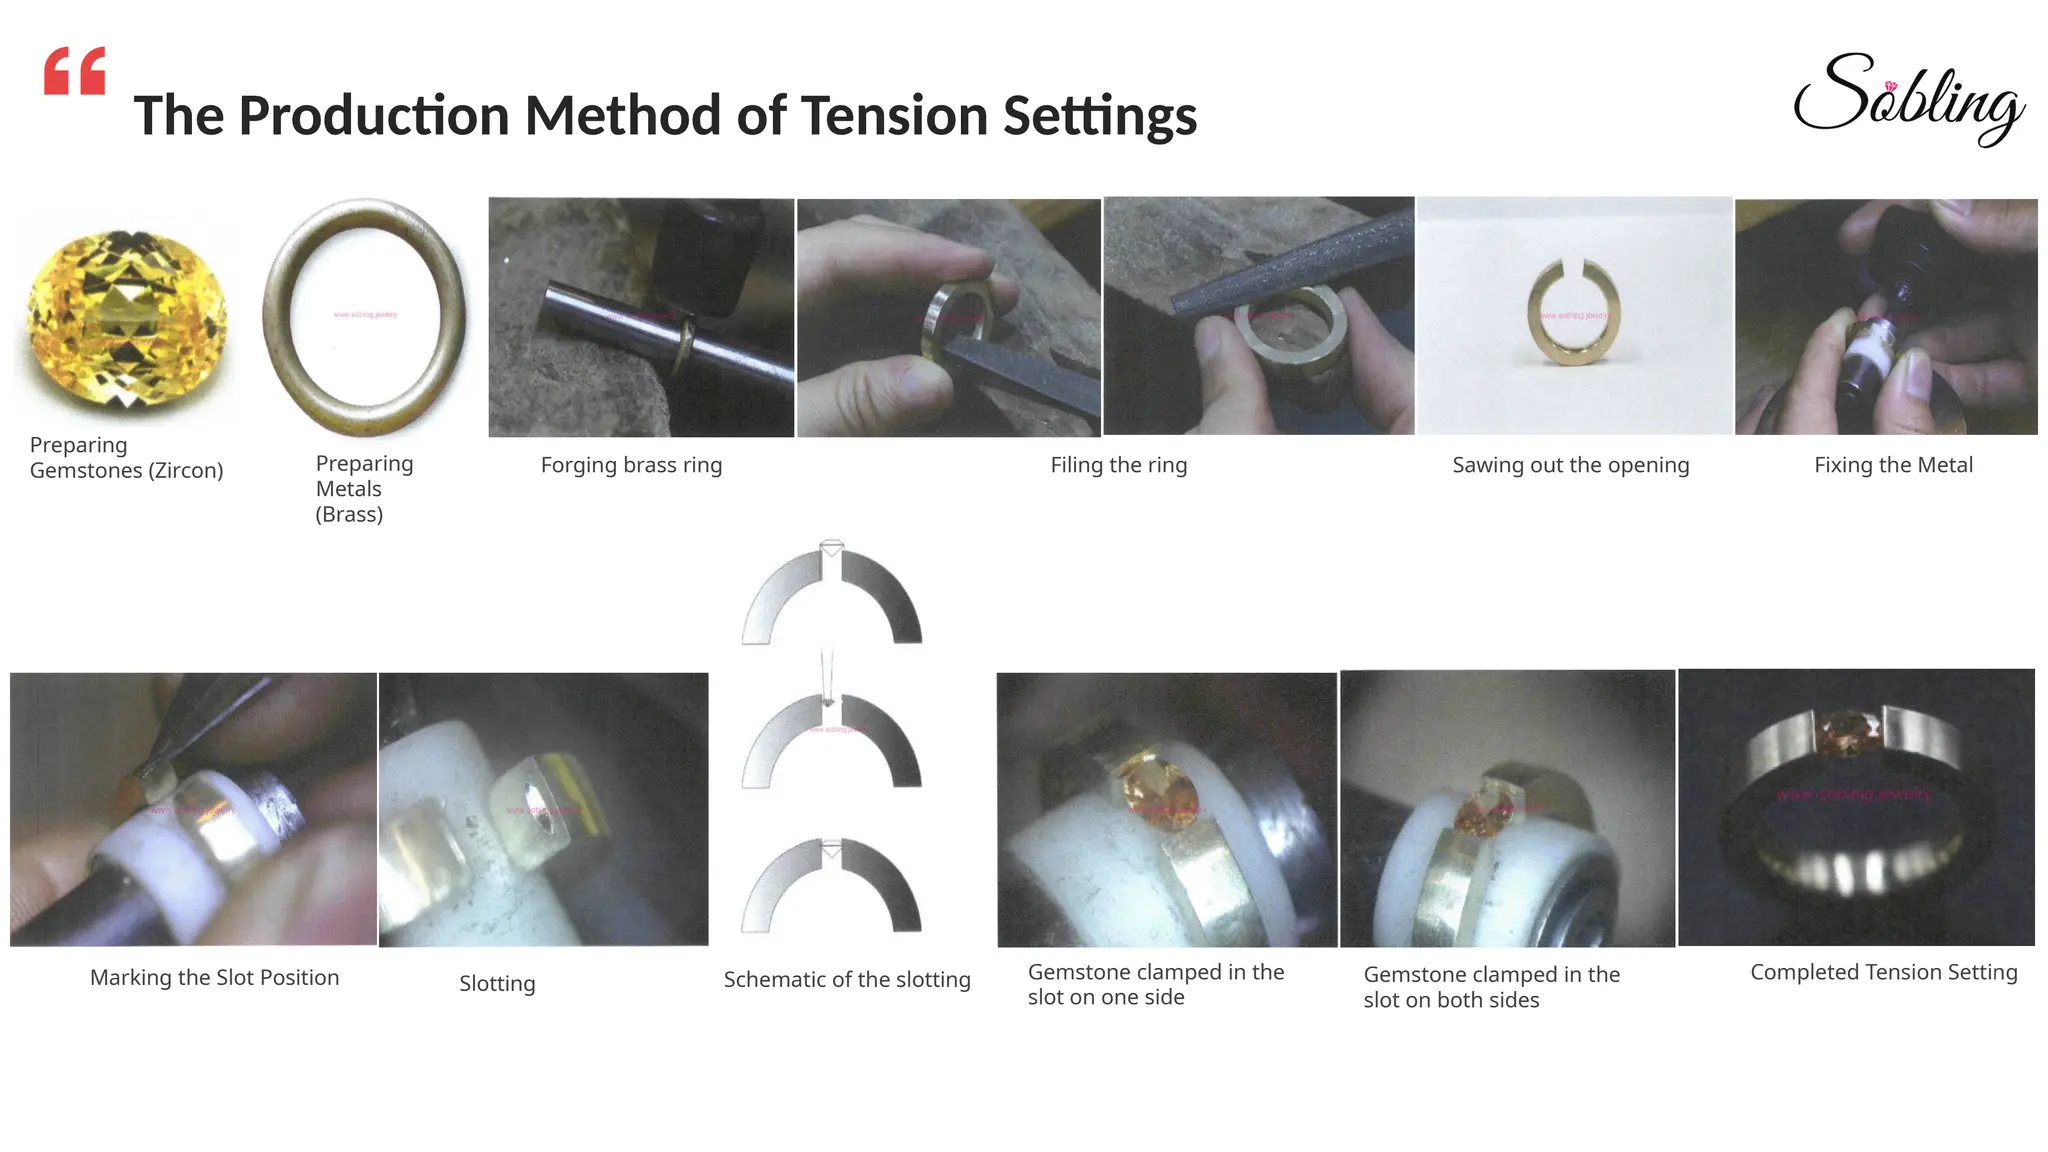
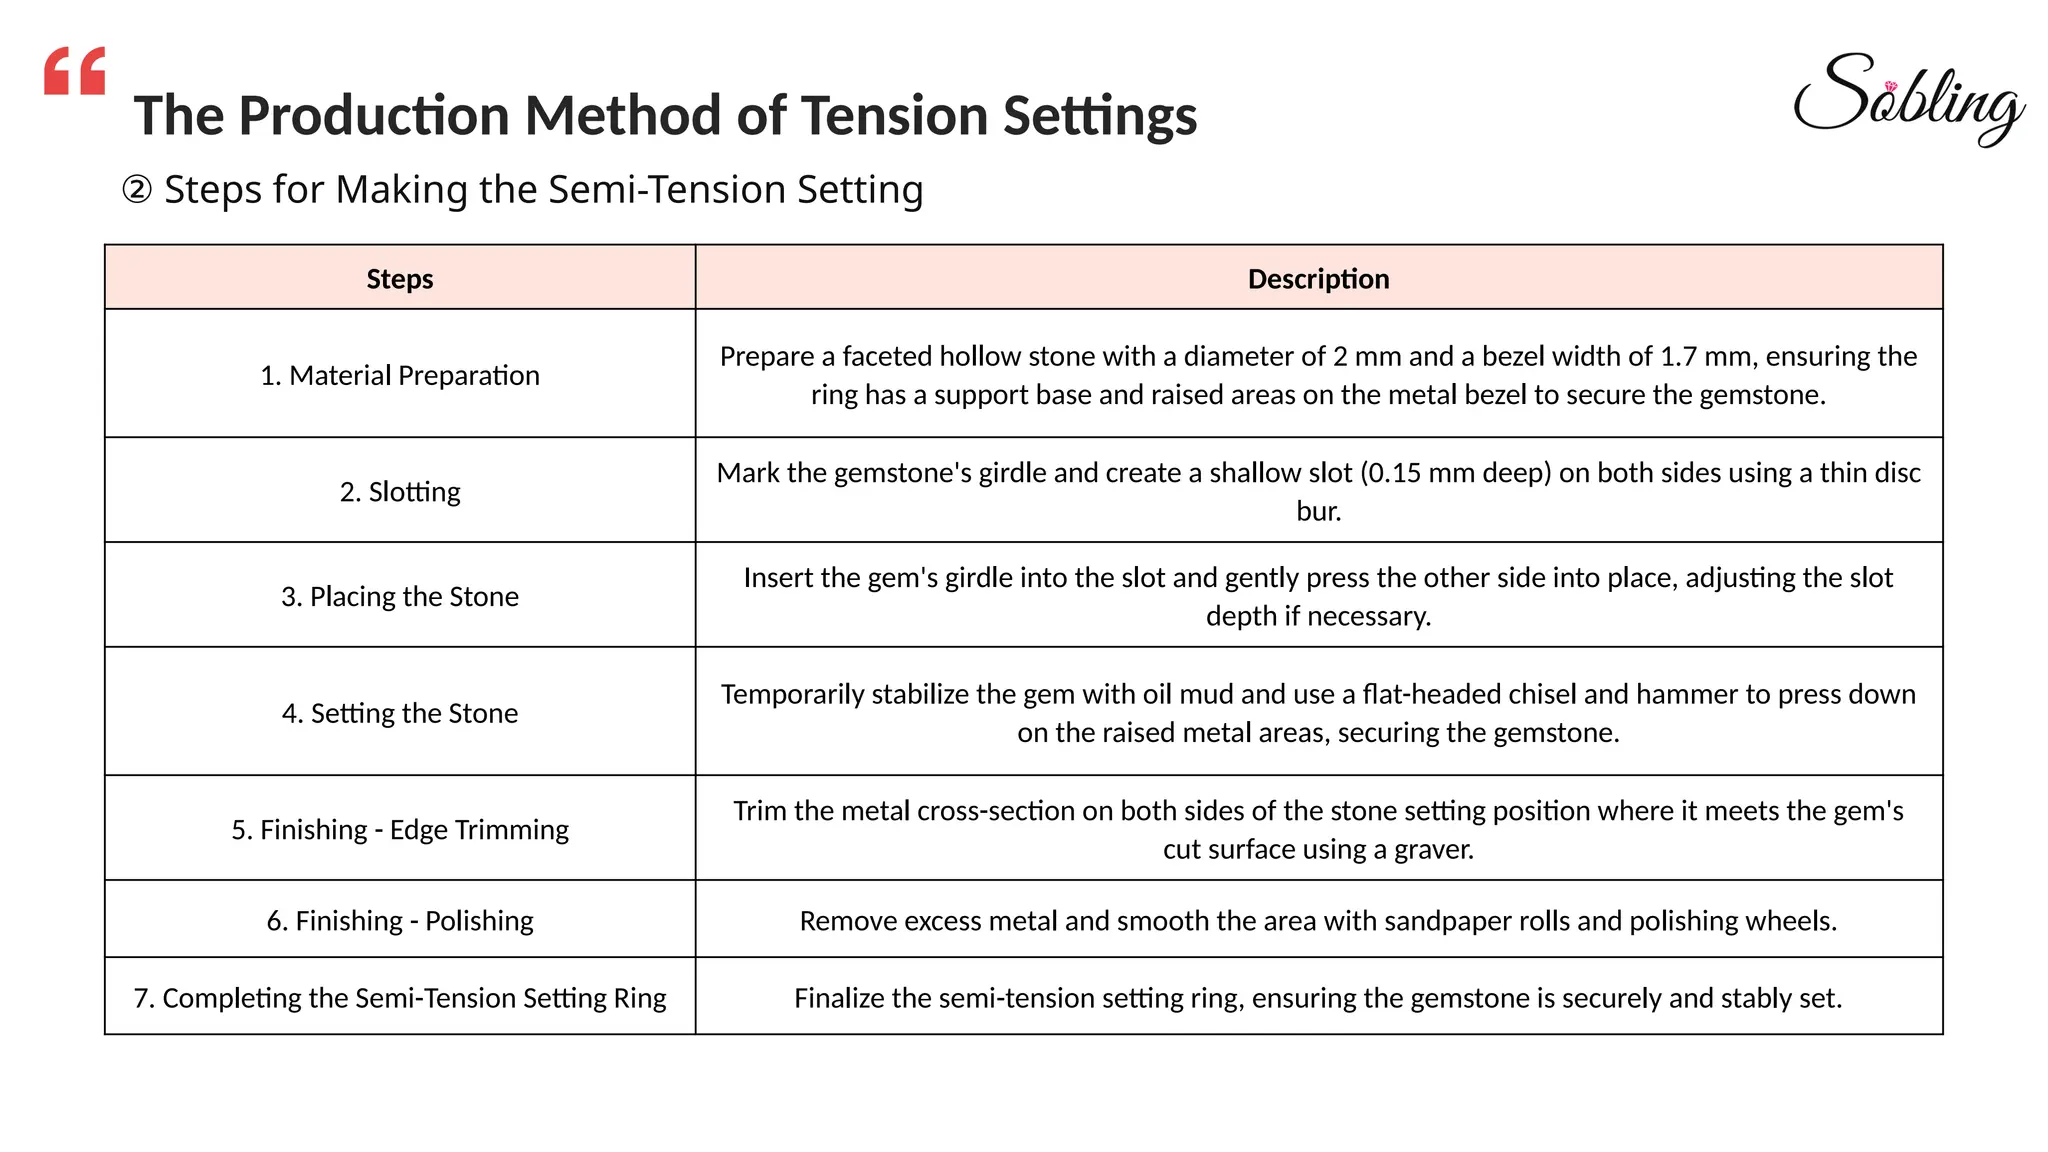
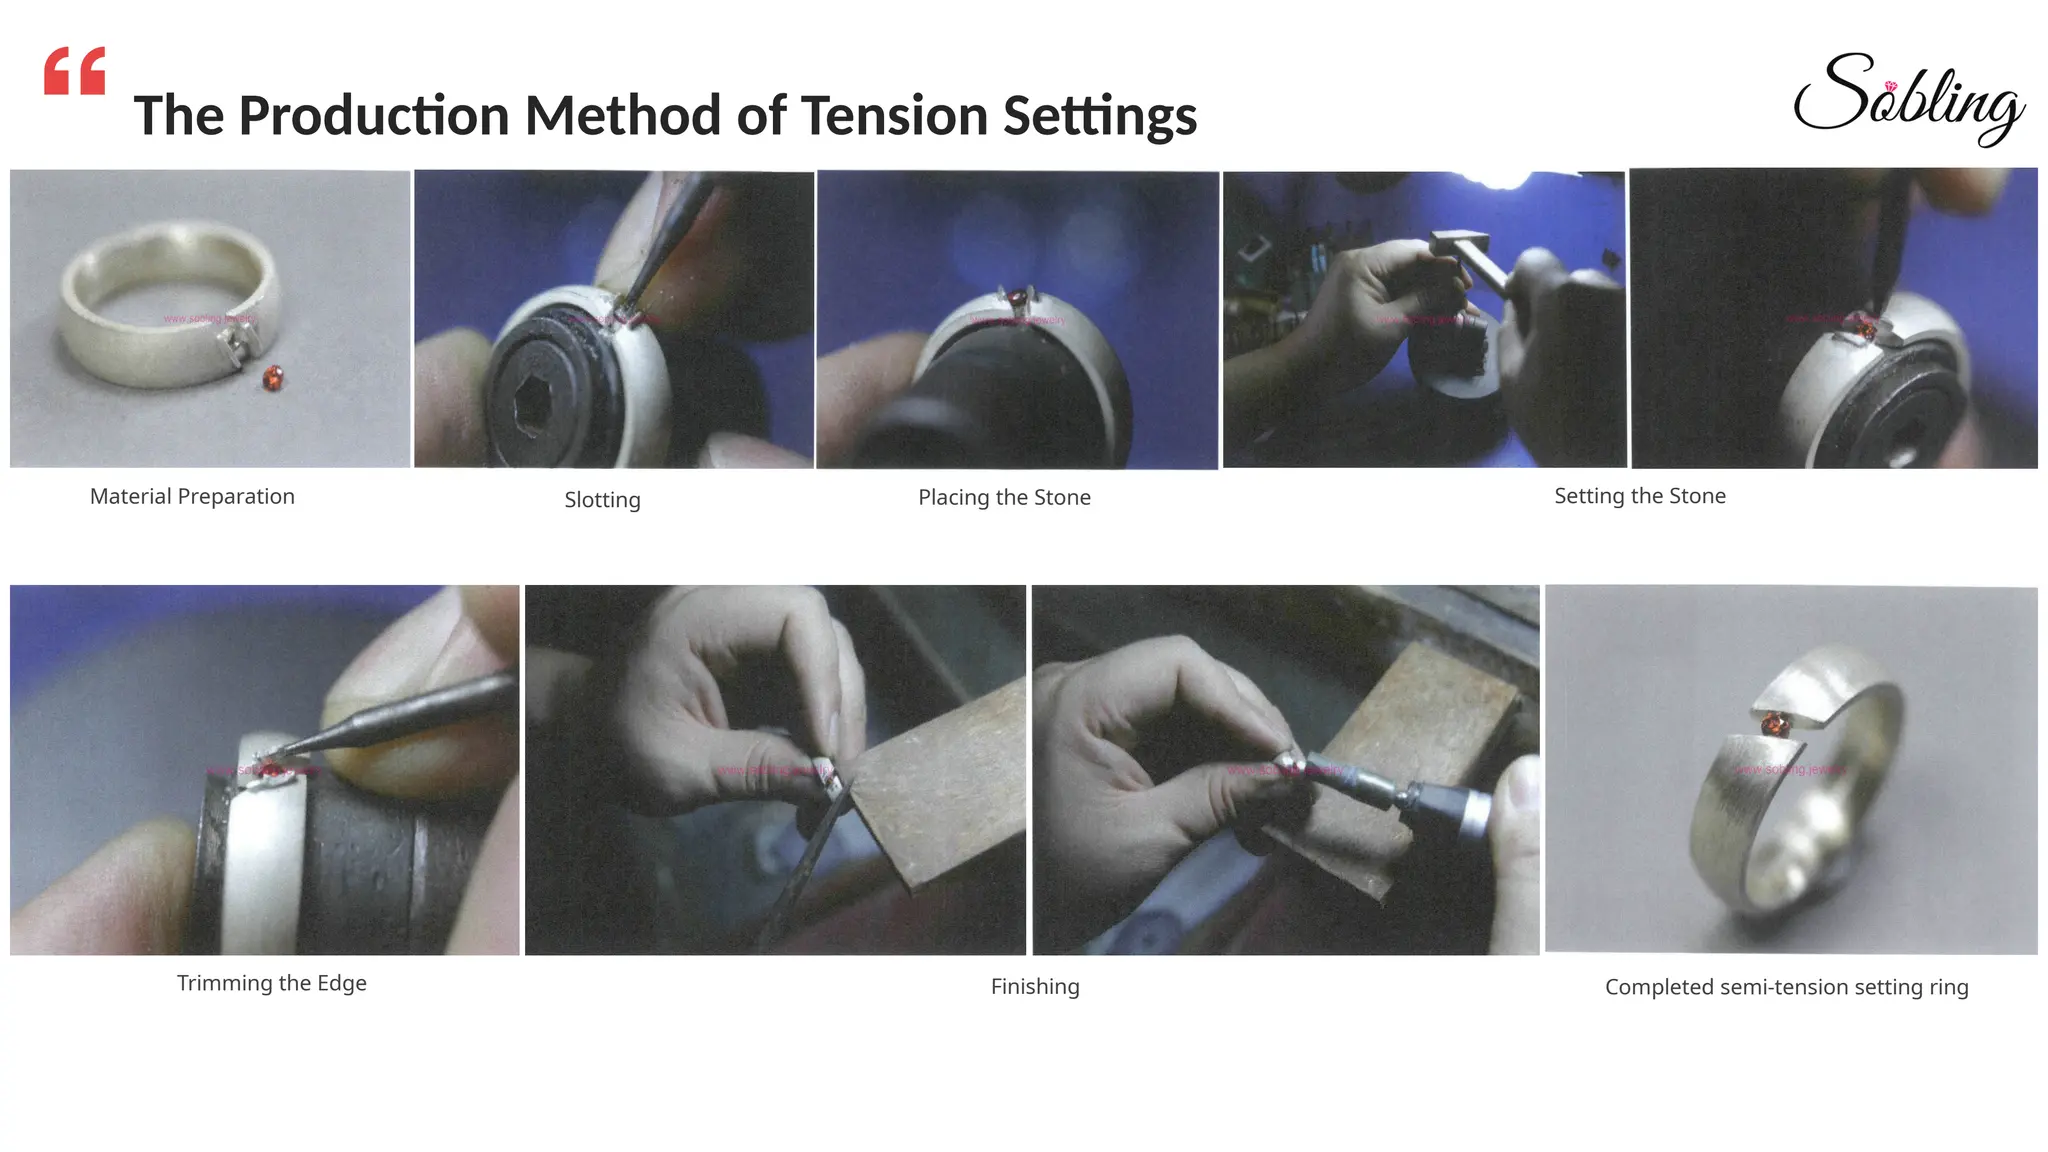
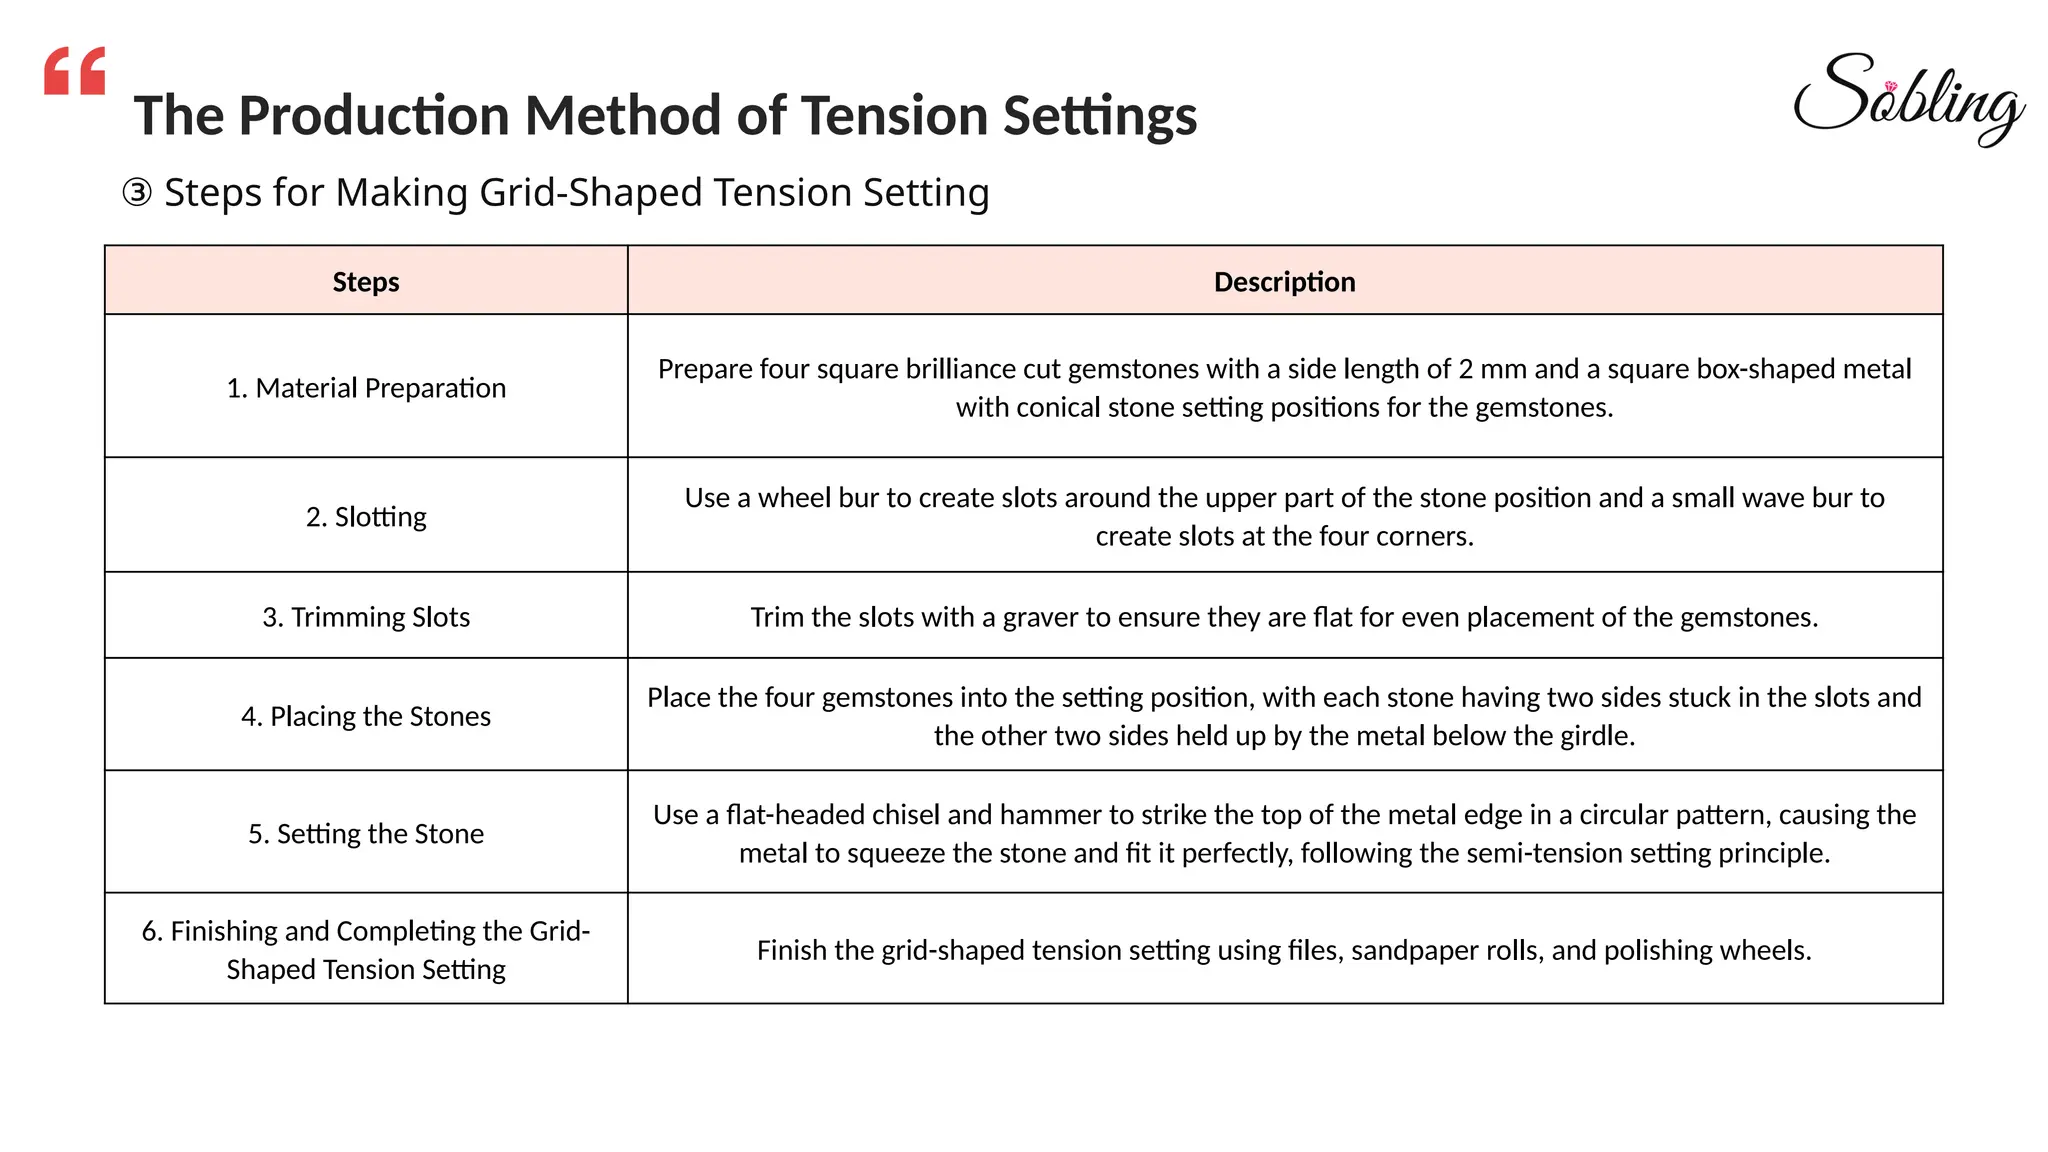
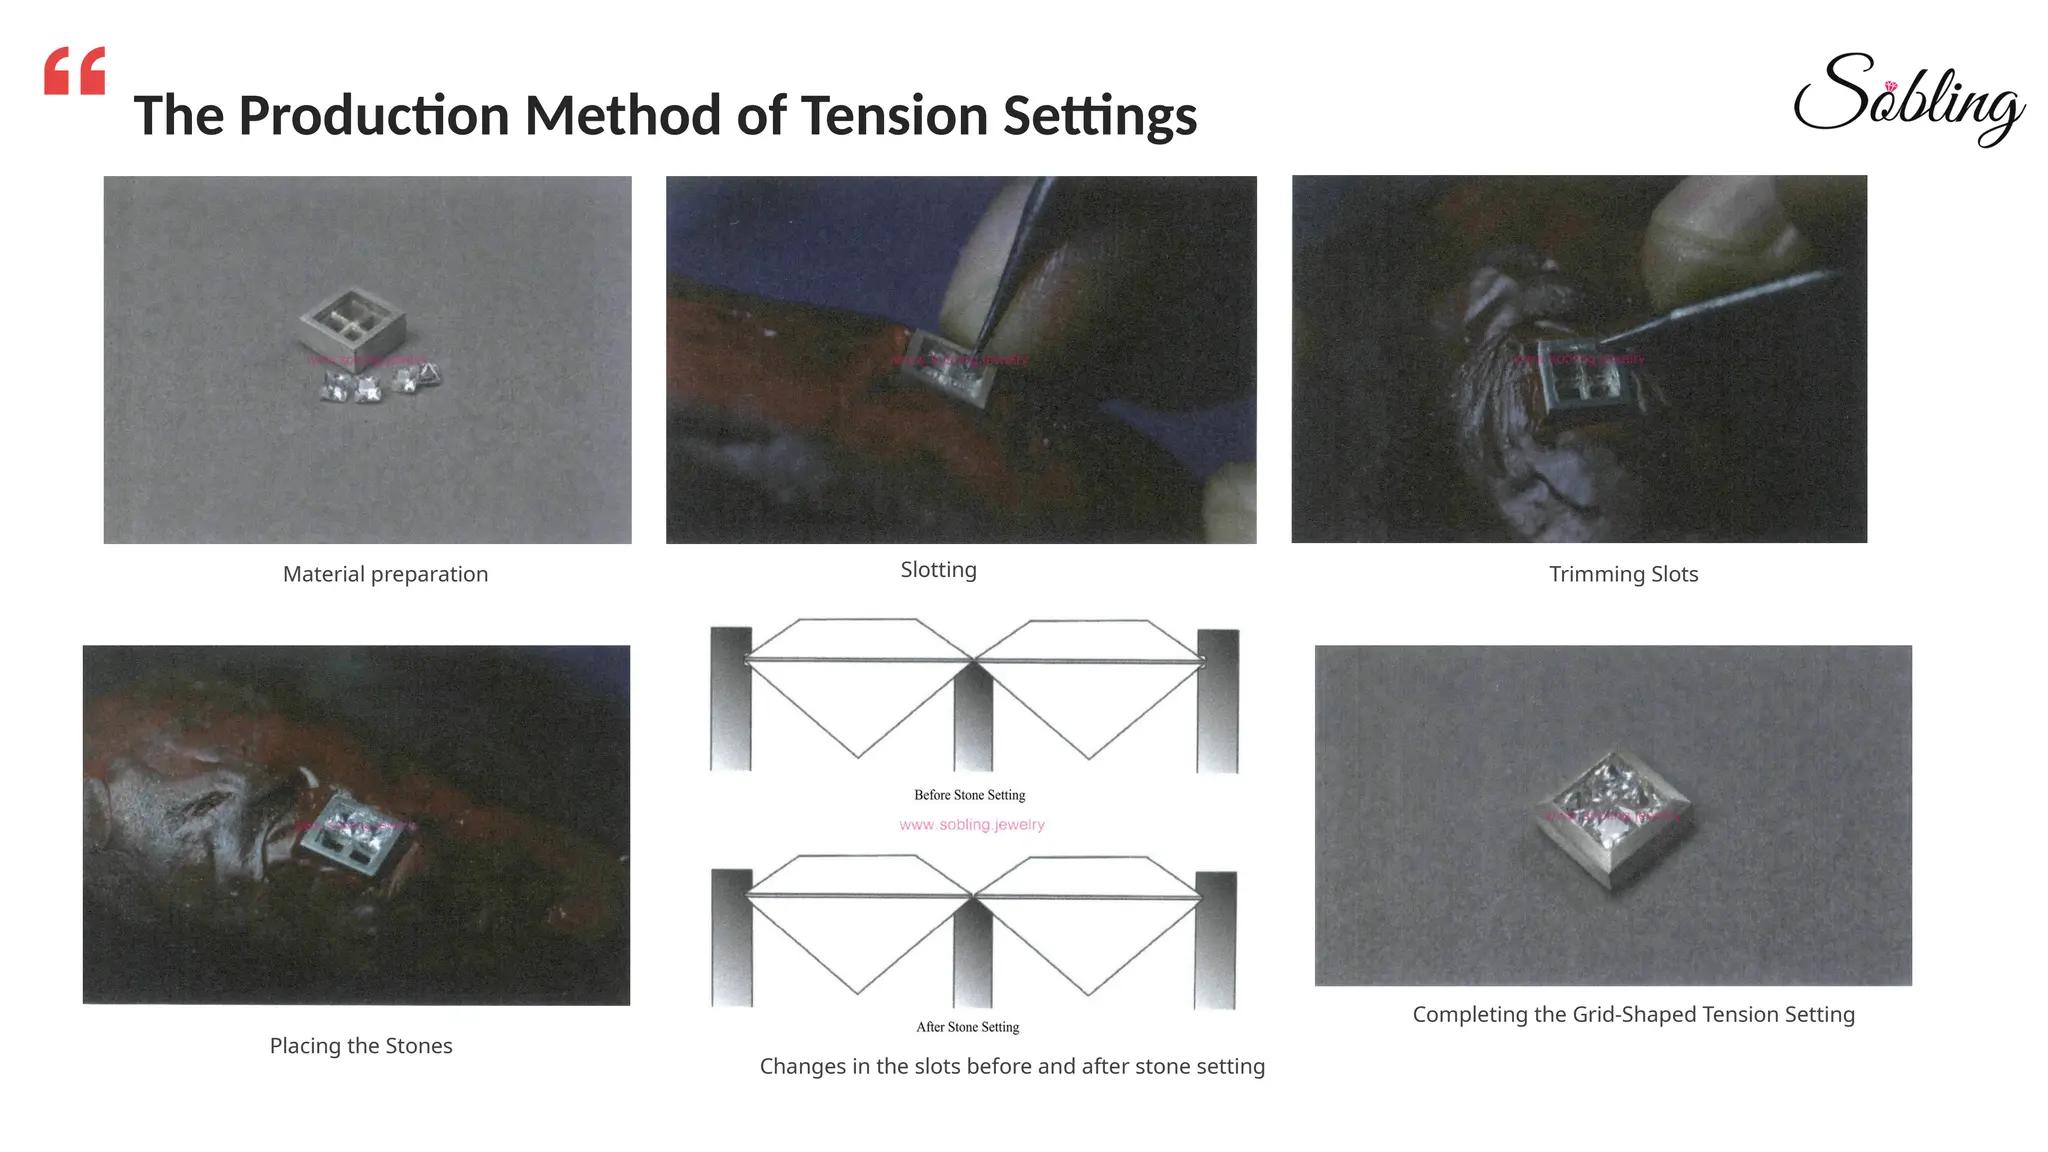
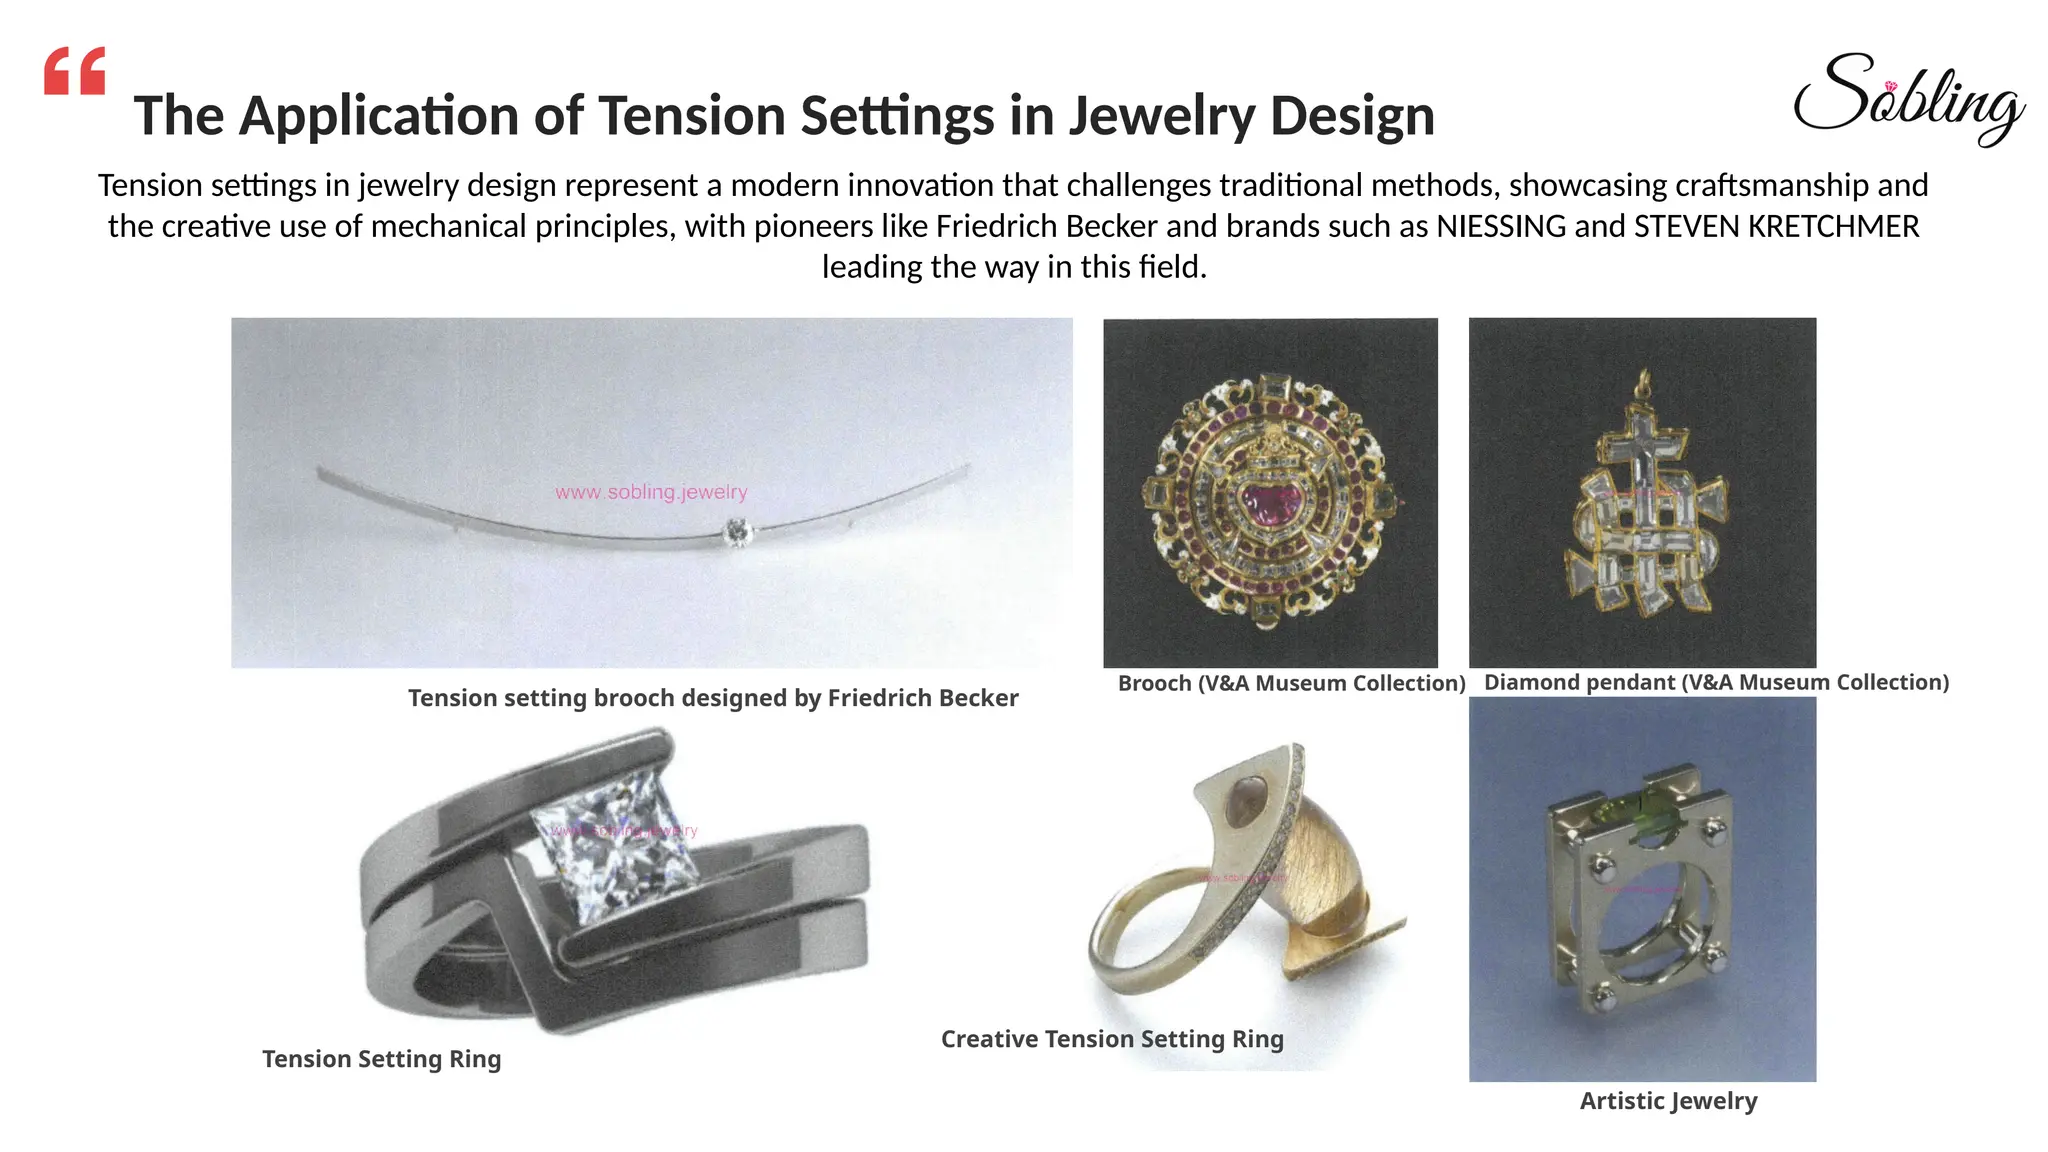

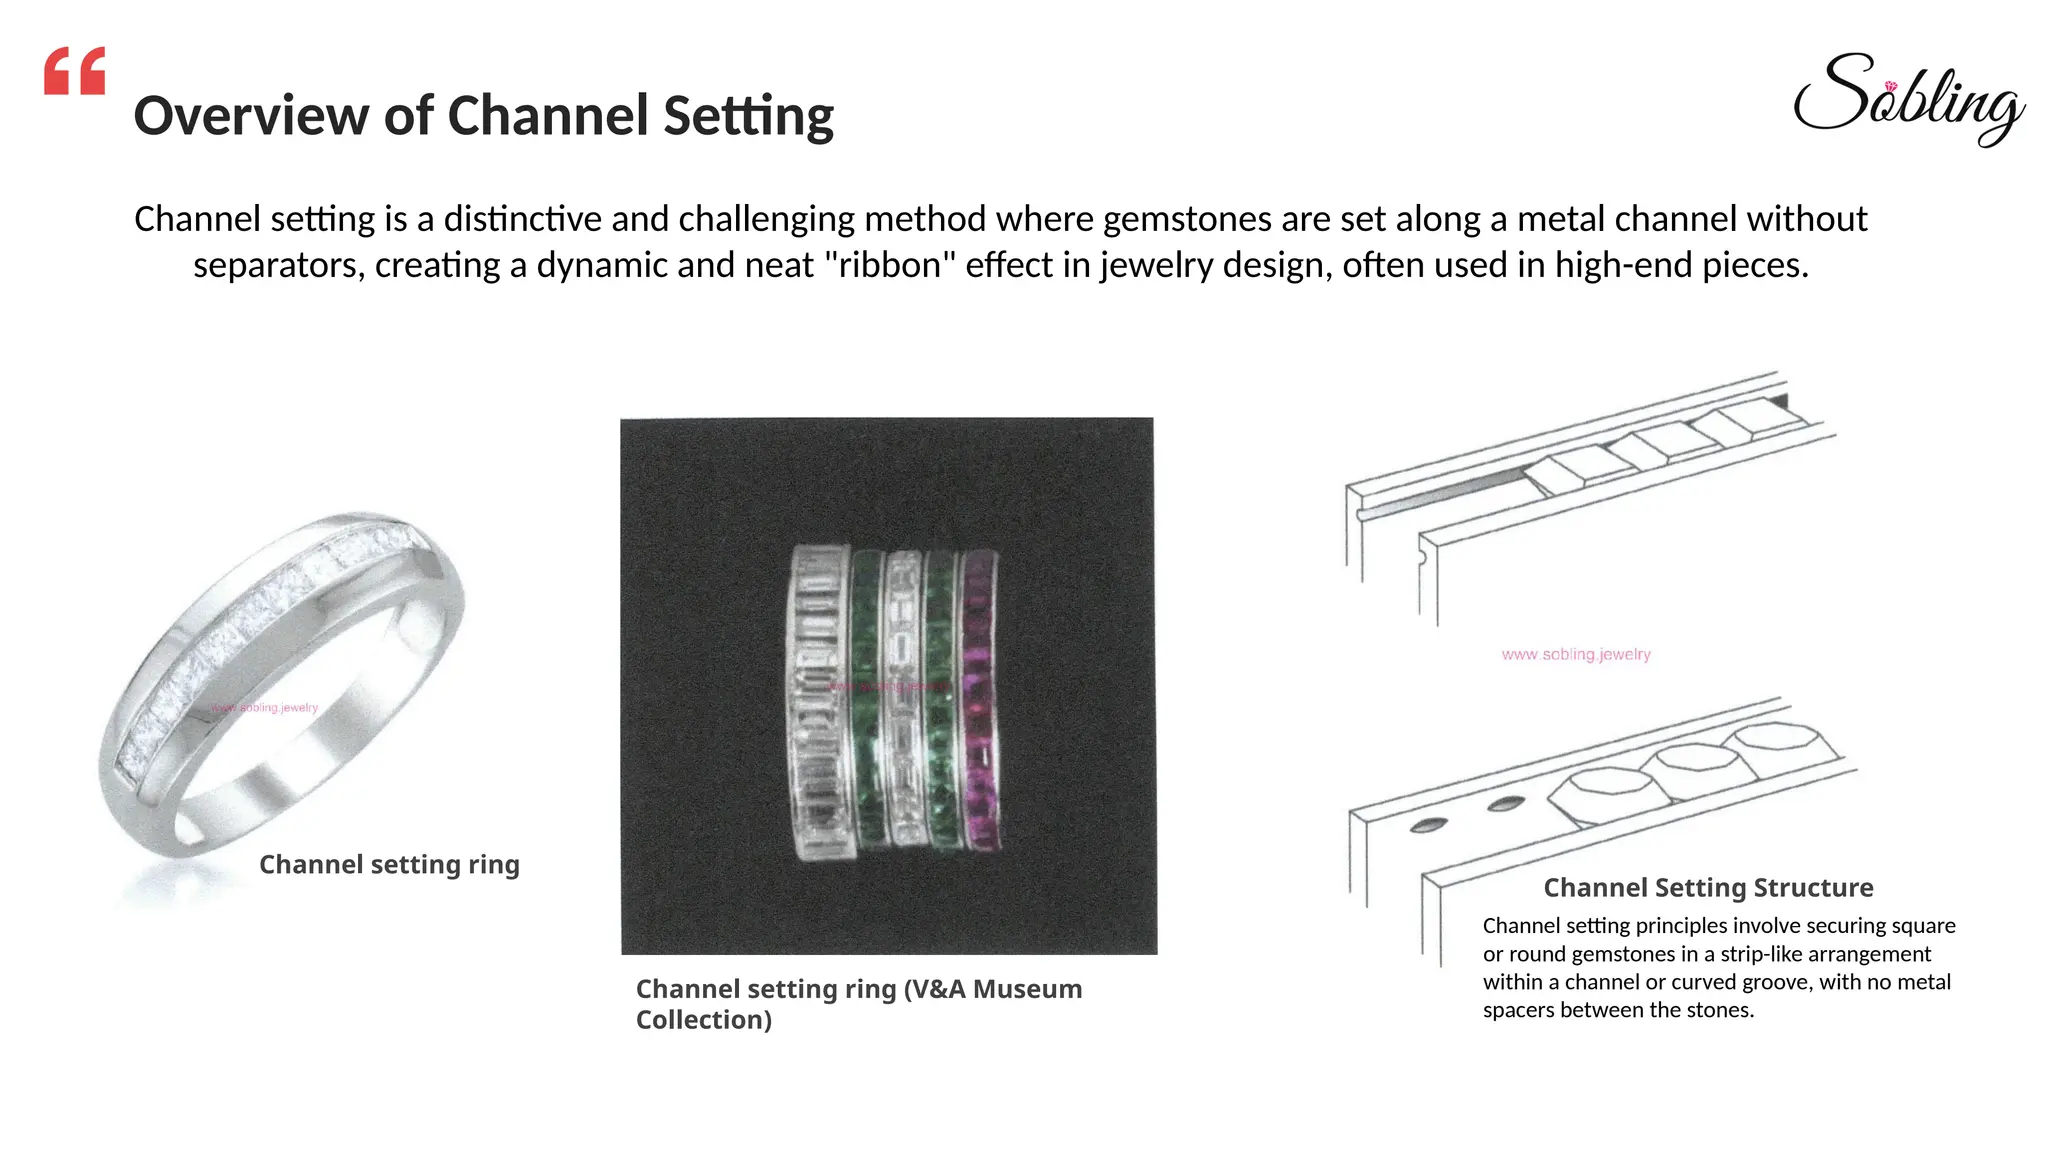
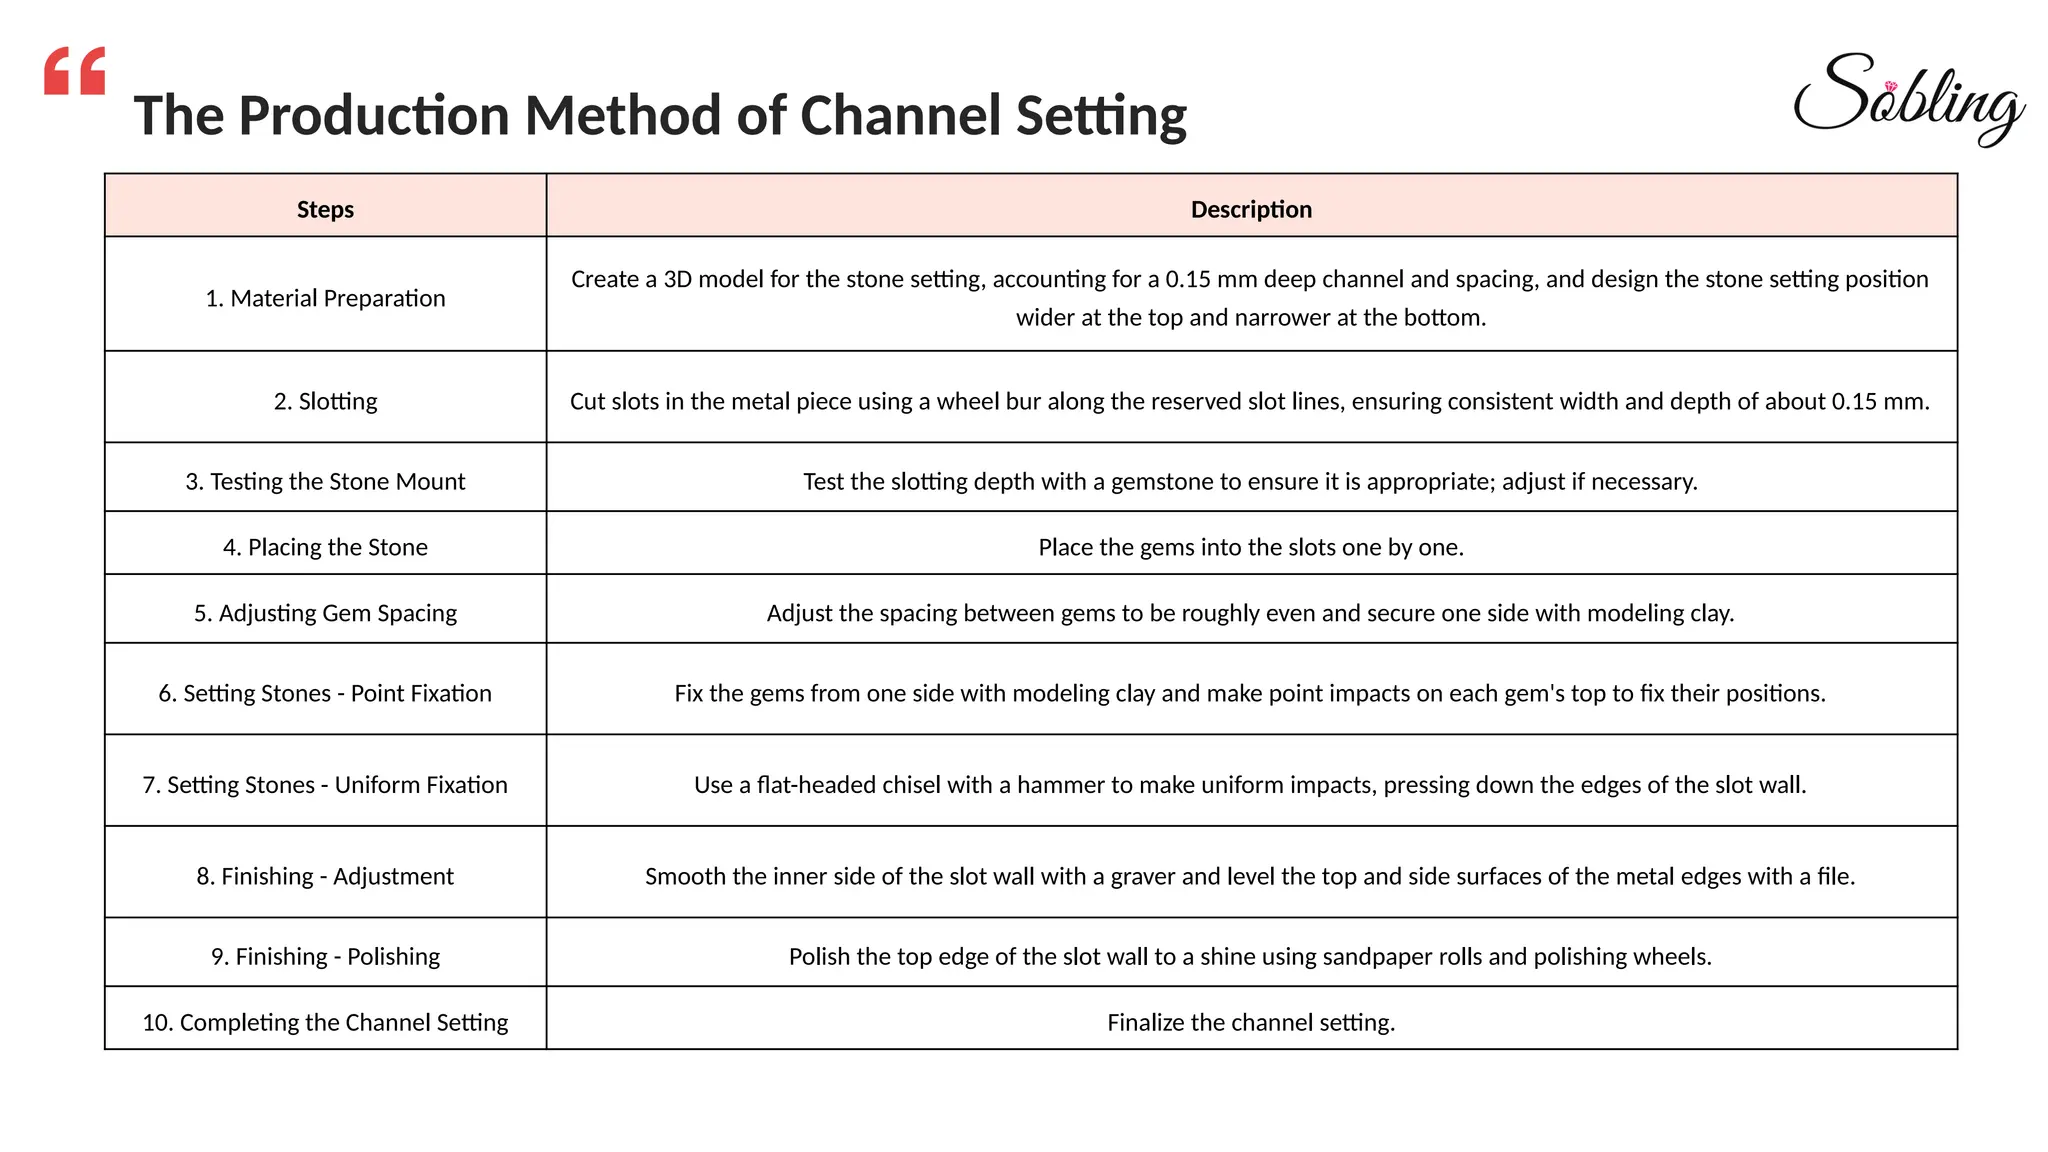
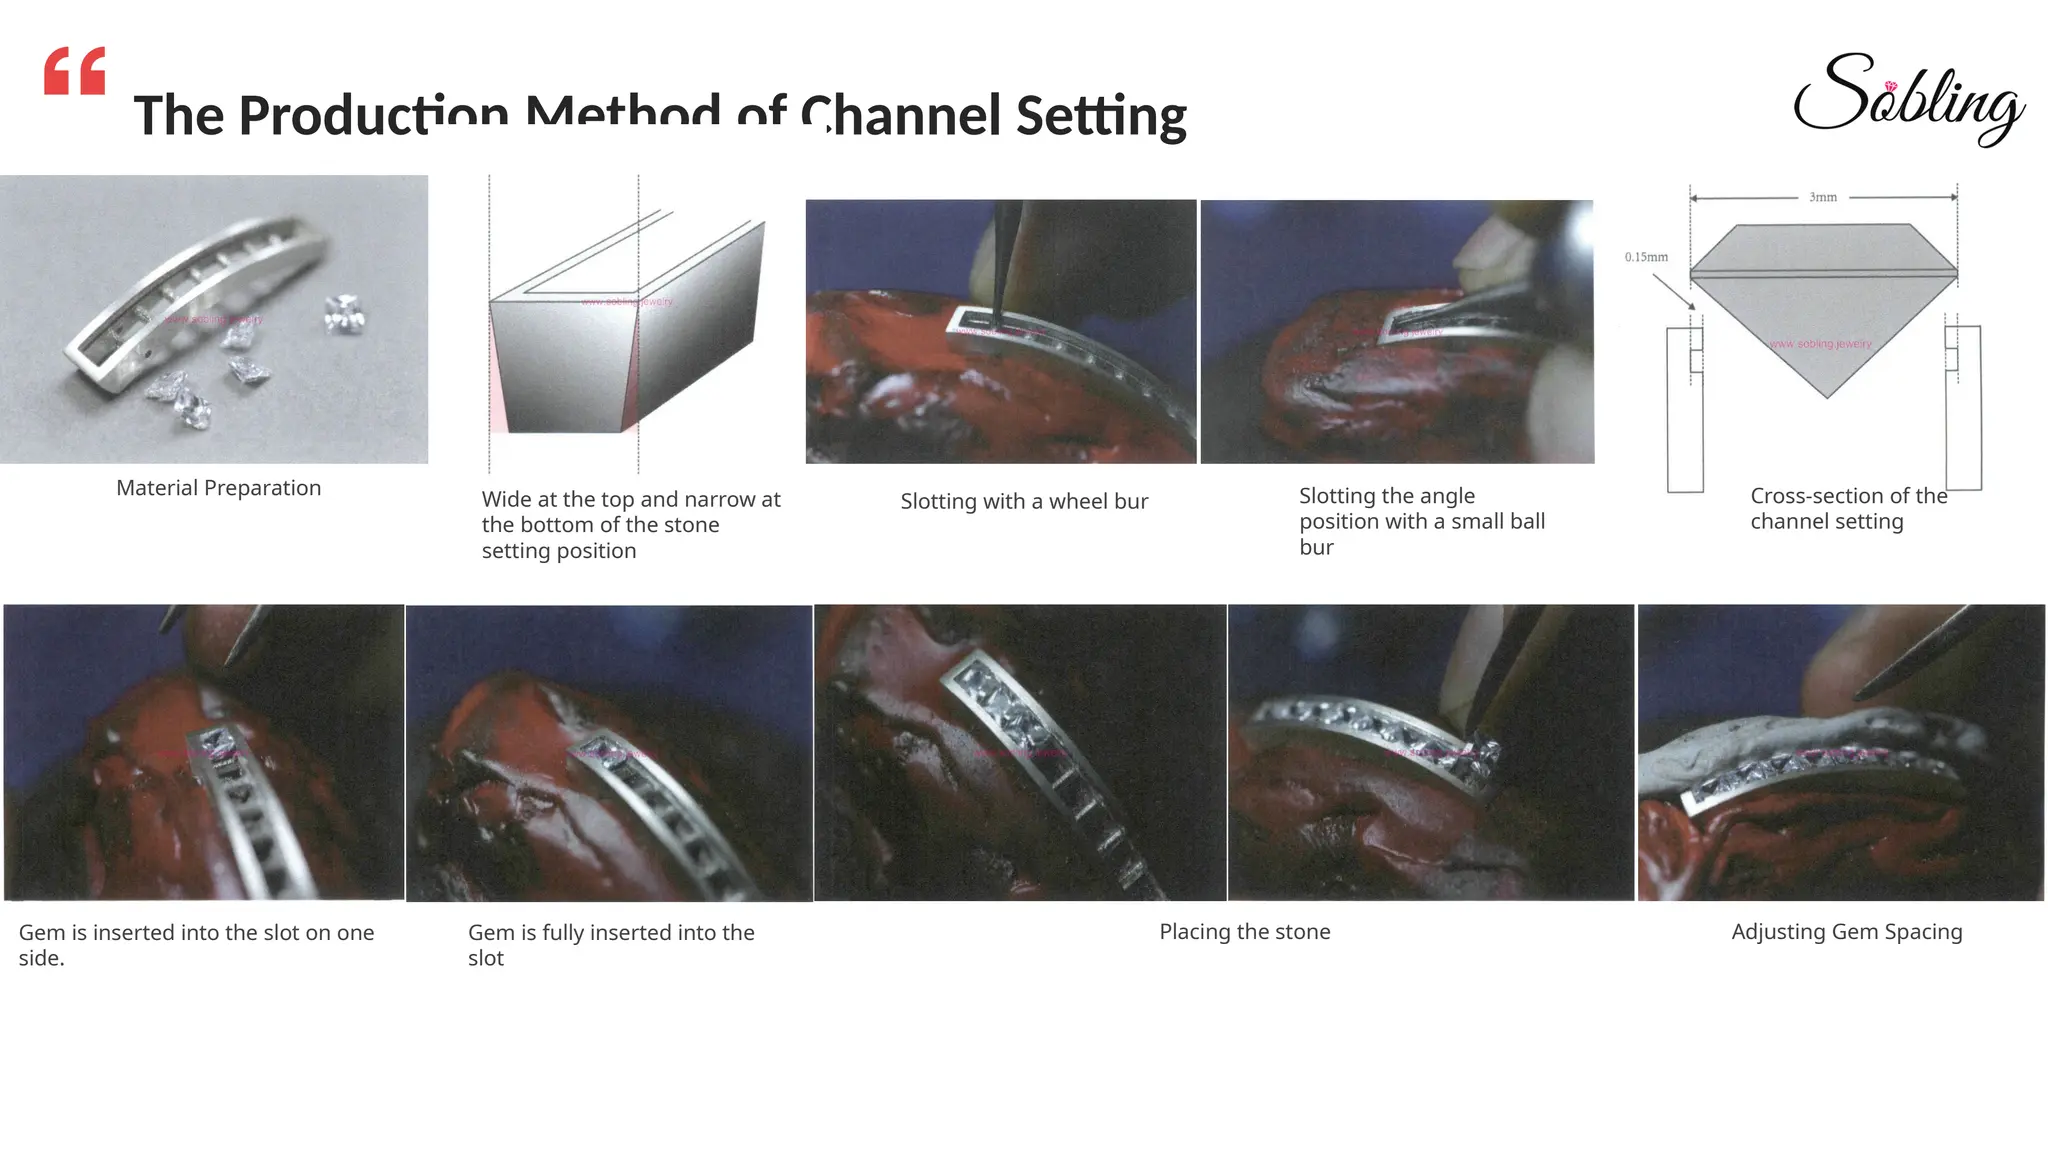
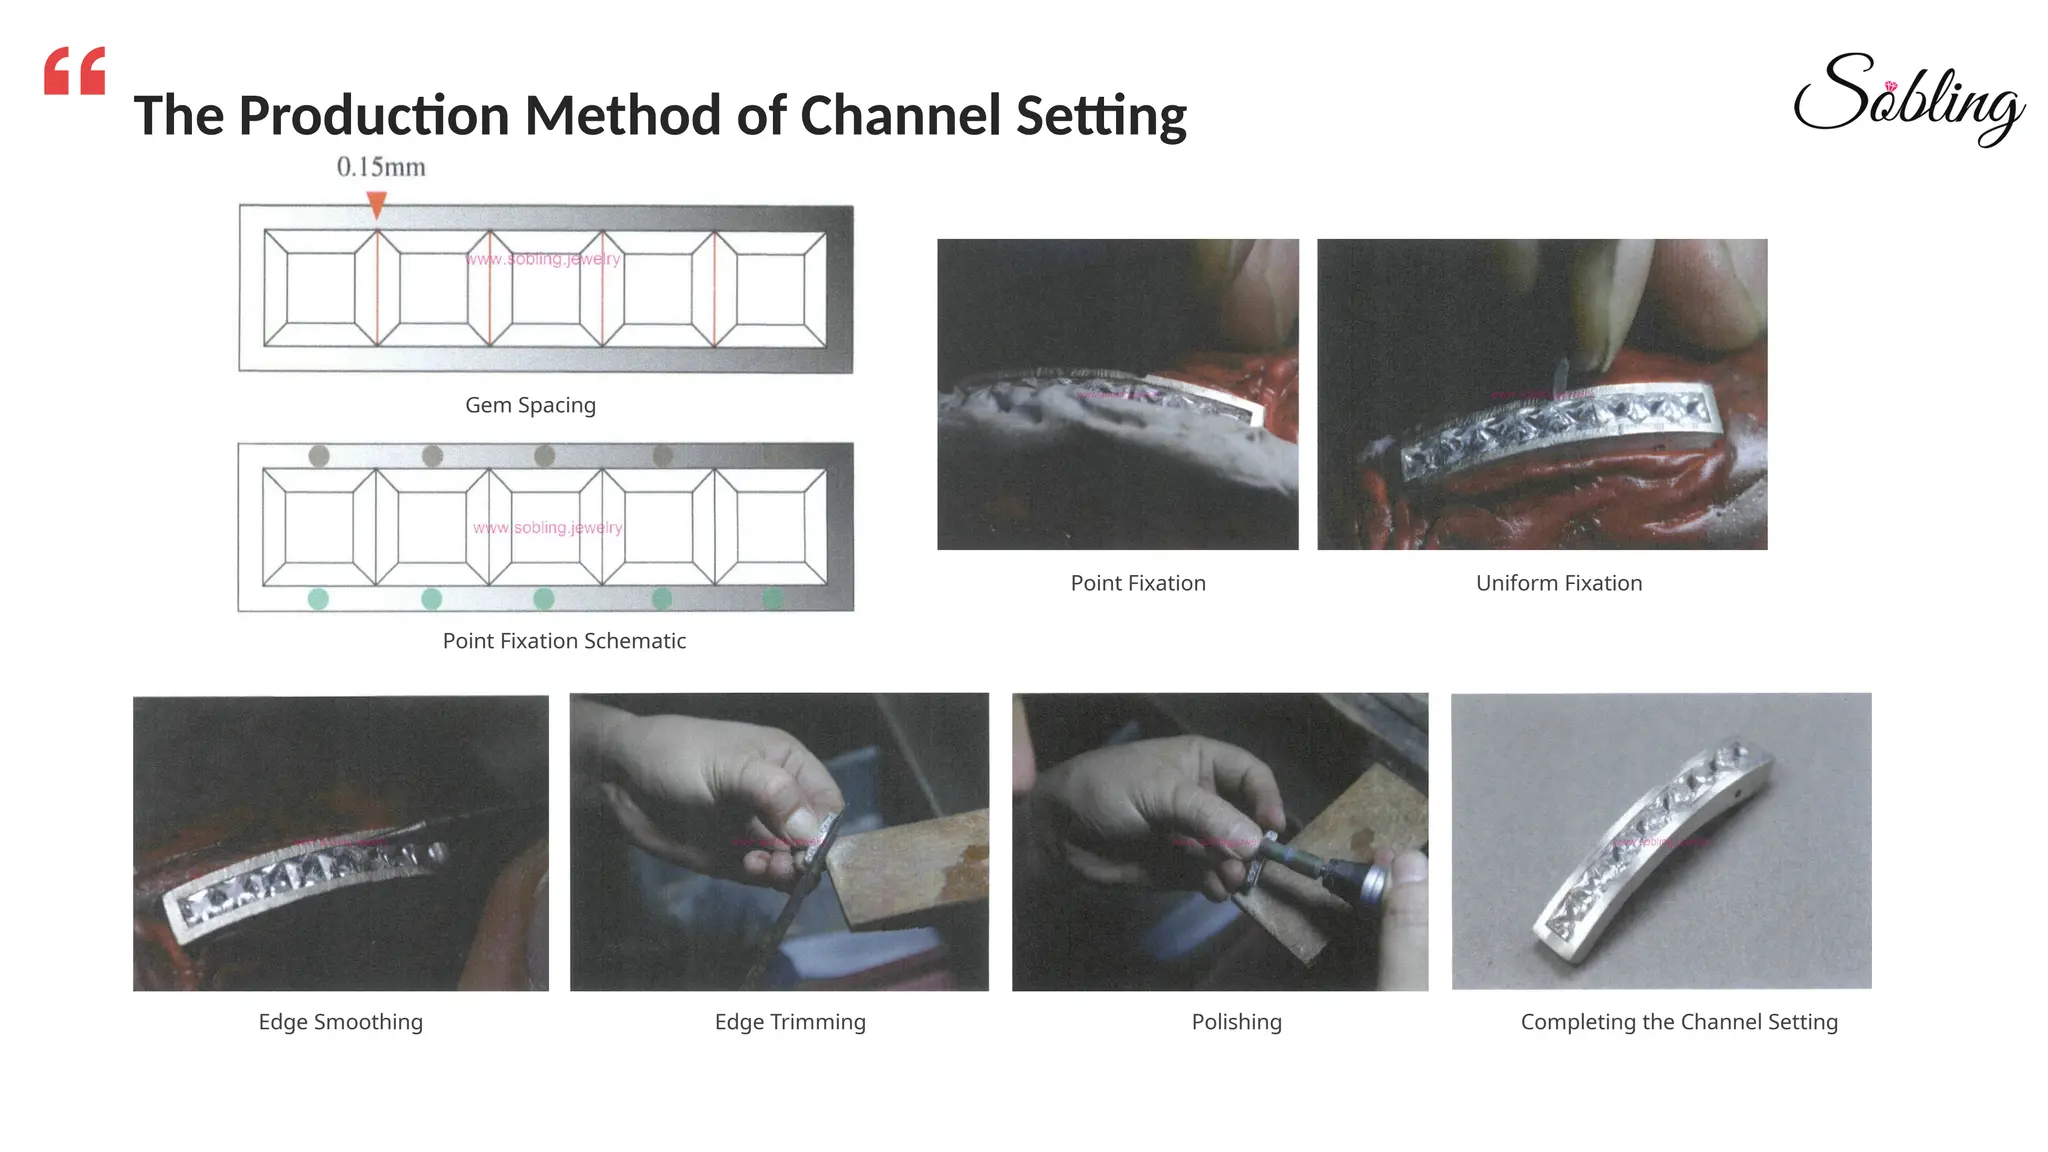
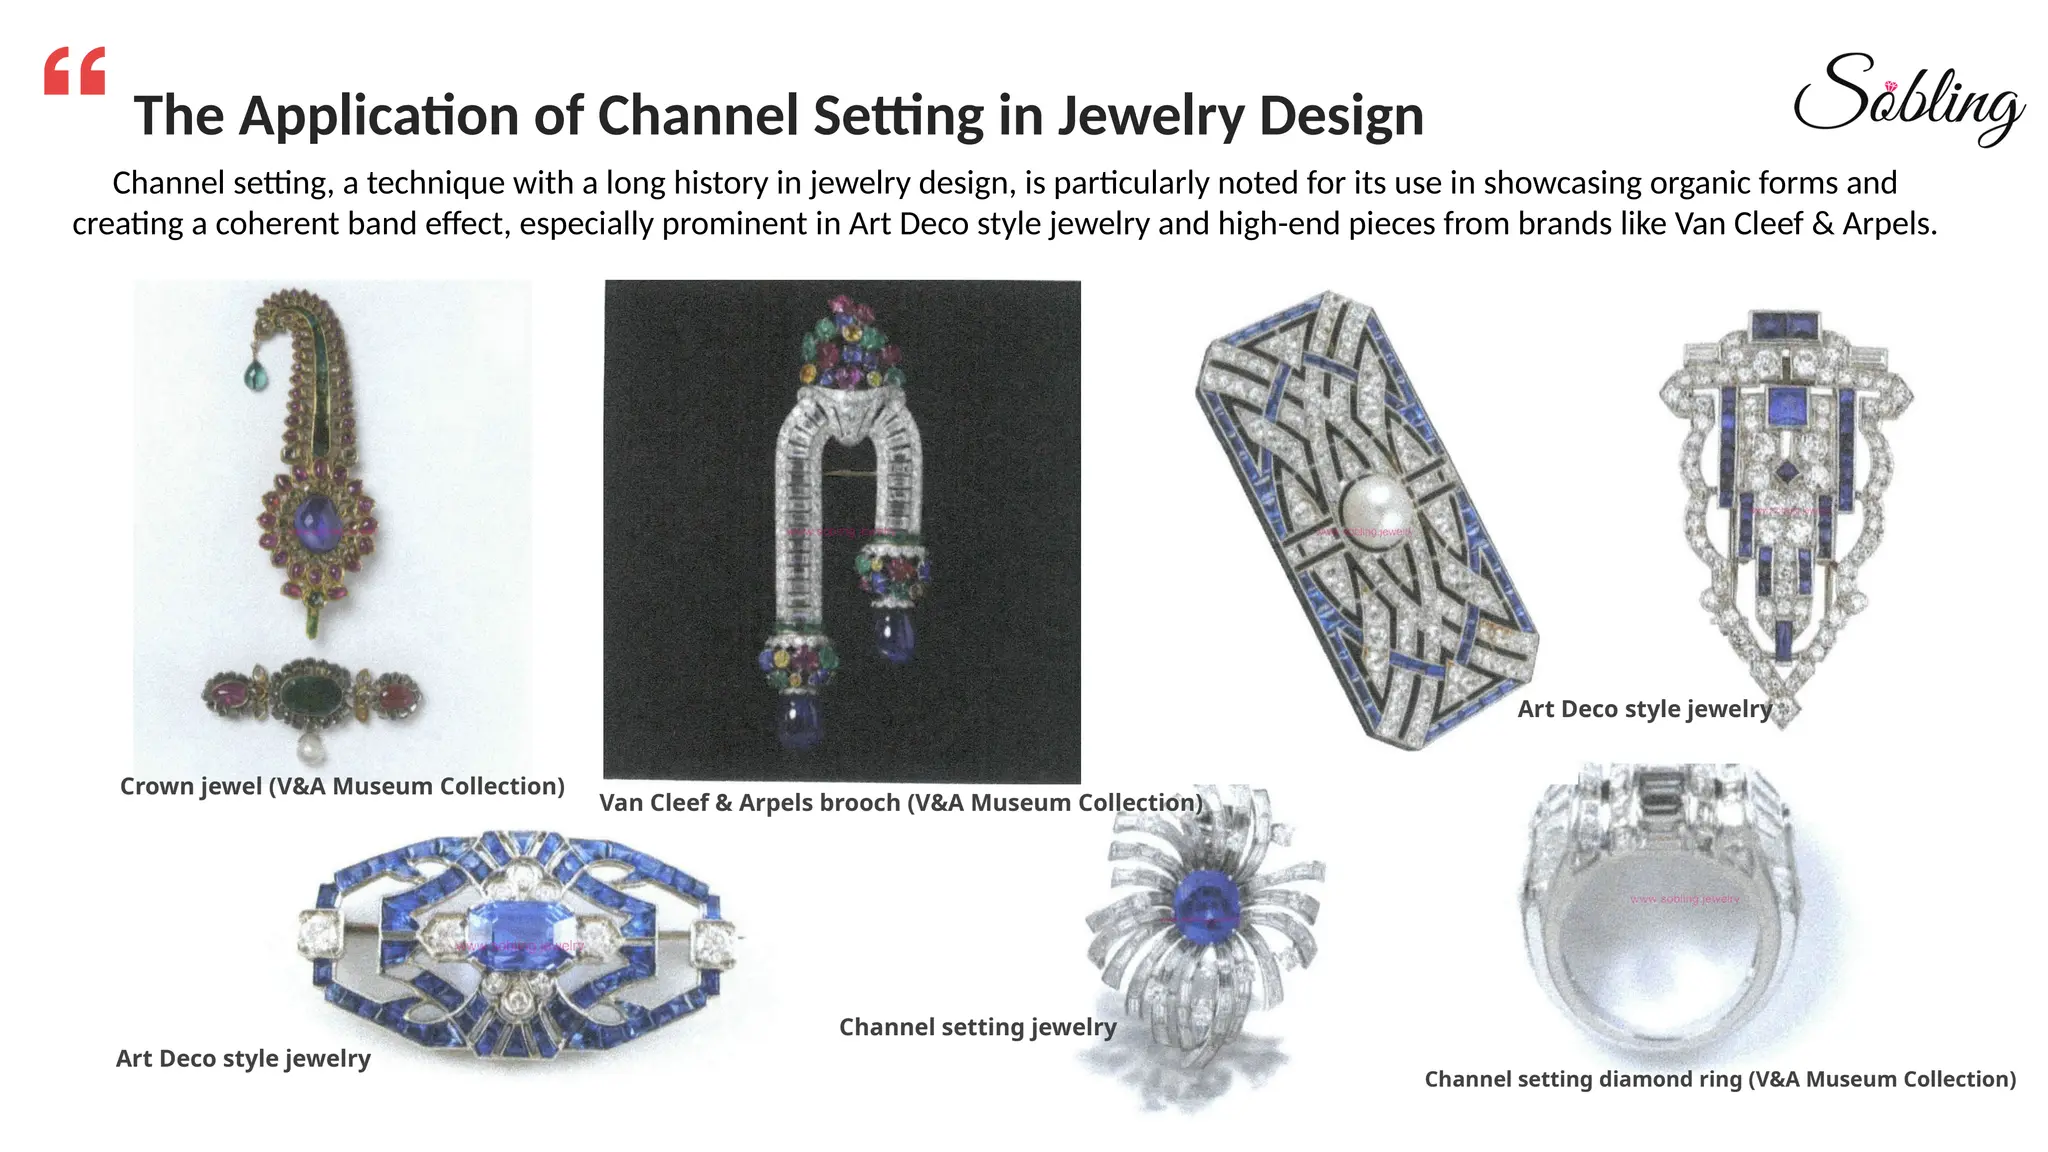

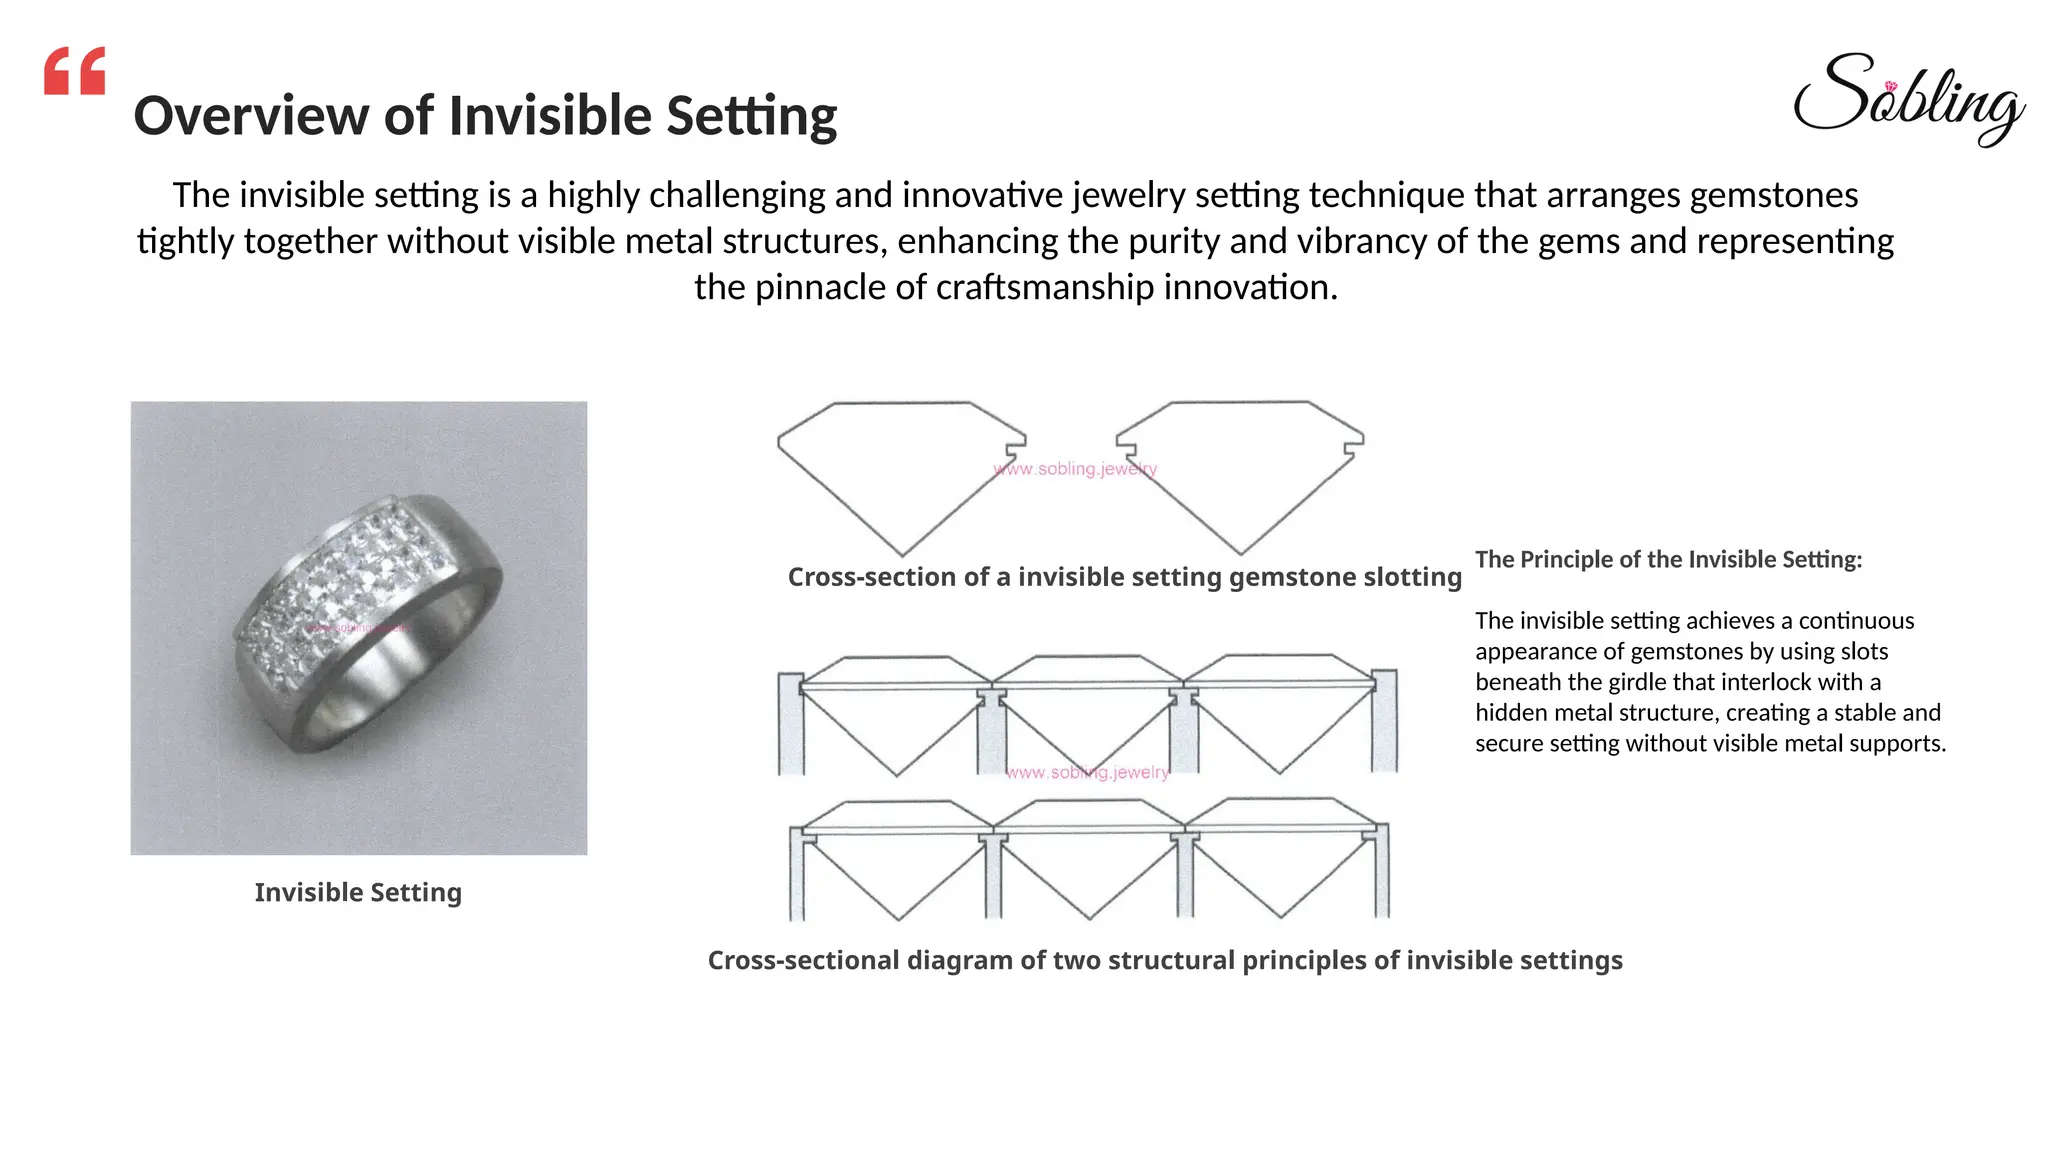
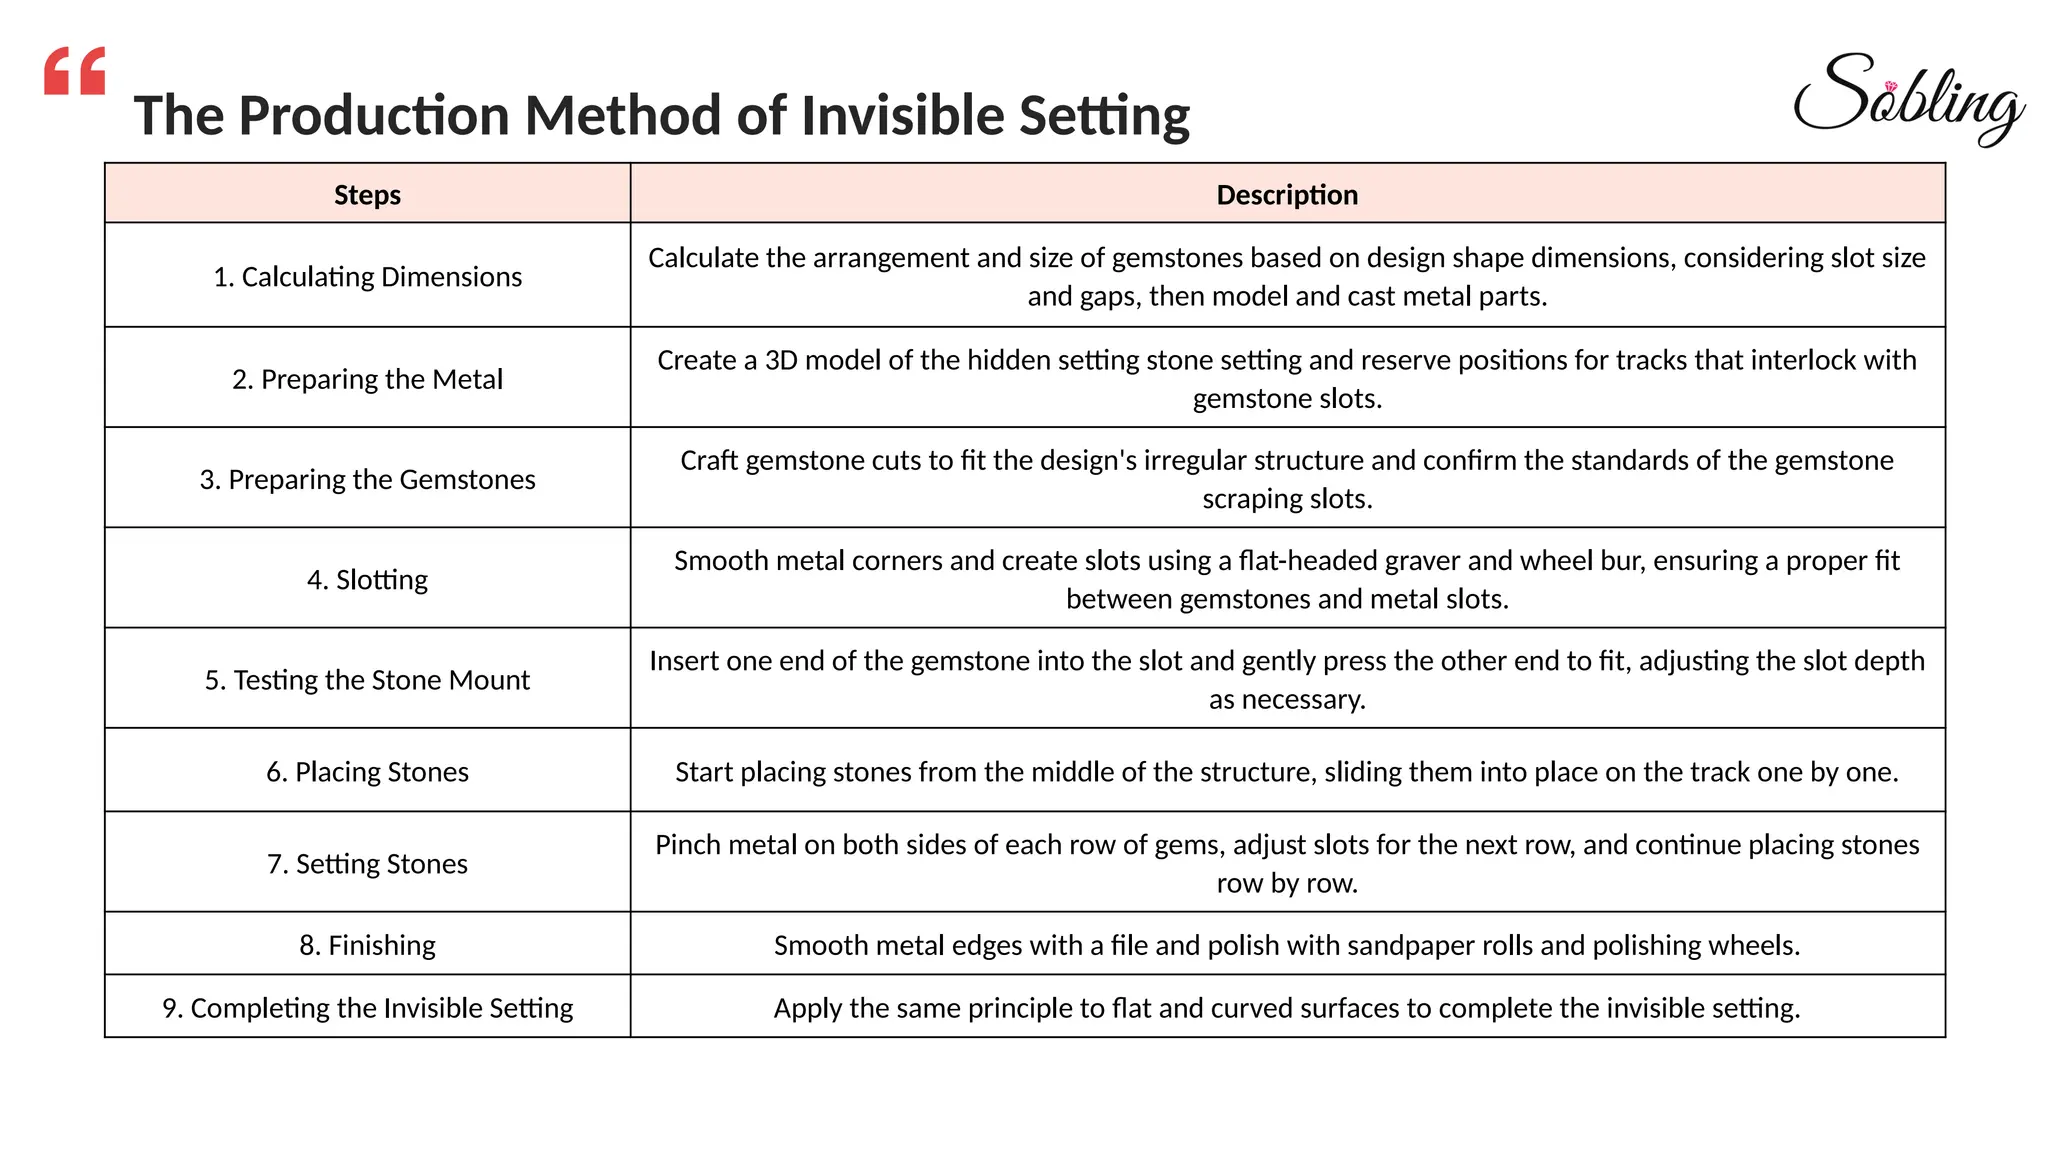
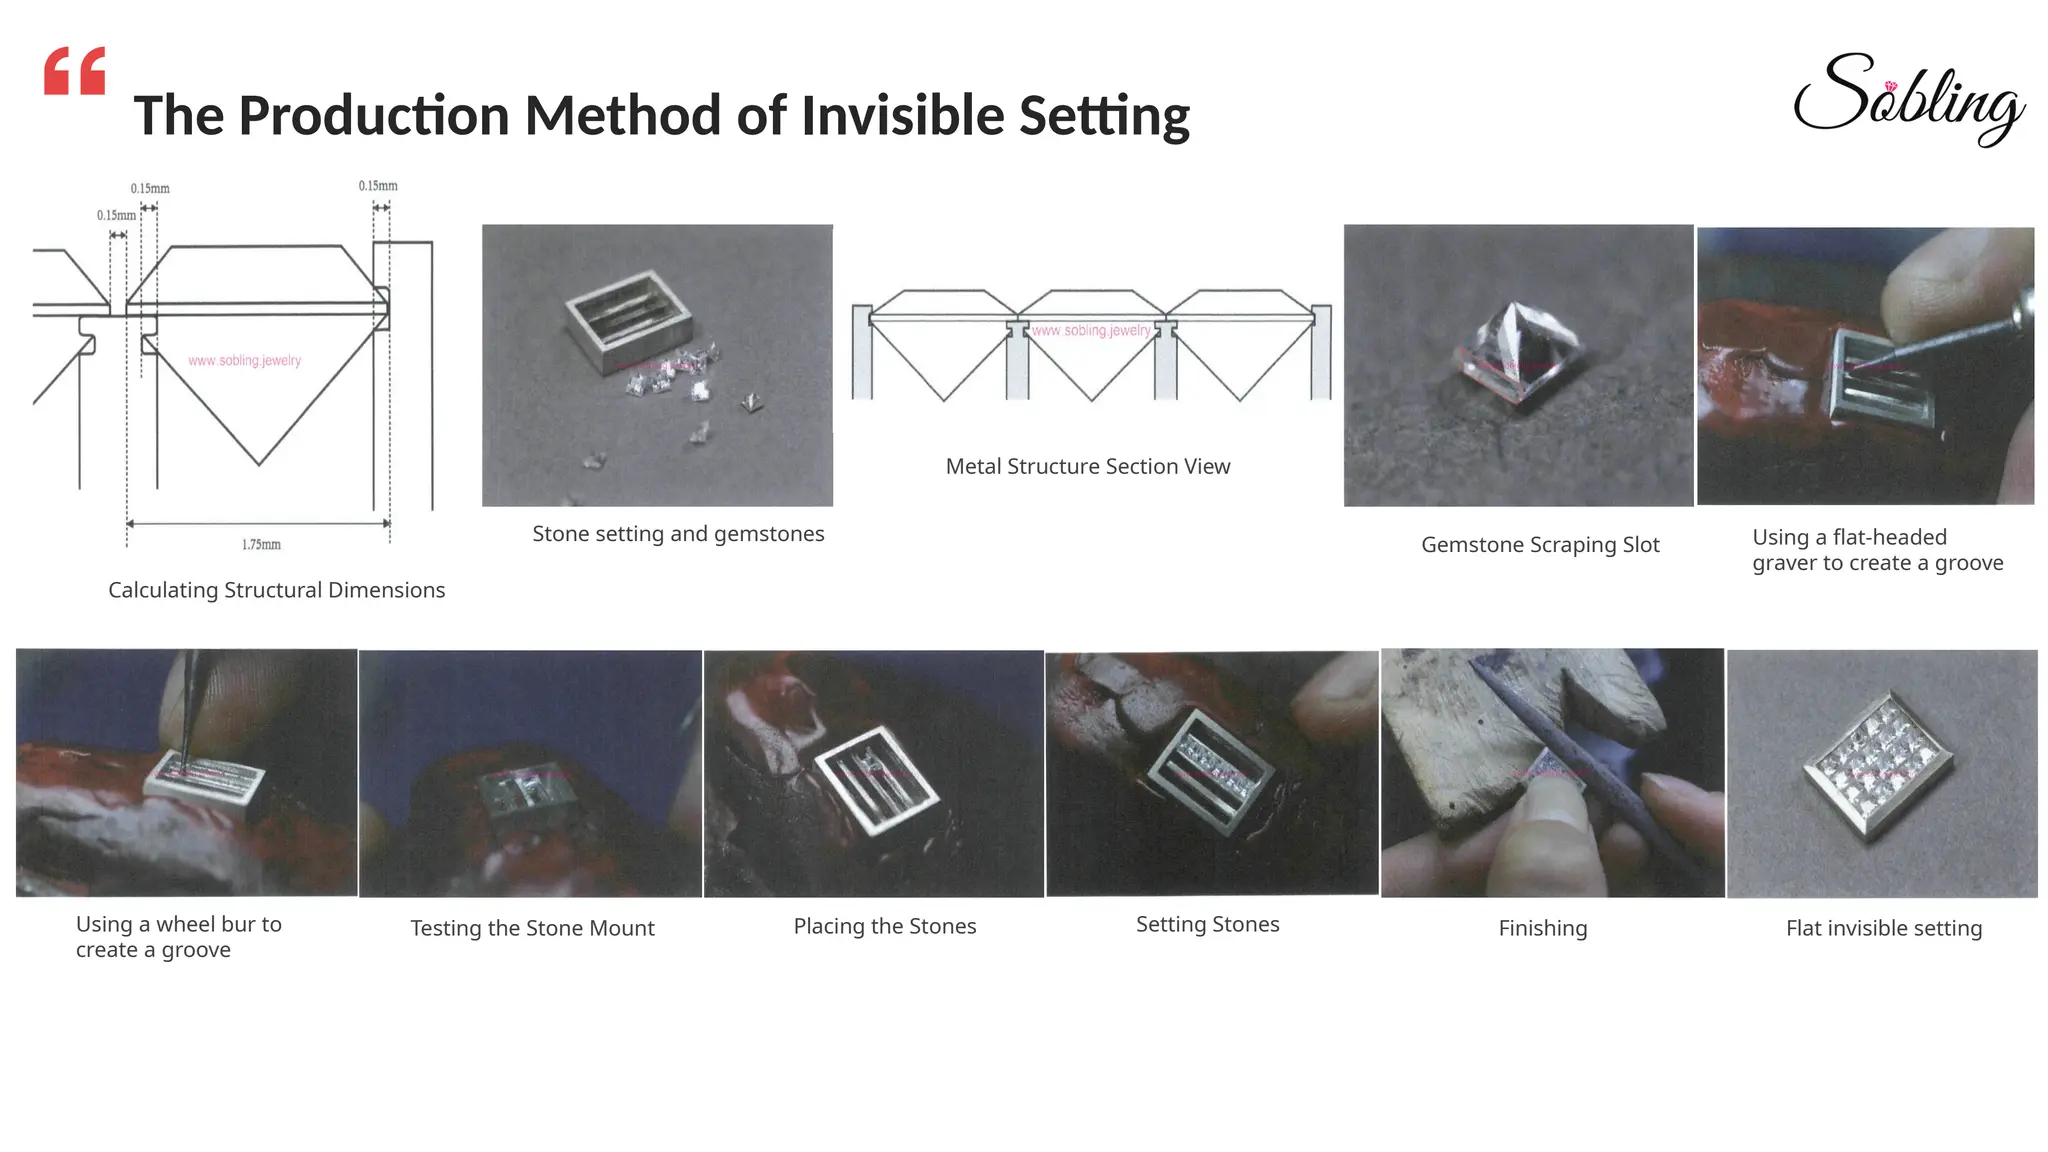
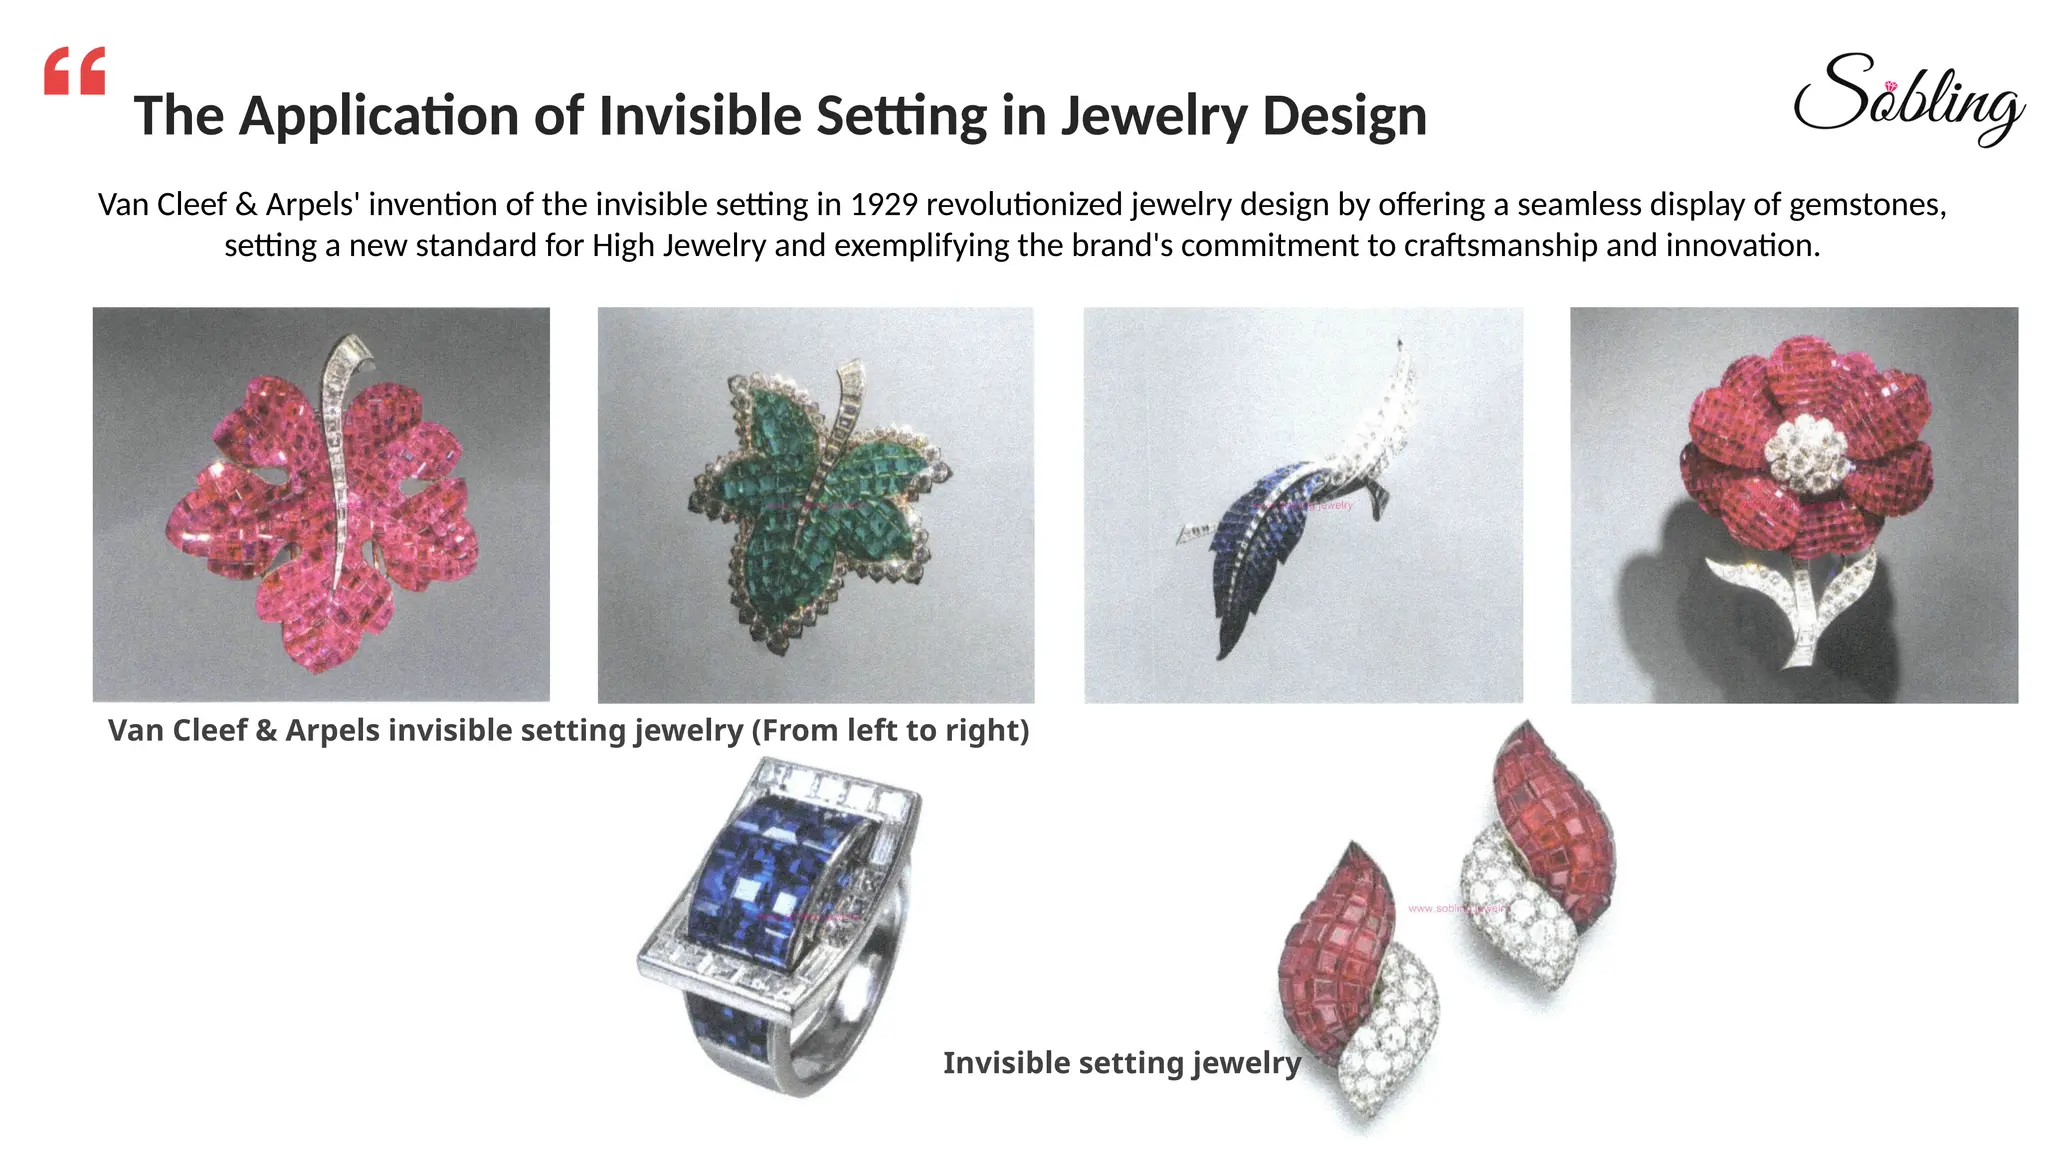


The document discusses various jewelry setting techniques including flush, gypsy, tension, channel, and invisible settings, detailing their characteristics, production methods, and applications in jewelry design. Each setting has distinct features, with flush and gypsy settings known for stone prominence, tension settings using metal tension for secure placements, channel settings creating a ribbon effect, and invisible settings hiding metal structures for a seamless look. The content emphasizes the artistry and craftsmanship involved in implementing these techniques in contemporary and high-end jewelry.


