Downloaded 103 times
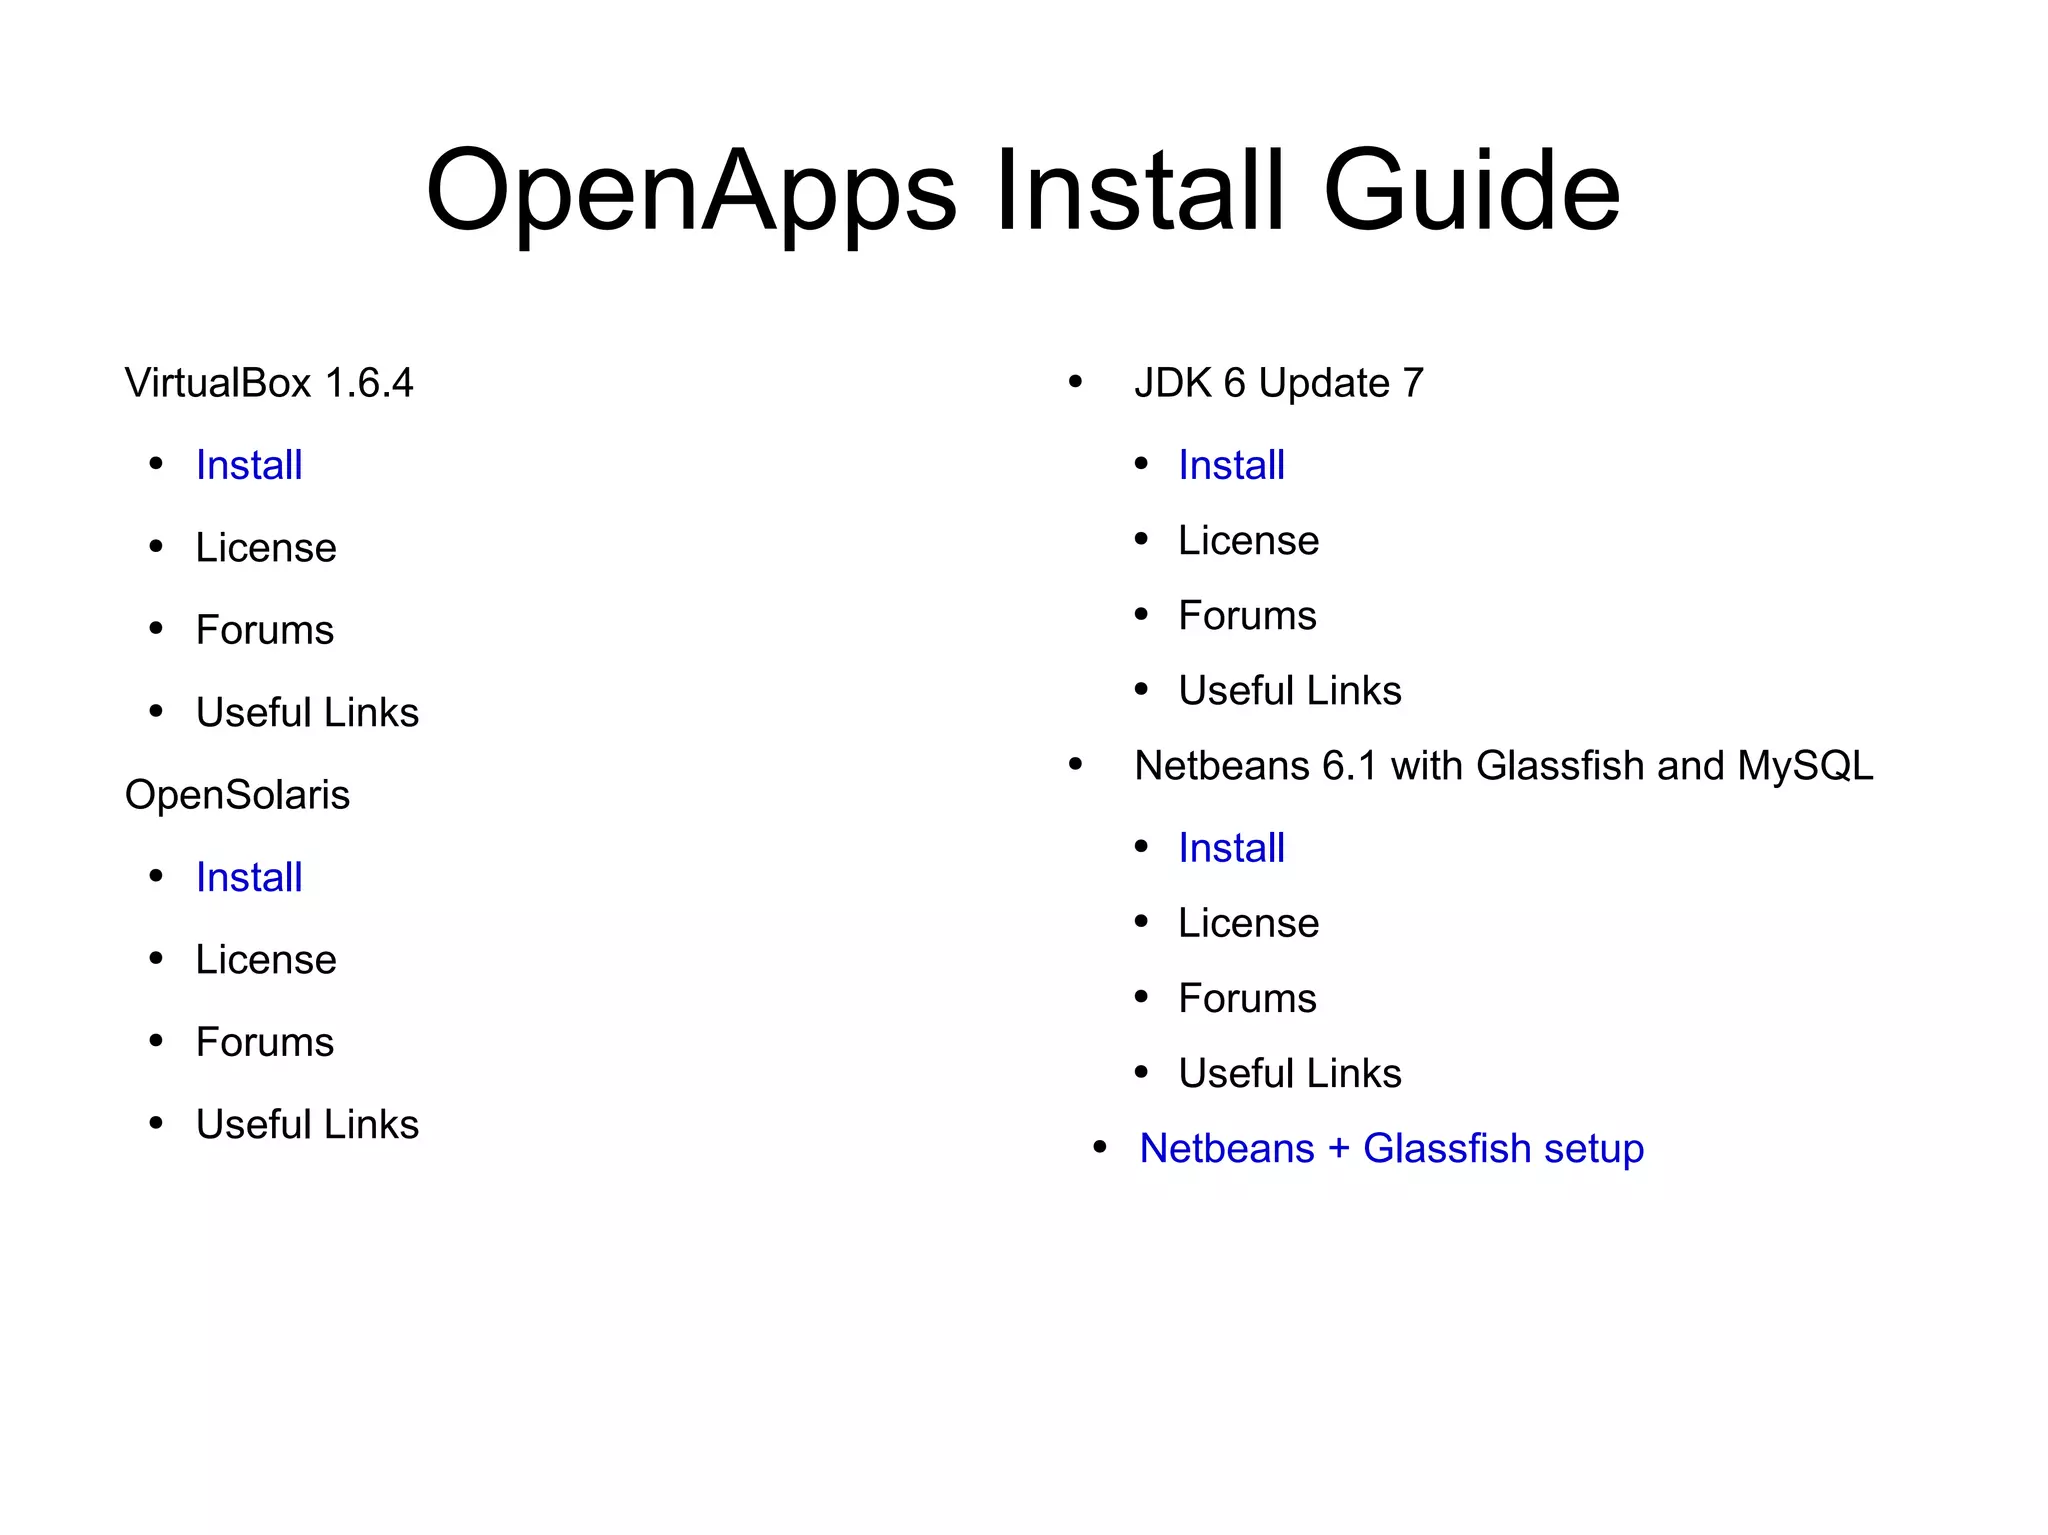
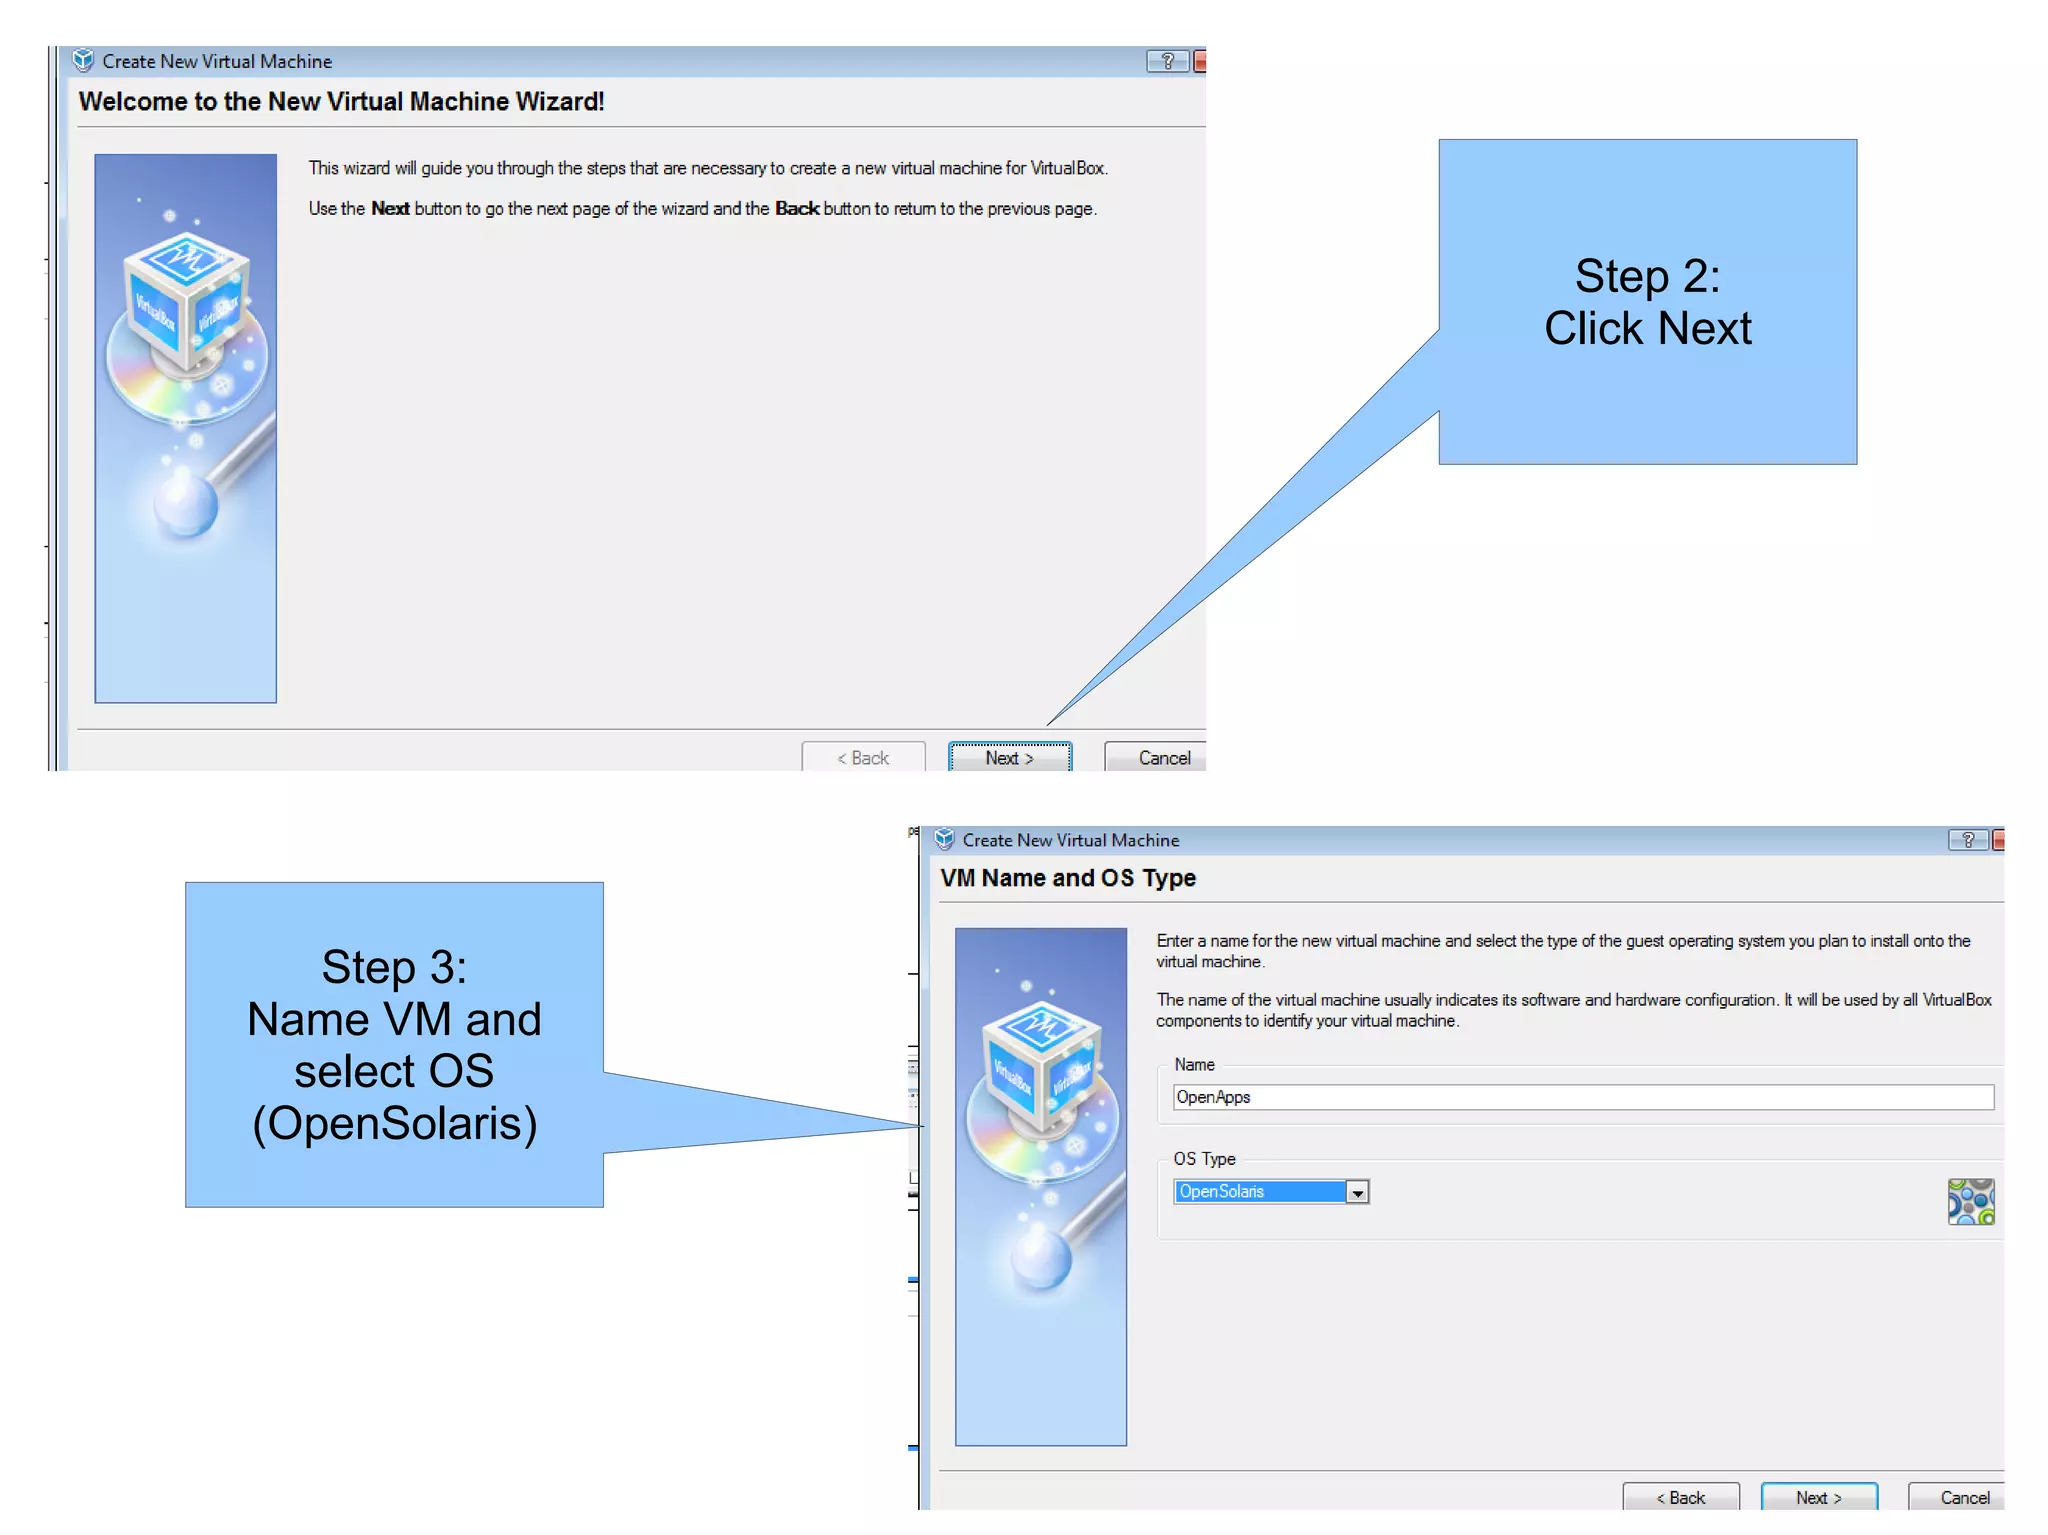
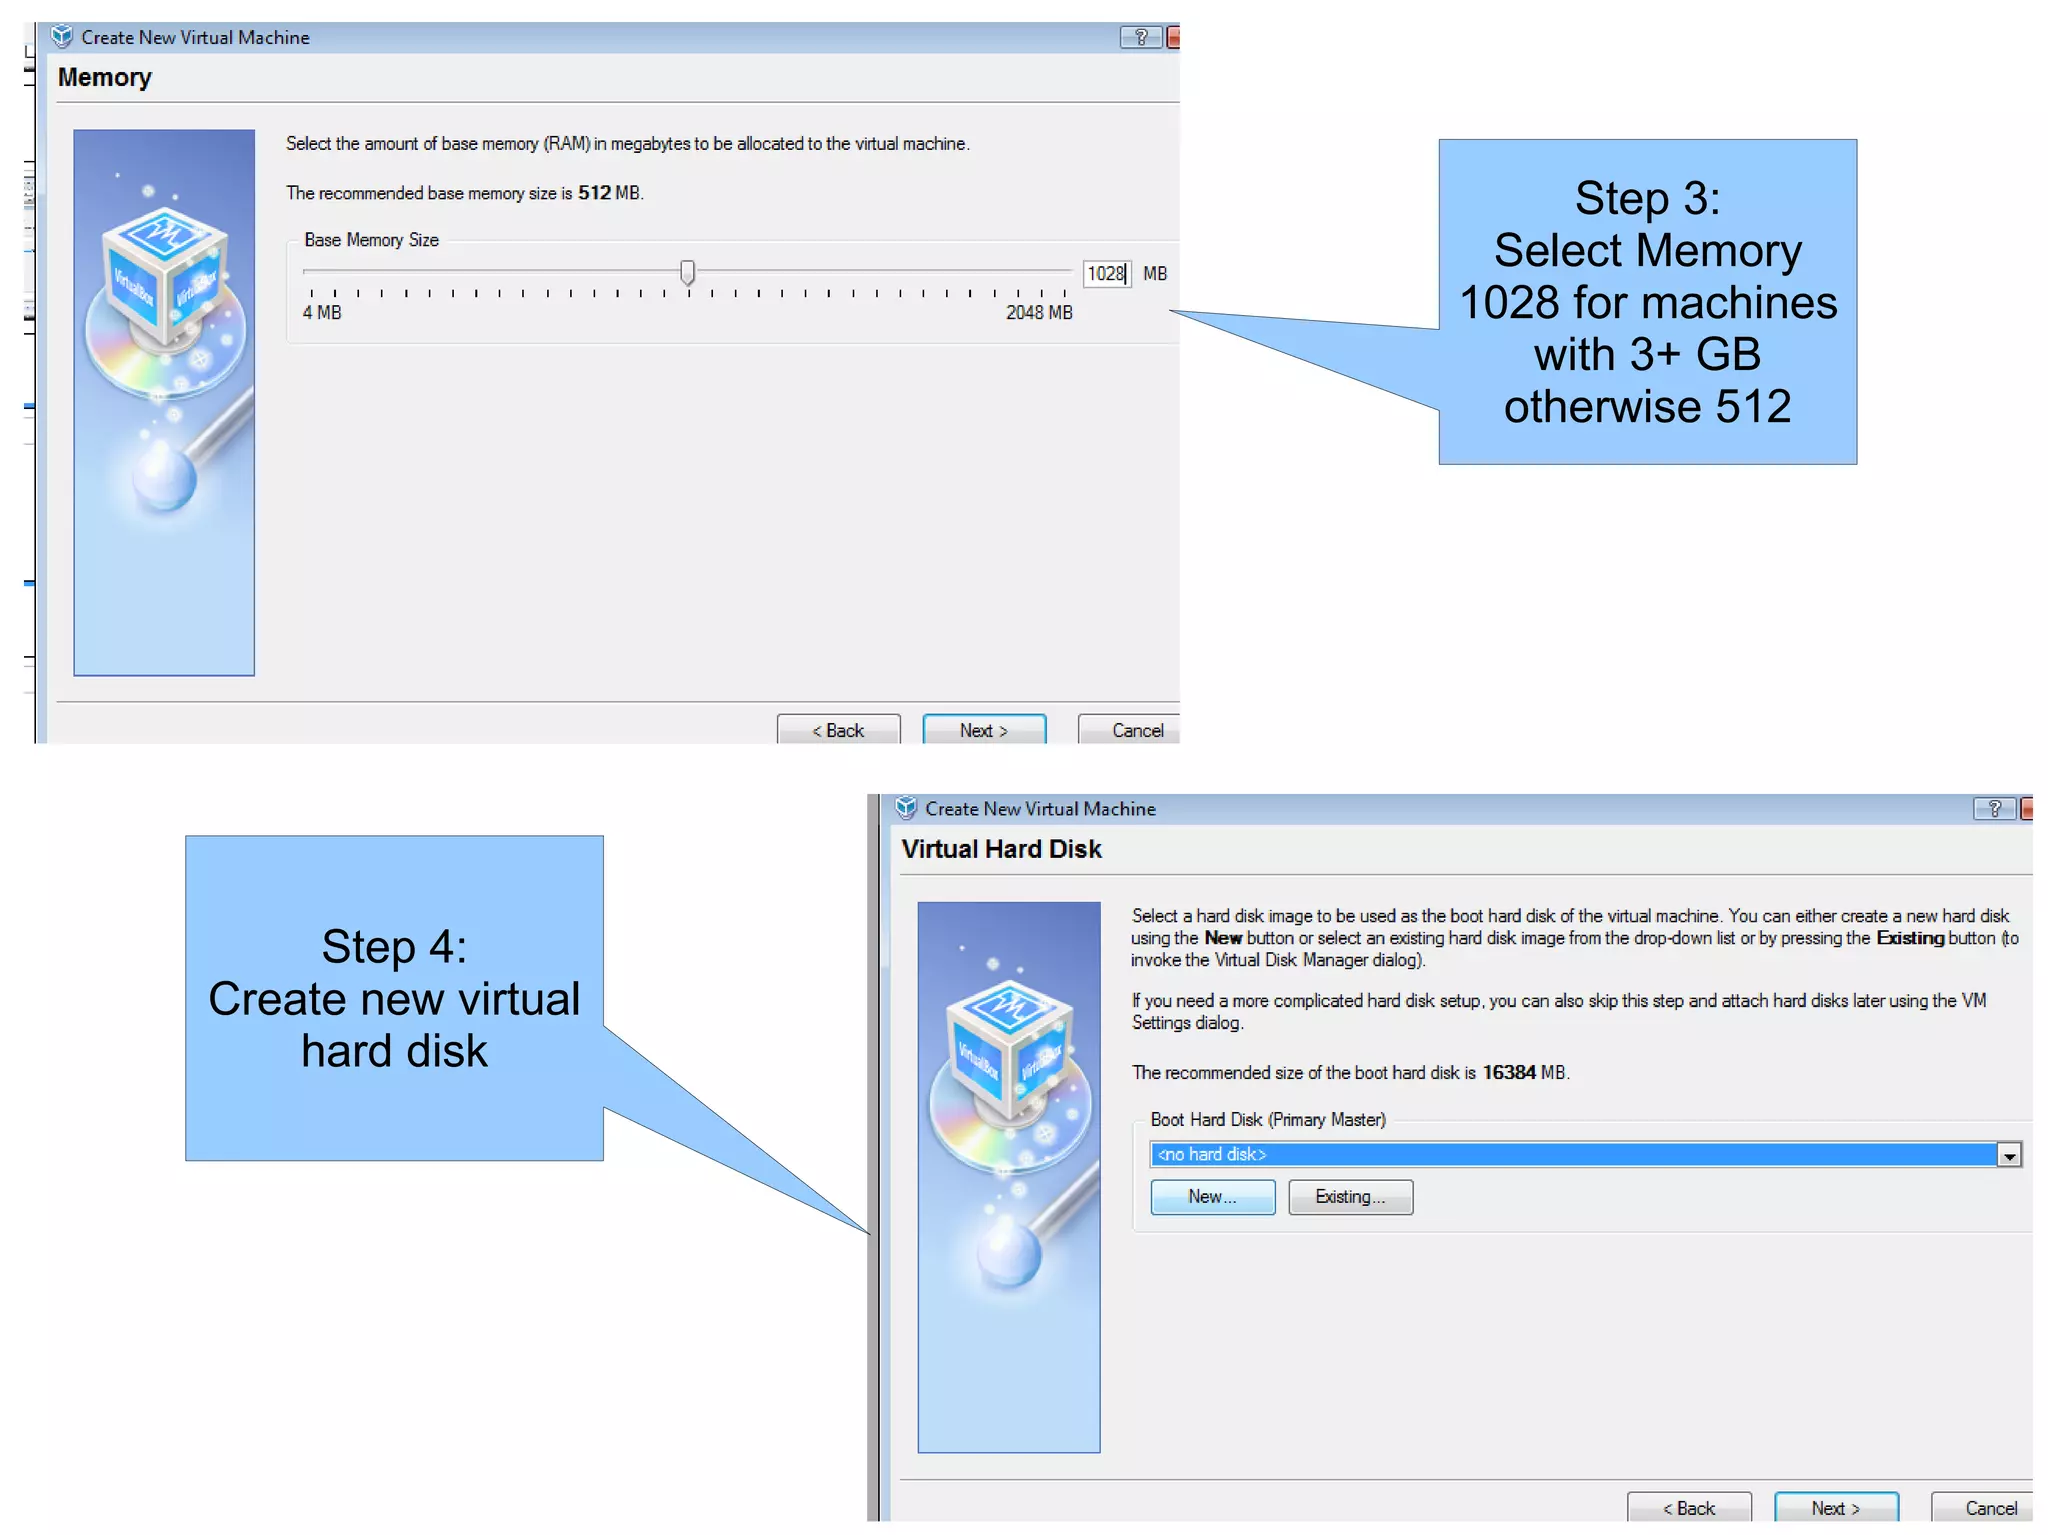
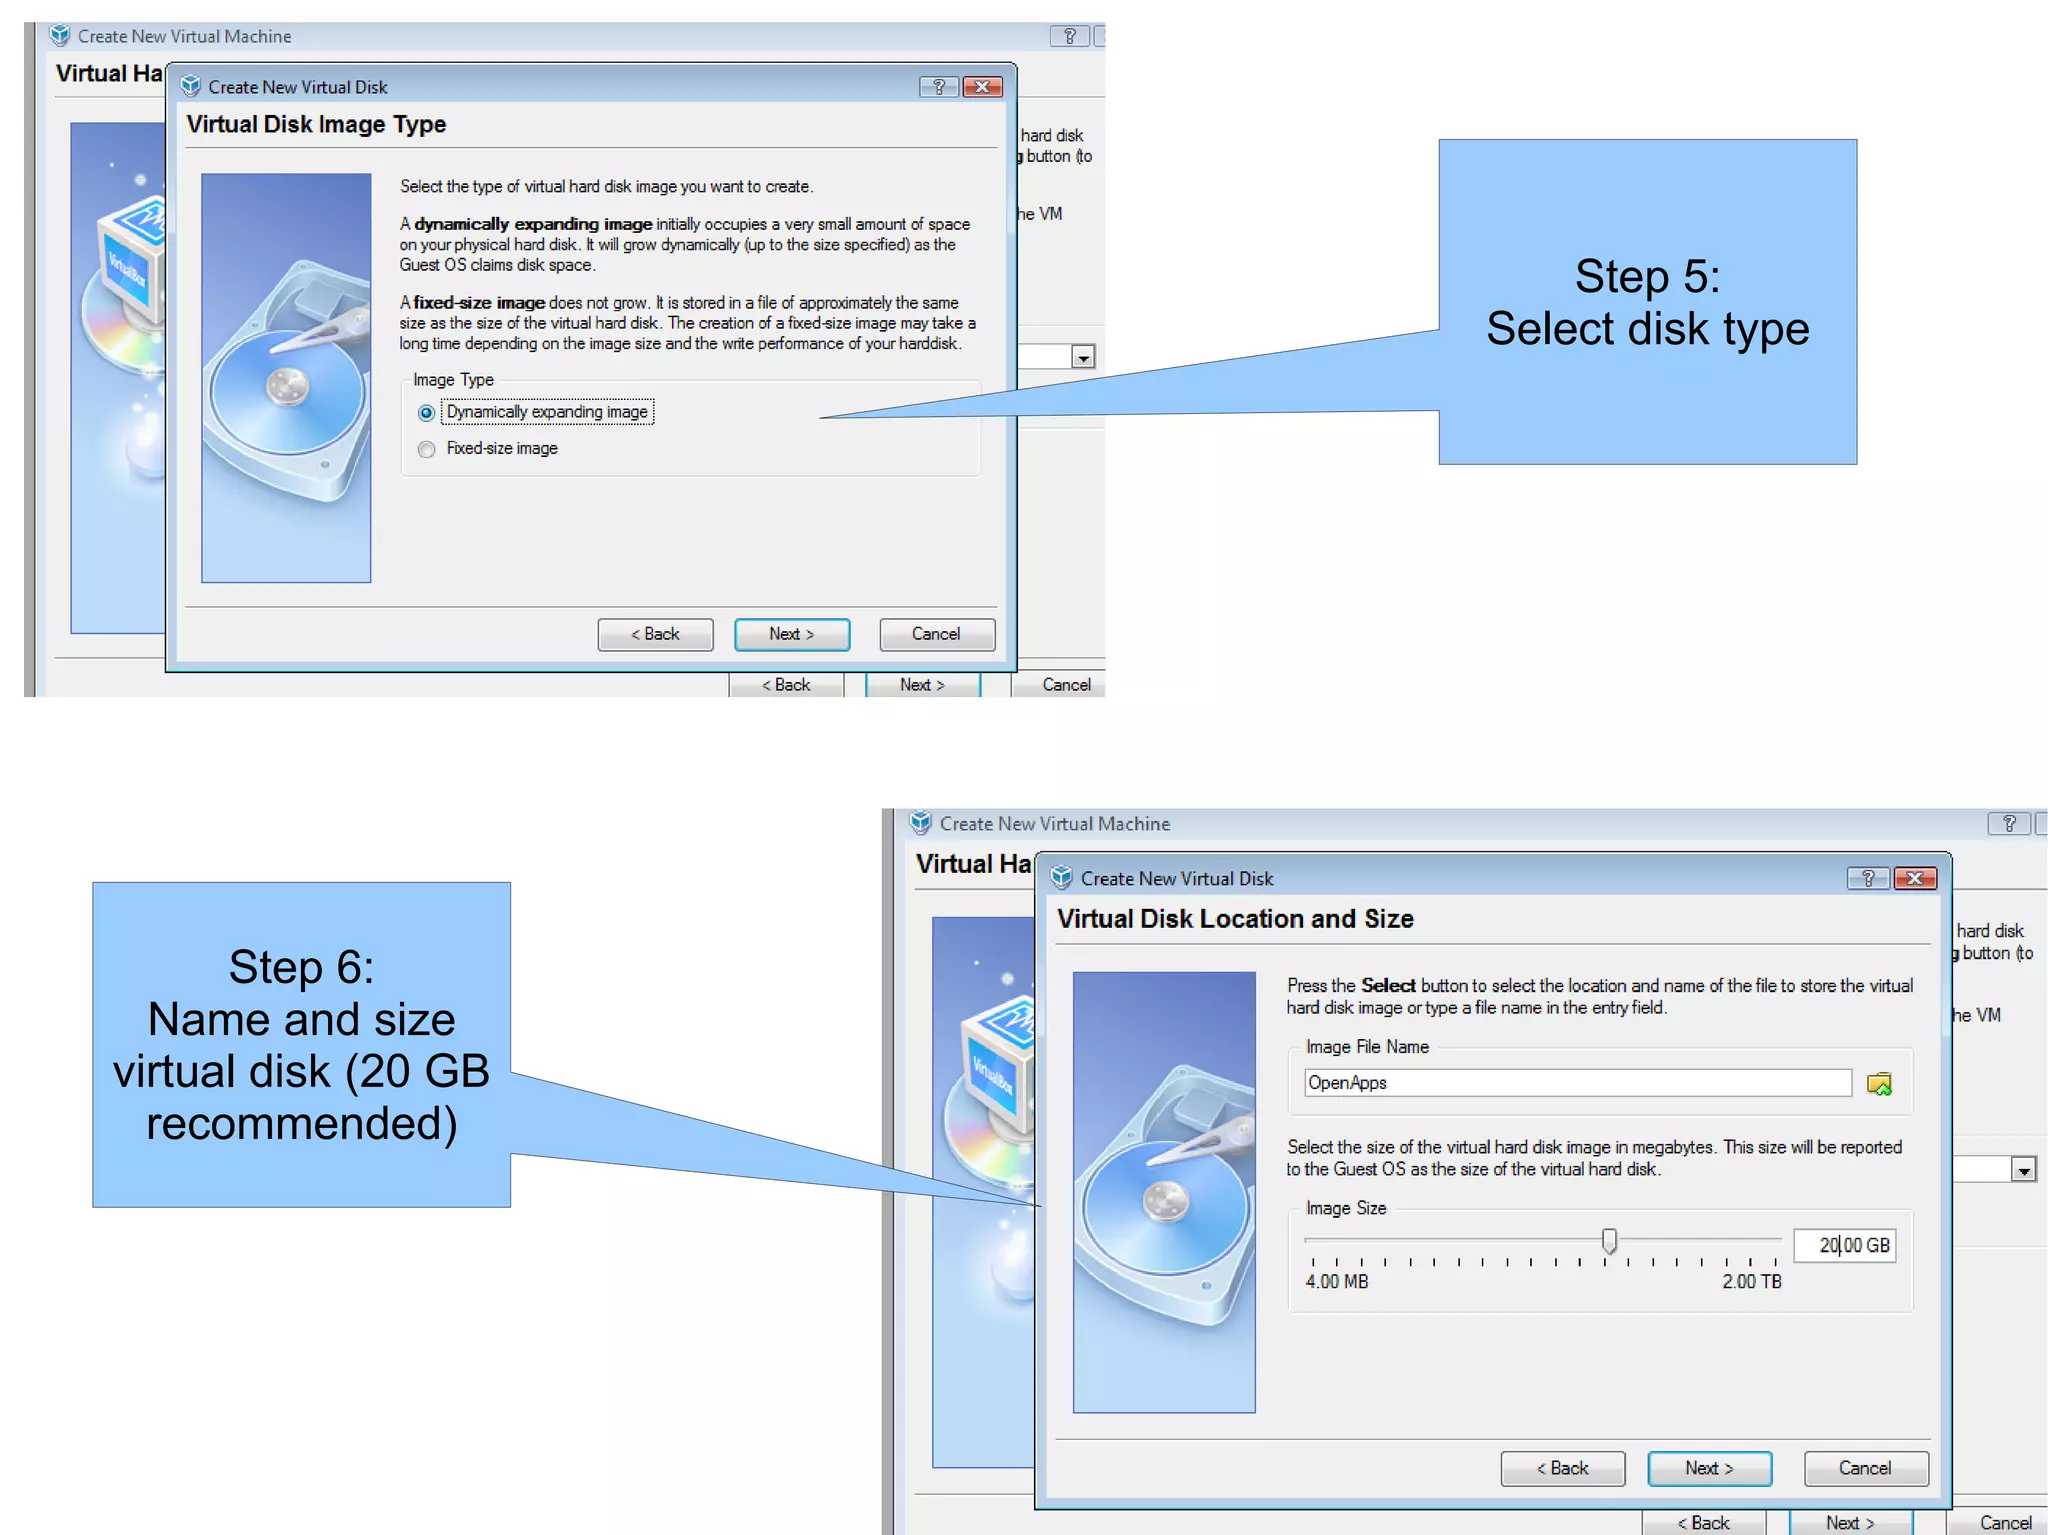
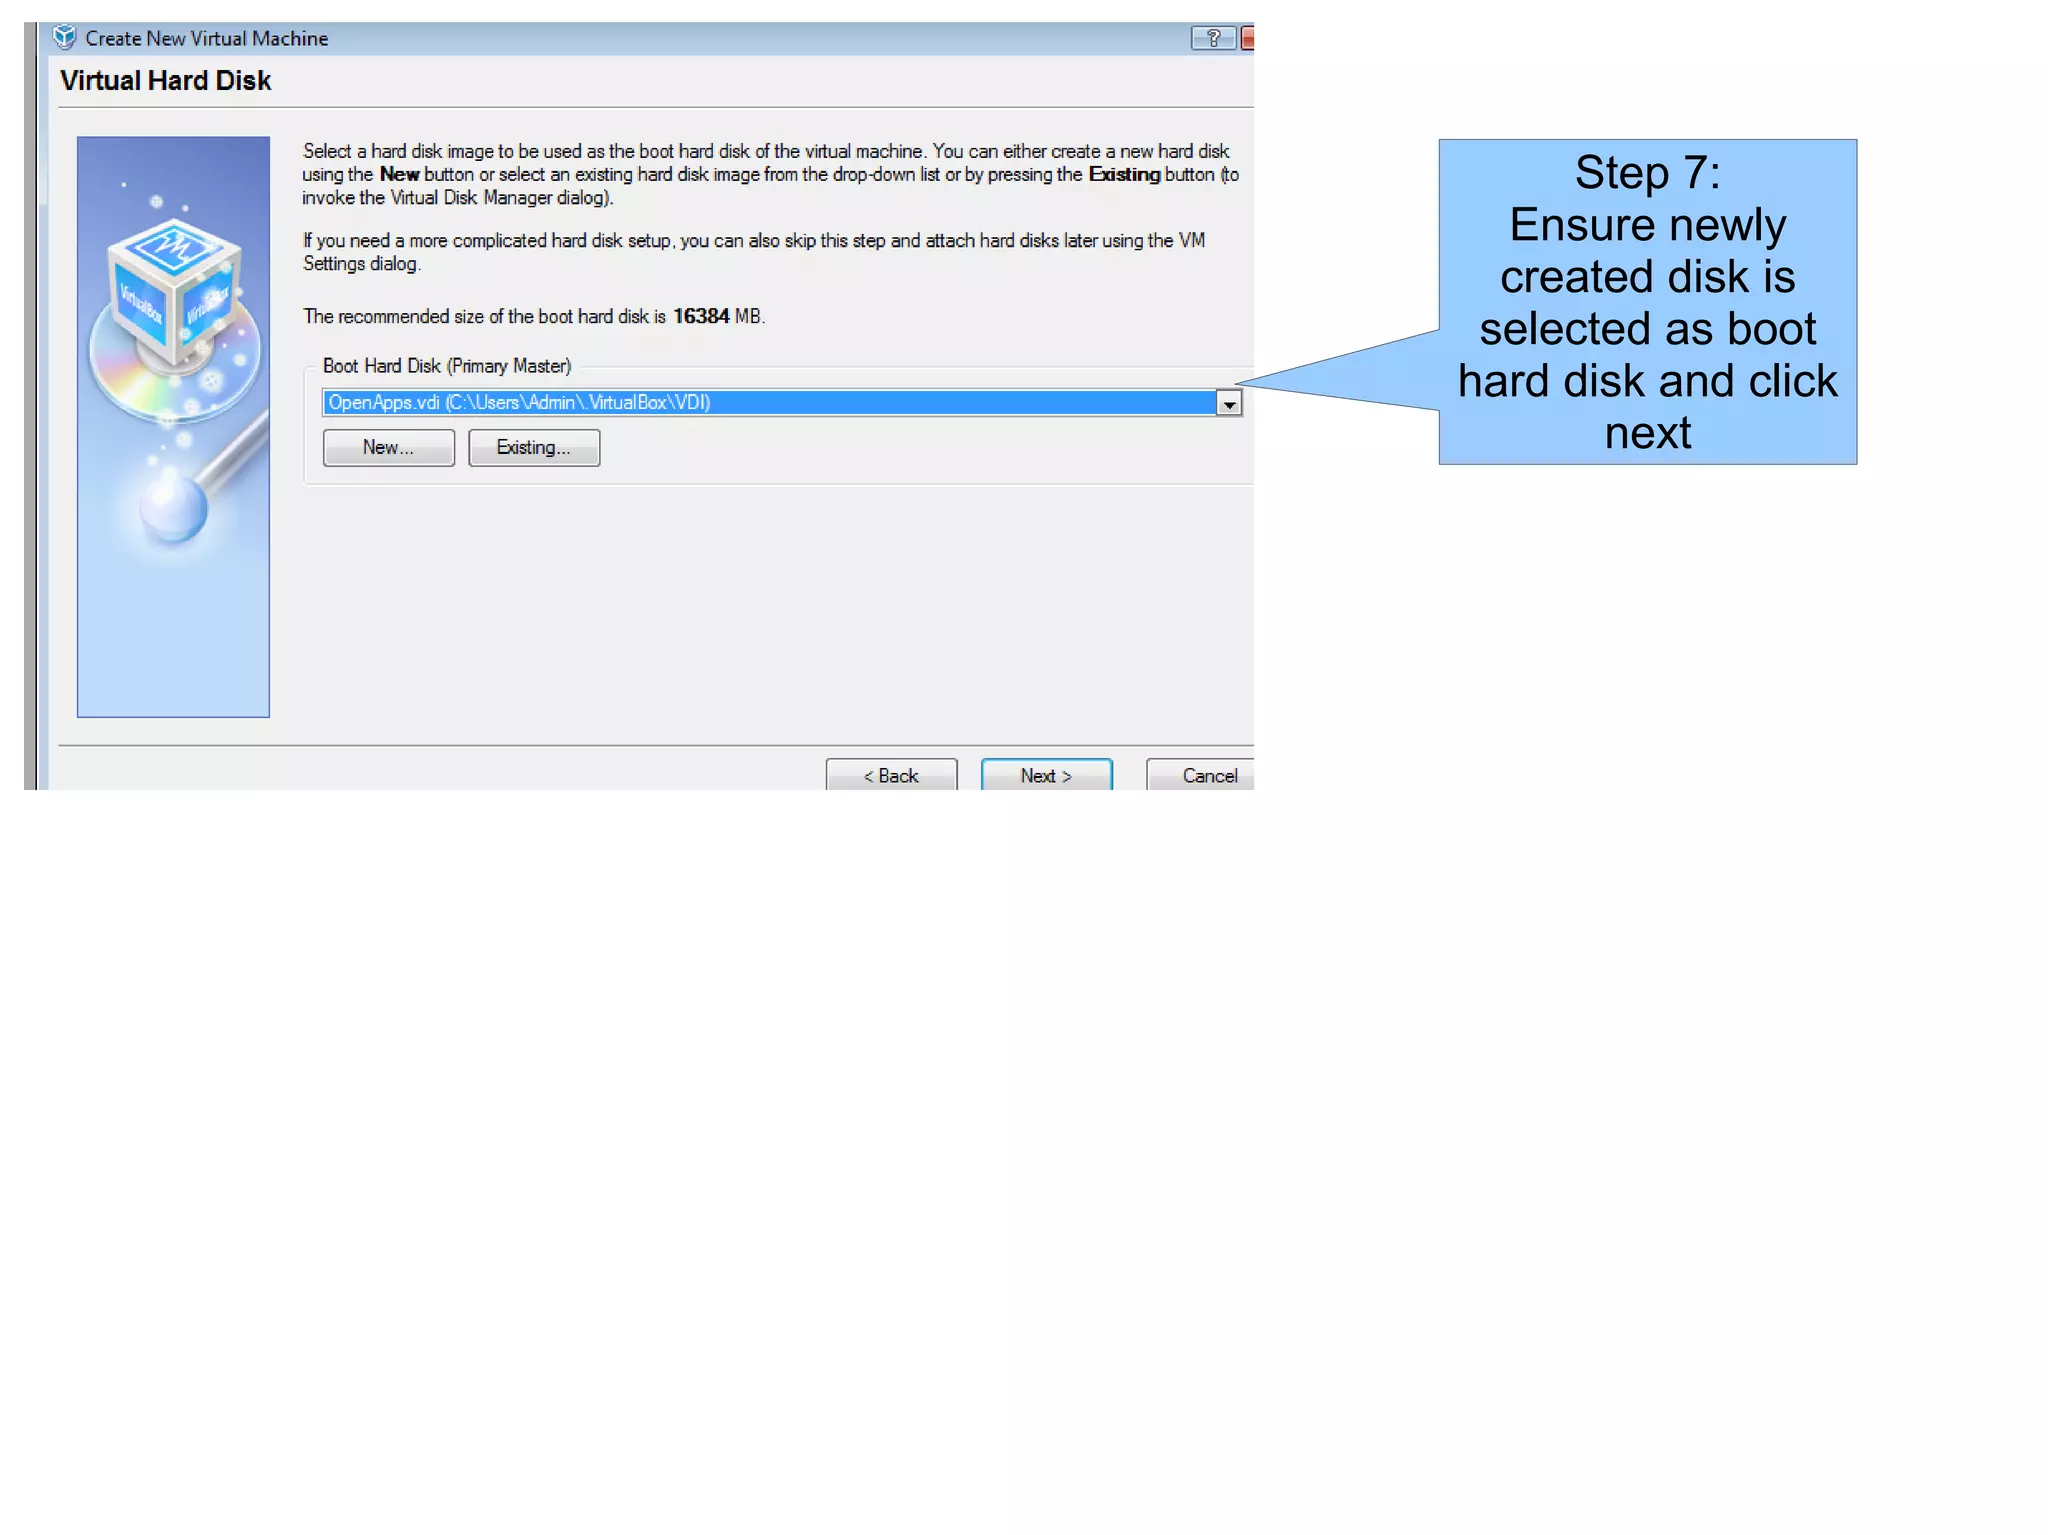
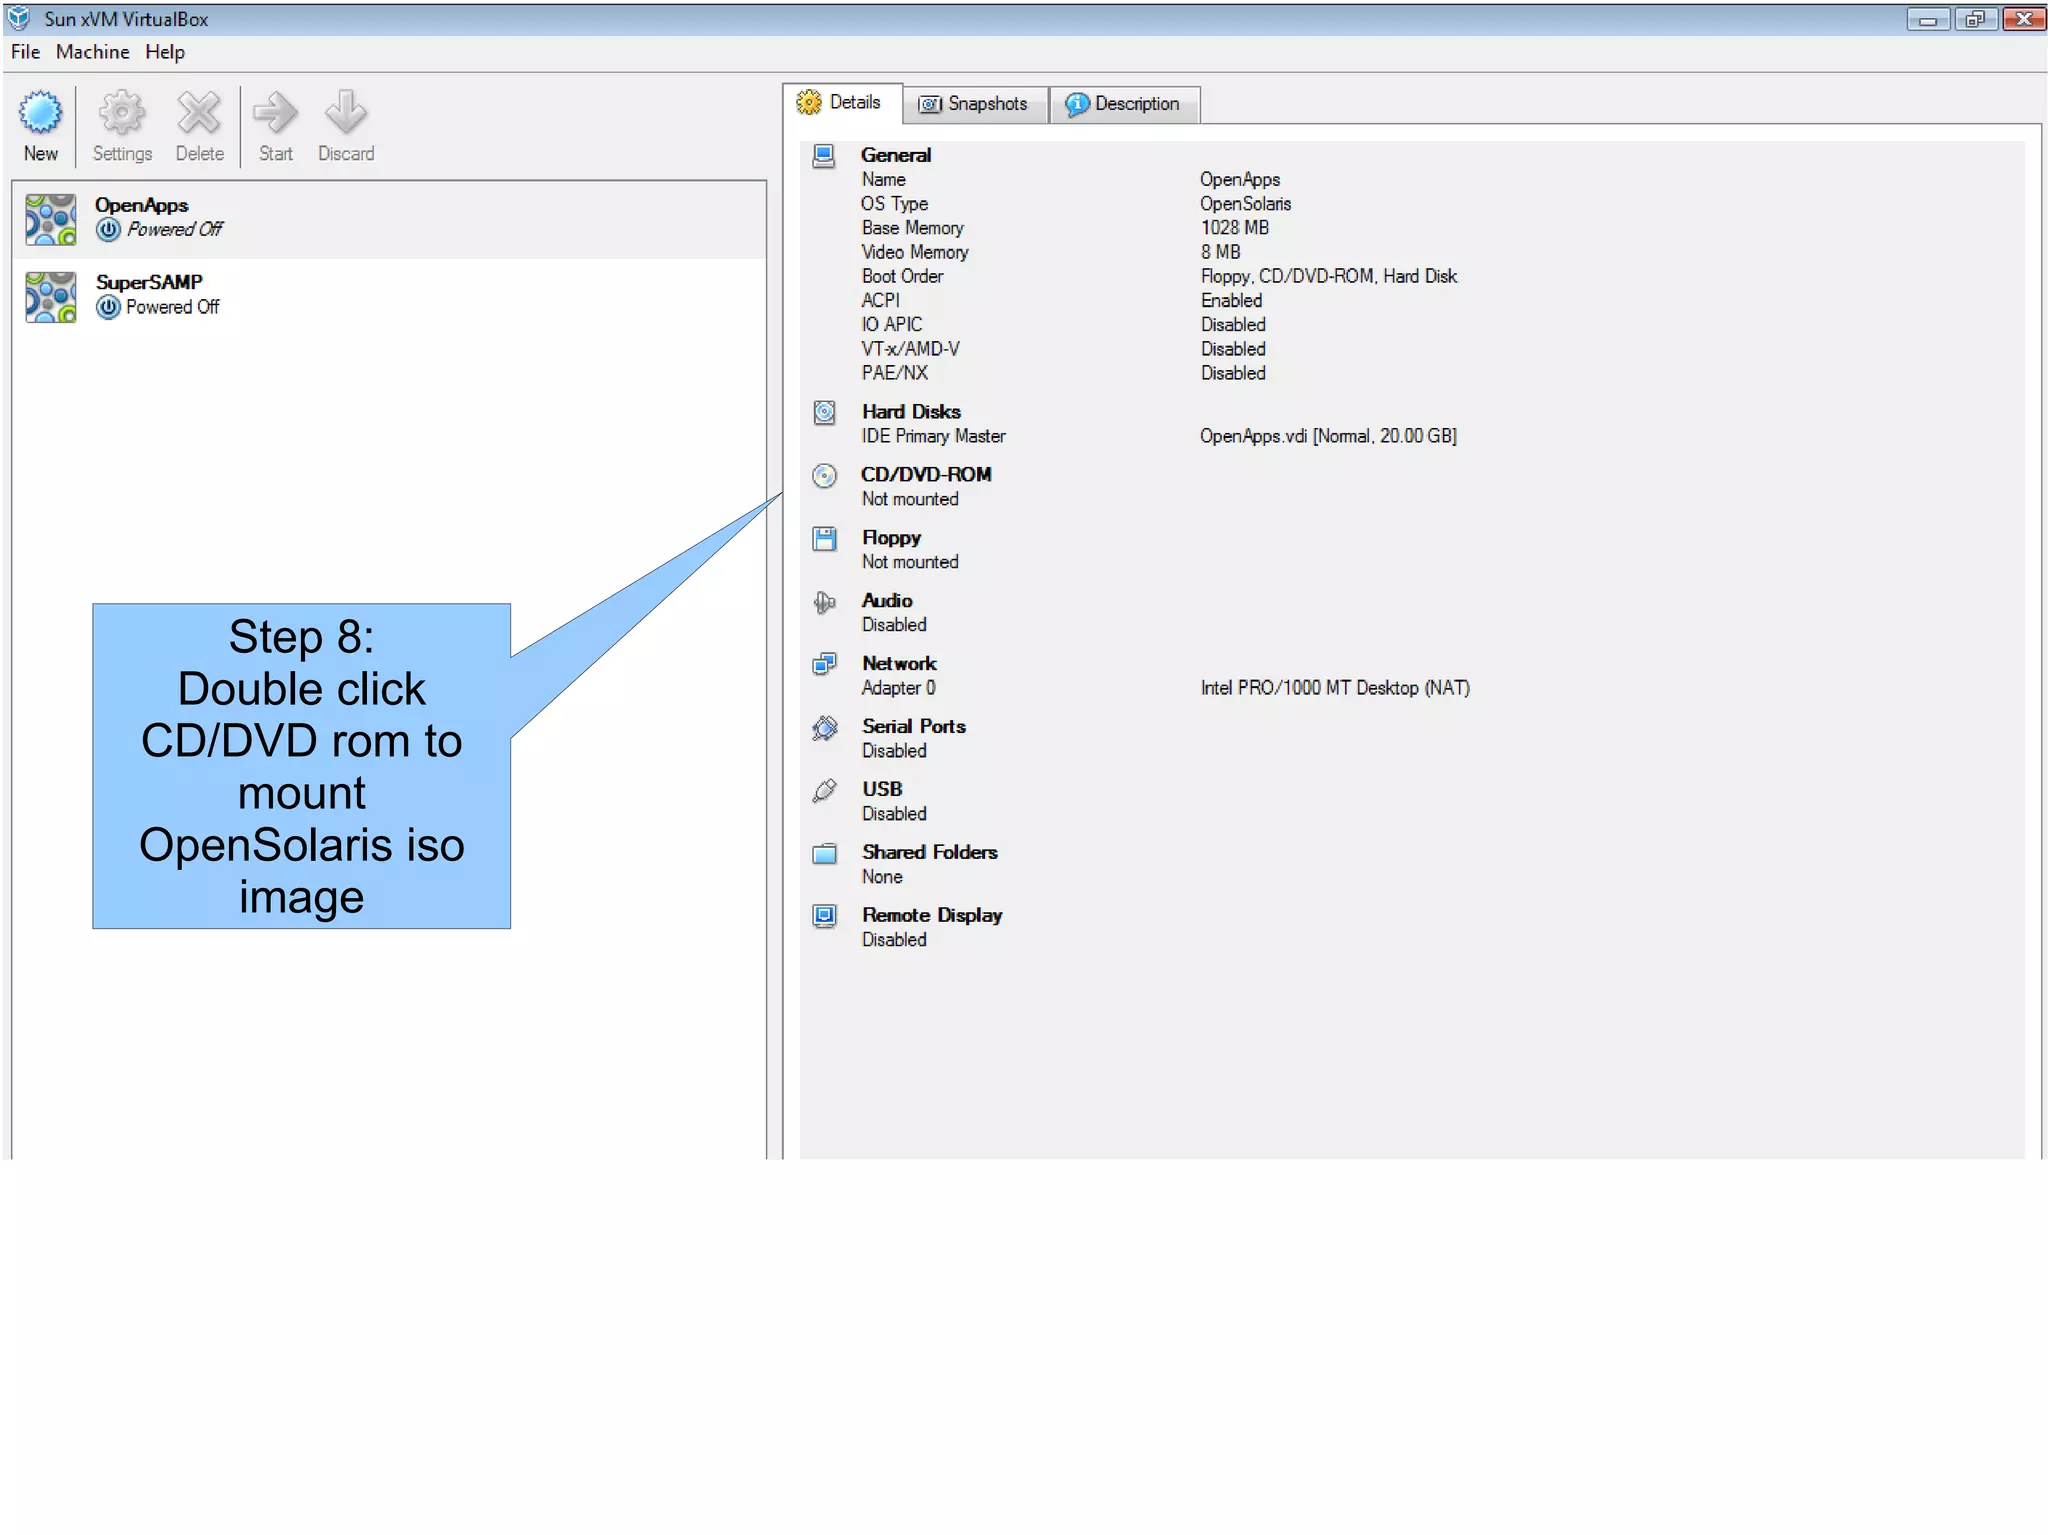
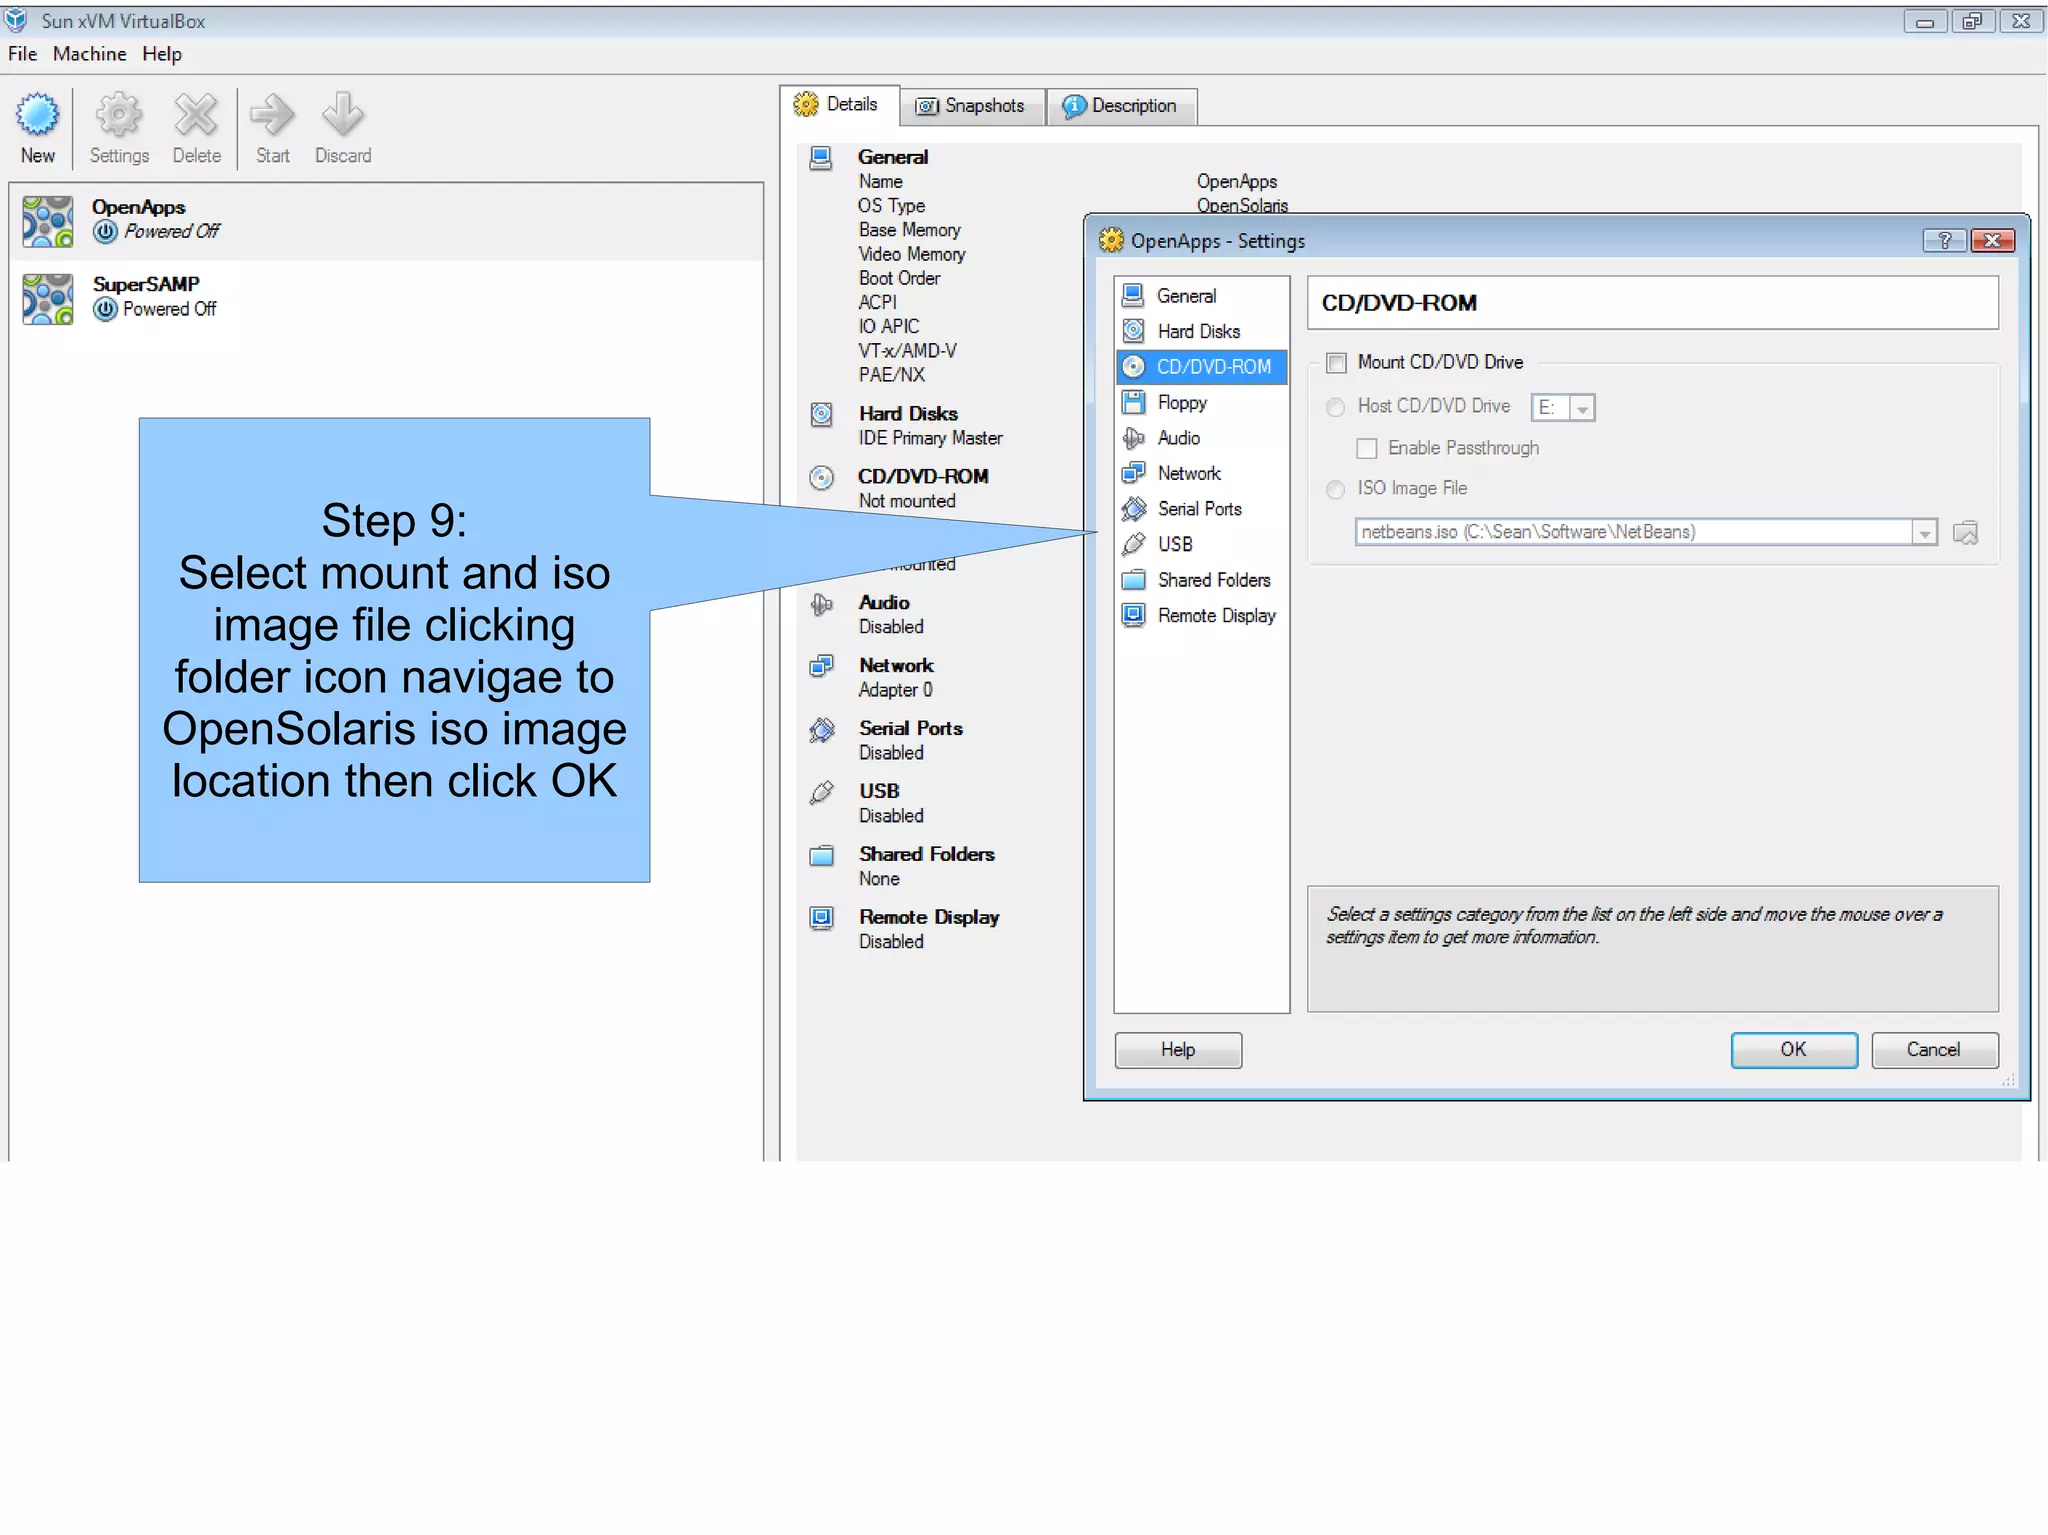
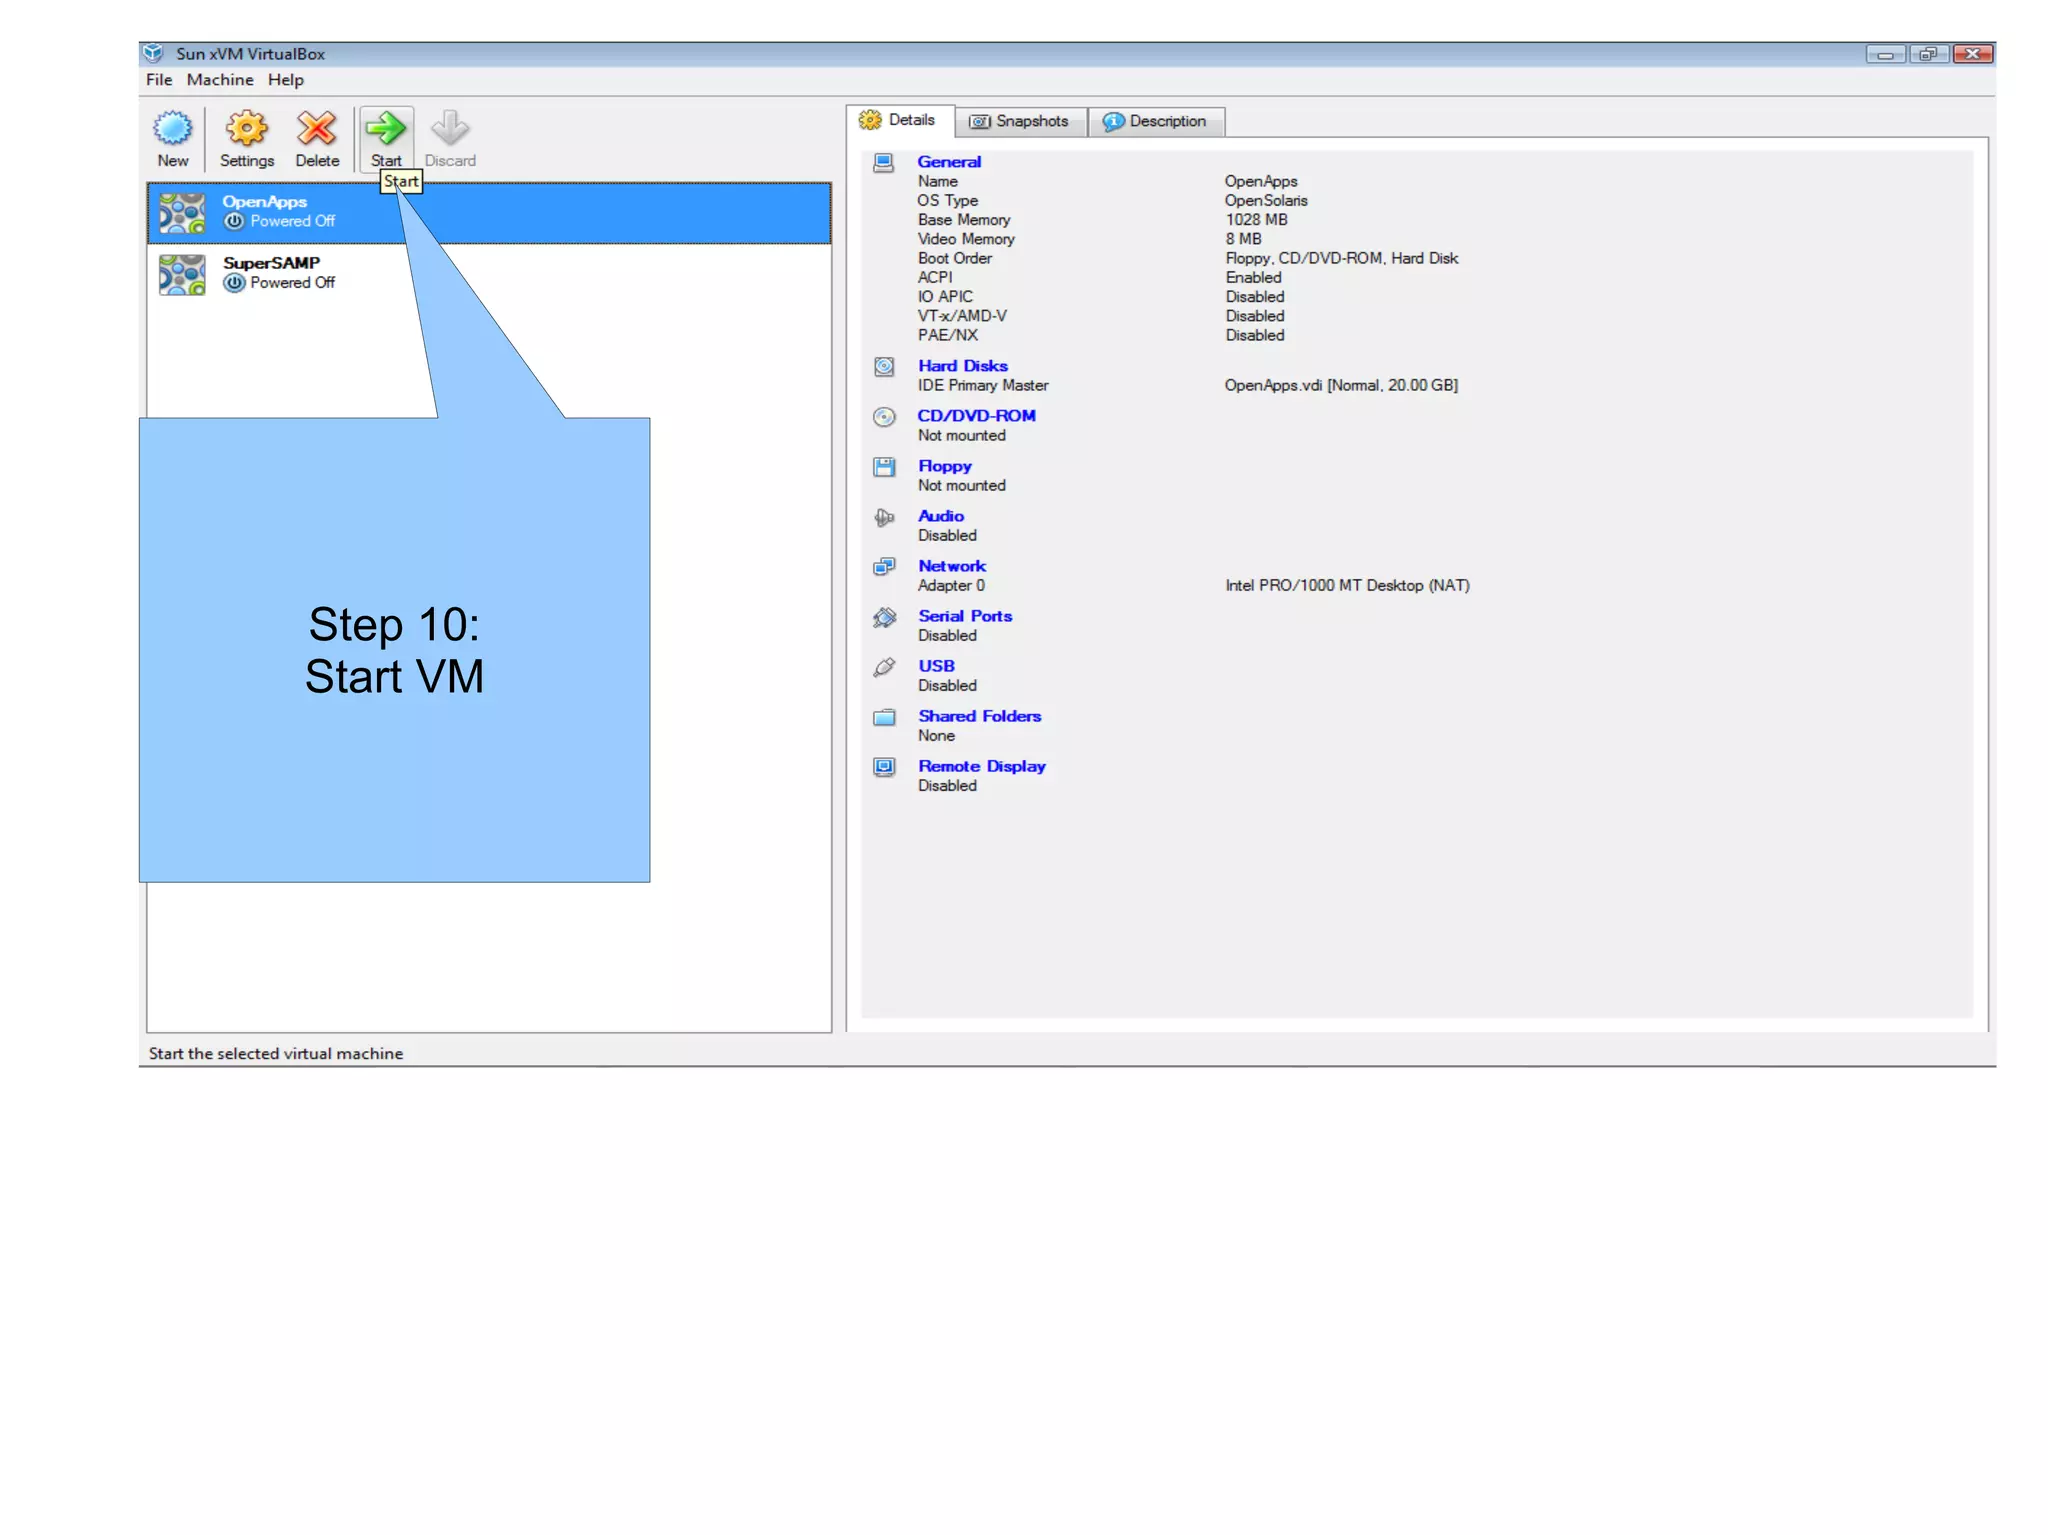
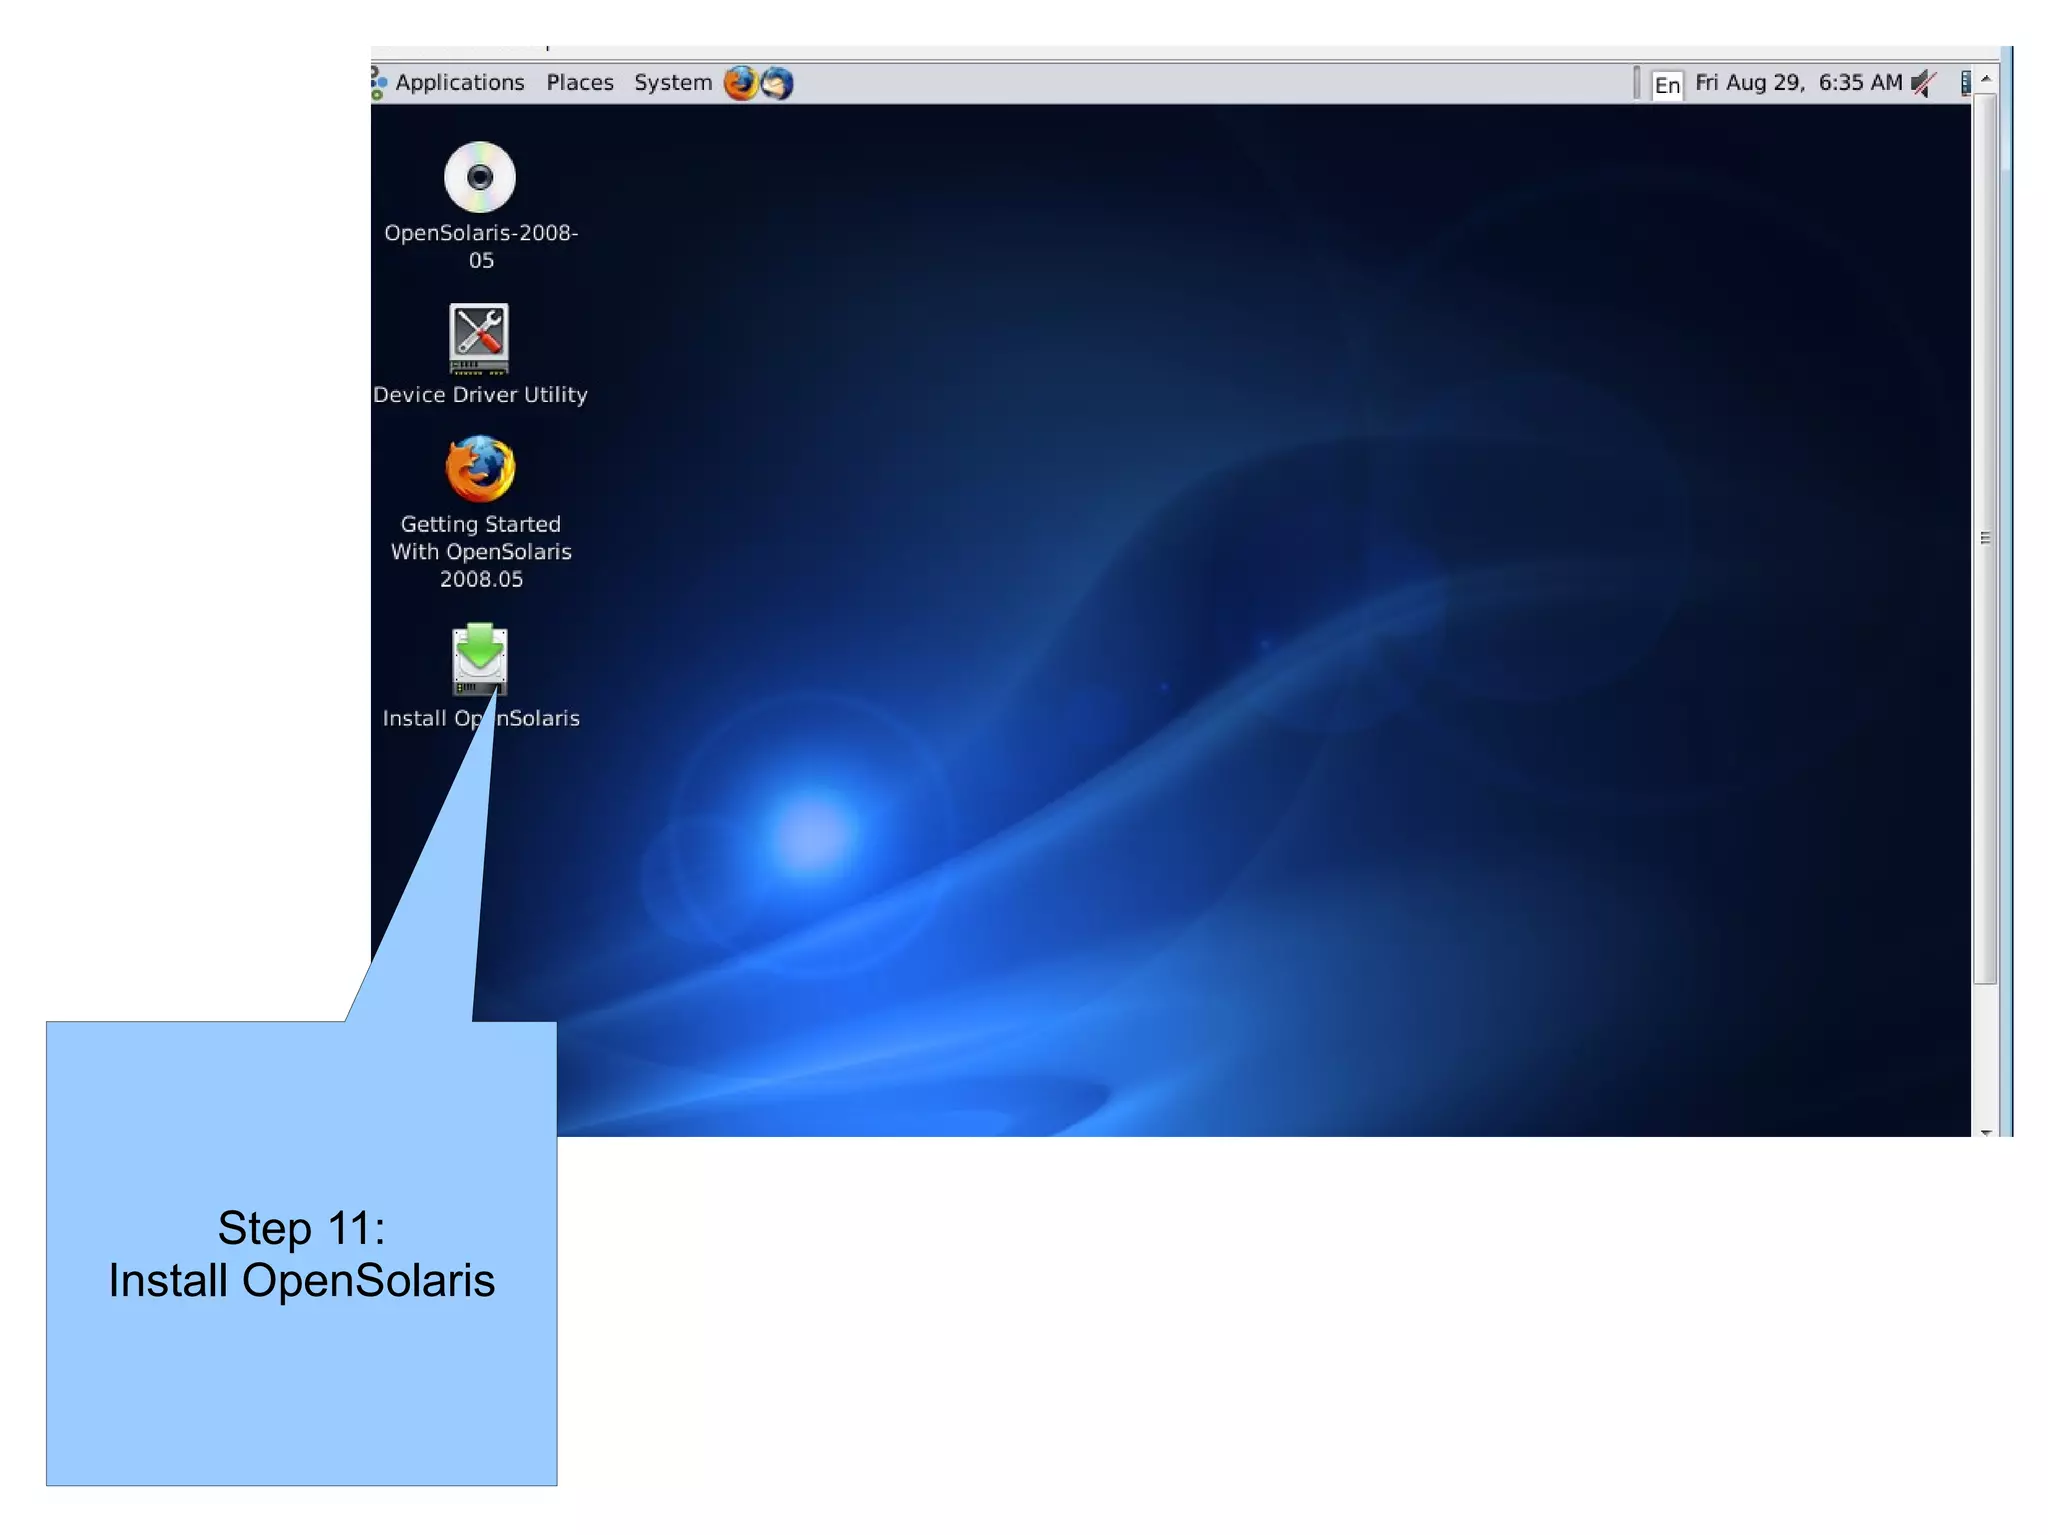
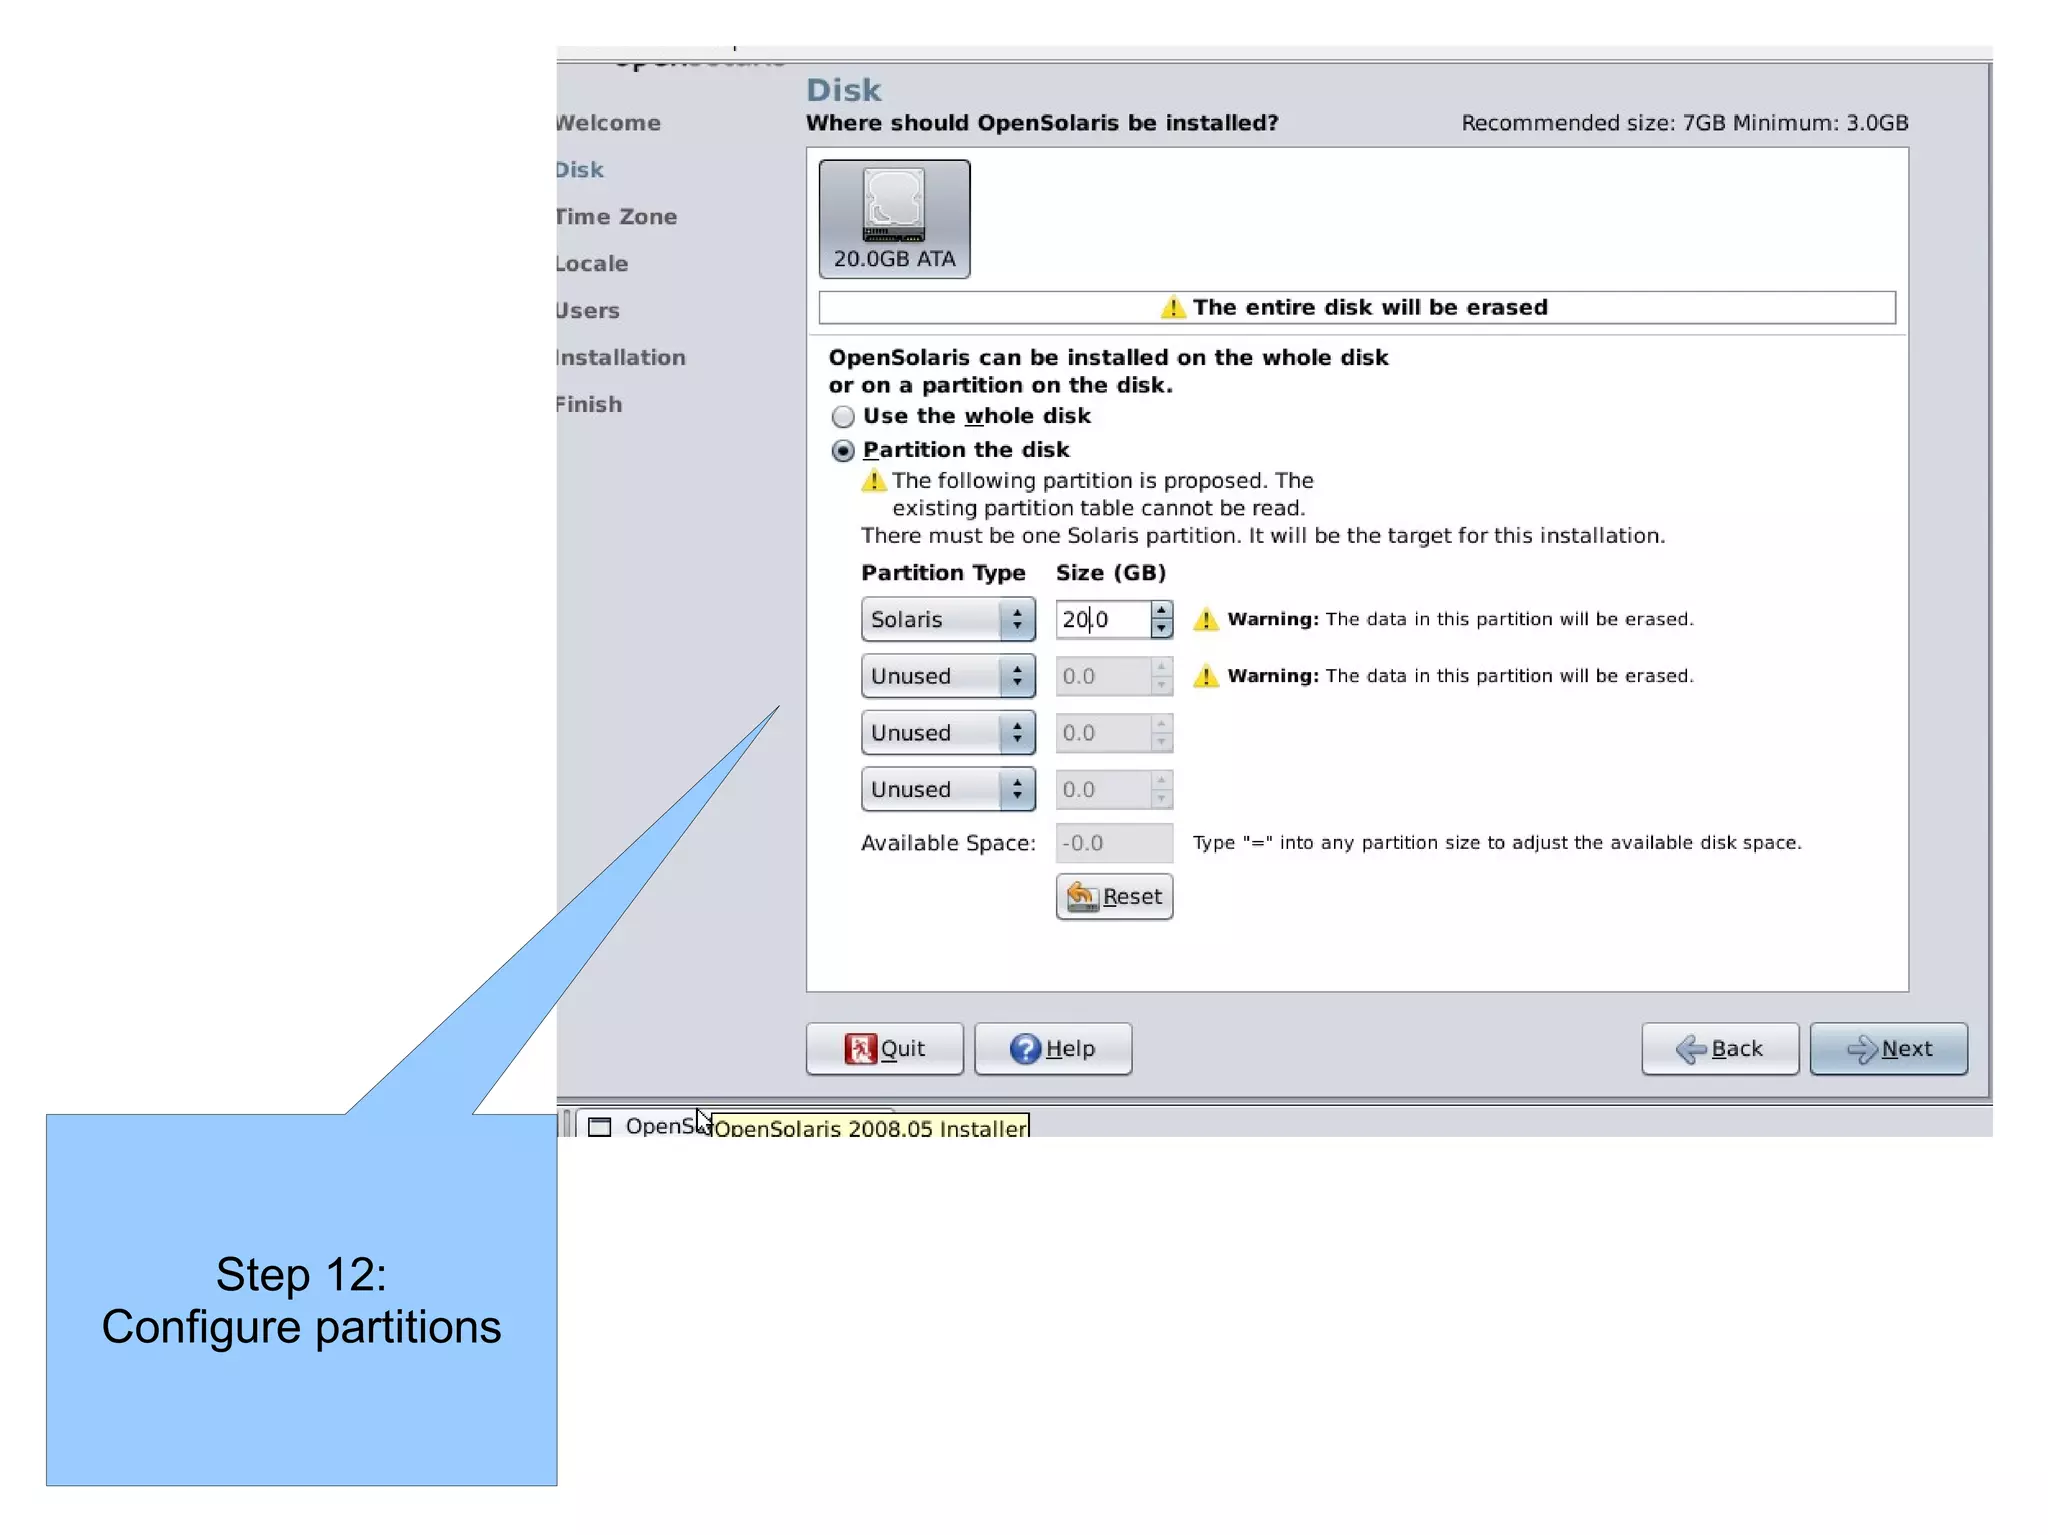
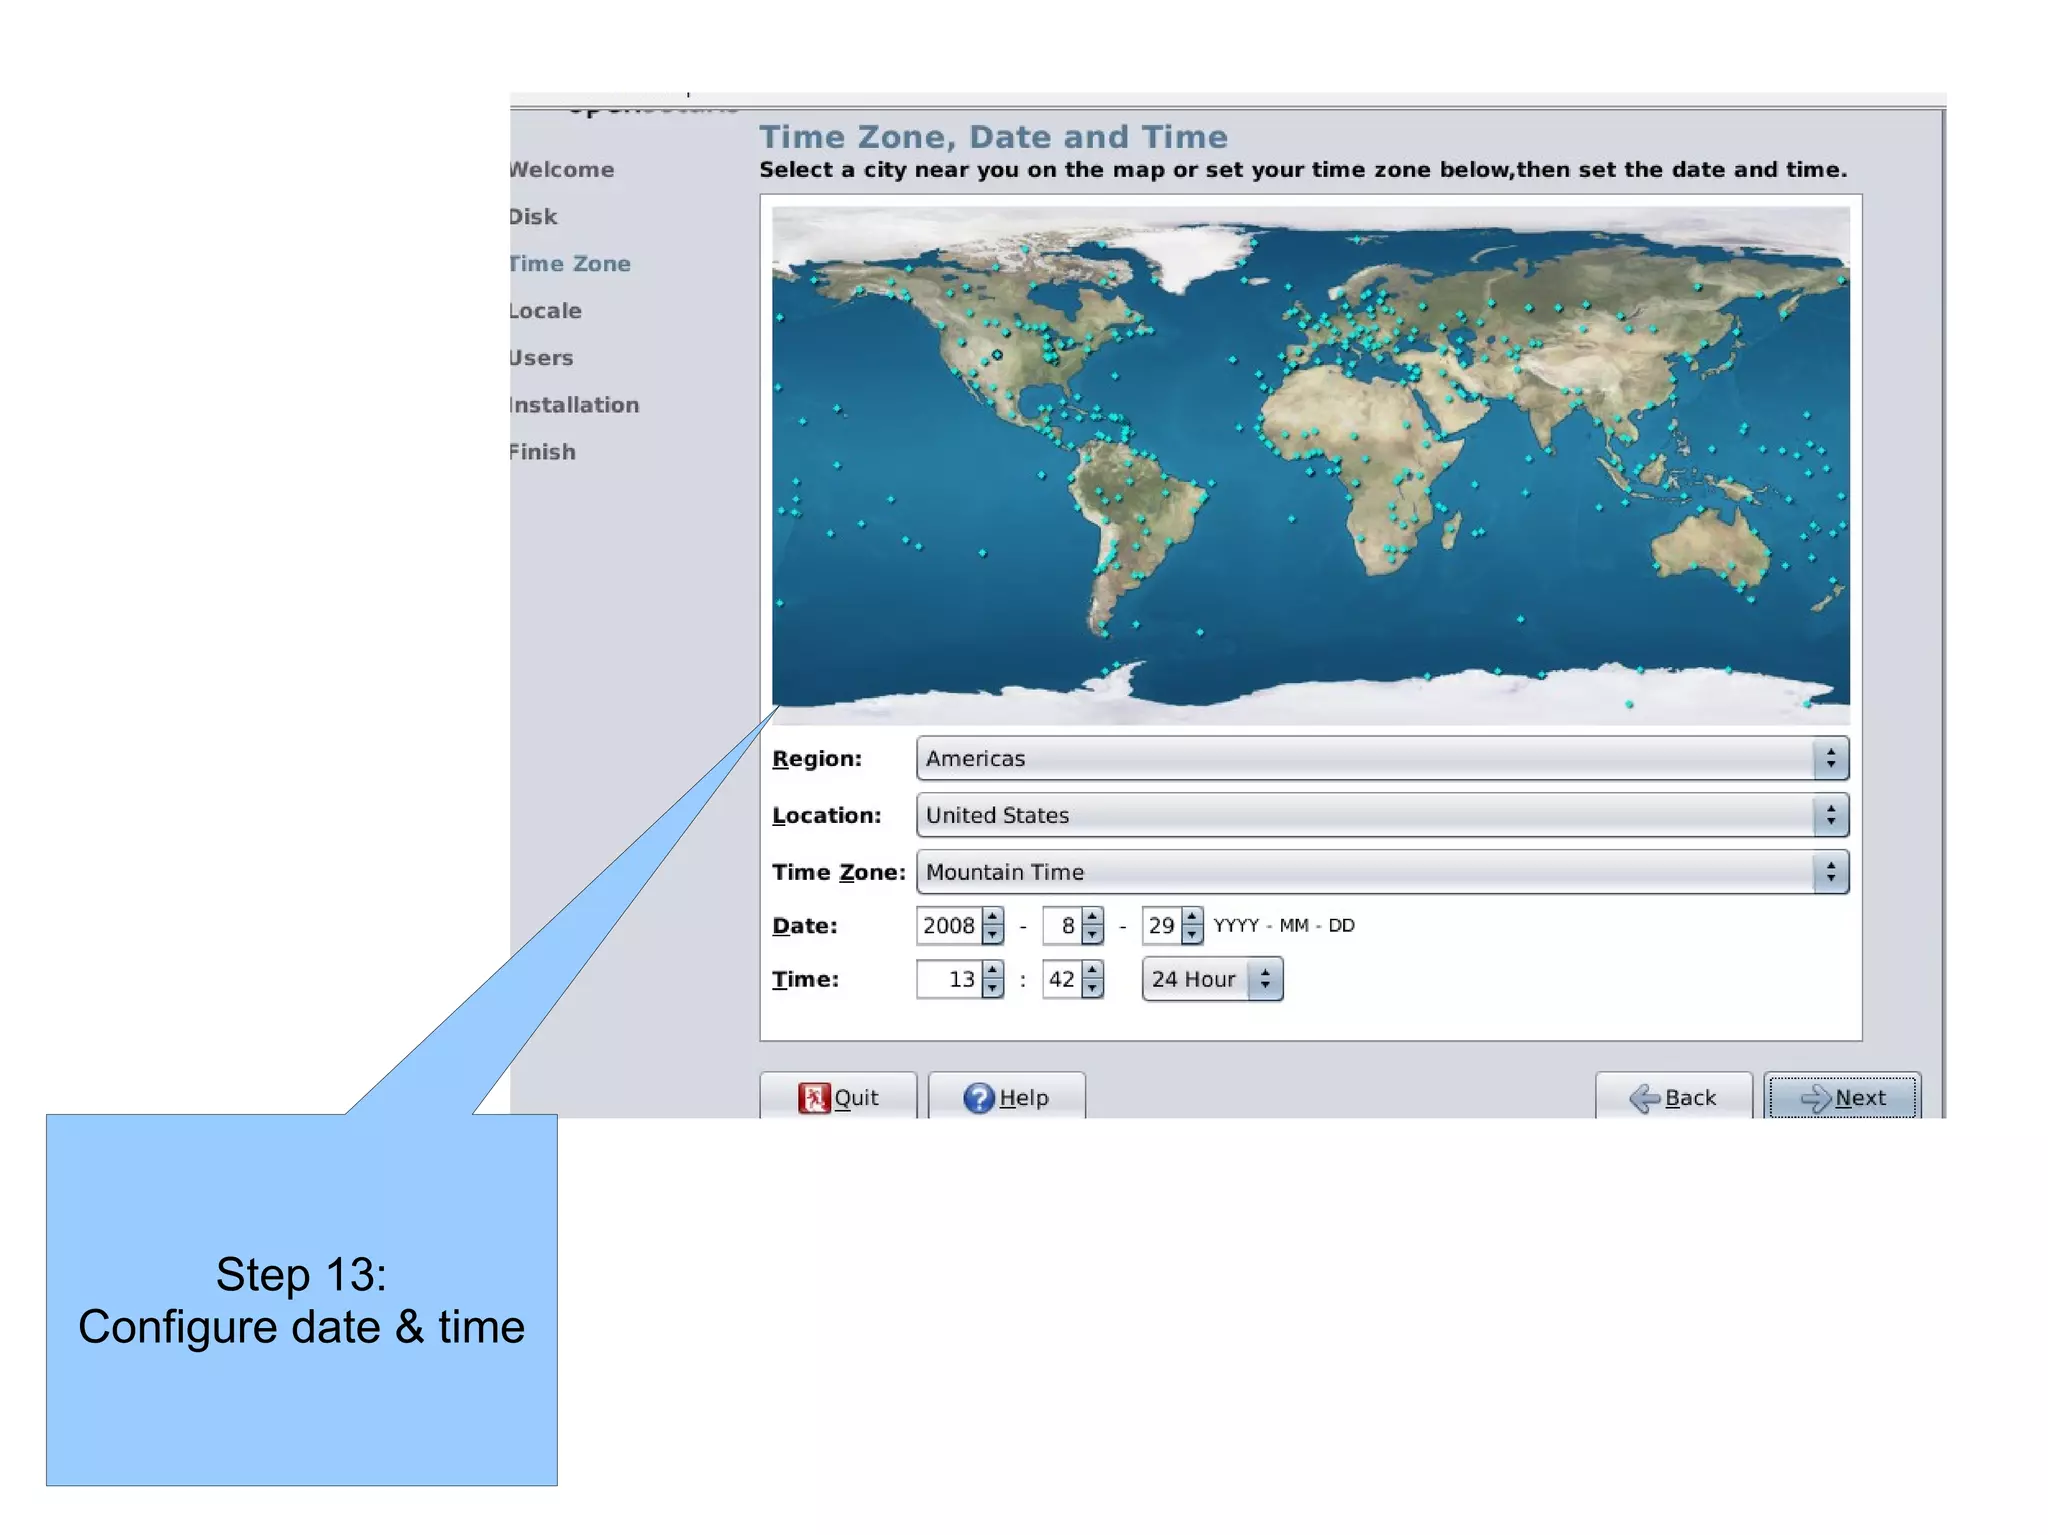
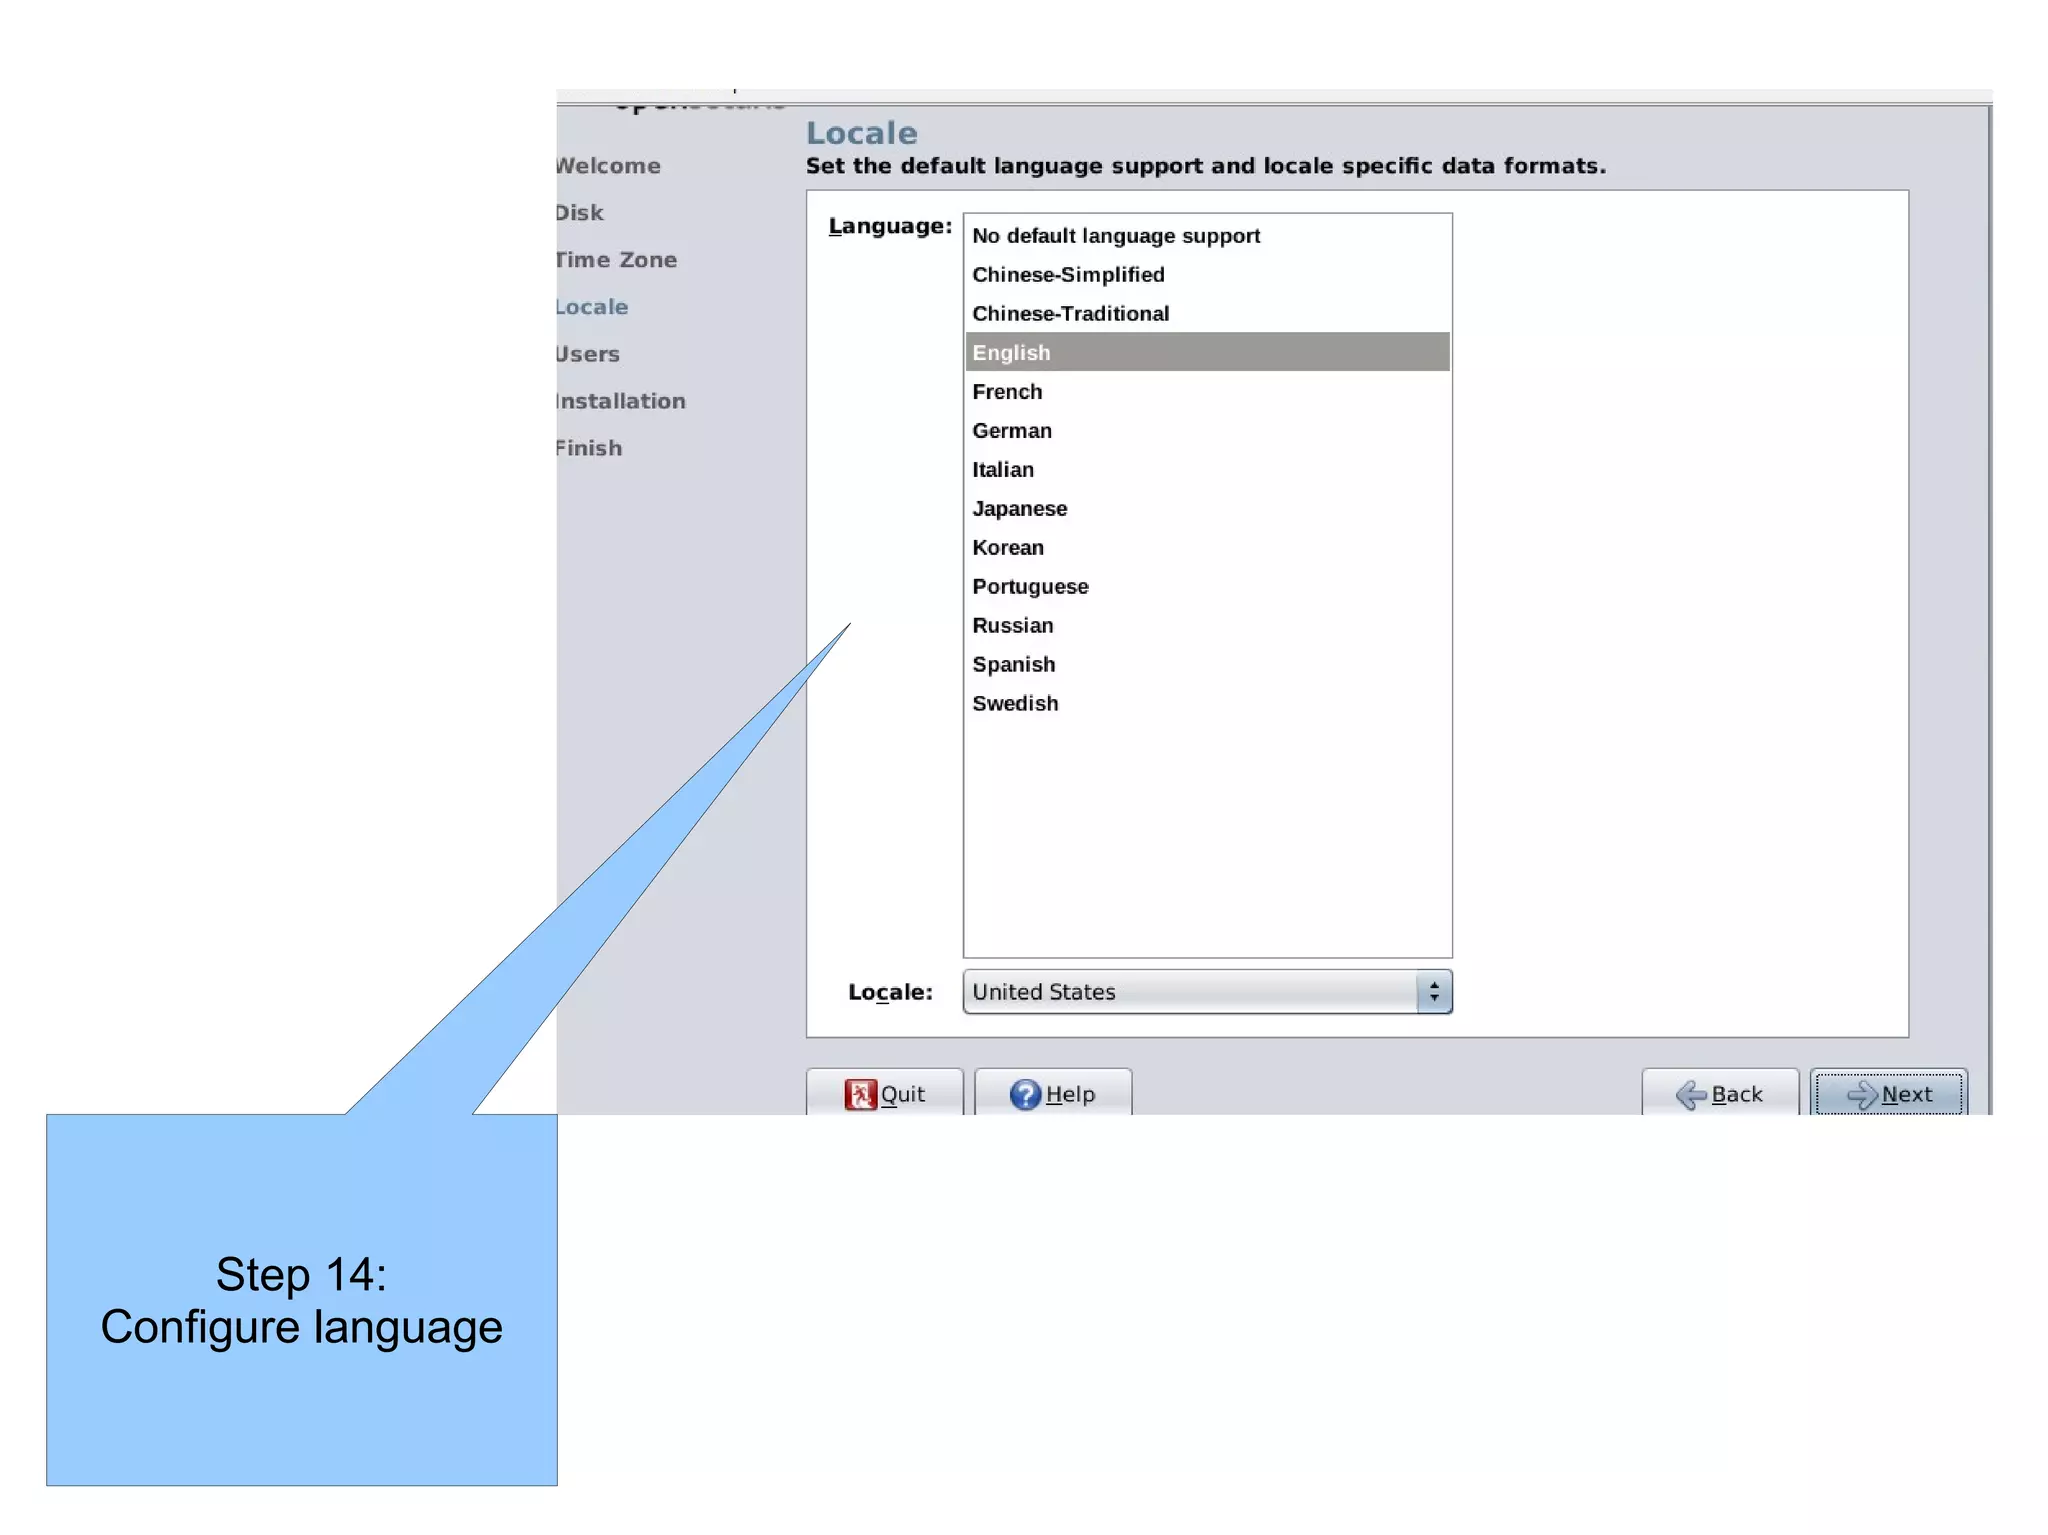
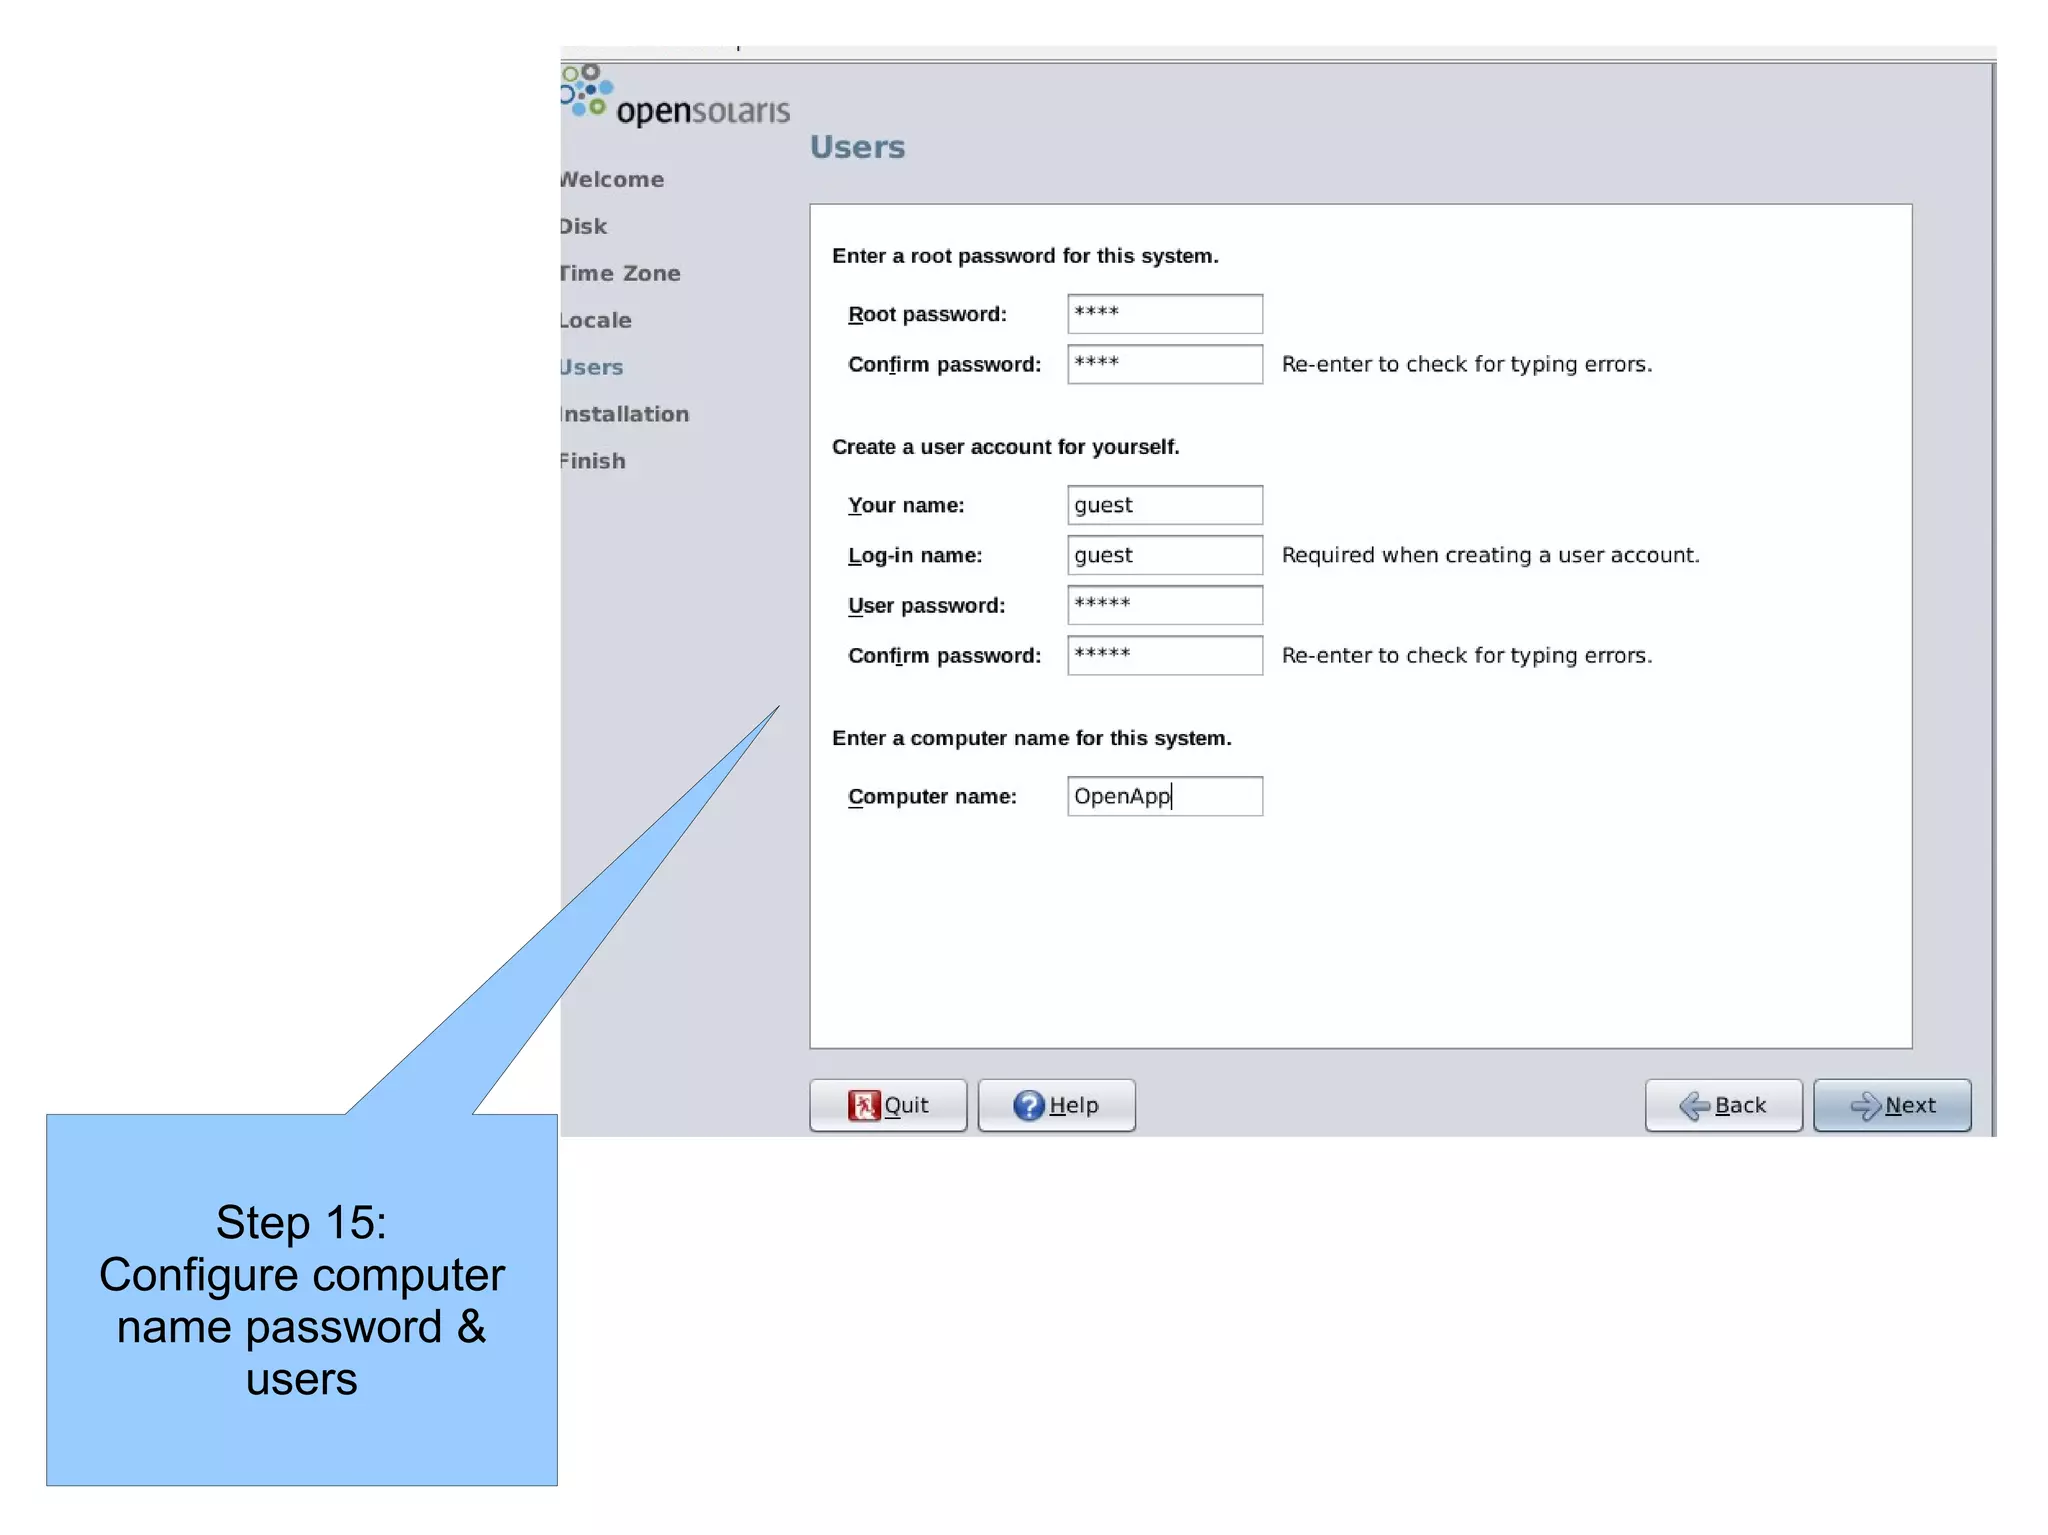
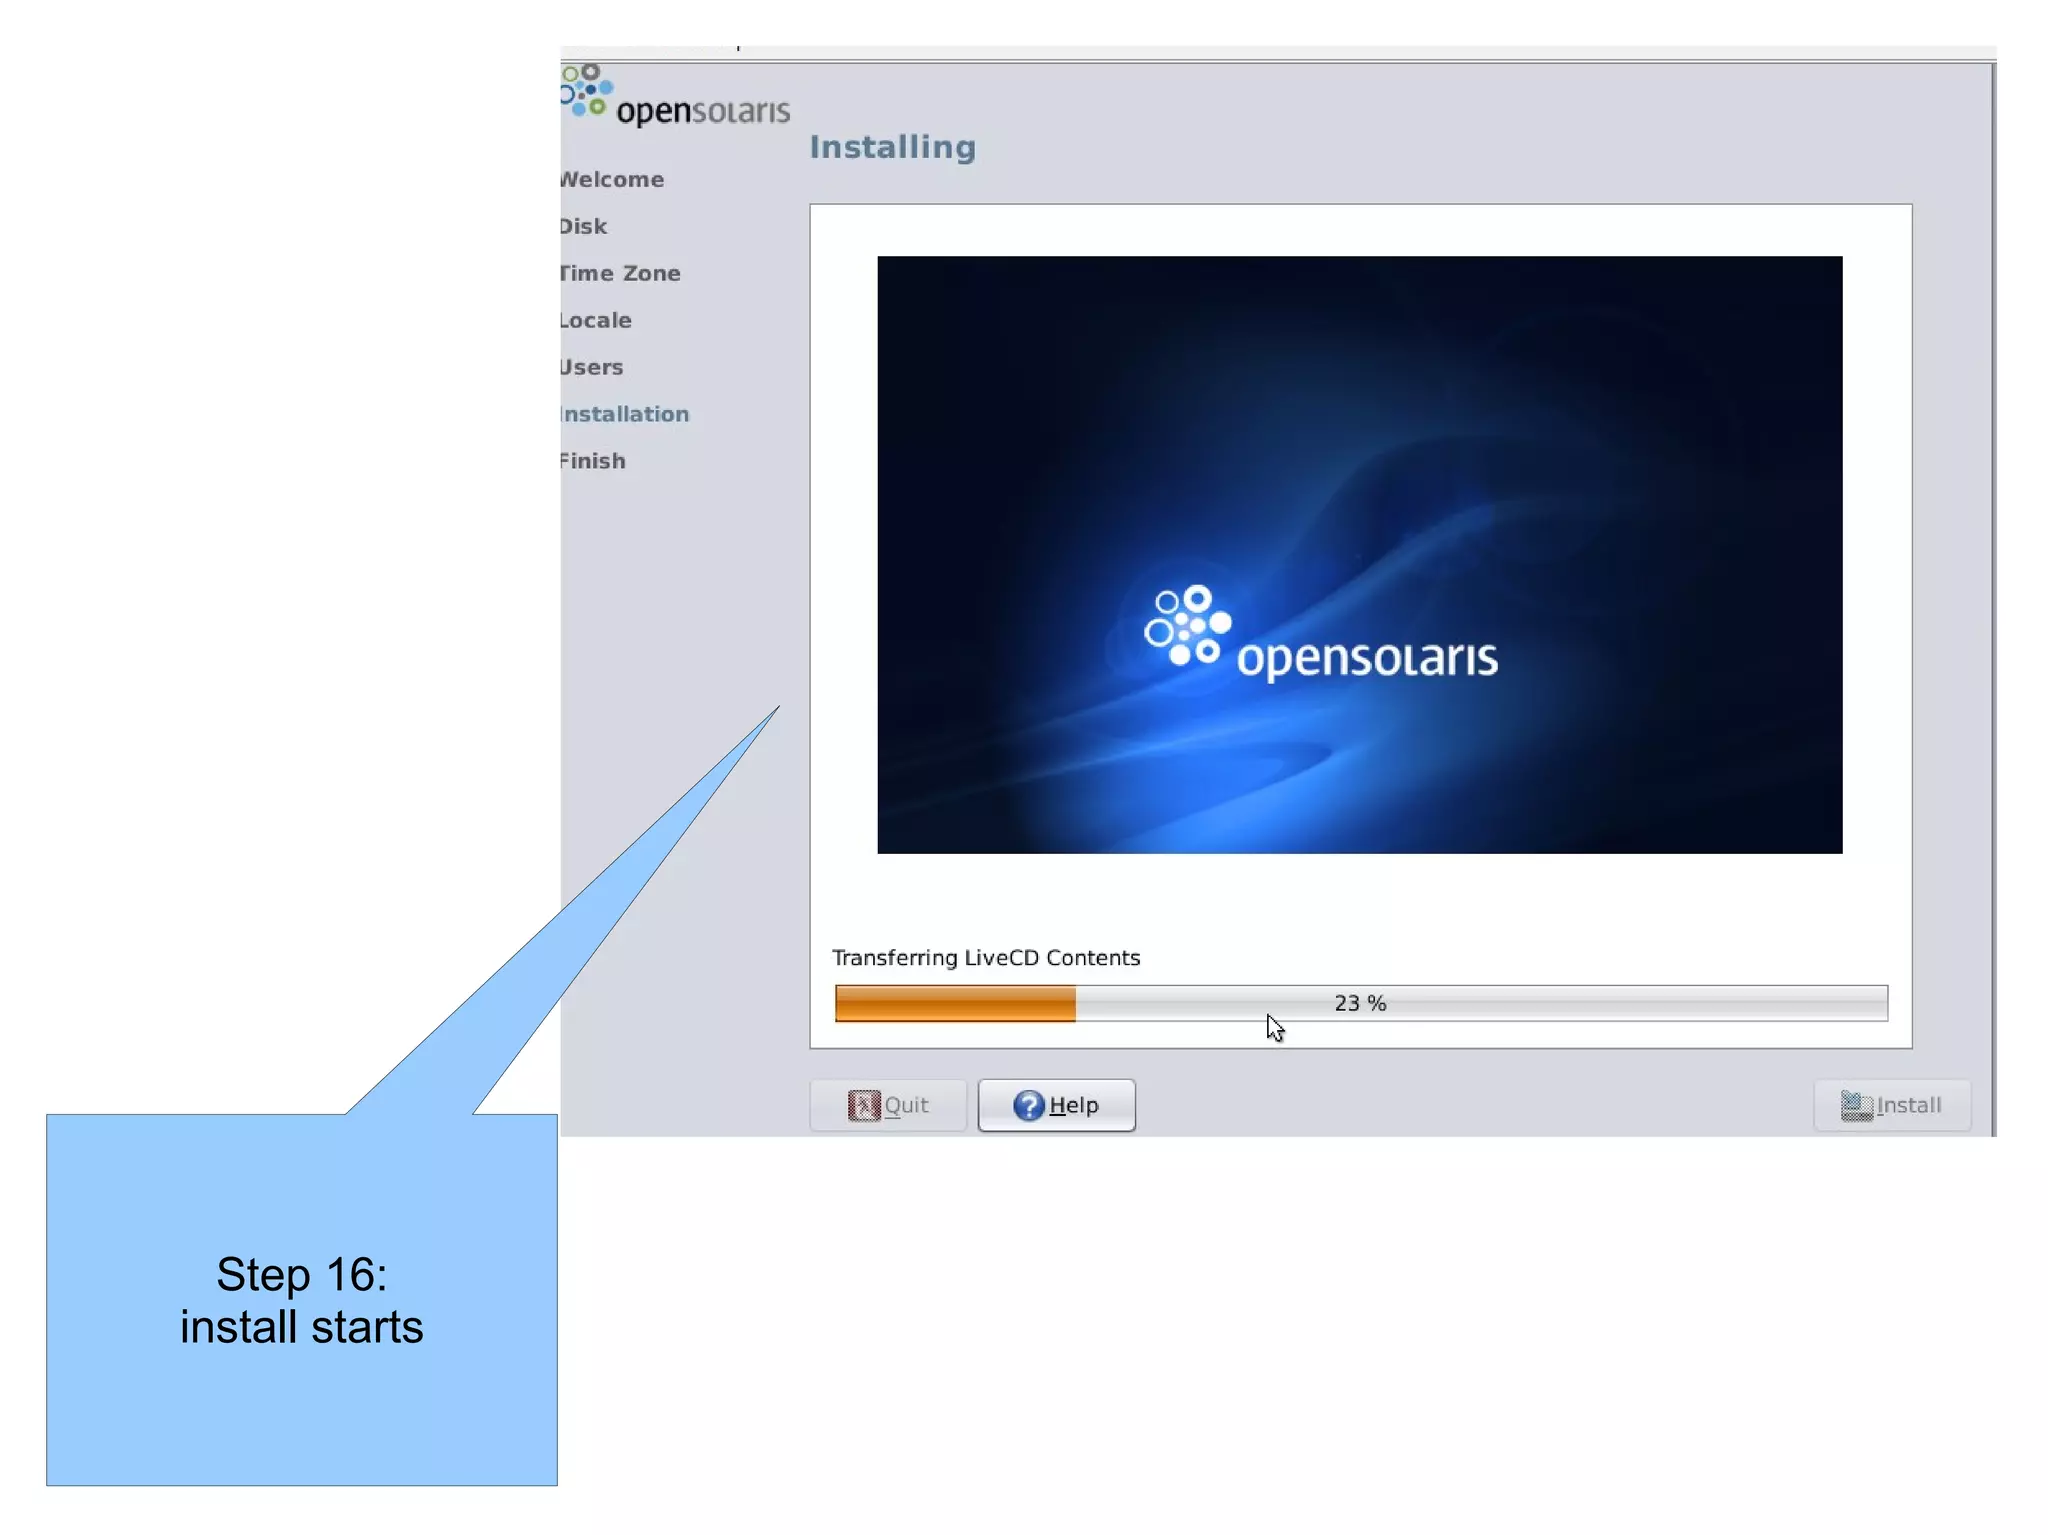
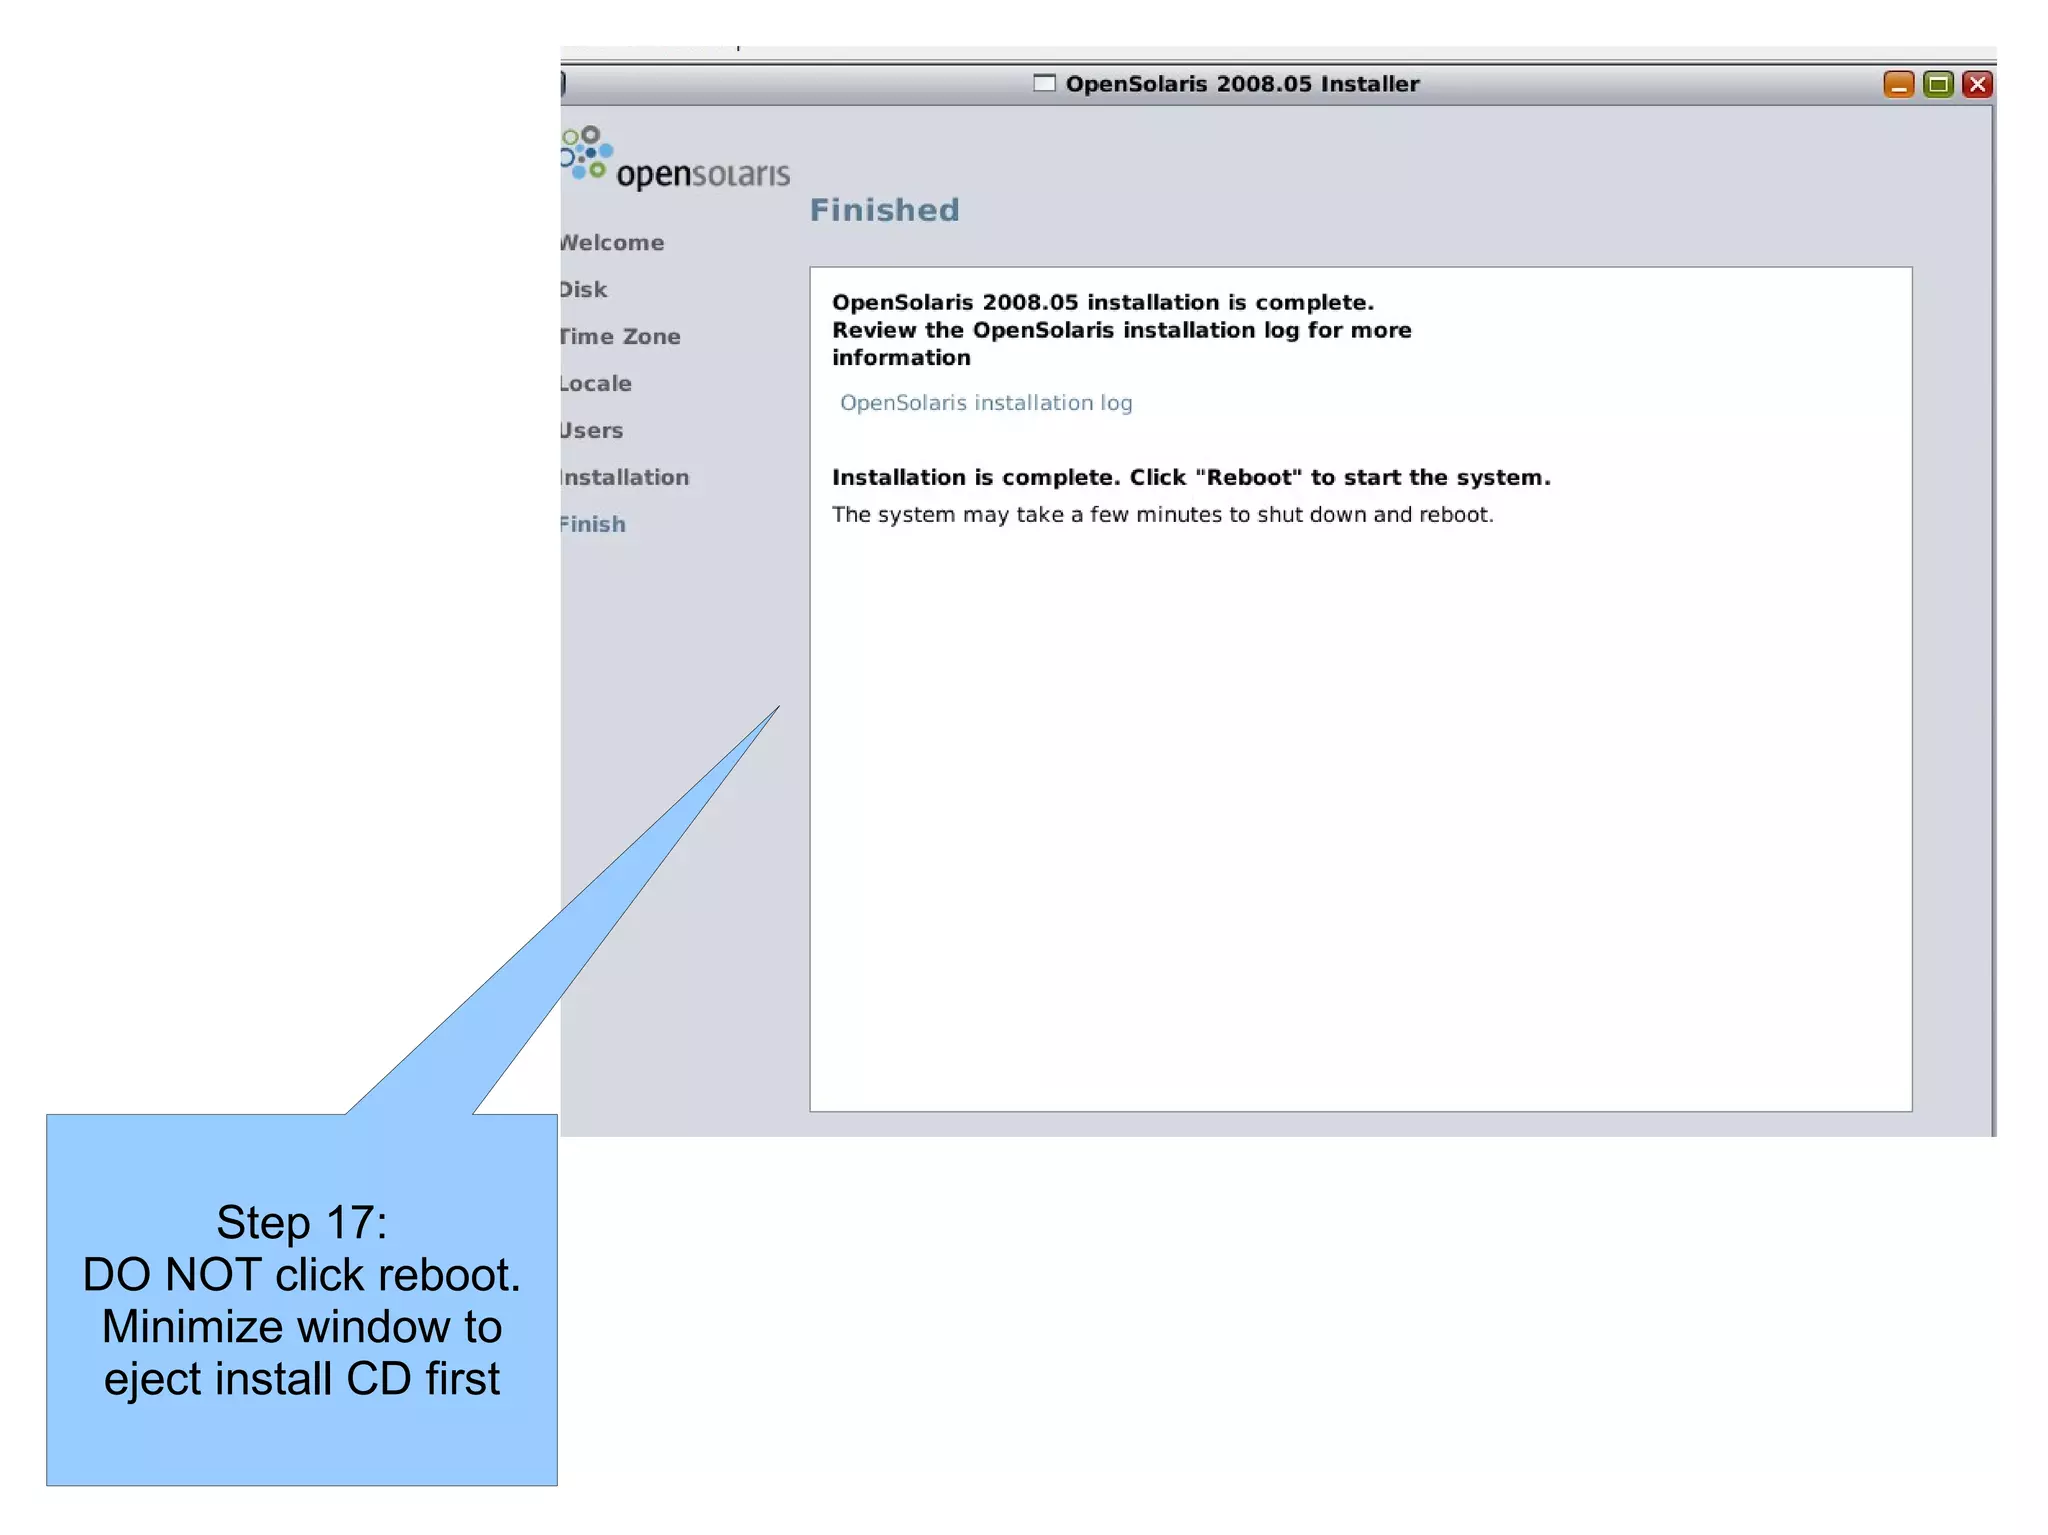
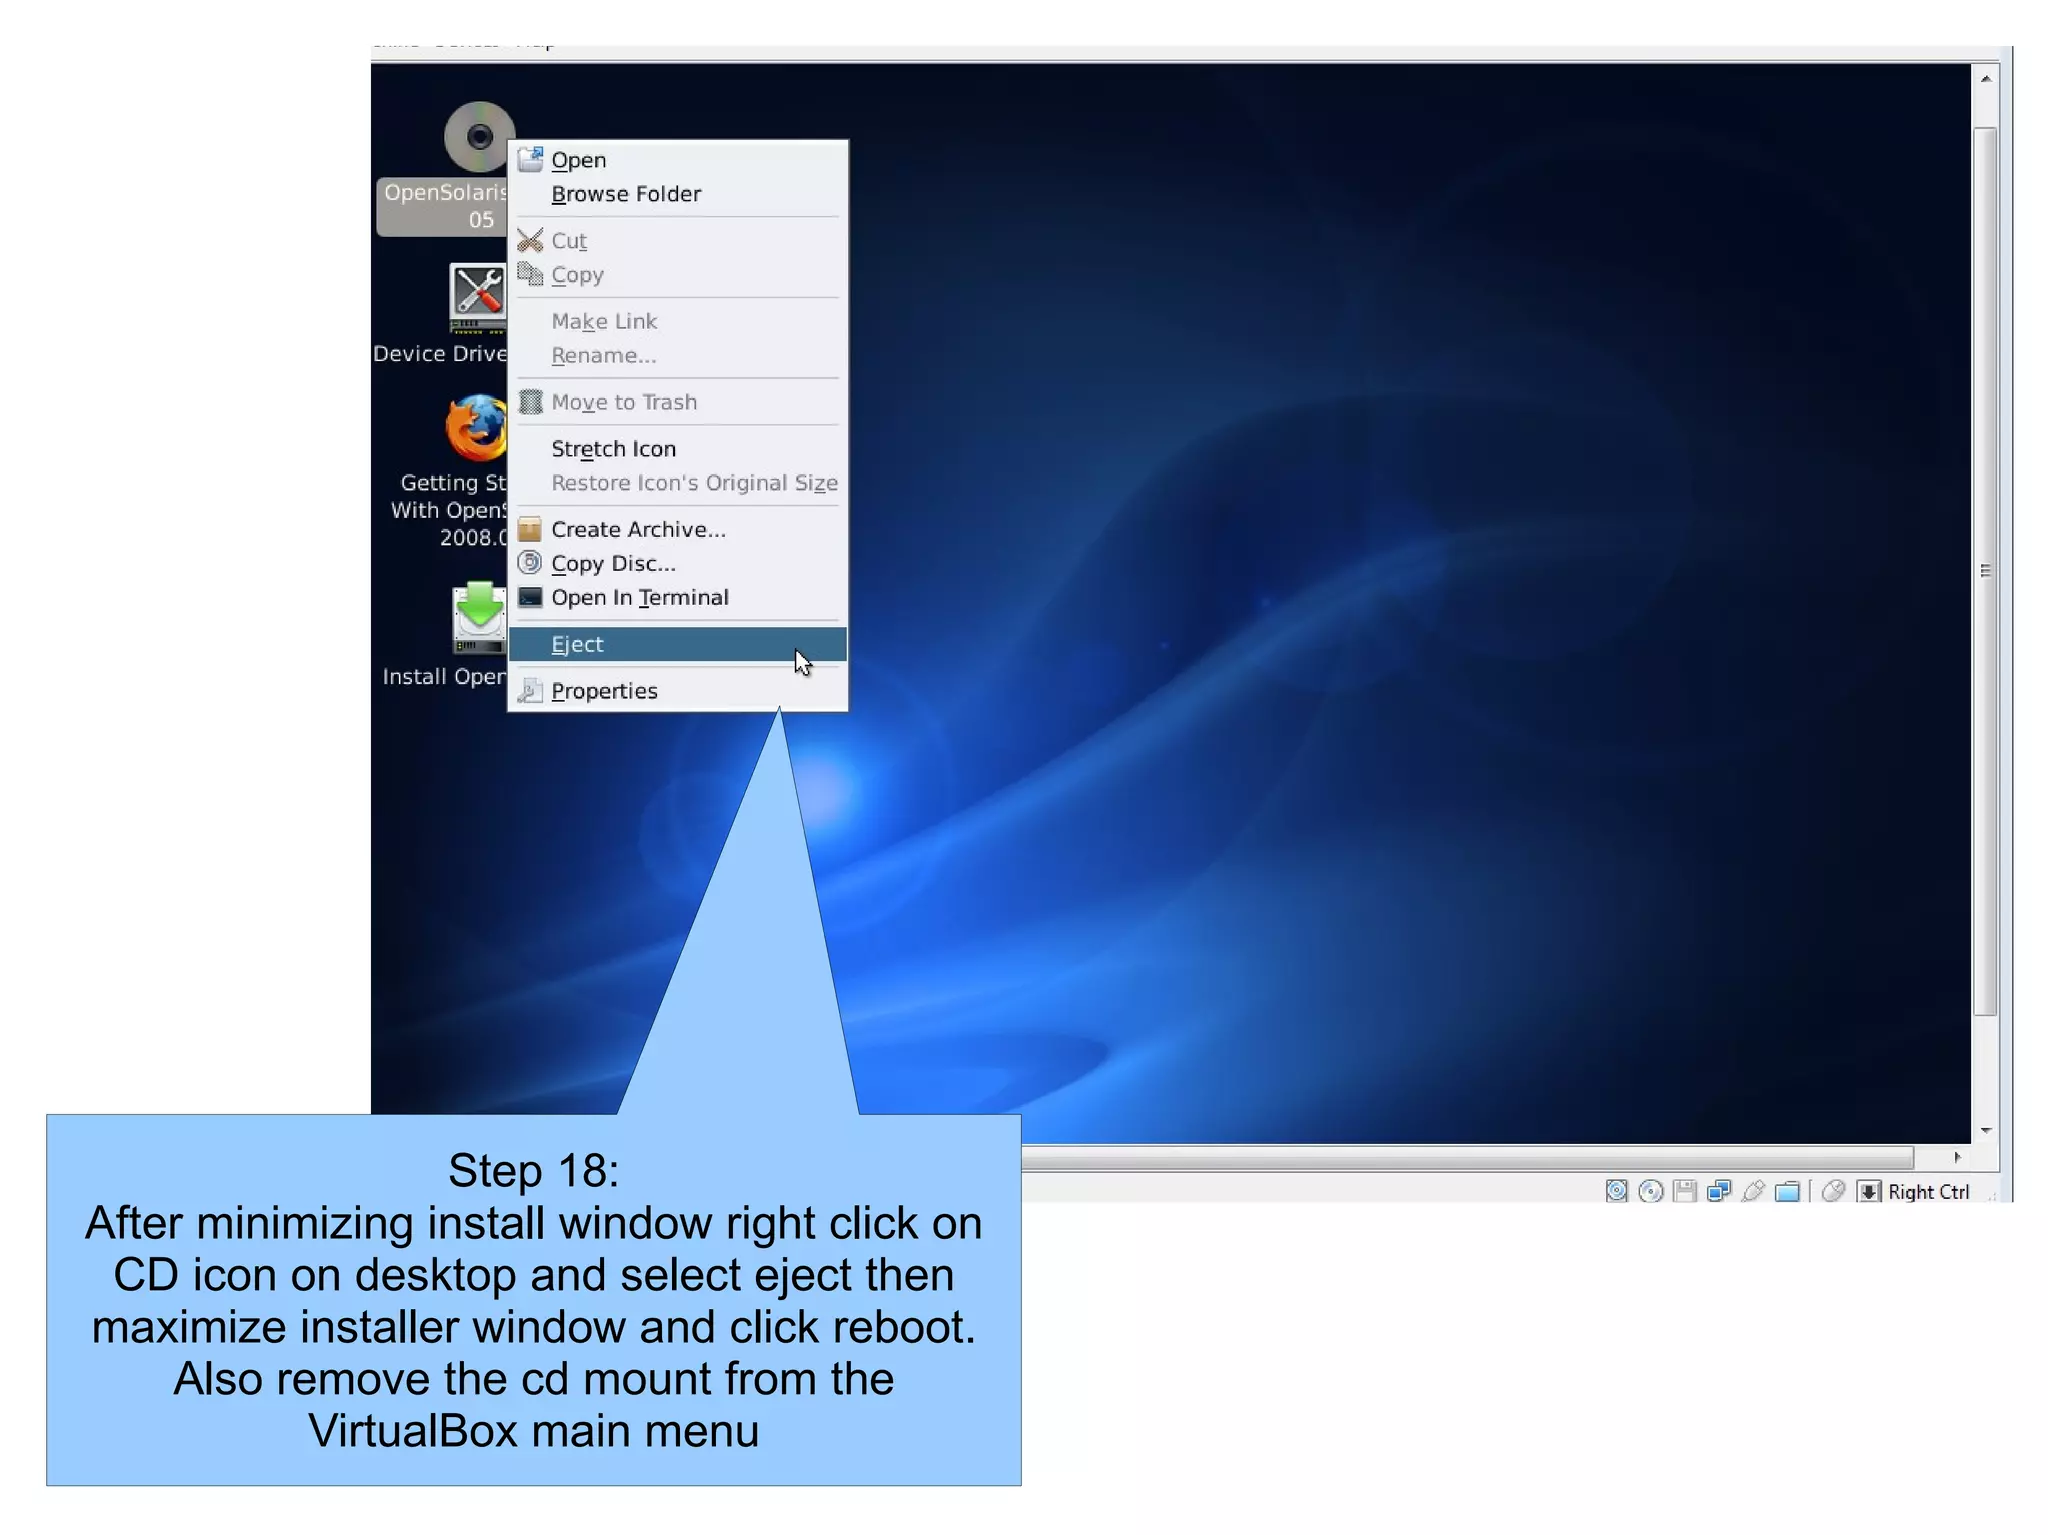
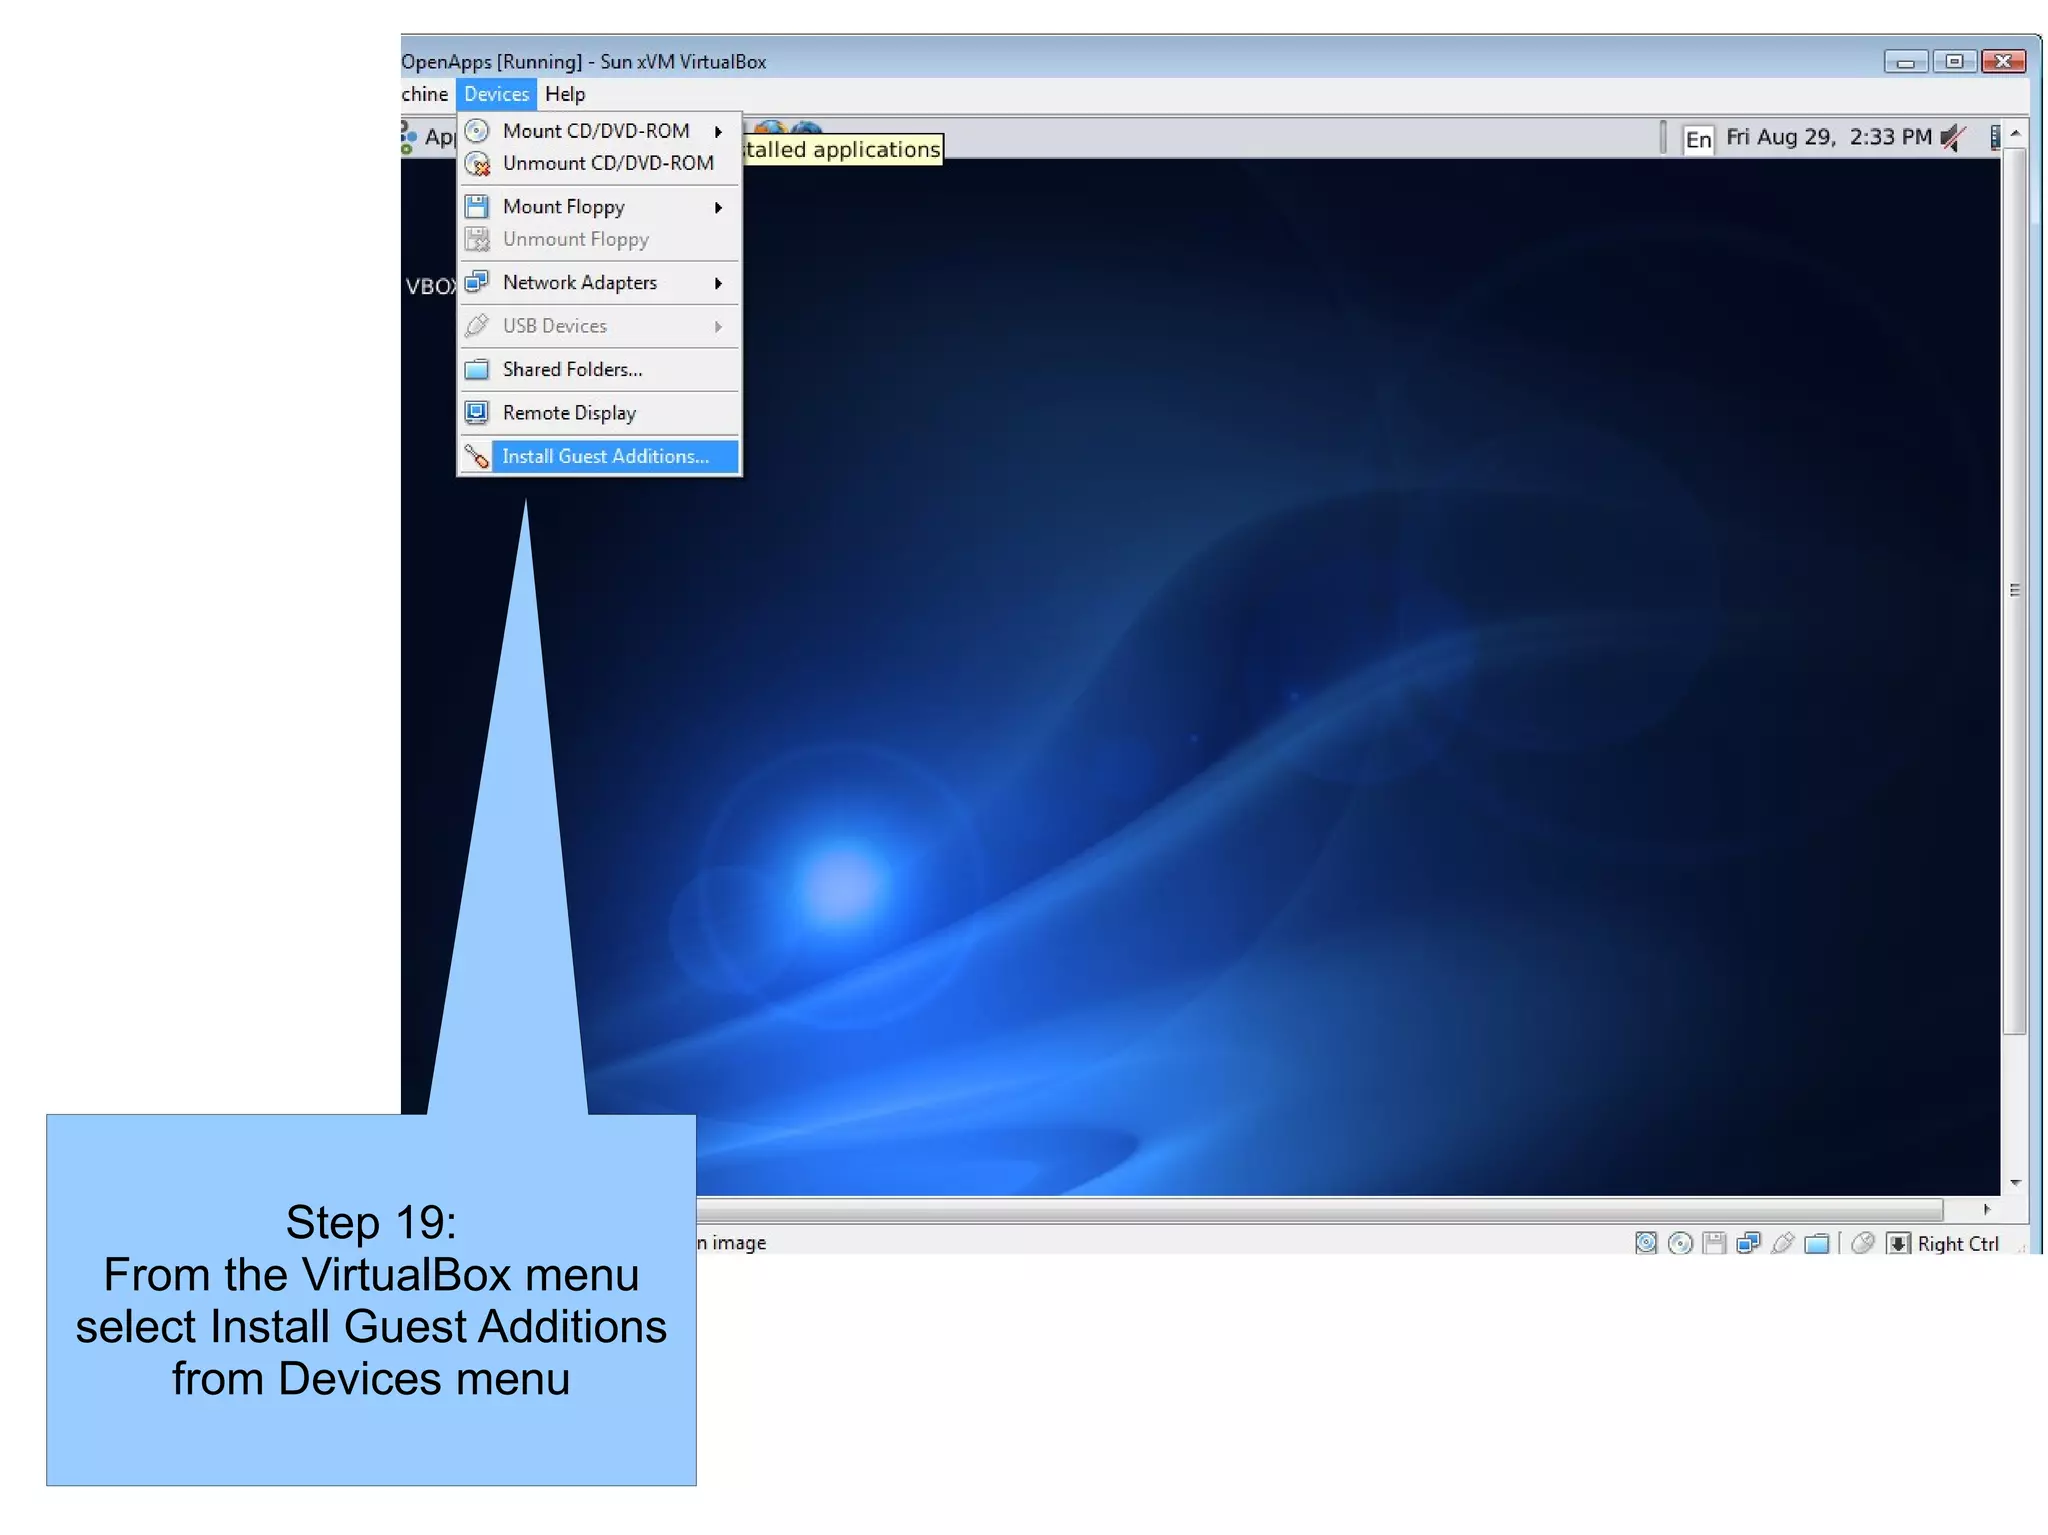
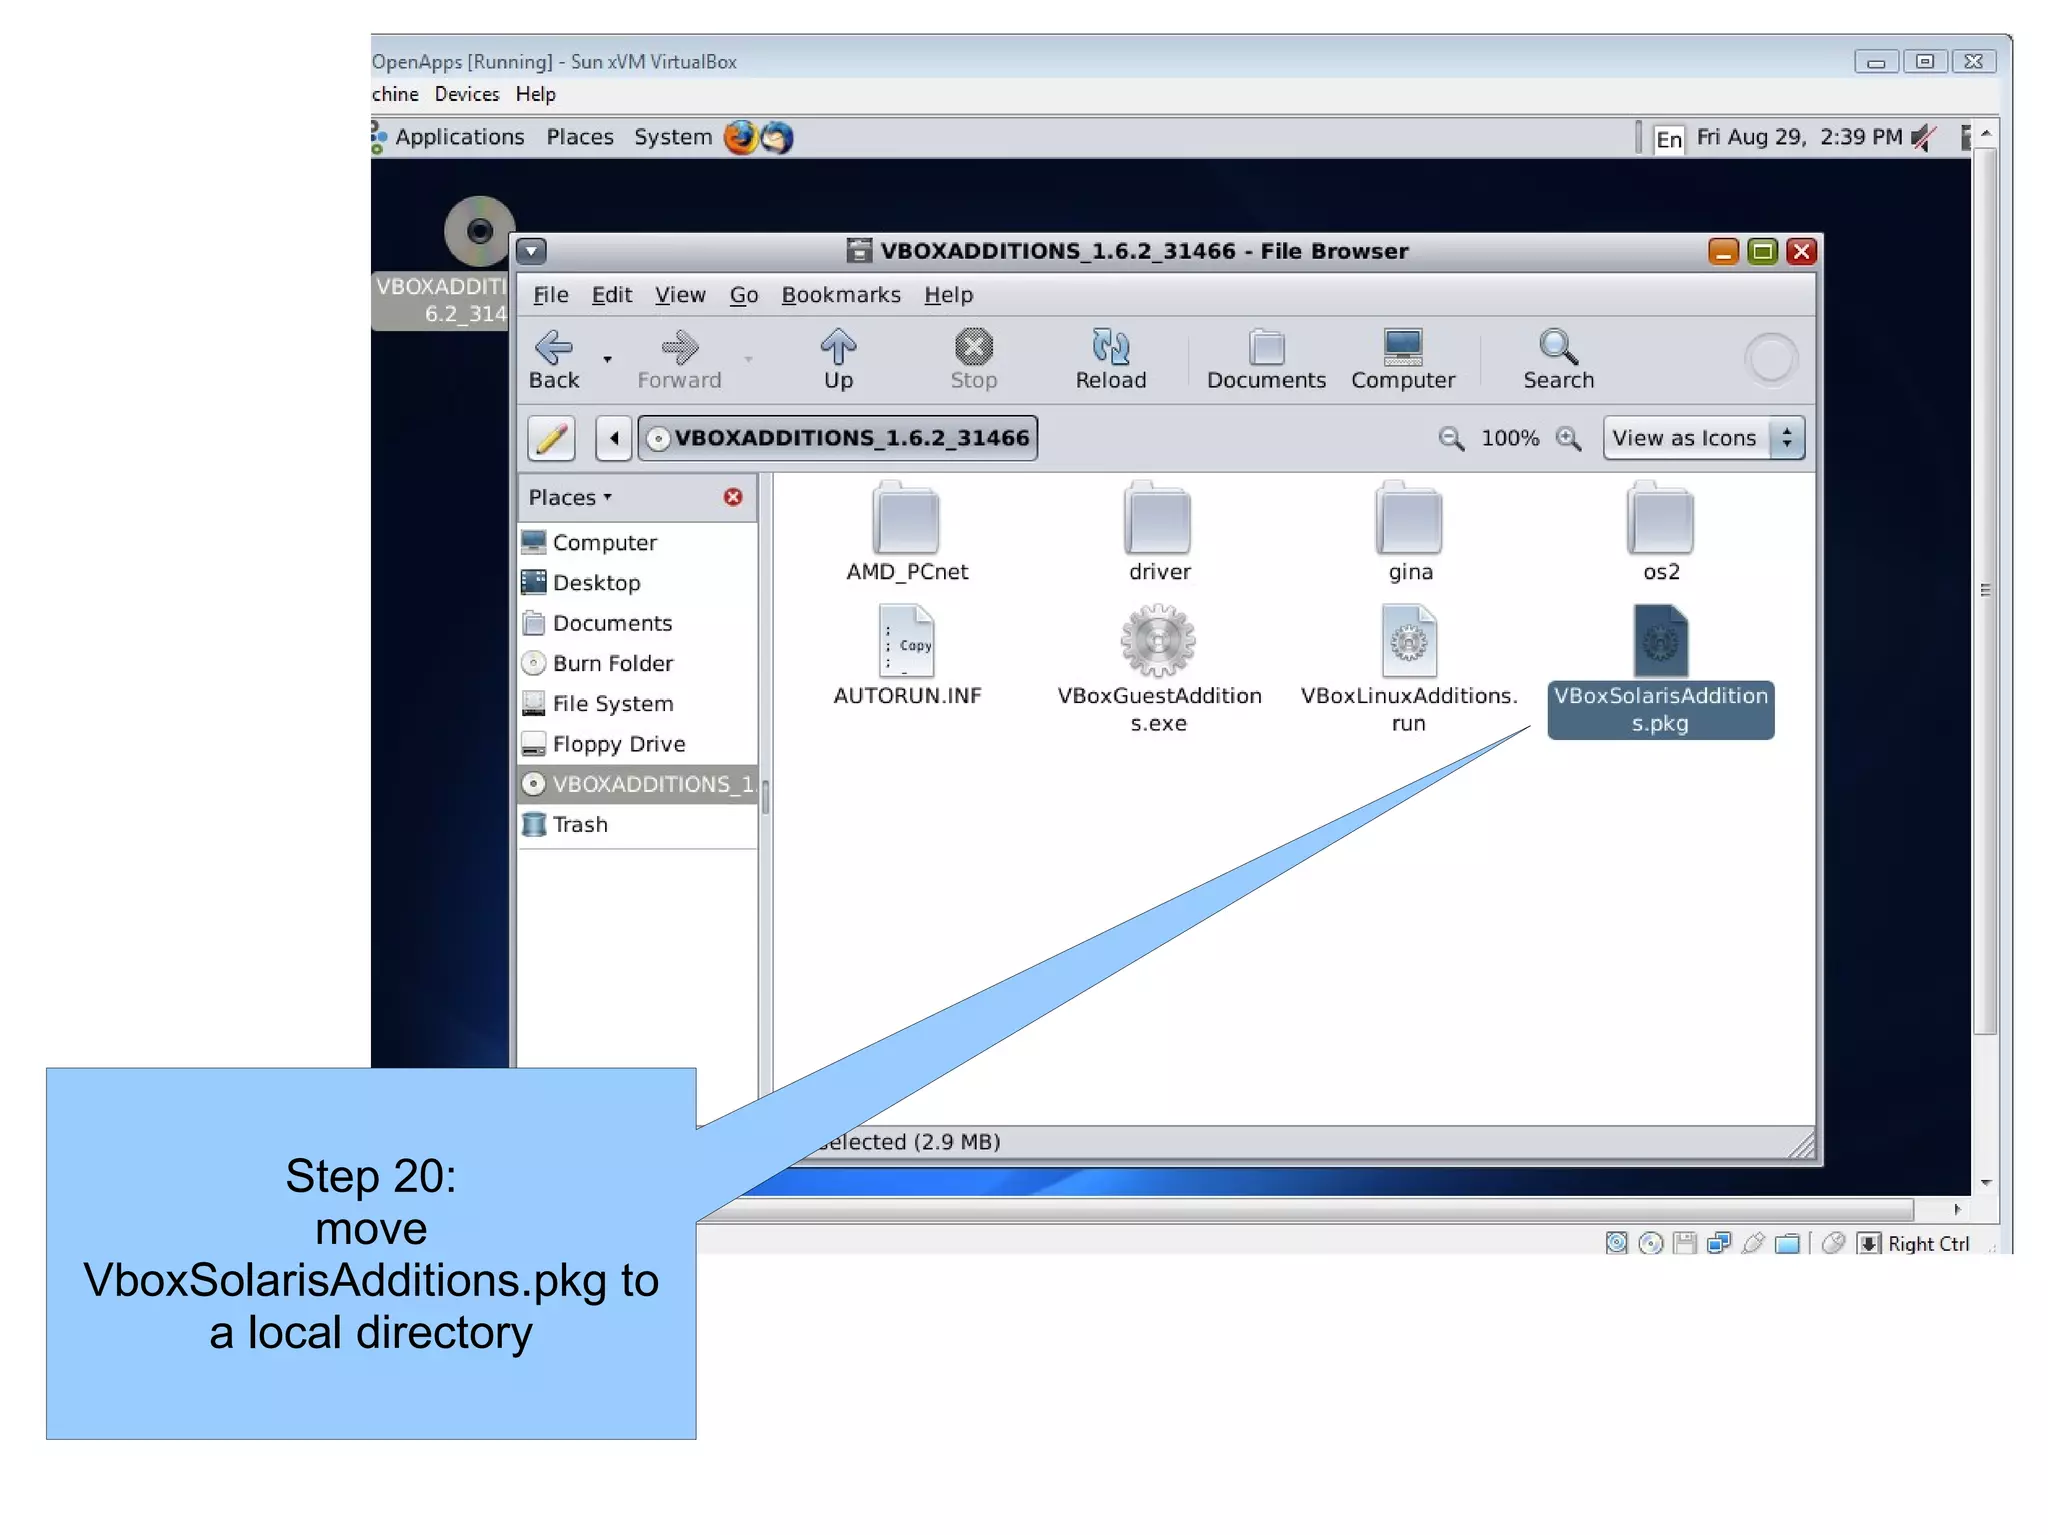
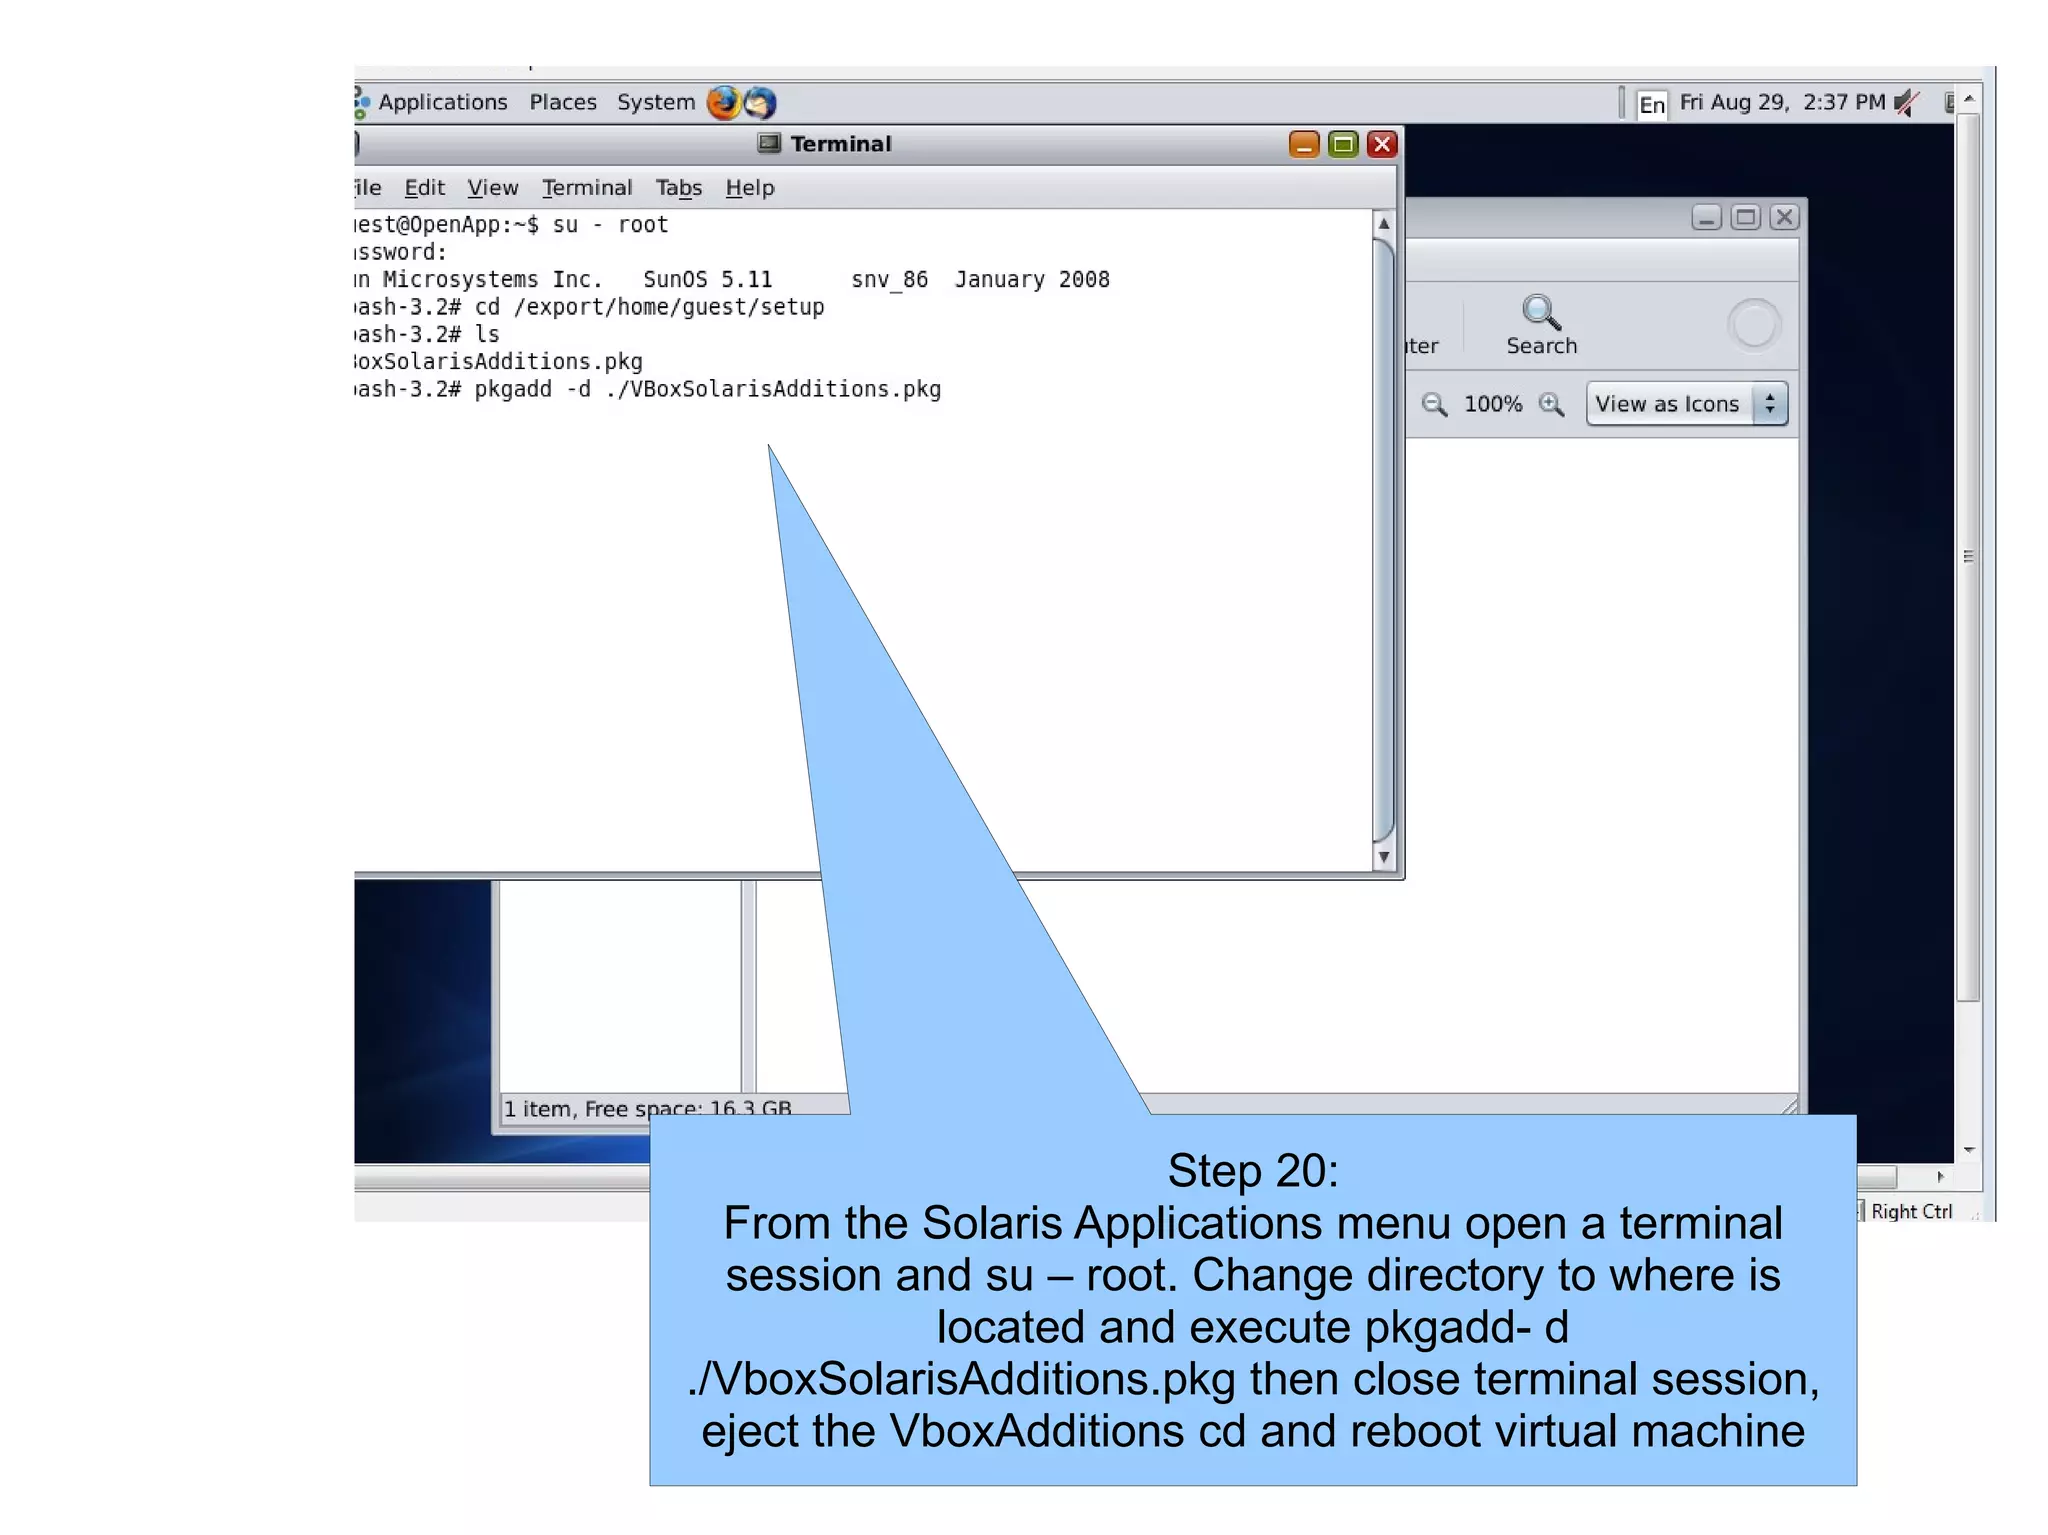
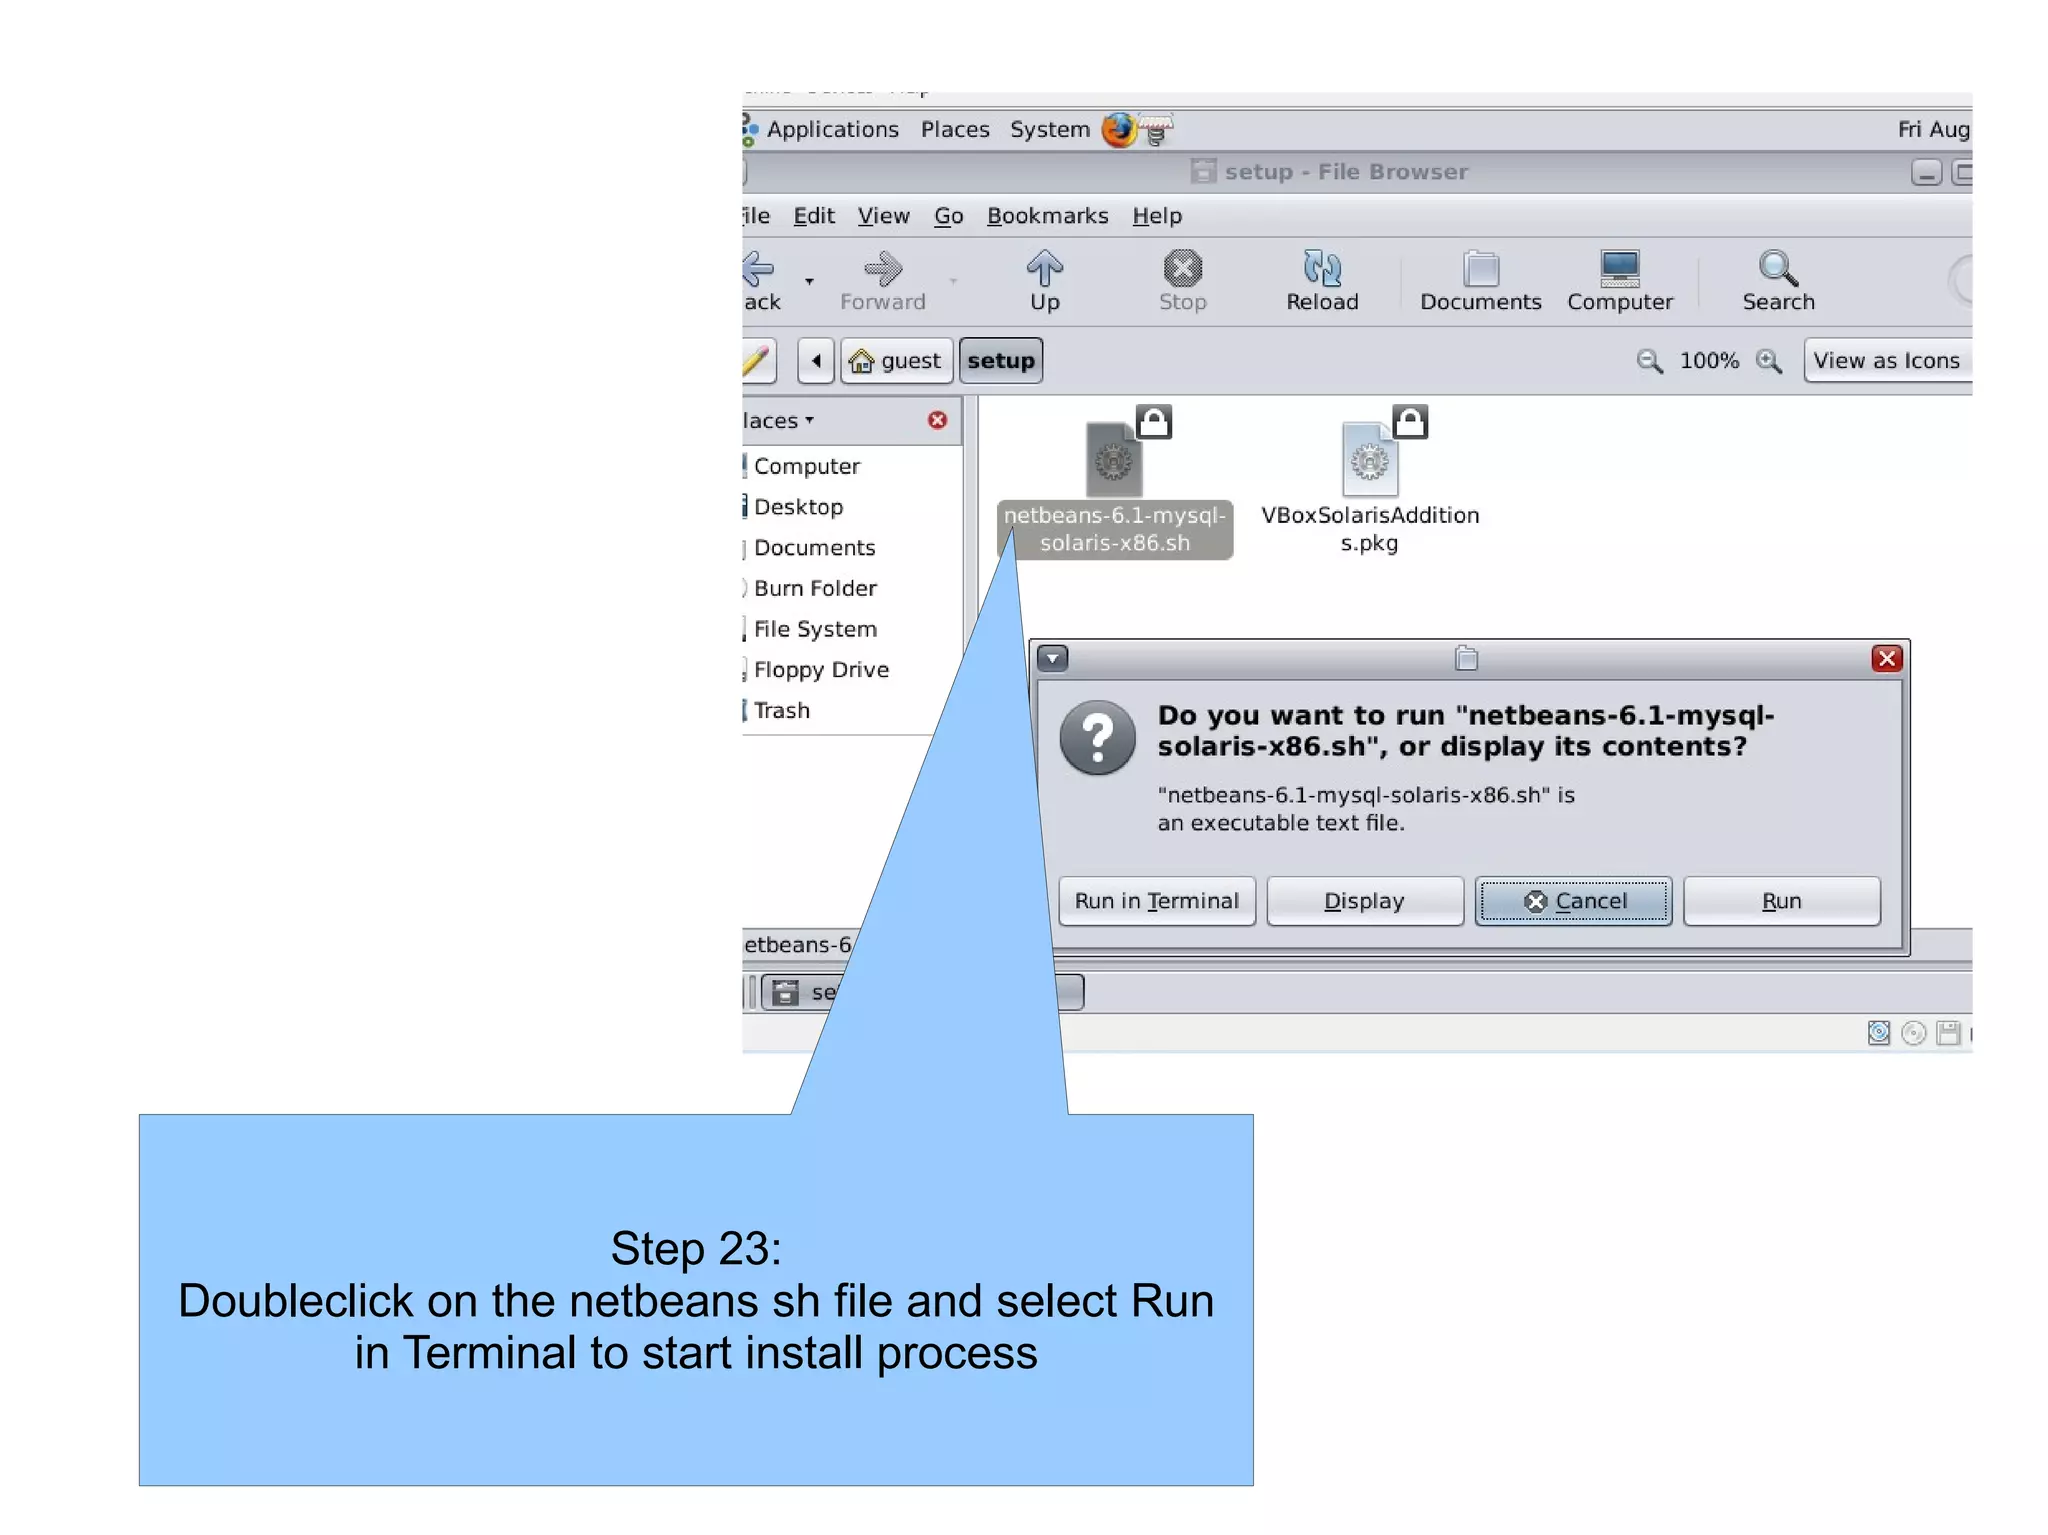
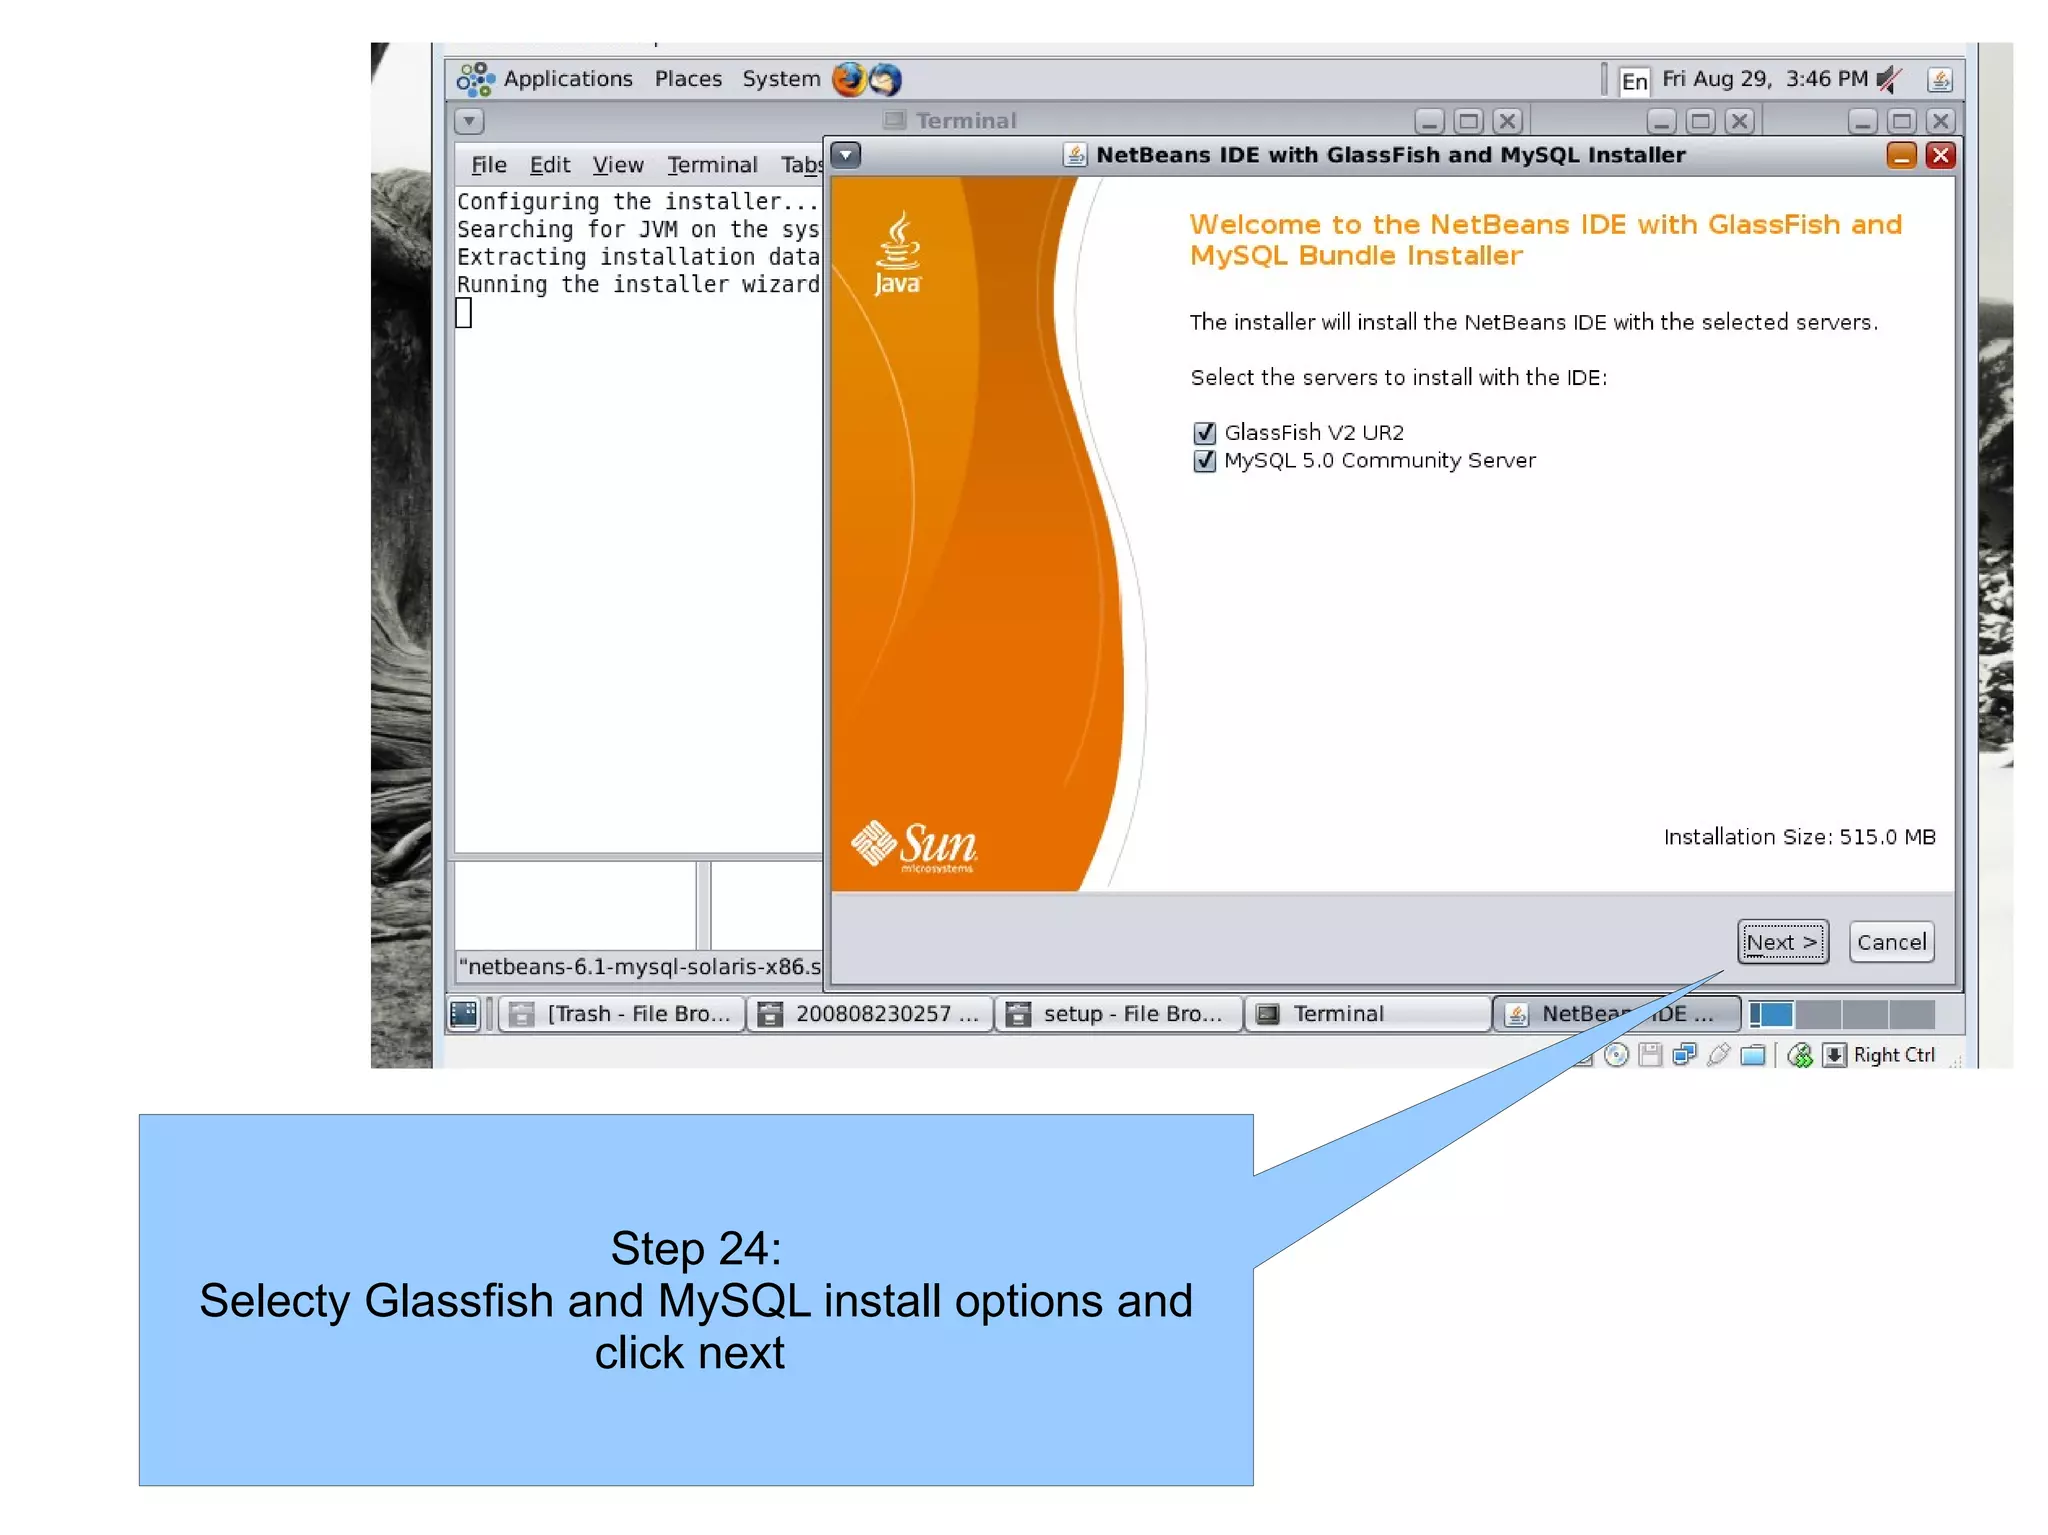
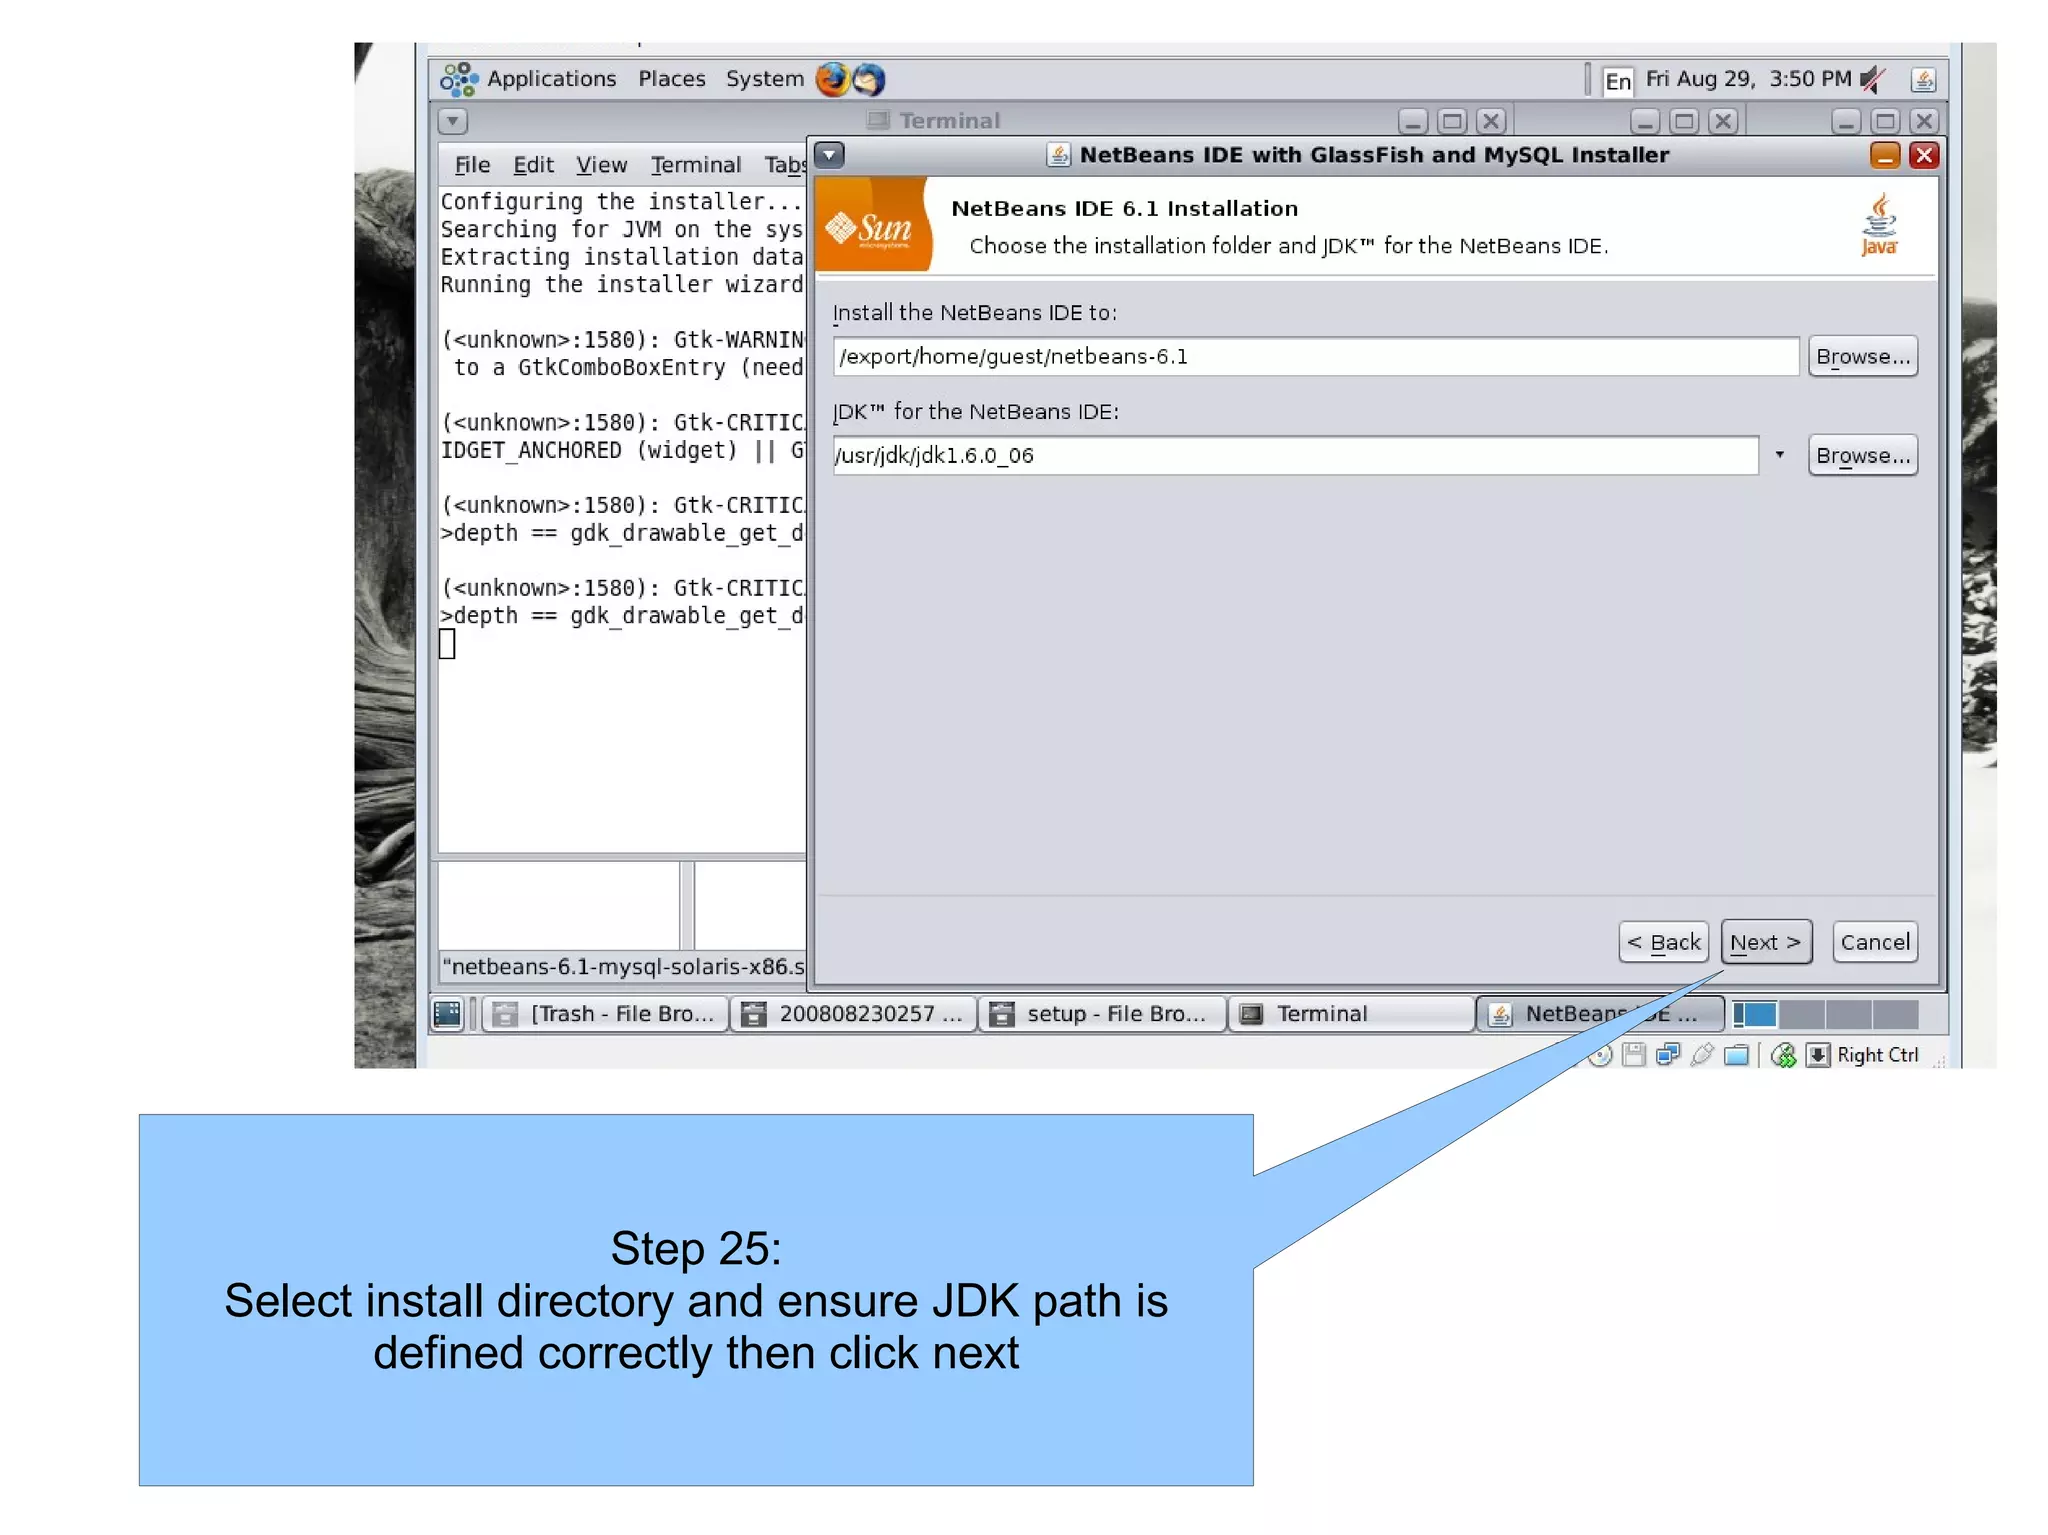
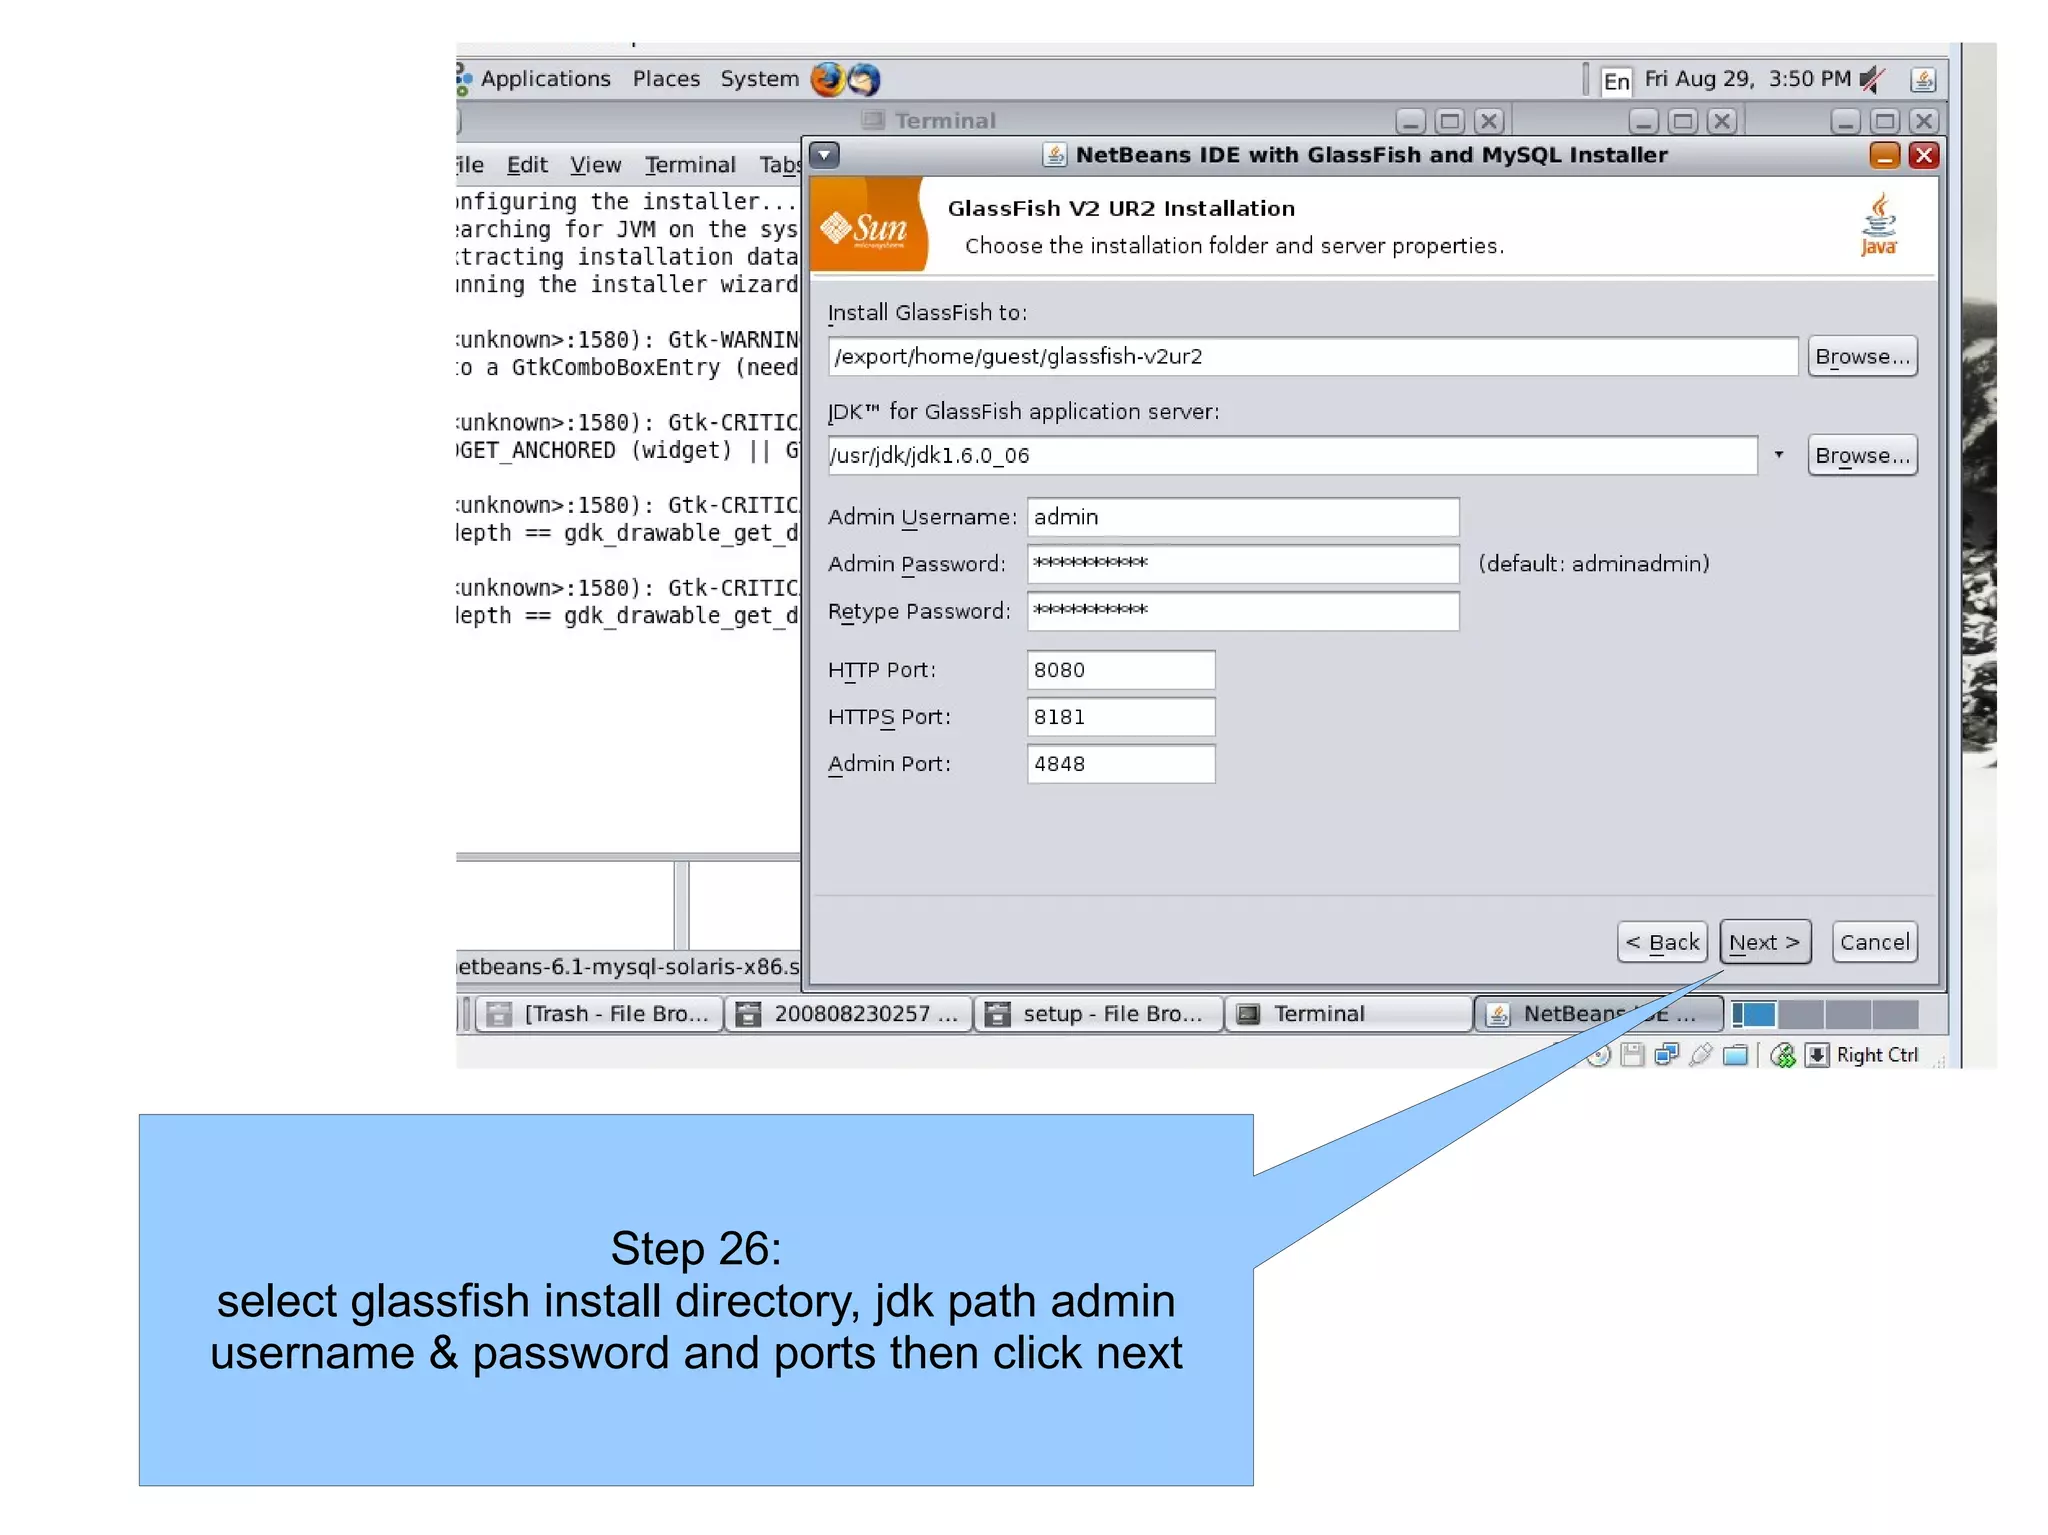
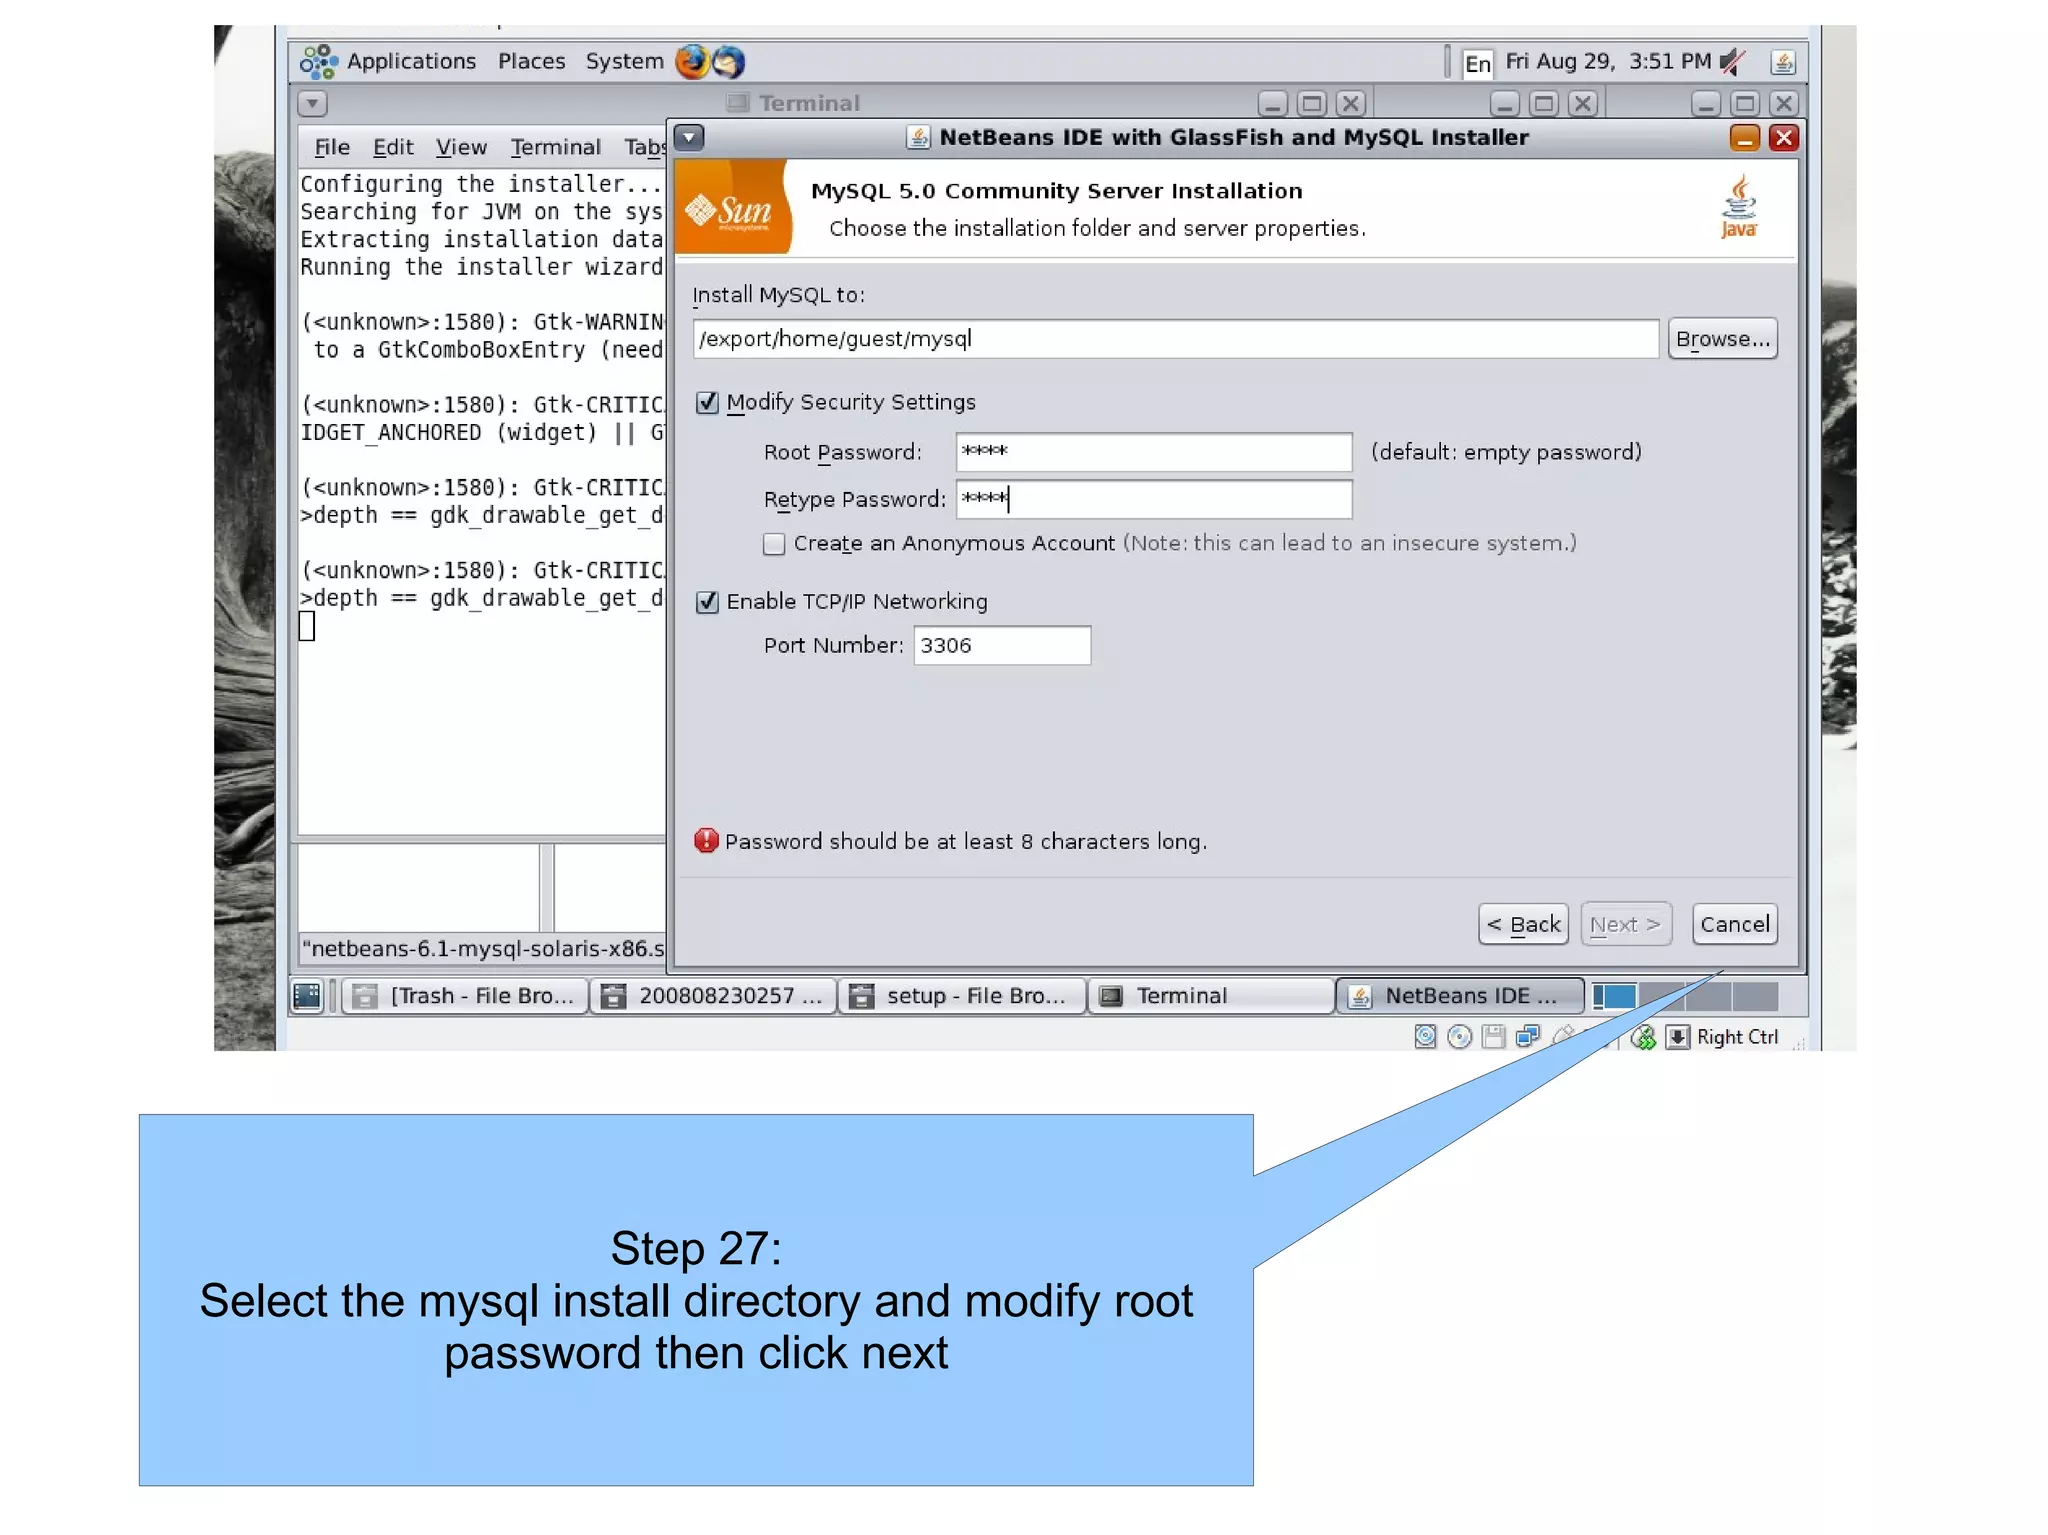
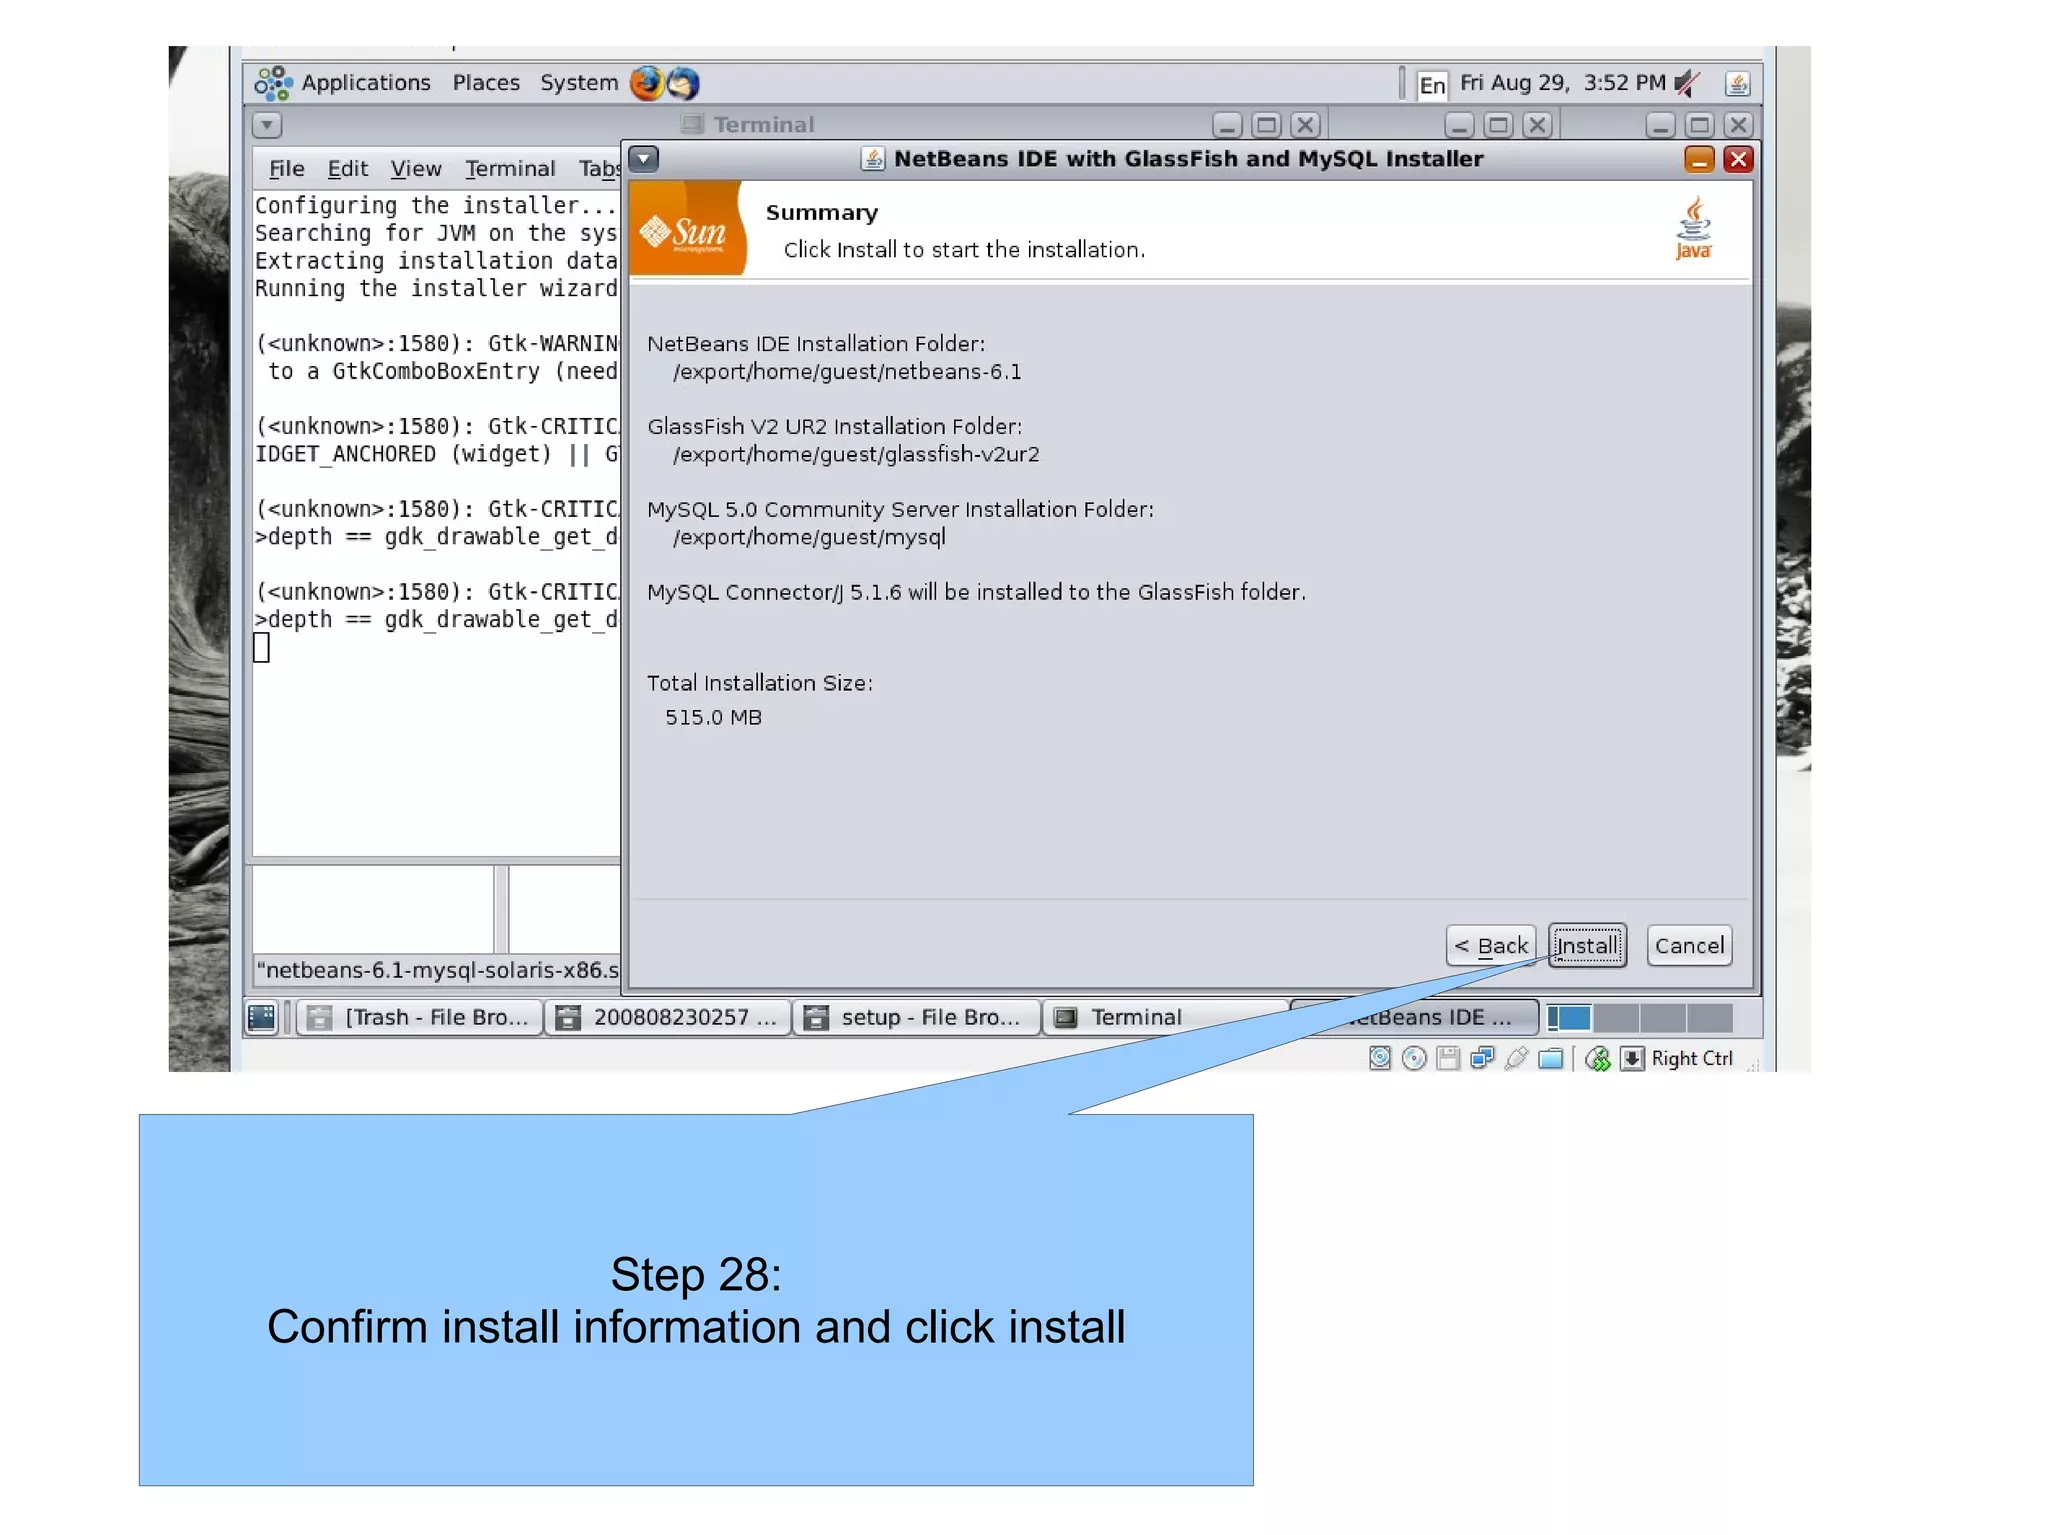


The document provides step-by-step instructions for installing OpenSolaris, VirtualBox, JDK 6, Netbeans 6.1, Glassfish, and MySQL on a virtual machine using VirtualBox to create an open source enterprise solution. It outlines 27 steps for configuring the virtual machine, installing the operating system and software packages, and configuring the packages.