To create a Word document:
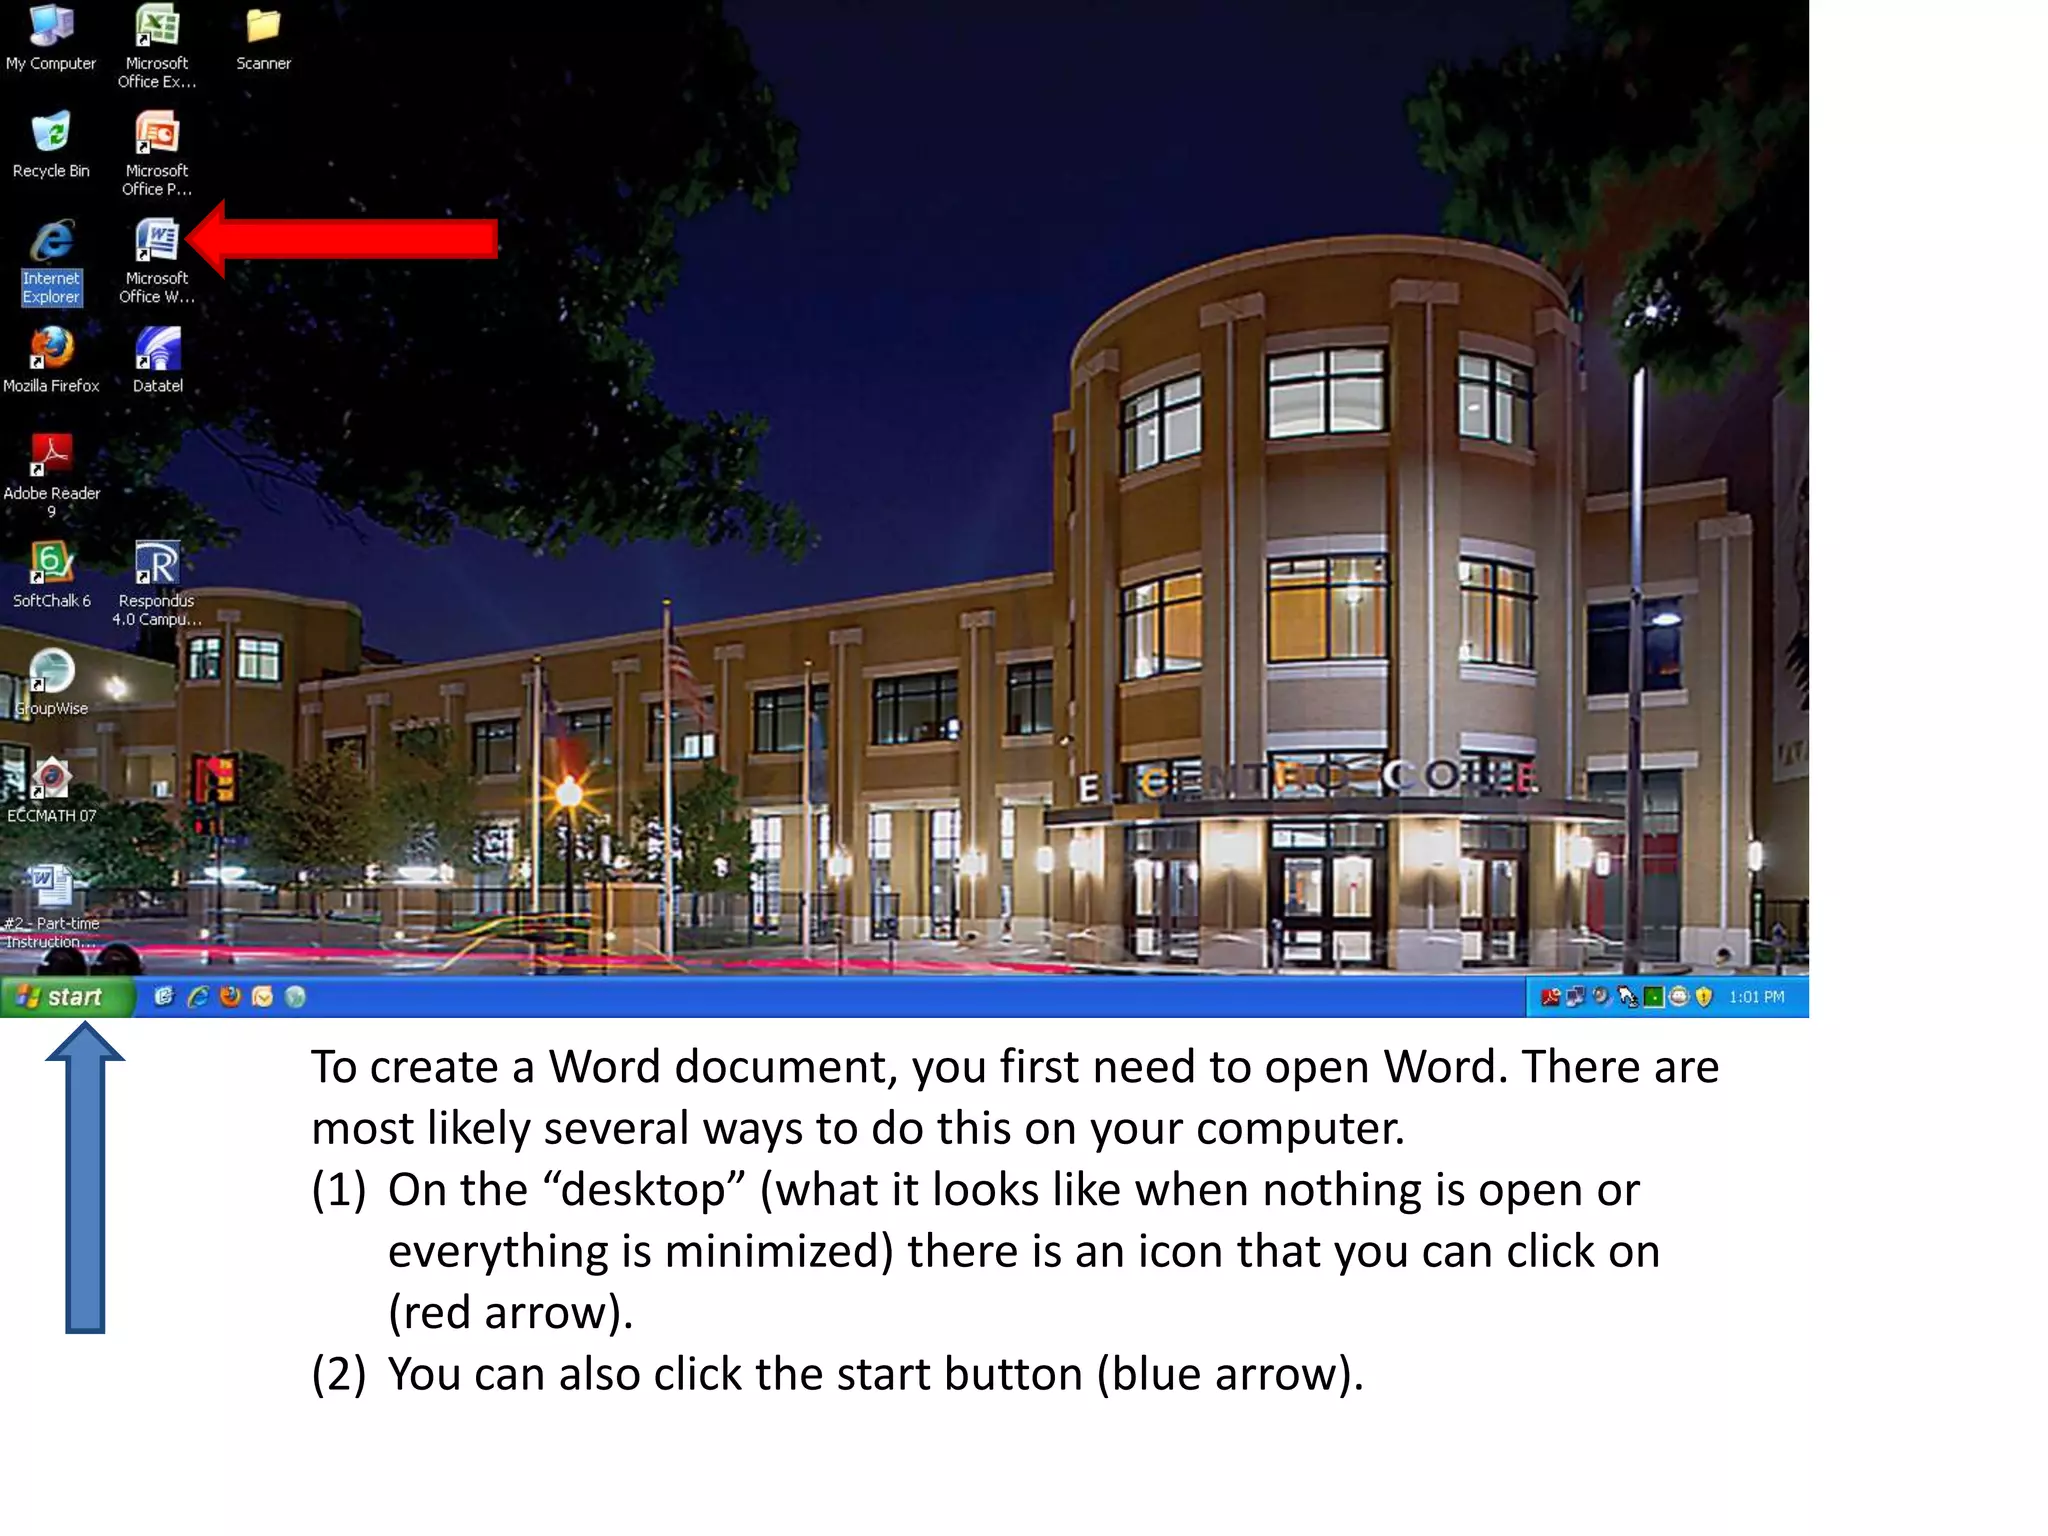
1. Open the Word program by clicking on the icon on the desktop or through the Start menu.
2. A new Word document window will open with various options to save the file, including using the floppy disk icon, menu button, or Ctrl+S keyboard shortcut.
3. When saving the file, choose a name and location. It is important to remember where you have saved the file.
To create aWord document, you first need to open Word. There are most likely several ways to do this on your computer.On the “desktop” (what it looks like when nothing is open or everything is minimized) there is an icon that you can click on (red arrow).You can also click the start button (blue arrow).
2.
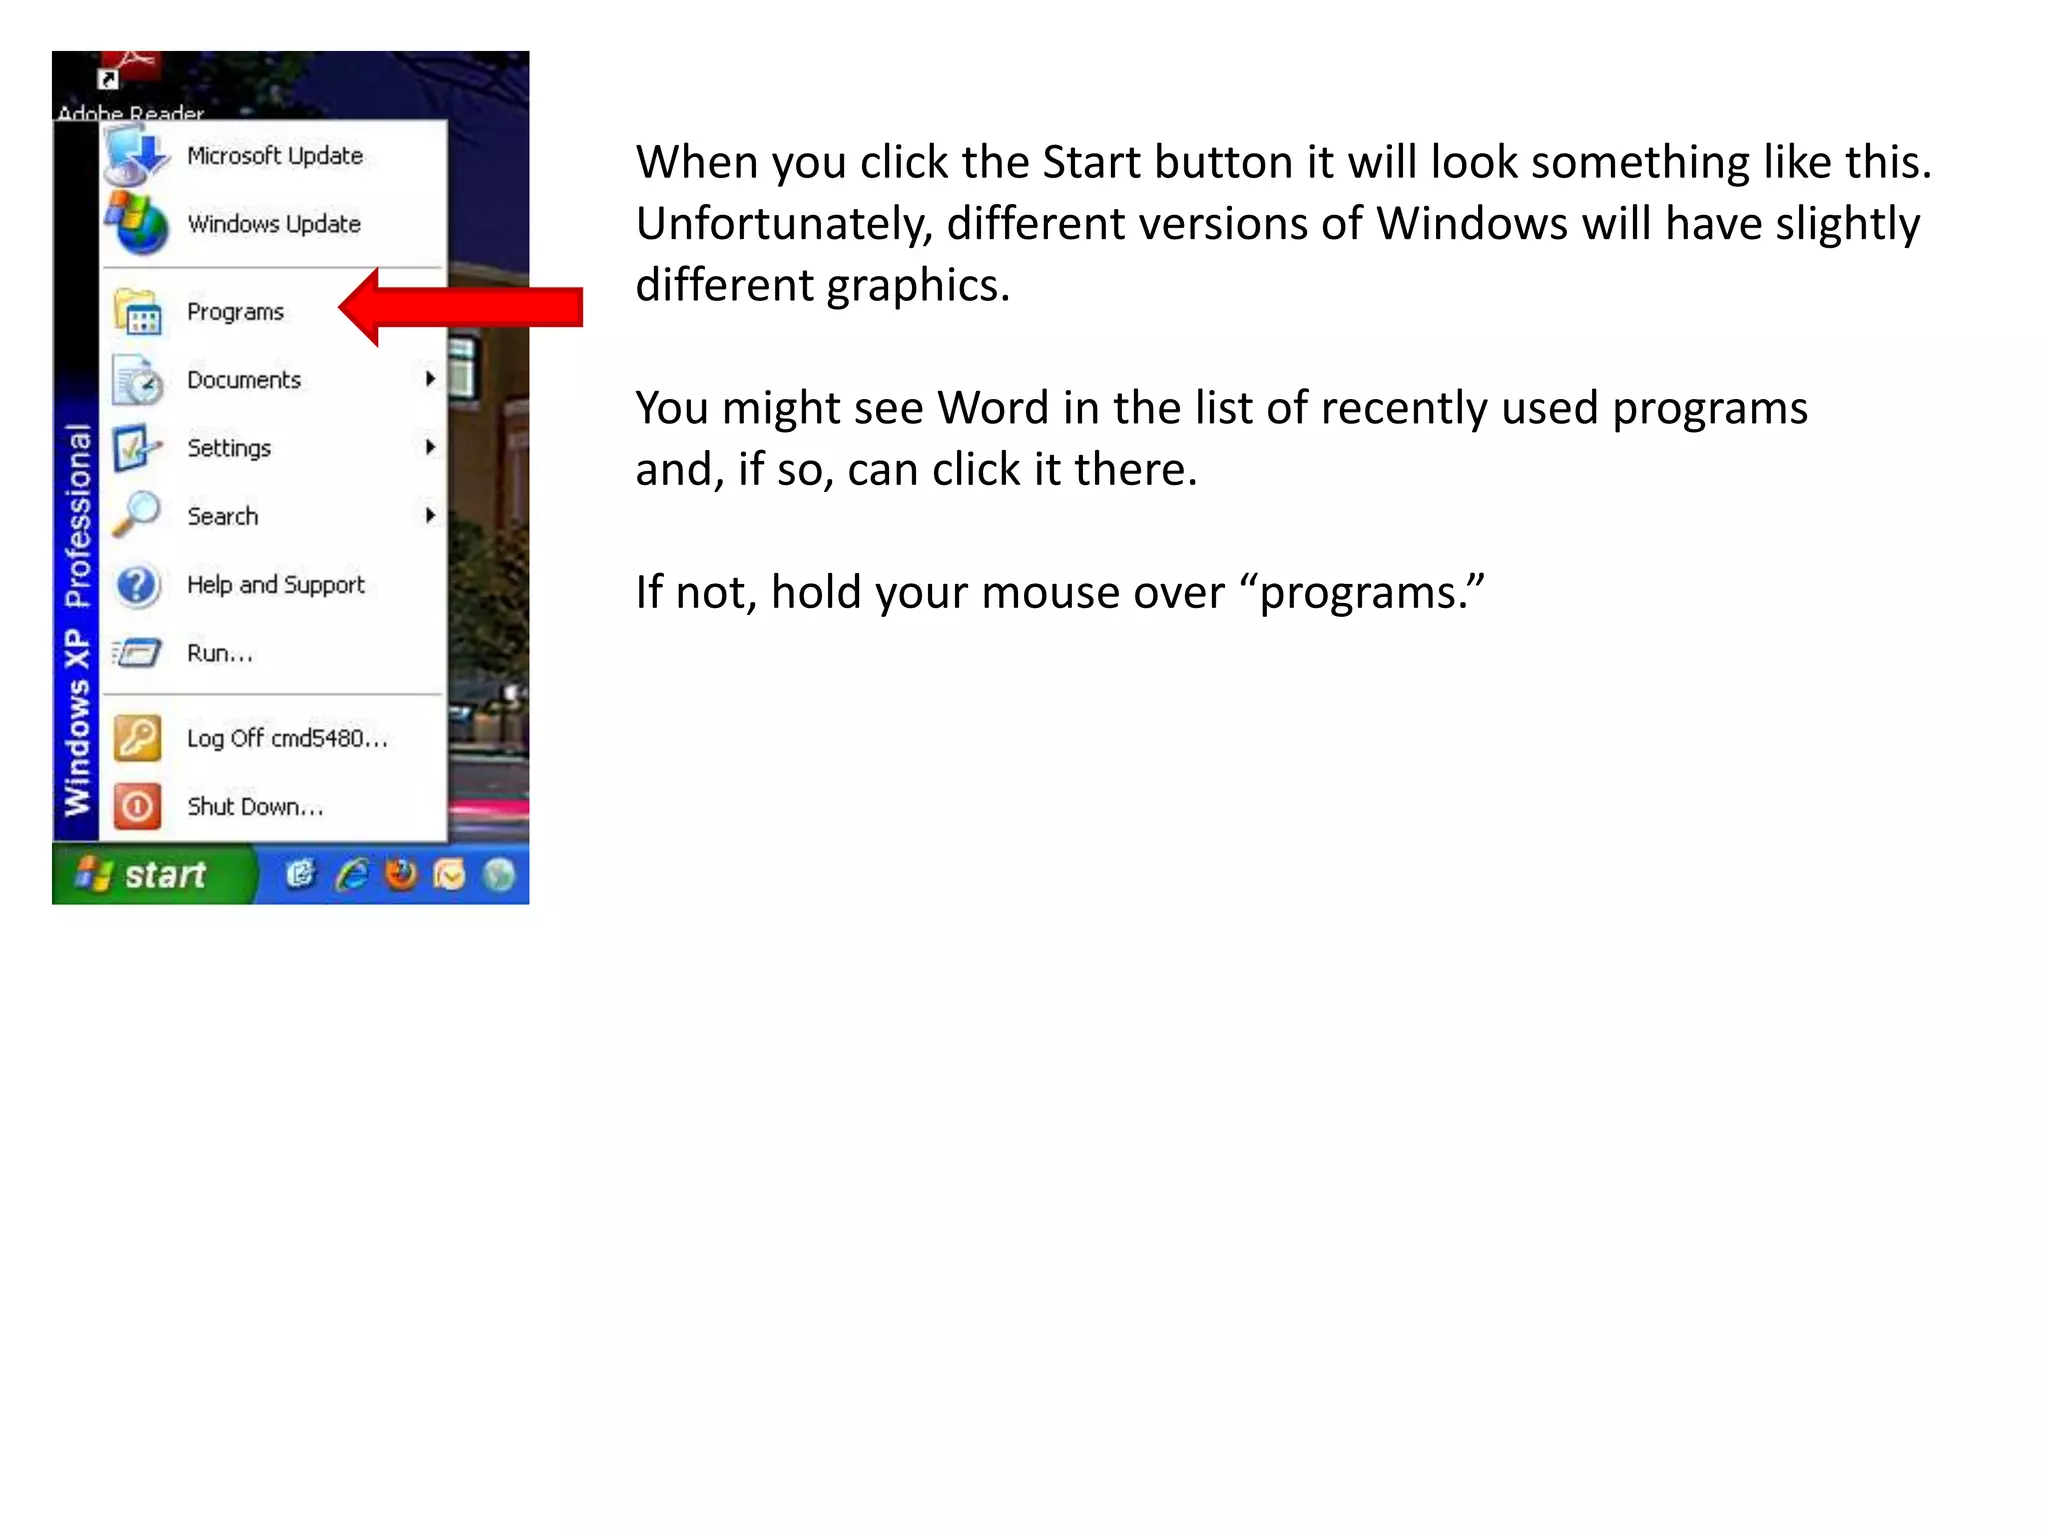
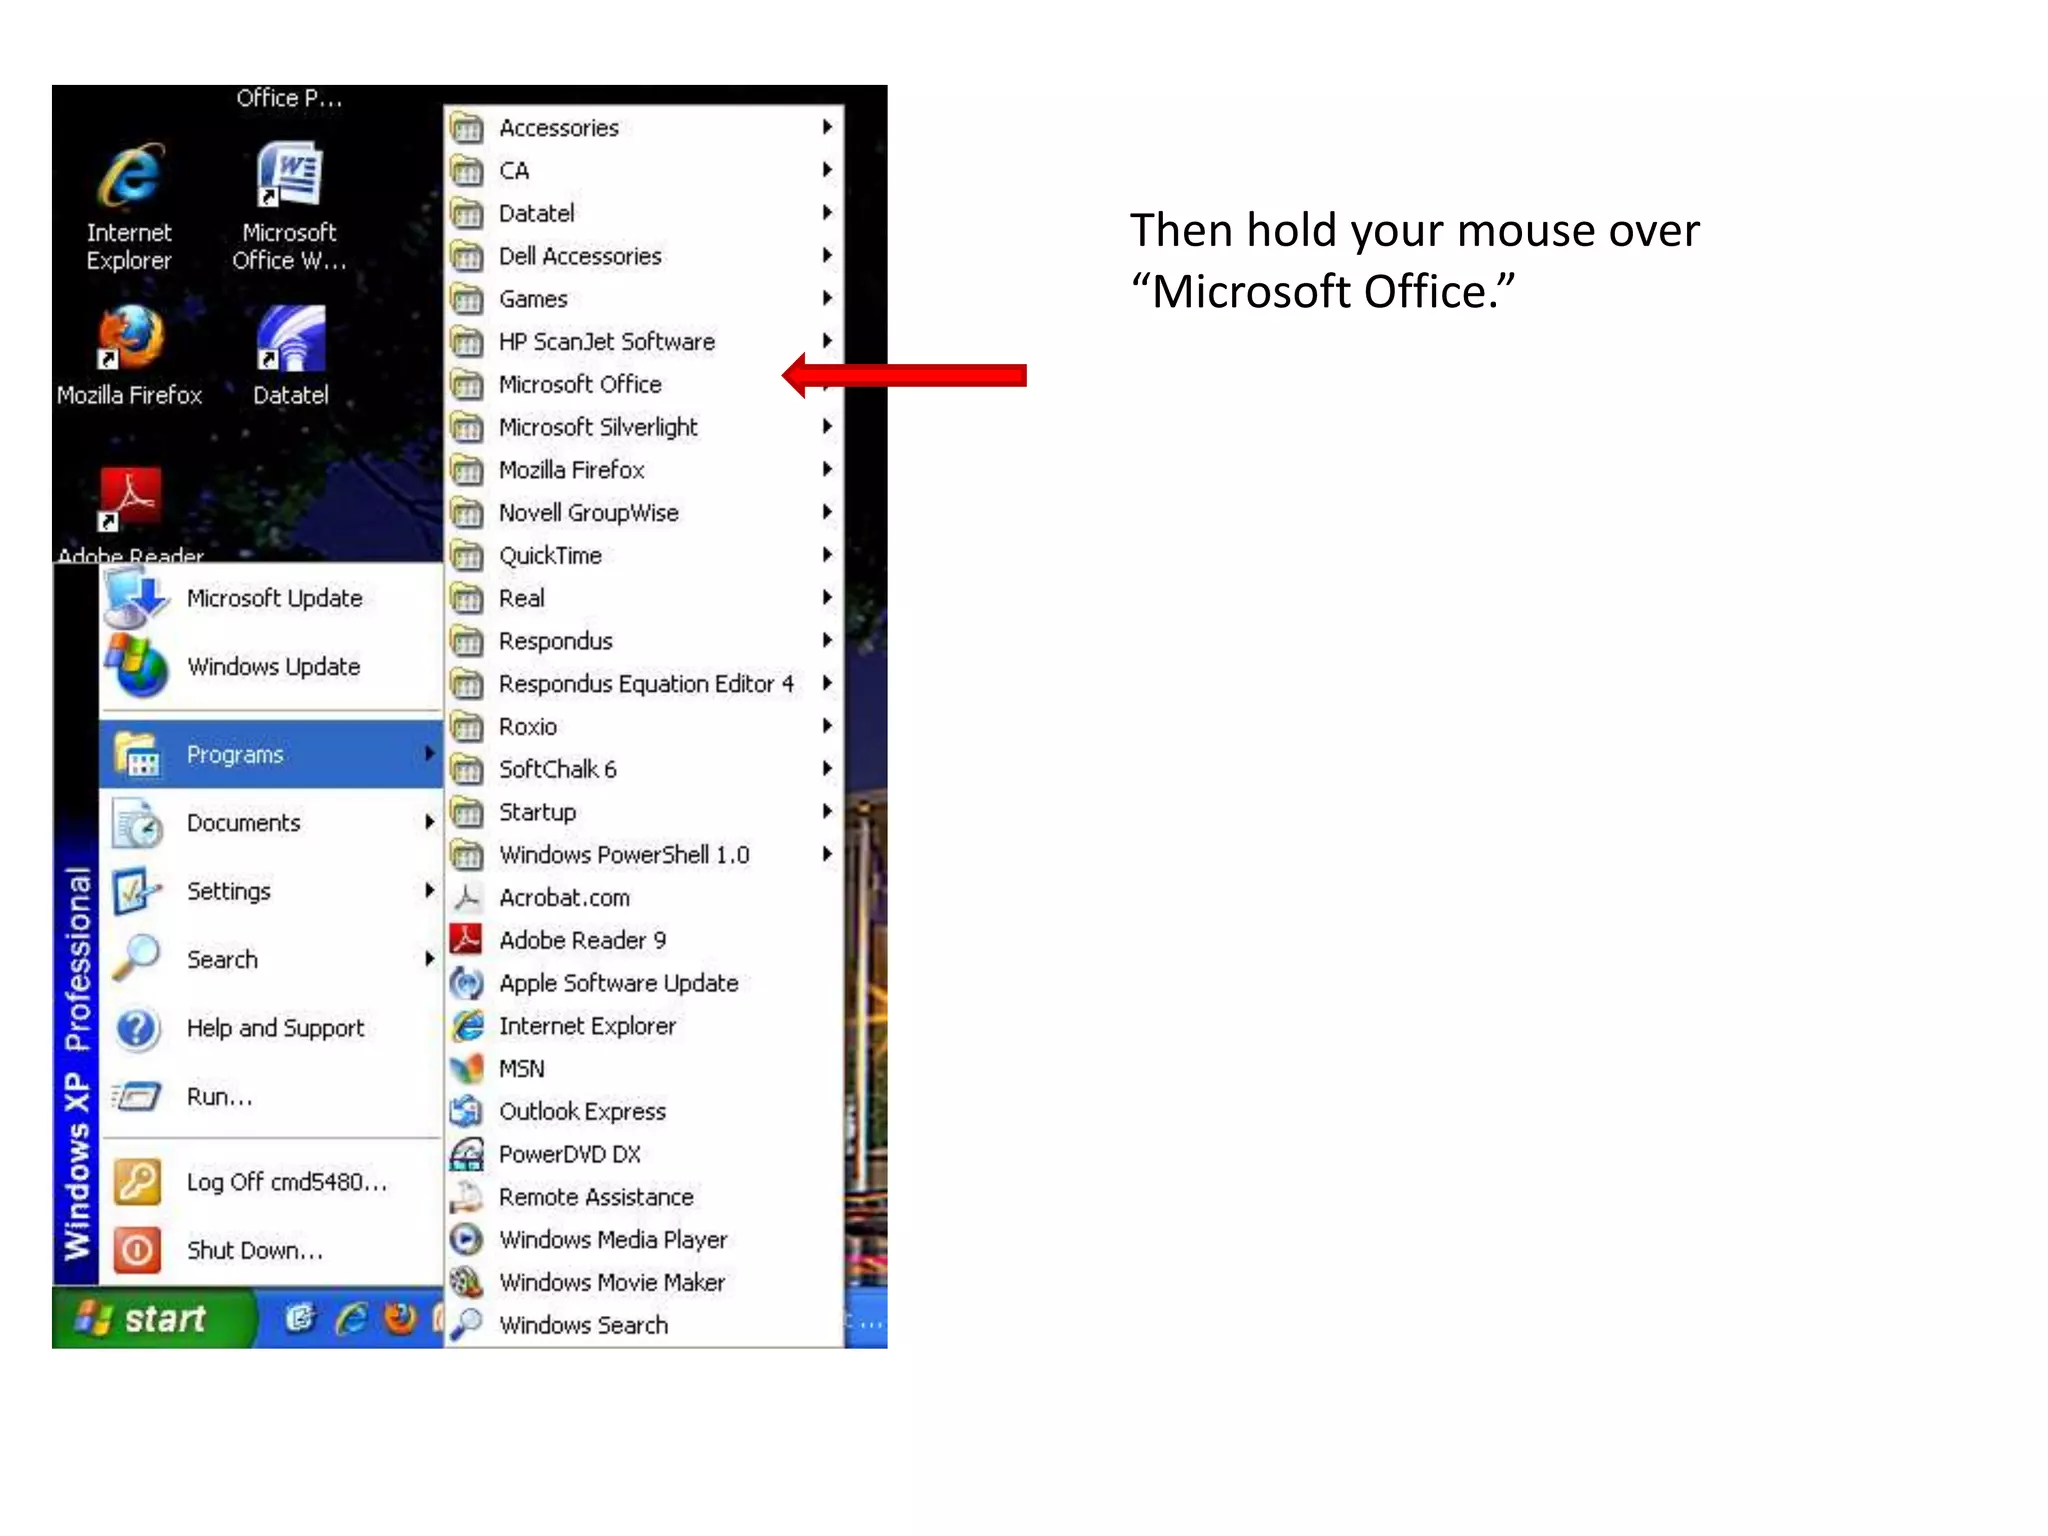
When you clickthe Start button it will look something like this. Unfortunately, different versions of Windows will have slightly different graphics.You might see Word in the list of recently used programs and, if so, can click it there.If not, hold your mouse over “programs.”
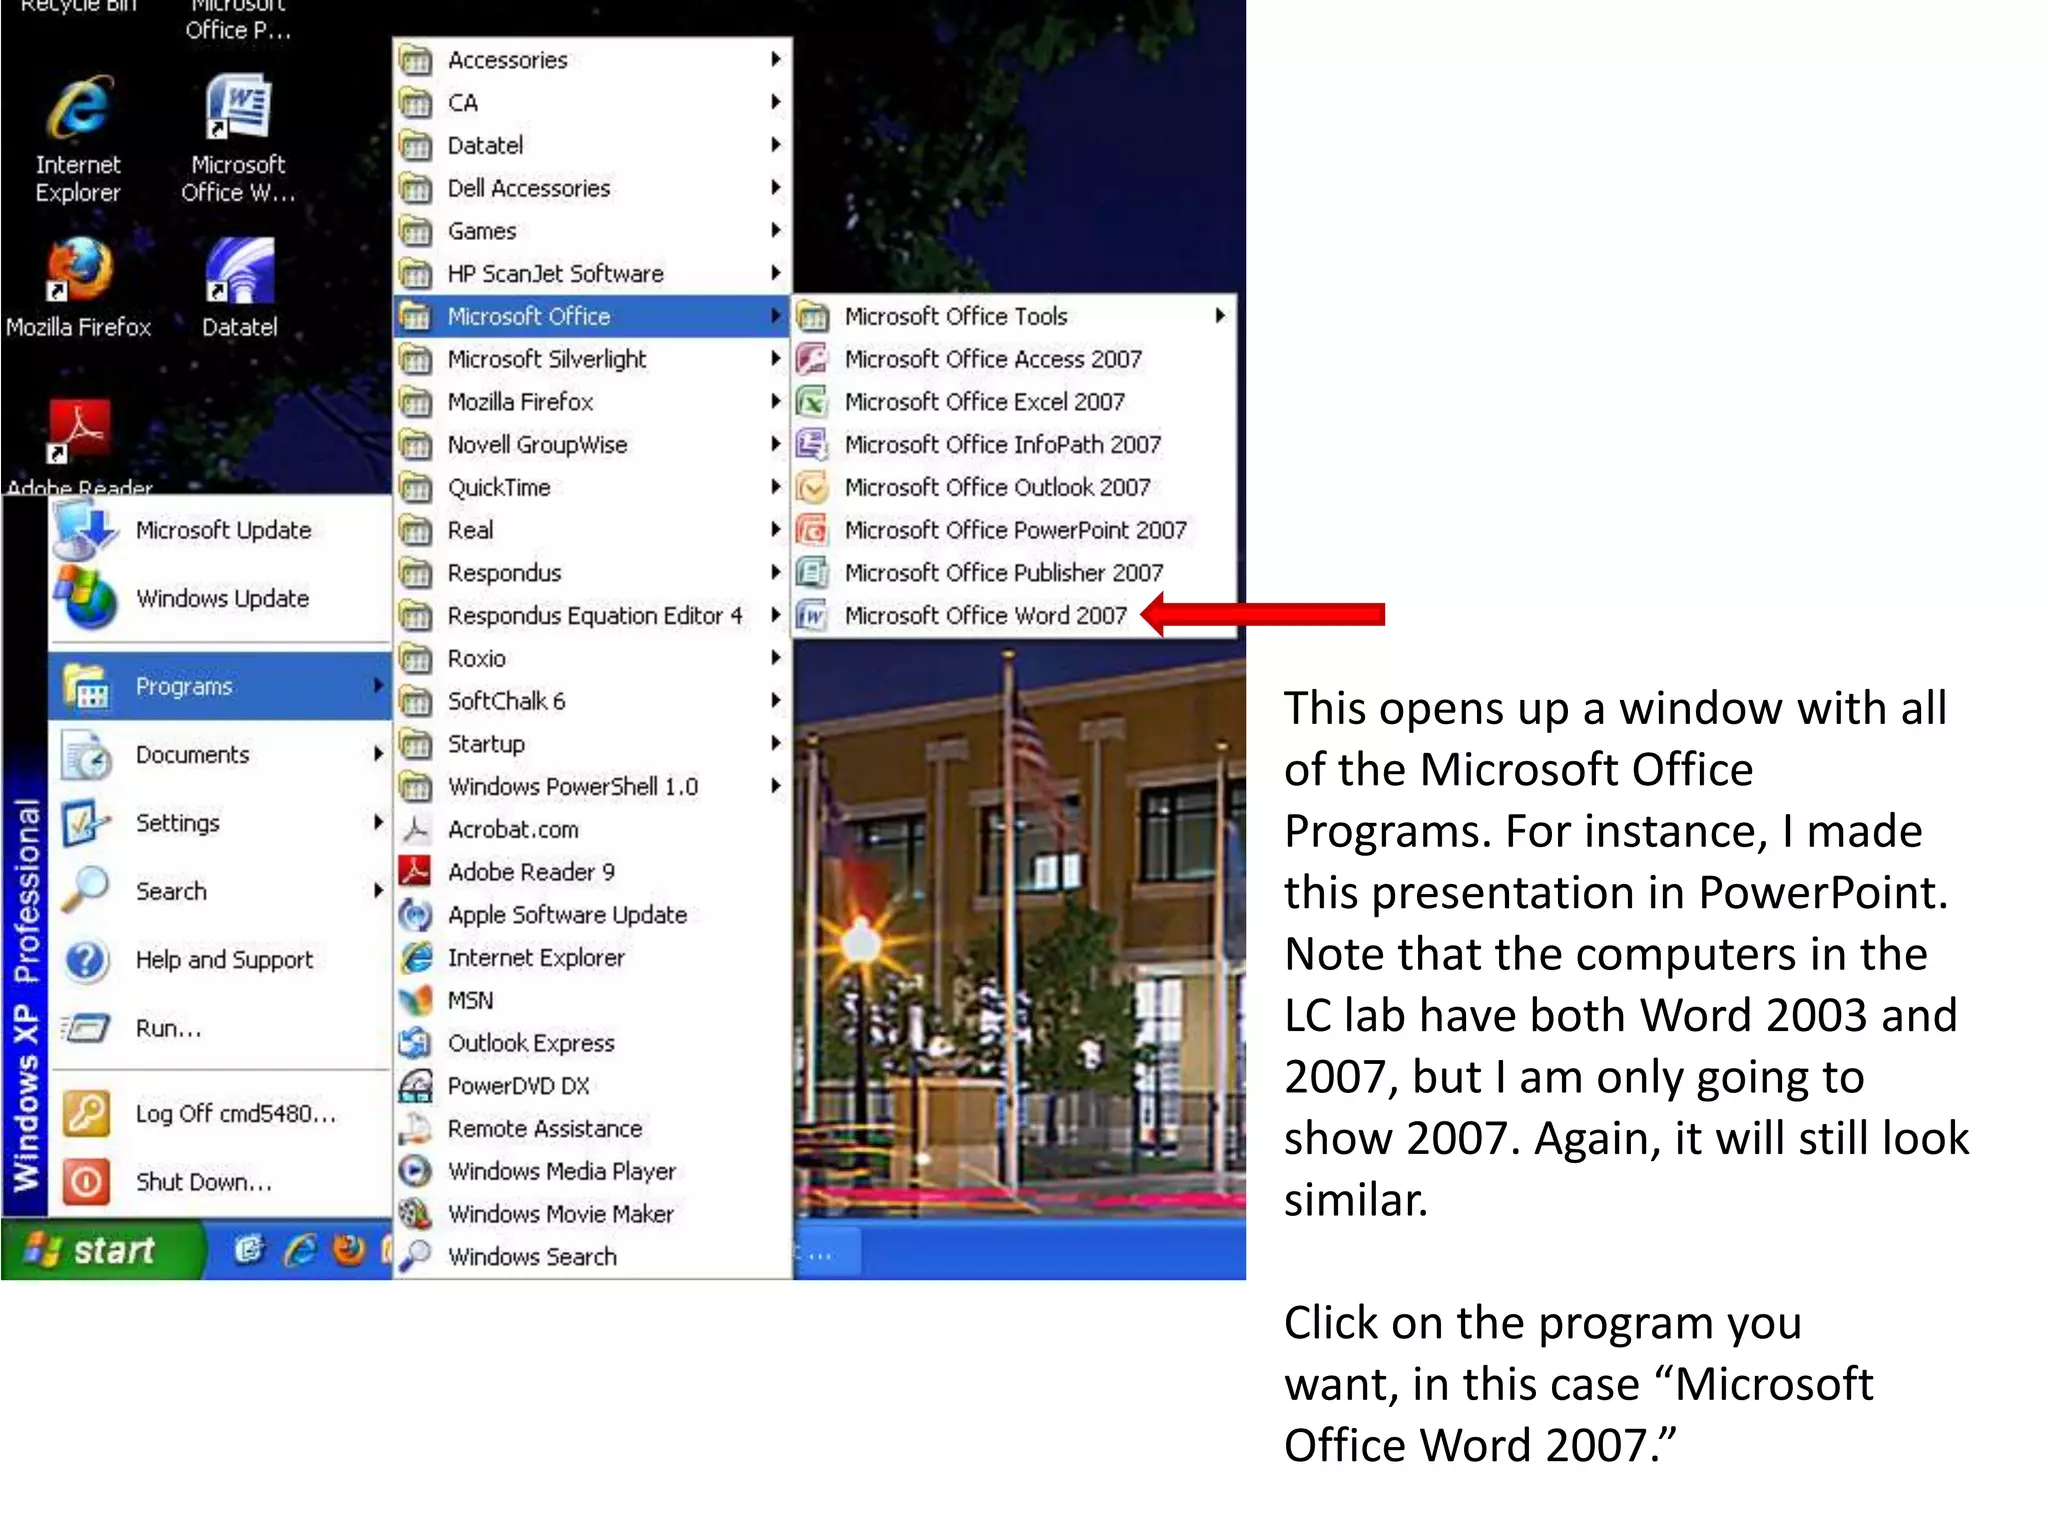
This opens upa window with all of the Microsoft Office Programs. For instance, I made this presentation in PowerPoint. Note that the computers in the LC lab have both Word 2003 and 2007, but I am only going to show 2007. Again, it will still look similar.Click on the program you want, in this case “Microsoft Office Word 2007.”
5.
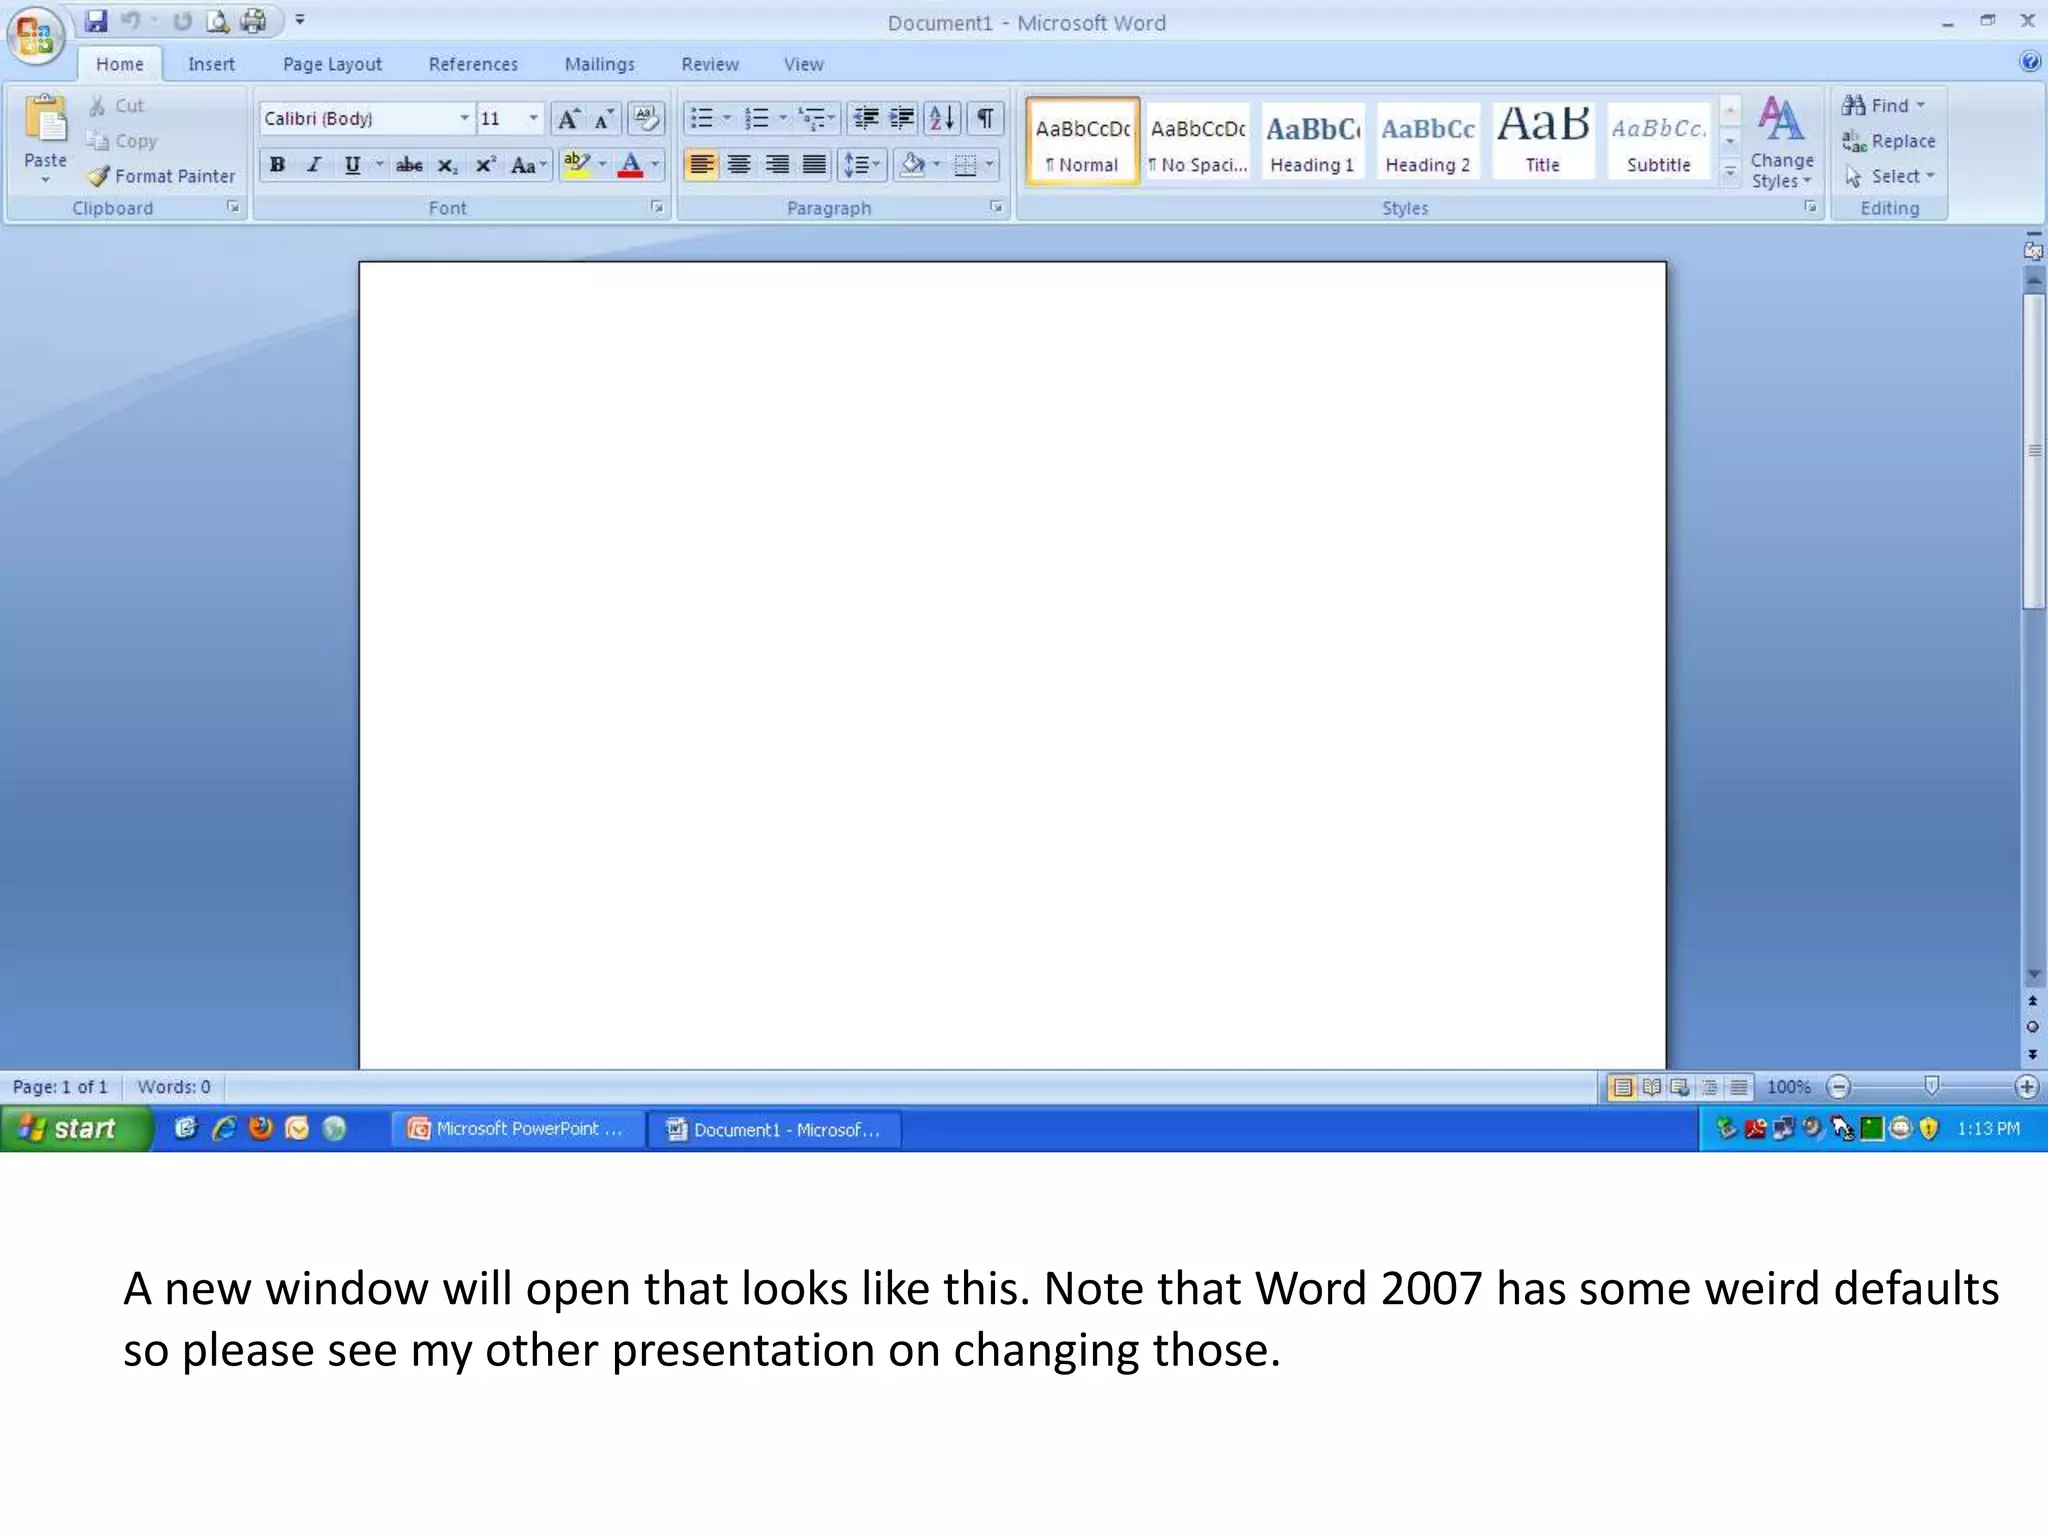
A new windowwill open that looks like this. Note that Word 2007 has some weird defaults so please see my other presentation on changing those.
6.
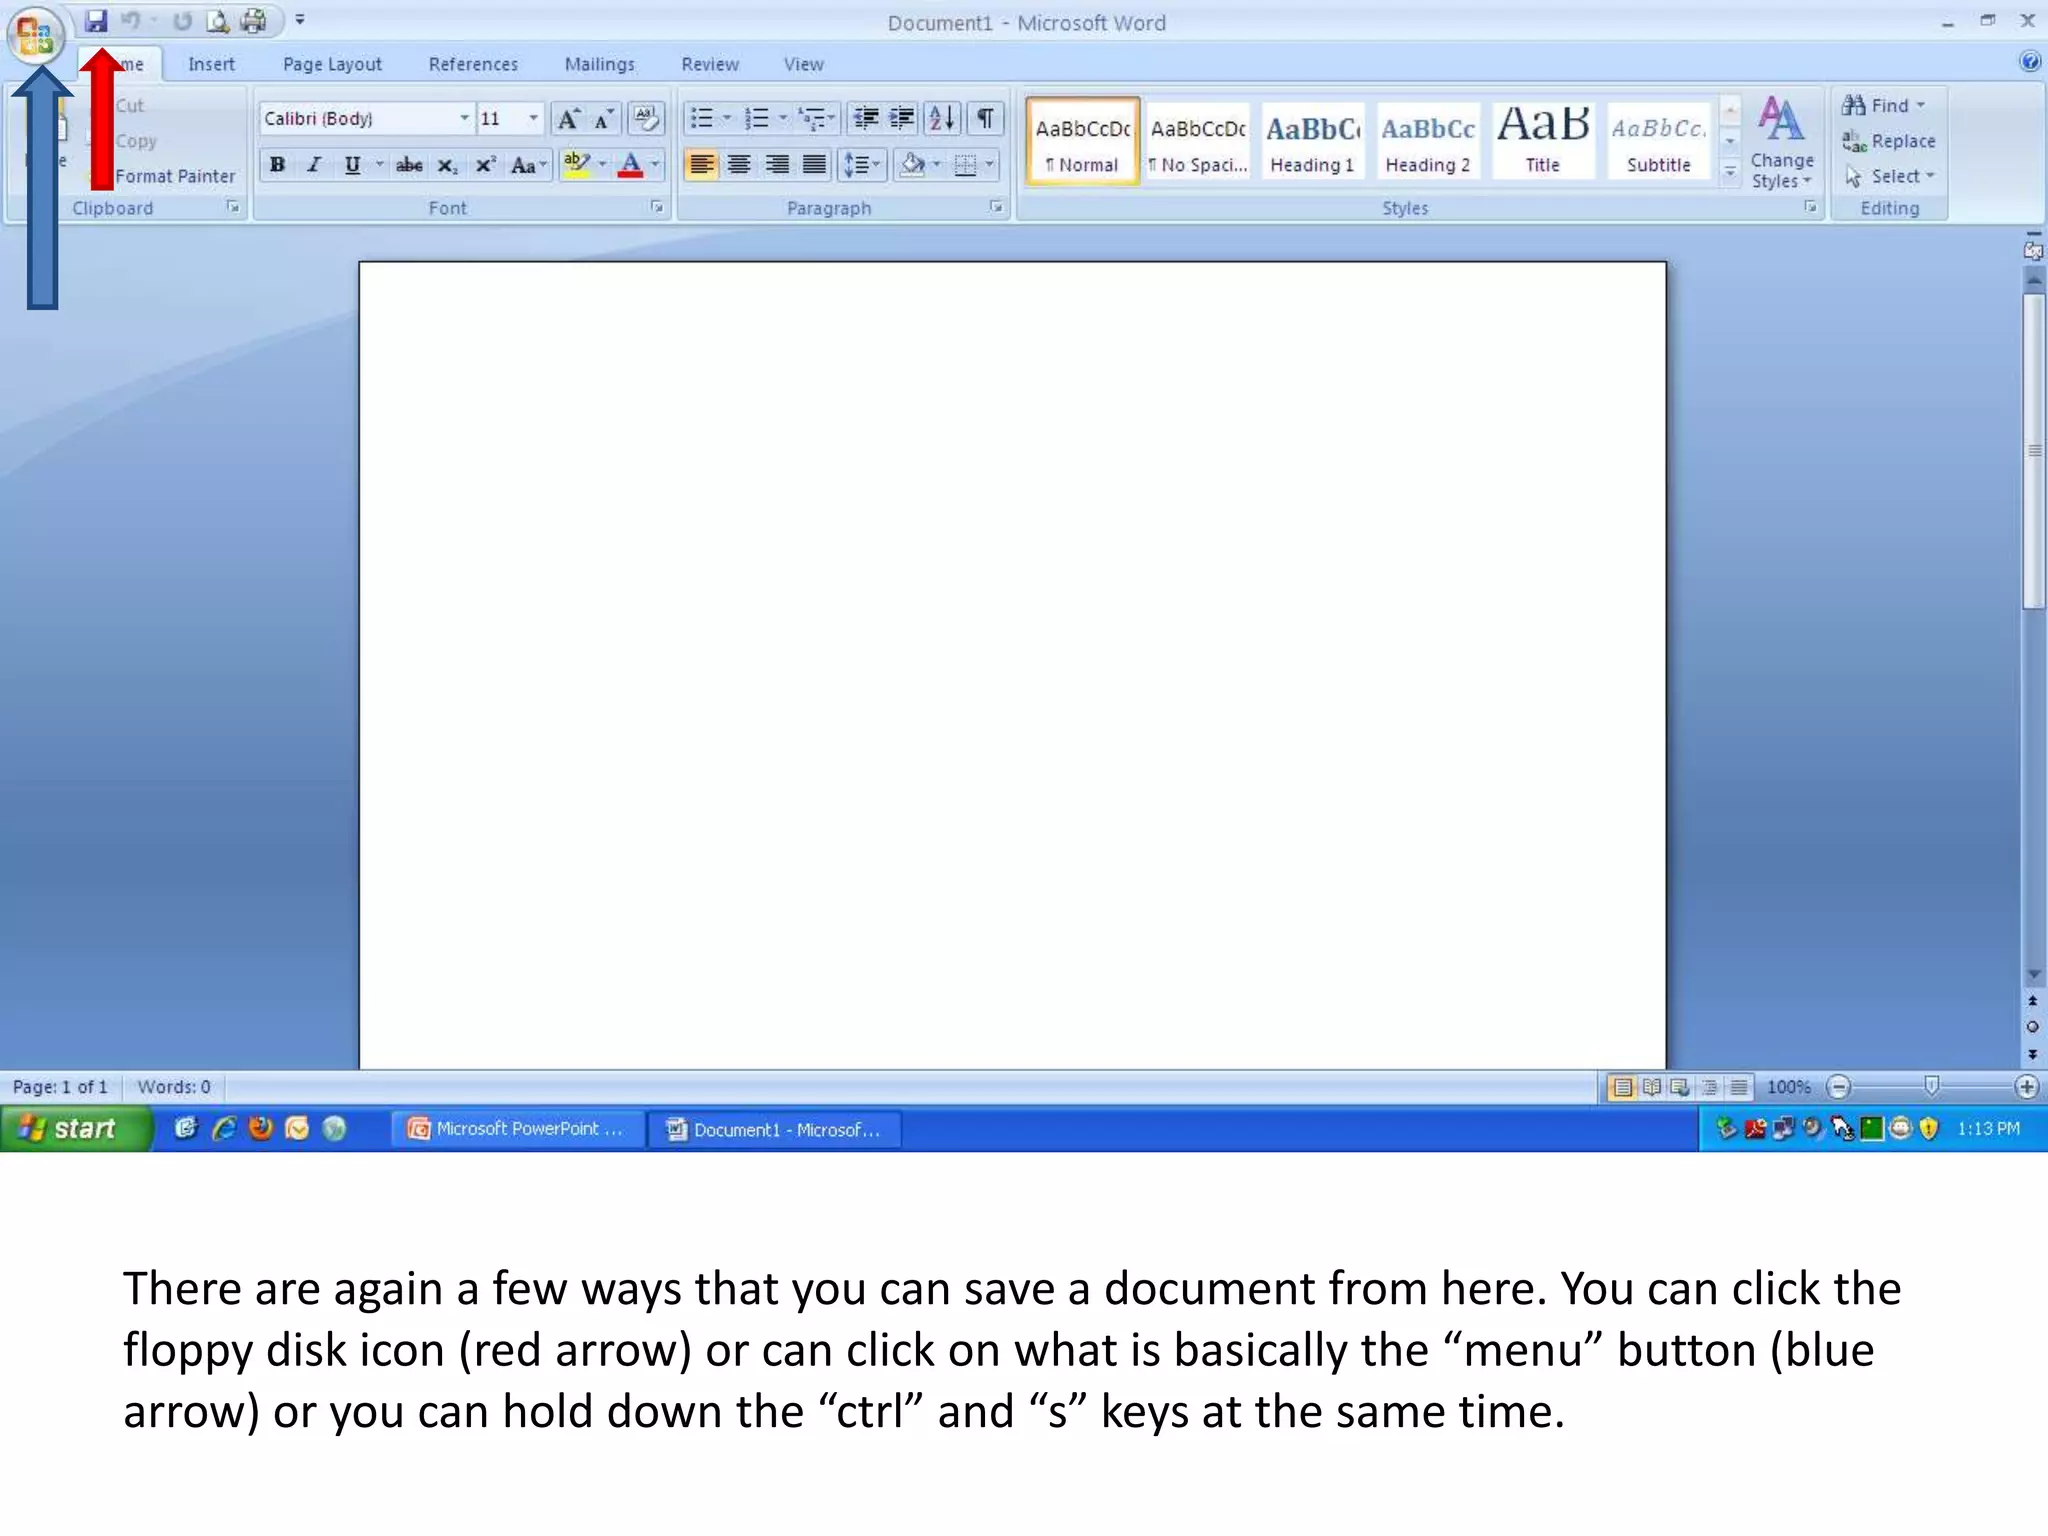
There are againa few ways that you can save a document from here. You can click the floppy disk icon (red arrow) or can click on what is basically the “menu” button (blue arrow) or you can hold down the “ctrl” and “s” keys at the same time.
7.
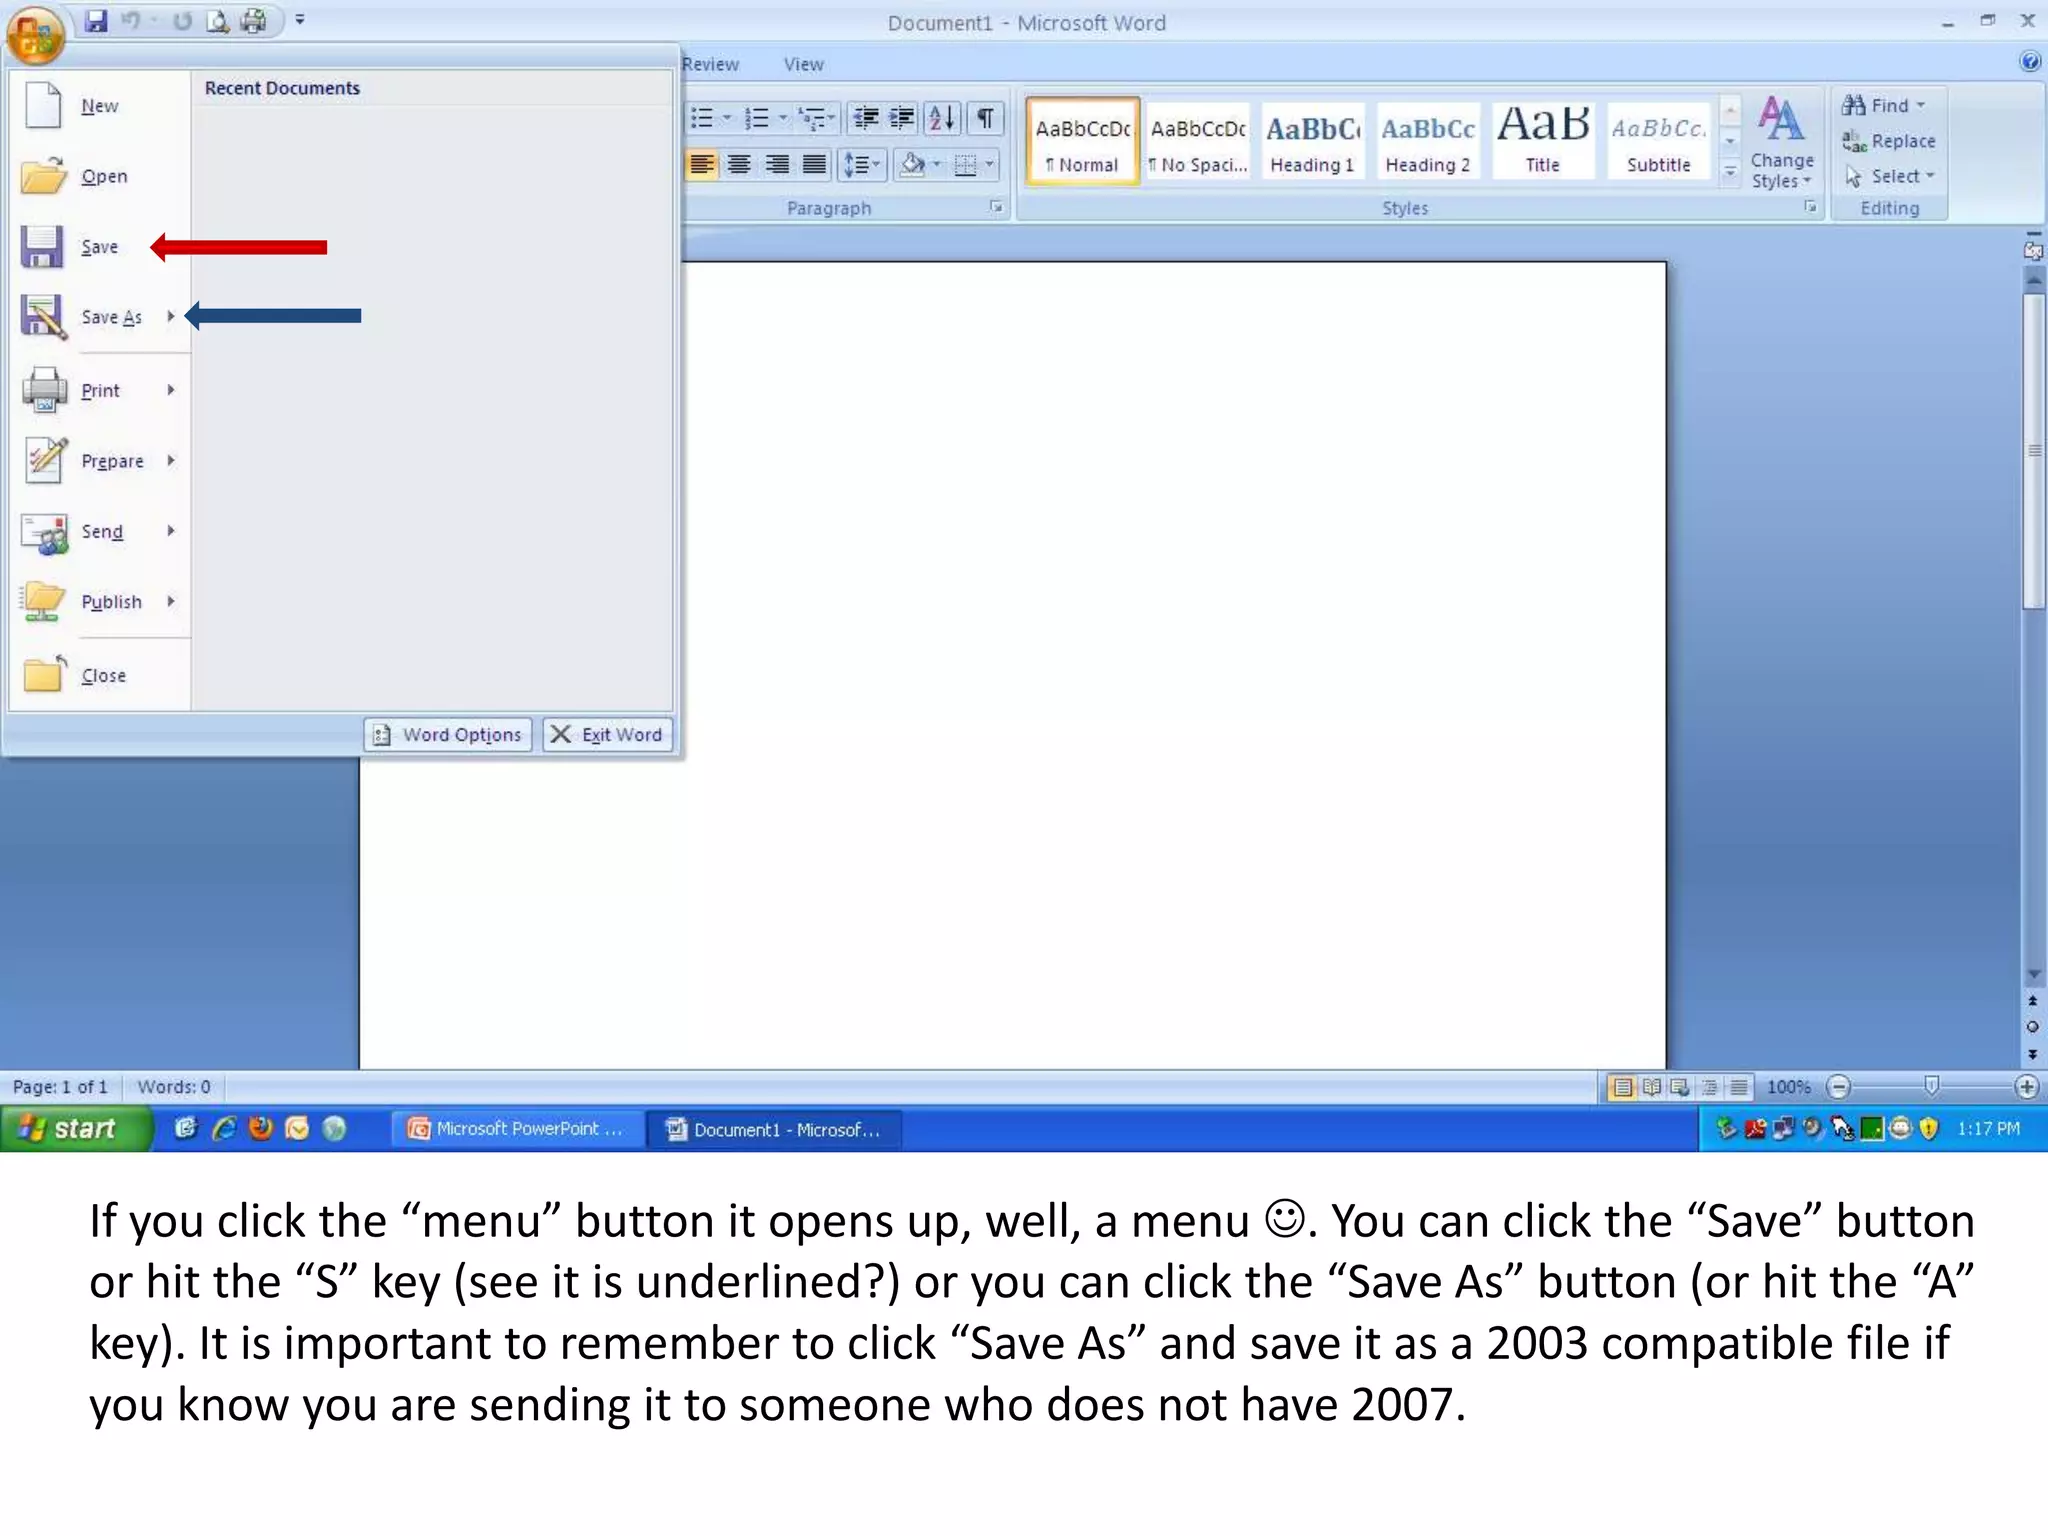
If you clickthe “menu” button it opens up, well, a menu . You can click the “Save” button or hit the “S” key (see it is underlined?) or you can click the “Save As” button (or hit the “A” key). It is important to remember to click “Save As” and save it as a 2003 compatible file if you know you are sending it to someone who does not have 2007.
8.
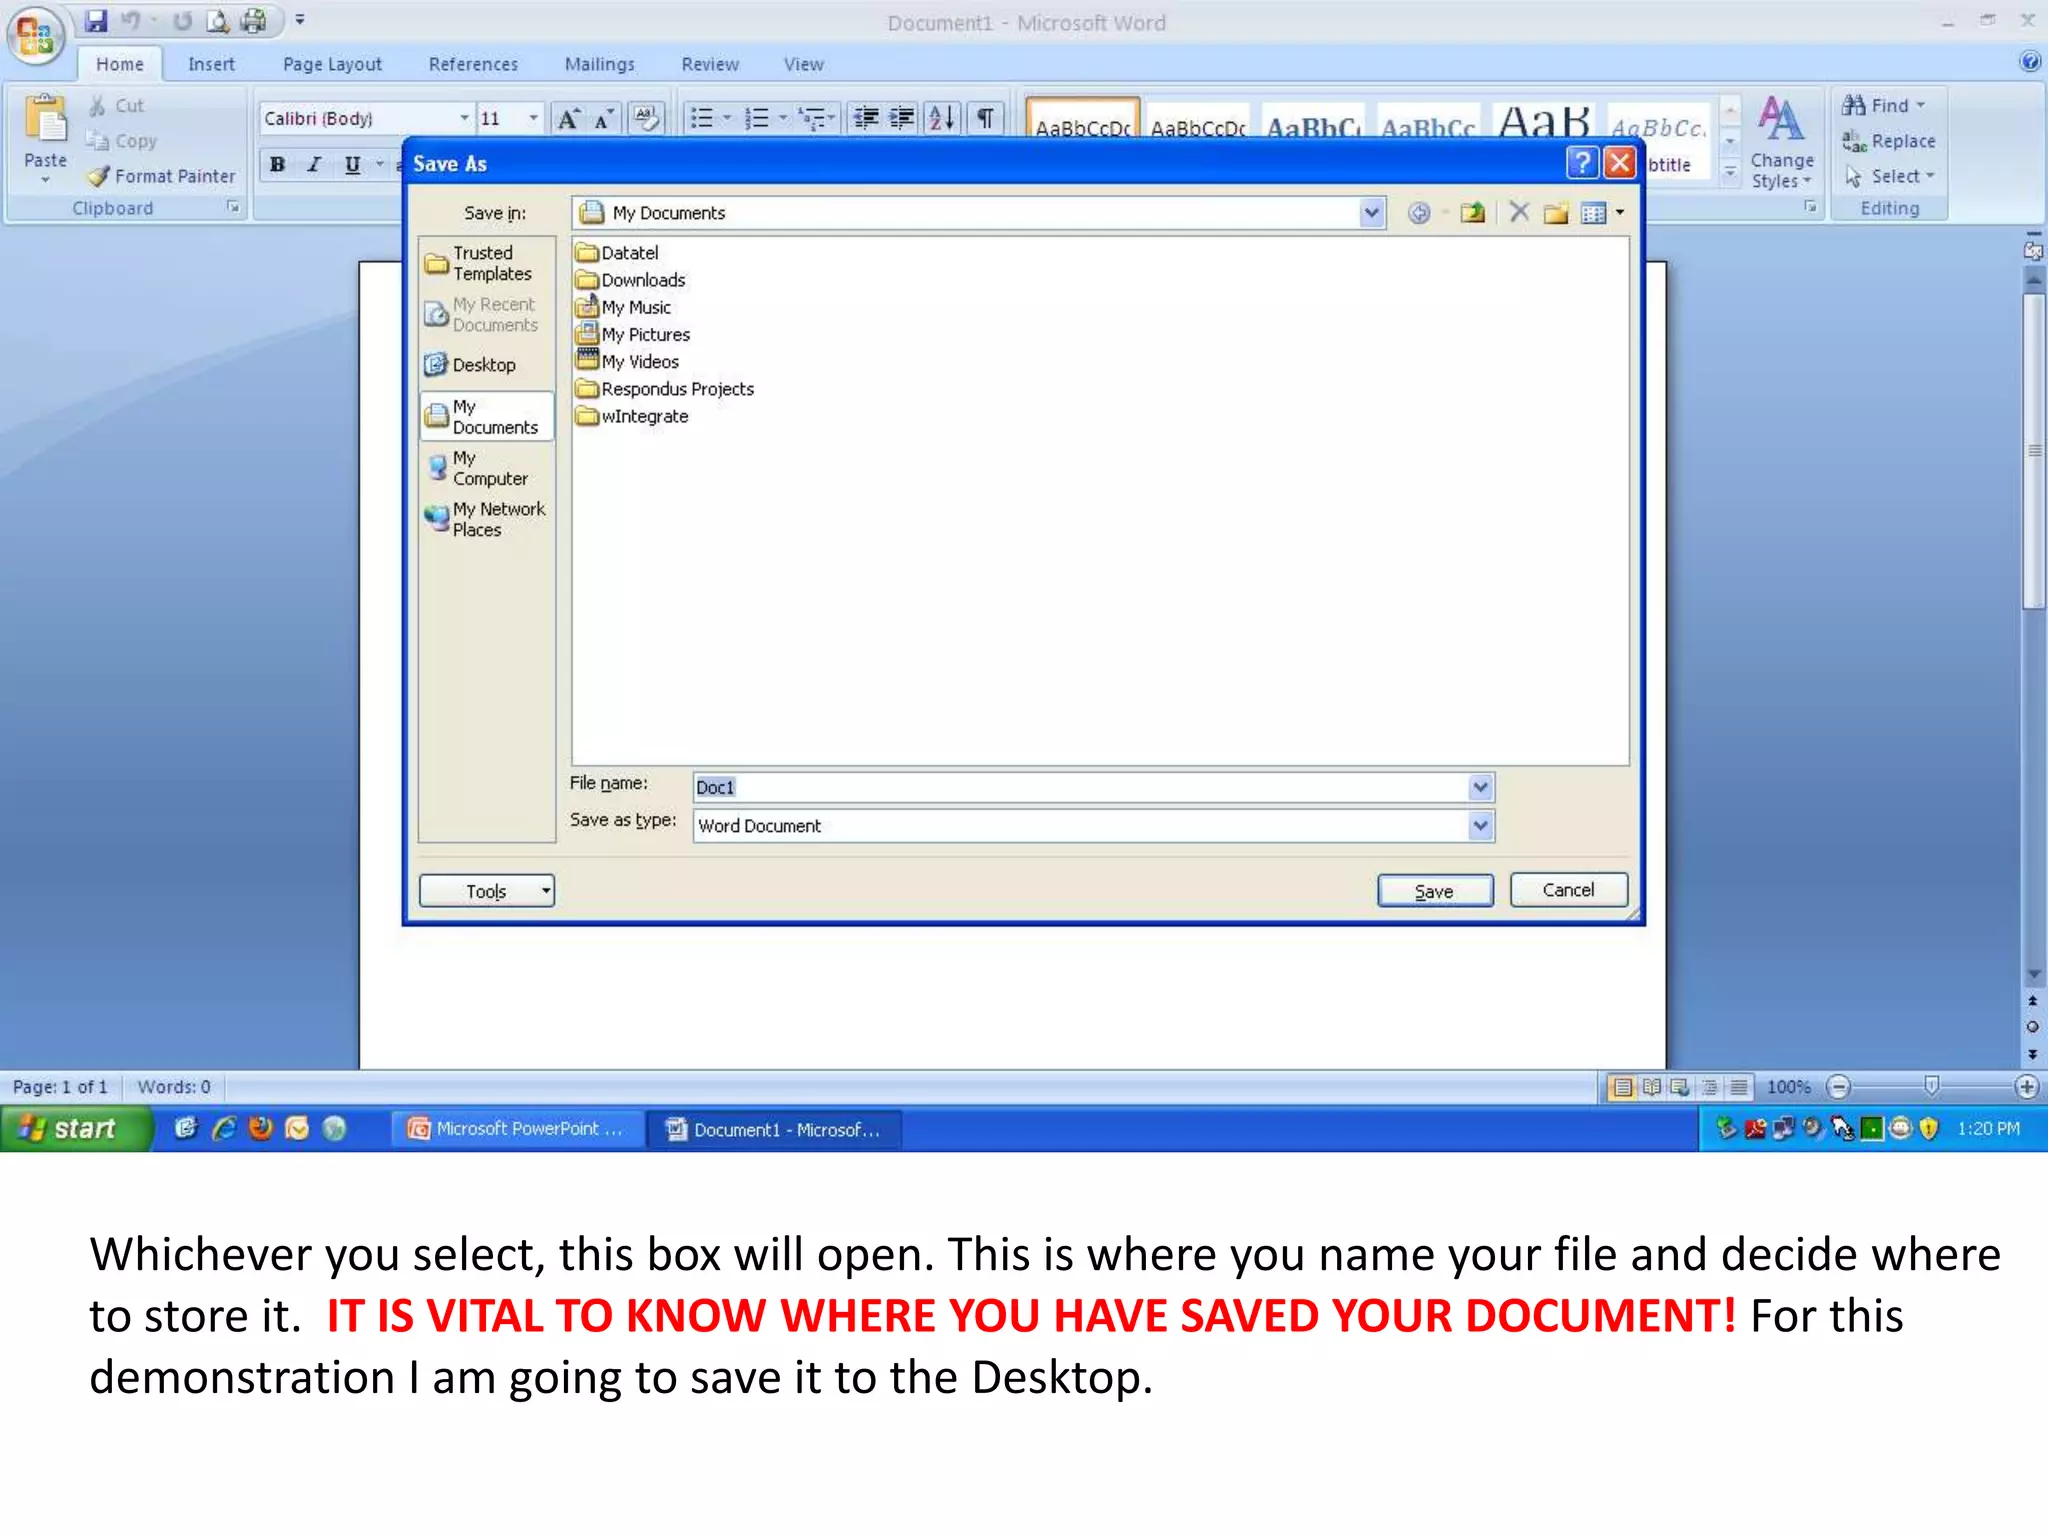
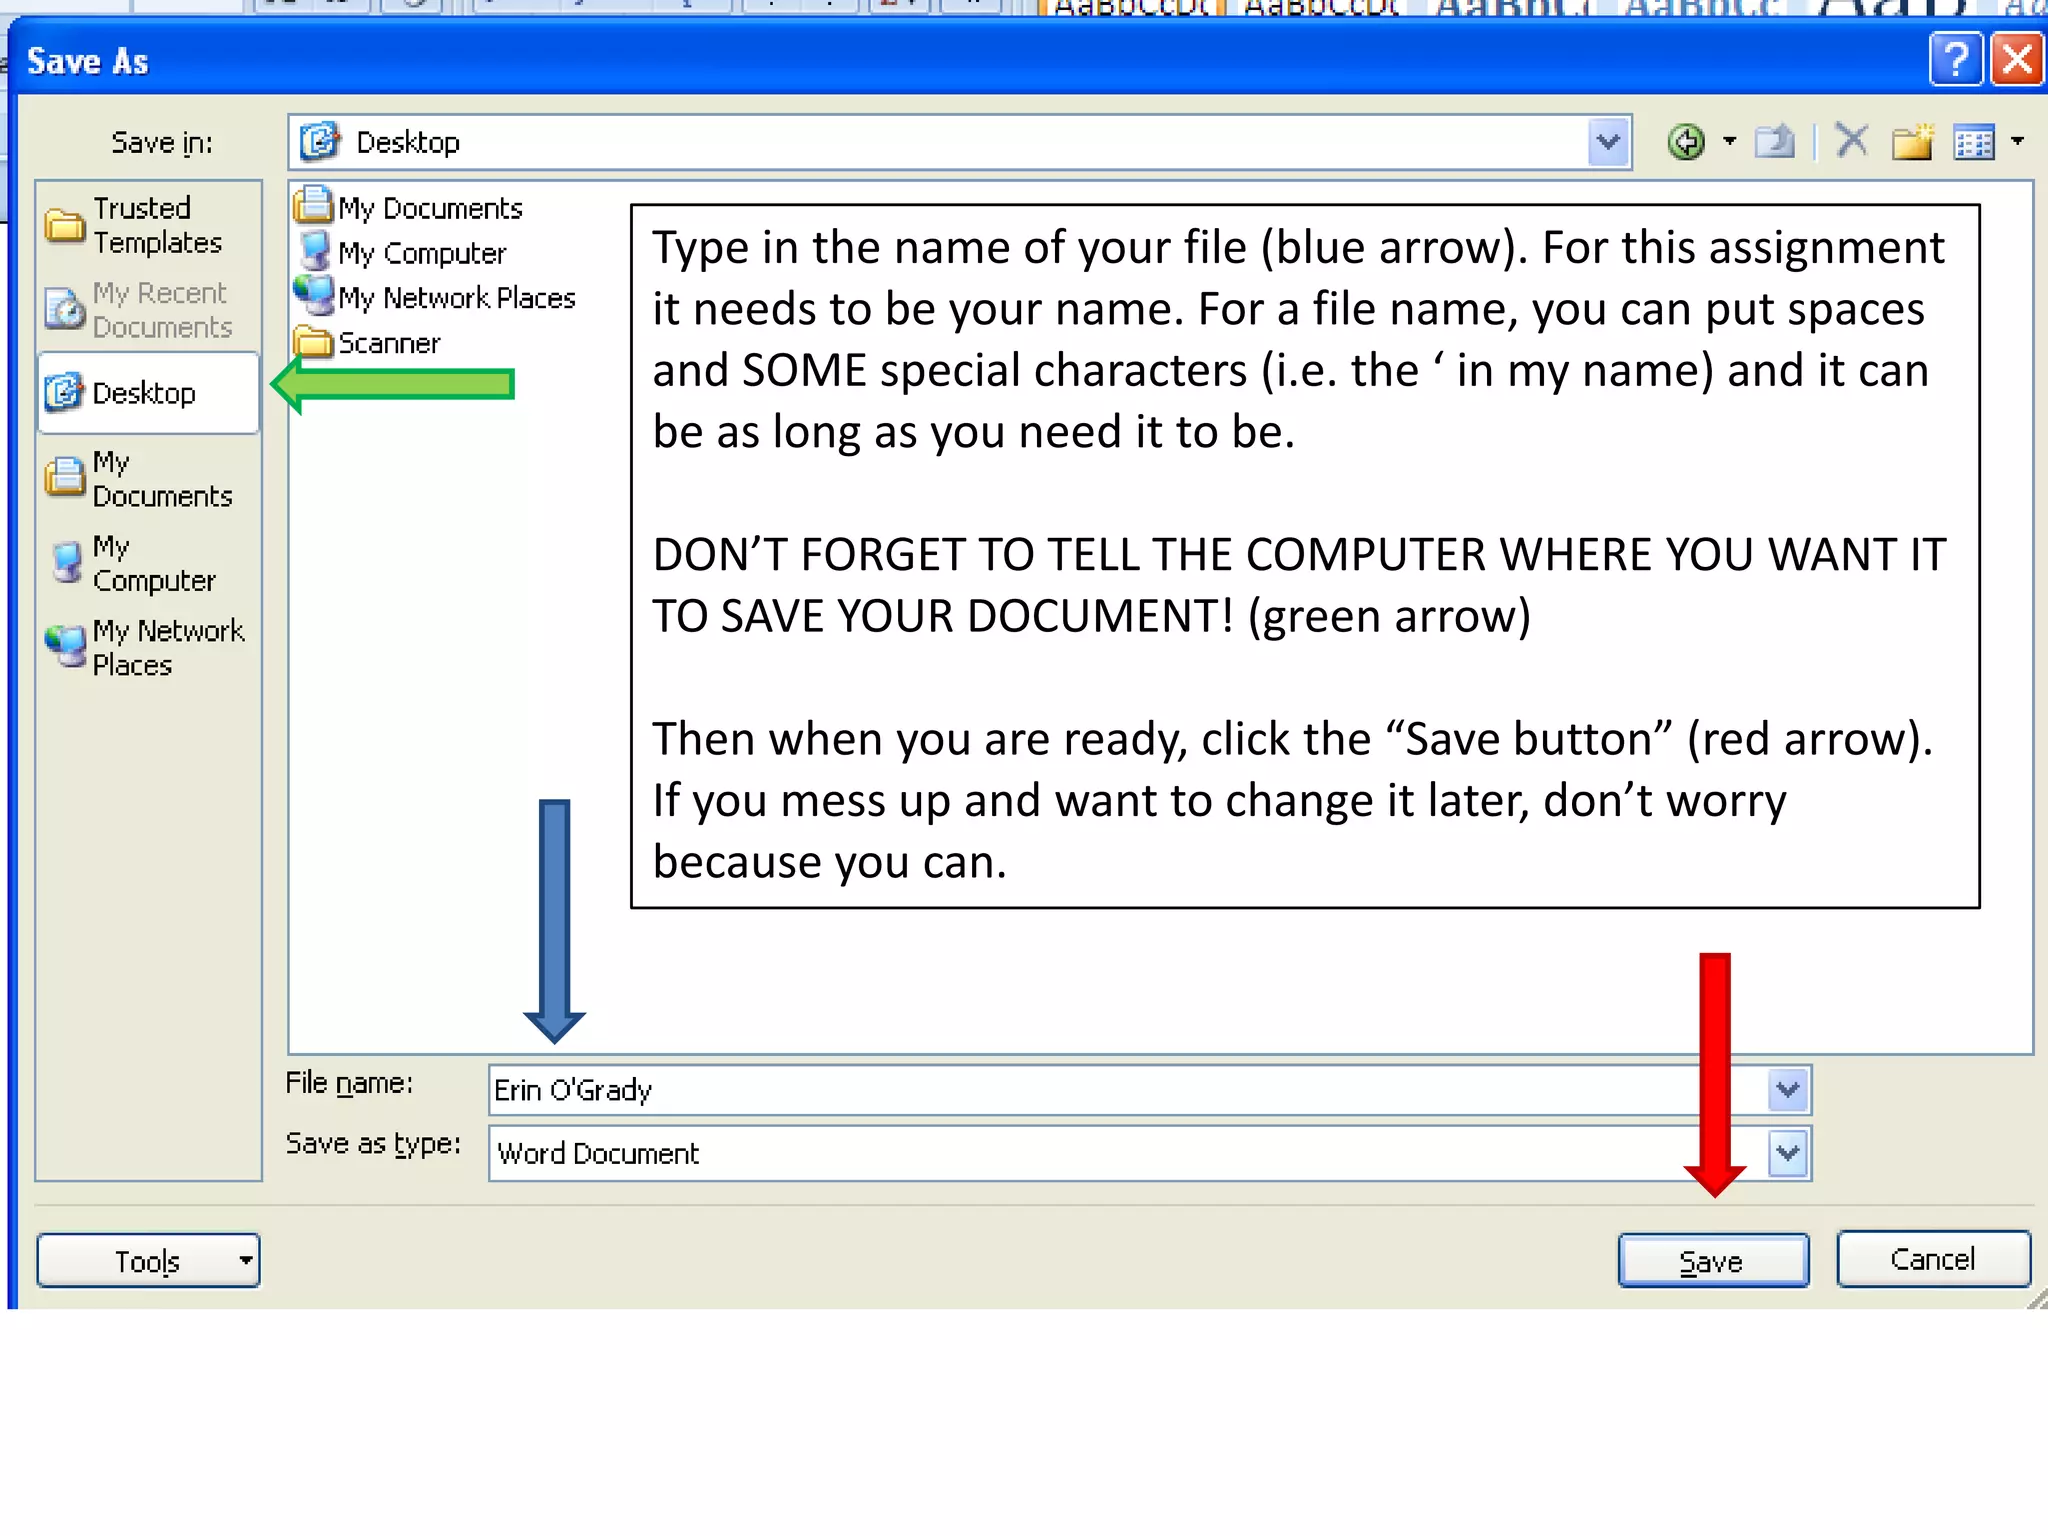
Whichever you select,this box will open. This is where you name your file and decide where to store it. IT IS VITAL TO KNOW WHERE YOU HAVE SAVED YOUR DOCUMENT! For this demonstration I am going to save it to the Desktop.
9.
Type in thename of your file (blue arrow). For this assignment it needs to be your name. For a file name, you can put spaces and SOME special characters (i.e. the ‘ in my name) and it can be as long as you need it to be.DON’T FORGET TO TELL THE COMPUTER WHERE YOU WANT IT TO SAVE YOUR DOCUMENT! (green arrow)Then when you are ready, click the “Save button” (red arrow). If you mess up and want to change it later, don’t worry because you can.
10.
Now you cansee the document I’ve created.It is important to remember something else, though! The lab computers are PUBLIC. If you save something to the specific computer you are using:(1) people can see your work and(2) you might not have access to it as you have not saved it somewhere accessible to YOU and it may get deleted.