Downloaded 324 times


This document provides steps to configure Landed Cost Management (LCM) in Oracle EBS R12.1.3. The steps include: applying required patches; creating new account codes for LCM; defining cost factors; defining LCM shipment types, organizations, and options; integrating with Oracle Advanced Pricing by setting profile options; and testing the LCM configuration. Optional steps include assigning items to the new inventory organization and opening a period for the new organization.
Introduction to configuring Landed Cost Management (LCM) in EBS R12.1.3 after receiving or as a service.
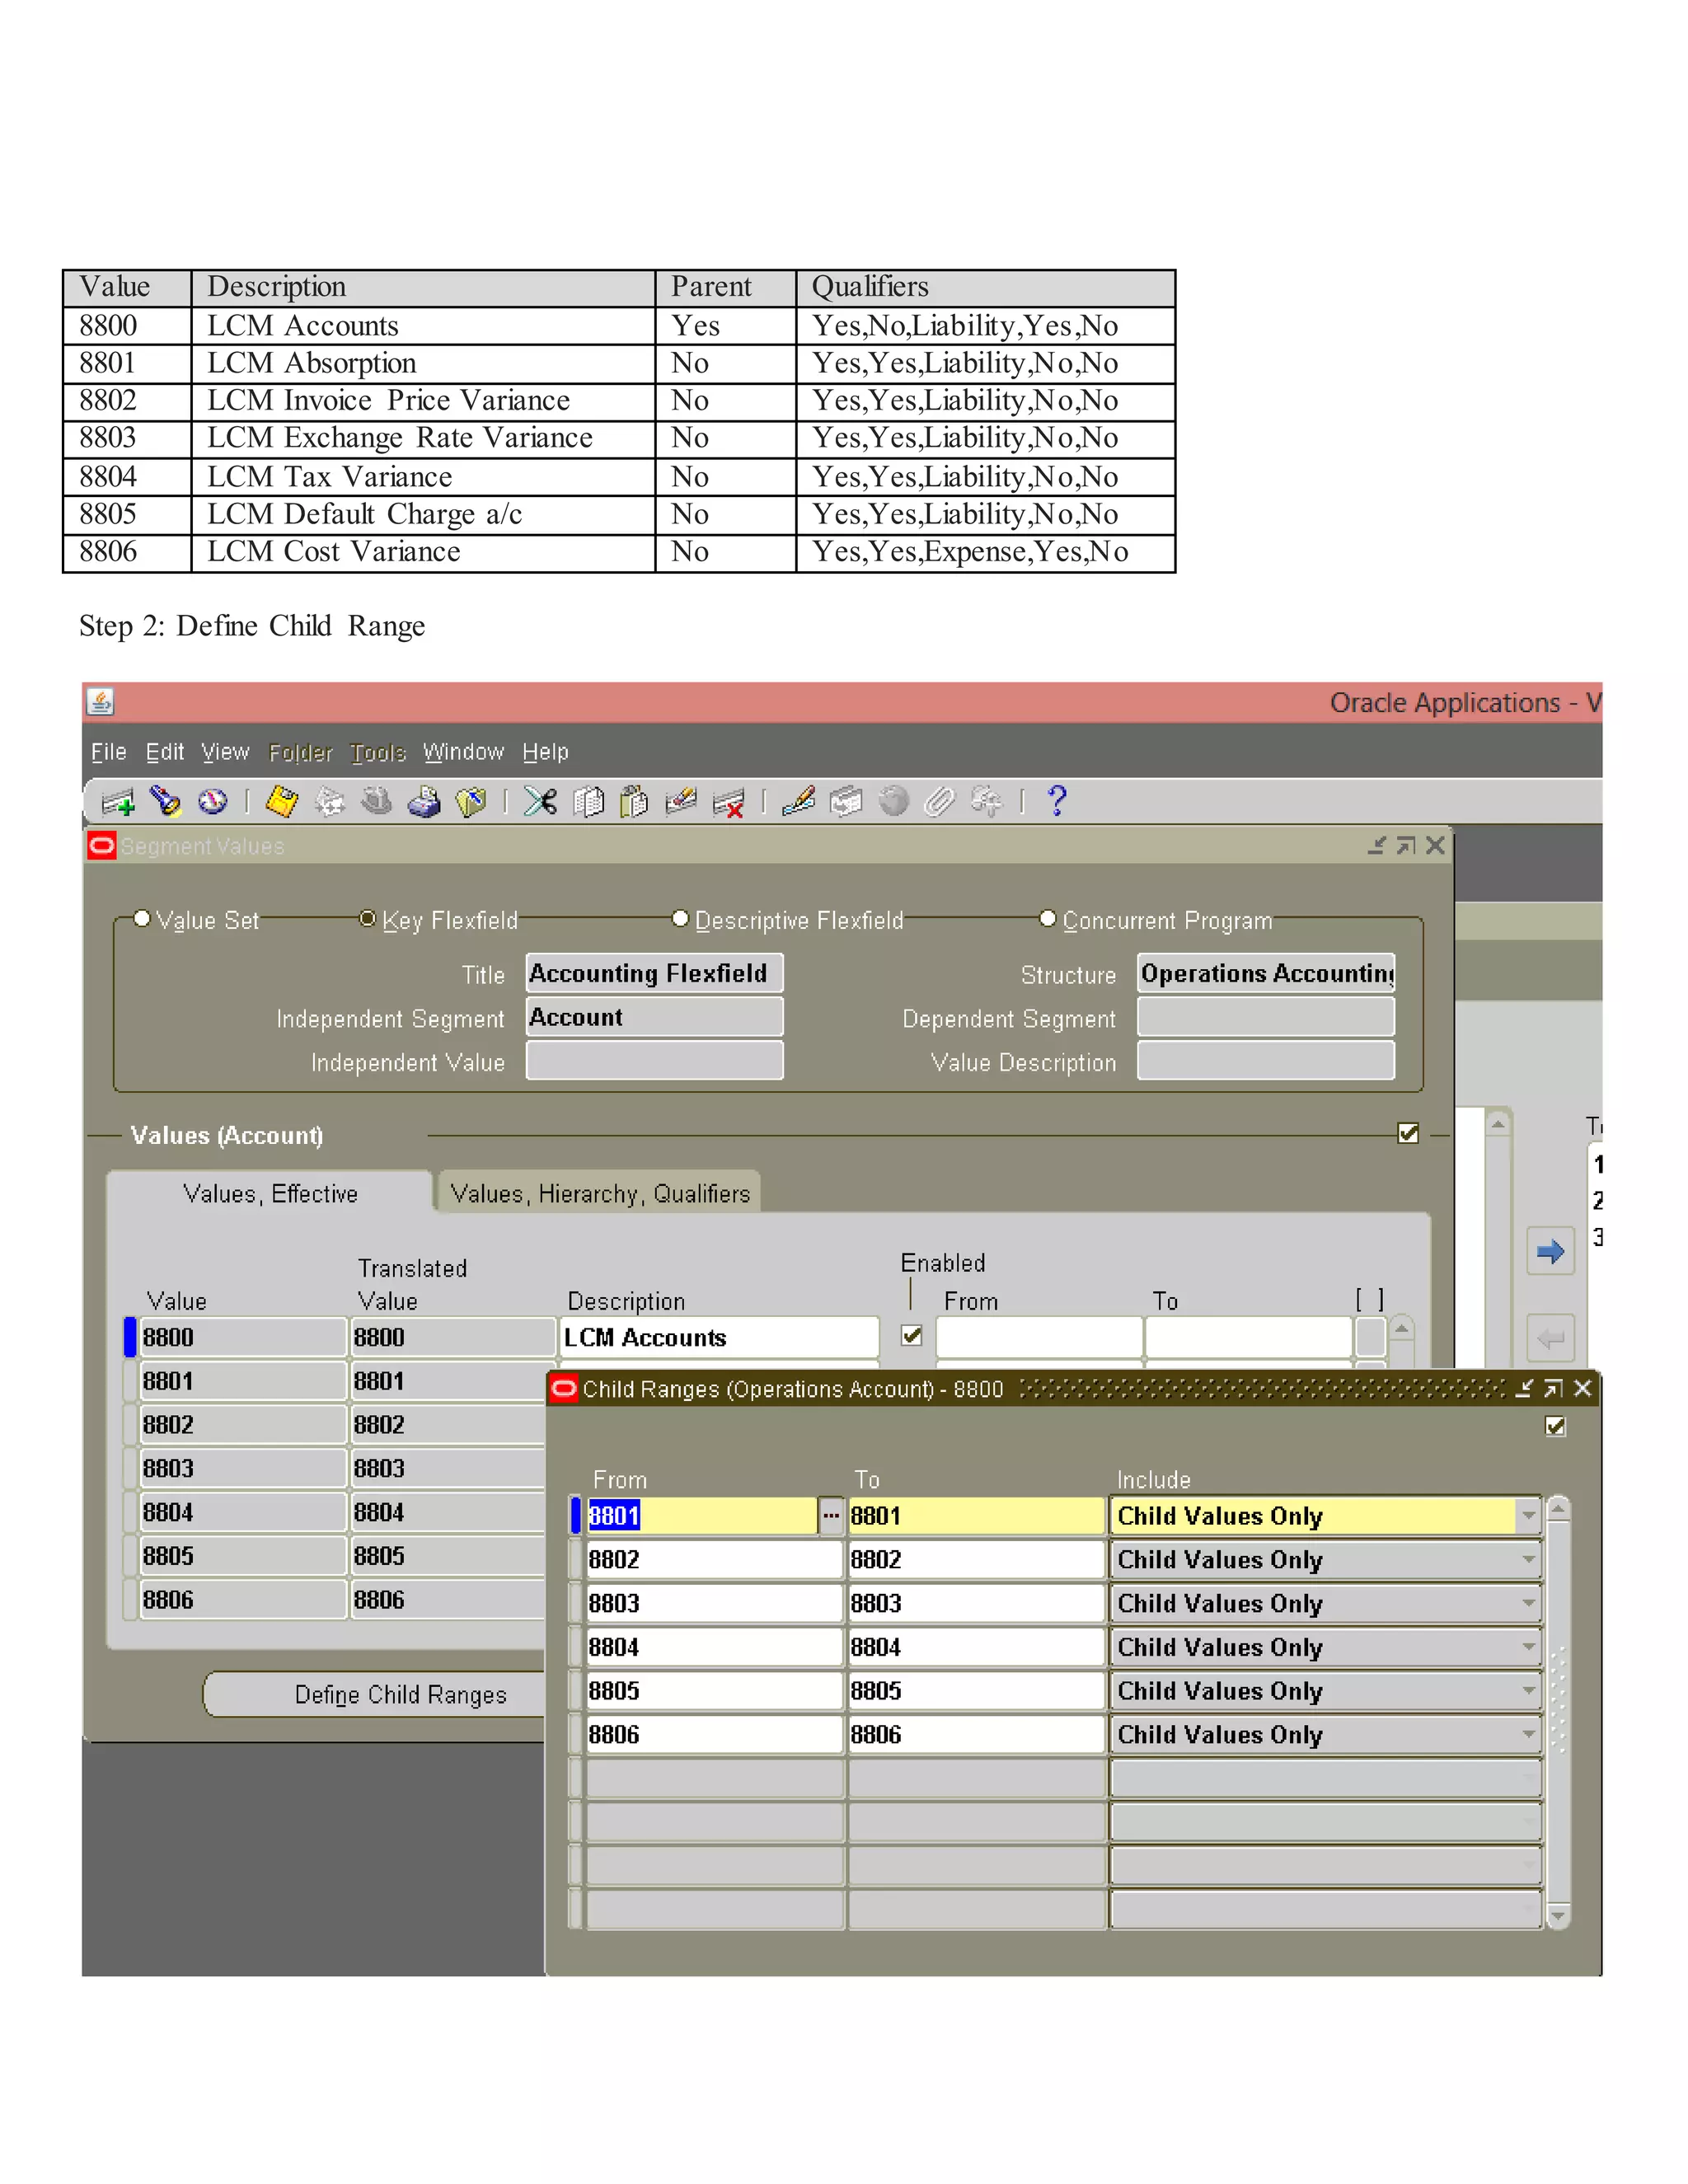
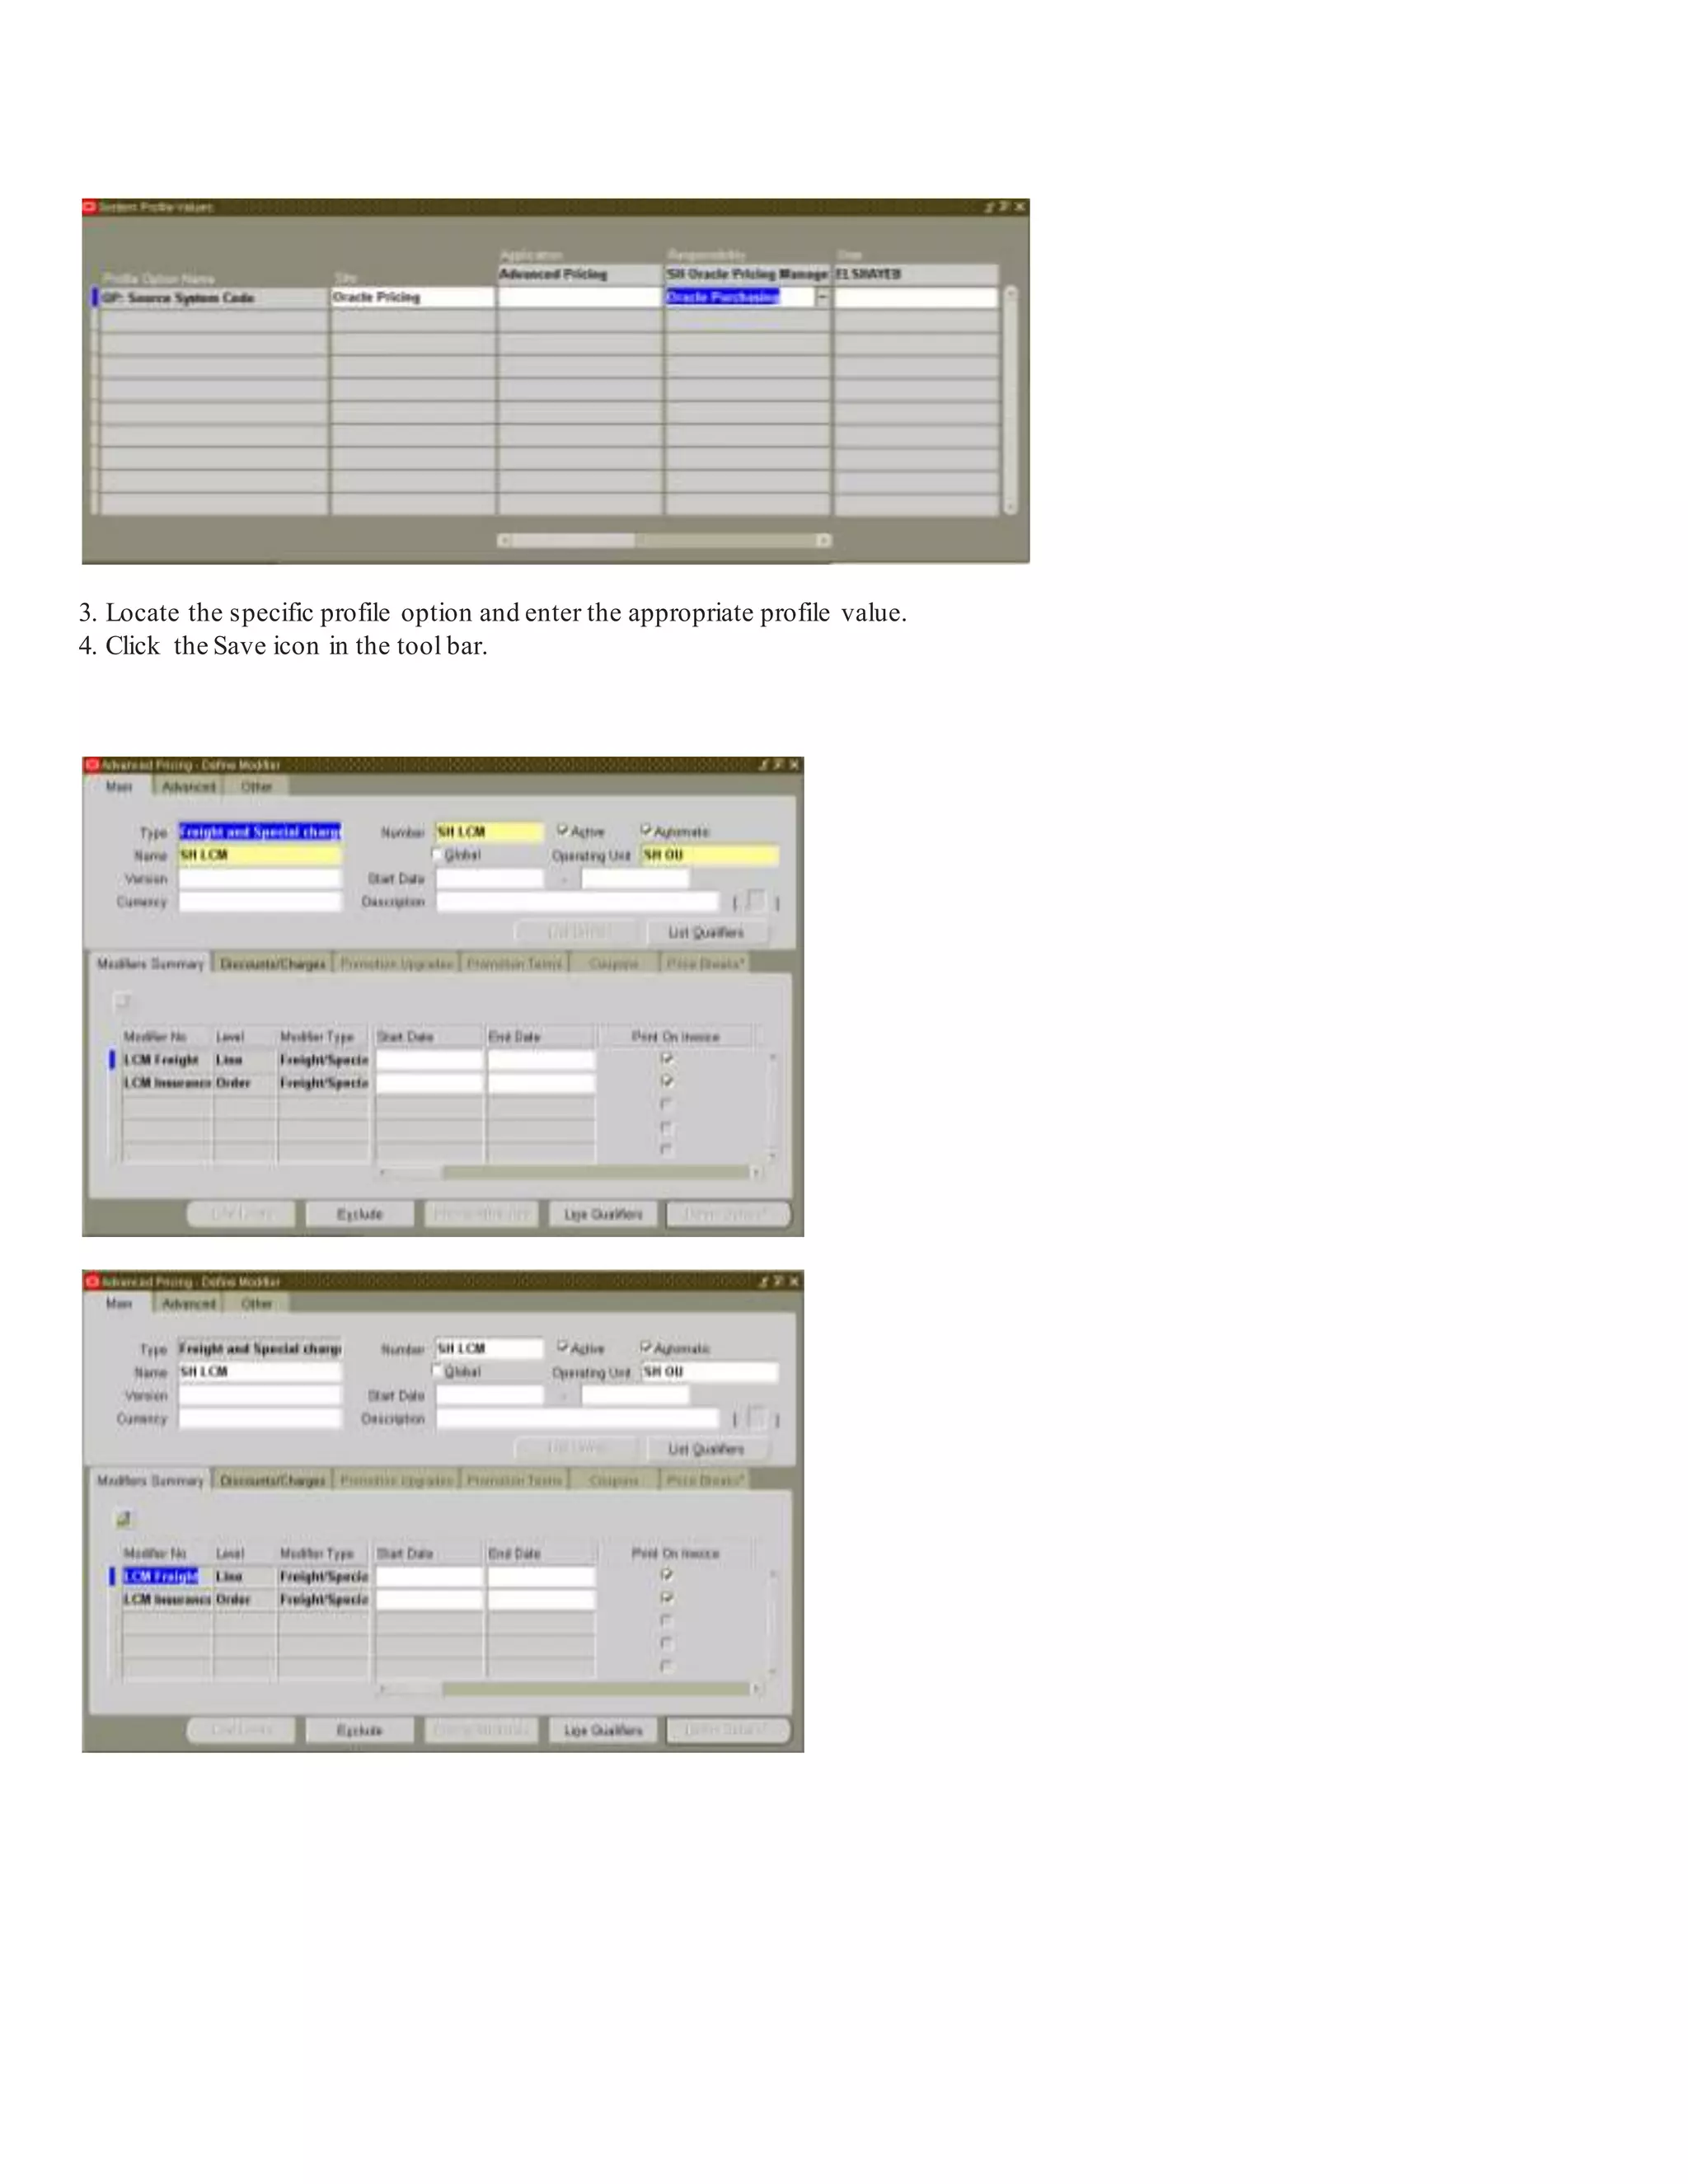
Steps to set up LCM include applying patches and creating new account codes for various cost factors.
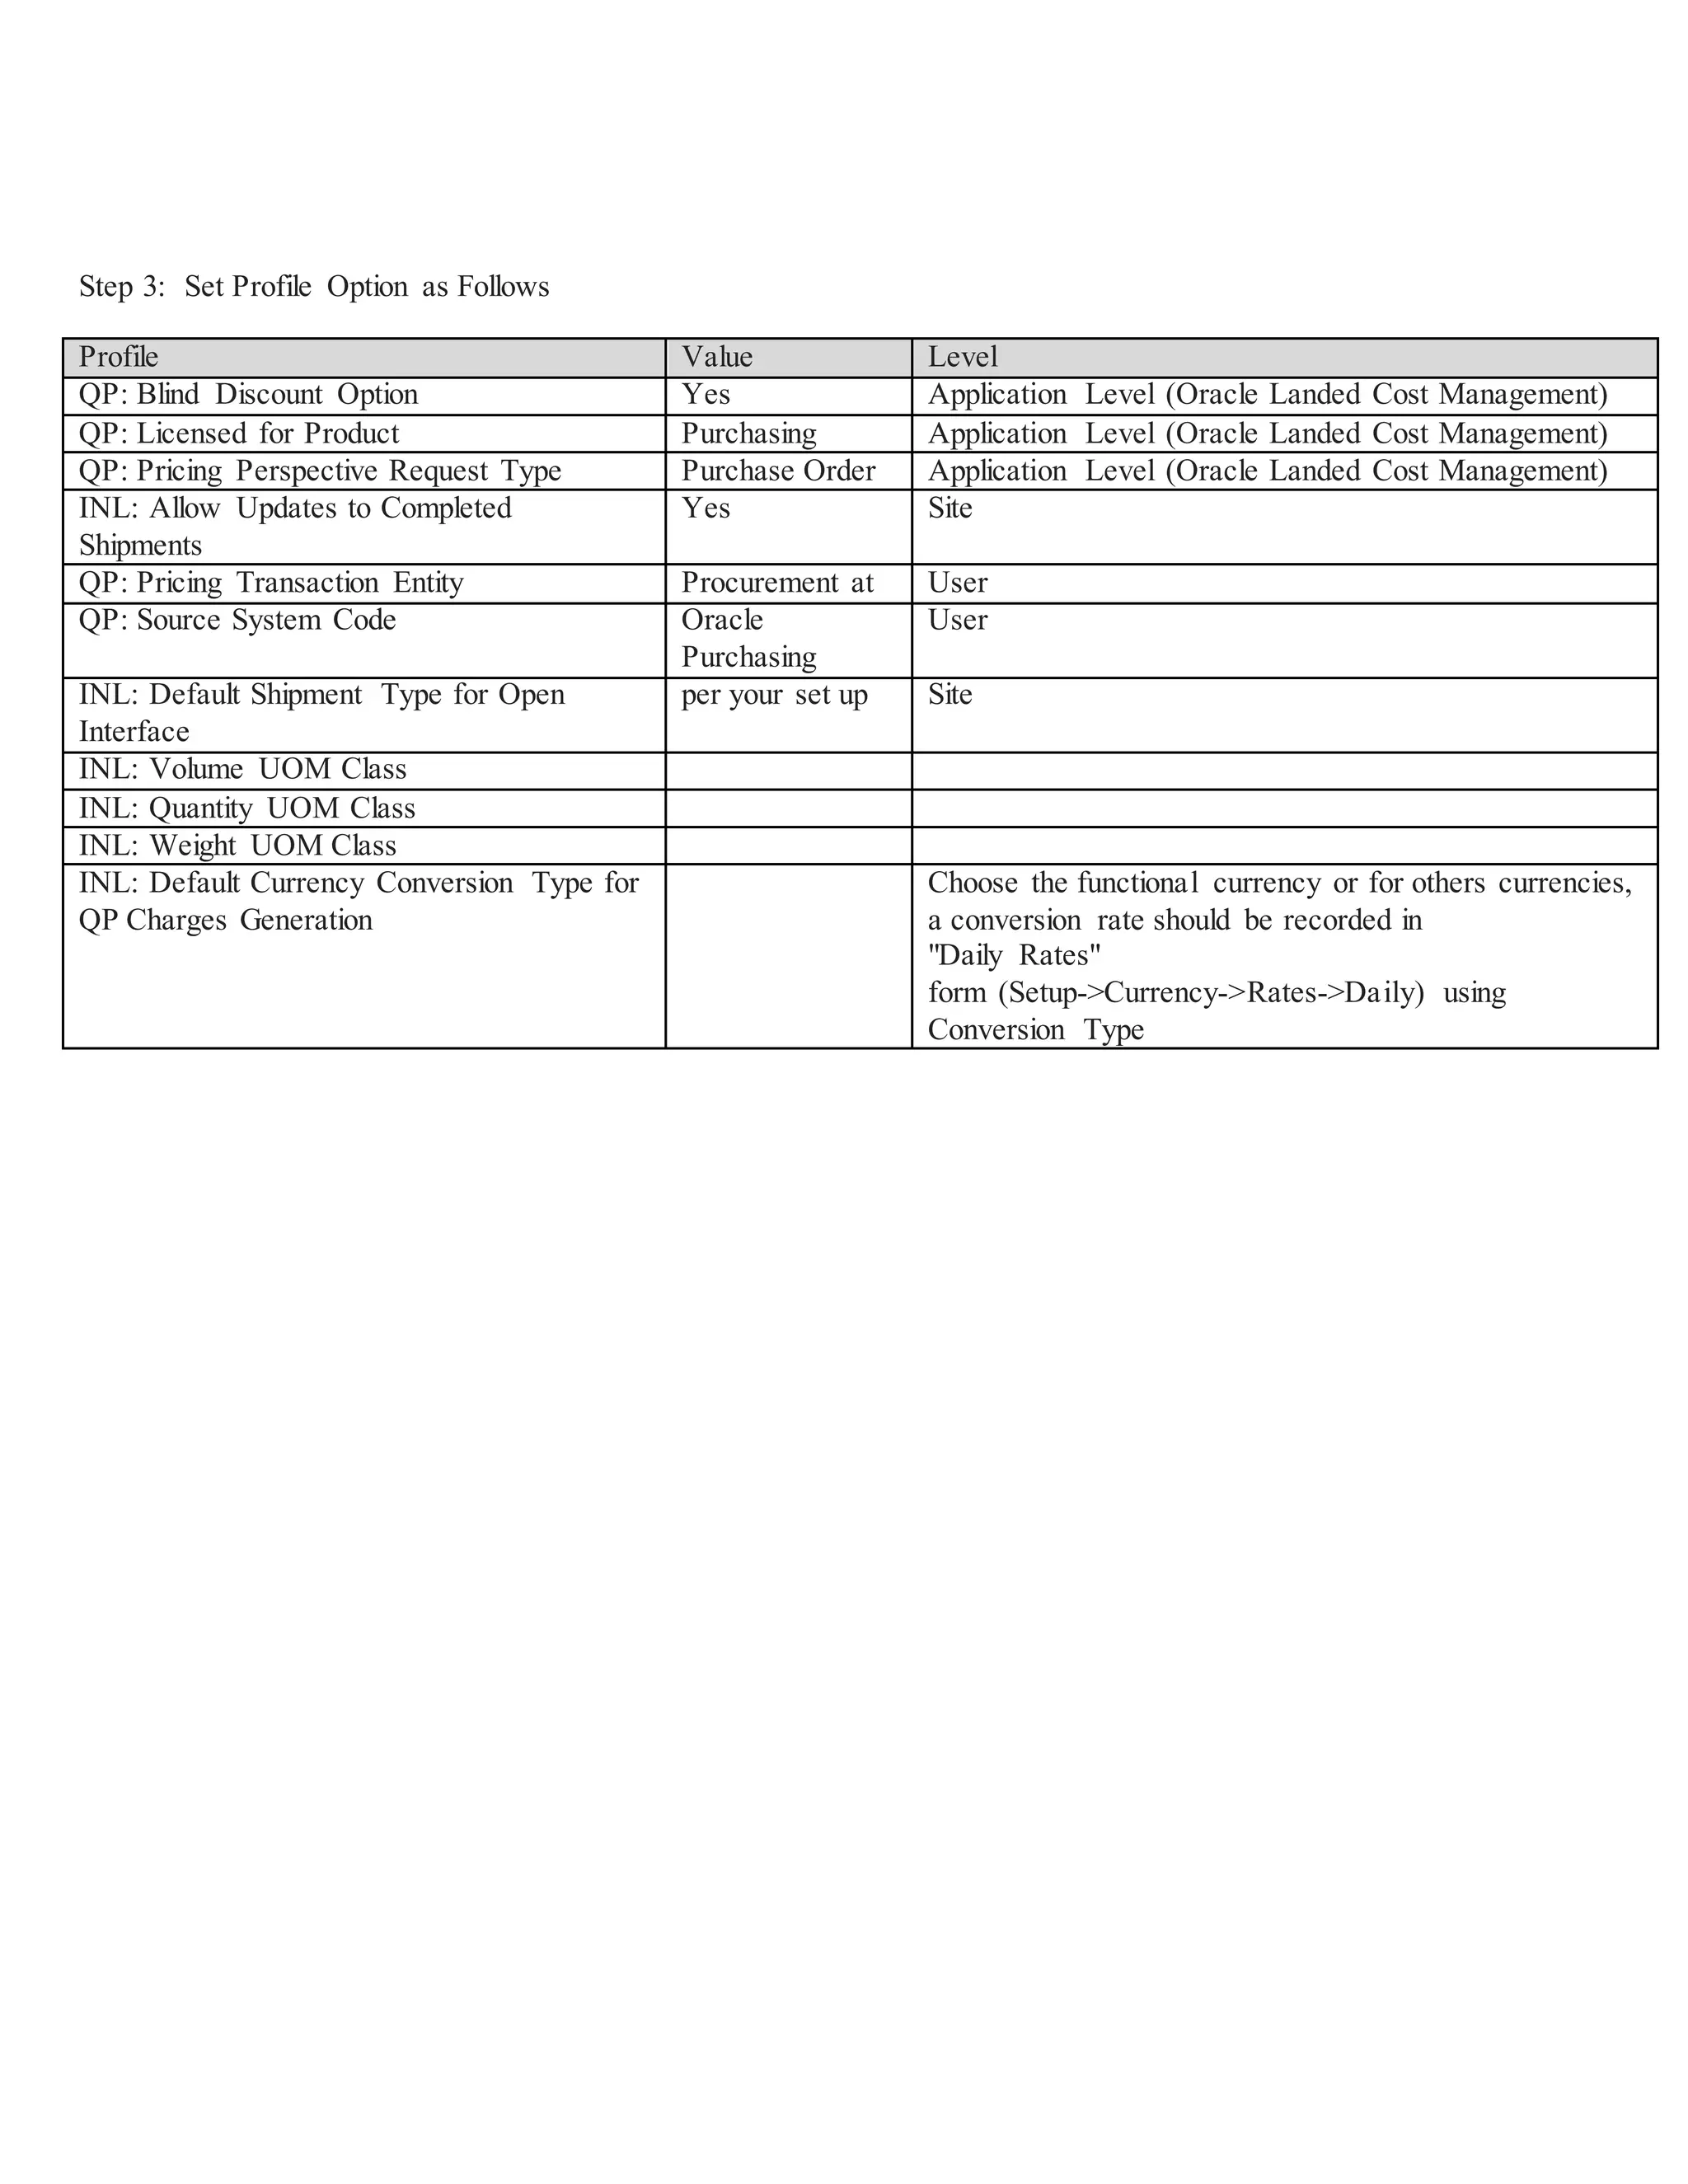
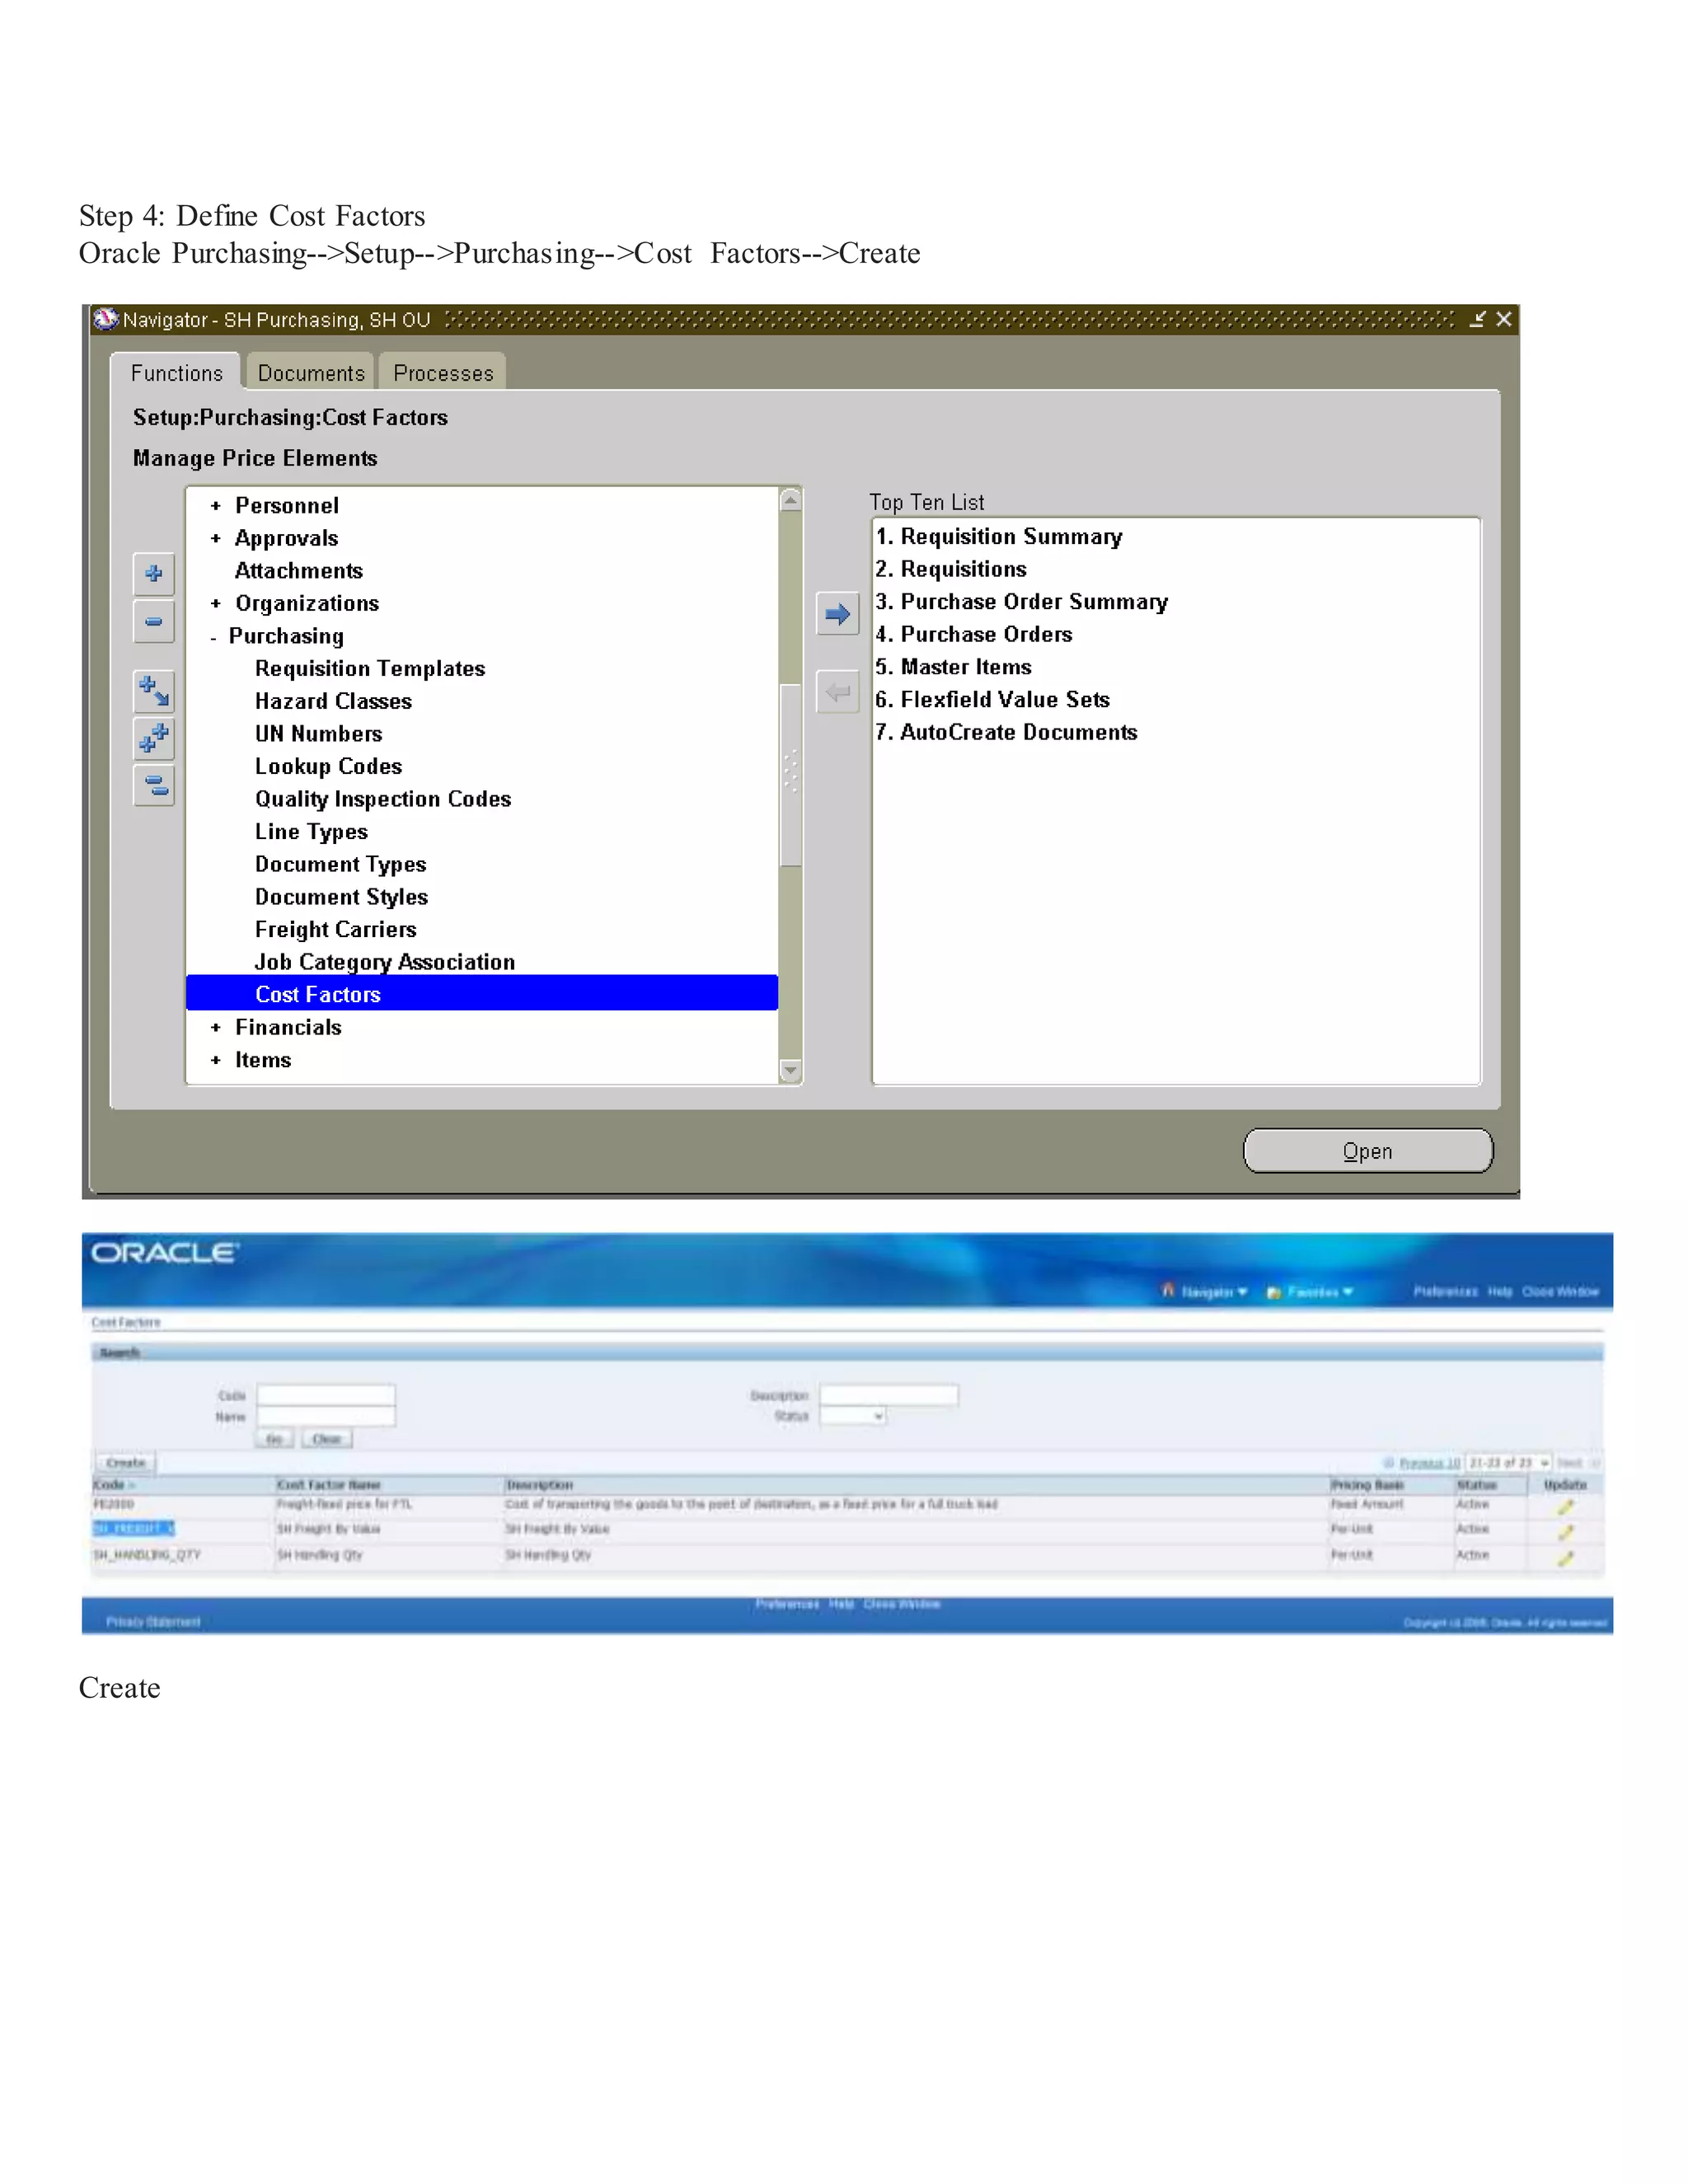
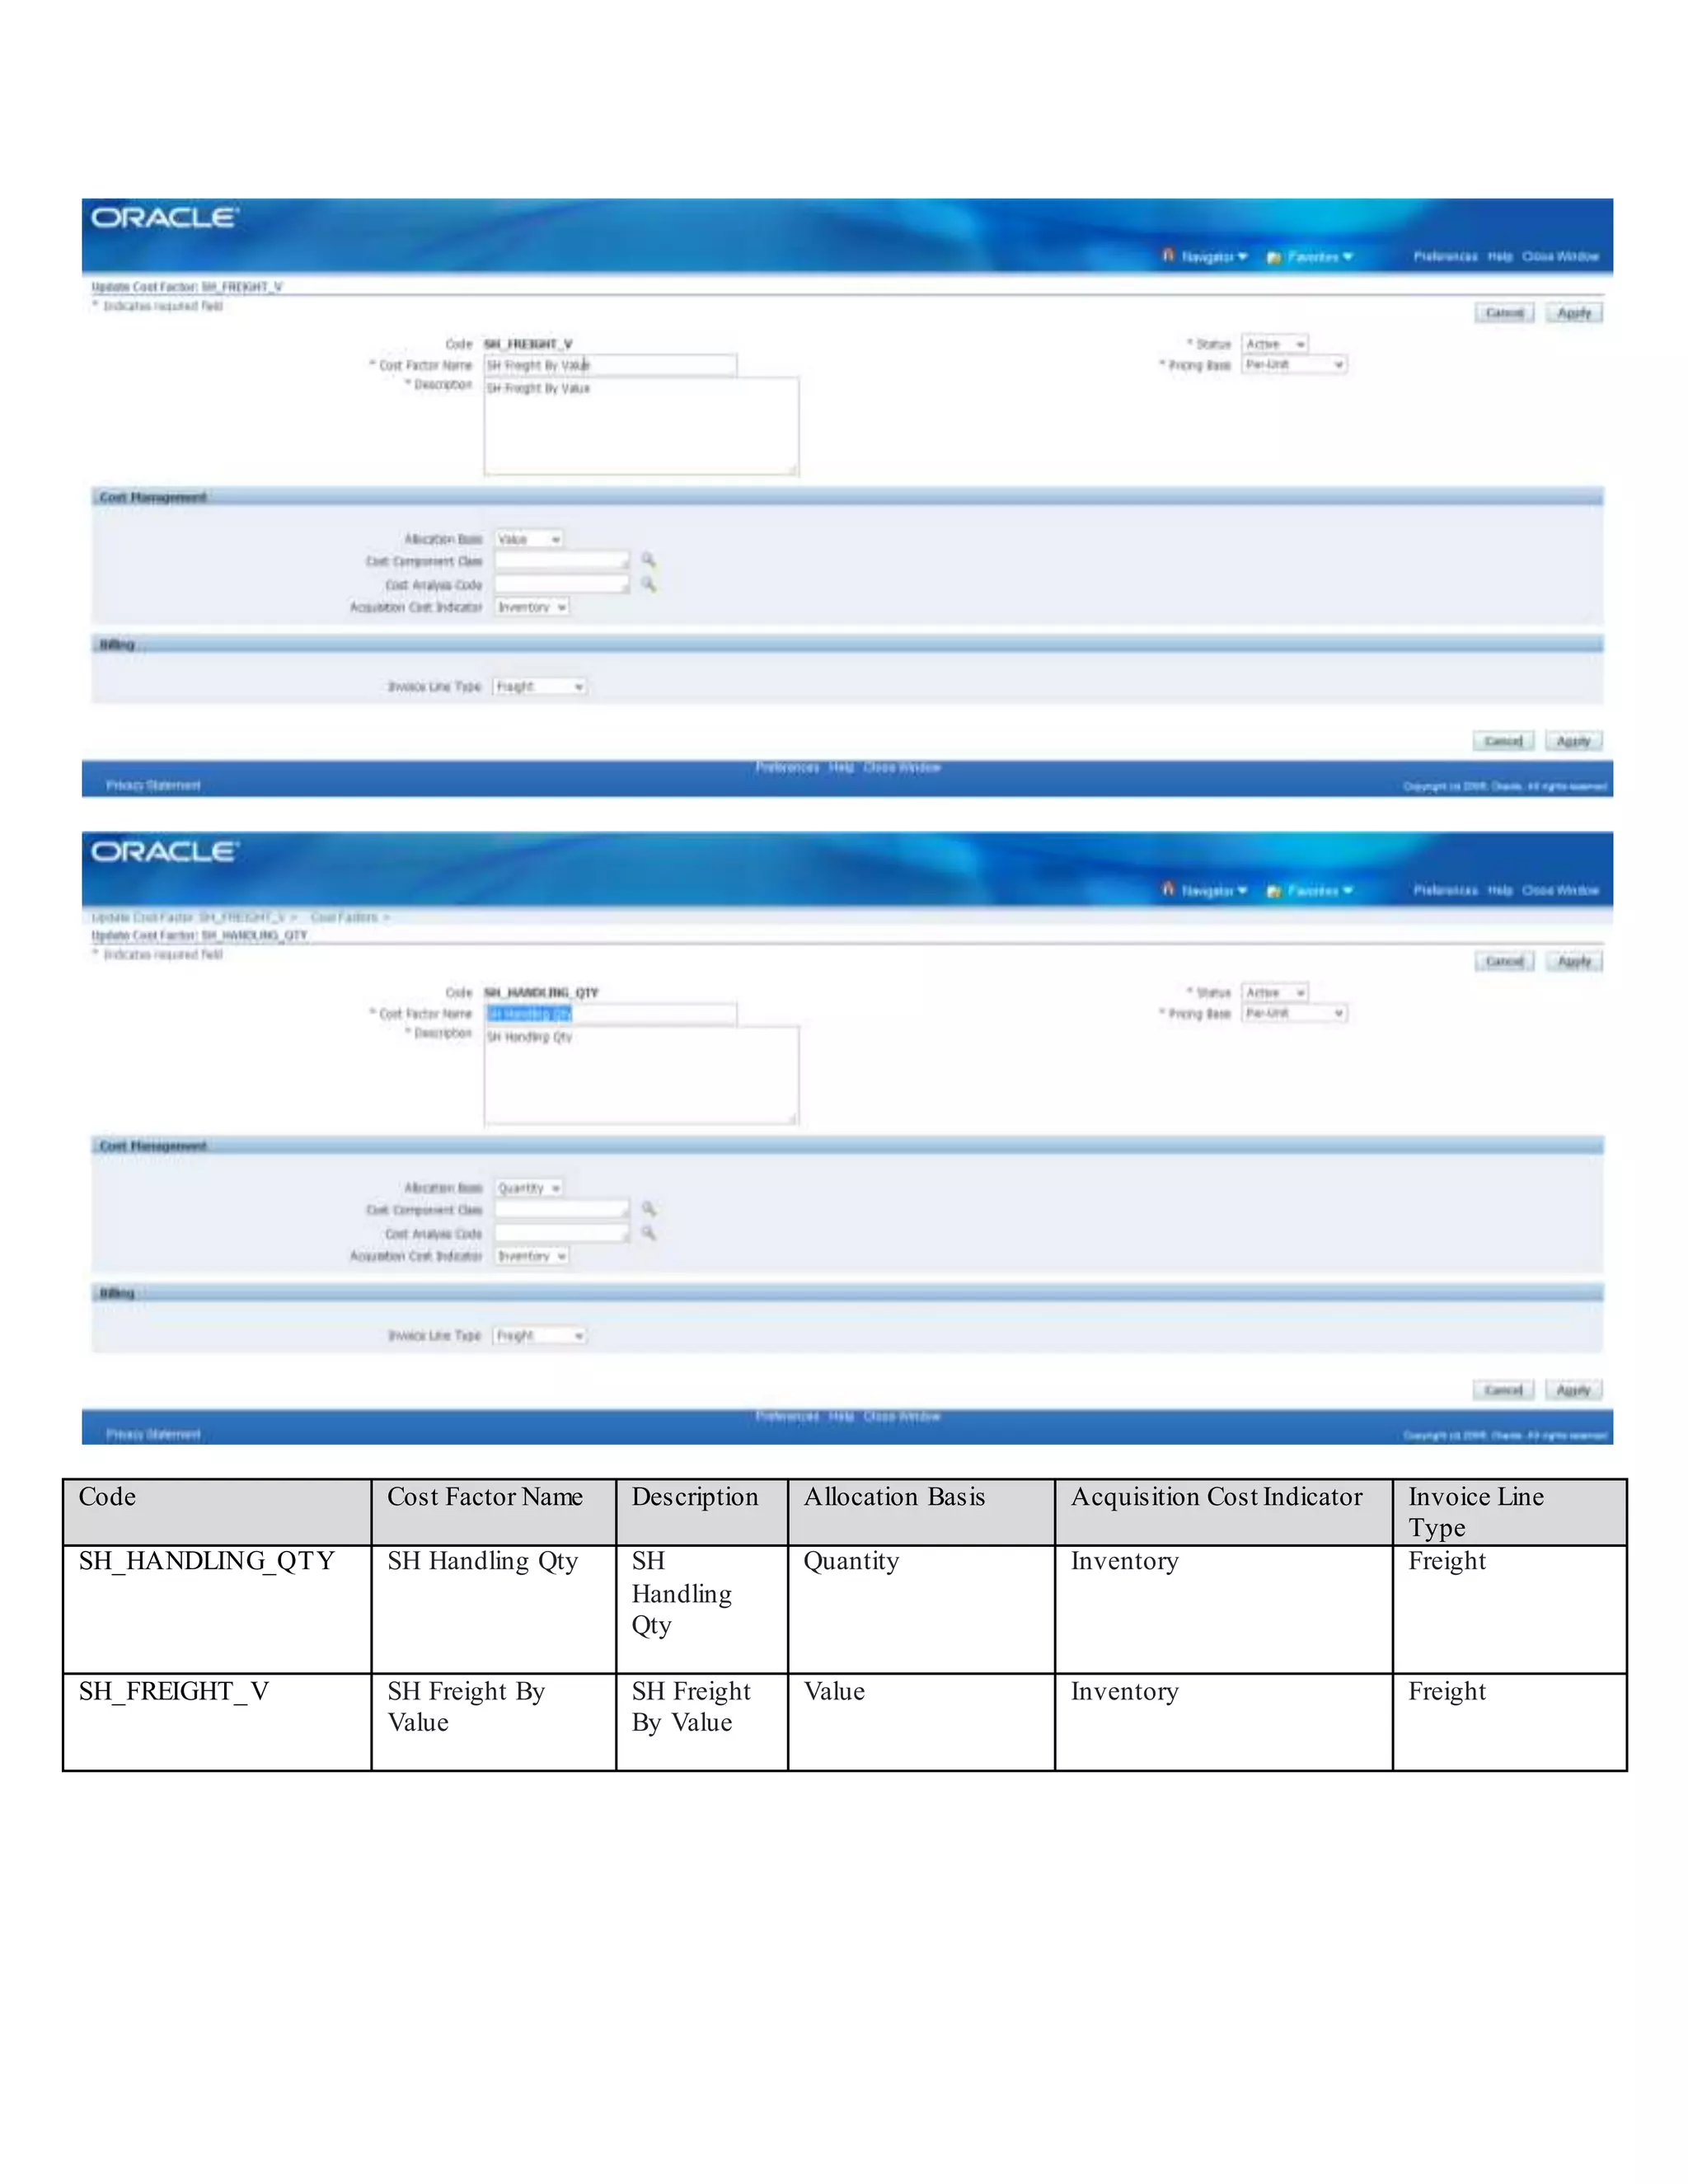
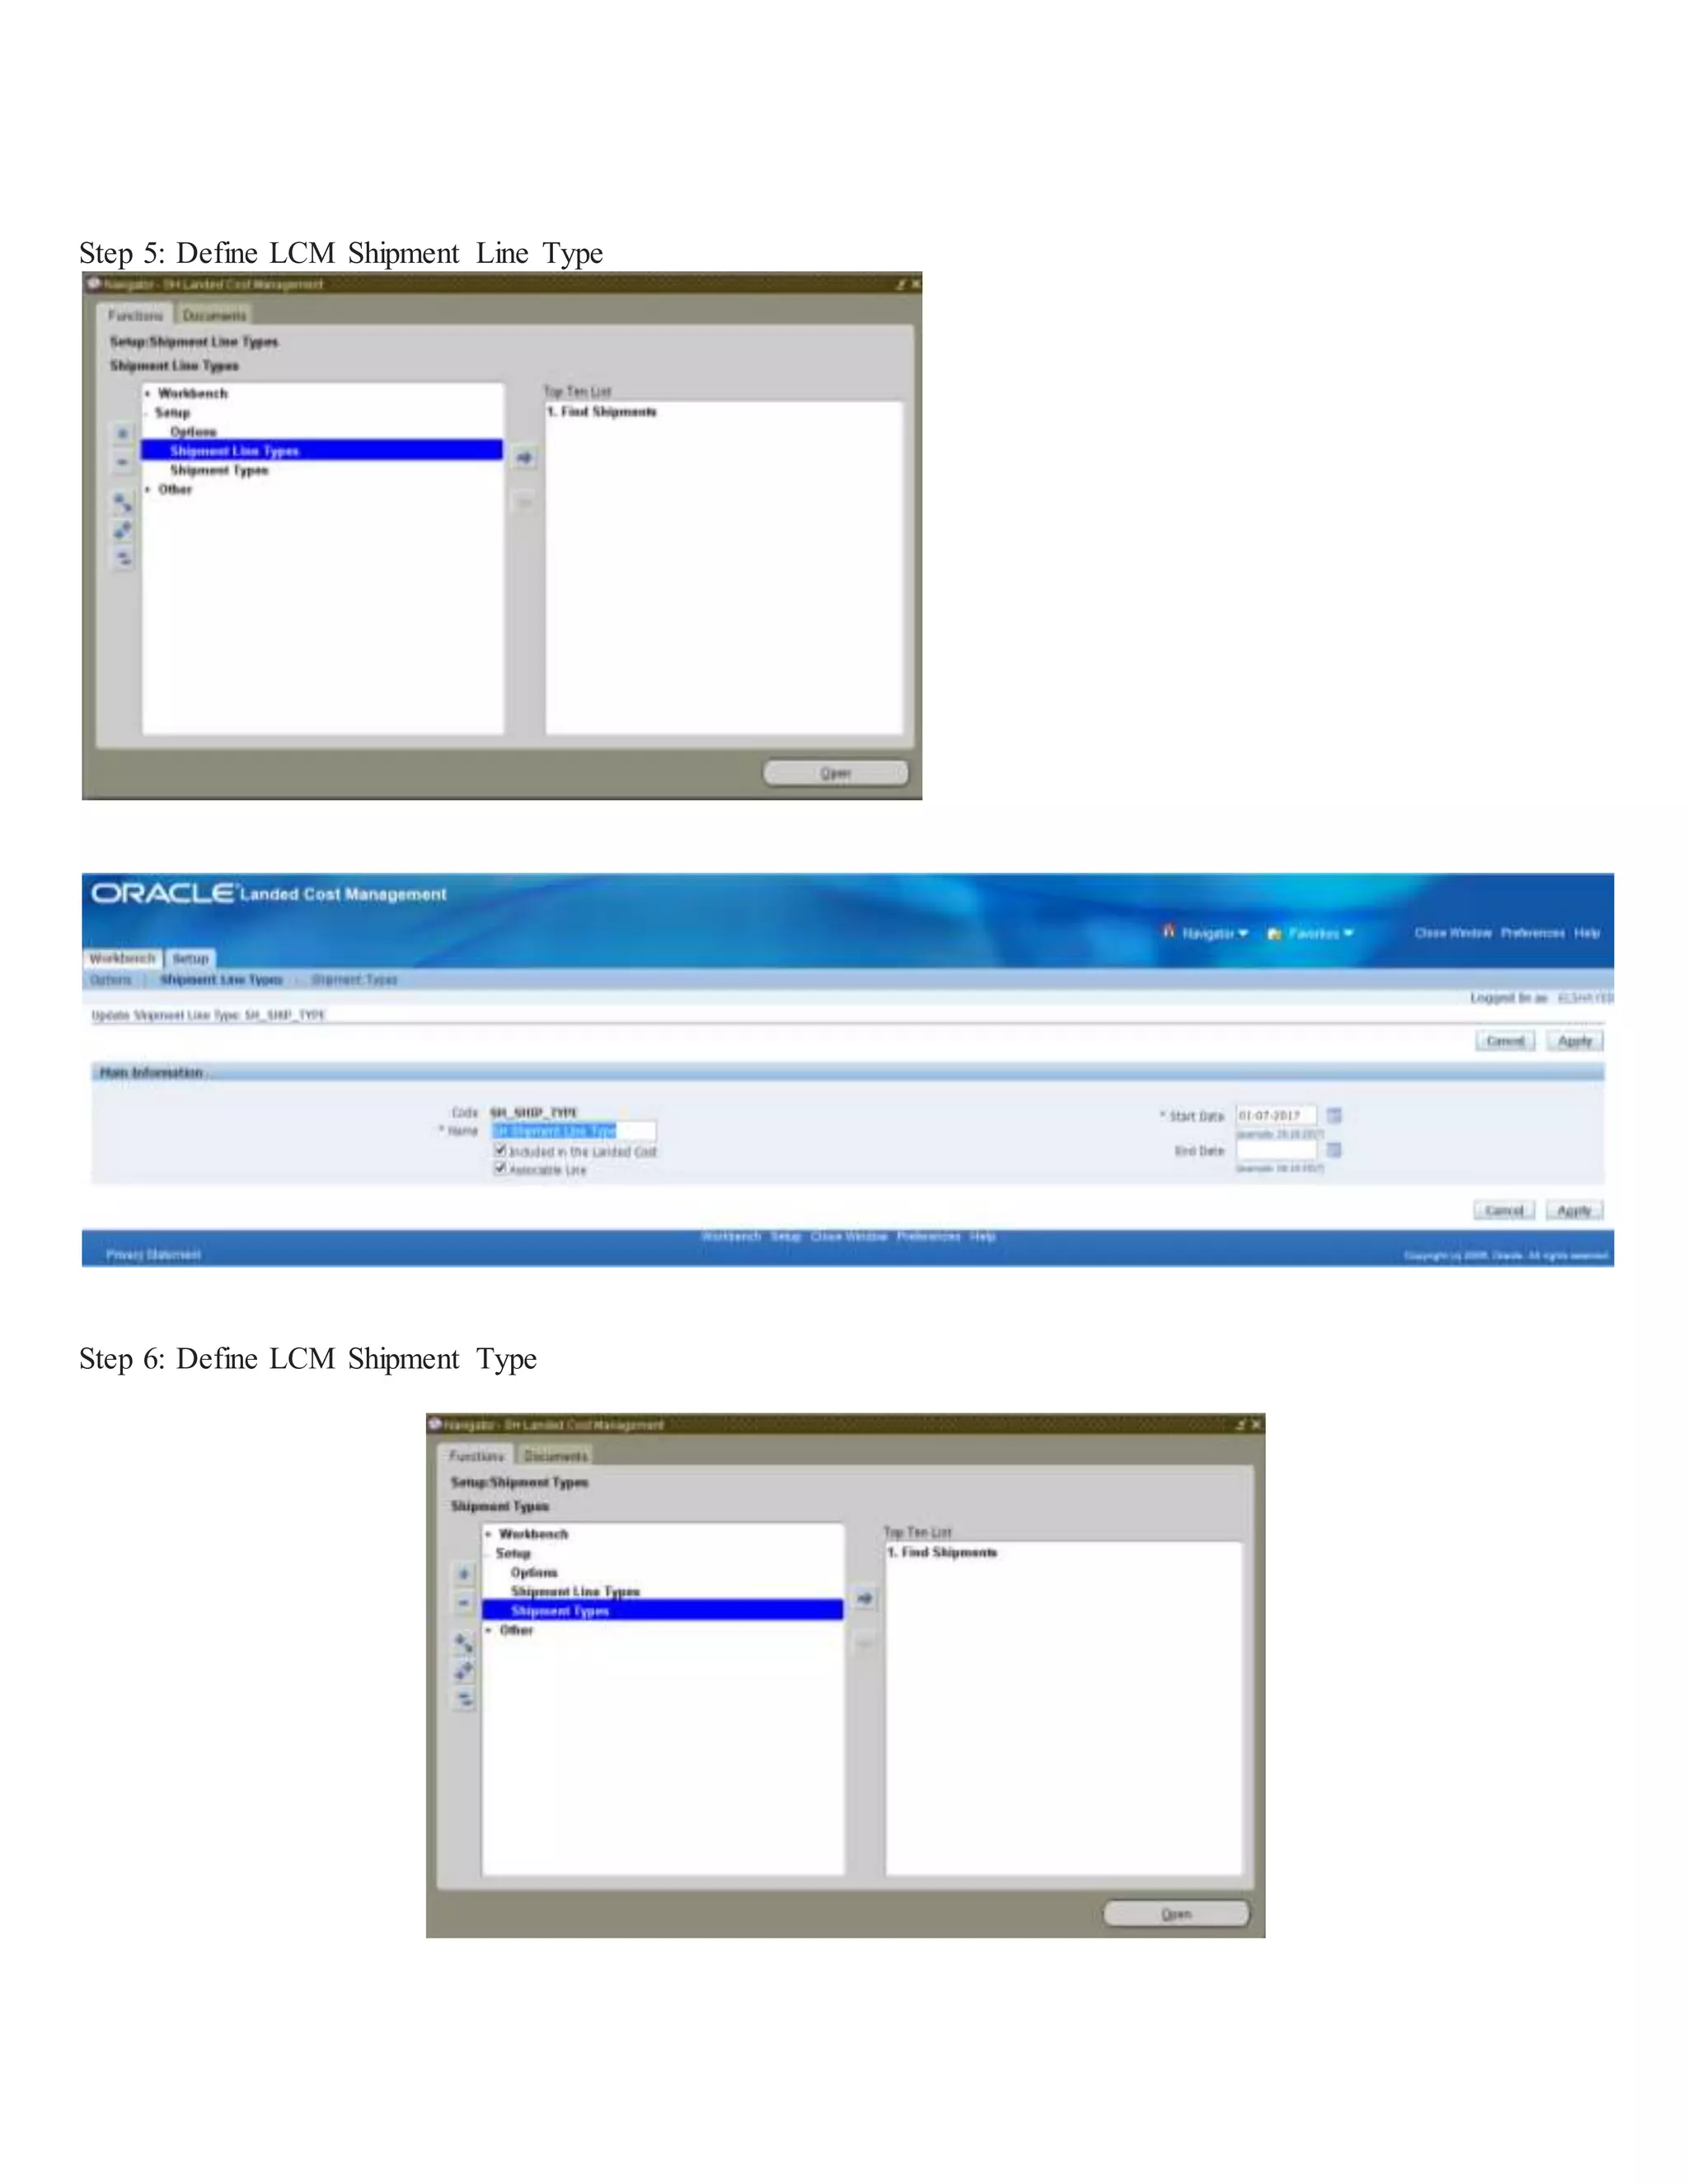
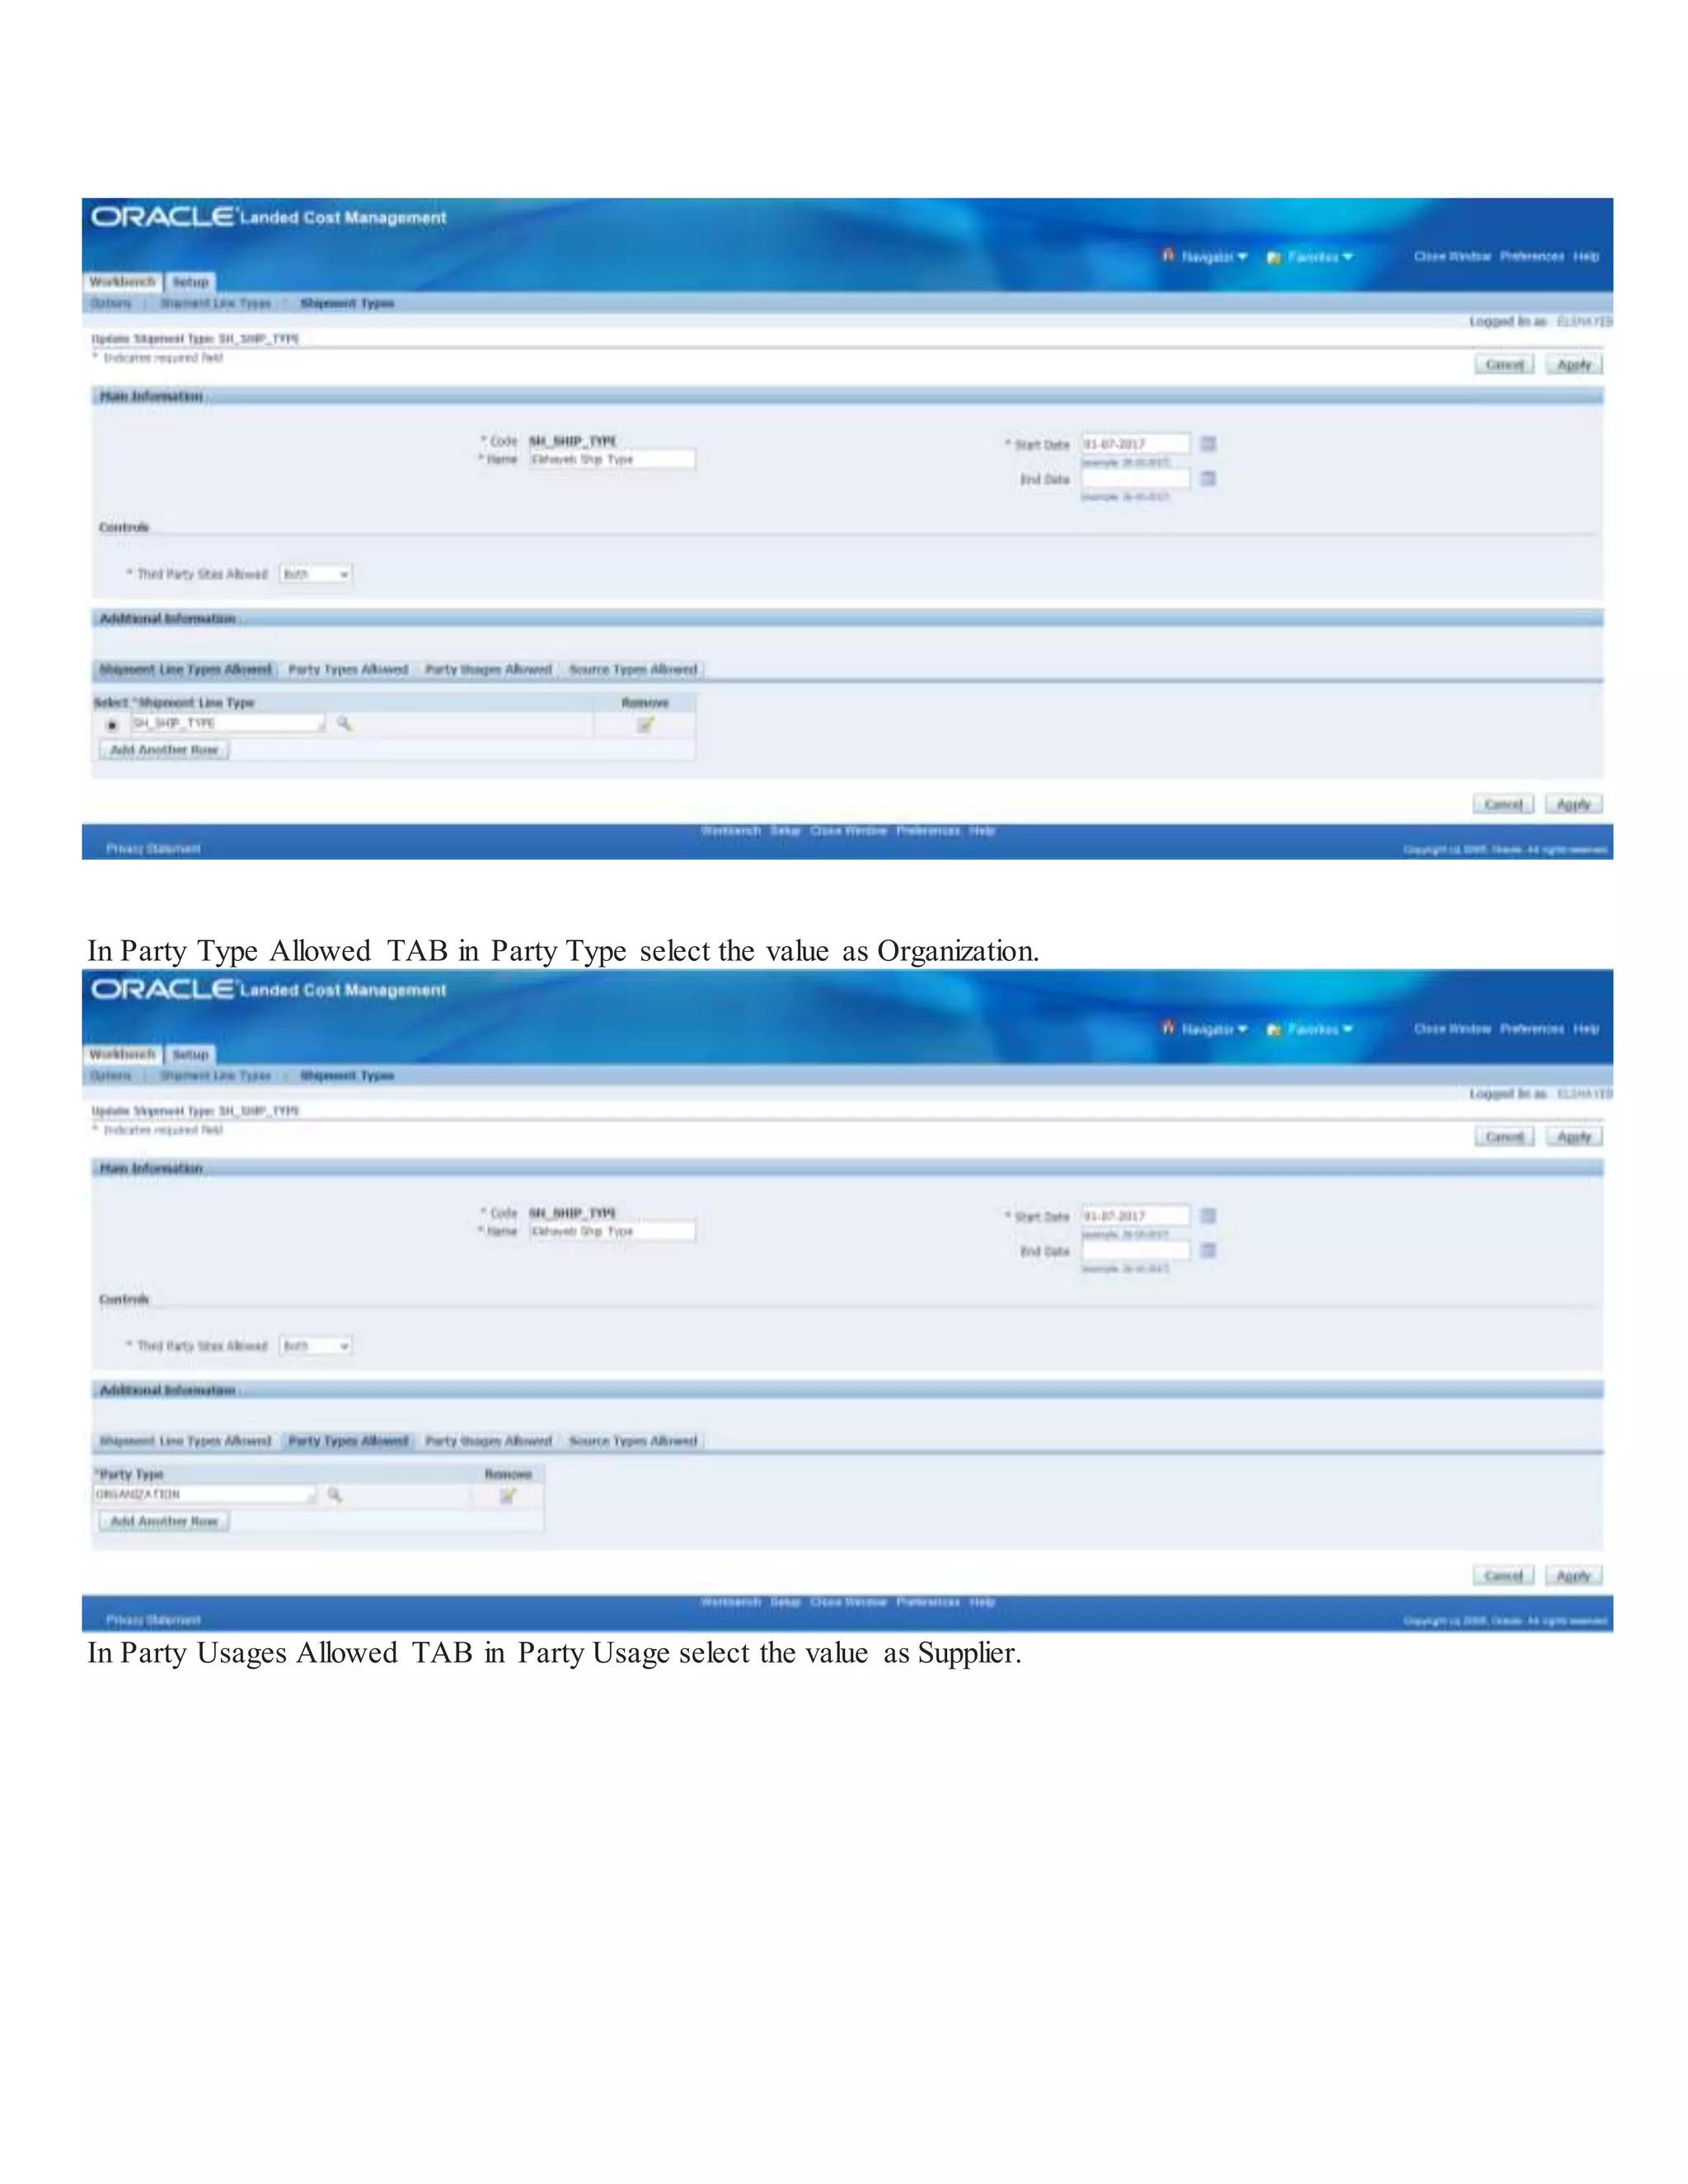
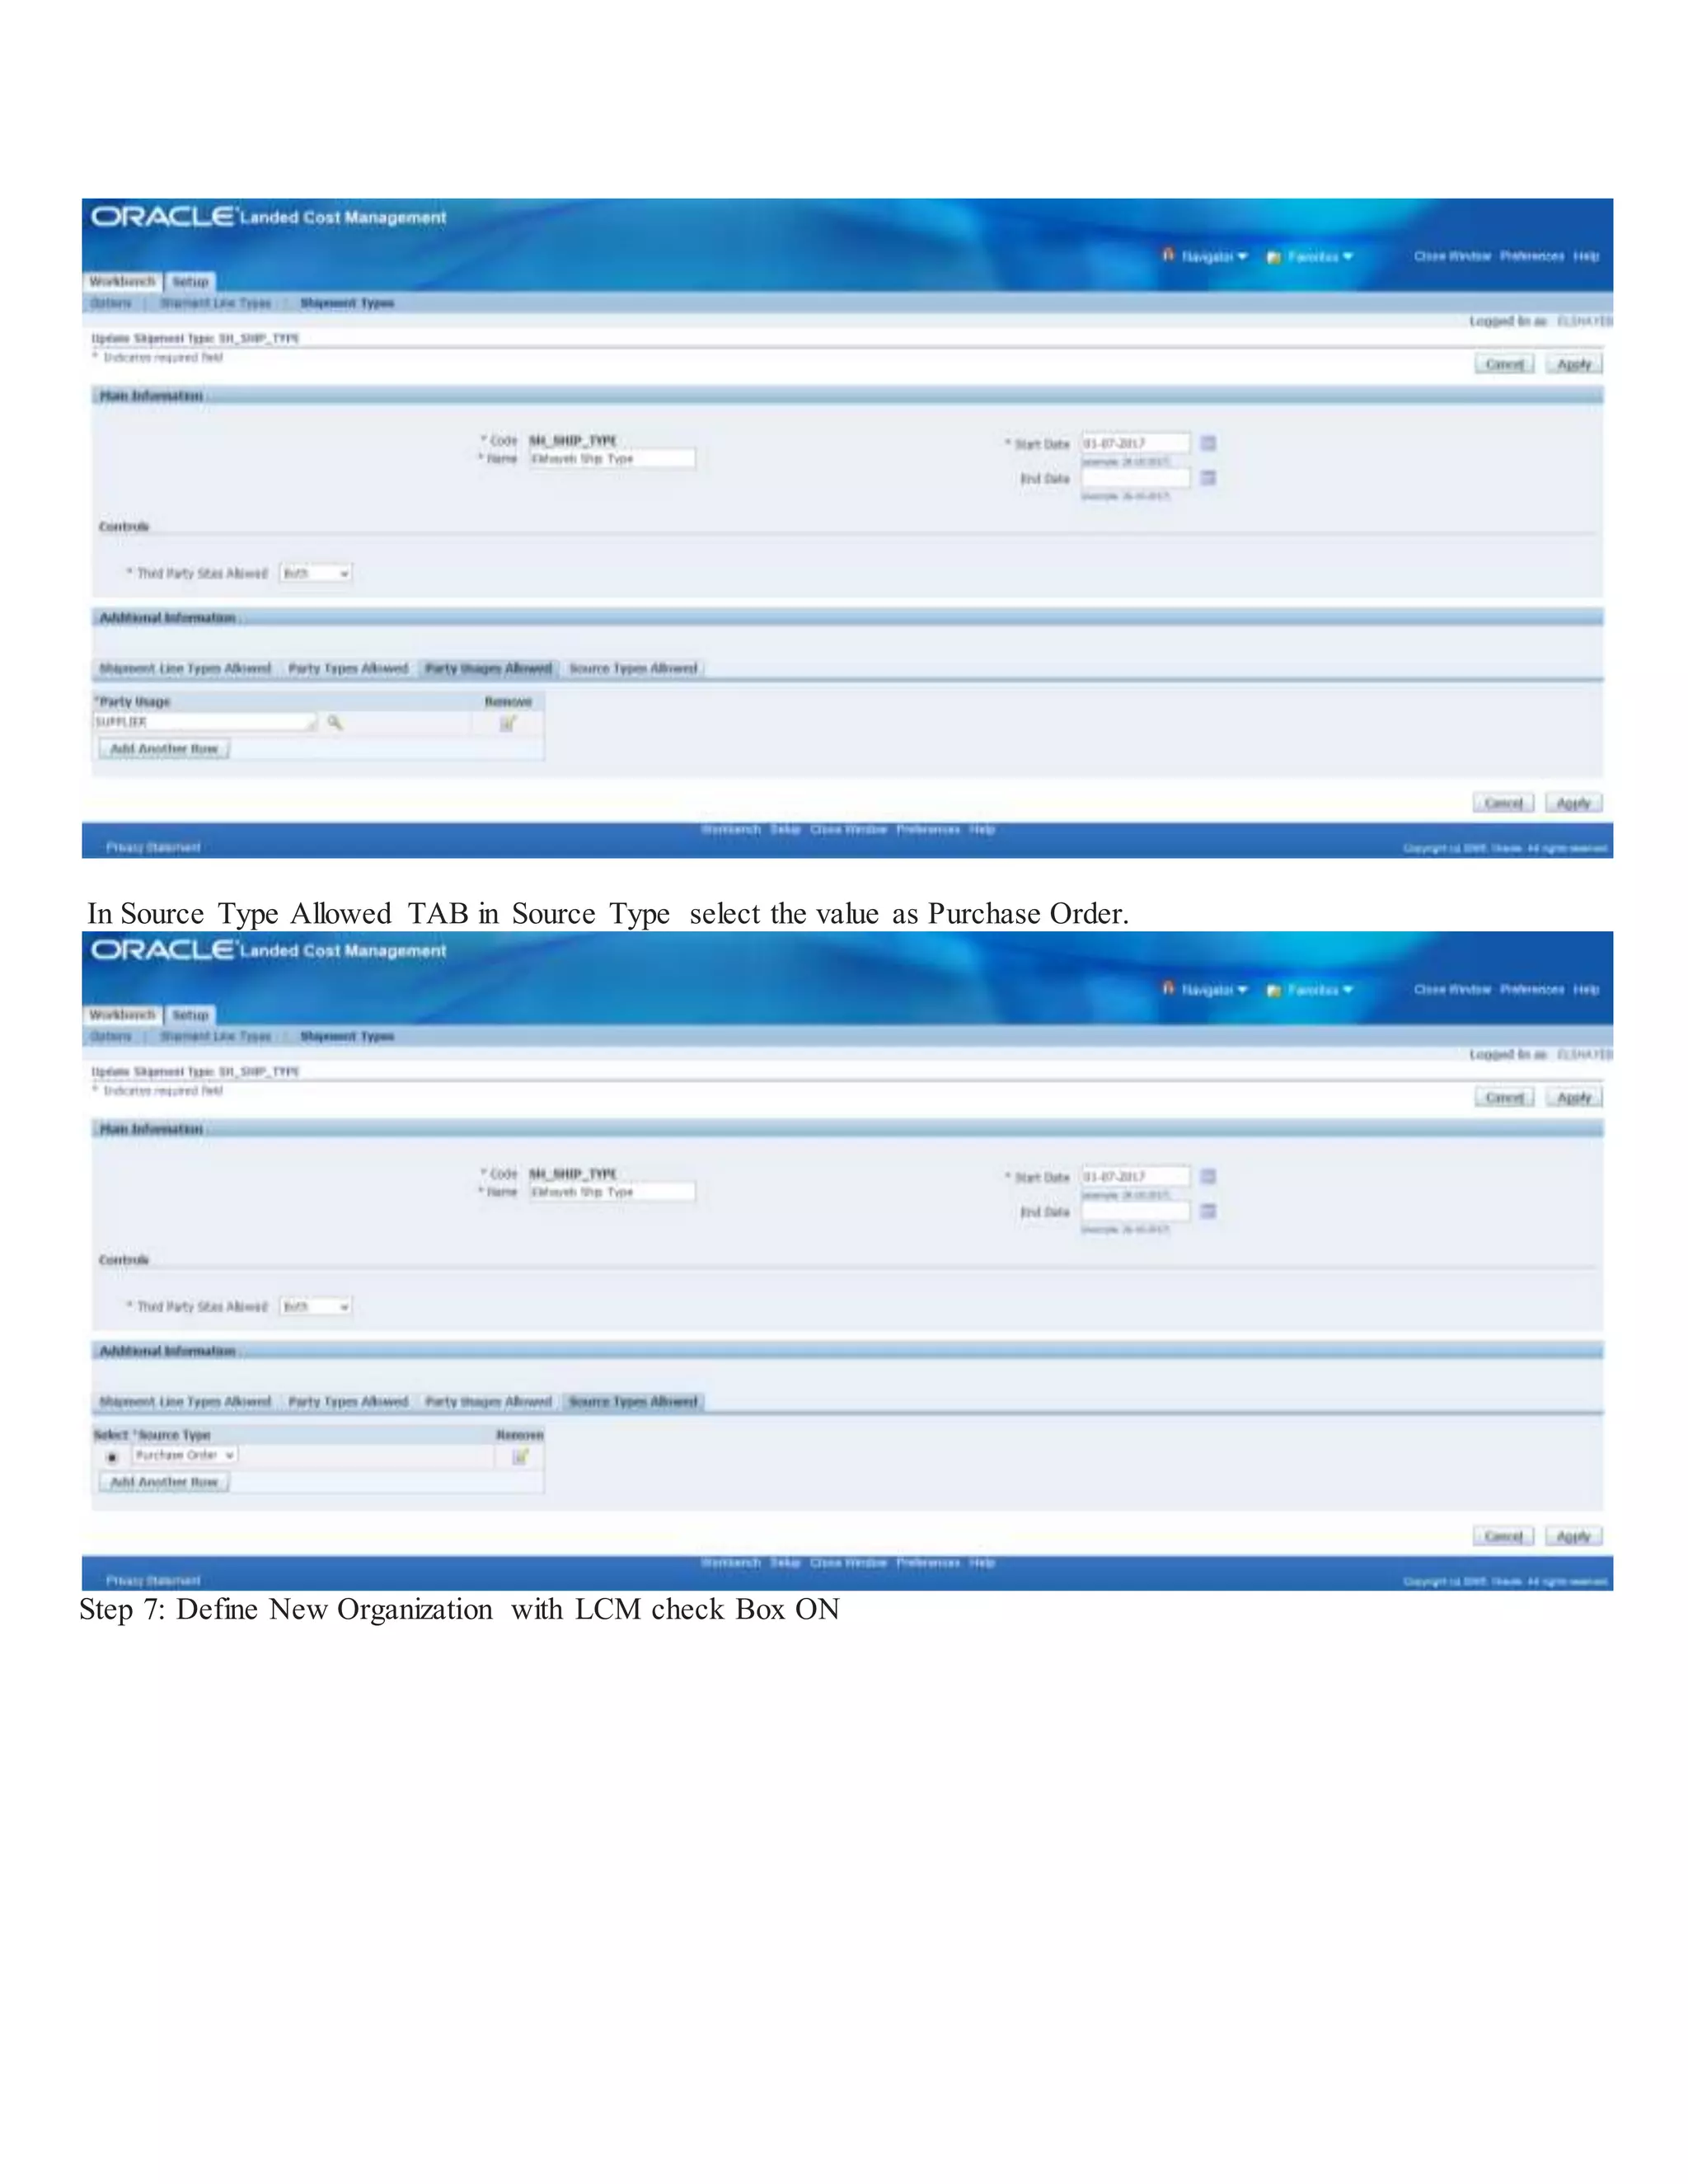
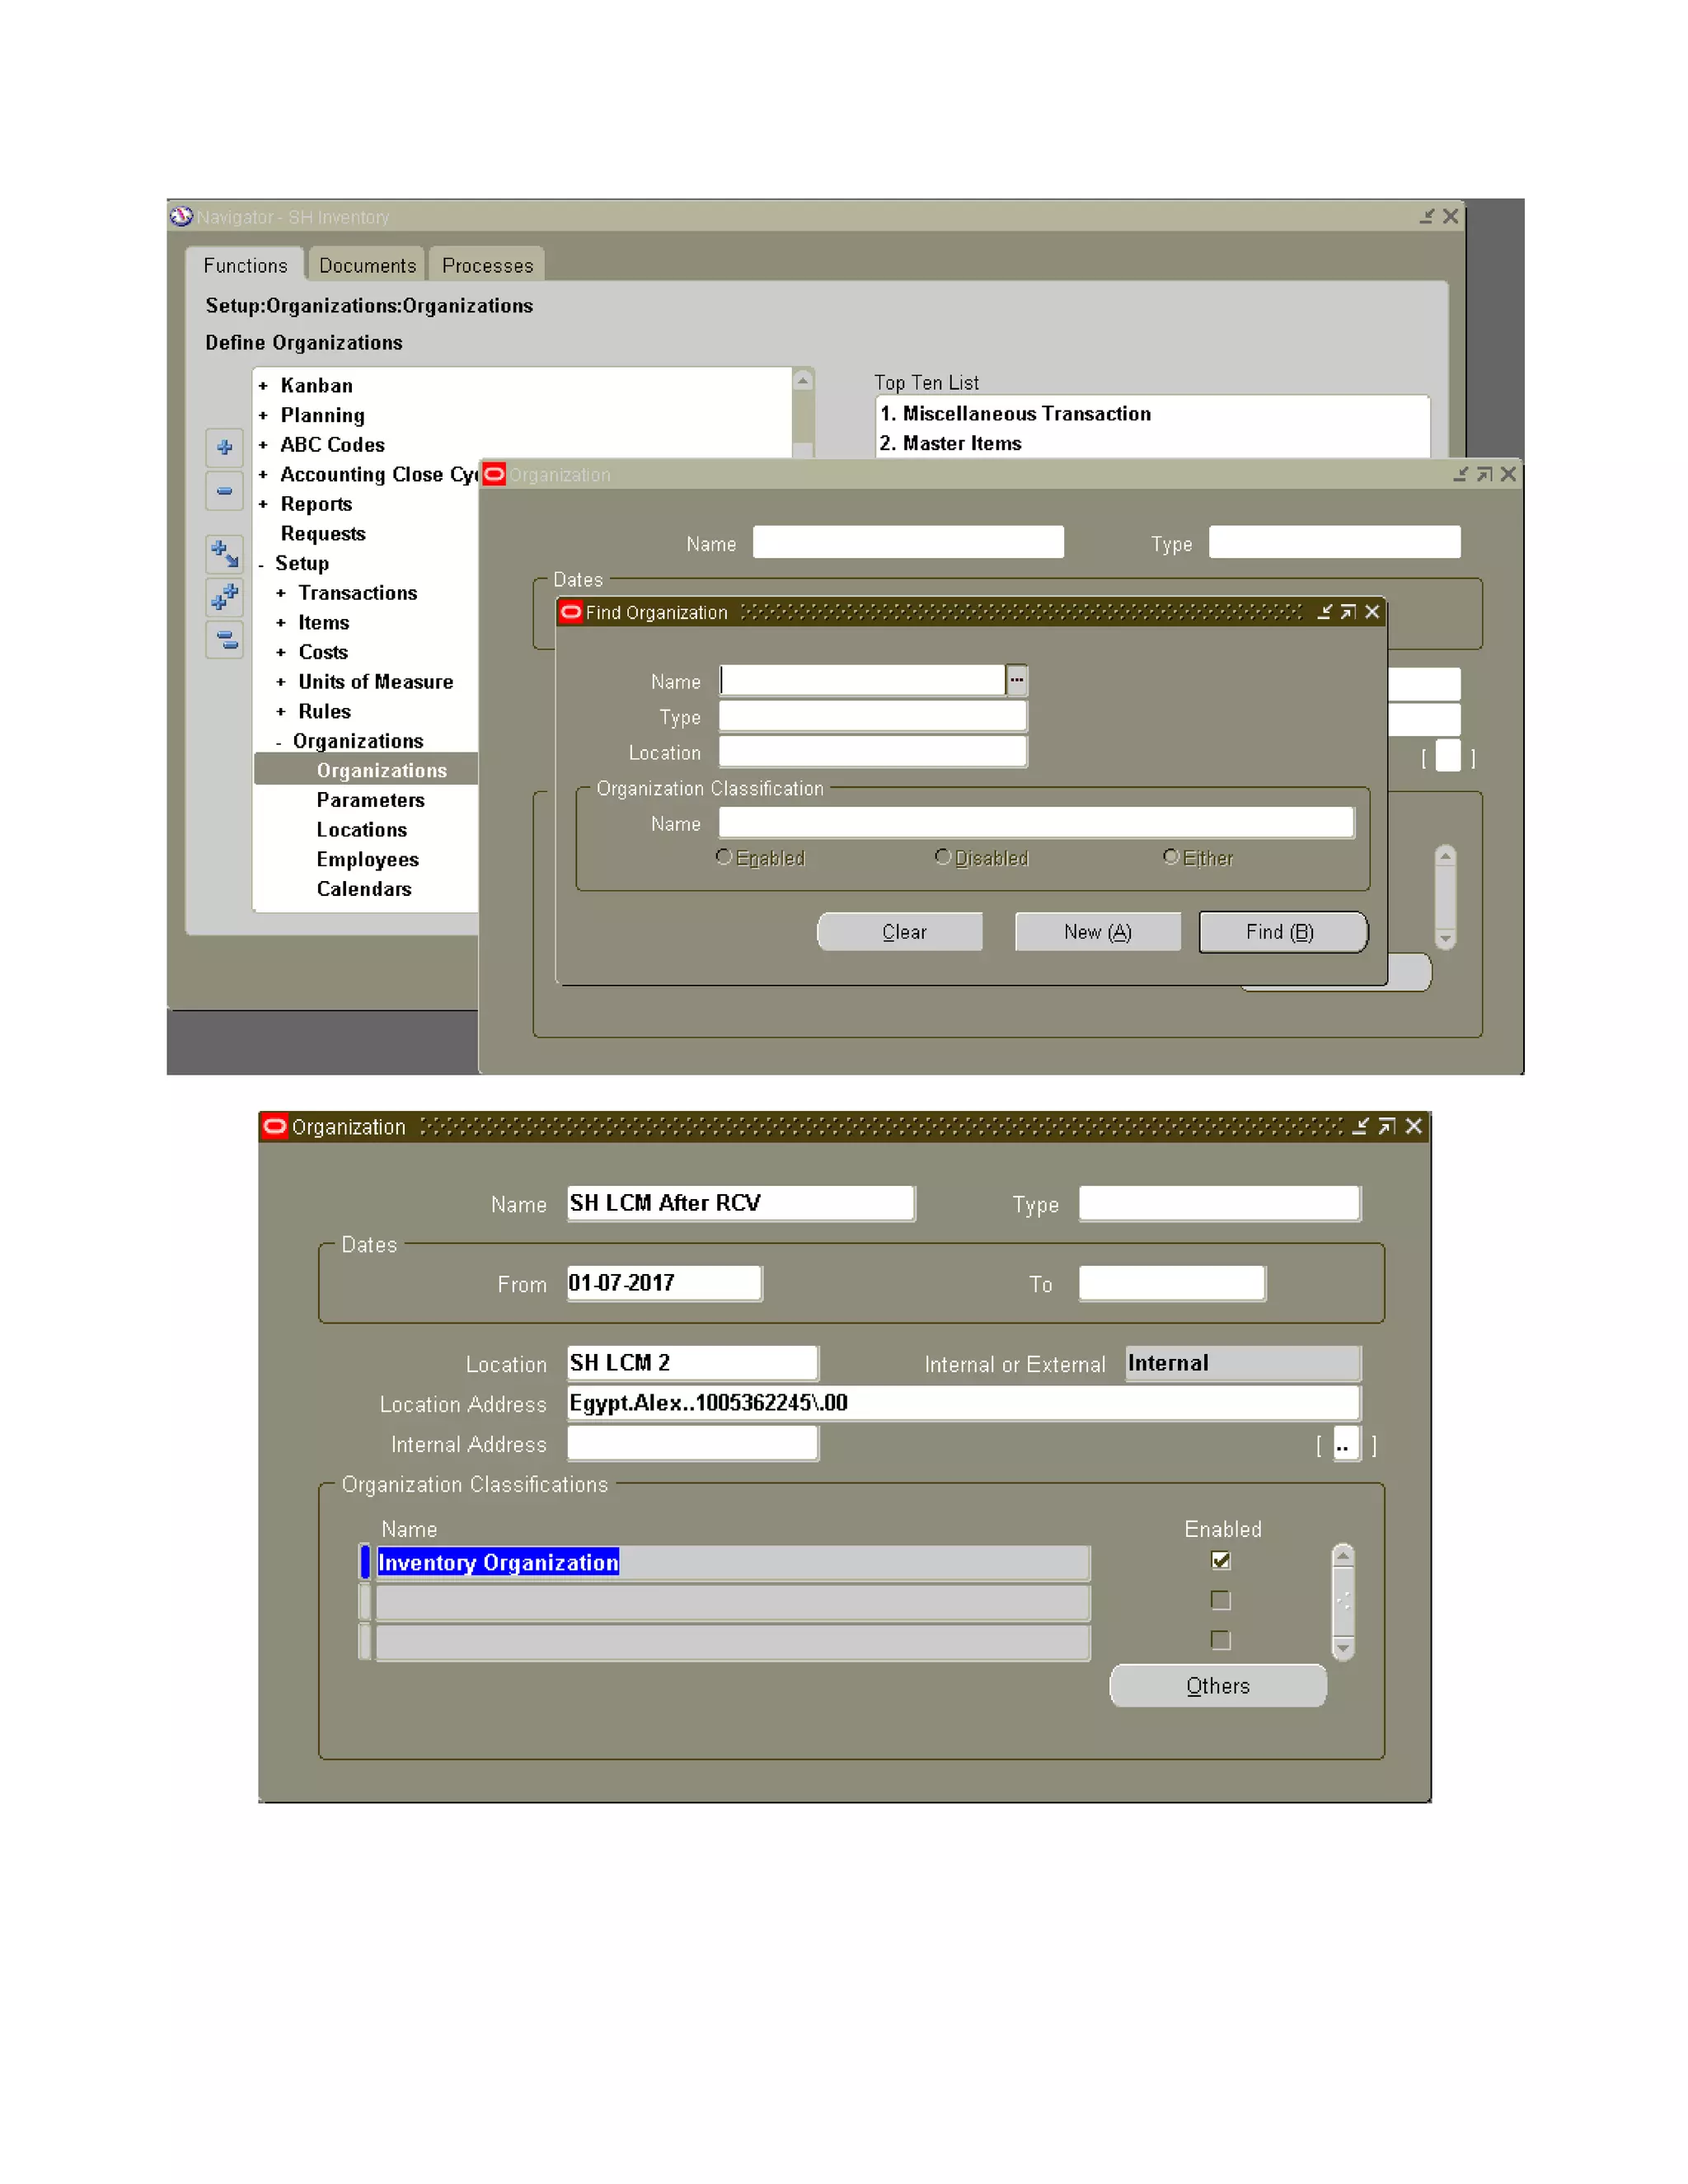
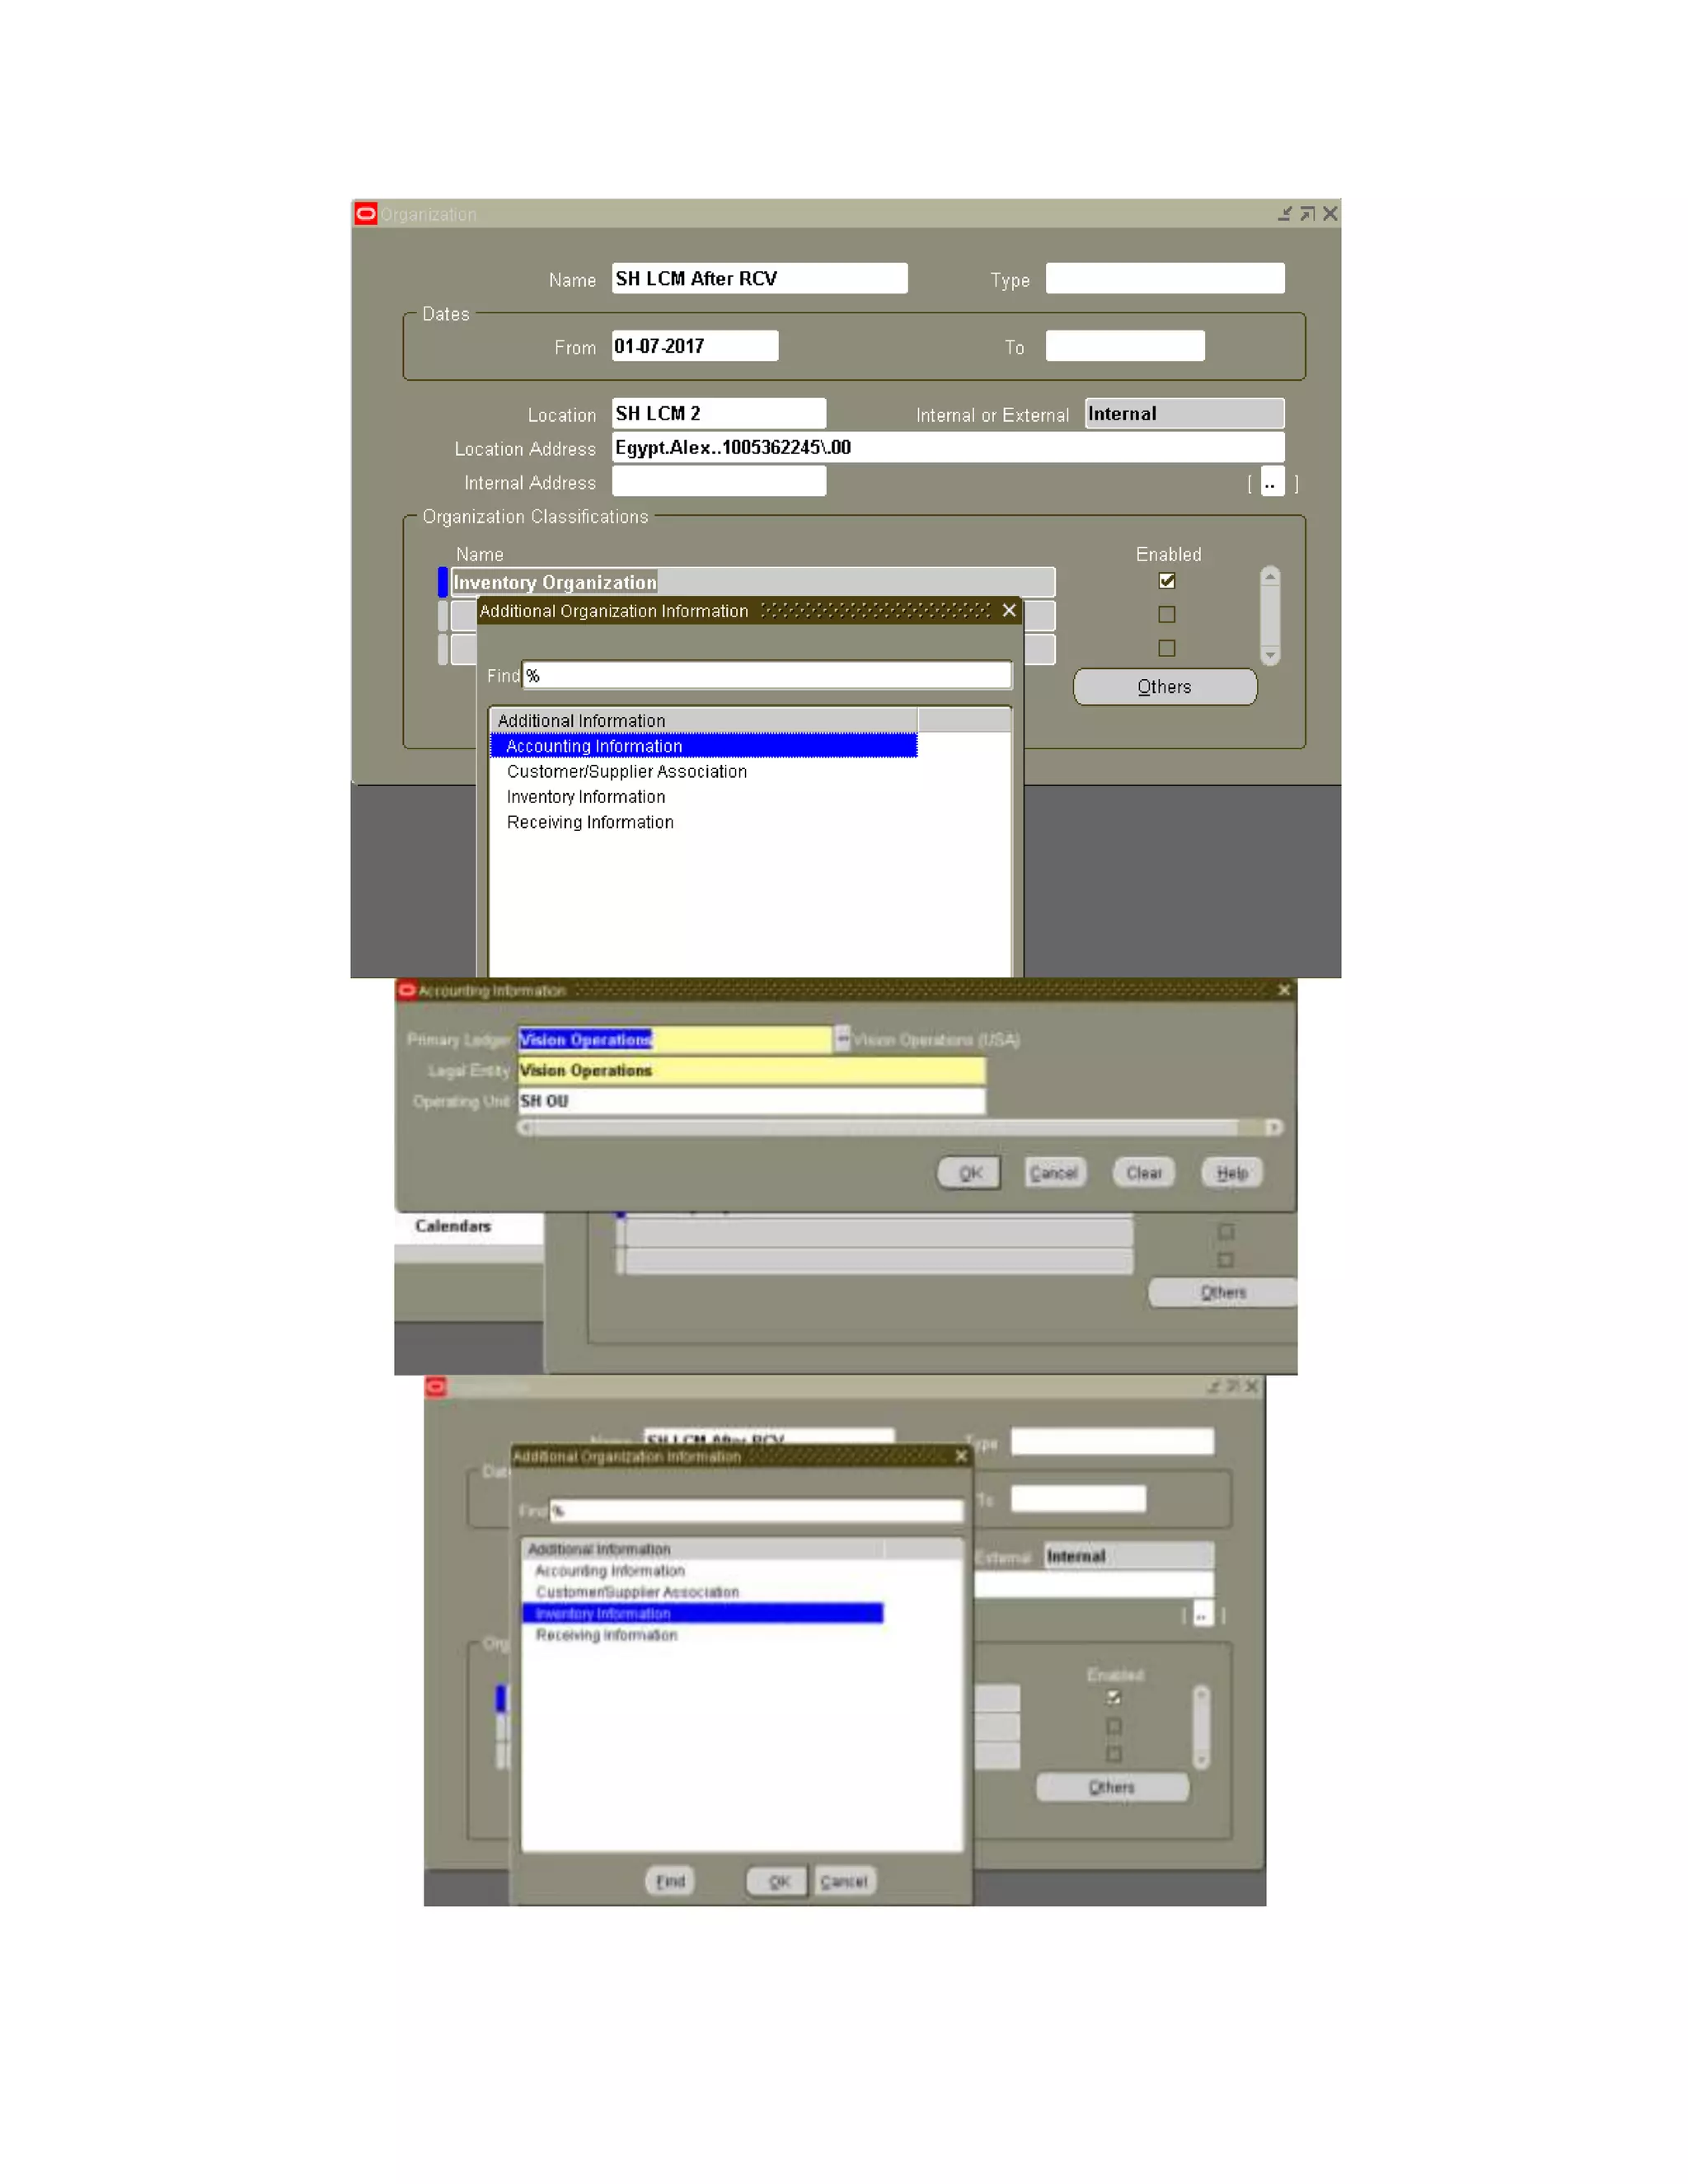
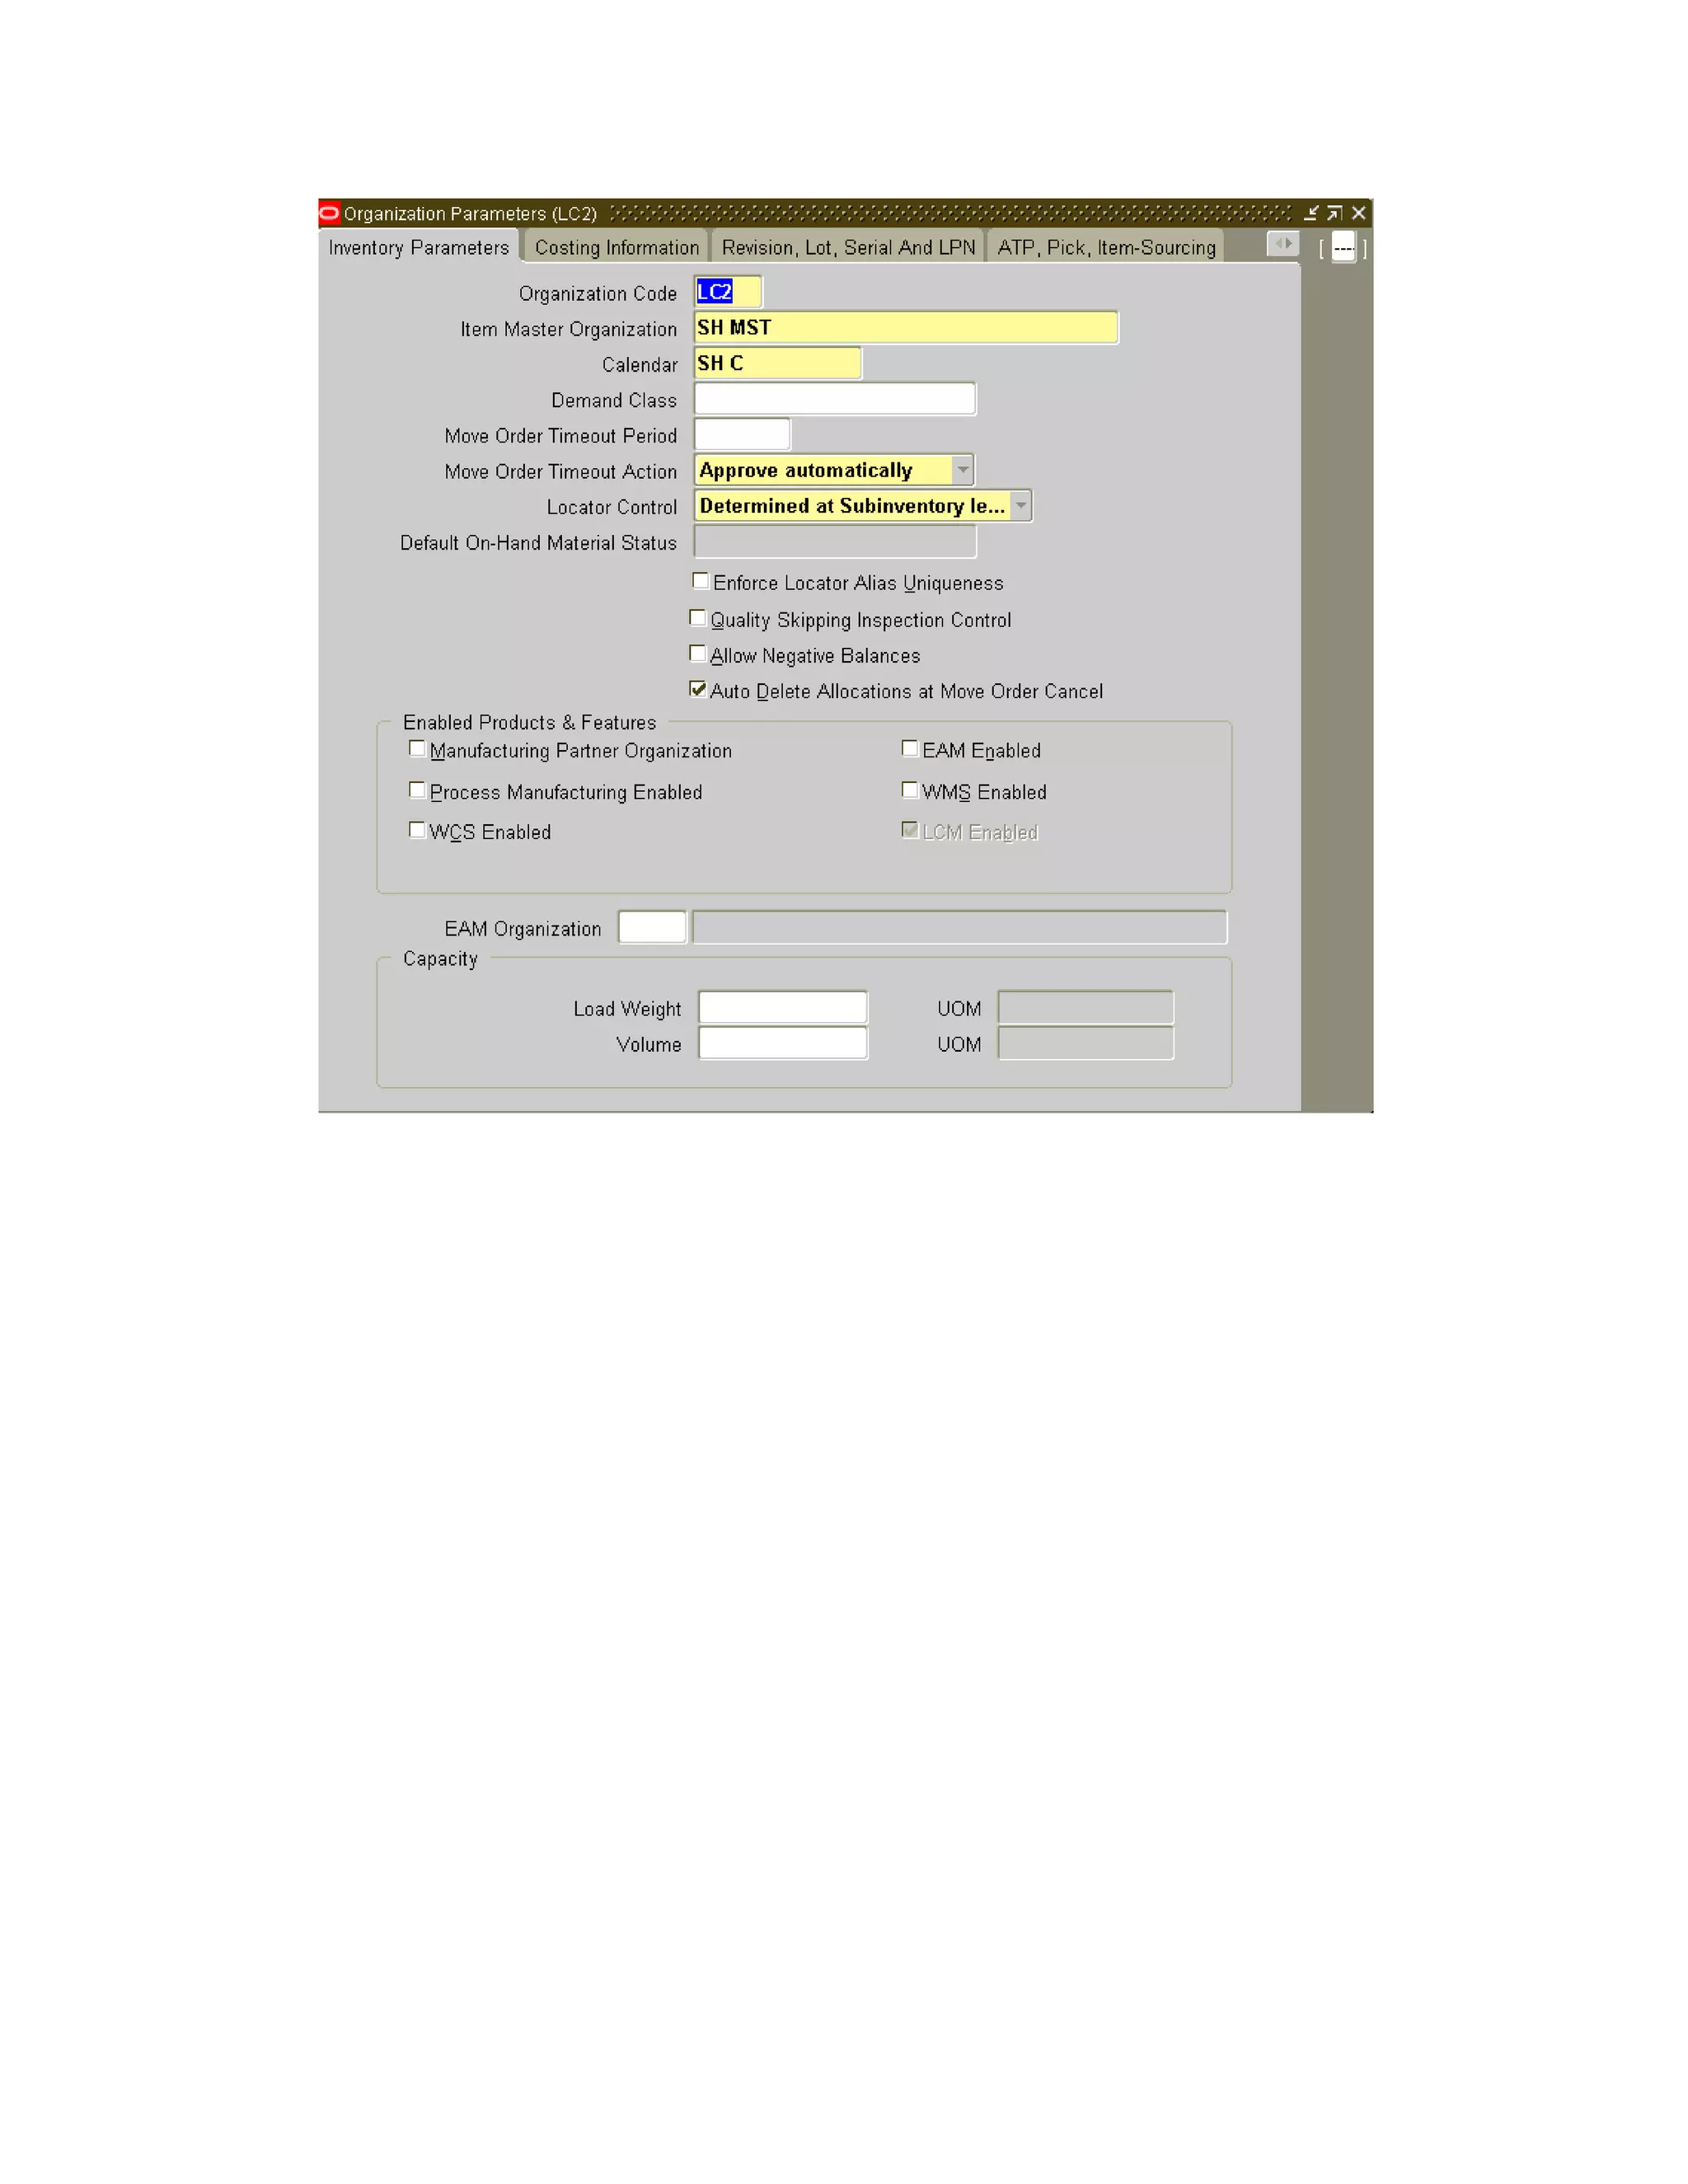
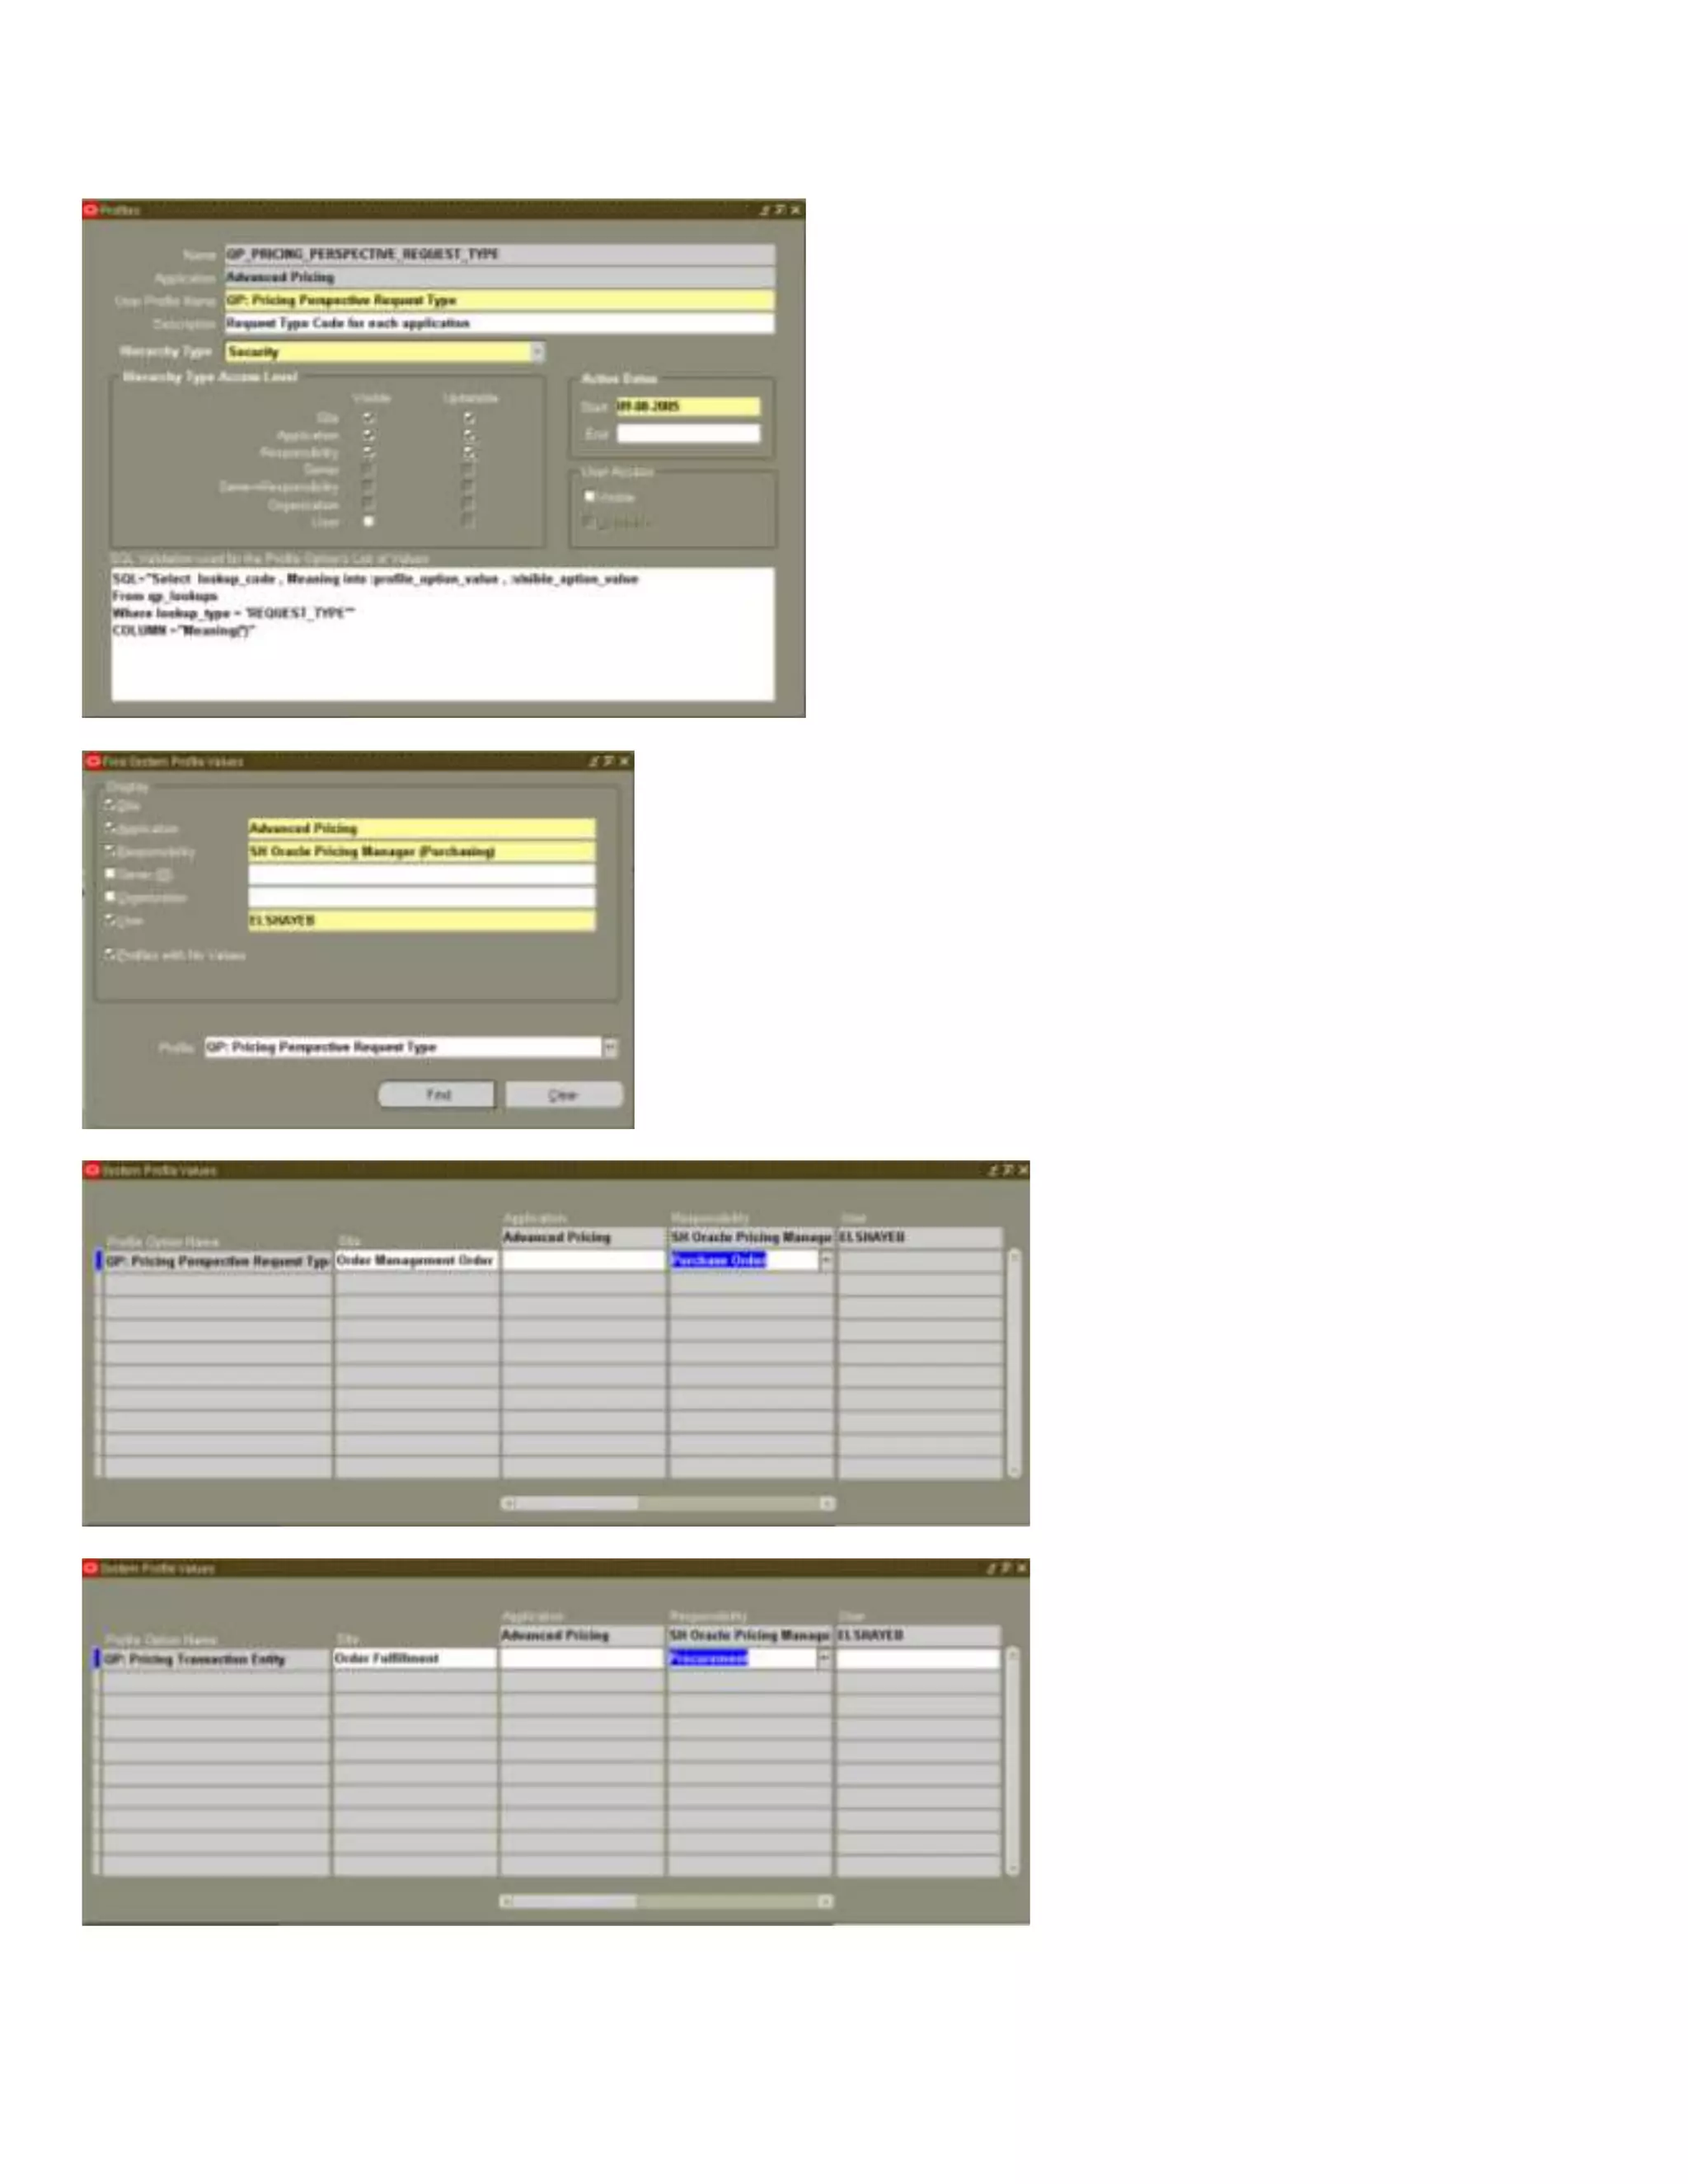
Defining cost factors, including allocation basis and various cost variance accounts for LCM. Steps for setting profile options, organization setup, and defining shipment types for LCM.
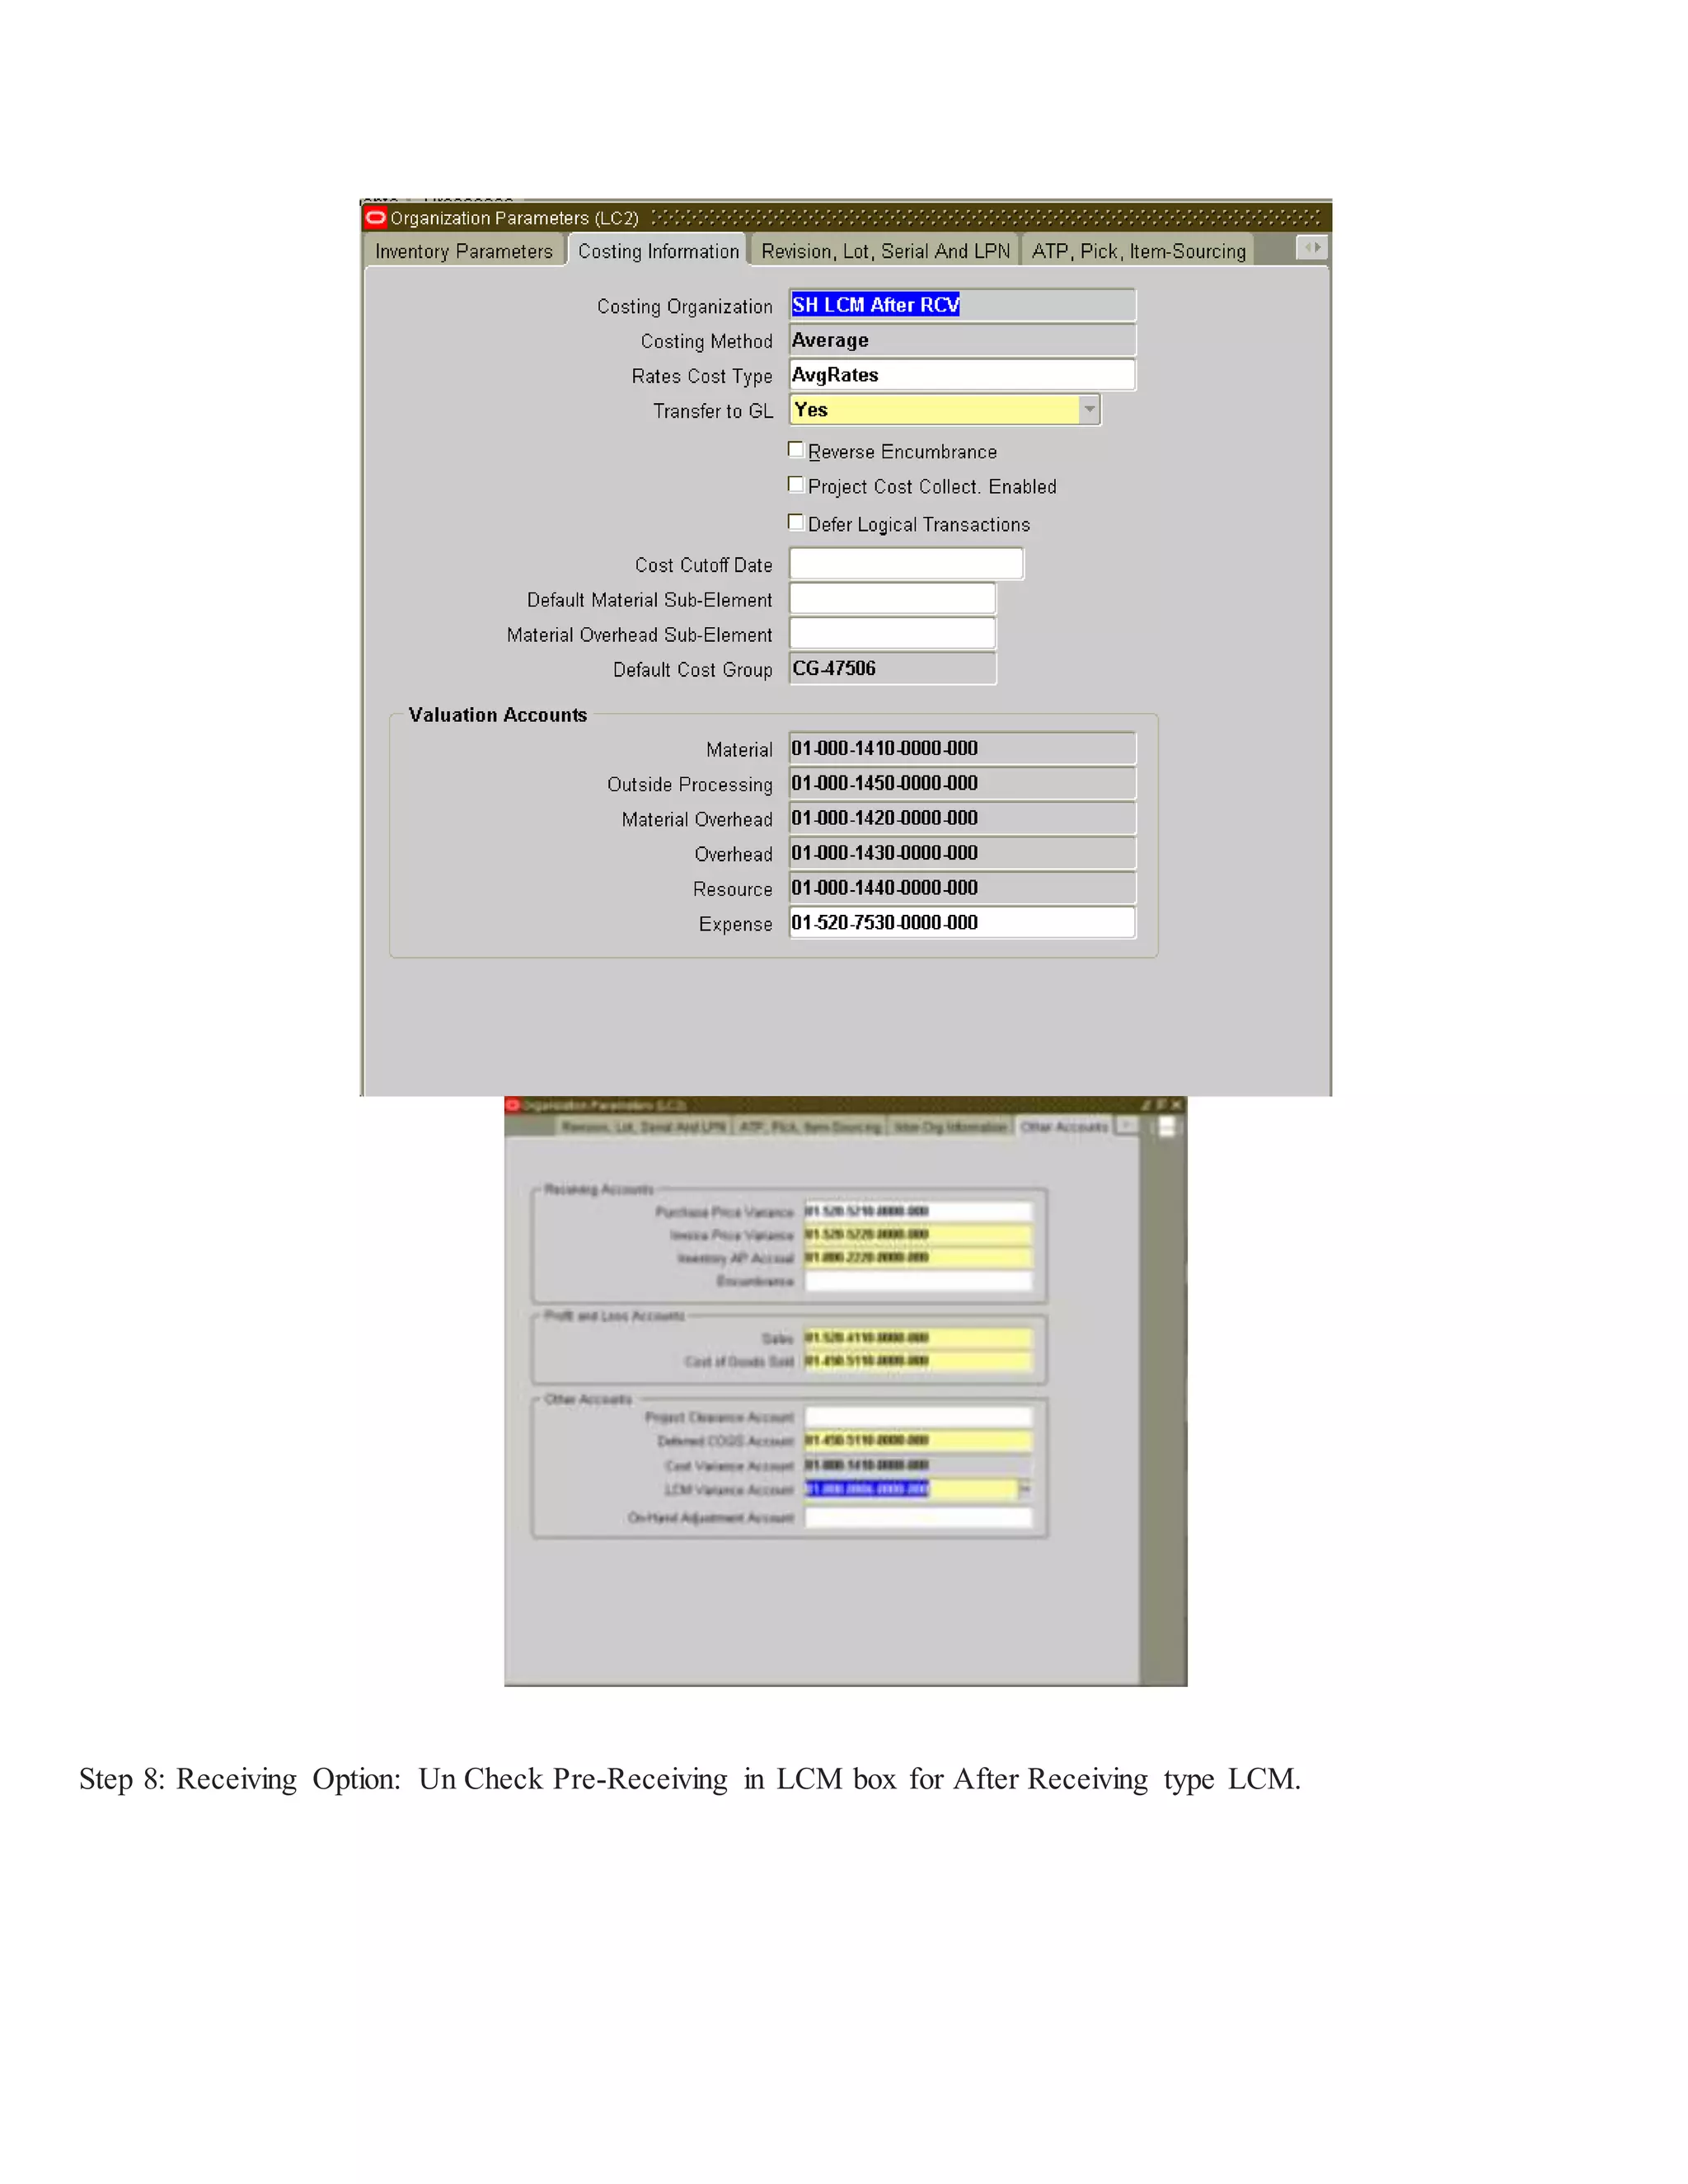
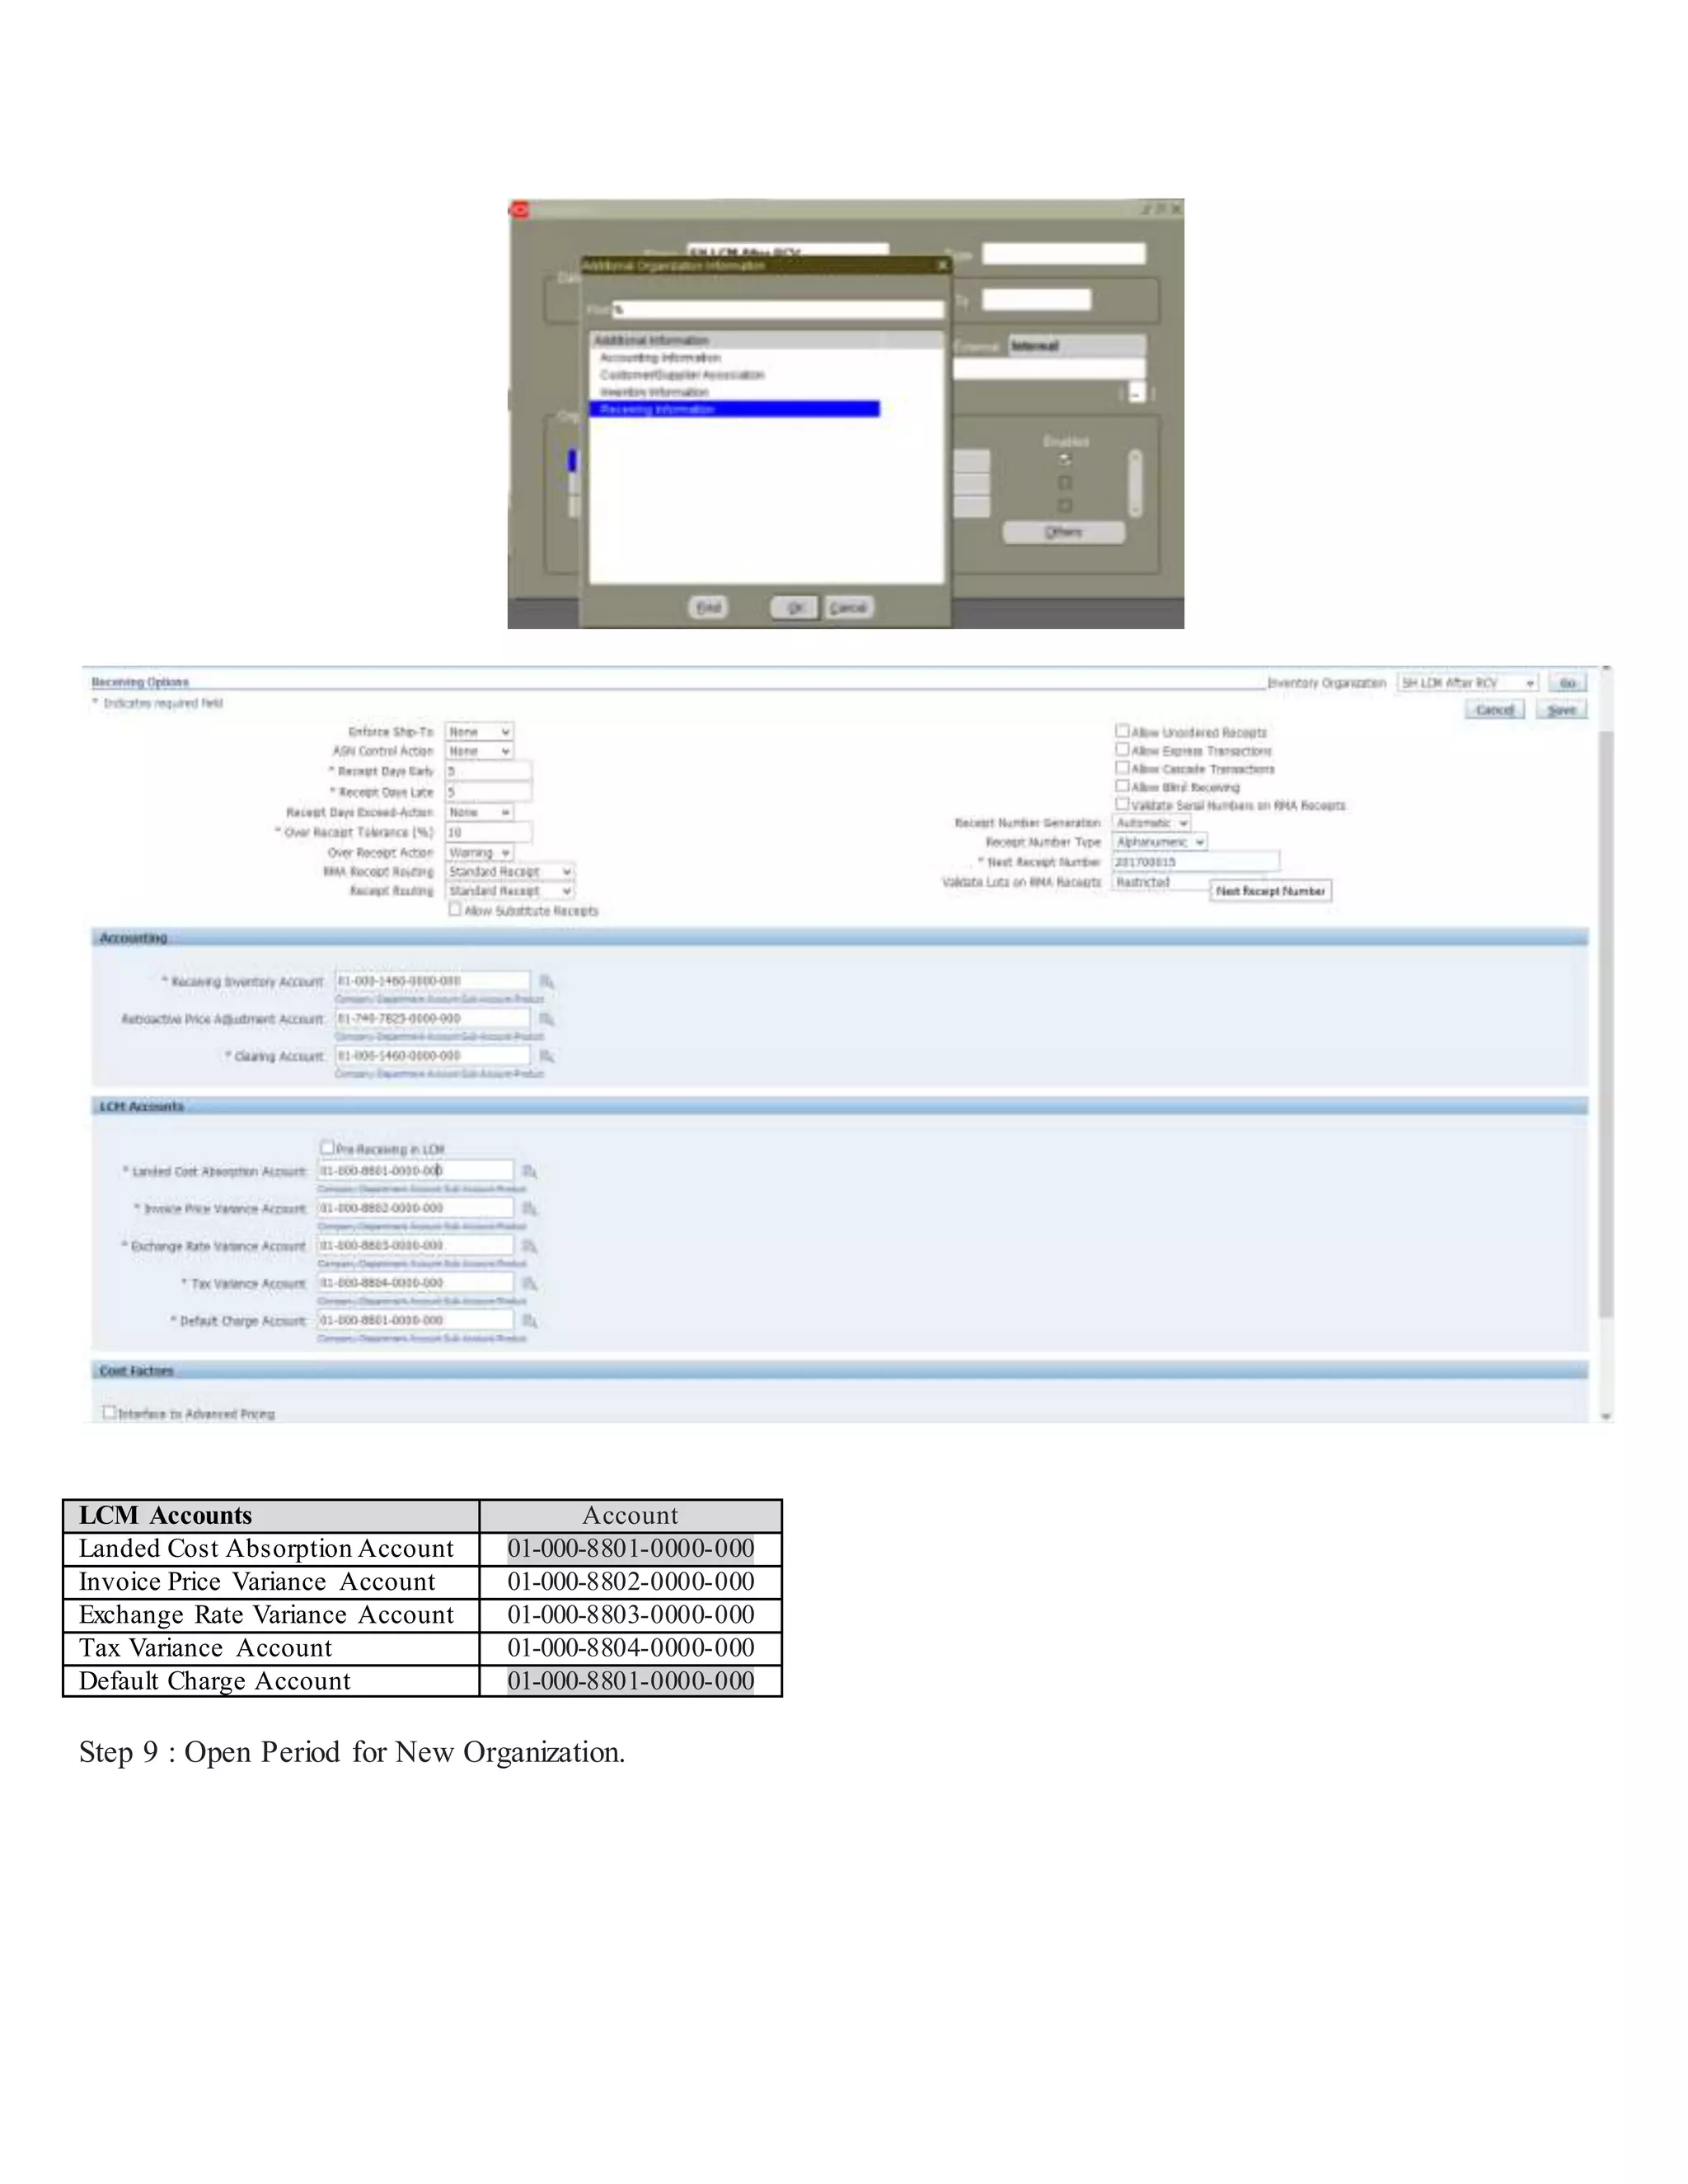
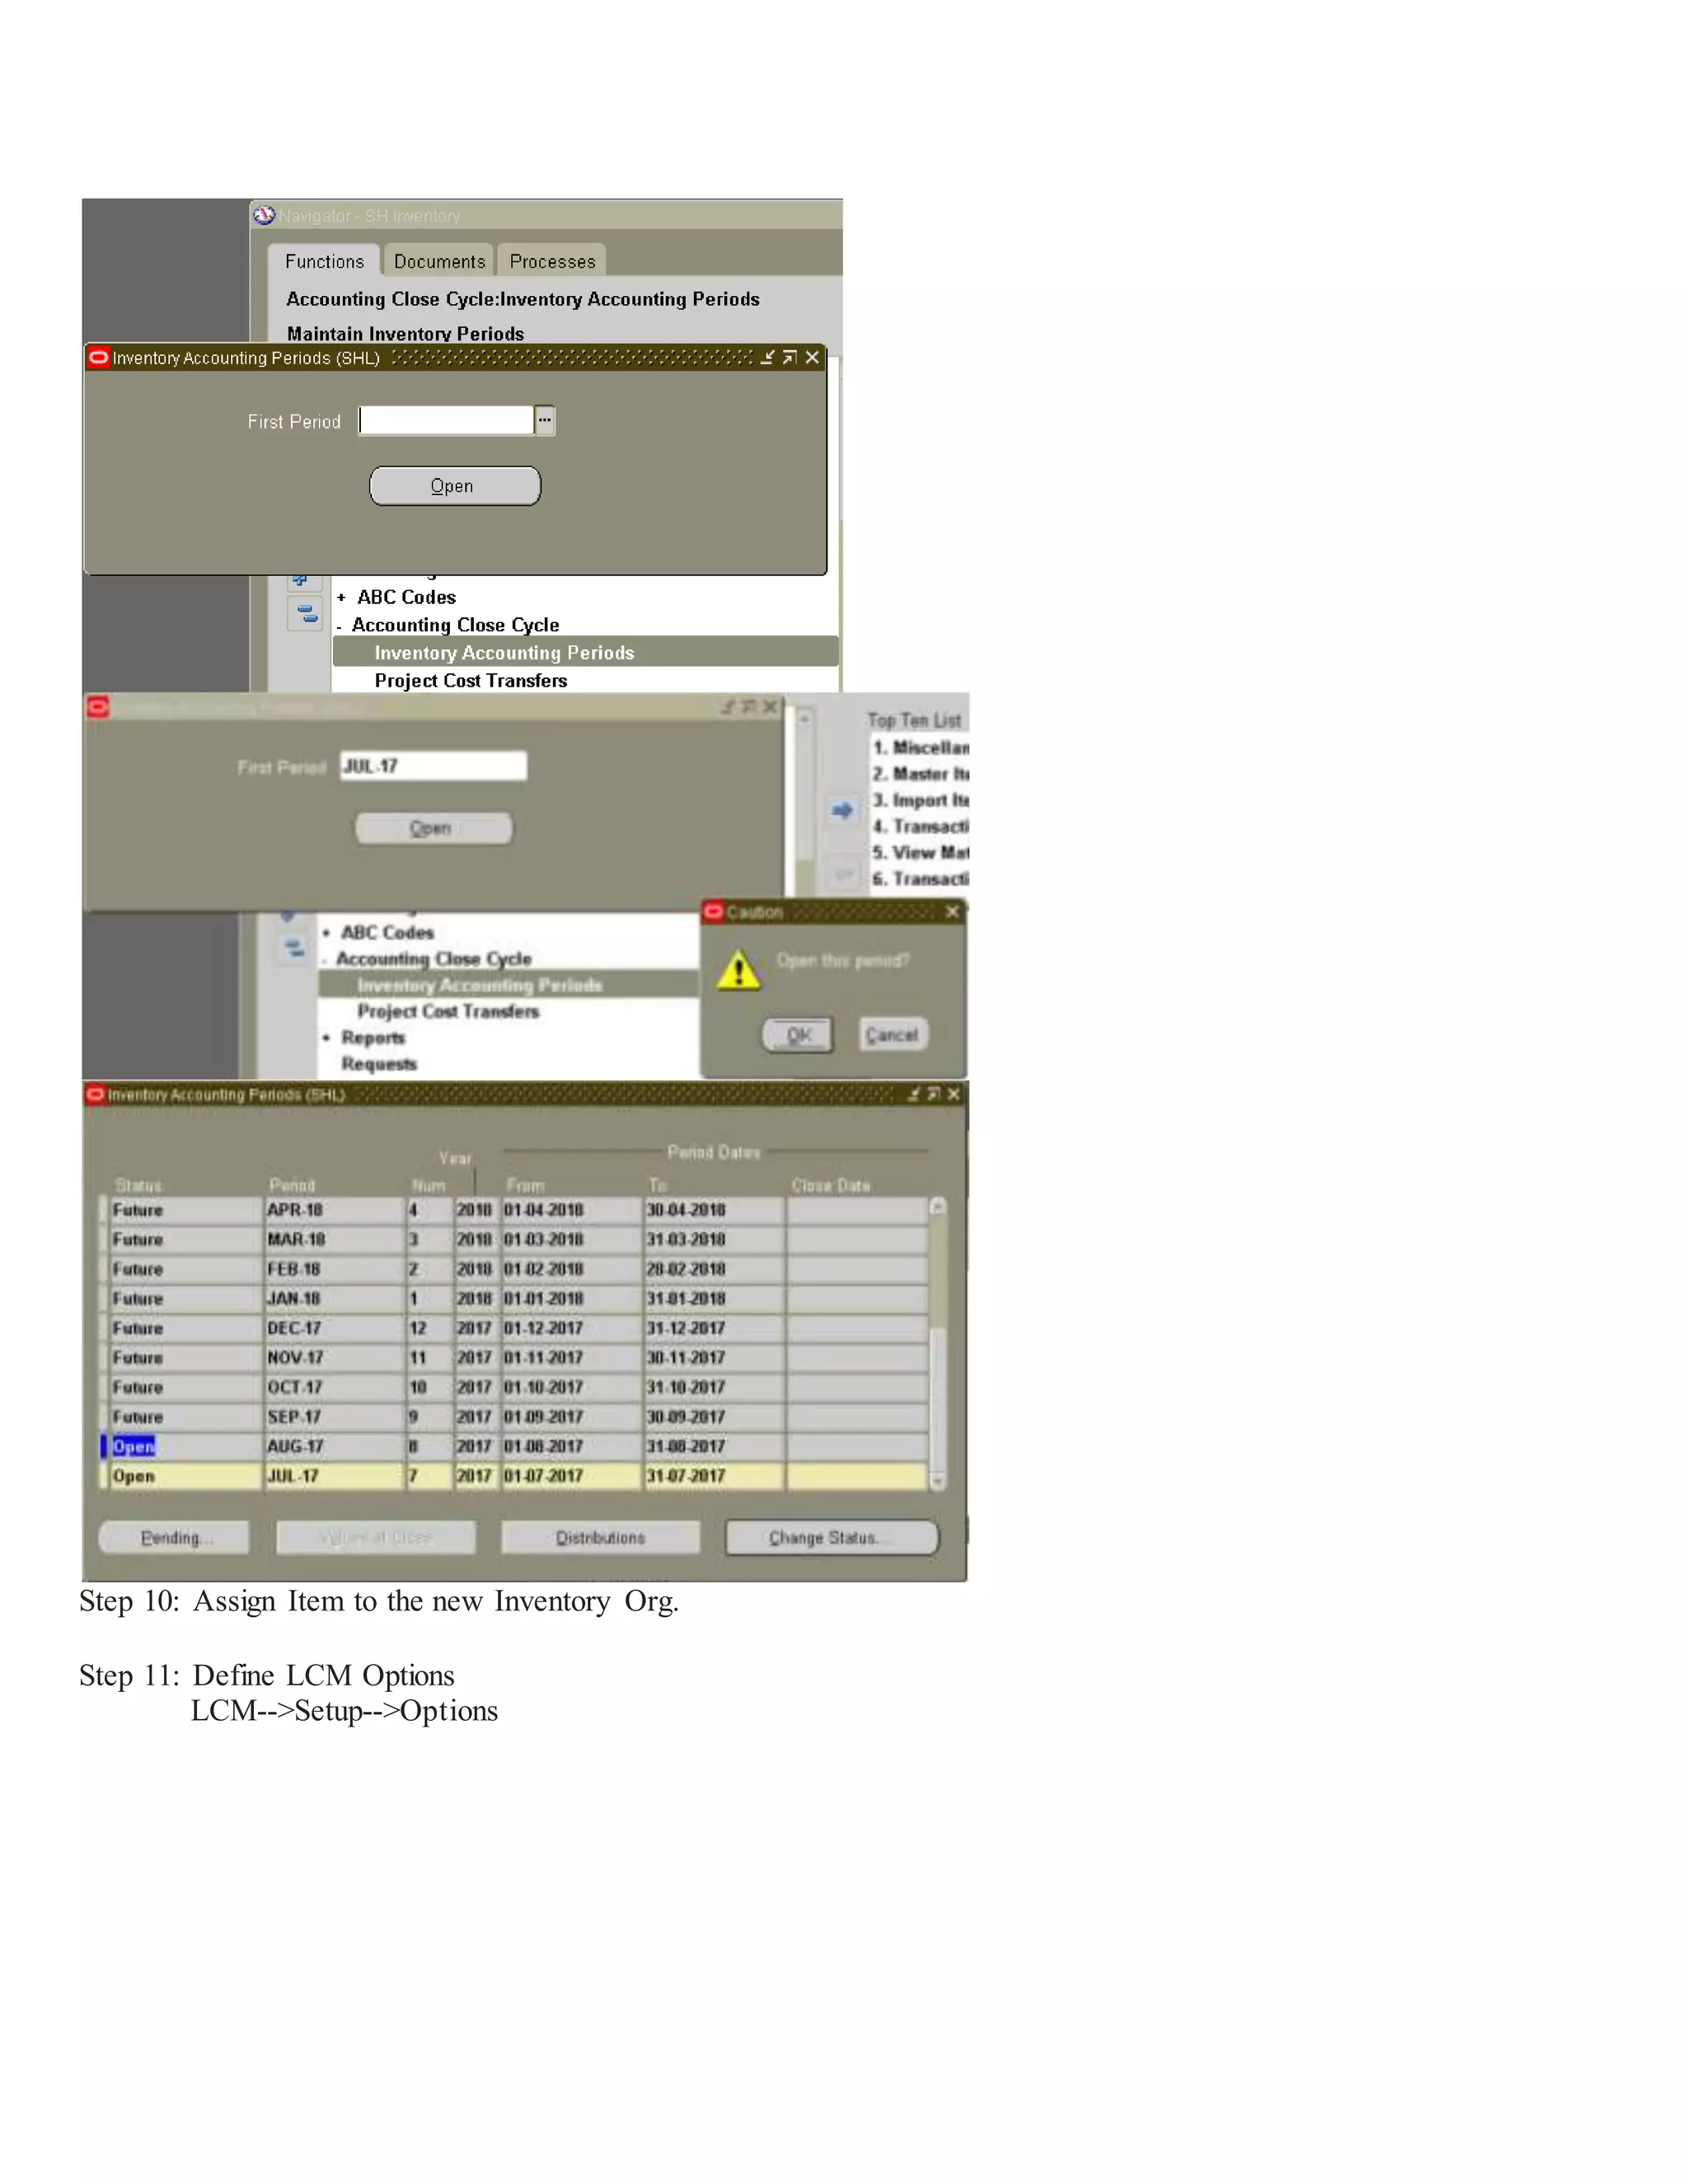
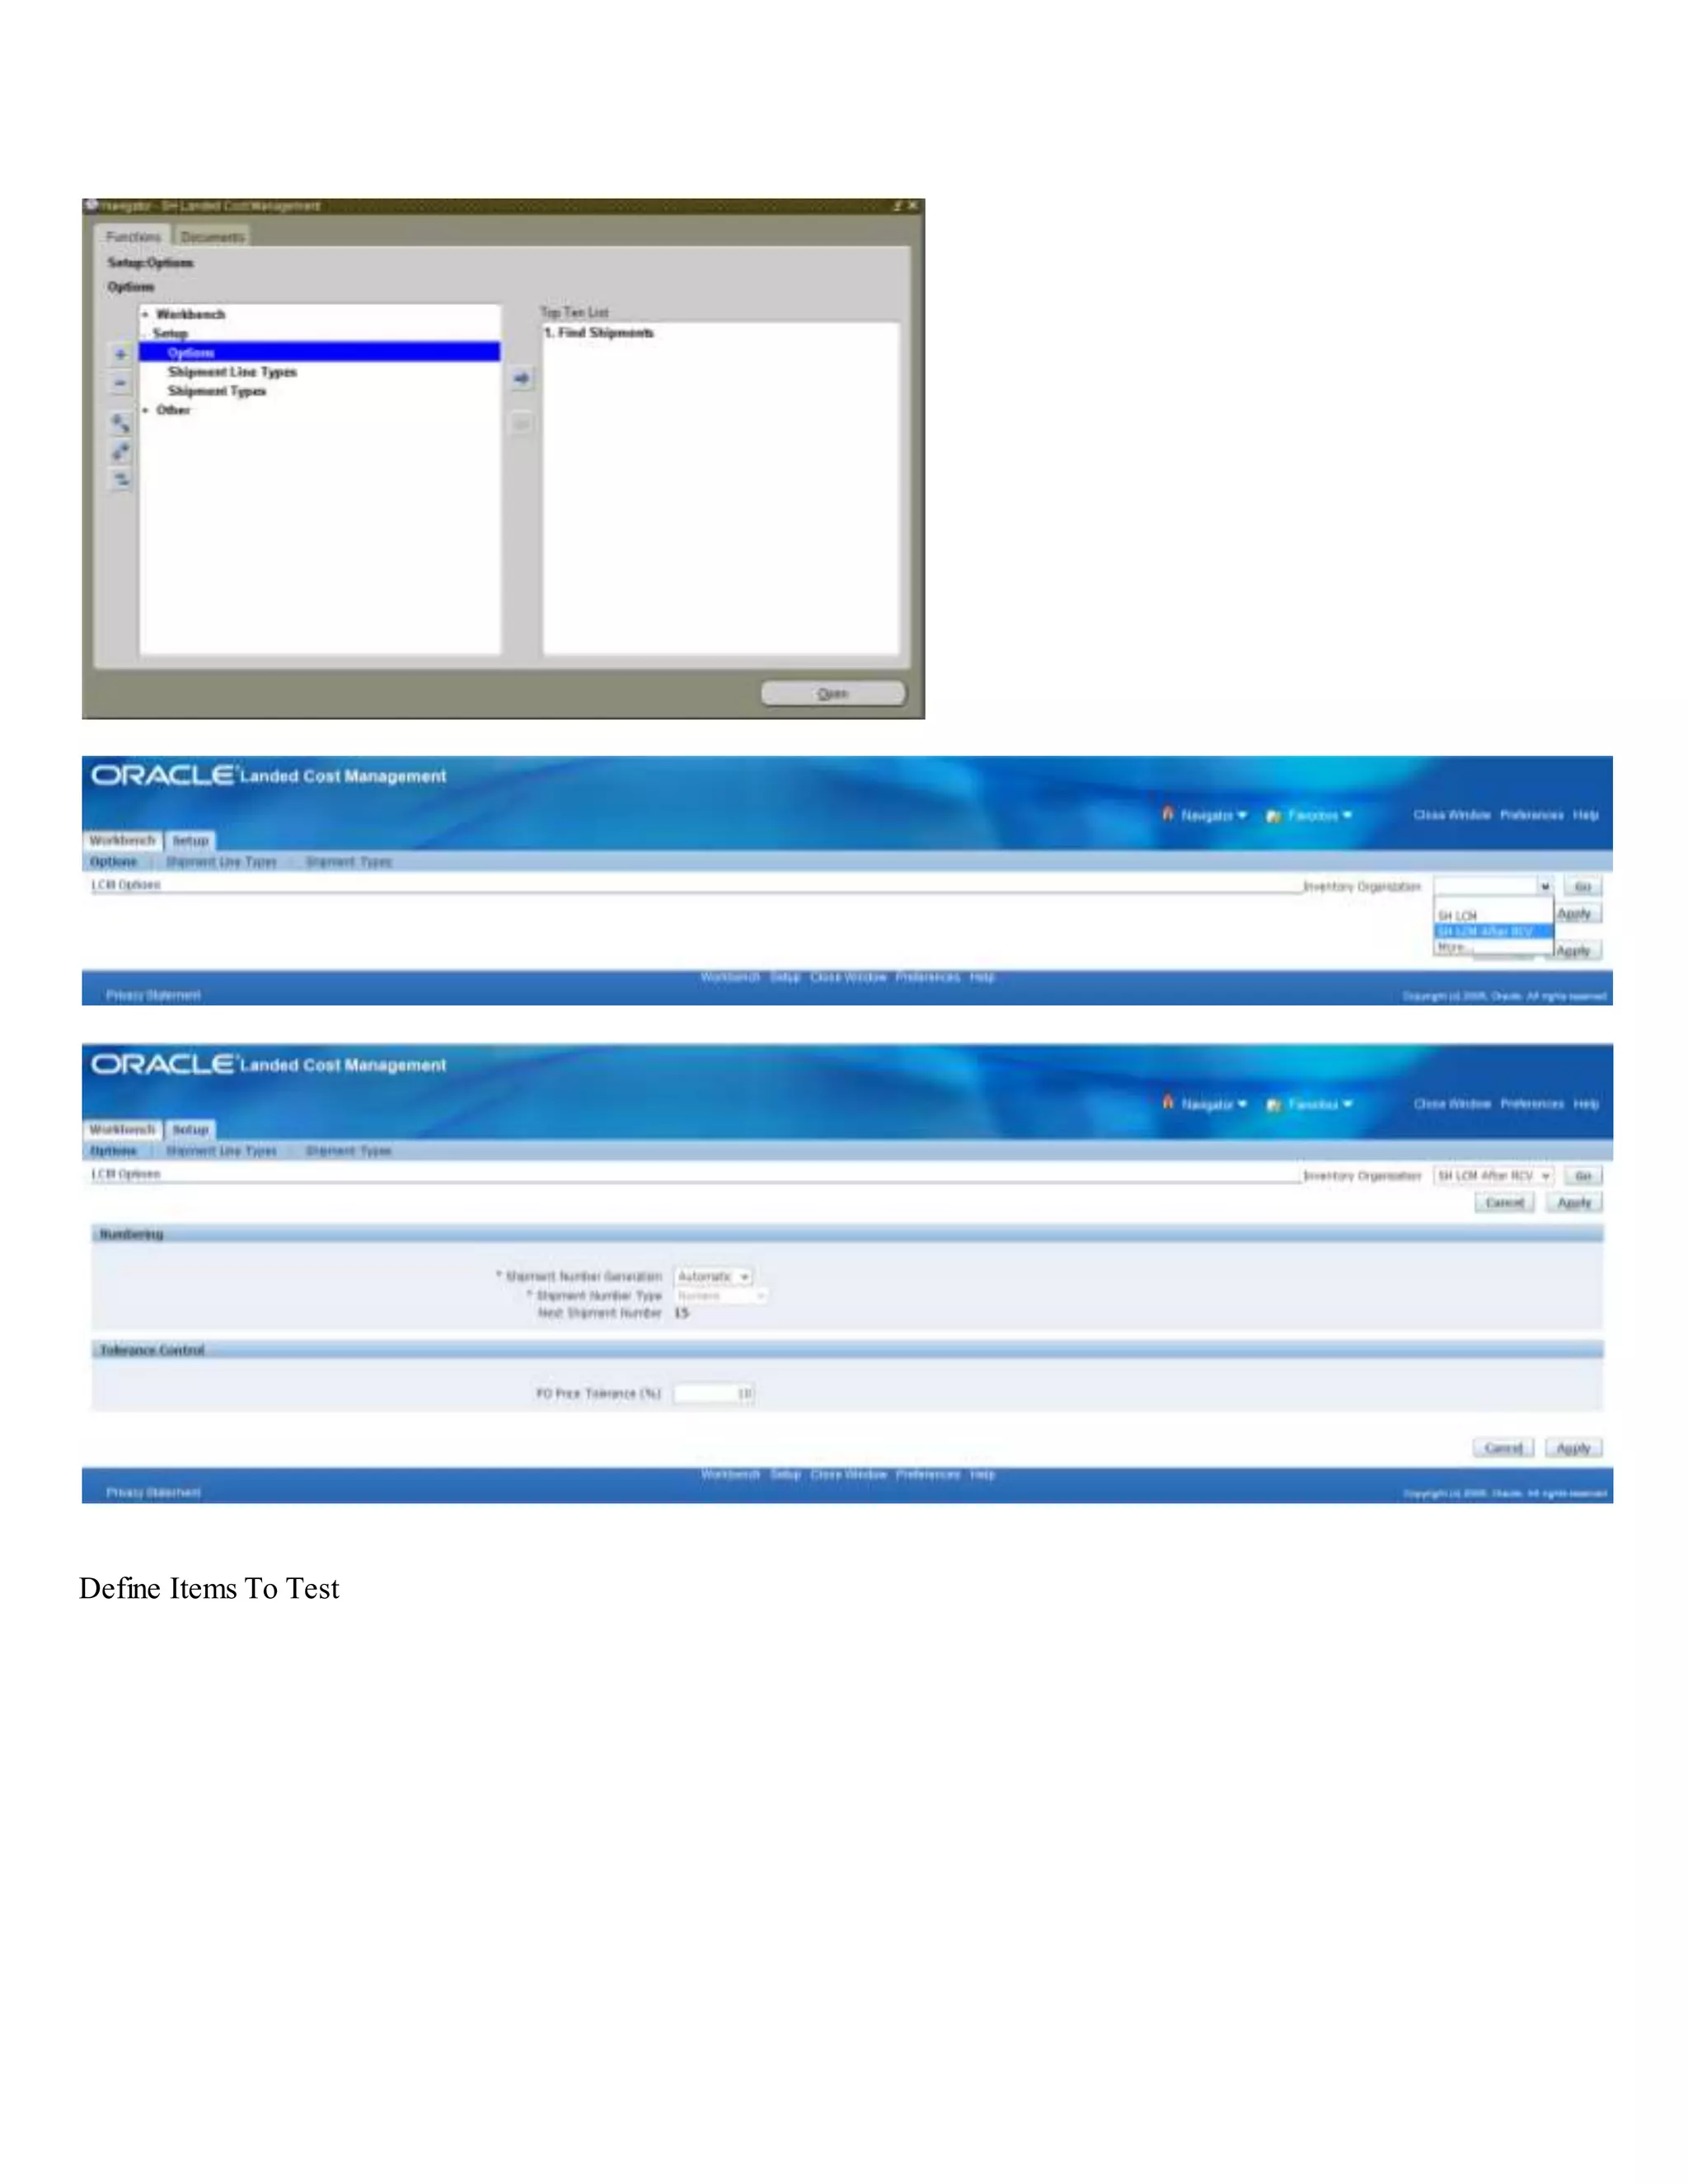
Finalizing LCM configuration with receiving options, account assignments, and period management.
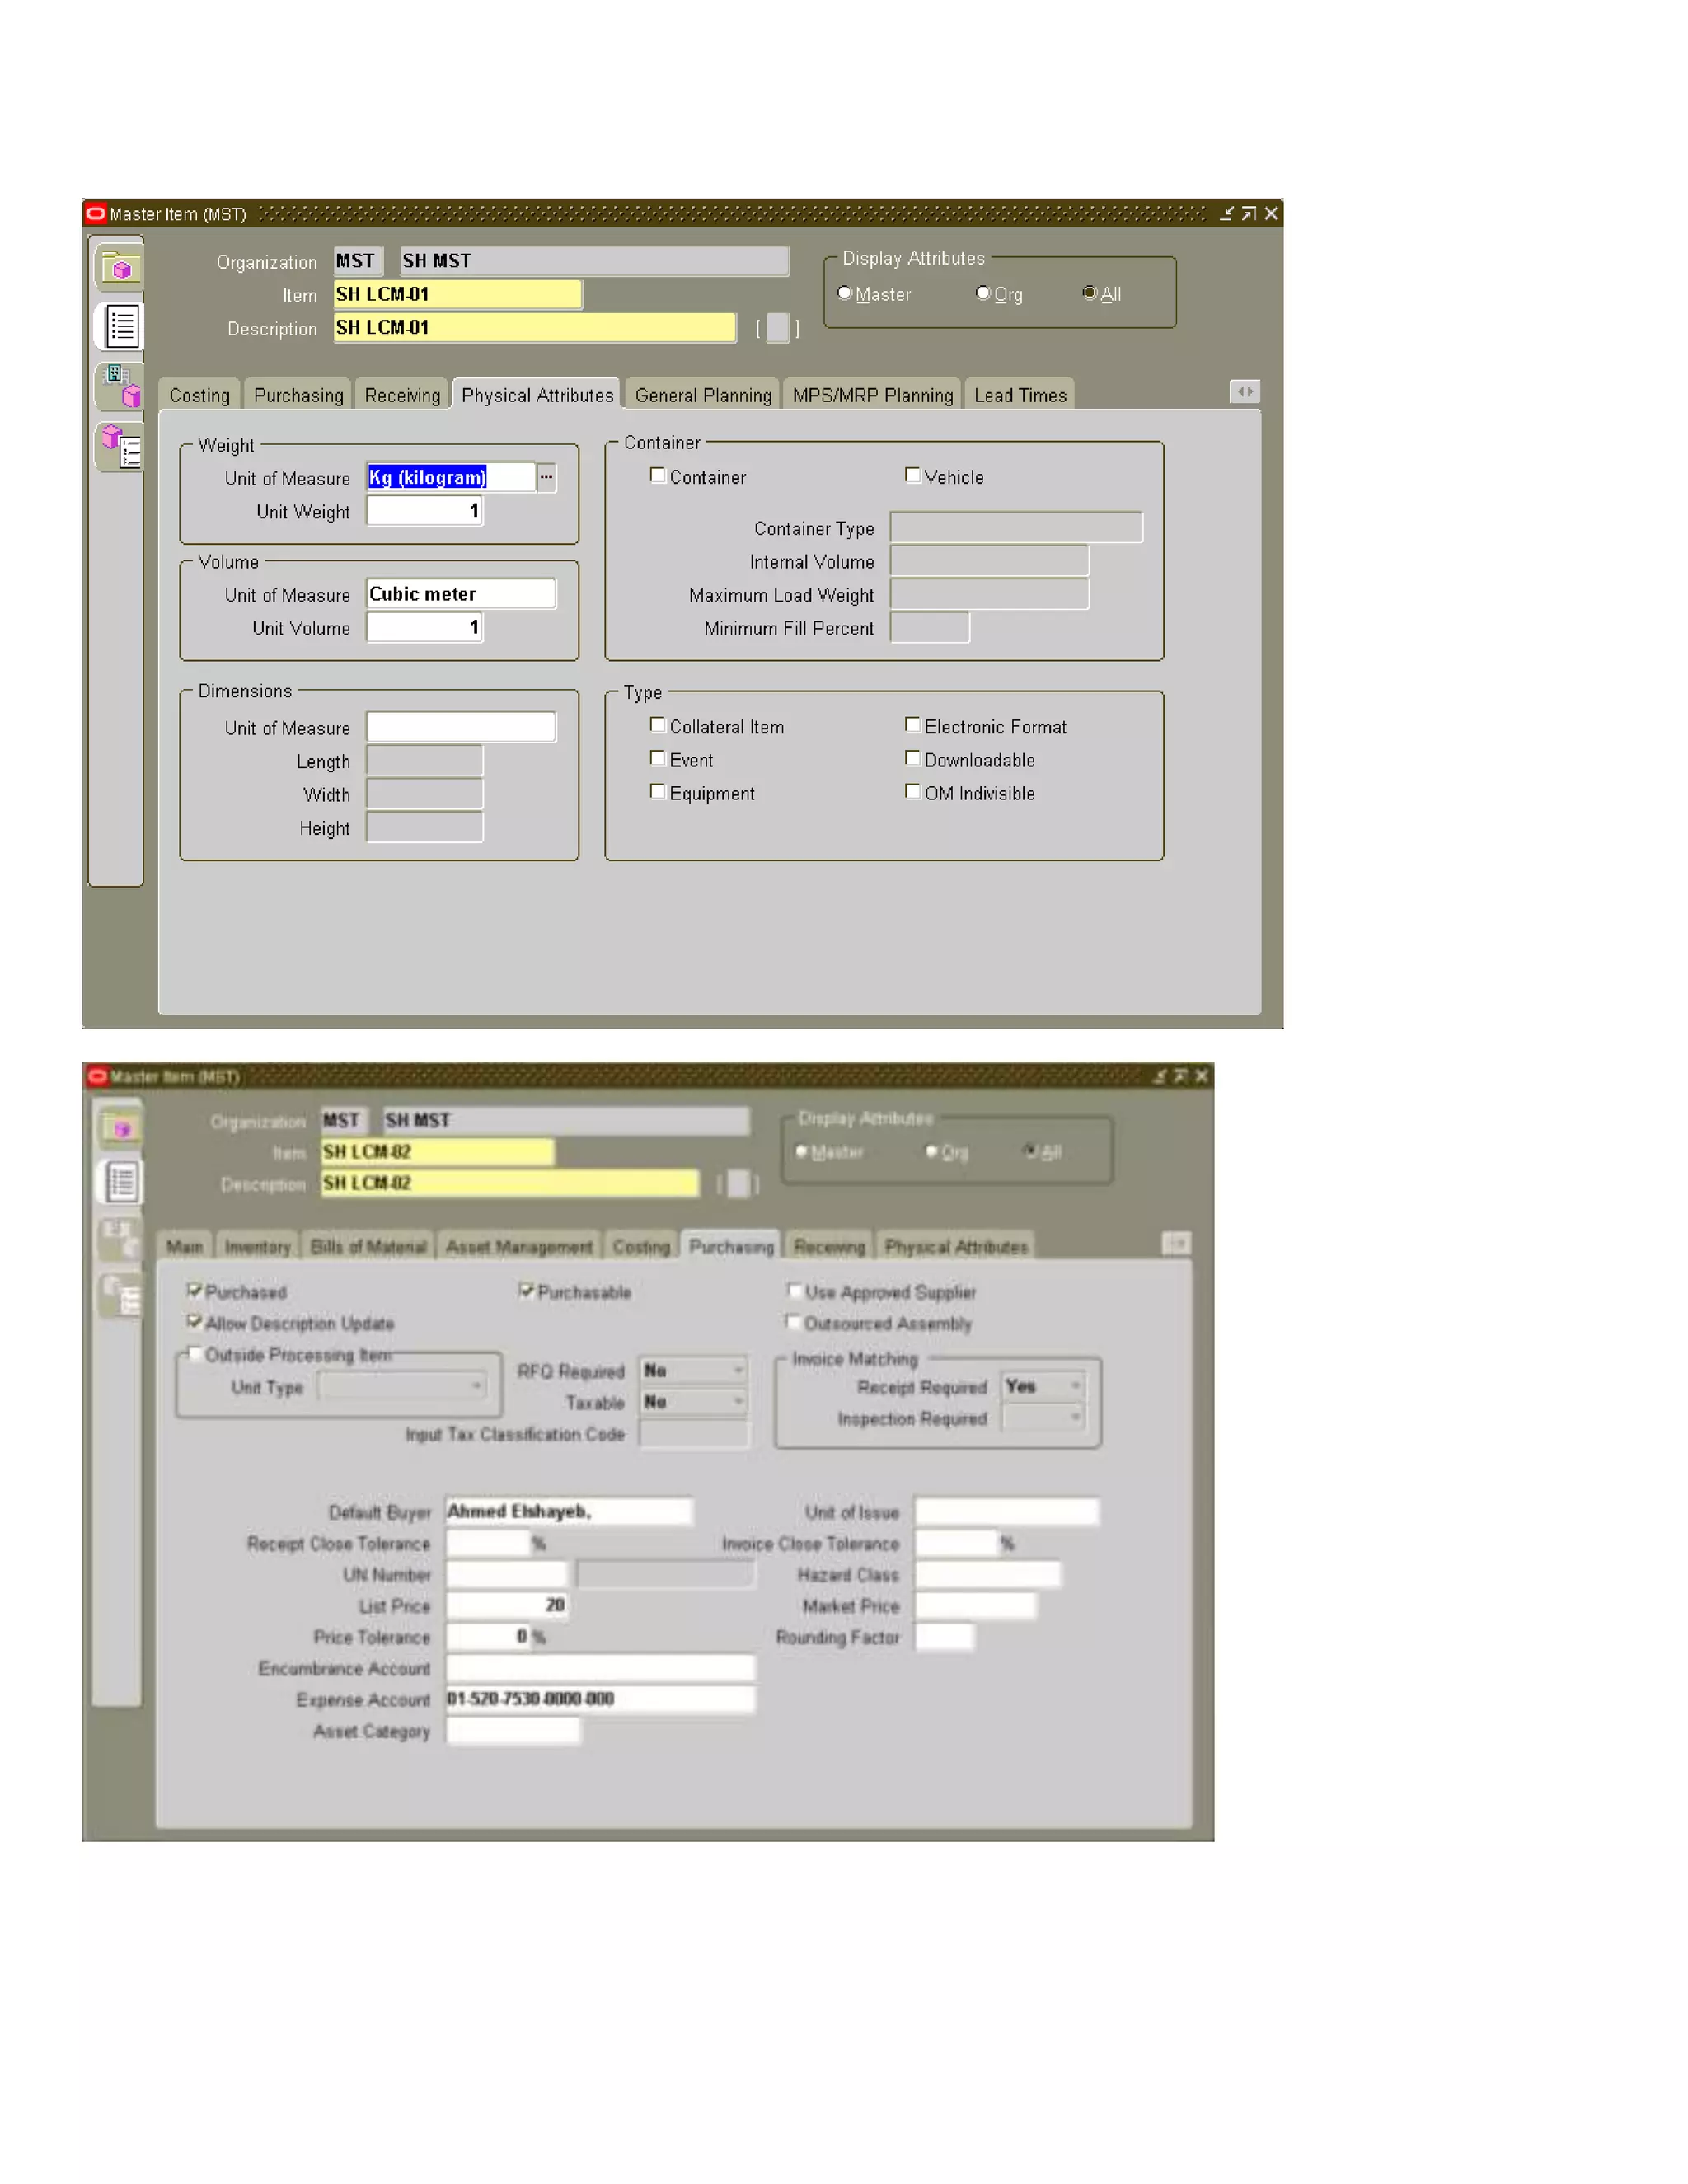
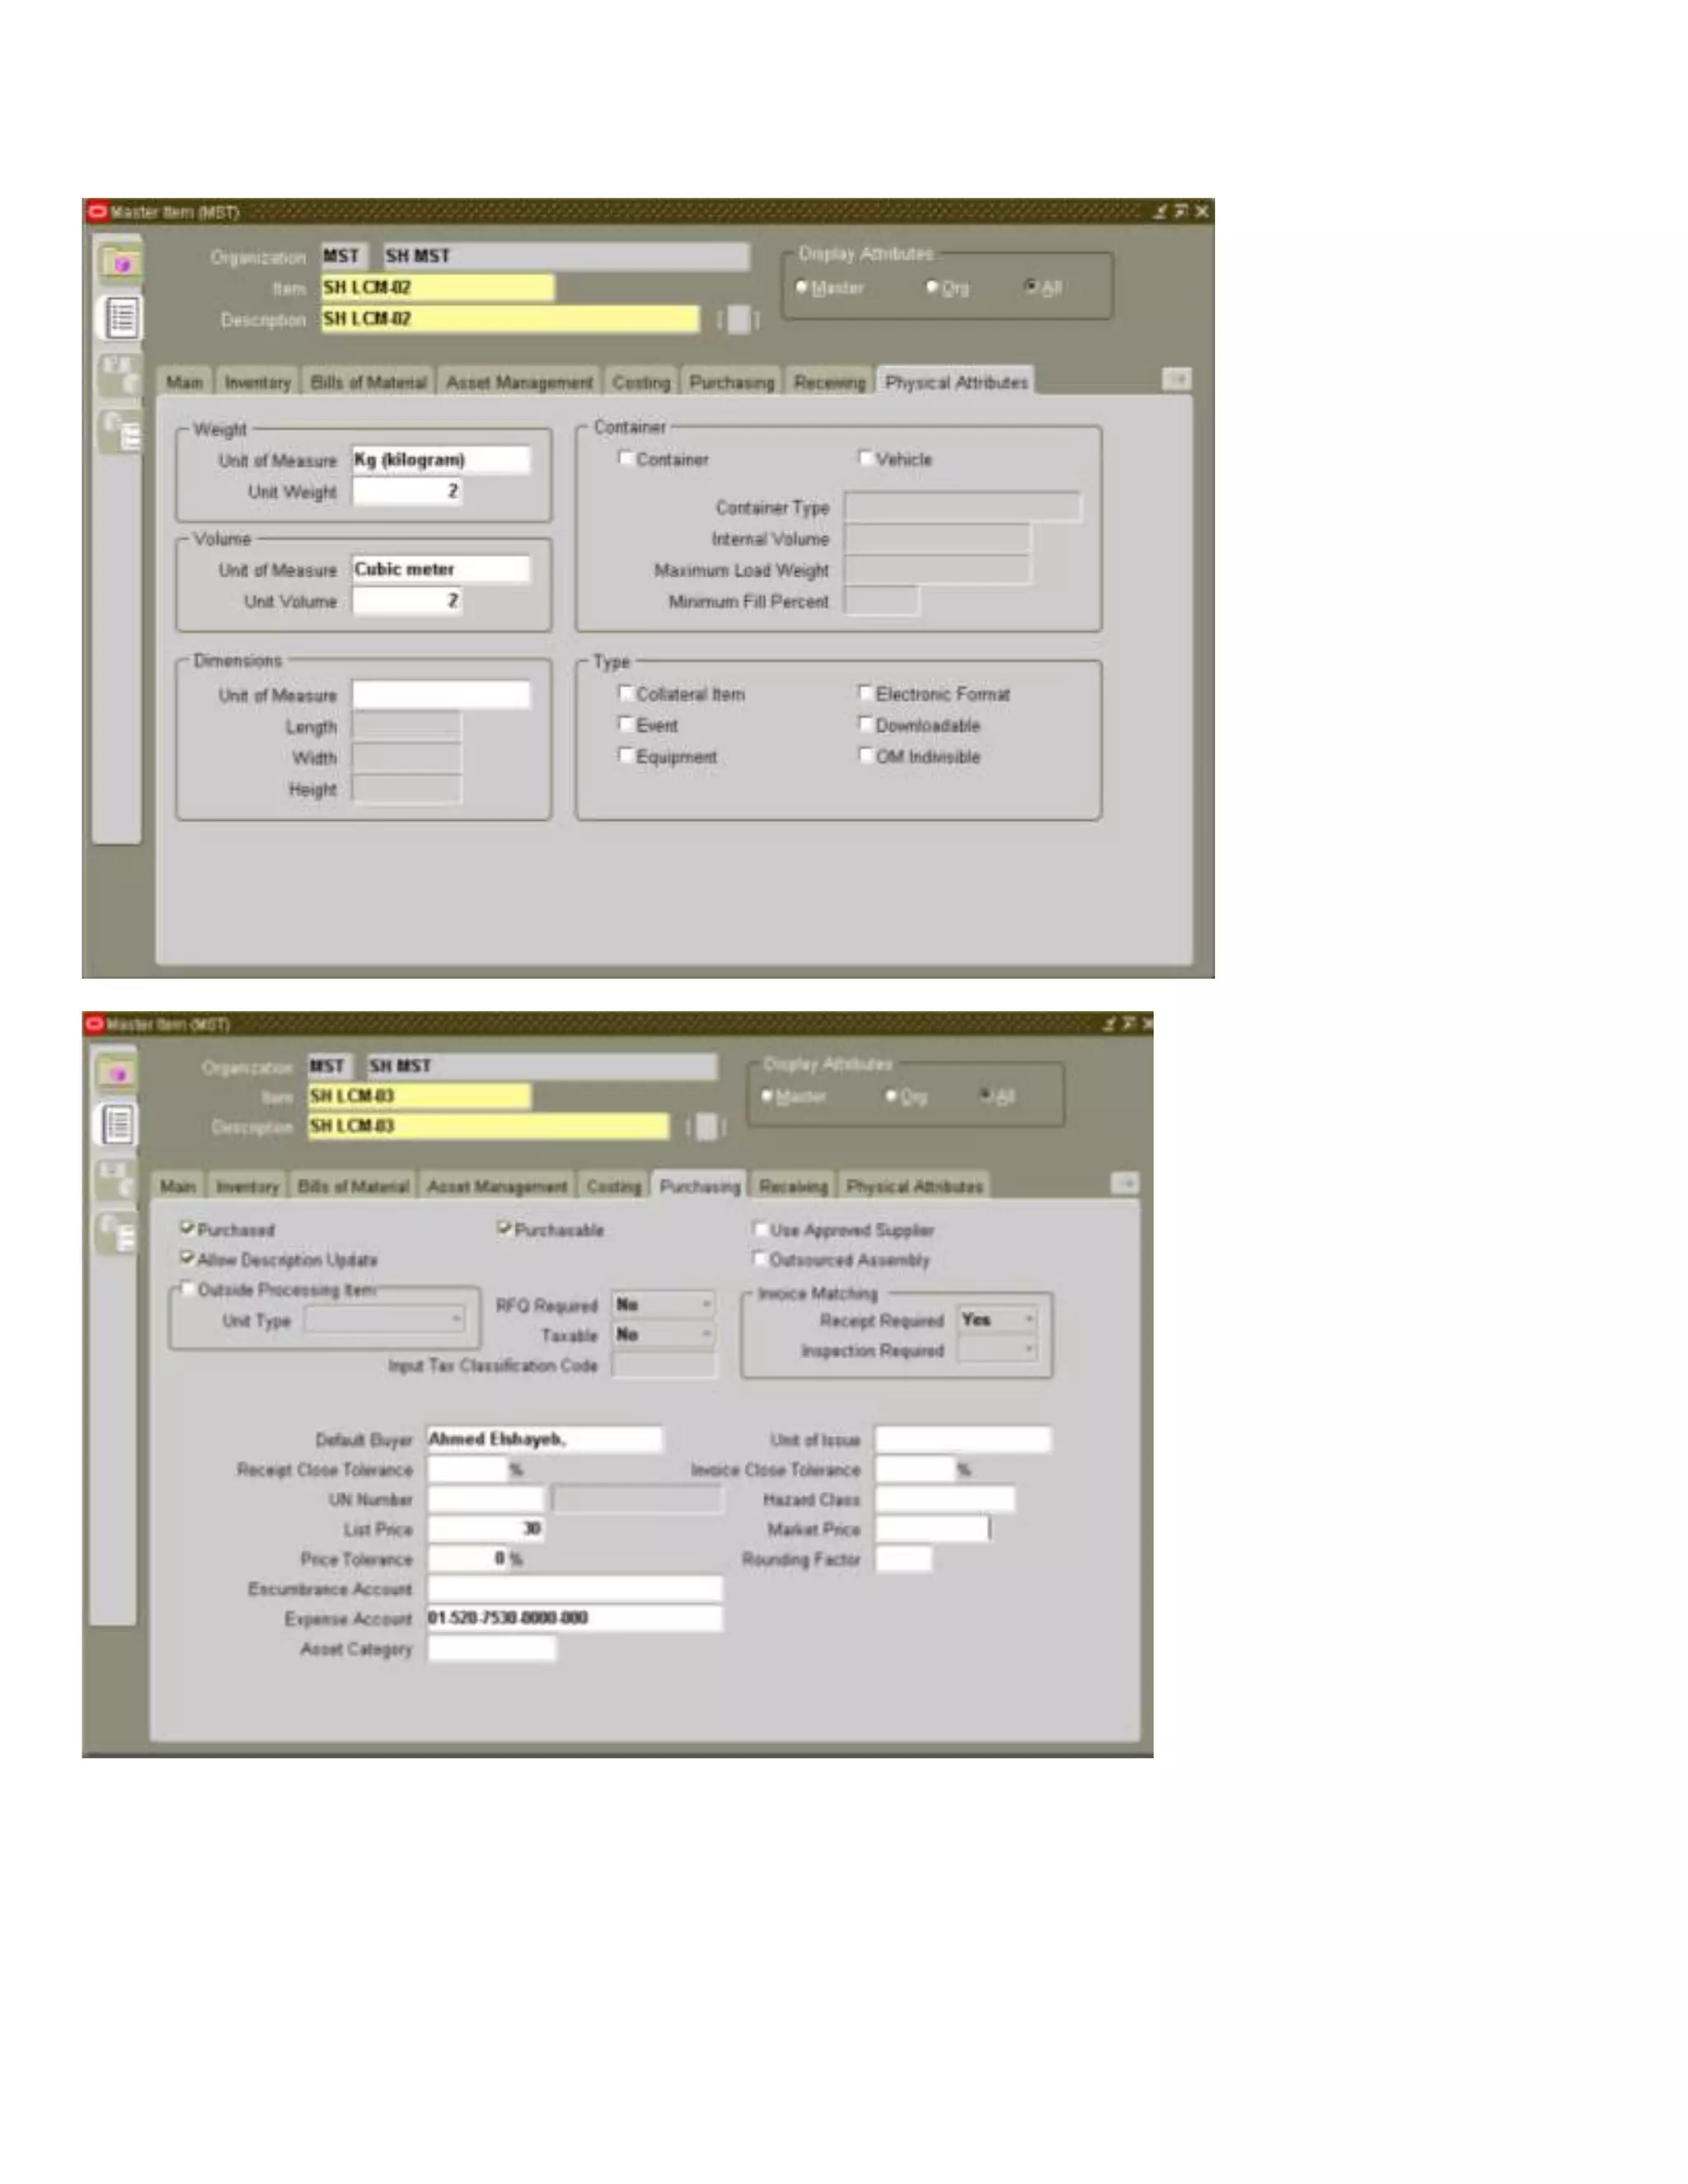
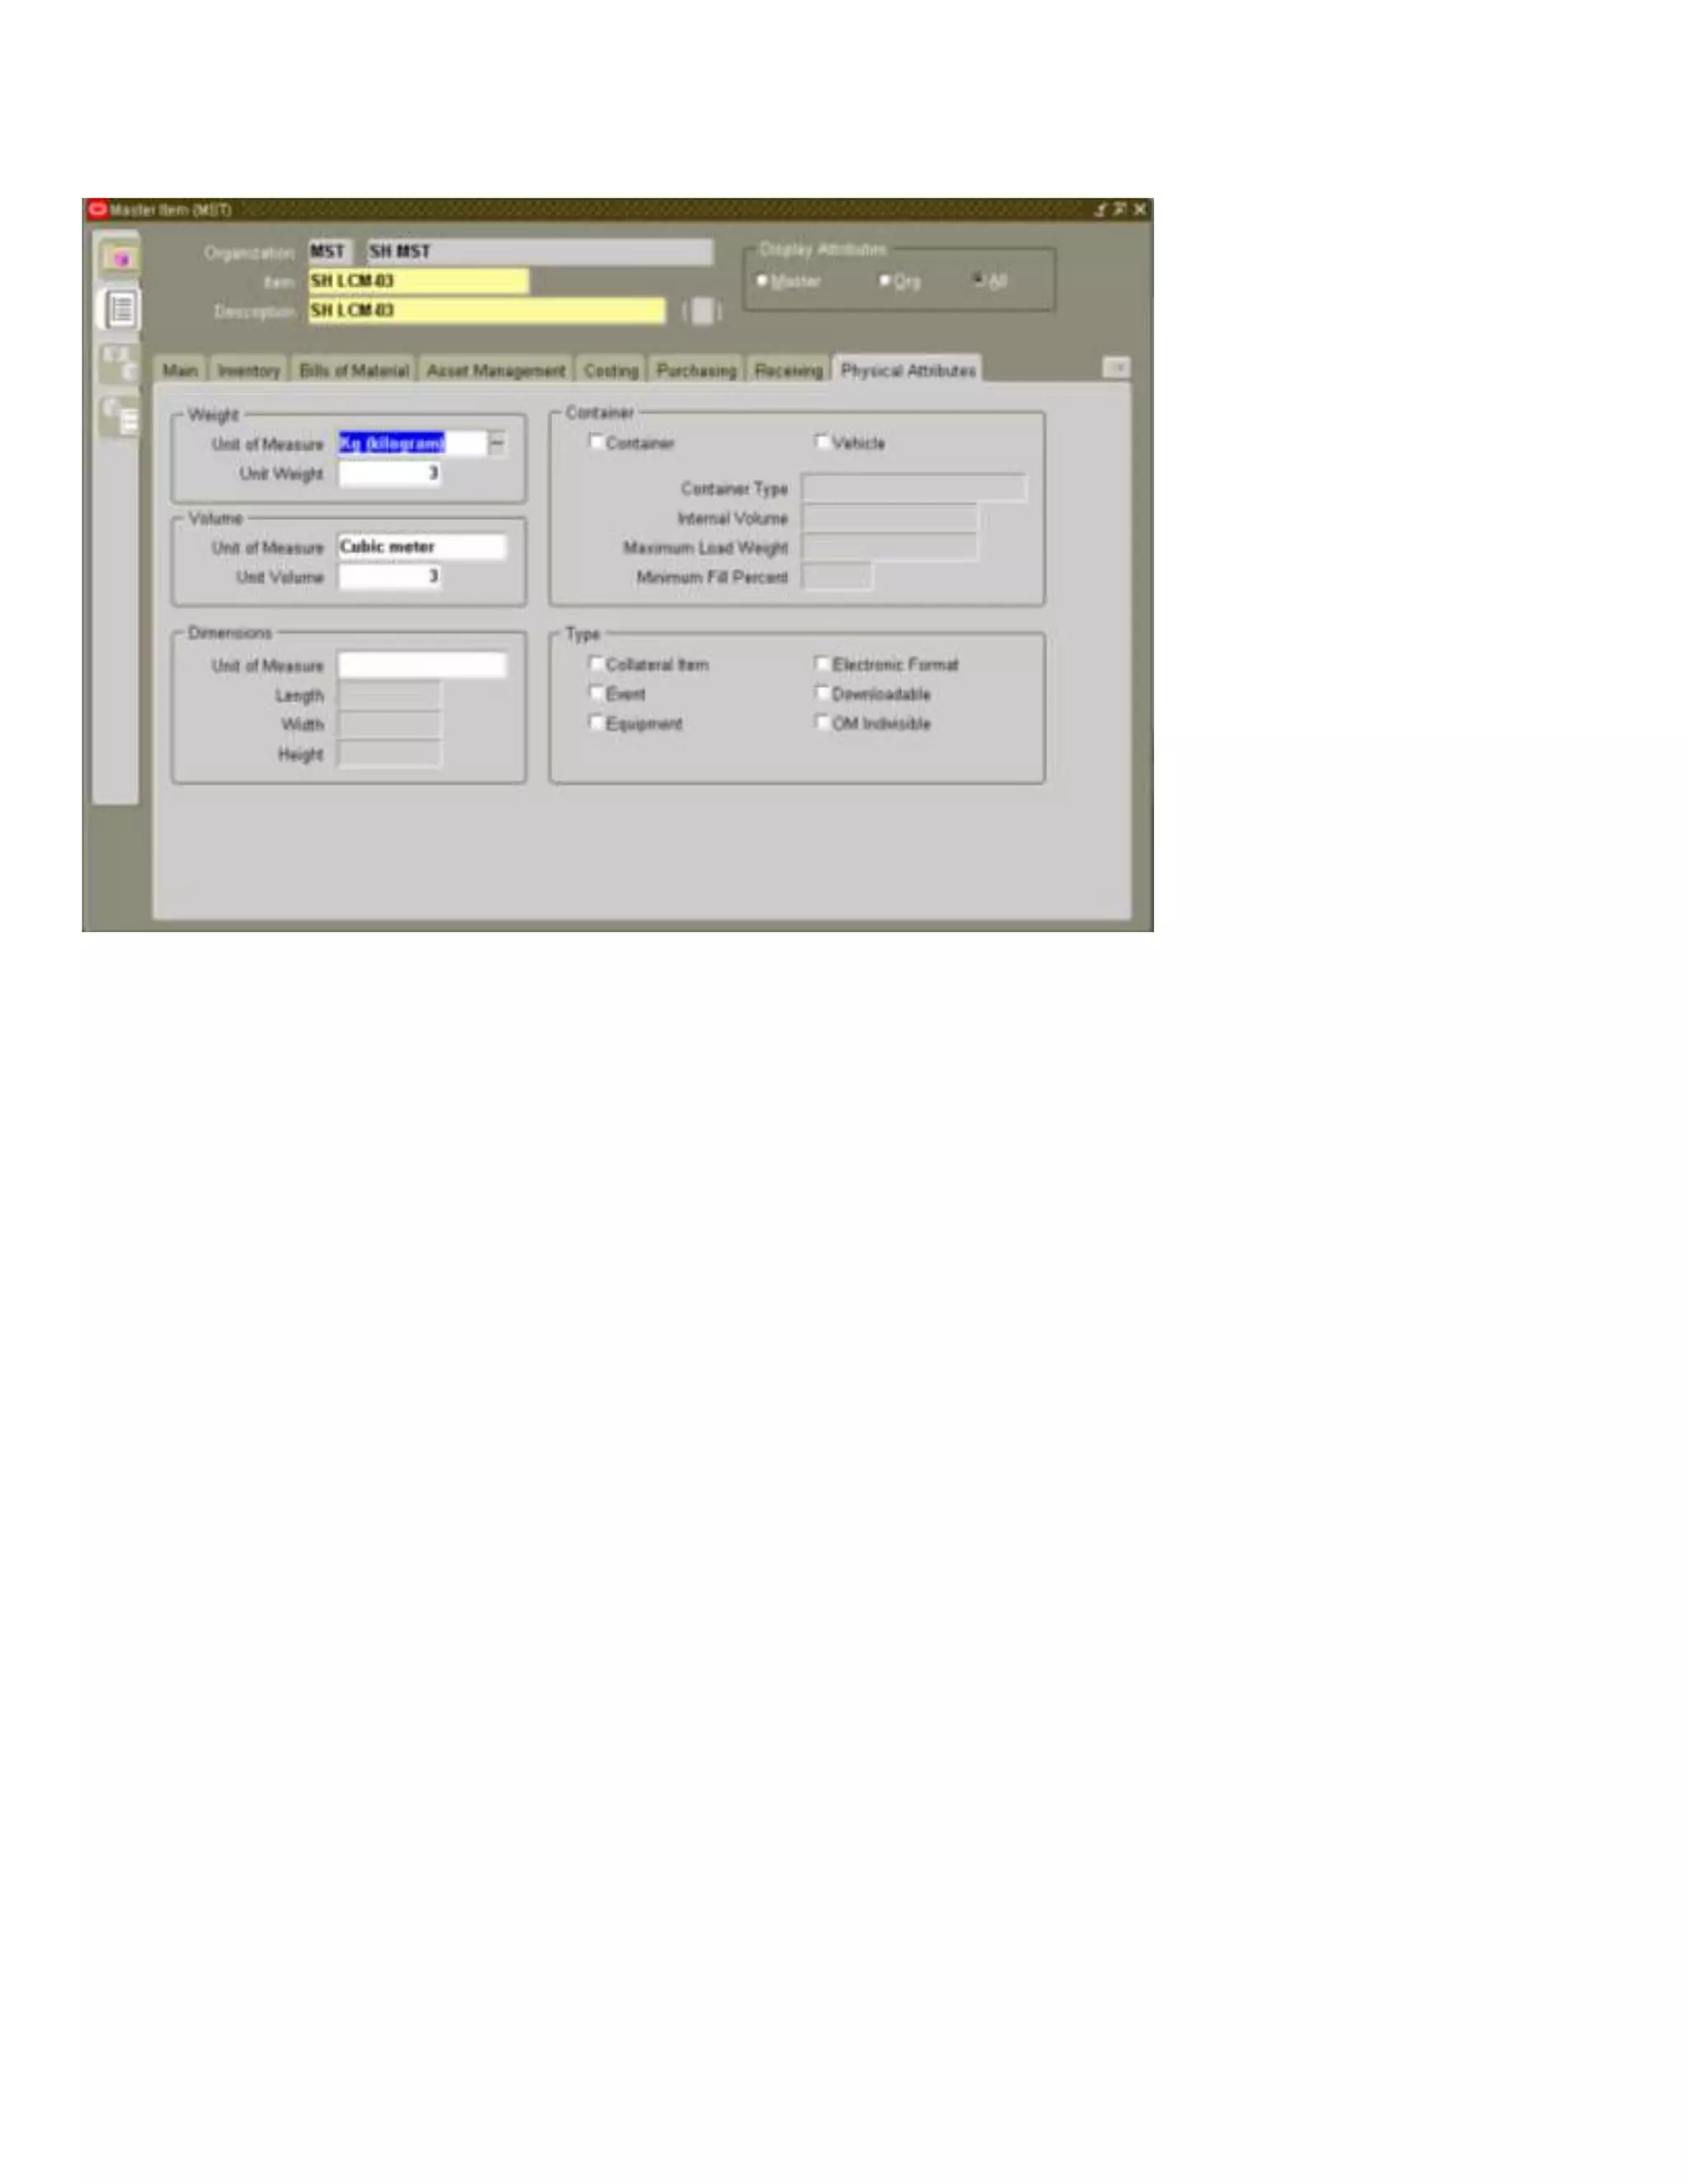
Defining items to test and additional LCM options for integrated setup.
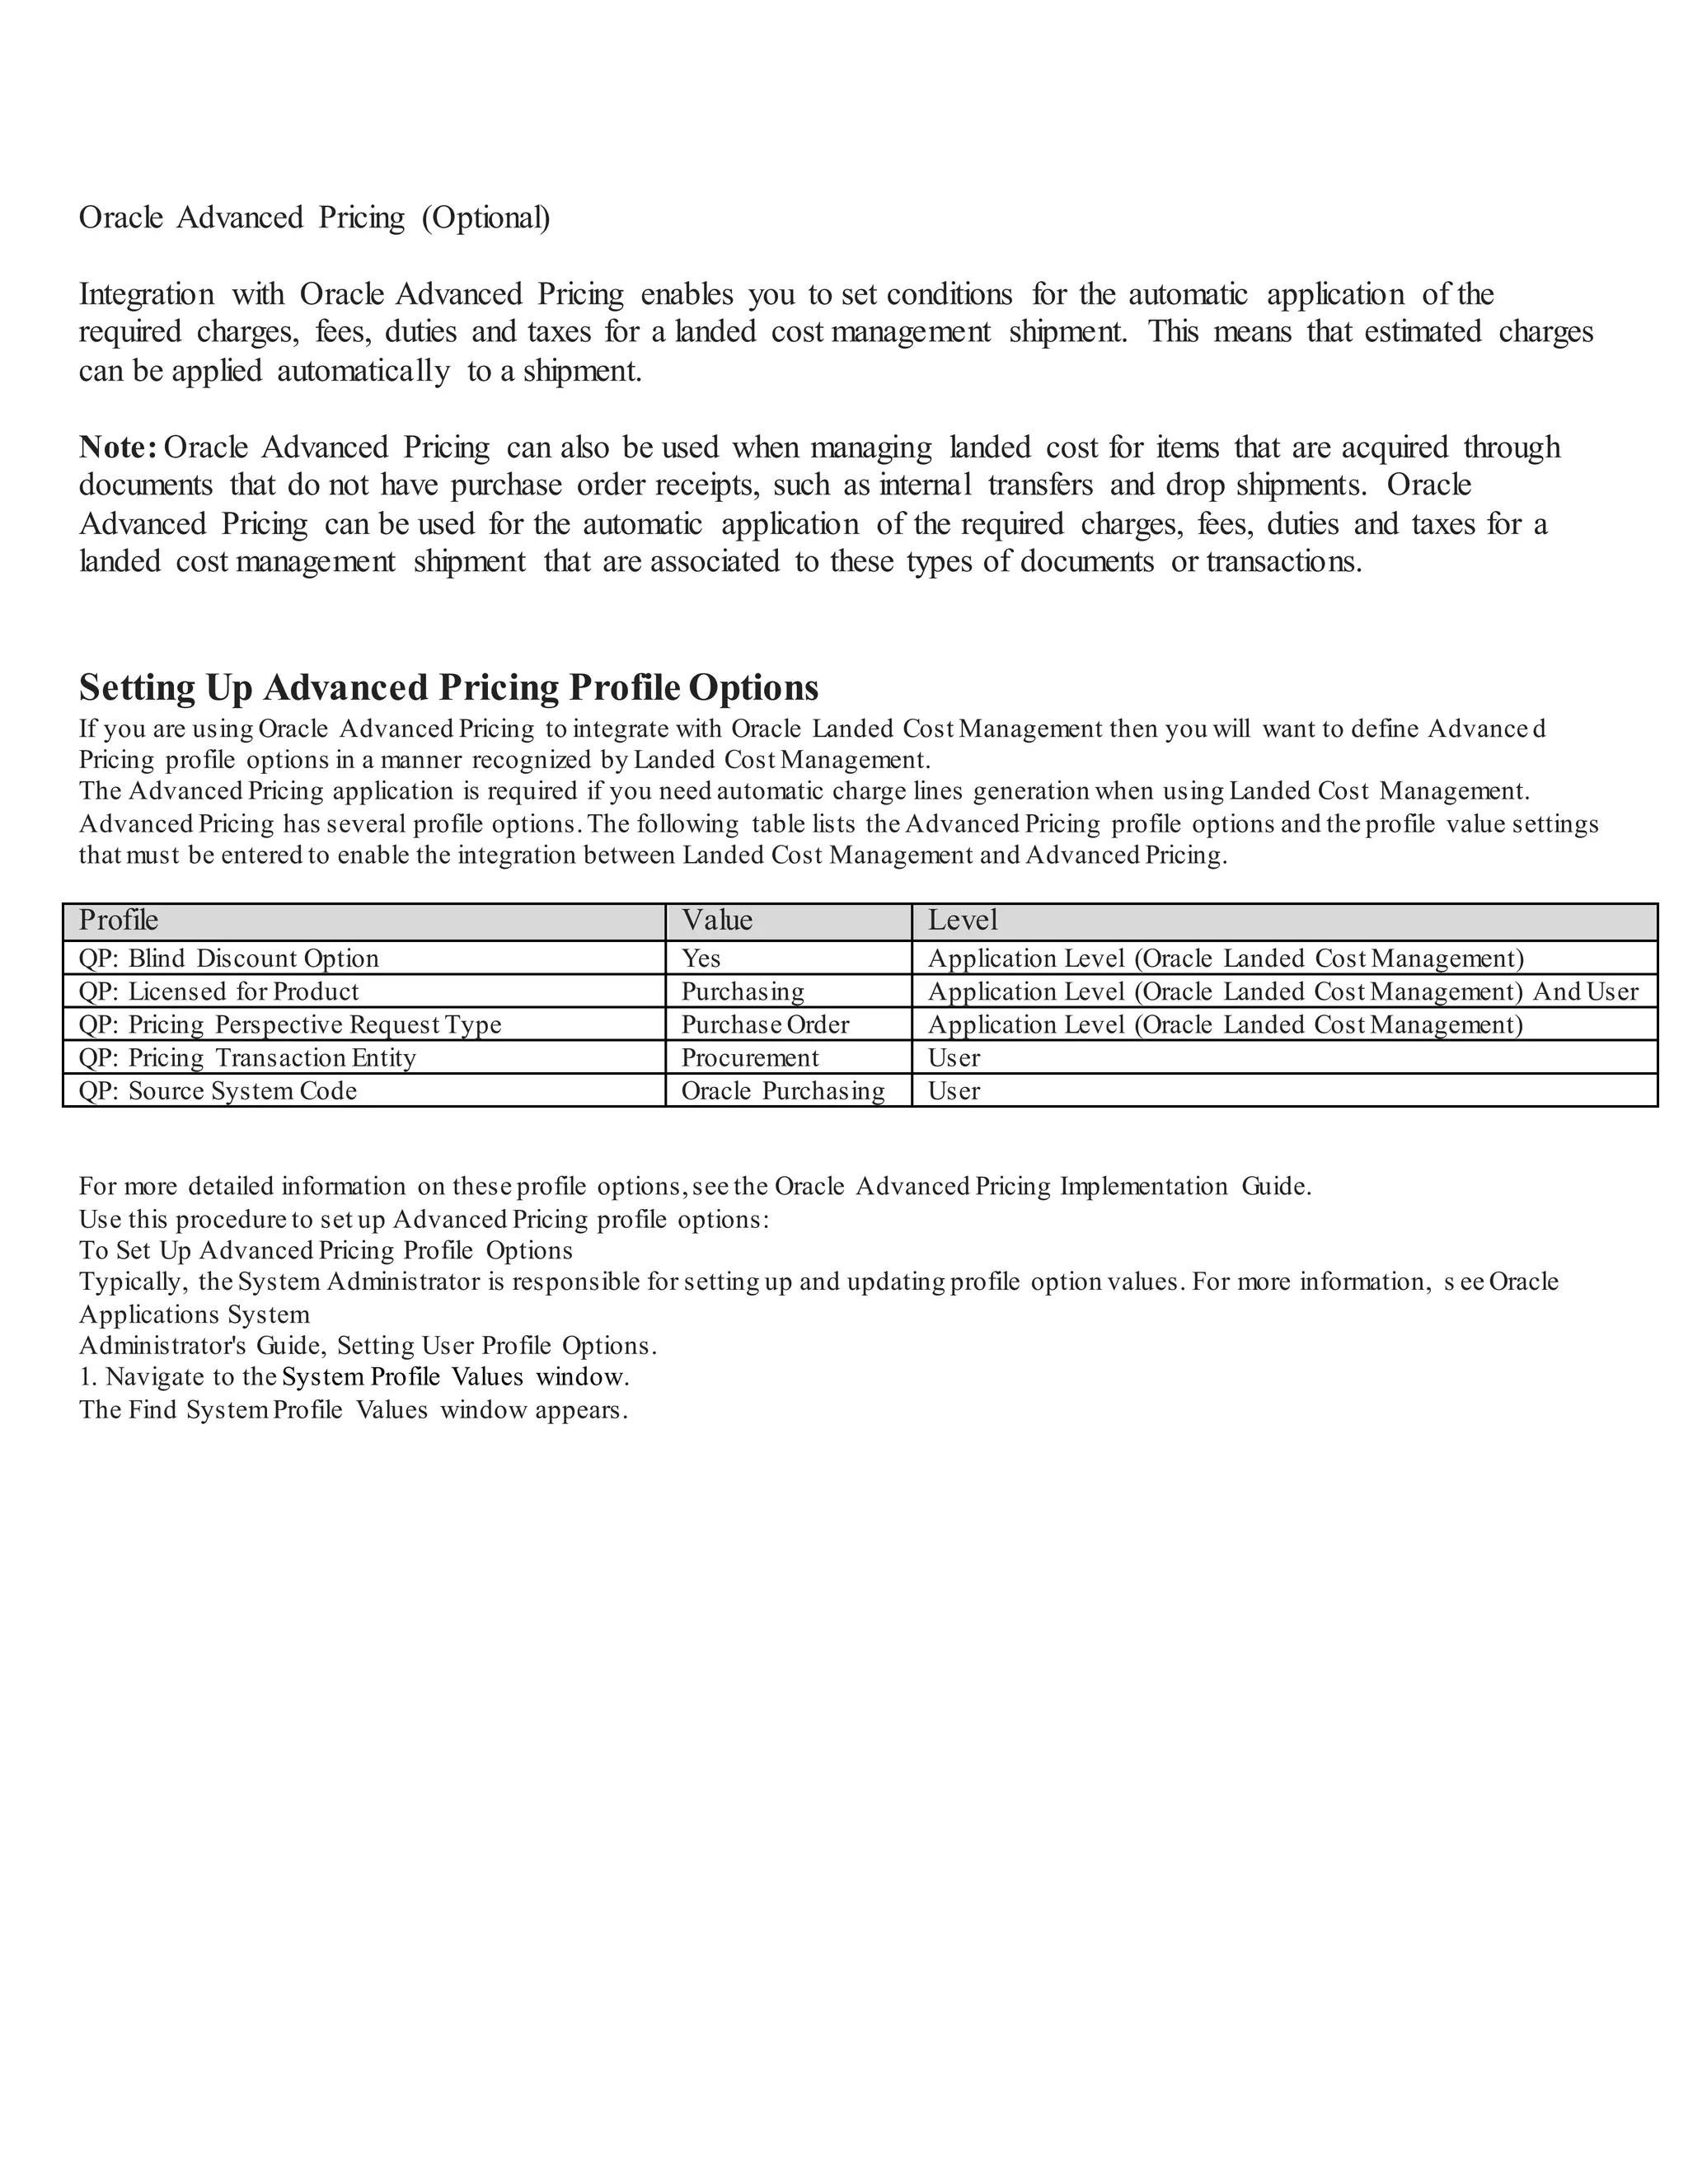
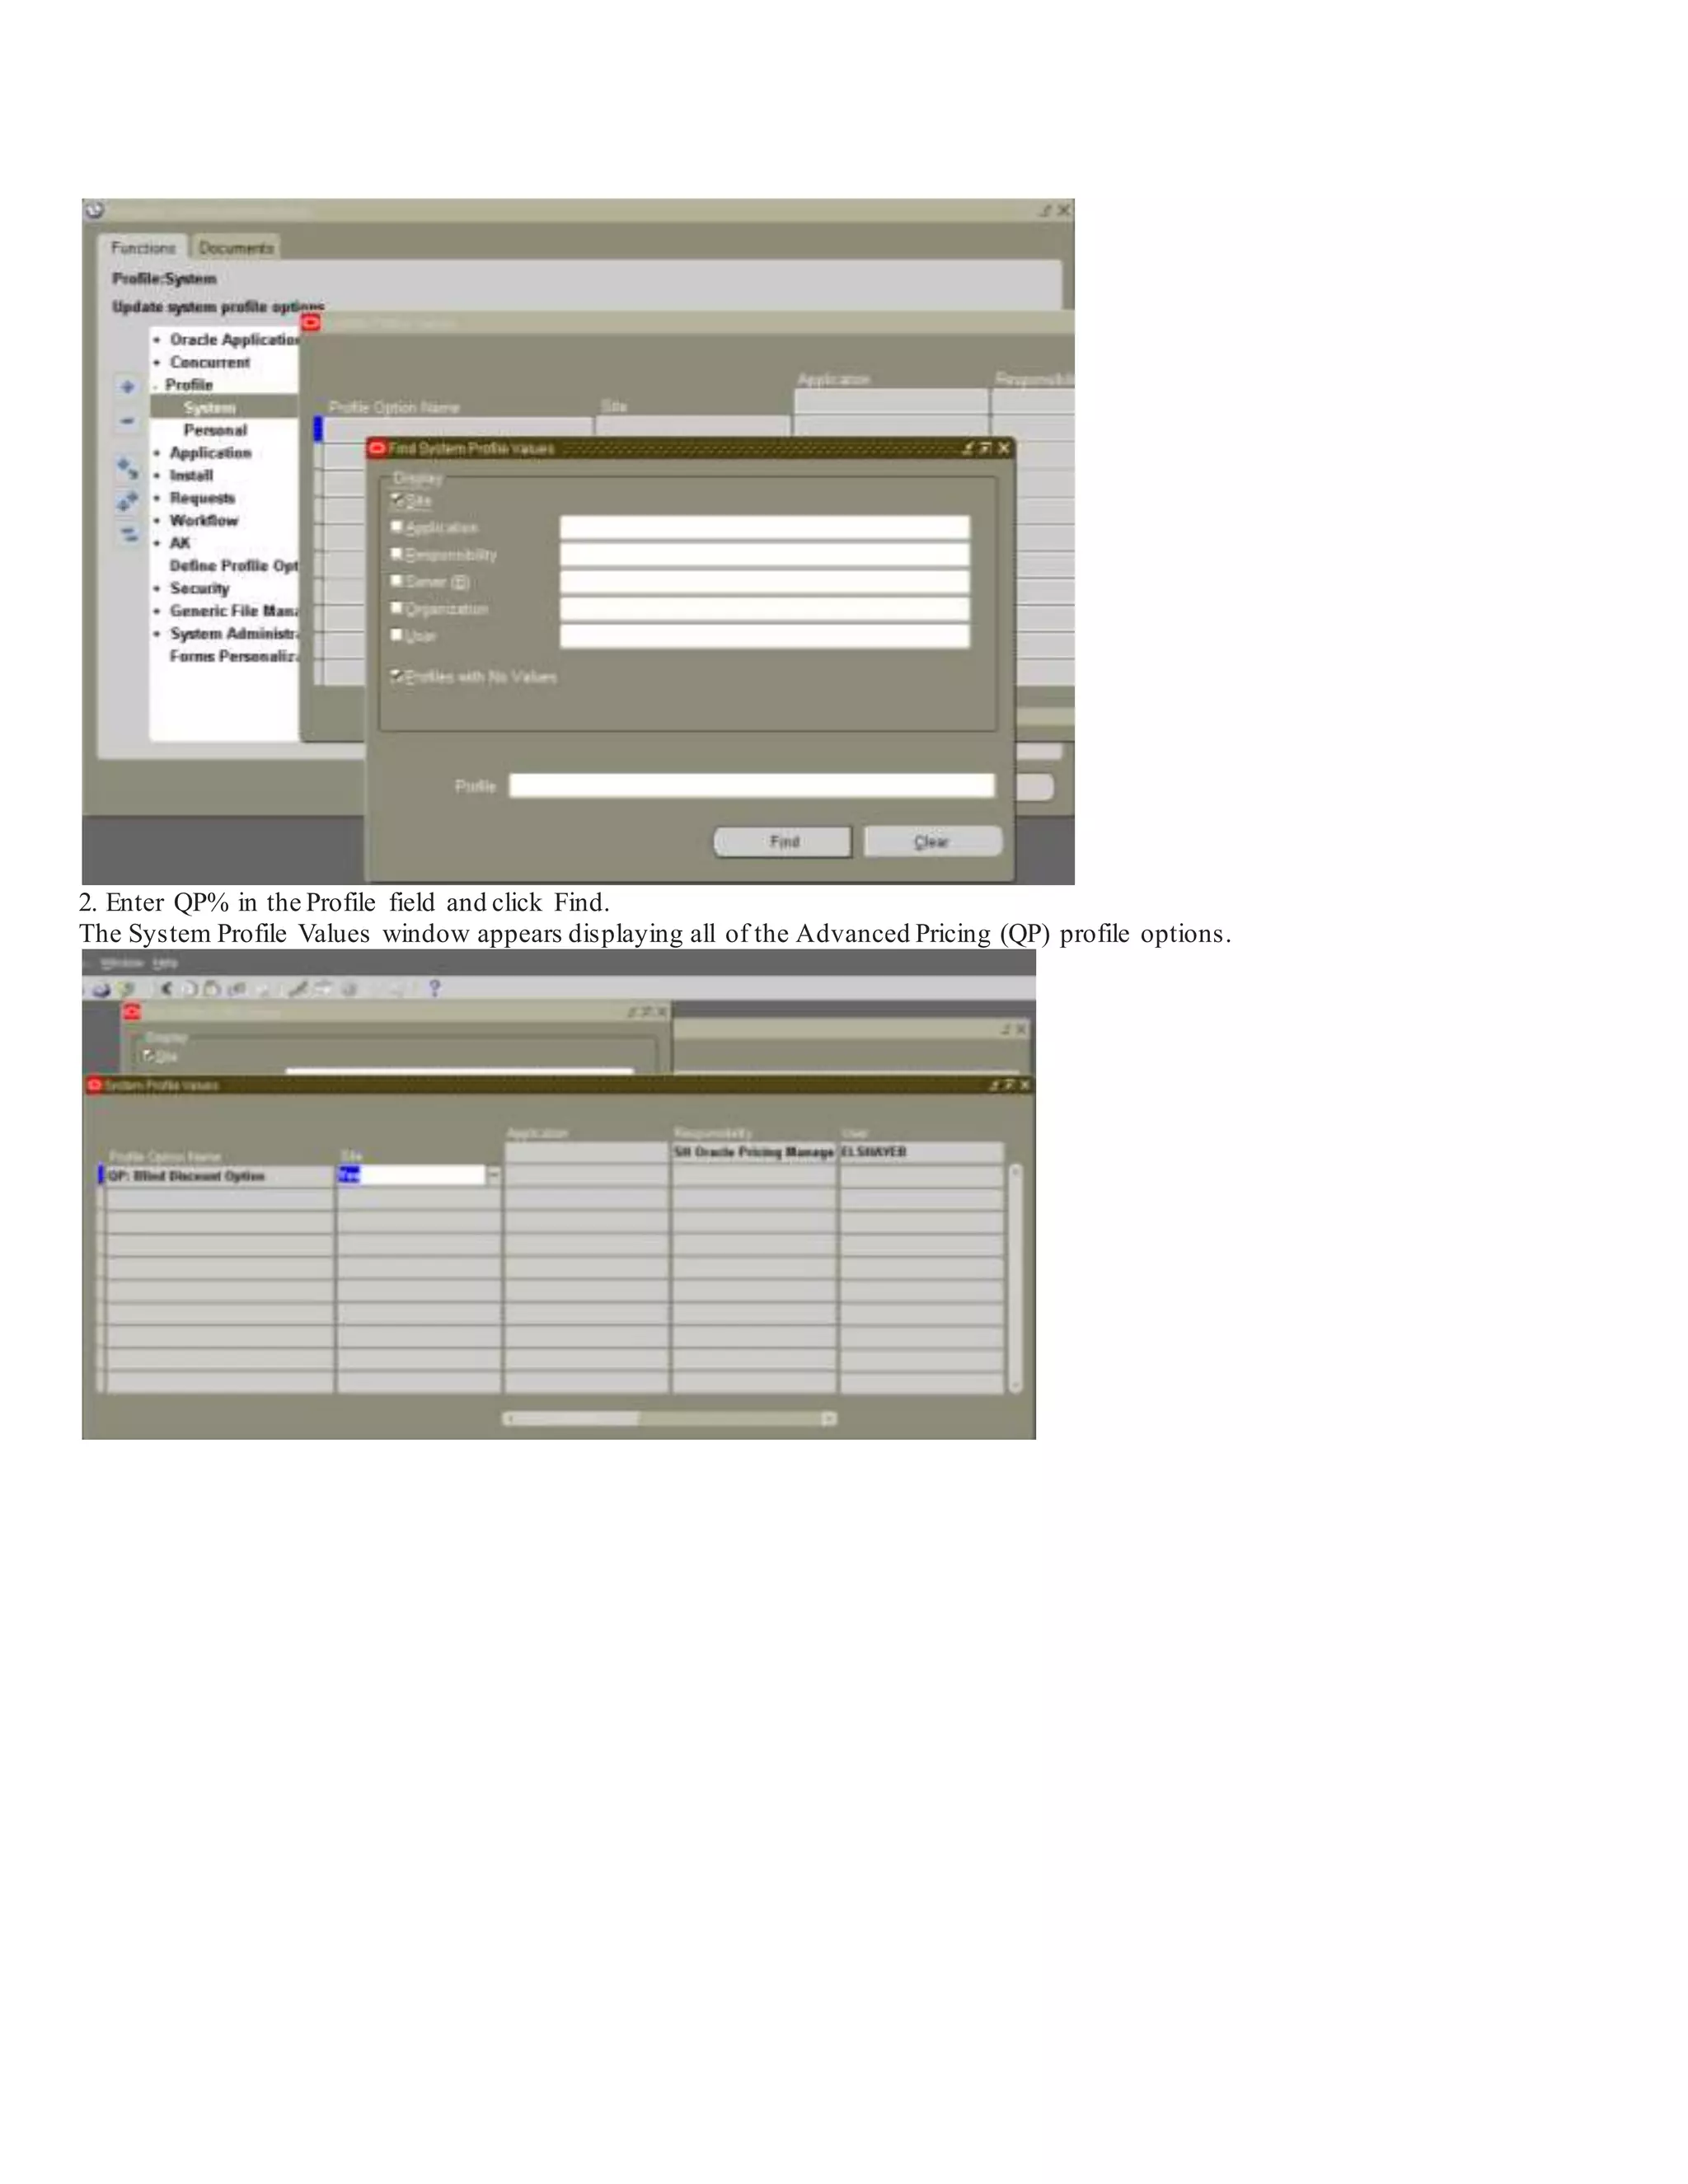
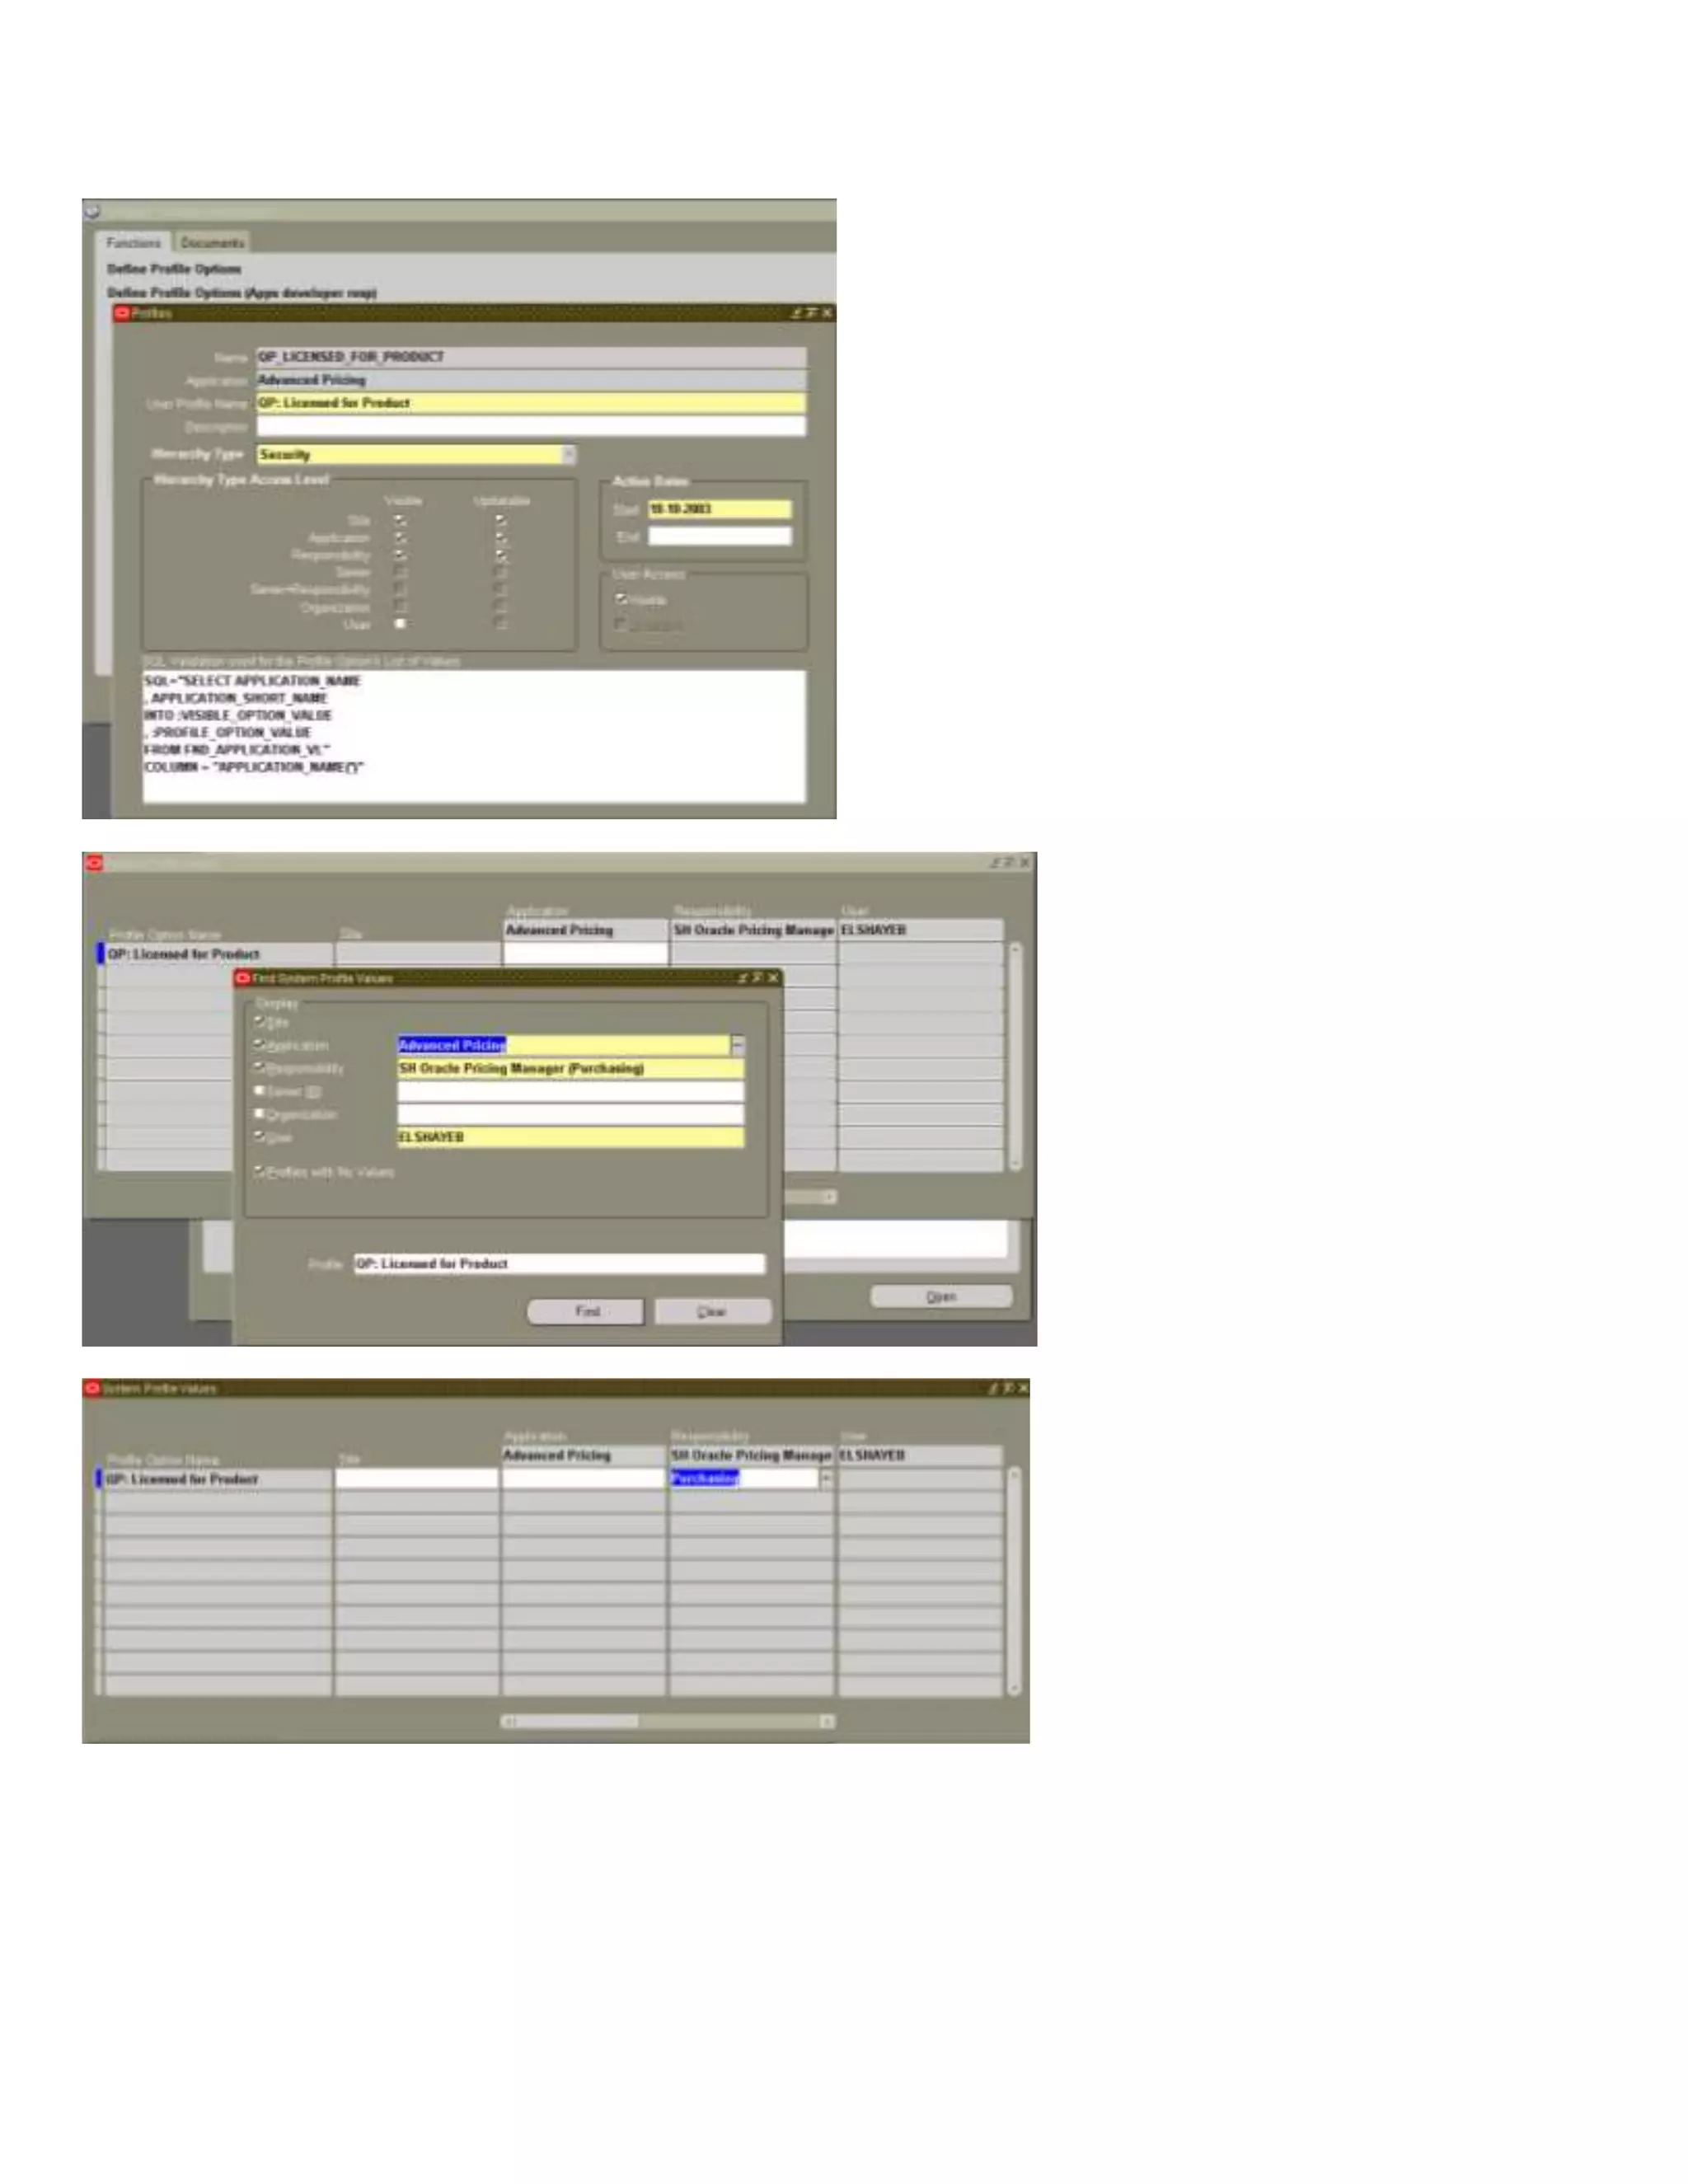
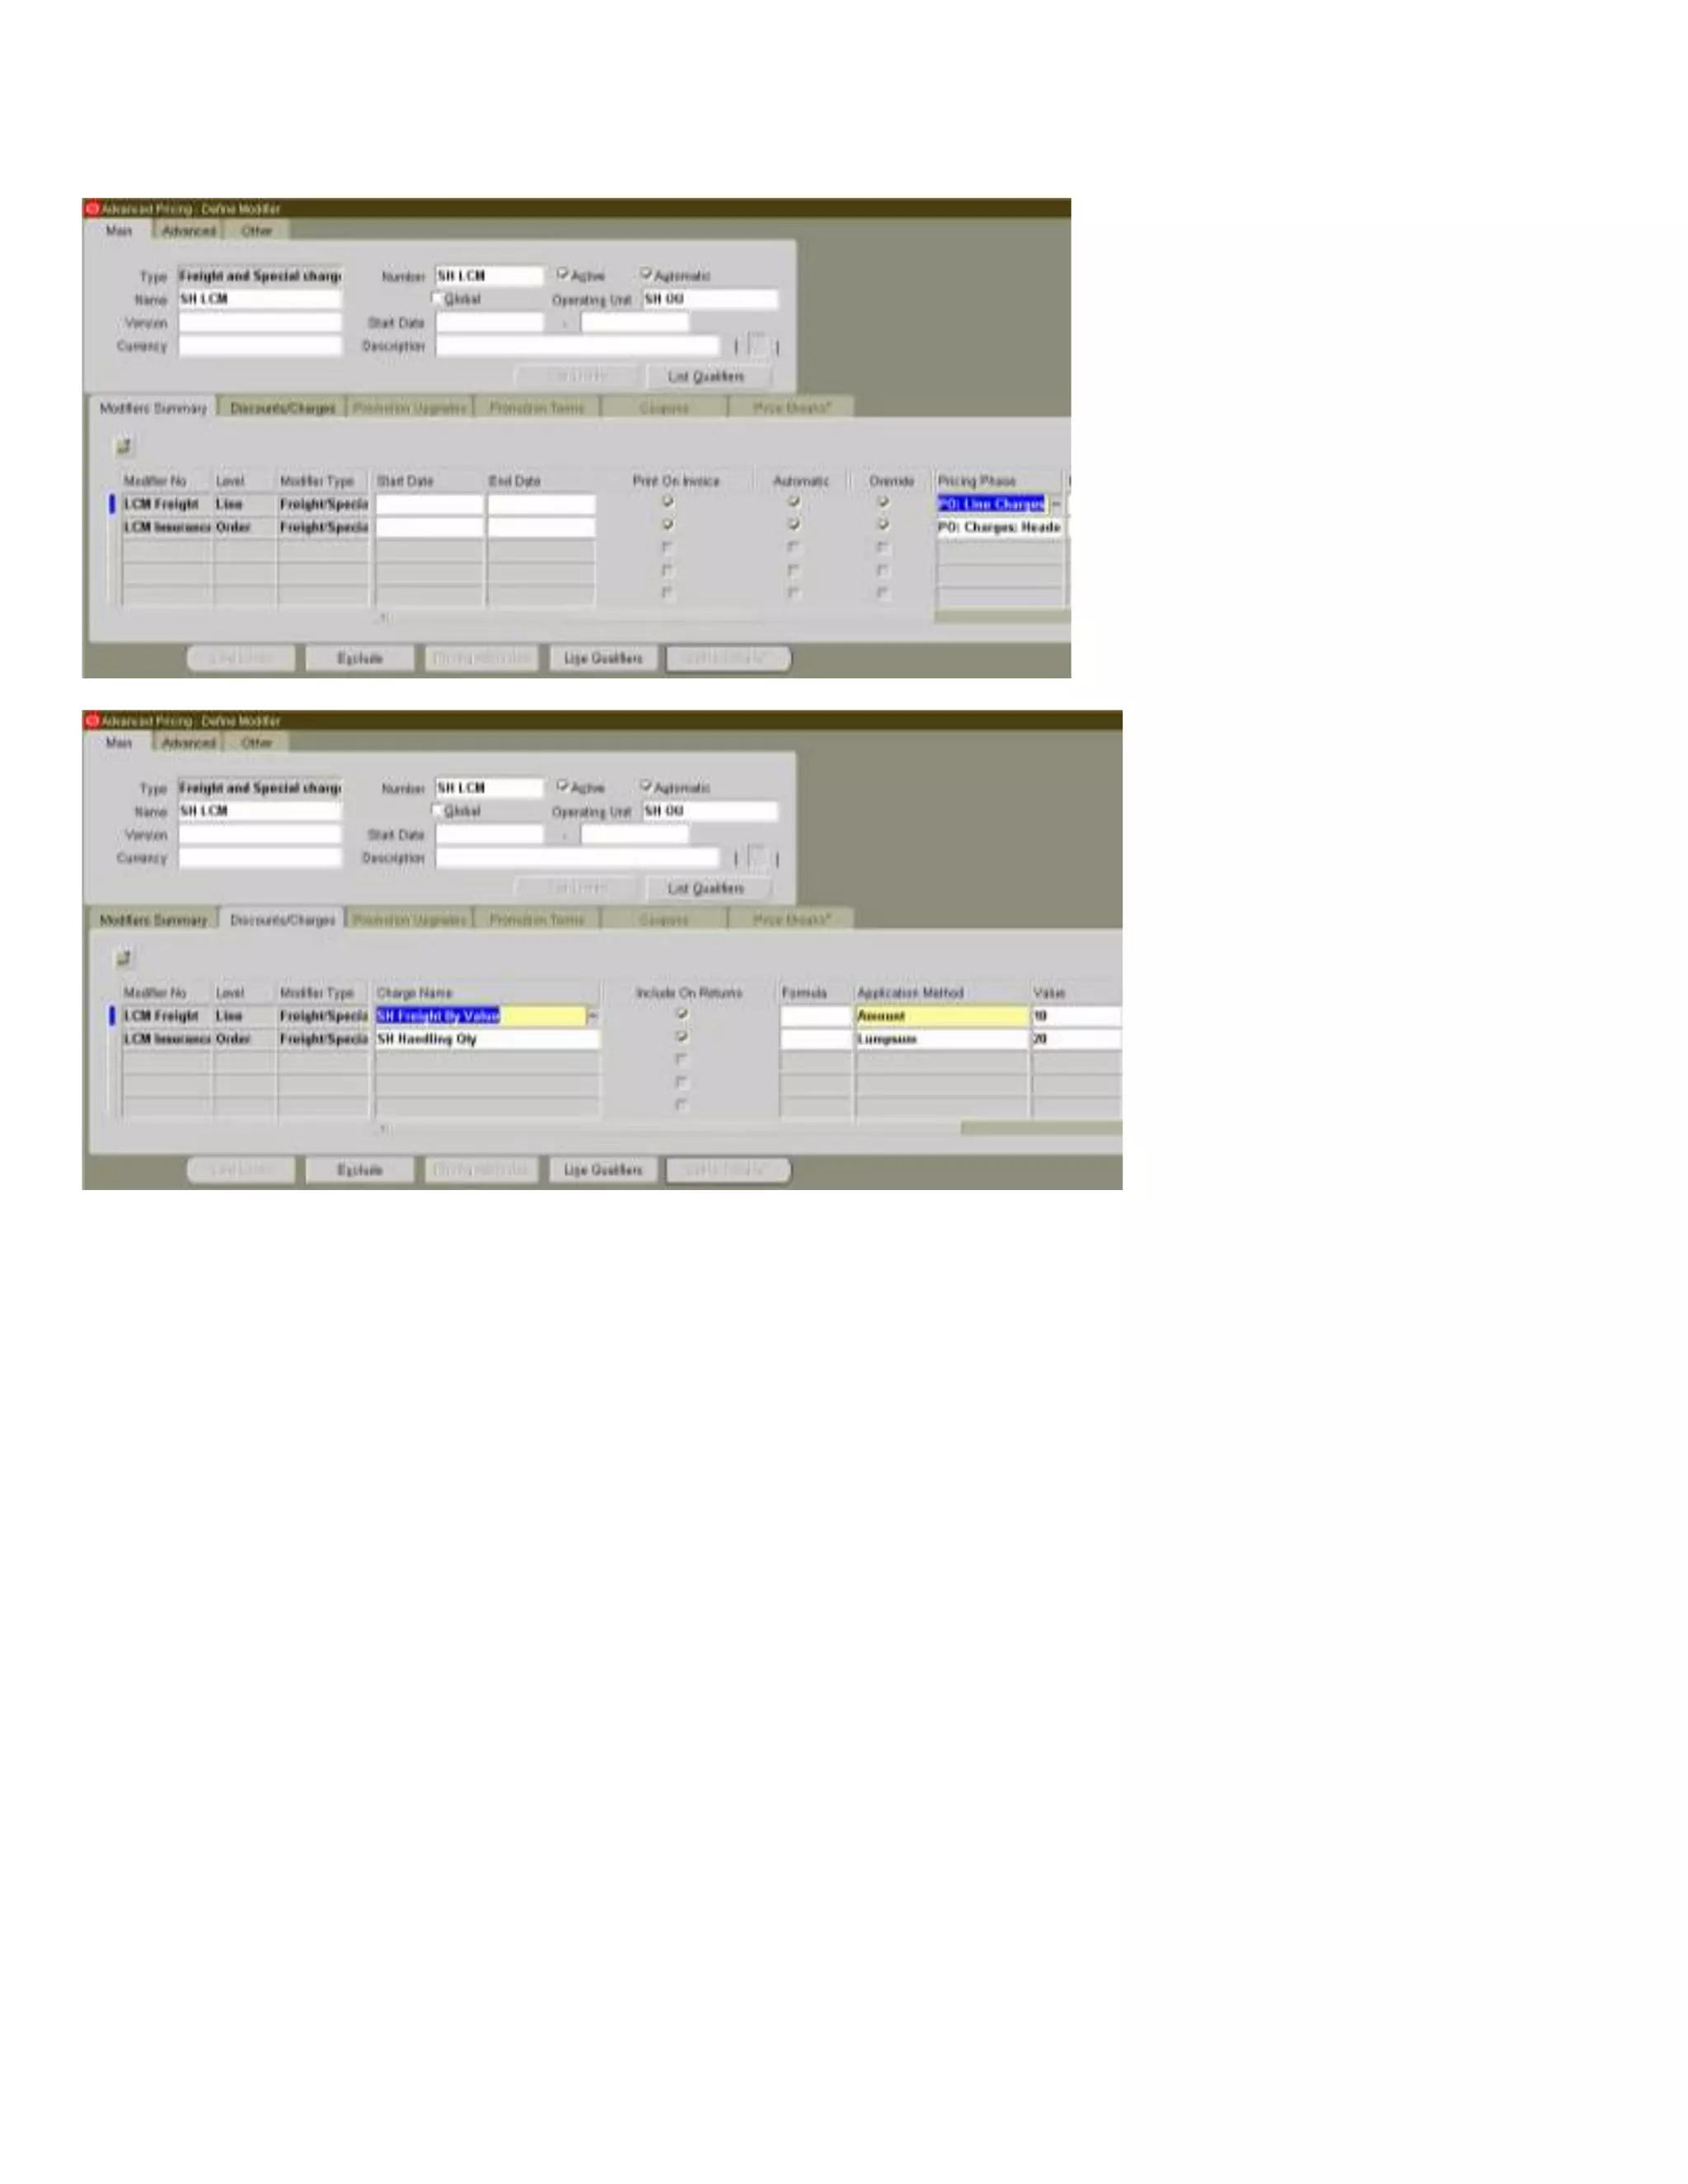
Integration setup of Oracle Advanced Pricing for automating charges in LCM shipments.